Category: Photography

  • Total Beginner’s Guide to Lightroom – Step by Step

    I had tried Lightroom in the past, but always preferred using Apple’s Aperture photo editing program. But in the spring of 2014, when it was announced that Apple was no longer supporting Aperture, I decided to make the leap to Lightroom. At first I found it difficult to use and not really intuitive, but I soon found my way around and I was a Lightroom convert.

    beginners-guide-lightroom-blue-buds

    If you are new to Lightroom and don’t know where to start, or have thought about using it but feel overwhelmed, then please know I feel your pain, and know where you’re coming from. I wrote this Beginner’s Guide to Lightroom to help you, and I wish I would have had something like this when I first got started. It’s designed to help you through a few basic steps from opening up Lightroom for the first time, making two basic edits, and exporting (saving) a final version of your picture.

    What is Lightroom and what does it do?

    In a nutshell, Lightroom is a program that can manage and edit your images. The catch, though, is that it doesn’t really edit your images, or actually manage anything either. Instead, the program works by looking at pictures you have stored on your computer, and allows you to create instructions for how you want to change them.

    For example, let’s say you have a photo of a squirrel that’s a bit dark so you want to make it brighter. Lightroom doesn’t touch the original image! It doesn’t move it, copy it, rename it, or change it in any way. Instead Lightroom, is a non-destructive editing program, that allows you make changes to a preview or thumbnail version of the picture, which means you can see what the final image will look like after you make it brighter. When you are finished with your editing you export (or save as) a final image from Lightroom (again leaving the original file completely un-touched) and voilá, you now have a second, much brighter photo, to print or share with others.
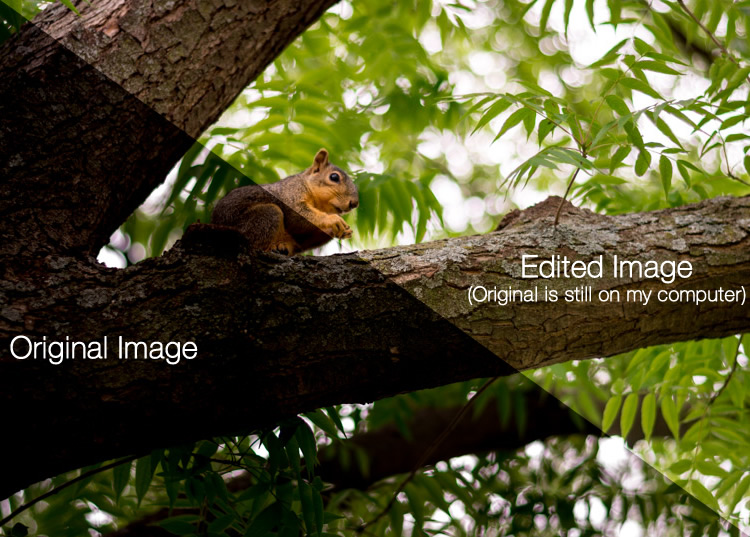
    beginners-guide-lightroom-squirrel-comparison

    The Lightroom catalog is like a recipe book

    Lightroom stores a record of all the changes you want to make to your images in a separate file called the Catalog, which is stored independent from your pictures. The best analogy I can think of is that of a kitchen: your original pictures are kind of like the raw ingredients in your cupboards, and the Lightroom Catalog is like a recipe book. Lightroom doesn’t do anything to your ingredients (your original files), but instead saves the instructions for transforming your supplies into actual finished products (in this case output edited images), just like recipes for your photos. When you are finished, your original image files still remain, but you have a new creation (i.e. an edited picture) that you can share with others.

    The Importance of Adobe Camera Raw

    Before we get too deep into the weeds here, it’s important to back up a bit and look at another program called Adobe Camera Raw (ACR), which allows you to perform all sorts of edits and changes to your Raw images – from simply making them brighter or darker, to selectively editing colors, or working with curves. You may already have it on your computer and not even know it, and it’s actually the engine that powers everything Lightroom does in terms of editing your images. Every change, adjustment, and tweak you do to one of your photos in Lightroom, is actually being done by ACR. Understanding how this fits in might seem a bit extraneous to the overall Lightroom discussion, but it’s important to know how all it works together if you want to make sense of Lightroom itself.

    beginners-guide-lightroom-brothers

    You and Lightroom: best buds for life.

    Opening Lightroom for the First Time

    When I initially launched my copy of Lightroom four years ago, things started to go south within a matter of seconds. It asked me about making a Catalog, and wanted to know where to store it, and I started channeling my inner Gob Bluth while muttering to myself, “I’ve made a huge mistake.” If this sounds like you, don’t worry – there’s really not much going on here that you need to worry about, and everything will be fine. Remember the kitchen analogy I mentioned earlier? All your computer wants to know right now is where to store the Catalog, or recipe book, that it will use to keep track of the changes you want to make to your pictures. You will need to create a new Catalog, and specify its location on your hard drive. I just keep mine within my Pictures folder.
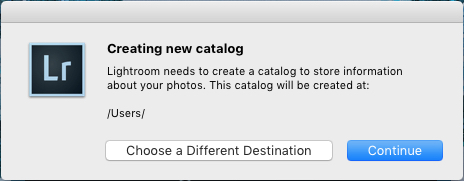
    beginners-guide-lightroom-catalog-dialogue

    Lightroom wants to know where you would like to store its Catalog, or database of edits you want to make to pictures. If you’re not sure what to do here, just click the “Continue” button.

    Some people are very specific about where they want this Catalog to be located, and professional photographers will often have multiple image collections and many catalogs as well. Honestly, if you just want to figure out how to use Lightroom you can just click the “Continue” button and go about your business. For casual photographers the exact location of the Catalog file is not all that important, so don’t sweat it.

    Note: do not store your catalog on an external hard drive though, it will not run optimally or may not run at all. Keep it on your computer’s main drive. If in doubt just click Continue as noted above.

    In terms of new-user-confusion, the next screen (the Library module) you see is not much better. Upon encountering it for the first time I felt like someone had quashed my photography enthusiasm with a scary dull grey veil. There are a few tutorial hints that pop up in the middle, which aren’t very helpful, and after you dismiss them you’re left staring at an empty dark wasteland, wondering why you didn’t just stick to using Instagram filters like everyone else.
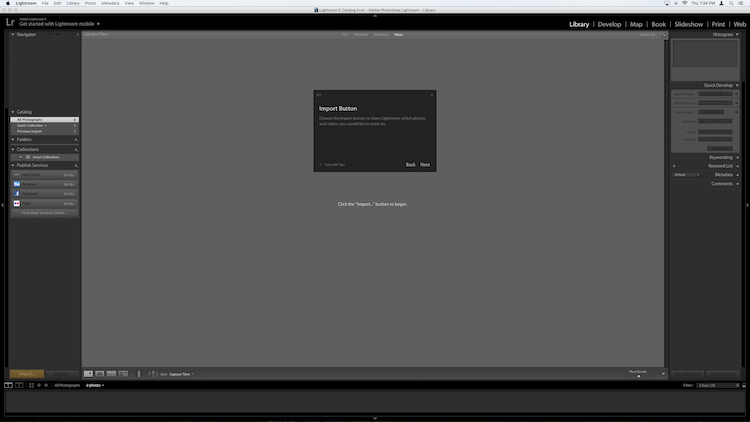
    If this screen doesn't make a new user run screaming from Lightroom, I don't know what would.

    If this screen doesn’t make a new user run screaming from Lightroom, I don’t know what would.

    What you’re looking at here is your entire library of photos, but it’s empty because none have actually been imported yet. There’s plenty of other options and buttons here as well – enough to confuse even the most experienced user – so for now just ignore the Catalog/Folders/Collections stuff on the left side, and all those Quick Develop options on the right side. And for heaven’s sake, don’t give a second thought to those strange chessboard-like icons at the bottom. Just take a breath, grab your memory card and your favorite beverage, and get ready to import some photos. Plug your memory card into your computer, then click the “Import” button in the lower-left corner to start transferring your pictures over to your hard drive. You can also import photos that are already sitting on your computer, but for now I want to focus on the kind of workflow you might encounter, as a photographer who just wants to figure out this program.

    Importing Photos

    The first thing you see once you have your memory card connected is a grid with tiny thumbnail previews of all the pictures on your memory card.

    Note: You can also connect to your camera directly – however, it’s a better idea to use a card reader then plug in your camera directly. If the camera battery dies during import you can crash the card and damage or lose your images.
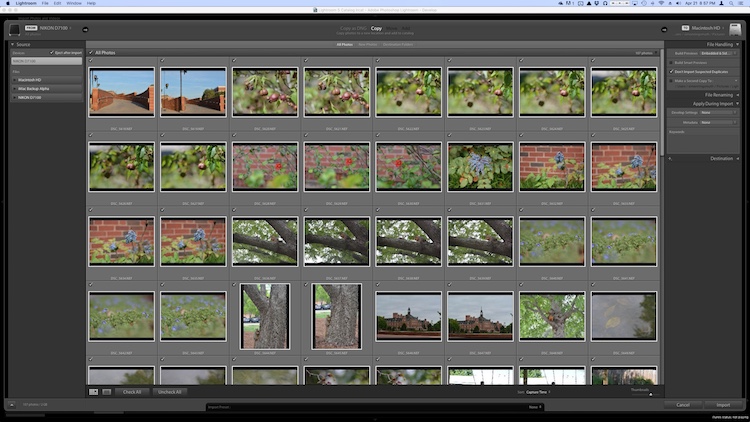
    beginners-guide-lightroom-import

    There are all sorts of options on this screen, but if you just want to get the basics down, here’s what you need to look at:

    1. At the top of your screen, select the option that says “Copy.” This will, as you may guess, copy the pictures over to your computer, and add them to the Lightroom catalog so you can make edits to them later.
    2. On the right-hand side you have to choose a Destination so the program knows where to put the original photos on your computer. You can select a specific destination or just let Lightroom figure this out for you. You can also do things like rename your pictures as they are imported, apply specific edits (called “Develop Settings”) to all of them, or give them keywords such as “Wedding” or “Camping.” For now don’t worry about any of this, and I promise everything will be just fine.
    3. Choose which pictures to import by making sure they have checkmarks in the top corner of each thumbnail preview. They should all be checked by default (if they aren’t just click Check All), but if there are any images you don’t want to import, you can just un-check the box next to them.

    When you’re all set, click the Import button in the lower-right corner of your screen. Your computer will beep or chime when everything is done, and you’ll be ready to start editing your photos!

    Organizing and Developing (Processing)

    After your photos are imported things start to get really crazy, but once again just try to ignore all the new things that show up on the side of your screen, and focus on just a few of the essentials. First of all, don’t start making edits or changes to your pictures just yet.

    Instead, look at the left side of your screen and find an area called “Collections.” beginners-guide-lightroom-collectionsRemember that Lightroom doesn’t actually do anything with the original pictures. When you clicked Import, it copied them over to a folder on your hard drive where they will remain, intact and untouched, until the end of time. What you can do is organize the pictures into Collections within Lightroom itself, in order to keep track of them more easily. Collections function just like playlists in iTunes or Spotify, and allow you to sort photos manually or automatically, based on how you want them to fit together. Click the + button on the right side to make a new Collection (i.e. Playlist), Smart Collection (where sorts your photos automatically based on criteria you specify) or Collection Set (a folder containing multiple Collections). Once you have a Collection created you can populate it by dragging and dropping your photos over to it, just like in iTunes. During this process the original images stay exactly where they are on your hard drive, you are just using Collections to help manage them a little easier.
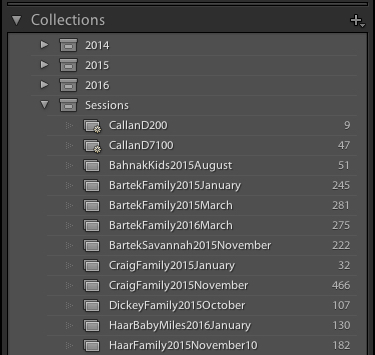
    Read more on collections and organizing here: How to Organize Your Photos in Lightroom

    Once you have your images sorted into Collections it’s time to start editing them. (Or you can start editing without doing any sorting at all. It’s up to you.) Click the “Develop” option in the top-right corner of your screen to begin making changes (or click D on your keyboard). At first I was put off and confused by the term Develop, but Adobe used it to hearken back to the days of darkrooms and analog film photography. (which some photographers still use even today). Before digital cameras you had to actually get your film developed before you could see your pictures, and that’s essentially what Lightroom is trying to emulate here in the Develop module. If it doesn’t make sense to you yet, just pretend it says “Edit” instead of “Develop” and you’ll be fine.
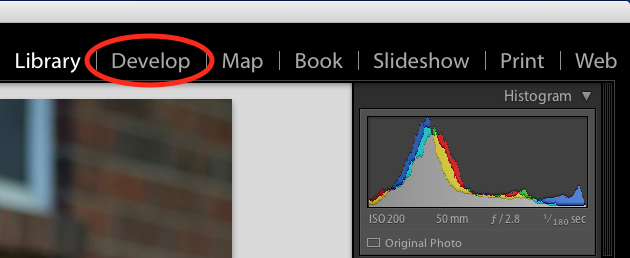
    beginners-guide-lightroom-develop

    You are now in the Develop module, which is one of seven different working states available inside Lightroom, the rest being: Library (which you started in), Map, Book, Slideshow, Print, and Map. I ignore all the others, and spend about 98% of my time in either Library or Develop, and as a new user I would recommend the same for you.

    At first when you click on the Develop module it might not seem like anything is different, but look again and you will see that all the metadata information that was on the right-hand side of your screen has been replaced with a series of panels like Basic, Tone Curve, Lens Corrections, and more. Don’t start hyperventilating! I promise this is easier than it may seem at first. There are a metric ton of tutorials and web pages online devoted to helping you understand the Develop module, but right now I just want you to focus on two simple things: Cropping and Exposure.

    One of the most basic edits many people do, is to trim them down so just the important parts are in the frame, and get rid of things along the edge like trees, trash cans, bystanders, and the like. To do this click the square icon under the colorful graph called the Histogram, (or use the keyboard shortcut R) and you will see a nifty overlay appear on your image that you can use to crop it down how you want. Also read: How Cropping in Post-Production Can Improve Composition
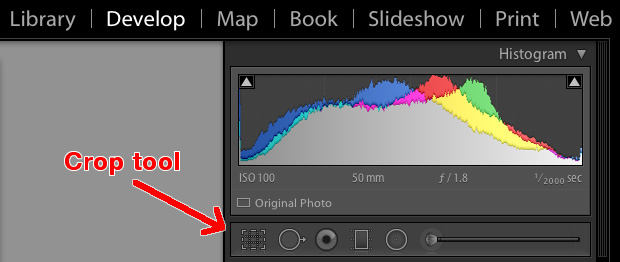
    beginners-guide-lightroom-crop-tool

    Use the corners of the rectangle overlay to crop your picture down so it contains only what you want, then when you are done press the [enter] or [return] key to see the results. Remember what I said earlier about Lightroom being nondestructive? It might look like you have just removed part of your photo, but the original is entirely untouched, and remains fully intact on your computer. What you are actually editing here is a placeholder – a preview of what the final image will look like – not the actual image itself. None of your edits in Lightroom are permanent, and you can reverse or undo any editing decision you make, so don’t be afraid to play around with it, kick the tires, and just start trying things even if you’re not entirely sure what the result will be.
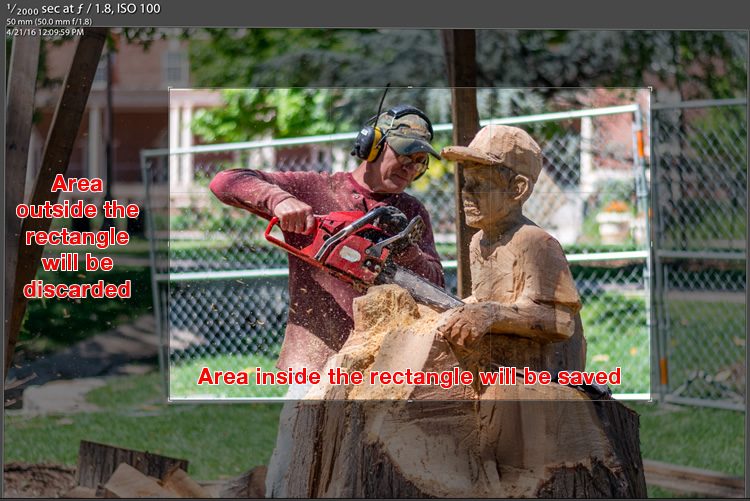
    beginners-guide-lightroom-crop-tool-example

    But your original file remains uncropped on your computer – Lightroom only shows how it will look if you apply this setting.

    The other common edit that people make to their images is adjusting the brightness, often to fix an image that is too over or under-exposed. This can easily be done with the top panel on the right side of the Develop module, appropriately titled “Basic.” Look for the slider called “Exposure” and move it to the right or left in order to make your picture brighter or darker.
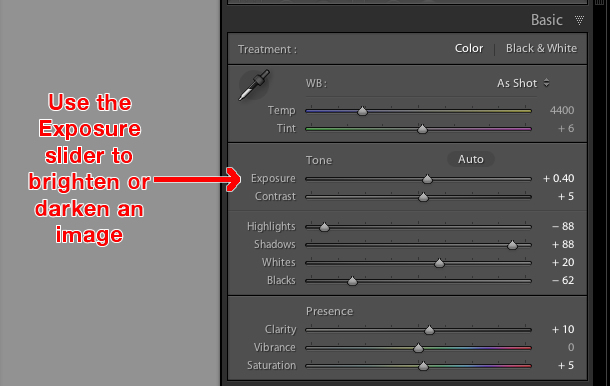
    beginners-guide-lightroom-exposure-tool

    Once again you will notice the changes you make reflected on the picture you see, but keep in mind you are not actually editing the original photo. Your instructions to crop, brighten, or otherwise change the picture are being stored in the Catalog file, while the original remains untouched. At this point you can go ahead and experiment with all the other options, tools, and sliders you see in the Develop module and take note of how they alter your photo. Even if you are not at all sure of what is happening just remember that Lightroom is nondestructive so you may as well play around with things to your heart’s content, since your original pictures will never be altered, and are safe.

    Read more on the basic editing tools and sliders here:

    • Master These Five Lightroom Sliders and Your Photos Will Pop
    • Understanding the Basic Sliders in Adobe Camera Raw

    Exporting (Save As)

    Once you have made all the changes to a picture that you want, it’s time to export the final photo. This is again where the cooking analogy may come in handy, since this step is similar to putting your cake, casserole, or quiche, in the oven so it can bake. You still have the original ingredients on your counter and in your pantry, but once your timer beeps you will have an entirely new creation based on the recipe you used.

    In Lightroom you edit photos instead of making pastries or pies, and the Export step is when you put them in your virtual oven to be processed. You may also think of this as opening up a document or spreadsheet, making some changes, and then choosing “Save As” instead of “Save.” This leaves the original document intact while creating a new one with your changes, much like exporting a picture in Lightroom leaves your original image as it was, and gives you a new edited version, complete with all the edits you made.
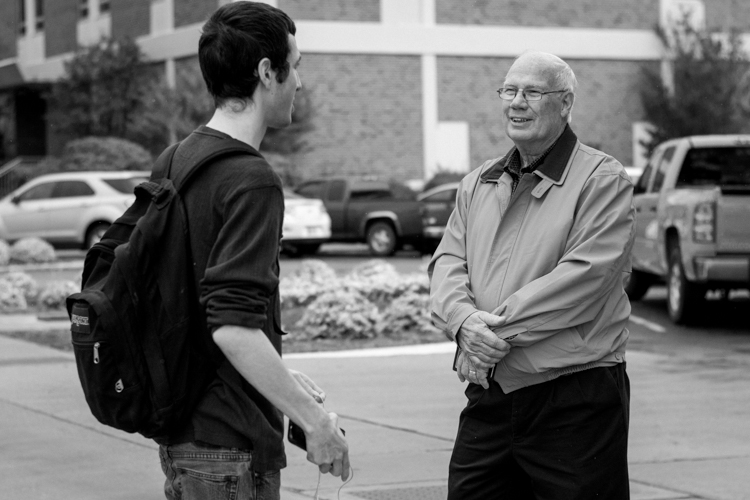
    beginners-guide-lightroom-conversation

    When you are ready to export a photo or multiple photos, select the ones you want while in the Library or Develop module and choose “File > Export”, which will bring up yet another confusing dialog box filled with head-spinning options and choices. Hopefully by now you are getting a little more used to this sort of thing when using Lightroom, but if not just focus on a few specific items on this screen.

    On the left side you will see a few presets for exporting your photos, depending on whether you want to print them, email them, etc. You can also create your own presets for exporting, but for now don’t worry about that and just focus on a few specific settings.
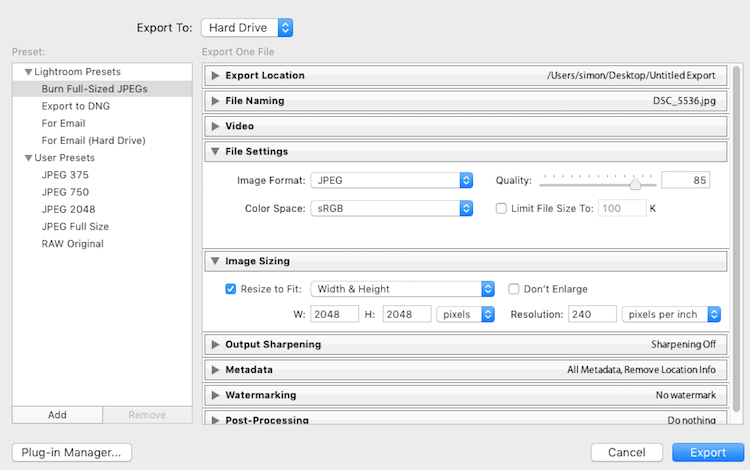
    Once you get the hang of the Export box you can create your own presets for saving pictures with specific parameters that you set.

    Once you get the hang of the Export box you can create your own presets for saving pictures with specific parameters that you choose.

    If you’re not sure which option to choose, start with “Full-Sized JPEGs” and then modify things just a bit by tweaking a couple settings (make sure Export To: is set to Hard Drive at the top of the box). Then find and adjust the following:

    • File Settings – Choose “JPEG” as the Image Format, set the quality slider to 85, and Color Space to sRGB.
    • Image Sizing – Tick off “Resize to Fit” then choose “Width & Height” and then enter 2048 in both the W (Width) and H (Height) boxes, (make sure it says “Pixels after Height, not In or Cm.). Leave the rest of the parameters alone.
    • Post-Processing – make sure After Export is set to:  Show in Finder (or Show in Windows Explorer if you use a PC).

    These settings will give you pictures that are large enough to print up to about 5×7″ size, or share on social media sites, (for email use a slightly smaller size like 1200 or 800px). When you’re ready, click the “Export” button in the lower right corner and you’re all set. As long as you did the last part, Lightroom will open a Finder (or Windows Explorer) window showing you all your new images, and where they are on your harddrive. Lightroom will probably save the edited copies of your pictures to your Desktop (the default) but you can double check this using the “Export Location” option (at the top of the box) in the Export pop-up box if you want.

    Read more here:

    • Organizing Images in Lightroom 5 (still applies in 6 and LR CC)
    • Photography Workflow Tips – From Memory Card to Computer and Beyond
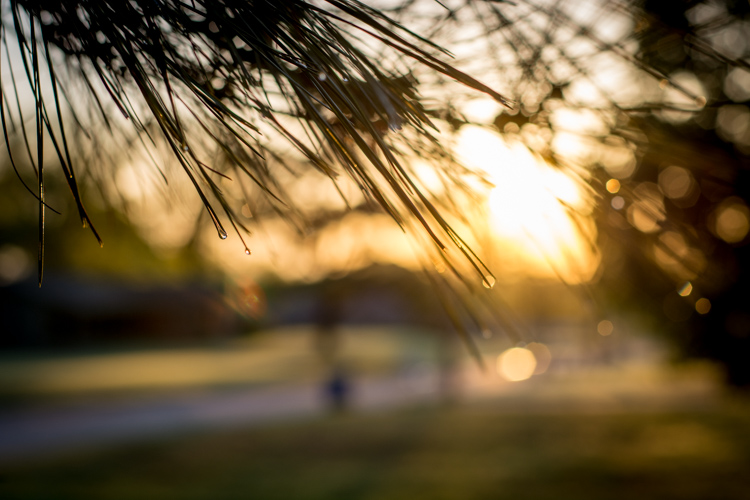
    The original photo was OK, but Lightroom helped me coax much more detail, color, and vibrance out of it.

    The original photo was okay, but Lightroom helped me coax much more detail, color, and vibrance out of it.

    Let’s Review

    This all seems like a lot, but hopefully if you have made it this far, you now have a good understanding of a very basic Lightroom workflow. If you take away nothing else from this tutorial, remember these few precious nuggets of wisdom:

    • Lightroom does not edit your original images. They will always remain wherever you put them, and Lightroom does not change them in any way.
    • You are looking at preview versions when you are editing your photos in Lightroom, and not the actual images themselves.
    • A complete record of edits to your photos is kept in a database called the Catalog. Think of this like a recipe book, where you have instructions for how to cook your images, but you are not altering the original ingredients in the kitchen.
    • The editing process is not complete until you Export your images, which saves a new copy of your photos, complete with the changes you made in Lightroom.

    I hope this Beginner’s Guide to Lightroom was helpful. Please leave any thoughts or questions in the comments section below. Good luck, and feel free to share some of your favorite images that you have edited in Lightroom too!

    googletag.cmd.push(function() {
    tablet_slots.push( googletag.defineSlot( “/1005424/_dPSv4_tab-all-article-bottom_(300×250)”, [300, 250], “pb-ad-78623” ).addService( googletag.pubads() ) ); } );

    googletag.cmd.push(function() {
    mobile_slots.push( googletag.defineSlot( “/1005424/_dPSv4_mob-all-article-bottom_(300×250)”, [300, 250], “pb-ad-78158” ).addService( googletag.pubads() ) ); } );

    The post Total Beginner’s Guide to Lightroom – Step by Step by Simon Ringsmuth appeared first on Digital Photography School.


    Digital Photography School

  • Review of the MindShift BackLight 26L Backpack

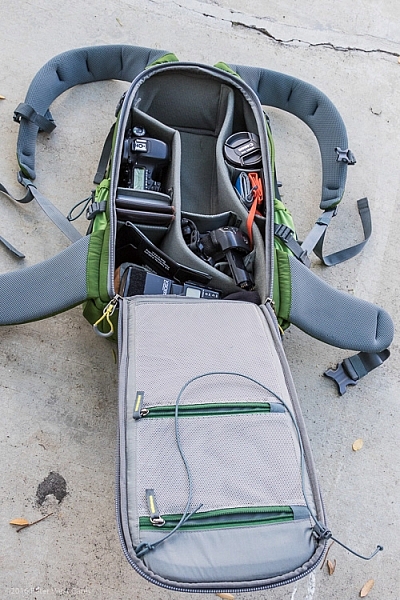
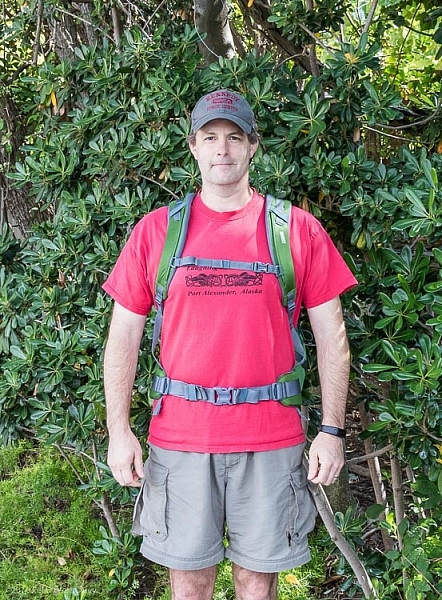
    PWC-Mindshift-Backlight-26-5844It sounded like another gimmick but I’ll give you the short of it: The MindShift Gear BackLight 26L works as a backpack that can rotate around your body, and give access to all your gear without getting muddy on the trail.

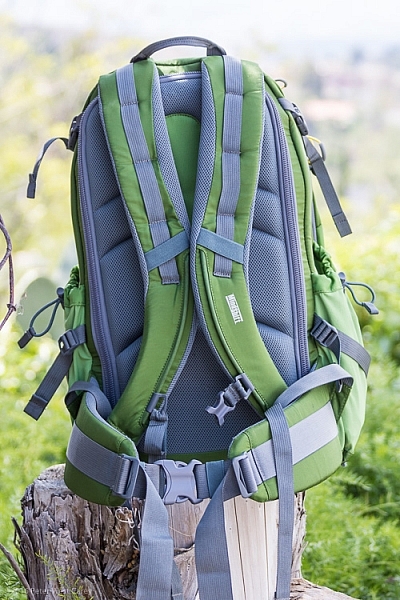

    Mindshift has tried the rotating thing before (see my previous review of the Rotation 180 here on DPS) and this time they are trying to make the entire pack come all the way around your body for easy access. Sounds incredible, doesn’t it? Let me show you how it works, and some aspects that need attention.

    An overview

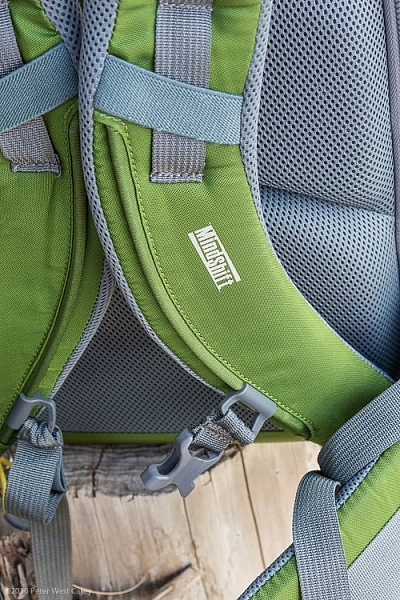
    The pack looks normal enough; side compression straps, just enough padding on the hip belt, zippers here and there, and good back support.

    PWC-Mindshift-Backlight-26-5856

    PWC-Mindshift-Backlight-26-5847

    PWC-Mindshift-Backlight-26-5845

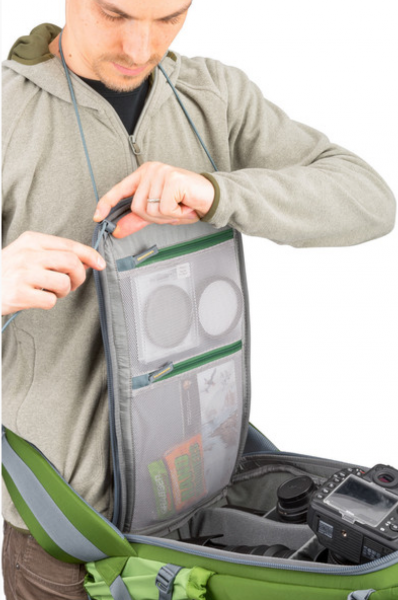
    It has loops on the back for securing ice axes, trekking poles, and other miscellaneous whatnot. Inside the main compartment on the back is space for a laptop, a tablet, and even a book. Just not a thick book. There is an organizer for pens, cards, and the top section has a small pocket with a hook for car keys. Kind of the normal items we expect from a photography backpack.

    PWC-Mindshift-Backlight-26-5850

    But there is one key difference in the shoulder straps. They are attached, and cut in such a way, to enable full removal with the hip belt still attached. The pack is then rotated around so you can access all your goodies inside the camera compartment. You can see how it works in the sequence of photos below.

    PWC-Mindshift-Backlight-26-5861 PWC-Mindshift-Backlight-26-5862

    PWC-Mindshift-Backlight-26-5863

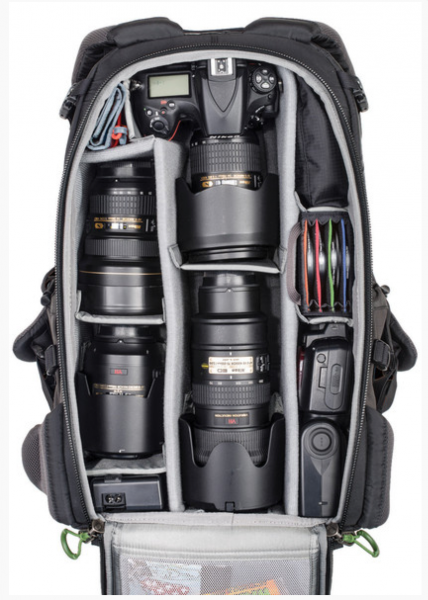
    Inside you can store a fully gripped DSLR and big old 70-200mm lens. You will need to modify the highly customizable storage space, but as you can see, not only will the camera and lens fit, but there is room for a second body, secondary lens, all kinds of filters, batteries, flash, cards and even a hat.

    PWC-Mindshift-Backlight-26-5867

    My personal configuration above is meant for a DSLR with a grip. The standard images below from Mindshift are without a grip on the camera. You can technically fit the gripped camera upright, bit it will poke into your back a little.

    Mindshift-Backlight26-22 Mindshift-Backlight26-21

    The main flap has a loop on it, that I think is a little goofy, but I see why they added it. It is meant to go around your neck to hold the flap up and out of the way, as seen here.

    Mindshift-Backlight26-20

    Great in concept, but I found it annoying in practice.

    What About the Other Features?

    Some features I like on the pack:

    • Just the right amount of space for two DSLR bodies and my gear (as seen in the photos above).
    • Organizer inside has room for what I need: iPad, pens, business cards, note pad, dental floss.
    • Comes with a rain cover.
    • Ample attachment points.
    • Hipbelt is easy to adjust.
    • Deep water bottle holders.
    • Seven months of constant use shows little wear and tear. Zippers are great.
    • Fits under a typical airplane seat. Great for taking aerial shots on commercial flights.
    • The sternum strap goes low enough! This is a big one for me. It’s been a bane of most bags that for a taller torso, the sternum strap rides too high, sometimes at my neck. This strap goes extra low, or as I like to call it, just right.
    PWC-Mindshift-Backlight-26-5849 PWC-Mindshift-Backlight-26-5859

    Then there are some things I can see that need improving:

    • Just not enough space for a sandwich. Makes a day hike harder, as bananas and other squishables don’t work as well.
    • To get into the main back compartment fully, the compression straps need to be removed. Minor annoyance.
    • That neck loop thing used when opening the pack? It often sticks out and gets in the way of the zipper.
    • My wife doesn’t like the color, but I do (it also comes in charcoal, which hides even more dirt and use).
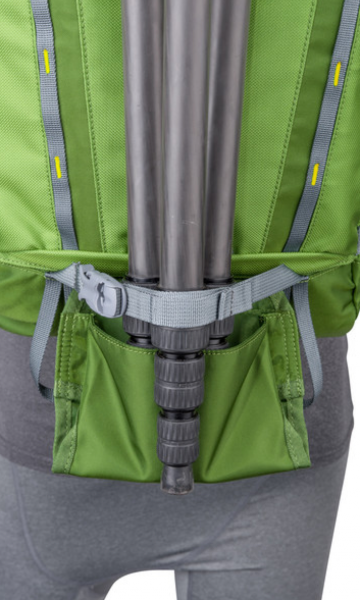
    • There is a mount for a tripod, but it hangs below the bottom of the pack. So it works (and is great how it hides away on the top and bottom of the pack) but it means you can’t easily set your pack down.

    PWC-Mindshift-Backlight-26-5852

    Mindshift-Backlight26-23

    Testing it in real life

    This has been my travel, and around town pack for the last seven months. This is why the pack you see in the photos here looks a little worked in. I’m trying to give more of my review items a solid, semi-lengthy test. How better to tell how a pack rides on your back than to wear it 50+ times?

    One of my gripes with the pack is the overall amount of usable space inside. When I place my iPad in the sleeve, I can’t imagine fitting an actual laptop behind it. Even sliding in a legal pad of paper takes some pushing. I think it’s built for one or the other. A thin laptop could work, I suppose.

    The same goes for fitting in a couple smaller books. Fitting one book in the very back pocket works just fine, but when I try to place a second book inside, I have to wiggle it in. This isn’t the end of the world, by any means, and it does keep the unit nice and compact for fitting under a plane seat. It’s something to be aware of if you normally carry lots of planners, books, and bulkier items.

    Now then, about that spinning around thing this pack is built for.

    PWC-Mindshift-Backlight-26-5863

    I know, it looks goofy that way, but once you get accustomed to NOT taking off the hip belt to get to your stuff, the system works quite well. NOTE: If the pack is filled with lots of heavy glass, as in the stock photos above, it will tip far forward and feel odd in the wrong places for some of us.

    I’ve mentioned in other reviews that I often travel with my family, and they are prone to leaving me behind when I stop to take a photo. This pack has seen me be left in the dust far less. Its ease of swinging around and getting into the pack, has me taking more shots than I would with a pack that I have to fully remove for my camera.

    When swinging the pack to return to my back, I find my shirt tends to bunch up, but that’s a minor thing. On the dusty and wet hikes I have been on, I have greatly appreciated this pack’s ability to stay off the elements and keep my gear clean. It comes with a rain cover that does not need to be removed to get to your camera. Bonus!

    I like the way the pack rides for my height (6’1″ or 1.8m). I also appreciate the dual water bottle holders of ample size, so an extra large bottle does not tip out easily.

    PWC-Mindshift-Backlight-26-5860

    Conclusion

    I wouldn’t have kept testing the MindShift Gear BackLight 26L backpack for months on end if I didn’t like it. It’s a great size for two cameras and the essentials, while allowing me to carry the basics of my mobile office.

    It’s not perfect for a day hike, in my opinion, because there isn’t enough space in the back to pack things like apples, bananas, or sandwiches, without them getting a little scrunched. If I don’t fill the main camera area with gear, I can fit food in there. So it can get the job done if you have space. There is space on the top for keys, headphones, and charging cables, which makes them easy to get to on a plane when the bag is under a seat.

    The bag retails for $ 249.99 in the US and can be found on Amazon.

    googletag.cmd.push(function() {
    tablet_slots.push( googletag.defineSlot( “/1005424/_dPSv4_tab-all-article-bottom_(300×250)”, [300, 250], “pb-ad-78623” ).addService( googletag.pubads() ) ); } );

    googletag.cmd.push(function() {
    mobile_slots.push( googletag.defineSlot( “/1005424/_dPSv4_mob-all-article-bottom_(300×250)”, [300, 250], “pb-ad-78158” ).addService( googletag.pubads() ) ); } );

    The post Review of the MindShift BackLight 26L Backpack by Peter West Carey appeared first on Digital Photography School.


    Digital Photography School

  • Step by Step How to Make a Moody Desaturated Image in Lightroom

    Often times we occupy our processing time with thoughts of what can be added to our images in order to make them more impactful; more sharpness, contrast, or color. But, this may not always the best route to take. The old expression “Less is more” can be applied to many aspects of photography, and it is especially true when it comes to dealing with colors.

    Example 1

    Desaturated images are becoming more and more popular, especially with nature, landscape, and street photographers. As counterintuitive as it might seem, removing some color saturation can be more effective than adding it in some situations. That being said, there is more to making a strong desaturated photograph than simply working with the saturation and vibrance sliders in Lightroom or ACR.

    In this article I will walk you through all the steps needed to process a moody, desaturated image in Lightroom. It’s extremely easy, and will help you add a unique look to your images. But first, a little bit of knowledge that you need to understand before we get started processing our photos.

    What is Saturation?

    It might seem to be one of those “It goes without saying” type of situations, but have you ever really thought about what saturation means, or how it can impact your images? As it relates to photography, saturation is the overall intensity of a color. Technically, saturation can be viewed as how far a color differs from pure white in the color spectrum.

    For our purposes, saturation is the depth of colors present within a photograph. How intense the colors are in an image can be controlled globally (affecting the entire photo) in multiple ways such as: the saturation slider, HSL panel, and tone curve. Also, saturation can be controlled selectively, to only certain areas of the image, by using the filter and brush tools. In the end, saturation adjustments apply themselves to all colors no matter their luminance.

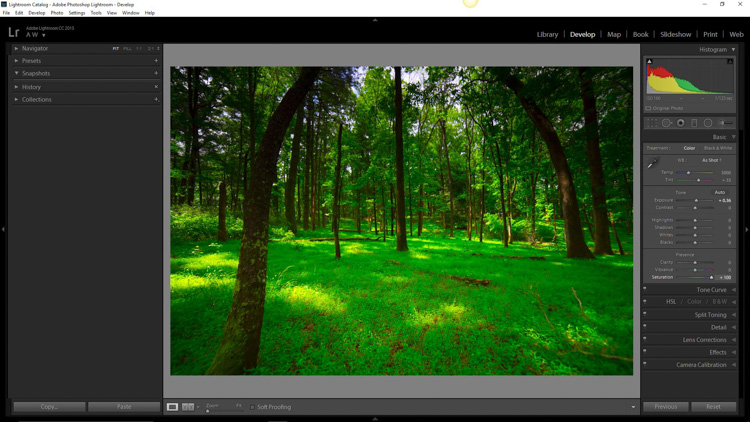
    Full saturation applied

    Full +100 saturation applied – notice the histogram here.

    What is Vibrance?

    Vibrance is a somewhat more interesting concept. This is a term Adobe has used to label something that is very similar to saturation. The difference between saturation and vibrance isn’t always black and white (color humor), but there is a distinction.

    The saturation slider controls the intensity of all color tones throughout the image, regardless of their luminance. This means any colors whose brightness falls into the highlights, mid-tones, and shadows are all affected. Vibrance is different, in that it only affects the saturation of colors whose luminance falls into the mid-tone range. It has been referred to as smart saturation, and I tend to agree. Vibrance is very useful for enhancing, or in our case desaturation of the colors within a photo, without being as harsh as the saturation slider.

    +100 Vibrance applied - notice the difference between this histogram and the saturation one.

    +100 Vibrance applied – notice the difference between this histogram and the saturation one.

    When Does Desaturation Work Best?

    Bright colors lend themselves to photos when the intent is to bring an upbeat or more cheerful feel to the image. Not to say that all less saturated images have to be melancholy or less cheerful, most times it is quite the opposite. The purpose of desaturated, or muted tones, is not to dampen the spirit of a photo, but rather to enhance the mood. Still, more often than not, photographs that benefit the most from desaturation are those which carry an underlying sense of brooding. Images that work well with desaturation include but are definitely not limited to:

    • Moody portraiture
    • Earthy outdoor photographs
    • Urban landscapes and cityscapes
    • Emphasizing dank weather conditions such as rain, mist, or fog

    Now that you’ve been patient and endured the why, we will move onto the how.

    How to Desaturate Images Effectively

    More often than not, the actual desaturation process is accomplished with the vibrance slider more so than the saturation slider itself. They key is the desaturate the image without making it appear flat and completely colorless. There should almost always points of color which are emphasized. As with most aspects of photography less can actually be more. Don’t take away too much color and be sure to work with the colors that enhance the photo. It should be about harmony.
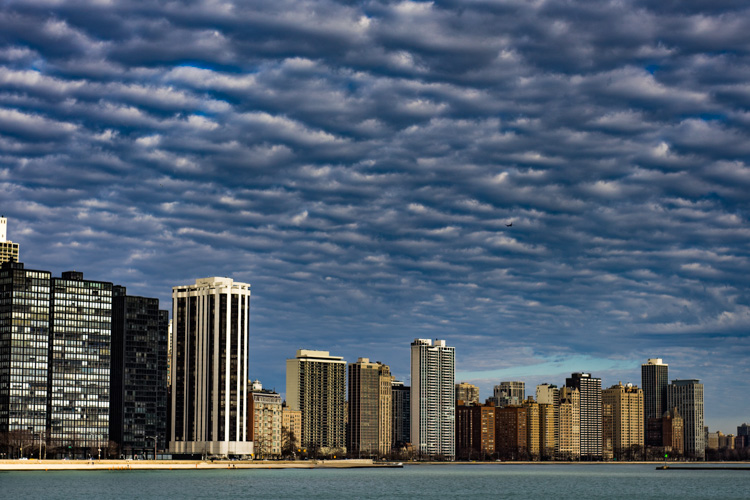
    We begin with a RAW file straight from the camera.

    RAW Chicago

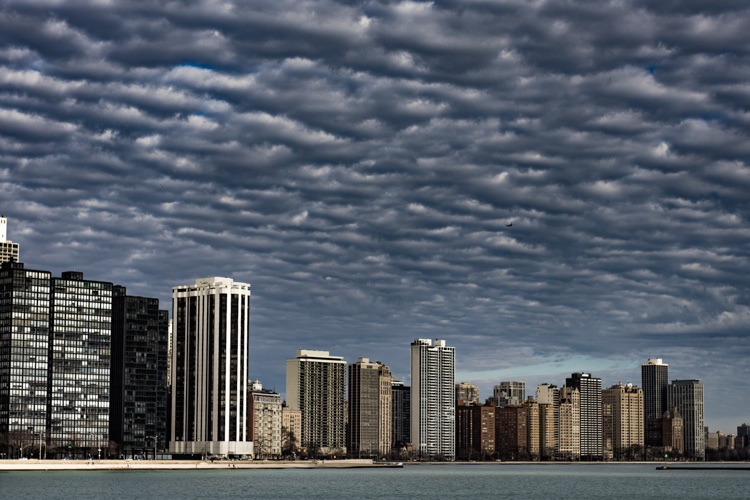
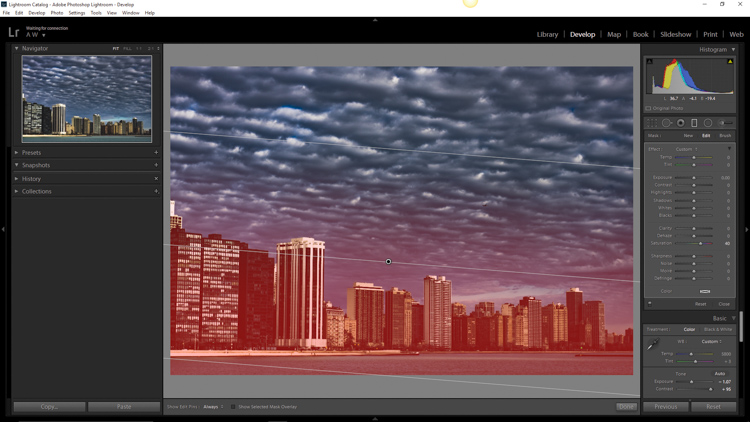
    Here we have the same image after being straightened, and some adjustments in the basic panel of Adobe Lightroom applied. I also used the neutral density filter tool to equalize the exposure of the sky, buildings, and water. Then +45 dehaze was added.

    Chicago Basic

    Now that we’ve finished with our basic adjustments, the desaturation process can begin. I find it usually works best to save the saturation adjustments for toward the end of the editing process. Please keep in mind that there are an infinite number of directions you can take your saturation effects, so have some fun with this part.

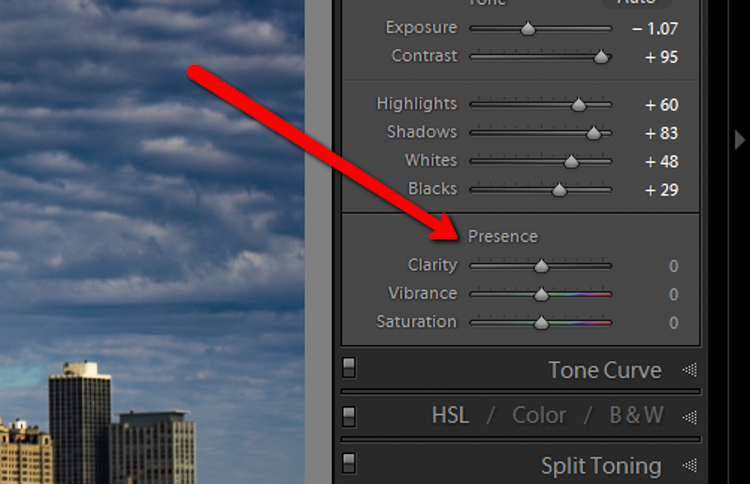
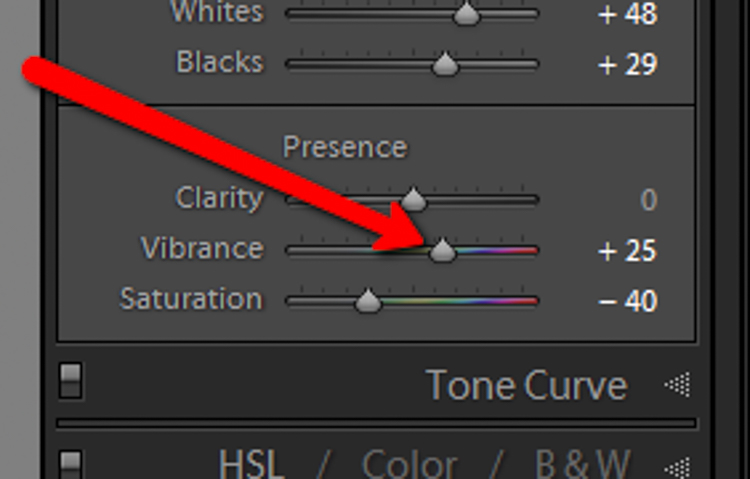
    Find the Presence section of the basic Panel in the develop module of Lightroom.

    Presence

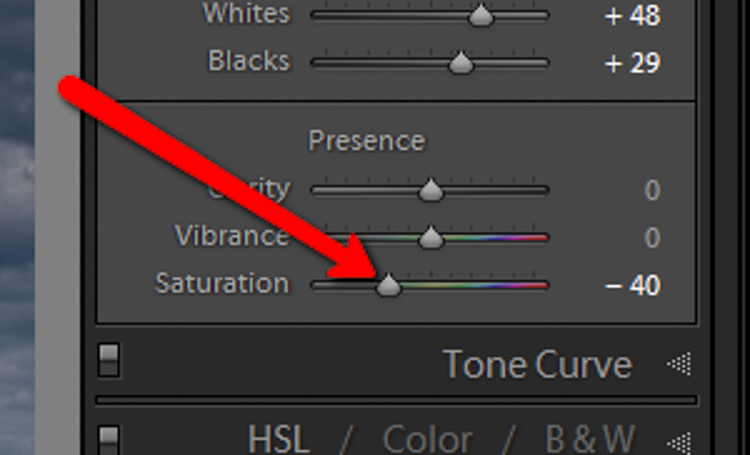
    For this image I took the saturation to -40.

    Desat Slider

    This brings the entire photo into a considerably desaturated state.

    Desaturation Chicago

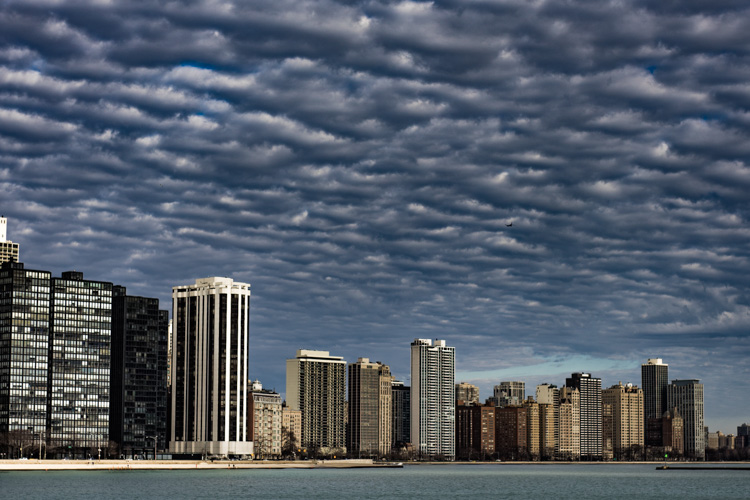
    By itself the desaturation leaves the image a little flat. To counteract this, let’s increase the vibrance to +25.

    Vib Slider

    Remember that vibrance affects the colors in the mid-tones only. In this case, the blue, orange, and yellow tones are amplified. This makes them stand out more within the image, adding a little more pop.

    Increased Vib Chicago

    Now, this is where things get interesting. Instead of settling for an image that is merely desaturated, we will now take full control with some advanced options, in order to make the photo stand out.

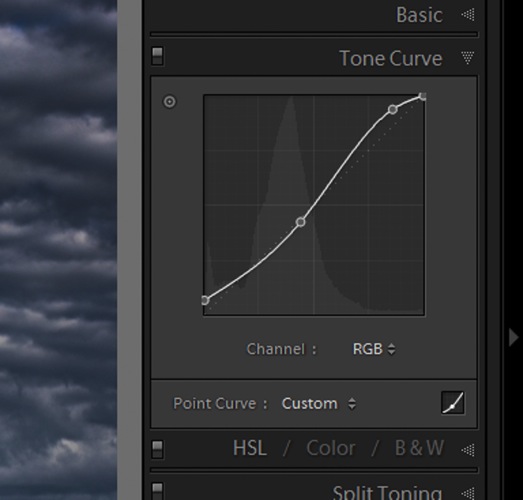
    To do this, we turn to the curves panel. The tone curve is simply a graphic representation of the luminance present within the image. If you’ve ever seen a vintage style photo, most likely some edits have been applied using this technique. What we want to do is to slightly fade the image, in order to add a washed out feel to the scene. Mainly the blacks will be lightened and the highlights enhanced. This forms somewhat of an S-curve and looks something like the following image:

    Tone Curve

    Which leaves us with a subtly faded effect.

    Tone Curve Update

    The buildings and the water still look a little drab, so to add a little color intensity we will once more turn to our old friend, the graduated filter tool. This will allow a little more color to be added where it is needed, without affecting the entire image.

    Grad Filter Sat

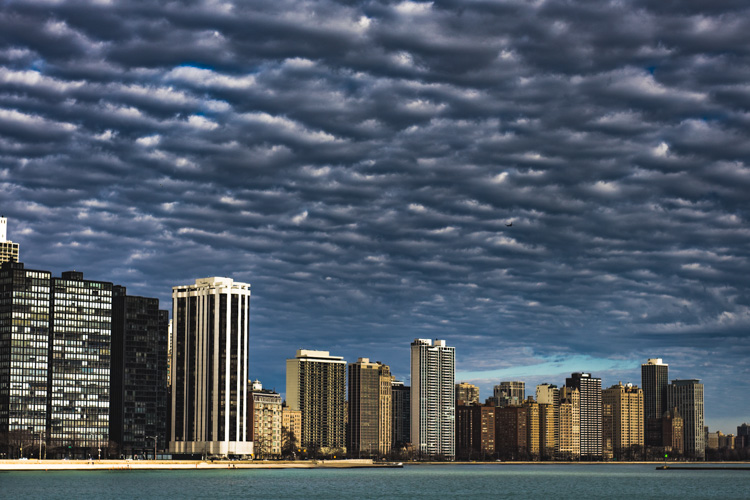
    Which leaves us with a photograph much different than the one we began with just a few minutes earlier.

    Final Desat Chicago

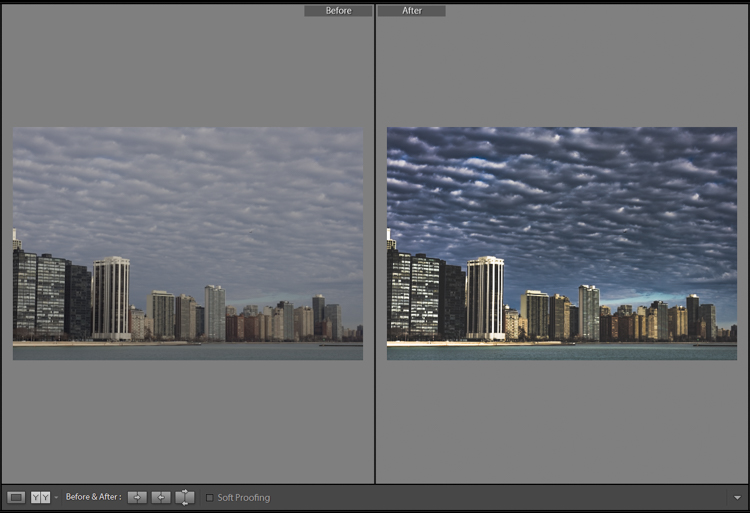
    The difference is quite apparent when compared to the original RAW file.

    Before_and_After_Desat_Update

    Desaturating a photograph goes much further than merely taking away color. Sure, you can move those sliders to the left and continue on your merry way, but why not go further to the next level, and really make them unique? Remember these key points:

    • Begin with a RAW file in order to give you the most dynamic range possible.
    • Complete all basic adjustments such as exposure, contrast, and clarity first.
    • Don’t go too far with your desaturation.
    • Make use of the tone curve panel to add additional ambiance.
    • Fine-tune your finished product using local adjustments such as graduated filter tool or the adjustment brush.

    The important thing to remember is to never underestimate the possibilities for your images. Take the time to experiment with different effects until you discover what you like best. It may be something entirely different that what your expected.

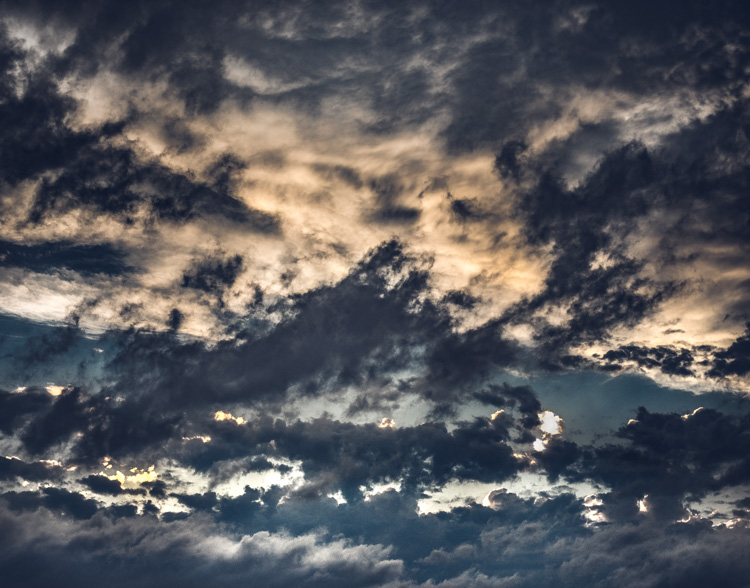
    Here are a few more examples of images processed with a desaturated look:

    Desat 1

    Desat 2

    Desat 3

    Desat 4

    Desat 5

    Have you got some photos that you purposely desaturated? Be sure to share them with us in the comments below.


    Editor’s Note: Adam also has a Lightroom Preset pack called Desaturated Cinematic that will give you this sort of look. Inspired by motion pictures and tv series, this pack of 25 lightroom presets will achieve great-looking desaturated effects. Perfect to give your images a simulated cinematic look. You can get more info on that by clicking the link.

    googletag.cmd.push(function() {
    tablet_slots.push( googletag.defineSlot( “/1005424/_dPSv4_tab-all-article-bottom_(300×250)”, [300, 250], “pb-ad-78623” ).addService( googletag.pubads() ) ); } );

    googletag.cmd.push(function() {
    mobile_slots.push( googletag.defineSlot( “/1005424/_dPSv4_mob-all-article-bottom_(300×250)”, [300, 250], “pb-ad-78158” ).addService( googletag.pubads() ) ); } );

    The post Step by Step How to Make a Moody Desaturated Image in Lightroom by Adam Welch appeared first on Digital Photography School.


    Digital Photography School

  • How to Make a Unique Portrait in the City at Night

    What makes a portrait into a portrait ?

    Making a portrait is like baking a cake in a way, you need to mix the right ingredients, evenly set it in a tray and add some personal touches. Once the cake is in the oven there is no way back, a bit like pressing the shutter release, then the portrait is done.

    ouria_tadmor_city_portrait003

    Any portrait, will always include a person, a background, and a key light that will allow the subject’s face and soul to come through in the picture. The subject, background and light are the ingredients, and your frame is the baking tray. Let’s hit the streets and bake the perfect portrait cake!

    The city, especially after sundown, has a vast variety of portrait ingredients to be found. Take your portrait subject with you, and go for a walk in the urban studio to look for frames, backgrounds, and light.

    The key to success, as always, lies in your eyes, so start looking at the city through a portrait lens, and look for balanced compositions that will frame a good portrait. Try to use what can be found on the streets, but if that’s not possible, a simple off-camera flash with white umbrella can complete the setup for the urban studio.
    We took a walk in the city and looked for portraits to be made. Here is what I and my model found.

    Bright store in a dark corner

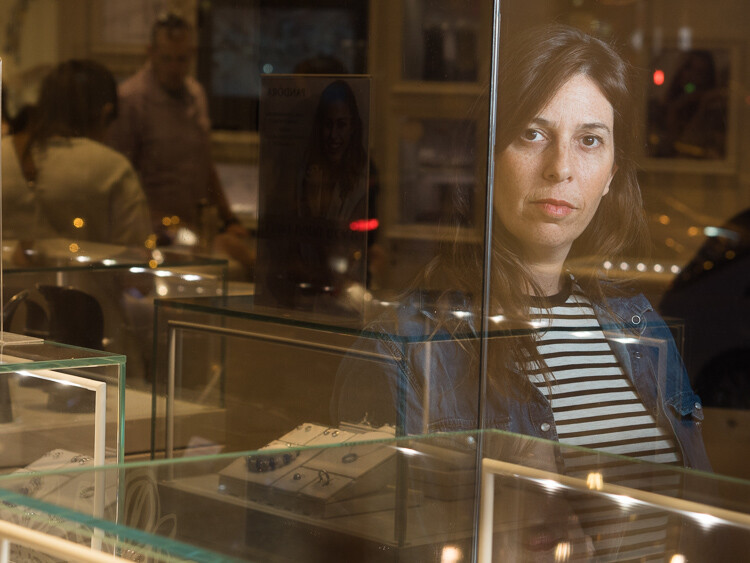
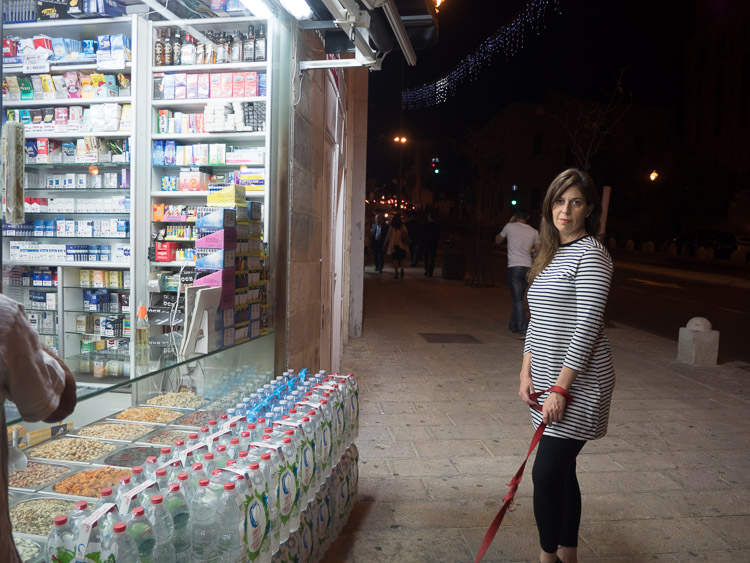
    The dynamic composition shown here creates the needed interest that focuses viewer’s attention on the model’s facial features and eyes, therefore communicating the personality of the model. This is done by having soft gentle light coming from the left and adding a red bokeh circle in the background. An invisible triangle between the model’s lips, eyes, and the red circle is directing the energy back to her eyes.

    ouria_tadmor_city_portrait011
    As you can see here, the setup for this portrait wasn’t a big soft-box in the studio, but instead was a messy drug store at night, in a busy street corner in Jerusalem. The store’s fluorescent lights provided an even and soft light source, while the much needed red circle in the background came from the traffic light behind the model (shown in green in the photo below).

    ouria_tadmor_city_portrait012

    Hotel enigma

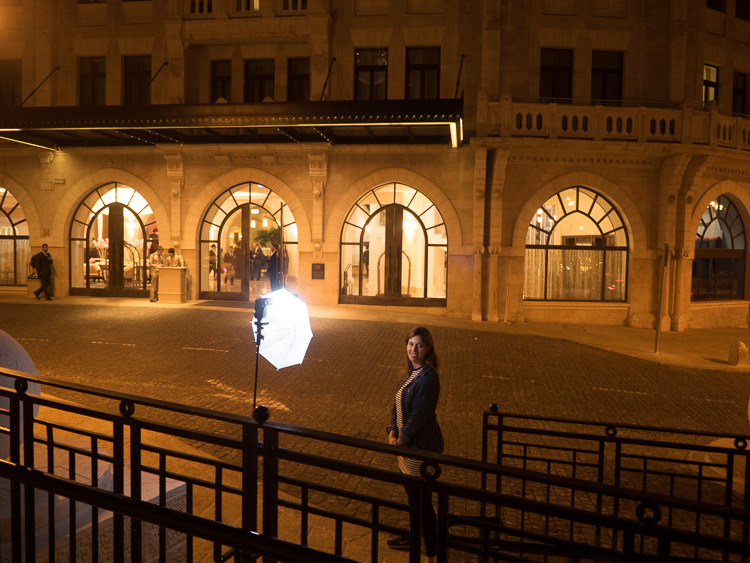
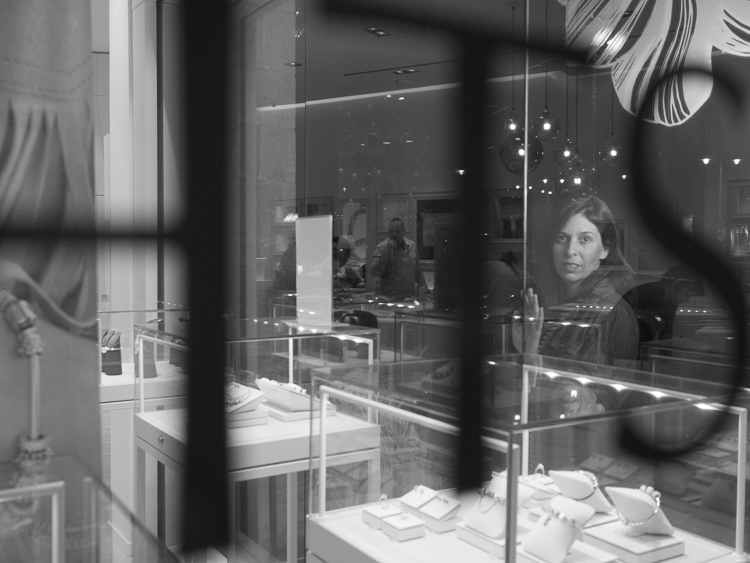
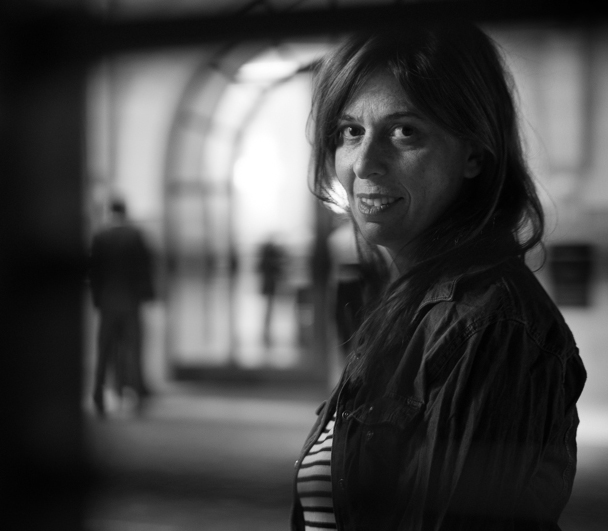
    A classic hotel building, with some human presence, helped create an enigmatic atmosphere for this portrait, the background here being part of the story. The key light on the subject came from an off-camera flash positioned at 90 degrees. The dark frame for this composition was made by photographing through a metal railing between the camera and the subject, as you can see in the next photo. This setup helped create depth, that continues with the blurry figures on the street and inside the building.

    ouria_tadmor_city_portrait013

    The whole setup can be seen below. The flash was positioned about four feet from the model, with the output set to manual at 1/32 power, in order to match the amount of light coming from the background.

    ouria_tadmor_city_portrait014

    Layer store

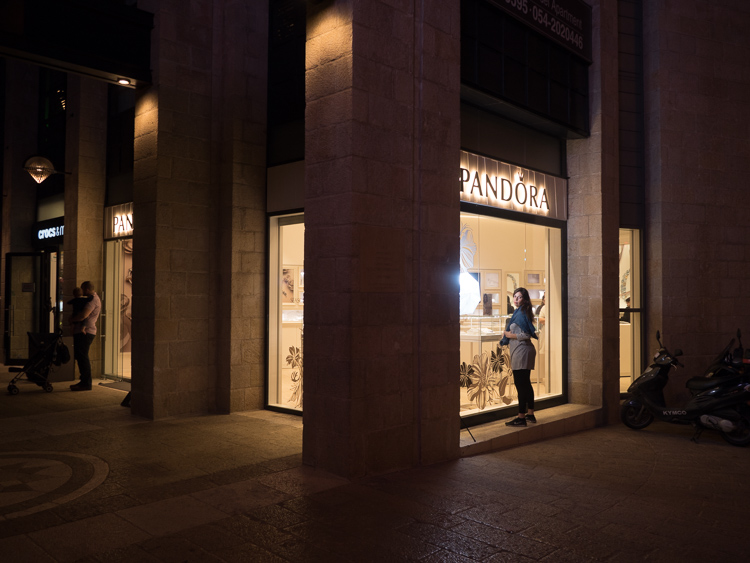
    Layers are not only to be found in photo editing programs, they are everywhere, all over the city. A corner store with windows on both sides made it possible to compose a complicated composition, that gives the eye something to explore. When doing so, you need to make sure that the viewer’s eye ends up looking at the subject, so it can still be a portrait. Dividing the frame into three, using the vertical lines on the store’s window, and positioning the subject in the right third of the frame, kept the focus on the subject in this case.

    ouria_tadmor_city_portrait002

    The main light here also came from the off-camera flash setup, as you can see in the next image. The photo was taken through the window on the left side of the store.

    ouria_tadmor_city_portrait004

    Equipment

    Any camera with a decent portrait lens and manual exposure control can do the work, most of it is hidden in the lens.

    A classic portrait lens is between the 85 mm and 105 mm focal lengths on a full frame camera, or their equivalents on any other sensor size. Those focal lengths will give you the perfect camera to subject distance of about six feet, and will produce a moderate compressed perspective, that is distortion free. Typical portrait lenses have a large aperture of f/2 or wider, which allows more light to go through, and therefore are perfect for working with what the city has to offer at night, and will deliver a shallow depth of field when needed.

    Off-camera flash can be any speedlight with manual control and radio slave system. Here is the list of equipment I used for this session:

    • Panasonic GH4 camera
    • Olympus M.Zuiko 45mm f/1.8 lens
    • Metz 52 AF-1 flash
    • Two Cactus V5 radio slaves
    • ProVision 20″ White umbrella
    • ProVision M11 shoe mount umbrella adapter
    • Meking L-2000A Light Stand

    So if you want to try something a little different get a willing subject (model), grab a flash, and head out into the city at night to make some unique portraits.

    Please share your questions and results in the comments below.

    googletag.cmd.push(function() {
    tablet_slots.push( googletag.defineSlot( “/1005424/_dPSv4_tab-all-article-bottom_(300×250)”, [300, 250], “pb-ad-78623” ).addService( googletag.pubads() ) ); } );

    googletag.cmd.push(function() {
    mobile_slots.push( googletag.defineSlot( “/1005424/_dPSv4_mob-all-article-bottom_(300×250)”, [300, 250], “pb-ad-78158” ).addService( googletag.pubads() ) ); } );

    The post How to Make a Unique Portrait in the City at Night by Ouria Tadmor appeared first on Digital Photography School.


    Digital Photography School

  • Weekly Photography Challenge – Glass

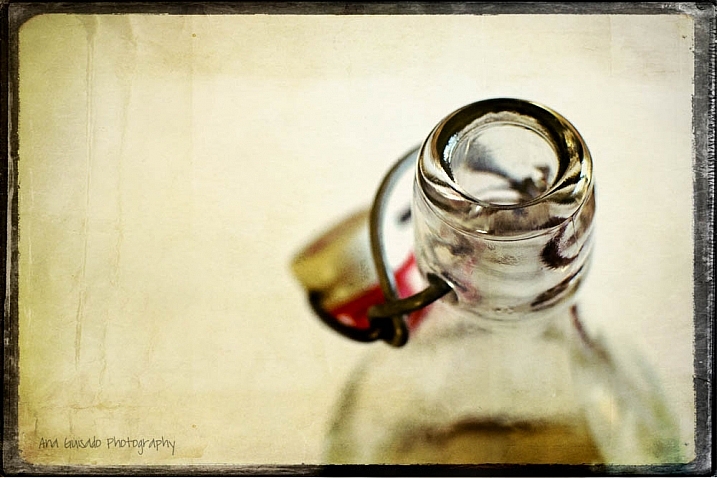
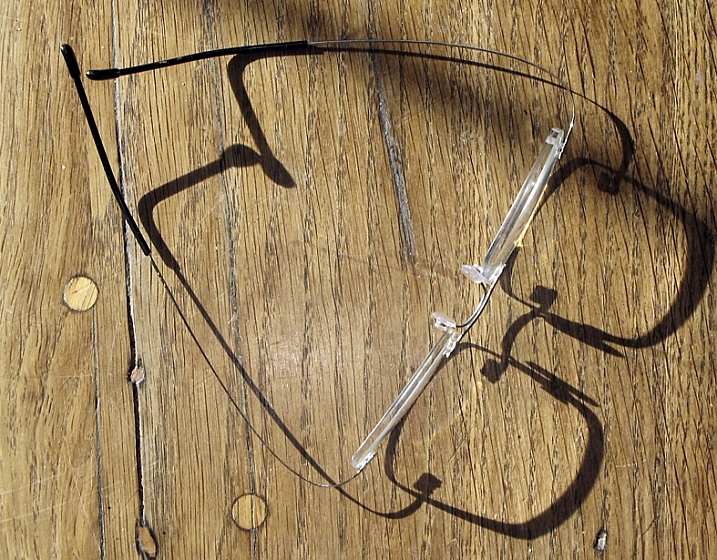
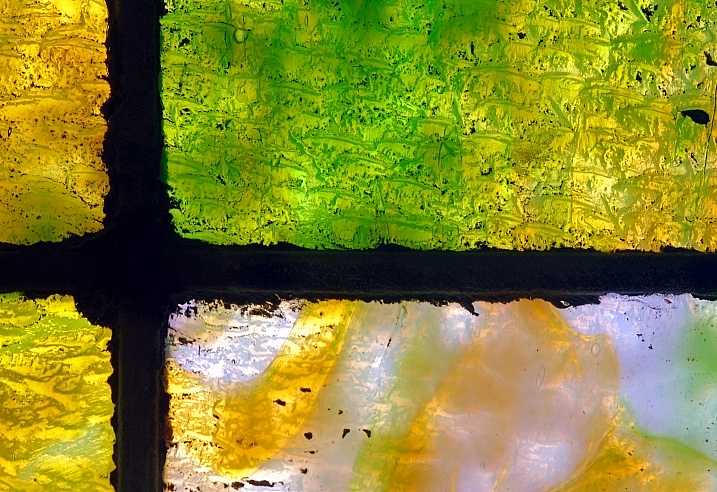
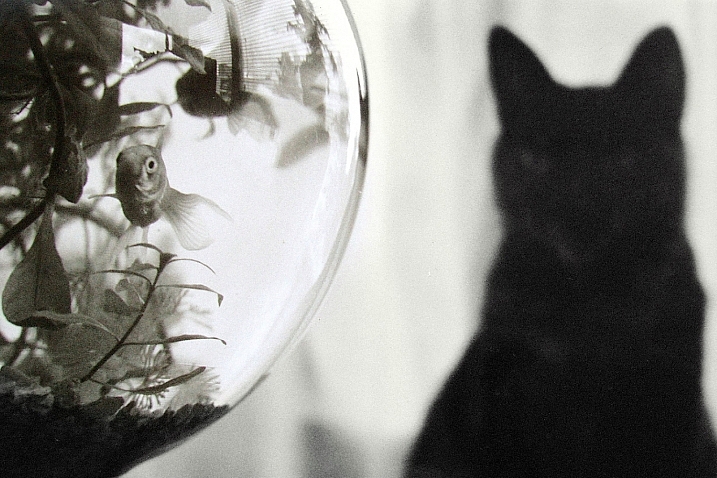
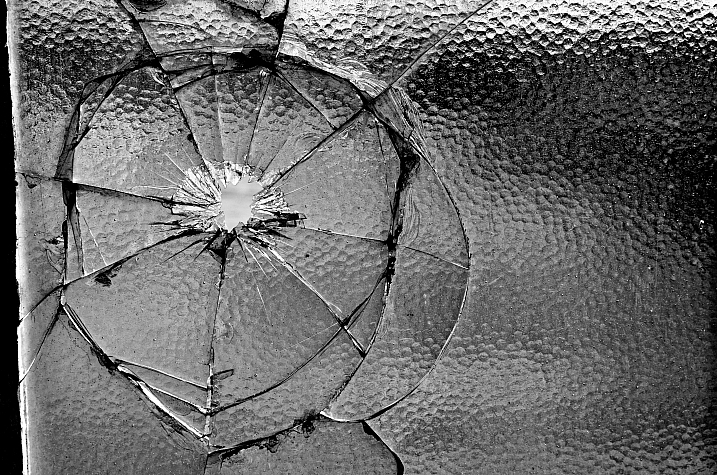
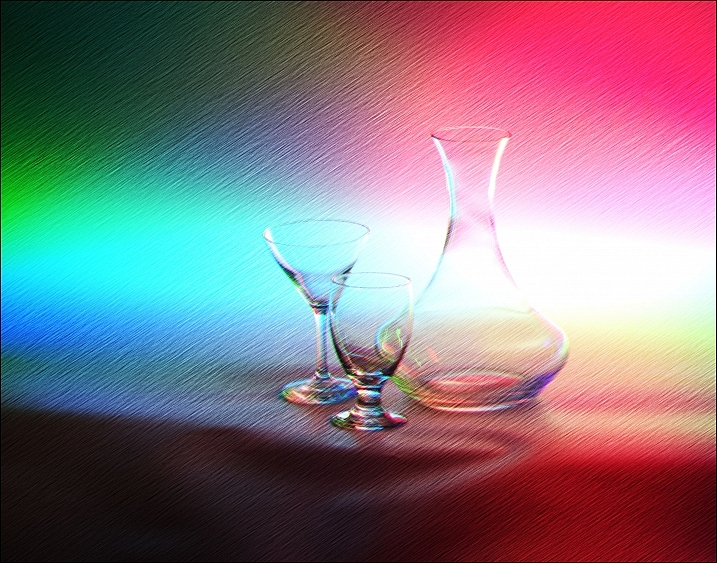
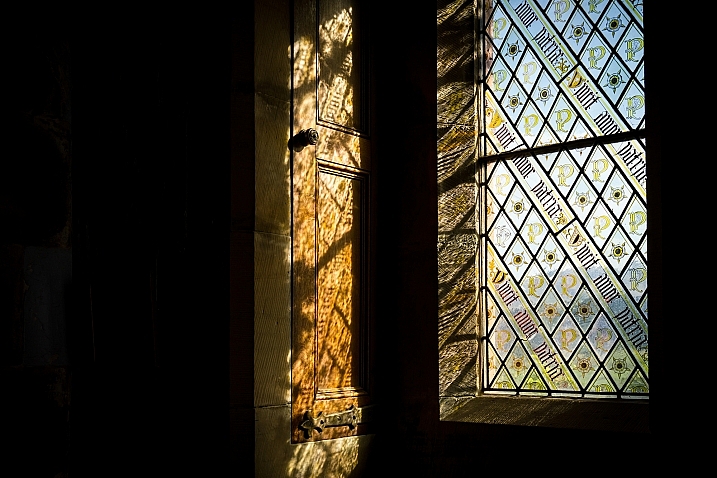
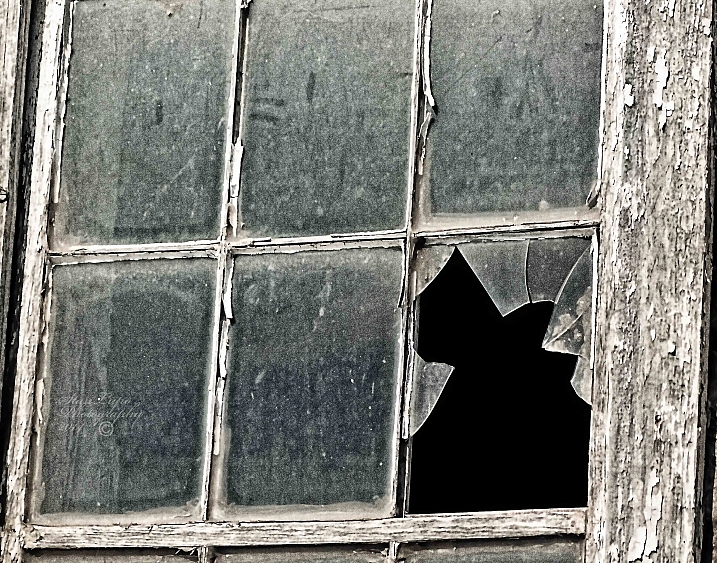
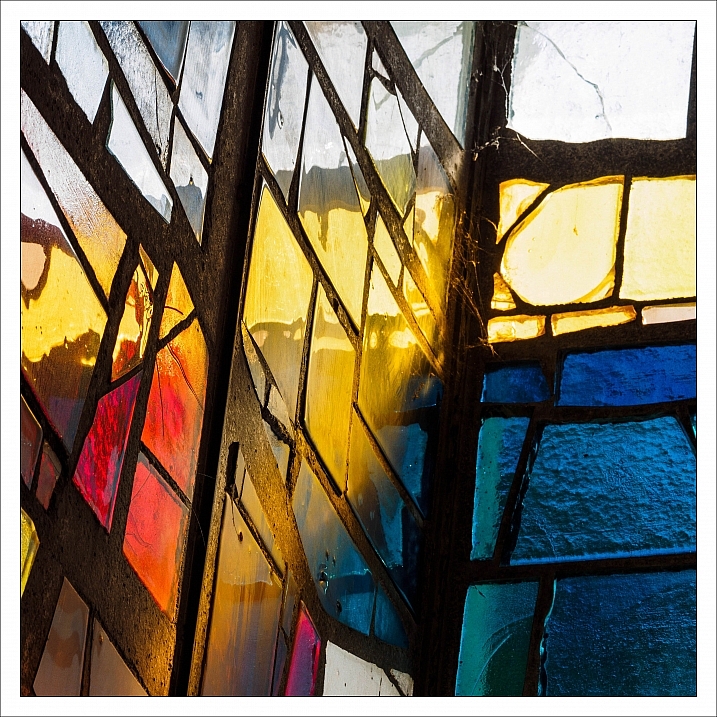
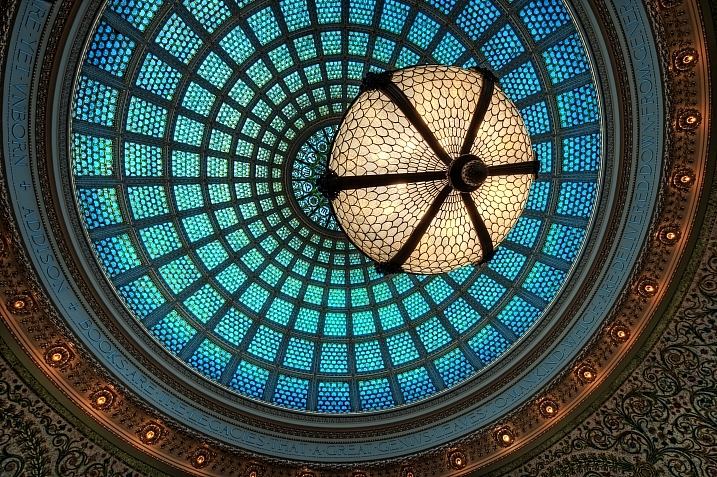
    How do you photograph something that is transparent or see through, like glass? See how these photographers did it with 28 images of glass subjects, then see if that gives you some ideas for this week’s challenge.

    Designmilk

    By designmilk

    Weekly Photography Challenge – Glass

    This should be easy enough to find subjects for this week’s challenge – glass – the tricky part is how to photograph it. Glass reflects everything including the light source and even yourself. So how you approach this will be up to you. Shoot a crystal glass in the studio, photograph an old weathered window pane, work with the reflections and go with them for effect, or shoot through glass. Get creative.

    Bill Gracey

    By Bill Gracey

    ?ethan

    By ?ethan

    Dara Or

    By Dara or

    Share your images below:

    Simply upload your shot into the comment field (look for the little camera icon in the Disqus comments section) and they’ll get embedded for us all to see or if you’d prefer upload them to your favourite photo sharing site and leave the link to them. Show me your best images in this week’s challenge. Sometimes it takes a while for an image to appear so be patient and try not to post the same image twice.

    Matthew Rogers

    By Matthew Rogers

    Wil C. Fry

    By Wil C. Fry

    Han Cheng Yeh

    By Han Cheng Yeh

    googletag.cmd.push(function() {
    tablet_slots.push( googletag.defineSlot( “/1005424/_dPSv4_tab-all-article-bottom_(300×250)”, [300, 250], “pb-ad-78623” ).addService( googletag.pubads() ) ); } );

    googletag.cmd.push(function() {
    mobile_slots.push( googletag.defineSlot( “/1005424/_dPSv4_mob-all-article-bottom_(300×250)”, [300, 250], “pb-ad-78158” ).addService( googletag.pubads() ) ); } );

    The post Weekly Photography Challenge – Glass by Darlene Hildebrandt appeared first on Digital Photography School.


    Digital Photography School

  • 28 Ethereal Images of a Transparent Subject – Glass

    Glass is one of the trickiest subjects to photograph. Trying to avoid reflections, seeing through it, and distortion it causes. It can also help create some dramatic and stunning images.

    In this image collection we see how several photographers have handled different kinds of glass subjects:

    Ana

    By Ana

    ?aura Tou

    By ?aura Tou

    Thomas Hawk

    By Thomas Hawk

    Maurits Verbiest

    By Maurits Verbiest

    Hellsgeriatric ?

    By Hellsgeriatric ?

    Martin Brigden

    By Martin Brigden

    Dean Hochman

    By Dean Hochman

    Tim

    By Tim

    Sparkleice

    By sparkleice

    Jurek D.

    By jurek d.

    Heike Giesler

    By Heike Giesler

    Broterham

    By broterham

    Michael

    By michael

    Sandy/Chuck Harris

    By Sandy/Chuck Harris

    Hehaden

    By hehaden

    Stan Lupo

    By Stan Lupo

    Chechi Peinado

    By Chechi Peinado

    Carl R Jr.

    By Carl R Jr.

    Iahan 13:20

    By Iahan 13:20

    Andreas Manessinger

    By Andreas Manessinger

    Neil Tackaberry

    By Neil Tackaberry

    Chechi Peinado

    By Chechi Peinado

    Justin Kern

    By Justin Kern

    R.e. Kittson

    By r.e. Kittson

    Mister G.C.

    By Mister G.C.

    Tim

    By Tim

    Billy Wilson

    By Billy Wilson

    Jonathan Cohen

    By Jonathan Cohen

    googletag.cmd.push(function() {
    tablet_slots.push( googletag.defineSlot( “/1005424/_dPSv4_tab-all-article-bottom_(300×250)”, [300, 250], “pb-ad-78623” ).addService( googletag.pubads() ) ); } );

    googletag.cmd.push(function() {
    mobile_slots.push( googletag.defineSlot( “/1005424/_dPSv4_mob-all-article-bottom_(300×250)”, [300, 250], “pb-ad-78158” ).addService( googletag.pubads() ) ); } );

    The post 28 Ethereal Images of a Transparent Subject – Glass by Darlene Hildebrandt appeared first on Digital Photography School.


    Digital Photography School

  • 4 Easy and Unique Ways to Light and Photograph Wedding Rings

    Snapdeals Sale: If you’d like to learn more about how David and Patrick photograph weddings you may want to check out their 14 hour tutorial on all things wedding photography. It’s currently $ 100 off at SnapnDeals.

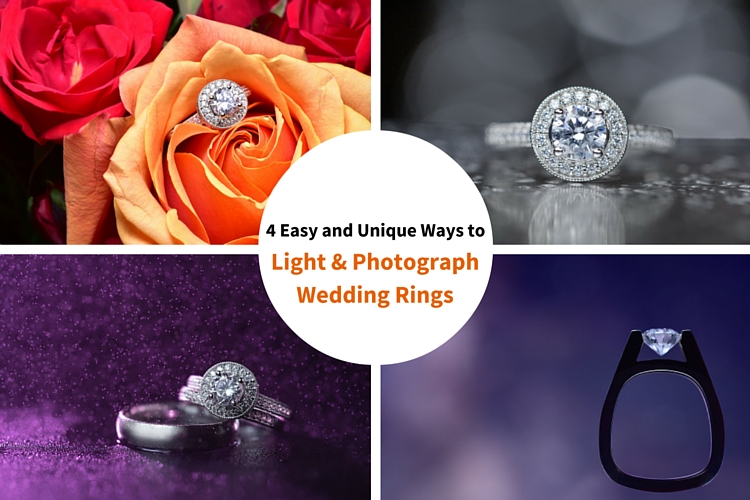
    Wedding photographers are expected to capture every aspect of a wedding day and in many cases we only have a couple minutes to work. The wedding rings are an important detail that many photographers either overlook completely or over think. Over the years I’ve taught some practical ways to improve your wedding business and shooting skills. Let me show you four quick and unique ways to photograph the wedding rings.

    4 Easy and Unique Ways to Lightand Photograph Wedding Rings

    You’ll Need a Macro Lens

    04.jpg

    To capture wedding rings properly you’re going to need a macro lens. Without one, you simply won’t be able to zoom in and focus close enough. Yes, you could shoot wider and crop in but you will be losing tons of resolution. Luckily basic macro lenses are not that expensive.

    If you’re shooting Nikon I would suggest the Nikon Micro 55mm f/2.8 or the Micro 60mm f/2.8. These lenses are very small and will easily fit in your bag. If you’re shooting Canon I would suggest the 100mm f/2.8L IS USM Macro. This one actually does have auto focus.

    If you’re anything like me, you’re not going to use a macro lens very often, so you won’t want to spend a ton of money on extra features like vibration reduction (image stabilization). If you want to save even more money, buy the lens used. Amazon is actually great for used lenses. Simply click used at the bottom of any description on Amazon. You can get them cheap and they will hold their value for years to come.

    Technique #1 Wedding Rings in Flowers

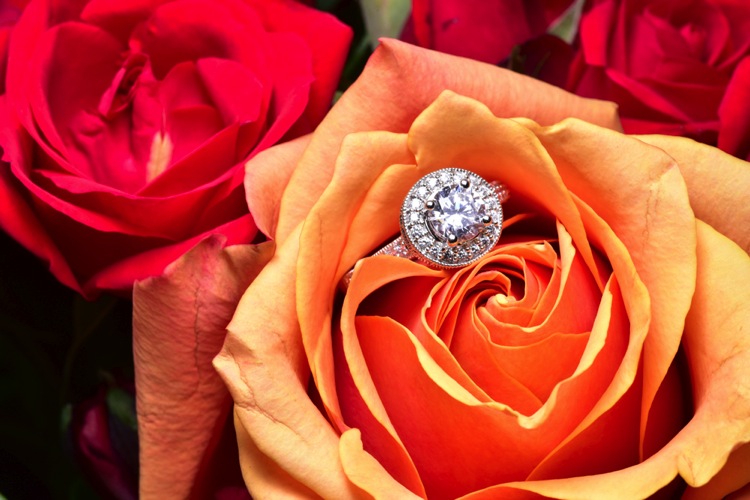
    The absolute easiest shot to capture, and one that I’m sure to get at every single wedding I photograph, is one or more of the wedding rings placed inside, or on top of flowers. I don’t think I’ve been to a single wedding where flowers weren’t easily available. This shot is overdone and boring to a lot of photographers, but keep in mind that your clients will (hopefully) only get married once. So, to them, this shot is unique. It shows off the wedding rings, and it also captures the flowers, which they spent a lot of time and money picking out.

    Sometimes I will use the bouquet of flowers and lay them down on the table, but I usually find it easier to work with flowers that are standing up. For this I will often use a vase of flowers, usually found in center of the tables at the reception.

    For lighting this first shot I’m going to use a speedlight, any type will work. If you don’t have enough money to buy a name brand-name speedlight, then I would highly suggest checking out Yongnuo flashes, the base version is only 70 bucks. If you shoot Canon, you may want to spend a bit more, and buy the YN600EX-RT, that will communicate with radio signals for $ 129.

    1 flowers direct flash

    Holding the camera in one hand and the flash in the other, you can see that we can get a decent result (image above), but it would be much better if we could soften the light.

    If you didn’t bring a modifier with you, you can use anything nearby that’s white. I’ve used a white plate, paper napkin, white t-shirt, and a tablecloth in the past. For this shot we will use a white paper towel. By bouncing the light off of, or through the paper towel, we can get much larger, softer light.

    Having my assistant move the flash with each picture I take, ensures that we will get a lot of variety, without wasting time looking at each shot individually. Remember, this is all taking place during a wedding, so I really don’t want to spend more than a minute or two on these shots. After taking 10-20 shots in rapid succession, I can quickly review them and confirm that I have a keeper.

    2 moving soft light

    I consider this to be my safety shot because I can get it in under two minutes at every wedding I do, and the client always loves it. After I knock it out, if I have time, I’ll try some more complicated and creative shots.

    Adding Multiple Lights and Water

    For this next shot we are going to complicate things a bit in terms of gear, but we are also going to be able to do it without the help of an assistant.

    First, find an interesting surface to place the rings. It could be a tablecloth, wood grain, granite, or anything you find around the reception site. We took our picture on a black, glass-top table.

    First I setup the camera up on a tripod so that I could keep my hands free. From behind the ring, I added the first speedlight, to create a rim light on the back of the subject. To add a bit of interest I used a purple gel, and to confine the light, the Magmod grid.

    3 Final Back Light Only

    Now it’s time to light the rings from the front. Instead of using a paper towel, I decided to use the Fstoppers FlashDisc. It’s basically a collapsible softbox that can used with just one hand. When it’s collapsed down, it’s small enough to fit in your pocket, which makes it extremely convenient at weddings.

    Read: Review: Flash Disc Lighting Modifier by Fstoppers for more information on this product.

    4 Final backlight and flashdisc

    To add one more interesting aspect to this shot, I used a miniature spray bottle to add mist behind the rings. The purple light coming from the back, lights up the water, and takes this shot to the next level.

    5 Final best 1 retouched

    Building Your Own Set and Using Continuous Lighting

    If you like to be prepared for any situation, you’re going to want to travel with a few props that you know you can work with, if the items around a wedding aren’t cutting it as a background. I travel with a pack of metallic foils that can be used to place the rings on. I also brings along cheap reflective jewelry that I can use to create bokeh effects.

    Instead of using a strobe for this shot, a cheap LED panel was used as a continuous light source. These panels can be extremely handy, but keep in mind that you will probably want to use a tripod if you are going to use them to light the rings so that you can keep everything sharp (the shutter speed may be slow). If you want extremely blurry bokeh, you’re also going to want to shoot at a wider aperture than you normally might.

    6 Final Image 2

    Using a Screen to Create Your Own Background

    For this final shot, we are going to use a computer screen to create our own background. If you don’t travel with a laptop, you could use an iPad, or maybe even a smartphone screen instead.

    I would suggest practicing this shot at home before you ever get to a wedding. You don’t want to be fiddling around with your setup, or searching for different backgrounds while the wedding is going on. If you are prepared though, this shot can be extremely easy to pull off.

    First I placed the ring on bit of putty to get it to stand up. I then set my computer screen to its brightest setting, and exposed for the screen itself. At this point the shot is a silhouette of the ring.

    7 Screen backlit

    To light the ring itself you could use your smartphone’s flashlight, or you could use any cheap LED flashlight. If your flashlight doesn’t dim, you can simply move it closer or farther away from the ring to get a correct balance of light, with the screen in the background.

    Because your background will be so blurry, it really doesn’t matter what is on the screen in the background, you are basically looking for certain colors, and large shapes that will create an interesting mood.

    8 screen shot 1

    9 screen shot 2

    10 screen shot 3

    11 screen shot 4

    In the post-production you can either zoom-in past the putty (crop it out) or you can Photoshop the putty out and have a floating ring effect.

    12 Final Edit 4

    You can also watch us go through these techniques in the following video:

    Snapdeals Sale: If you’d like to learn more about how David and Patrick photograph weddings you may want to check out their 14 hour tutorial on all things wedding photography. It’s currently $ 100 off at SnapnDeals.

    googletag.cmd.push(function() {
    tablet_slots.push( googletag.defineSlot( “/1005424/_dPSv4_tab-all-article-bottom_(300×250)”, [300, 250], “pb-ad-78623” ).addService( googletag.pubads() ) ); } );

    googletag.cmd.push(function() {
    mobile_slots.push( googletag.defineSlot( “/1005424/_dPSv4_mob-all-article-bottom_(300×250)”, [300, 250], “pb-ad-78158” ).addService( googletag.pubads() ) ); } );

    The post 4 Easy and Unique Ways to Light and Photograph Wedding Rings by Lee Morris appeared first on Digital Photography School.


    Digital Photography School

  • The Uncomfortable Truth About Street Photography

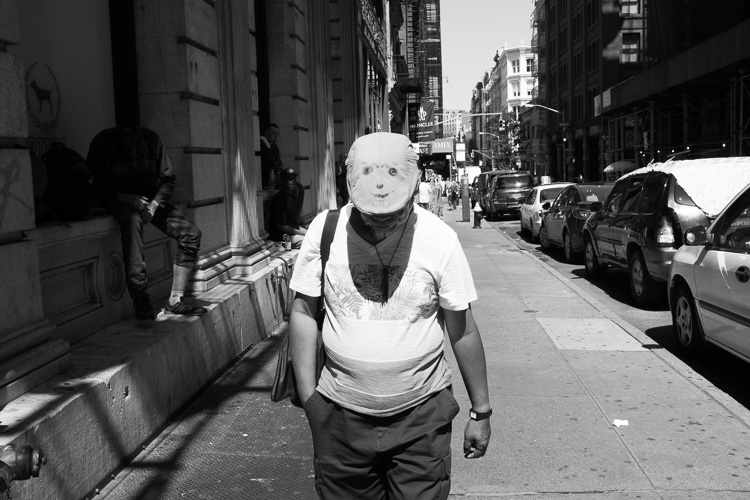
    Smiley Face, SoHo, NYC.

    As someone who has photographed people candidly since I first picked up a camera over 15 years ago, there is something that needs to be said to everyone that is interested in street photography.

    Yes, what we’re doing has importance, whether through the angle of documenting history, noticing interesting moments, fostering ideas, or creating art. These photographs will have cultural value to them in the future, and most of us capture culture and humanity because we like them. We like people. We like to people watch.

    Many photographers have been drawn to this genre before even realizing that it has a name, and this helps us realize that this way of viewing the world is instinctive to some people. It comes naturally. I remember picking up my first camera in New York. I could have easily looked up at the tall skyscrapers and epic architecture, and I did and still do, but the people walking around seemed just as fascinating.

    Duck Face, SoHo, NYC.

    Yes, it’s legal, at least if you’re in the United State and Britain. Yes, it’s within our rights to do this in public, and to share these images as art and for cultural purposes. No, it doesn’t make us bad people.

    Street photography will make some people uncomfortable

    But no, everything that I just mentioned does not completely free us from culpability out there. We have to consider that the practice of street photography can be inherently uncomfortable to our subjects. Some will understand what we are doing, but others will be weirded out by a stranger capturing a photo of them suddenly in public, whether it is in an obvious or a more candid way. Morality, cultural importance, and the good things that we are trying to create should all be put aside here, so that you realize there is a tradeoff going on. We are creating uncomfortable situations for others.

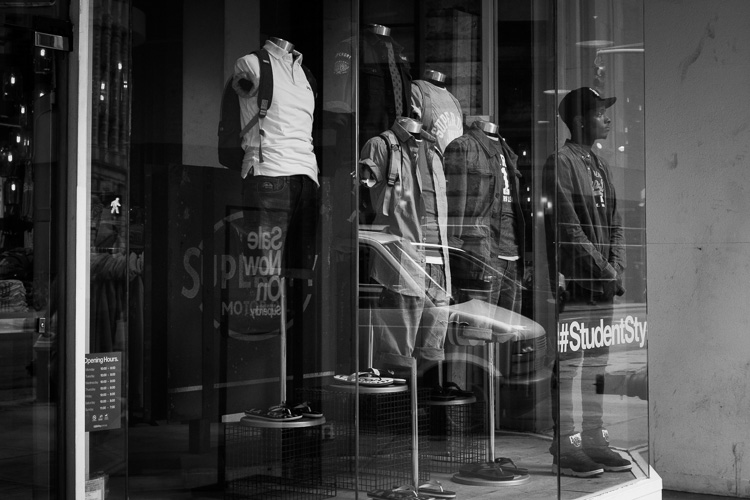
    Student, Broadway

    Some would even argue that it is a virtue to create a little uncomfort out there, and that we all need to be thrown off balance every once in awhile. I agree with this statement, but I still realize that there is a negative side to what I am doing.

    Some people do not like that we are taking their photograph. Some would not be happy seeing the photograph afterwards. No matter how hard you try, you cannot avoid those people through your daily shooting.

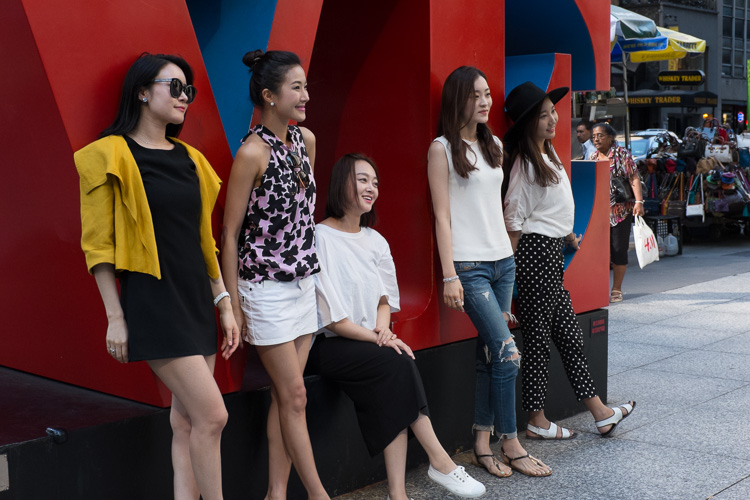
    Love, Midtown

    This is something that you will have to come to terms with if you practice street photography. You can have a smile on your face and talk to anyone who seems uncomfortable with your presence with a camera. You can tell them that you did not mean to make them uncomfortable, and you can even offer to delete a photo if the person really doesn’t like it. You can do all of those things, but still you need to know that you are making people uncomfortable.

    Yes, you.

    I’m not saying that this should stop you from doing it, or slow you down, but it should be in the back of your head. It’s a privilege that we are allowed to do this, and we need to respect our subjects in the way that we shoot, even if there is no choice but to occasionally make someone uncomfortable. You can choose who it is you photograph, and the way and situations in which you photograph, but you will never be able to completely get rid of this.

    Broadway Joe, SoHo, NYC.

    Learn to live with it and accept it as you photograph people, but don’t ignore it.

    Do you do street photography? How do you handle this uncomfortable aspect of this kind of photography? Please share your experiences in the comments below.

    googletag.cmd.push(function() {
    tablet_slots.push( googletag.defineSlot( “/1005424/_dPSv4_tab-all-article-bottom_(300×250)”, [300, 250], “pb-ad-78623” ).addService( googletag.pubads() ) ); } );

    googletag.cmd.push(function() {
    mobile_slots.push( googletag.defineSlot( “/1005424/_dPSv4_mob-all-article-bottom_(300×250)”, [300, 250], “pb-ad-78158” ).addService( googletag.pubads() ) ); } );

    The post The Uncomfortable Truth About Street Photography by James Maher appeared first on Digital Photography School.


    Digital Photography School

  • Tokina AT-X 11-16 Pro DX II Review: Best Value from Wide Angle

    Tokina 11-16mm f2.8 is an ultra wide angle lens for crop sensor camera bodies (DX) with a moderately fast constant aperture of f2.8. It is Tokina’s top of the line lens (AT-X) with an internal focusing (IF) and Super-low Dispersion glass (SD). It is available in Canon, Nikon and Sony A mounts. Due to its focal length and fast aperture, Continue Reading

    The post Tokina AT-X 11-16 Pro DX II Review: Best Value from Wide Angle appeared first on Photodoto.


    Photodoto

  • 5 Tips to Help Get Yourself Out of a Photography Rut

    Shootthroughyourrut 01

    Are you in a photography rut?

    Tell me if this sounds familiar – you’re the person who almost always has a camera with you. Maybe it’s in a backpack or purse, in your trunk, or strapped right to your hip – you’re always seeking that next level. Yet on the flip side, you also find it excruciating when you hit a rut. You know that terrible feeling when you look at your recent work and feel like it’s the endless blip of a scratched record, when you don’t feel inspired, creative, or excited by your own work.

    Friend, when it gets to this point, you’ve officially hit a rut. Ruts are the curse of the artist. but fear not — if you handle this wisely, you’ll come out the other side on the next level. Here are a few tricks that have gotten me through my creative plateaus.

    Shootthroughyourrut 02

    Tip #1 – put the camera away for a while

    First, put that camera down. It’s unsettling, isn’t it? You see the world in a series of beautifully composed photos, and not having a camera feels like you’re missing a limb. Sit in that discomfort. Force yourself to look at your surroundings with a fresh eye — no lens between you and the world — and new frames, new light, new ways of capturing this crazy planet will all slowly unveil themselves to you.

    If you keep going in a rush to capture it all before it disappears, you’ll never see it properly. Start slow. Look carefully. Don’t take any photos. Keep things captured in your mind just for yourself. When you do pick up your camera again, it’ll feel like a whole new world of opportunity, because you’ve refreshed your own gaze. In the spirit of always keeping your gaze fresh, is the next point.

    Shootthroughyourrut 03

    Tip #2 – look for new inspiration close to home or online

    Find new sources of inspiration. During one of my “leave the camera at home” phases last month, I was hungrily soaking up inspiration from everywhere and everything BUT photography. I sat in slack-jawed wonder at Kehinde Wiley paintings, examined the brush strokes in Japanese calligraphy, studied ancient mapmaking techniques and short shadowy films, and the impeccable detail on the Manus x Machina gowns at the Met Museum.

    You don’t have to travel to new countries to find a street you’ve never walked down. This absorption of every art besides photography reminded me over and over that this world is rife with creativity that bursts from its very pores, in a hundred different manifestations. I felt so small, so unimportant, and so refreshed by the many ways of creativity that humans are capable of, that aren’t my piddly little photography efforts. It’s good to feel small, while also being inspired to be bigger. That being said, we come to the next tip.

    Shootthroughyourrut 04

    Tip #3 – stop comparing yourself to others

    Stop absorbing other people’s work. Seriously, give yourself a break from the comparison game, because no one wins. Either you end up in a fetal position in defeat, after a depressing Instagram session in which you realize you’re a talentless hack, or you’re left with that icky smug feeling when you look at someone’s work who isn’t as good as yours. Either way, the comparison game doesn’t improve your art, nor does it improve the world either. Take an Instagram break, stop looking at how other photographers are doing it, and keep working on your own vision. It’s a smarter use of your time, and will take you further (now if only I could figure out how to actually implement this one).

    Shootthroughyourrut 05

    Tip #4 – take advantage or your own strengths and skills

    Take the photo that only you can take. This is the crux of it. Instead of imitating other photographers’ techniques and subjects, have a good hard think about the photo that literally can only be taken by YOU. What communities are you a part of that others would kill to break into? What skill sets do you have, that will open doors that otherwise would stay latched shut? There are so many little components of you that make you unique — so don’t waste your time trying to recreate your current photography idol’s recent shoot.

    Shootthroughyourrut 06

    Tip #5 – just get some rest

    If all else fails – take a nap. Seriously, sometimes I’m just so damn tired that I can’t come up with a fresh idea to save my life. Have a good lie down, and know that the world will still be there, waiting to be captured when you wake up.

    In a rut? Leave your techniques for working through it in the comments section below, I can’t wait to hear how you handle it!

    googletag.cmd.push(function() {
    tablet_slots.push( googletag.defineSlot( “/1005424/_dPSv4_tab-all-article-bottom_(300×250)”, [300, 250], “pb-ad-78623” ).addService( googletag.pubads() ) ); } );

    googletag.cmd.push(function() {
    mobile_slots.push( googletag.defineSlot( “/1005424/_dPSv4_mob-all-article-bottom_(300×250)”, [300, 250], “pb-ad-78158” ).addService( googletag.pubads() ) ); } );

    The post 5 Tips to Help Get Yourself Out of a Photography Rut by Laura Sullivan appeared first on Digital Photography School.


    Digital Photography School