Category: Photography

  • Tips for Styling and Photographing Interiors

    The post Tips for Styling and Photographing Interiors appeared first on Digital Photography School. It was authored by Lily Sawyer.

    dps-how-to-style-interiors-for-photoshoots-lily-sawyer-interior-design

    On Instagram, I run a page called Layered.Home that’s focused on interiors: design, styling, home improvements and lifestyle in an interiors setting. Here, I work with brands on their brand awareness campaigns and product placements. All these involve styling and photographing products and spaces, sometimes with a specific brief to adhere to and at other times I have the freedom to style as I wish.

    The unprecedented rise and popularity of social media platforms has paved a way for a new photography niche: personal brand photography. This is where photographers shoot content for brands to use on their website, promotional materials and social media posts. Whilst this is not my niche, I have photographed businesses, interiors and products both for clients and for my own social media page and continue to do so.

    Here are some articles I have written on this topic before: shooting interior spaces , taking better photos for Instagram and photographing mixed lighting for interiors.

    Whilst I hope the above articles will give you some photography techniques, this article will focus on some techniques when styling interiors for photoshoots and some tips for photographing them at the end. Let’s dive in.

    dps-how-to-style-interiors-for-photoshoots-lily-sawyer-interior-design

    Purpose of the photoshoot:

    Before you can style interiors successfully, first you have to ascertain the purpose of the photoshoot. Who is it for? What is it for? Are there any targets to meet? Regardless of the answer, bear in mind that the styling must always be on-brand.

    Whatever the purpose may be, it is imperative that you understand your client’s branding first and foremost and that you style to strengthen the brand, not to dilute it.

    Some purposes of styling might be for the following:

    • client’s website – images for landing pages, blog posts, slideshows etc.
    • social media feed – styling content for Instagram, Facebook, Twitter etc
    • seasonal promotions – spring, summer, autumn, winter, etc
    • advert in a magazine
    • feature in a magazine – magazines also have their own niches and styles so stylists match interiors to appropriate magazine brands
    • product placement
    • brand awareness campaigns

    The latter two usually allow scope for styling off-brand. It may be because the client wants to reach your audience. Therefore, they may want you to style the product for your brand instead of theirs to reach your audience and as a result, expanding their customer base.

    dps-how-to-style-interiors-for-photoshoots-lily-sawyer-interior-design

    Style

    There are many styles with now trendy names coined to describe them such as Scandinavian or Scandi, Bohemian or Boho, Scandi-Boho, Modern, Mid-century modern, Minimalist, Maximalist, Eclectic, Mediumalist(!), Retro, Vintage, Contemporary, Traditional, Transitional(!), Industrial, Country, French-Country, Rustic, Shabby Chic, Hollywood Glam, Period (eg. Victorian, Edwardian), Coastal. And it goes on.

    Play it safe by reading up on the style or mixtures of style and nailing down the accessories and pieces that are appropriate for them.

    Understanding both purpose and style will help make you an effective stylist.

    Styling Tips

    1. When it comes to styling, there are two general camps: hero or layer?

    Hero styling is putting a piece in the spotlight, the piece that takes all of the attention. Nothing else surrounds it that might take away any of that attention and make the piece disappear. The aim is to evoke a strong response from the viewer and create maximum impact.

    Layering is the opposite type of styling. This is where you carefully style a piece within an arrangement of various other pieces, often varying in texture and form. Layering creates a cohesively styled space that evokes a strong response – the same aim as hero styling, but as opposed to hero, it doesn’t do so alone.

    If you think about it, the aim for many, if not all images, whether viewed on print or digital media is the same: the scroll-stopping, track-stopping, breath-taking response from the viewer. I’m sure there are many other ways to get there, but the aim is the same.

    dps-how-to-style-interiors-for-photoshoots-lily-sawyer-interior-design

    2. Evaluate what goes on the 6 walls!

    In a space, there can be up to 6 walls; the latter two are almost always forgotten! When one walks into a room or space, the first things we see are usually eye level surfaces and spaces, and that means the walls in front of us and around us. We notice pictures, mirrors, tall lamps, and accessories at eye level.

    A successfully designed space invites the viewer’s eye to wander everywhere and notice, not just eye-level design, but all-levels design. This includes the 4th and 5th walls – the floor and ceiling. A rug can do wonders to a floor in the same way a statement light or a painted/wallpapered ceiling can draw attention upwards.

    Regardless of the style you are creating, bear in mind the 6 walls in your space.

    dps-how-to-style-interiors-for-photoshoots-lily-sawyer-interior-design

    3. Play with scale

    Whether you are styling a Minimalist Scandi space or a Maximalist eclectic interior, do not underestimate what playing with scale can do to a space. You may be designing an all-white Scandi minimalist room with only six pieces in the room. Imagine having all of those six pieces at all the same scale – all small, medium or large.

    Alternatively, imagine playing with scale using those six pieces so that you are putting an oversized light arching towards the center of the room or hanging low from the ceiling and an oversized rug on the floor. The rest of the pieces are a mixture of medium and small. Immediately you are upping the interest level and increasing the dynamic of the space.

    dps-how-to-style-interiors-for-photoshoots-lily-sawyer-interior-design

    4. Arrangement

    In a Maximalist interior, it is easier to play with scale because you are dealing with so many decorative items often in varying sizes. The challenge is not so much the “what” as it is the “how.” How do you group and arrange together all these items so that there is order in the madness? Or so a full room does not look cluttered, and somehow there is a tidy structure to it all?

    You can arrange by size, color, theme, in rows, or you can mix-and-match and group items, so a busy space gets punctuated by quieter spaces in between. I find that having such a structure helps with how the space is received.

    dps-how-to-style-interiors-for-photoshoots-lily-sawyer-interior-design

    Photographing interiors

    Finally, you have finished styling. It is now time to photograph your space.

    Photograph wide so that you show the entire space. Be careful of going too wide where distortions are disturbing or cannot be corrected, especially when shooting at 24mm and wider. A focal length between 35mm – 50mm is easy on the eye and won’t give you distortions.

    Although interiors favor a wide-angle view of the space, close-ups are just as important. Use them to focus on specific features of the space or product. Get closer in and photograph vignettes and interesting compositions. Use mantle pieces or shelves for horizontal bases and alcoves or chimney breasts or sofa arms for vertical lines. Think of strong compositional framing and use elements in the space to achieve them.

    dps-how-to-style-interiors-for-photoshoots-lily-sawyer-interior-design

    Spaces look better when there is a contrast between light and shadow. This is why the use of flash (especially head-on, and flash that creates flat light illuminating an entire space) is often frowned upon and natural light is more favored. Choose a time of day where the light is at an angle, and you can photograph light and shadow. It looks natural and evokes emotion from the viewer.

    That is what really makes an image successful.

    dps-how-to-style-interiors-for-photoshoots-lily-sawyer-interior-design

    I hope these tips help you style and photograph spaces and interiors.

    Do comment below if you have tips to share, or if you would like to share some of the spaces you style after using these tips.


    The post Tips for Styling and Photographing Interiors appeared first on Digital Photography School. It was authored by Lily Sawyer.


    Digital Photography School

  • Are Early 2000s Digital Cameras Secondhand Bargains?

    The post Are Early 2000s Digital Cameras Secondhand Bargains? appeared first on Digital Photography School. It was authored by Glenn Harper.

    Today, digital photography is ubiquitous, but there is still a demand among enthusiasts for classic film cameras. By all accounts, the analog medium has made a comeback over the last 2-3 years. What you don’t often hear of is people hankering for older digital cameras, even for the sake of nostalgia. Technology has moved on, but has it moved on so much that they are obsolete? Or are early 2000s digital cameras secondhand bargains? We’ll find out.

    film cameras - Olympus OM10

    There is still plenty of love out there for old film cameras. This is an Olympus OM10 (c. 1978-87).

    Inescapable truths

    Those of us that have been shooting digitally for over ten years probably don’t miss the early days of post-processing. The sensors were noisier and there was no in-camera dust removal. One way or another, a lot of time was spent trying to clean things up. Less advanced, too, was the software we used to process photos. Trying to recover highlights or remove noise, for instance, was harder than it is today. Photos were abandoned that might be saved with modern editing.

    Canon EOS 5D sensor dust

    The original Canon EOS 5d (c. 2005) had no dust-cleaning capability. Neither did I. Whenever I had the sensor cleaned, dust spots quickly reappeared.

    Aside from noisier, dirtier sensors and editing limitations, exterior hardware on cameras was also inferior in the early days. LCDs were smaller with a lower resolution, and electronic viewfinders weren’t as clear. The benefit of a bright viewfinder shouldn’t be underestimated, and it’s still a feature of higher-end cameras today over entry-level models (e.g., pentaprism vs. pentamirror optical viewfinders).

    Sensor resolution

    With camera age comes the question of sensor resolution. Modern cameras have high-res sensors. More resolution gives you more freedom to crop pictures after the event and still end up with a decent-sized print. It’s like having an extra lens. Many photographers prefer not cropping pictures, but it’s a luxury that didn’t always exist. In the “old” days of low sensor resolution, there was more discussion among photographers on interpolation methods. People wanted to make their digital files bigger so they could create larger prints. That subject is now almost archaic.

    Panasonic FZ-28 CCD sensor

    The CCD sensor of the Panasonic Lumix DMC-FZ28 (c. 2008). Despite having a smaller sensor than the earlier FZ30, the FZ28’s resolution was higher. Advances in sensor technology are frequently used to increase resolution rather than substantially decrease noise.  Photo: Thomas Bresson [CC BY 3.0], via Wikimedia Commons

    Glimmer of light

    Despite the drawbacks of using old digital cameras, some had useful features that are rare or even extinct today. And the minuses are mostly surmountable. Let’s examine three cameras that are all 10+ years old and see what we can do with them. All of the following are eminently affordable on the secondhand market: more so than many classic film cameras.

    Old camera #1: Sony Cyber-shot DSC-R1

    Even by today’s standards, the 2005 10.3-megapixel Sony DSC-R1 is an innovative camera. It never sold well, but it had a unique combination of a fixed 24-120mm Carl Zeiss lens, an APS-C sized CMOS sensor, full-time live-view LCD display (a first at that sensor size), and live histogram. The technical quality was/is excellent.

    Sony Cyber-shot DSC-R1 - early 2000s digital cameras

    The Sony Cyber-shot DSC-R1 is a bridge camera with a large APS-C sensor. It was unusual in 2005 and remains so today.

    The main limitation of the Sony R1 is a sensor that gets noisy above ISO 400 combined with an absence of image stabilization. This is not a camera you can easily use for high-quality interior photos without a tripod. You have to employ old-school sturdy shooting methods with controlled breathing, a good stance, a steady hand, and a camera braced against pillars or posts if necessary.

    Sony R1 JPEG and fill flash

    This is a Sony R1 JPEG with a bit of fill light from the built-in flash. I persist with the raw files despite their slowness in writing.

    At ISO 160-200, Sony R1 pictures are clear with great color. At ISO 400 they’re still good. When viewed at 100%, the images are satisfying with lots of detail. On the minus side, raw files take a long time to write on the R1 (several seconds, typically). This was never a rapid-fire camera for those aiming to pull the most quality from it. The R1 takes CF cards or Sony memory sticks – no SD cards.

    The quality of the R1’s Carl Zeiss T* 24-120mm lens doesn’t disappoint. Exposure: 1/160th sec, ISO 160, f/8, approx 40mm equivalent focal length.

    The R1’s WLF (waist level finder)

    The flip-out 2″ LCD of the R1 didn’t appeal to everyone as it swivels upwards, effectively making the camera bigger. It’s already quite a bulky bridge camera. Personally, I love the fact that the LCD screen can slot flush into the top of the camera, turning it into a waist-level finder. That’s great for candid portraits or street photos, even if you have to wait for those big Sony raw files to write (you can shoot JPEGs). The camera has an electronic viewfinder that’s dimmer and lower resolution than you’d expect from today’s cameras, but it’s usable.

    Sony R1 waist level finder

    I’m not aware of any other digital stills camera that allows this. The LCD is only 2″ wide, but that allows it to slot neatly into the top of the camera like a WLF.

    Of all the digital cameras I’ve used, the Sony R1 is one of the few that I haven’t sold over time. I can’t bring myself to get rid of it because of its quirkiness and quality. For those familiar with him, well-known US photographer and blogger Kirk Tuck was still singing the praises of the R1 just a few years back. This is a secondhand bargain if you can cope with the cons.

    Old camera #2: Panasonic Lumix DMC-FZ30

    The main problem with the 2005 Panasonic Lumix FZ30 is the noise from its 8-megapixel CCD 1/1.8″ sensor. Even at ISO 80, it’s there. That aside, there are many appealing features. The 12x Leica-branded optical zoom lens with image stabilization is sharp across its whole range. Despite its age, the electronic viewfinder in this camera isn’t bad, even if the dioptric dial nudges out of place too easily. I tend to use the EVF more than the 2″ flip-down LCD.

    The 12x optical zoom of the Lumix FZ-30 is fairly modest by today’s standards and isn’t very wide at the wide end. But still, you get good long-lens versatility that doesn’t seem to exceed its Mega O.I.S. ability (Optical Image Stabilization).

    Offering all the exposure control you’d expect from an SLR, the Lumix FZ30 also allows raw shooting – a strong point in its favor. With today’s processing, and by restricting your photography to base ISO where possible, you can achieve good results. Limiting? Yes, but you get 36-432mm versatility for your trouble. The stabilization is effective, allowing you to make use of that long zoom at relatively low speeds with good technique.

    Panasonic Lumix DMC-FZ30 controls - early 2000s digital camera

    The Panasonic Lumix DMC-FZ30 feels well made and gives you as much control as you want. Aside from allowing raw files, it captures modest VGA res video (typical for its age).

    This is a camera that yields detailed pictures, is quick to handle, has long battery life and doesn’t hold you up with big raw files. One frustrating aspect is the need for 2GB SD cards to run it, which many people will not have in this day and age. It doesn’t accept SDHC cards (4GB+).

    This is a 100% section of an FZ30 file with Adobe’s “enhanced details” and some basic masked capture sharpening applied in Lightroom. The detail isn’t at all bad at base ISO and unsharpened noise is unimposing. (Best viewed full size @ 1500 pixels.) Exposure: 1/500th, f/5, ISO 80.

    Although noise is an issue with the Lumix DMC-FZ30, that is less important now than 14 years ago when the camera came out. Software like Topaz AI Sharpen, though not perfect, is good at suppressing noise and bringing out detail. The tools in Lightroom and other programs have also improved no end. Old cameras become more viable as processing technology advances.

    Panasonic Lumix FZ30 - Early Digital Cameras

    Exposure: 1/160th @ f/4 – ISO 80. The focal length is 52mm, equating to around 250mm in 35mm terms. Image stabilization is probably helping a little here.

    Old camera #3: Canon EOS 450D/Rebel XSi

    I wouldn’t recommend early digital SLRs to anyone based on dust problems alone, but that becomes a non-issue four generations in. The Canon EOS Rebel XSi (450D in Europe) came out in 2008. It was an entry-level DSLR offering many benefits over previous models. Among them were a sizeable 3″ LCD, Live View with phase and contrast detection AF, spot metering and a bigger, brighter viewfinder.

    Canon EOS 450D - Rebel XSi

    The lightest camera among the three even with its lens is the EOS Rebel XSi (450D). The kit lens is good, but a cheap 50mm f/1.8 would make even more of the camera’s excellent sensor.

    The Rebel XSi is small and light by SLR standards and won’t give much satisfaction to metal-loving traditionalists. It doesn’t feel substantial. However, it’s understated and functional, and lets you go about your work stealthily. No-one is going to think you’re a pro, no matter how well you hold the camera. The most noticeable flaw is some wacky white balance results from time to time, especially under artificial light. Shooting raw, that’s not a deal-breaker.

    Caanon EOS 450D - eary 2000s digital cameras - bargains

    This 100% view (with capture sharpening) shows good detail from the 18-55mm Canon kit lens. A 50% view creates more of a real-world impression, so this is okay at full size.

    As you might expect from a Canon CMOS sensor, noise levels are low with the EOS Rebel XSi (lower than the Sony R1, for instance). Obviously, they’re not as impressive as a high-end camera from today or even yesterday, but you can risk ISO 800 or even max ISO 1600 images for some indoor shots and polish them up later. Better still, you can make use of live view, manual focusing and a tripod if circumstances allow.

    Canon EOS 450D - Topaz Sharpen AI

    Topaz Sharpen AI is good at sorting out detail from noise, though you have to check over the result for artifacts. This is an ISO 800 shot viewed at 100% with Topaz sharpening and noise suppression. This type of software is only going to improve.

    A question of balance

    If you’re using heavy “L” series lenses, they may not sit well on the Rebel XSi. It doesn’t have any heft. The original 18-55mm kit lens is sharp, lightweight and has good image stabilization. A modern equivalent of the Rebel XSi would give you more resolution, more advanced processing (a little quicker, less noise at high ISOs), a higher res LCD and video. All this was available in the camera that superseded it in 2009 – the EOS Rebel T1i (500D). But the stills photographer looking for a bargain DSLR might find an answer in the Rebel XSi. It has just enough and a bit more.

    Canon 18-55mm IS kit lens - EOS 450D - bargain early 2000s cameras.

    This 50% crop gives you a good idea of what the 2008 18-55mm kit lens can do, albeit through a compressed JPEG. There’s not much to complain about quality-wise, even if the sensor promises more.

    Conclusion

    With modern processing at our disposal, digital cameras from the early part of this century have more potential now than they had when new. Especially those that shot raw files. Yes, you’ll find it hard to go back to them if you’ve spoiled yourself with ultra-high-res LCDs and mega-bright EVFs. But some of the downsides in old cameras have upsides of their own: less brightness and resolution means better battery life. Low-res sensors mean not editing football-pitch-sized files.

    You wouldn’t use old cameras if your living relied on the best high-ISO performance. Still, any of the three models I’ve discussed can easily produce a publishable, high-quality photo if you accept their constraints and process the files carefully. Other than the Sony R1’s slow write times, the cameras are quick and easy to handle.

    So, with one or two caveats, I’d say early 2000s digital cameras can definitely be bargains.

    Do you use any of these cameras, or have any to add to this list? Please share with the dPS community in the comments below.


    The post Are Early 2000s Digital Cameras Secondhand Bargains? appeared first on Digital Photography School. It was authored by Glenn Harper.


    Digital Photography School

  • 7 Photography Exercises to Take Your Nature Photos to the Next Level

    The post 7 Photography Exercises to Take Your Nature Photos to the Next Level appeared first on Digital Photography School. It was authored by Jaymes Dempsey.

    Do you want to improve your nature photography skills? Do you want to take stunning nature photos, consistently?

    Don’t worry.

    In this article, you’ll discover 7 photography exercises all designed to get you capturing unbelievable nature images.

    (Plus, the exercises are a lot of fun!)

    So, if you want to improve your nature photography…

    …keep reading.

    1. Shoot a single nature subject from 9 different angles

    Here’s your first nature photography exercise (and my favorite):

    Choose just one nature photography subject.

    And shoot it from at least nine different angles.

    This will force you to stretch the boundaries of your creativity. It will force you to start looking at your subjects in many different ways.

    The first five angles might be easy enough. But the last four will be a struggle – as it should be!

    A few excellent angles to try:

    • Shoot on a level with your subject
    • Shoot from directly above your subject (if you can)
    • Get below your subject and shoot upward

    Then, once you’ve finished the exercise, pull up the photos on your computer. Take note of the different angles and how they gave your subject slightly different looks.

    And next time you’re doing photography, use those angles!

    2. Shoot a subject you normally avoid

    This exercise is all about getting you out of your comfort zone.

    Because if you don’t get out of your comfort zone, you’ll never grow as a photographer.

    So here’s what you do:

    Think about the subjects that you normally shoot.

    And then…

    Pick a subject that’s radically different. And shoot that subject, instead.

    If you normally photograph birds, shoot flowers for a day.

    If you normally photograph landscapes, shoot wildlife.

    Just pick something that you don’t normally like shooting.

    If you want to make this exercise extra useful, then don’t just shoot another subject for a single outing. Instead, do it for a week (or even a month).

    You’d be amazed by the tricks you pick up from learning another area of photography.

    3. Bring just one lens into the field

    Here’s the thing:

    When photographers go out for a photoshoot…

    …they tend to take multiple lenses (and even multiple cameras).

    And while this will give you a lot of flexibility, it won’t force you to think outside the box.

    But I want you to think outside the box. I want you to think in new ways.

    So the next time you go out to shoot, leave all your normal lenses behind.

    Instead, bring just one lens.

    And (if you’re feeling adventurous) make sure it’s a lens that you don’t use very often.

    This will force you to take nature photos that you would’ve never even considered.

    4. Shoot a Scene With Four Types of Light

    Nature photography is all about the light.

    Which means that, as a nature photographer, you must learn to master the light.

    This exercise is designed to help you do that.

    You start by picking a scene.

    Then you photograph that scene with four types of light:

    • Cloudy light
    • Midday light
    • Sunrise/Sunset light
    • Shade

    This will undoubtedly involve coming back several days in a row.

    But it’s worth it.

    Because once you’re done, you should look at all the photos you took.

    And note how the different types of light gives you different types of nature photos!

    5. Take both still shots and action shots of your subject

    Oftentimes, we get in the habit of shooting the same type of subject, over and over again.

    I’ve already given you one way of avoiding this problem.

    But another way…

    …is to keep shooting that same subject. But shoot it in a different way.

    Specifically, try to take a combination of shots:

    Still shots.

    And action shots.

    For those of you who shoot birds or wildlife, this shouldn’t be too difficult.

    But for flower and landscape photographers?

    This will be tough.

    If you generally photograph still subjects, you may have to get creative. Try to take some intentional camera movement photos. Or see if you can get some sort of action to happen in the frame (e.g., flowers blowing in the wind, waves crashing on the beach).

    And that’s it! This will force you out of your comfort zone. And get you taking some fresh photos!

    6. Edit your favorite nature photo in 5 different ways

    One thing that you need to know:

    Post-processing is a significant part of capturing stunning nature photos.

    Even small adjustments go a long way.

    So for this exercise, you should start thinking about different post-processing options. And edit your favorite nature photo in five distinct ways.

    You should experiment with edits in Lightroom, Photoshop, or another high-quality editing program. See what happens when you increase the saturation. See what happens when you drop the contrast.

    And try to do some new edits. Things that you haven’t done before.

    For instance, try some yellow/blue split toning. And try playing with the HSL options.

    You’ll be amazed by what you can do!

    7. Take a nature photo every single day for a month

    This last exercise is a classic – but that doesn’t mean it’s any less useful!

    One of the absolute best ways of improving your nature photography…

    …is to photograph constantly.

    Because practice really does make perfect.

    And if you take a nature photo every day, you’ll find that your mind starts to open up. You’ll start to see photography opportunities that you didn’t even know were there.

    Your skills will increase rapidly.

    And you’ll start to take stunning nature photos, consistently.

    Nature photography exercises: next steps

    Now you know 7 great exercises – all designed to improve your photography skills, fast.

    You don’t have to do them all at once. But try them out whenever you can.

    That way, you’ll become better, faster.

    You’ll soon be taking nature photos like a pro!

    Feel free to share some of the photos you take with the dPS community in the comments below.


    The post 7 Photography Exercises to Take Your Nature Photos to the Next Level appeared first on Digital Photography School. It was authored by Jaymes Dempsey.


    Digital Photography School

  • How to Achieve an Airy, Light and Bright Look in Photography

    The post How to Achieve an Airy, Light and Bright Look in Photography appeared first on Digital Photography School. It was authored by Karthika Gupta.

    The beauty of photography is that there really is no right or wrong way to take pictures (excluding any technical camera issues). It is such a subjective medium – what someone may consider a bad photograph, others might consider artistic. There are many different styles of photography. Dark and moody versus light and bright, or HDR and oversaturated versus desaturated and selective coloring. And there’s many more. But no matter your imaging preference, there is bound to be a market for that particular style of photography.

    Karthika Gupta CulturallyOurs Light Bright Airy Photography Style

    Having said that, I gravitate toward images that have a clean, natural look. My aesthetic style lends itself toward light, soft pastels, and bright images that have a sense of freshness. I find that I am my most creative self when I put myself in situations that give me the ability to photograph in this way.

    Give me a dark room, or a scene with lots of bold, warm colors and tons of contrast, and I feel mentally bogged down. I almost start to feel claustrophobic with all that color and contrast. Now perhaps this might seem a little silly, but that is my personal preference. It also goes back to my earlier comment about photography being a very subjective art form.

    I get asked quite frequently about how I achieve this “light, pastel, and airy” look in my photographs. It’s not that hard. It boils down to a few simple tips. These tips will help you to better visualize your intended photograph, and thus help you to achieve the light, pastel look.

    1. Lighting

    I can’t stress enough how important the lighting is when using it to achieve a particular look for your photography. Not all lighting is equal. And I have to say that there is no such thing as bad light. Light is just different at different times of the day. Sometimes the light is perfect – that warm, soft glow that translates beautifully in pictures. Other times, the lighting is harsh and strong. I wouldn’t say that type of lighting is always bad; it is just not the same every time.

    Once you train your eye to read the different types of light, and what the light can do to your images, you will be able to analyze your imagery better. You’ll also get photos closer to the style you like without wasting too much time in post-processing. No amount of editing can really fix an image taken in poor lighting.

    a. Golden Hour light

    Karthika Gupta CulturallyOurs Light Bright Airy Photography Style

    For outdoor photography, if you want those warm, creamy tones, then schedule your photo sessions as close to sunset as possible. That last hour, the Golden Hour, is when you will get some of the best light. This is because as the sun sets closer to the horizon, the range of light is broad and spreads more evenly.

    This type of light also lends itself well to the light, bright, and airy look that so many of us love in photographs. One thing to be aware of when you are using the Golden Hour lighting (a.k.a. shooting around sunset), make sure that you don’t photograph directly into the setting sun. This leads to a lot of sun flare entering your frame. It can also make the shot appear muddy and blown out to the point of not being able to see the subjects clearly, as shown in this image.

    When all else fails, a little bit of editing in post-production can fix it.

    b. Soft morning light

    Soft morning light is another favorite lighting scheme of mine because the light is subtle and soft. It tends to be more even-toned than when the sun is high up in the sky.

    Karthika Gupta CulturallyOurs Light Bright Airy Photography Style

    c. Harsh midday sunlight

    High noon lighting can be thought of as a spotlight directly over your head. This overhead lighting tends to create unflattering shadows. These shadows result from the angles and protrusions on your face, like your nose and eyebrows. If you wait until the sun hits the horizon, you will be pleasantly surprised to see how soft the tones are and how beautiful and even the lighting is. At this time of day, you can open up your aperture to smooth out the background.

    Sometimes when you are traveling or taking landscape shots, you cannot always control the time of travel. Here, you must make the best of the lighting situation and photograph scenes that will lend themselves to the light and airy look when tweaked in post-processing.

    Karthika Gupta CulturallyOurs Light Bright Airy Photography Style

    I added a bit of contrast and brought down the blues in post-production just to keep with my style. I have nothing against blue skies but maybe not so much blue in my photos!

    d. Overcast light/diffused light

    This type of light is also great for images where you want an even tone. The clouds act as a natural diffuser and help to balance out the light falling from the sun. However, this light does tend to be a little flat. But the good news here is, when there is cloud cover or an overcast sky, you can shoot at any time during the day without worrying about harsh, strong shadows.

    Karthika Gupta CulturallyOurs Light Bright Airy Photography Style

    This day in the marina was overcast with a lot of clouds. Considering most of the boats were also white, I had to blow out the sky a bit and use the accessories (like the yellow kayak) to add a pop of color.

    e. Backlighting/open shade lighting

    The bright, even lighting of open shade plays well into the light and airy style of photography. However, playing with backlit sunlight is another way to get that bright, fresh look. Light and airy photographers shoot backlight about 80% of the time.

    This means the sun is somewhere behind the subject. This is the tricky part. It’s more than just having the sun behind your subject. If you only do this, you’ll find that your images have a lot of sun flare – to the point of haze – and your camera autofocus may have trouble grabbing focus, resulting in out-of-focus shots.

    The trick here is to block the sun from actually hitting your lens. My favorite way to do this is the use of trees. The branches and leaves act as a type of diffuser that filters the sun’s light rays from hitting your lens.

    What you will get is called rim light from the rear of your subject. In front of your subject, you will achieve an even unshadowed lighting scheme. You might have to look for a natural reflector to bounce light back onto your subject’s face. Sometimes it is as simple as wearing something white so you can act as a natural reflector.

    Yup, being a photographer also means being aware of fashion and color trends!

    Another trick is to overexpose the skin tones by at least half a stop. Your highlights may blow out a little, but your subjects’ skin tones will look great. Of course, if you have a very interesting sky that you want to retain, you may not be able to overexpose your image. Most light and airy style photographers are okay with blowing out the details in the sky because this slight overexposure lends itself to a brighter image that is part of the light and airy look. If the background is important, you must consider that in your exposure calculations.

    Karthika Gupta CulturallyOurs Light Bright Airy Photography Style

    90% of my shots have the sky blown out and I am okay with that. My style is consistent with what my personal preference is with my images. To each their own.

    2. Scenery or background

    Personally, I feel like scenery or background is as important as the lighting for a great image – no matter what the style. Gorgeous mountainous backdrops with tall pine trees will look more majestic than a messy backyard with overgrown grass and a swing set in the shot.

    But don’t let a simple background deter you from taking a shot.

    Every place has hidden treasures, and it is up to you as the photographer to seek them out. I have been known to clear out a client’s home if I feel some furniture or clutter is getting in the way of the shot.

    For outdoors and travel photos, I wait patiently for crowds to clear if I feel all the other elements are there to make a great shot. After you’ve established where the good lighting falls, you can then search for the pretty scenery.

    For light and airy photos, look for backgrounds that are white or have pastel colors. White or light colored backgrounds add even more “airiness” to the image. It is hard to achieve a light, bright look if you have a dark or black wall in the background.

    Remember that both the lighting and scenery combined make for a natural recipe to that “light and airy look” that you want to achieve in your image.

    When in doubt, choose a clean neutral-colored background that can make the subject pop even more by eliminating any distractions.

    Karthika Gupta CulturallyOurs Light Bright Airy Photography Style

    3. Details

    Often, as photographers, we tend to only focus on the lighting, location, and subject. We feel that once we have these three elements, all else will magically fall into place.

    However, remember this; every single detail that is a part of the frame helps to make or break the image.

    If you have the perfect soft light, perfect background, and perfect subject, but they happened to show up wearing a graphic t-shirt with neon shoes, then that is not going to get you that light and airy image! In fact, details like the clothing, accessories, and props play a huge part in the overall look and feel of an image.

    For my portrait and editorial work, I am not afraid to send clothing and prop choices to my clients. It is there for them to use if they need it. This gives them an idea of “the look” that I am going for, and it helps me to get the images that I want for my portfolio based upon my style and my brand aesthetics. Props don’t have to be elaborate or expensive. Sometimes it is the little things like a simple off-white napkin that can do the trick.

    Karthika Gupta CulturallyOurs Light Bright Airy Photography Style

    Clothing choices and color preference is given but my clients have the freedom to choose what they want to wear at the end of the day!

    4. Camera settings

    If you are shooting digital and have a camera that allows you to photograph in RAW format, then definitely do so. Images created in RAW format retain more of the original details than a JPEG file format. The RAW file format also provides the most leeway for making edits to the image in post- processing when looking to achieve a specific “look.”

    Avoid extreme bright spots in your photograph by using the histogram feature on your camera. Digital images don’t handle the result of huge overexposure very well, so you’ll want to watch for that.

    Karthika Gupta CulturallyOurs Light Bright Airy Photography Style

    Having said that, I tend to overexpose my images by about 1/2 a stop about 95% of the time. I find that editing an underexposed image to the “light and airy look” is more difficult than adjusting a slightly overexposed image. I am less concerned about blown-out highlights than I am about dense shadows.

    5. Consistency in photography and editing styles

    Consistency in photography and editing styles is huge, and not something that too many photographers pay attention to. Photographic style develops over time. It takes a lot of practice, continuous shooting, and consistent editing procedure to make our pictures look a certain way and convey certain emotions. This is my 9th year in business, and my style has taken time to develop. After a lot of trial and error, I know what I like and how I want my images to look and feel – even if it is just for me!

    Some people jump on the latest editing bandwagon and are all over the place in terms of trying everything out there. Tempting as it may be, I have found that it just leads to more frustration and anxiety when finding one’s style. When you are just starting out, go ahead and try out all the different styles of photography. See what you like and dislike. Once you have narrowed down your personal style, stick to it. That way, it becomes second nature and helps you develop a consistent and strong portfolio.


    The post How to Achieve an Airy, Light and Bright Look in Photography appeared first on Digital Photography School. It was authored by Karthika Gupta.


    Digital Photography School

  • 7 Ideas for Creative Lens Ball Photography [video]

    The post 7 Ideas for Creative Lens Ball Photography appeared first on Digital Photography School. It was authored by Caz Nowaczyk.

    In this video by our friends over at Cooph, you’ll learn 7 great ideas for creative lens ball photography to have fun with.

    The 7 ideas for creative lens ball photography include:

    1. Typography

    Type some text and print it out (or find some text you already have) and photograph the lens ball on top. The ball acts as a magnifying glass and distorts the edges of the text.

    Look for large letters on signage and displays and photograph the lens ball in front of it for a cool effect.

    2. Split World

    Look for corners with contrast to create a yin/yang effect.

    3. Altering Structure

    Find interesting flat structures to photograph the sphere against. The sphere will alter its structure and give it form.

    Scan your lawn for flowers and photograph them through the sphere.

    4. Inner Circle

    Find round shaped objects that support the shape of the lens ball. Crawl into a tunnel (only a safe one, of course), set up your lens ball for the perfect shot.

    5. Elements

    Fill up a bucket with water. Set up your camera with a high shutter speed and have someone throw the lens ball out of the water bucket. You capture all the action.

    Prepare lighter fluid and a spark (Editor note: actually, I don’t fully recommend this one unless you can absolutely do this safely. Fire is dangerous!!)

    6. Portraits

    Play with nature and your model for capturing cool portraits using the lens ball.

    You can also have fun in the studio with this.

    7. Abstract Spheres

    Create custom backgrounds (cool wrapping paper or printouts will work great). Find interesting patterns too. These make for awesome shots using the lens ball.

    Grids also work well. Place your grid in front of a colored wall and light it up. Put your lens ball in front and take some shots.

    Bonus Tip:

    Use light sabers and your ball for cool effects.


    You may also find the following helpful:

    • How to Create Glass Ball Landscapes – 6 Techniques
    • Which Size Lensball is Best for Crystal Ball Photography?
    • How to Make Creative Photos with Prism Photography
    • Copper, Prisms, and Orbs, Oh My! – 3 Creative Techniques for People Photography
    • How to Take Unique Crystal Ball Portraits
    • 5 Photography Hacks to Improve Your Creative Photography


    The post 7 Ideas for Creative Lens Ball Photography appeared first on Digital Photography School. It was authored by Caz Nowaczyk.


    Digital Photography School

  • Weekly Photography Challenge – Funny

    The post Weekly Photography Challenge – Funny appeared first on Digital Photography School. It was authored by Caz Nowaczyk.

    This week’s photography challenge topic is FUNNY!

    Ben White

    Go out and photograph your pets doing something funny, kids laughing or doing something funny, laughter in general, or anything that is funny or quirky at all (as long as it isn’t distasteful). As usual, they can be color, black and white, moody or bright. You get the picture! Have fun, and I look forward to seeing what you come up with!

    Jakob Owens


    Dominik Vanyi

    Check out some of the articles below that give you tips on this week’s challenge.

    Tips for Shooting FUNNY IMAGES

    5 Non-Posed Ideas For Photographing Kids

    How to Capture Authentic Photos of Children with These Simple Tips

    21 Fun Images of People Laughing

    7 Fun Photography Tricks to Try on Your Smartphone

    Unposed Posing: Tried and True Tips for Photographing Families in Natural and Fun Ways

    6 Tips for Photographing Dogs in Action

    How to Shoot a Composite Image

    Weekly Photography Challenge – FUNNY

    Simply upload your shot into the comment field (look for the little camera icon in the Disqus comments section) and they’ll get embedded for us all to see or if you’d prefer, upload them to your favorite photo-sharing site and leave the link to them. Show me your best images in this week’s challenge.

    Share in the dPS Facebook Group

    You can also share your images in the dPS Facebook group as the challenge is posted there each week as well.

    If you tag your photos on Flickr, Instagram, Twitter or other sites – tag them as #DPSfunny to help others find them. Linking back to this page might also help others know what you’re doing so that they can share in the fun.

    The post Weekly Photography Challenge – Funny appeared first on Digital Photography School. It was authored by Caz Nowaczyk.


    Digital Photography School

  • Mirrorless Users Will Switch Back to DSLRs, Ricoh Executive Claims

    The post Mirrorless Users Will Switch Back to DSLRs, Ricoh Executive Claims appeared first on Digital Photography School. It was authored by Jaymes Dempsey.

    pentax camera DSLR

    The Pentax K-1 Mark II 36MP Weather Resistant DSLR.

    Imaging Resource recently released an interview with a group of executives from Ricoh, the company that produces Pentax cameras.

    When discussion turned to mirrorless cameras versus DSLRs – and decreasing DSLR sales – things got especially interesting.

    Said Hiroki Sugahara, General Manager of the Marketing Communication Department:

    Currently, mirrorless is a newcomer, so of course many users are very interested in the new systems, they want to use [them]. But after one or two years, some users who changed their system from DSLR to mirrorless [will] come back to the DSLR again.

    When questioned by the interviewer, Sugahara further explained:

    The mirrorless camera is very convenient to shoot, because users can [preview the final] image before shooting. But I believe the DSLR has its own appealing point, because users can create their own image from the optical viewfinder. People can see the beautiful image through the optical viewfinder, and then think how they can create their pictures–for example, exposure level setting or white balance or ISO [sensitivity]–and then imagine how they can get [the result they’re seeking].

    Sugahara concluded:

    So the DSLR market is currently decreasing a little bit, but one year or two years or three years later, it will [begin] getting higher.

    Could Sugahara be right? Might DSLRs soon be making a comeback?

    Personally, I don’t think so. While some people do follow the latest trends, mirrorless cameras have the specs to back up their popularity: they’re lightweight, they’re compact, and they produce top-notch images. And mirrorless systems will just keep getting more and more appealing, as electronic viewfinders improve and mirrorless lens-lineups expand.


    Of course, there are reasons to stick with a DSLR. For one, DSLRs tend to be more rugged than mirrorless cameras. And electronic viewfinders can have lag issues. But mirrorless technology is improving, and how many photographers will switch back to DSLRs for a more rugged body?

    Not to mention the questionable reasoning employed by Sugahara. Sure, the occasional photographer may not be happy with an electronic viewfinder. But will photographers really prefer the greater challenge provided by a DSLR optical viewfinder, as Sugahara seems to be implying? In my experience, capturing stunning photos is hard enough. Photographers won’t want to make it harder on themselves.

    What do you think? Will DSLRs rebound? Or is mirrorless the system of the future?

    Share your thoughts in the comments!

    The post Mirrorless Users Will Switch Back to DSLRs, Ricoh Executive Claims appeared first on Digital Photography School. It was authored by Jaymes Dempsey.


    Digital Photography School

  • Don’t Create Detail, Just Reveal It – How to Reveal the Hidden Details in Your Photos

    The post Don’t Create Detail, Just Reveal It – How to Reveal the Hidden Details in Your Photos appeared first on Digital Photography School. It was authored by Herb Paynter.

    Just as cleaning the lenses of your eyeglasses clarifies what you see, cleansing your pictures of dull lighting will put the sparkle in your photos.

    Have you noticed how many individual tools are available in your favorite editing software for changing the values of pixels? The array is dazzling, and most of this editing involves “localized” procedures (dodging, burning, painting, cloning, masking, etc.) affecting specific areas.

    But here’s something to consider.

    Unless the image you are working on is either damaged (either completely blown-out highlights, plugged-up shadows) or just contains too much unwanted clutter, you rarely need to create specific detail with these tools. The detail is usually right there just below the surface waiting for discovery. You need only make global adjustments to the tones within the darker and lighter ends of the range to achieve pretty amazing results.

    When I took this shot of my wife Barbara fifteen years ago, I put it in the reject file because it was so dark. But carefully adjusting and lightening the shadow and middle tones in the picture separated the deep shadow tones from the middle tones. Now both she and the picture are definite keepers. No local editing was necessary, and there is no tell-tale evidence of a touchup. The image contained all the necessary lighter tones – they simply had to be uncovered.

    Push tones instead of pixels

    Post-processing digital images is usually a process of subtraction; removing the visual obstacles that are covering the underlying detail in a photographic image. This detail will reveal itself if you merely nudge the tonal ranges instead of the pixels.

    The fact is…all the detail in every subject has been duly captured and is hiding in either the shadows or the highlights, waiting to be discovered.

    The digital camera’s image sensor sees and records the entire range of tones from black to white within every image it captures. What is hiding within this massive range of tones is the detail. Unfortunately, the camera sensor has no way of knowing the detail that may be under (or over) exposed within that range. It simply captures everything it sees inside the bookends of dark and light.

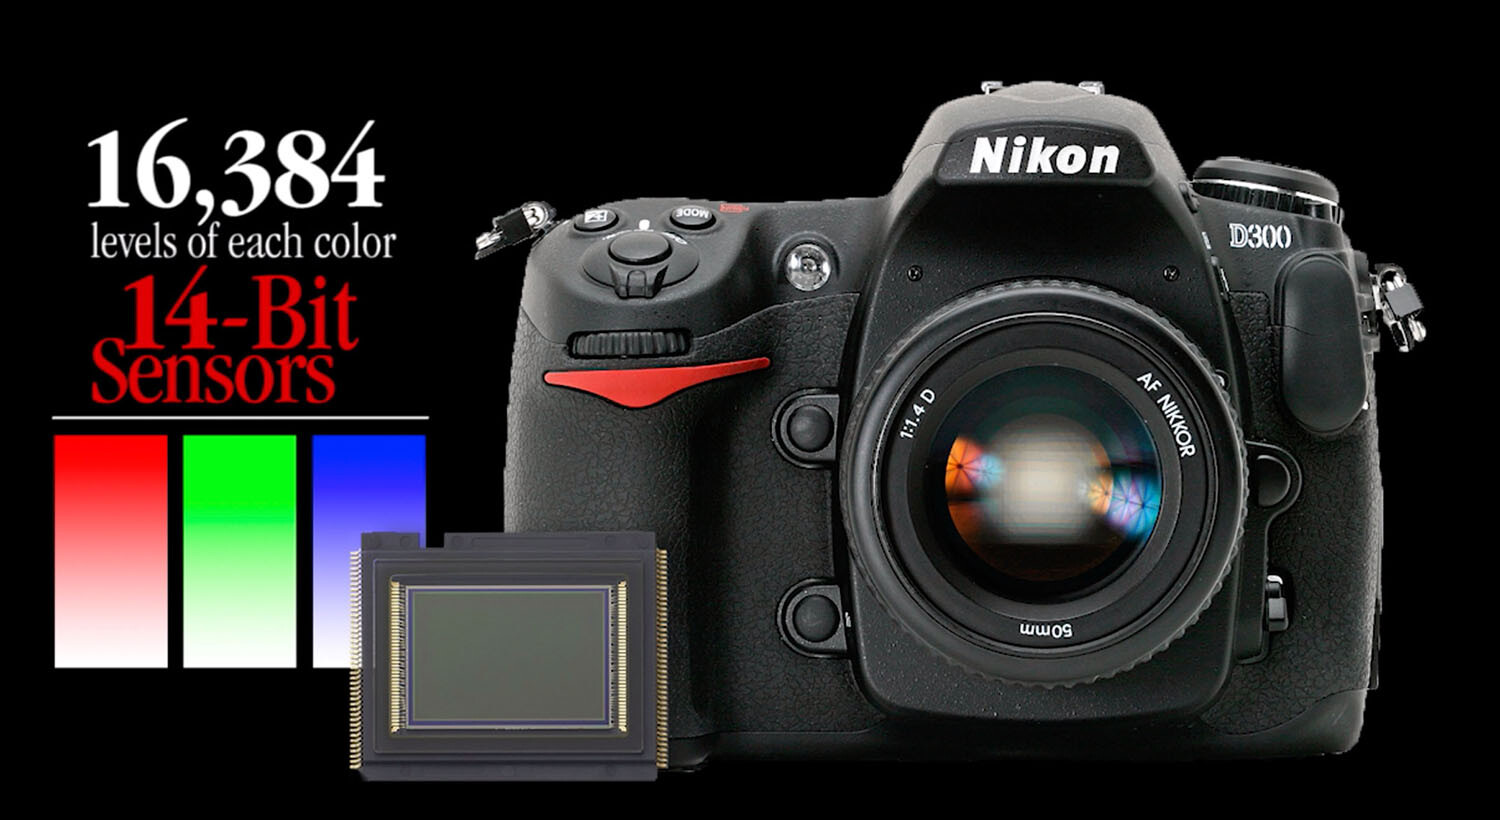
    Camera image sensors can capture a range of tones up to 16,000 levels between solid color and no color. This doesn’t mean that all 16,000-pixel values are actually present in the picture; it just means that the darkest to the lightest tones are stretched out over the significant detail that is hiding in the middle.

    Adjustments made to the image in Alien Skin’s Exposure X4.5 revealed detail in the sunlit walkway and darkened archway that appeared lost in the original capture. No painting or cloning tools were necessary.

    The purpose of this article is not to get geeky about the science, but to assure you that there is an amazing amount of detail that you can recover from seemingly poor images.

    A basic JPEG image can display more than 250 tones in each color. While that doesn’t sound like much, you should know that the human eye can only perceive a little over 100 distinct levels of each color. No kidding! Technically, 256 tones are too many.

    The balancing act

    Here’s a sobering truth. Your camera can capture more detail than your eye can detect and more tones than your monitor can display. As a matter of fact, it can capture up to 16,000 levels of tones and colors. That’s more than any publishing resource (computer monitor, inkjet printer, Internet, or even any printed publication) can reveal. Each of these other outlets is limited to reproducing just 8-bits (256 levels) of each color. The camera’s light-capture range is even beyond the scope of human vision. The range (light to dark) of your camera is immense compared to any reproduction process. What this means is that the editing part of the photography process needs MUCH more attention than the image capture process.

    This introduces a complex but interesting phenomenon. Your post-production challenge is to emphasize the most important details recorded inside the tones captured by your camera and then distinguish them sufficiently for the printer, your monitor, or the Internet to reveal.

    Your camera captures an incredible amount of detail in each scene that isn’t initially visible. However, with the right software, this detail can be uncovered just as an electron microscope can reveal detail buried deep inside things that the naked eye cannot perceive.

    Image editing is all about discovering and revealing what is hiding in plain sight.

    Image clarity

    Bringing a picture to life doesn’t always require additional touchup procedures. Sometimes, just massaging the existing detail does the trick. The Highlights, Shadows, and Clarity sliders were all that were required to transpose this shot from average to special.

    Clarity is the process of accentuating detail. The dictionary defines clarity as “the quality of being easy to see or hear; sharpness of image or sound.” When we clarify something, we clear it up. We understand it better. We view an issue from a different perspective.

    Many image editing software packages have a slider called “clarity.” The function of this slider is to accentuate minor distinctions between lighter and darker areas within the image. Each of the other tone sliders (Exposure, Contrast, Highlights, Shadows, Whites, Blacks, Clarity, and Dehaze) all perform a clarifying process on specific tone ranges.

    The real beauty of shooting with a 12/14-bit camera is the level of access you receive to the detail captured in each image. If you want to think “deep,” you can start with the editing process of your digital images. You’ll be amazed at what you will find when you learn to peel away the microlayers of distracting information in well-exposed photos.

    Just as cleaning the lenses of your eyeglasses clarifies what you see, cleansing your pictures of dull lighting will put the sparkle in your photos.

    Adobe Camera Raw controls reveal significant detail in the darker portions of the image by simply adjusting the Basic slider controls.

    Learning to expose images correctly

    The information you learn from excellent teaching resources like Digital Photography School teach you how to correctly set your equipment to capture a variety of subjects and scenes. Study the articles in this amazing collection and learn to shoot pictures understanding the basic tenets of good exposure. Poorly-captured images will hinder your discovery of detail. However, correctly exposed images will reward you with, not only beautiful color but, access to an amazing amount of detail.

    Learn to harness the power of light correctly for the challenge that each scene presents by balancing the camera controls of ISO, Aperture, and Shutter Speed. The more balanced your original exposure, the less post-processing will be necessary.

    Conclusion

    Every scene presents a unique lighting situation and requires a solid understanding of your camera’s light-control processes to capture all possible detail. Any camera can capture events and document happenings, but it takes a serious student of photography to faithfully capture each scene in a way that allows all that information to be skillfully sculpted into a detailed image.


    The post Don’t Create Detail, Just Reveal It – How to Reveal the Hidden Details in Your Photos appeared first on Digital Photography School. It was authored by Herb Paynter.


    Digital Photography School

  • Understanding Broad and Short Lighting in Photography

    The post Understanding Broad and Short Lighting in Photography appeared first on Digital Photography School. It was authored by John McIntire.

    There are a lot of lighting patterns for you to use in your portrait photography. Some of these are covered quite well. Rembrandt and butterfly lighting are two that are both easy to set up and yield great results a lot of the time. Of course, you can use just one lighting pattern all of the time and build a fantastic portfolio; however, if you want to have a full skillset with a variety of techniques to use in your portraits at any time, you will want to learn and understand as many of these lighting patterns as possible.

    Broad and short lighting are often clumped together because of the similarities in how they are implemented and described, but they couldn’t be more different in how they affect your images.

    This article will introduce you to the broad and short lighting patterns and explain when and why you might want to use them and what you can expect to achieve while using them. These are two very easy lighting patterns that can seem confusing at first, but once you get your head around them, they give you powerful tools to help shape the light and your subjects in your photos.

    What is a lighting pattern?

    First, let’s start with the very basics. A lighting pattern is any named lighting setup that gives you specific results. There is a fair list of these established lighting patterns for you to learn outside of the broad and short patterns discussed here. These include Rembrandt, Butterfly, split, cross, clamshell and more. Learning and understanding these lighting patterns can act as a shortcut to helping you get great results in your portraits. These lighting patterns apply to both natural light and artificial light, so it does not matter which you prefer.

    Broad and short

    The names of the broad and short lighting patterns refer to which side of the subject’s face is being lit first.

    Sometimes, understanding what broad and short mean in terms of lighting can be confusing. To make it as simple as possible, imagine a face turned slightly away from you. That face now has two sides divided by the nose. The side of the face that is closest to you is the broad side because you see more of it than the other. The other side, the one that’s furthest from you, is the short side.

    With broad lighting, your light is going to hit the broad side (or the side that’s closest to you) of the face first.

    With short lighting, your light is going to hit the short side (or the side that’s furthest from you) of the face first.

    Broad lighting

    Broad lighting can be used to great effect to help widen faces or give you more contrast than some other lighting patterns.

    When you choose to light the broad side of the face, it has several effects on your image. These include:

    • Broad lighting widens the face.
    • Broad lighting usually throws the short side of the face in shadow (dependent on light placement).
    • Broad lighting provides more contrast than some lighting patterns like butterfly lighting.

    When you want to use it

    Because broad lighting tends to broaden (go figure) the face, you’ll want to use broad lighting when you’re photographing subjects with a narrow face. Using it on subjects with a wider face can exaggerate that shape and you’ll want to avoid it there.

    If there’s a feature on one side of your subjects face that you want to take the emphasis away from, you can pose your subject so that feature is on the short side of their face and use broad lighting to ensure that it’s in shadow, taking the emphasis away.

    How to set it up

    Setting up for broad lighting couldn’t be easier. Just have your subject turn away from the key light until you have the desired effect.

    While there is no one way to set up broad lighting, here is a basic method to get you started.

    As in the diagram above, place your light forty-five degrees from your subject. Ensure that you have your subject’s face posed away from the light source.

    It really is as easy as that. Just remember that you can control the transition from highlight to shadow by changing the distance of the light from your subject and by using different modifiers.

    Next steps

    Adding fill to your broad lighting can help with extreme contrast while still retaining shadows for depth.

    Lighting patterns are a starting point. This isn’t a zero-sum game. To take your broad lighting setups further, feel free to experiment with fill light. You can use reflectors or a second light to lift up the shadows and reduce the contrast in your images for more flattering portraits. Conversely, you can also choose to emphasize the shadows and the contrast for darker, bolder portraits. The best advice here is to know what result you are after before you start.

    With a reflector as fill, you can now control the overall contrast in the image.

    Short Lighting

    Short lighting (depending on variables like your modifiers) tends to lend itself to dark, shadow-heavy imagery. This makes it the perfect lighting pattern when creating low-key images.

    When you choose to light the short side of the face first, it also has several effects on your portraits:

    • Short lighting narrows the face.
    • Short lighting will throw the broad side of the face in shadow.
    • Short lighting provides heavy contrast and is ideal for low-key images. It is also useful when you are trying to create images with a lot of depth.
    • Short lighting can be used to hide imperfections.

    How to set it up

    Again, there is no one way to go about a short lighting setup.

    Short lighting is trickier to set up than broad, but take your time and be deliberate in where the light is hitting your subject.

    For this example, start with your light source forty-five degrees to your subject just like you did for the broad lighting setup. This time, have your subject face towards the light. If you have a modeling light, or you’re using natural light, watch the highlights on your subjects face carefully. Either move the light or your subject until the brightest part of your subject’s face is the short side.

    Tip: If you’re having trouble seeing the contrast with your eyes, you can squint. I can’t even begin to tell you why this works, but it does. Squinting makes it far easier to see the contrast in a scene with your eyes.

    That’s it. While short lighting is slightly trickier than broad lighting, it is still easy to accomplish. Once you have it figured out, it will become second nature.

    Next steps

    Because short lighting tends to be heavy on the shadows, you can use as much fill as you want to control them. Use a reflector for a gentle lift, or a second light to bring them close to the other tones in your images.

    Since short lighting is so shadow-centric, you will almost certainly want to use fill light to control the contrast in normal situations. You can use a reflector, but if your shadows are quite deep, you may want to opt for fill light. Try exposing your fill light three stops less than your key (your main light) to retain your shadows while ensuring that all of the details are still there.

    Using a reflector lifts the shadows in this example, but retains enough contrast for depth.

    End matter

    There you have it; two basic, but powerful lighting patterns that you can use to create bold dynamic portraits. I encourage you to go out and practice with each of these set-ups. Experiment liberally with your distances between your light and subject and try as many different fill lighting techniques that you can come up with. Once you have the basics down; if you want a real challenge: use the short lighting pattern to create a high key image.


    The post Understanding Broad and Short Lighting in Photography appeared first on Digital Photography School. It was authored by John McIntire.


    Digital Photography School

  • Your Guide to Posing Bands in Photography

    The post Your Guide to Posing Bands in Photography appeared first on Digital Photography School. It was authored by Anabel DFlux.

    Getting your favorite band into your photo studio might sound like a dream come true – but could quickly turn into a disaster if you don’t know what you’re doing! Not all bands know how to pose or position themselves for photographs, and it’s your job as a photographer to direct them. So before you find yourself having a crisis – unsure of how to properly get bands set up for their epic promotional shoot – check out your guide to posing bands in photography!

    How is band photography different from other group photography?

    I hear this question a lot in my line of work. How does band photography differ from, say, a group portrait at a sports game or a family reunion? Well, the short answer is – the intent is different. Though all types of photographs tell a story, band photography has to sell both the image and idea of the band. The poses, styling, arrangement, lighting, and everything in between is akin to the marketing of the music group itself. To make this even more complex, the audience members have to develop the right preconceived idea of what the music will sound like based on the picture! This is the same principle that is applied to album artwork.

    Aimee Saturne

    As well as this, the connection between all of the members in the band is different than that of family members or a sports team. Bands can be a complex series of relationships, some akin to kinship, others to sibling rivalry, and some can even be likened to business partners. Whichever is true for the band you are photographing, that unique relationship will come out in the photographs.

    Does the genre of music affect the pose?

    DIM7

    In short, yes and no. The genre of music can impact every facet of the image, but not necessarily. Doubling back to the idea that a photograph of a band needs to sell their music, the genre portrayal can be a fundamental part of that goal. For example, metal music has a much darker, harder, and tougher edge to it than, say, a girl pop band.

    Much of how I figure out how to pose bands has to do with three key factors:

    1. What is the stereotypical image for that genre? (This being said, the image does not have to be stereotypical – but there are some specific poses to include if you want to really push on the fact that the band plays a specific type of music).
    2. What image does the music evoke? (I find that closing my eyes and listening to some of the key songs pointed out by the band can provide a lot of inspiration. Music and imagery tie together, and whatever image is evoked by the sound is one that you should likely follow).
    3. What is the story the band wants to convey with their presence?

    Aimee Saturne

    Here is an example of how these three questions can drive a photo shoot.

    Say that a five-piece, all-female symphonic metal band approaches you, with a melancholy and dark sound, whose story revolves around pagan rituals. With this in mind, the posing will likely be more rigid with the band members standing in a crescent formation due to the ritualistic nature. Their chins will likely be a bit lower down with a very slight hunch and legs tightly placed together, and eyes are looking directly towards the camera (whilst the face is slightly lower down).

    Likewise, say an all-male pop duo approaches you with a very light-hearted, summer, beach feel to their music, with a tagline revolving around living every day in the moment. The posing will be very loose, fun, and expressive – likely a popular choice would be to place the two lads back to back with them looking over their shoulders at one another laughing and the arms placed in very relaxed positions.

    As a photographer, much of our jobs revolve around bringing a static visual image to an ever-moving description.

    Chasing Desolation

    To express why genre doesn’t necessarily have to affect the pose, not all bands fall perfectly within a box.

    That’s a good thing. Art shouldn’t always be easily categorized.

    As such, some acts defy traditional rules and do not follow convention. Their images won’t follow convention either, and the posing may change drastically from the usual.

    Common posing qualms

    Of course, posing groups of people isn’t without its troubles.

    Here are some of the most common posing “uh-ohs” you might encounter (with solutions, of course):

    Not all of the band members are a similar height – someone might be very short or extremely tall

    This is a very common situation you’ll encounter. Luckily, there are some clever solutions!

    Firstly, if your band promotional image doesn’t include full body shots, simply place the member(s) on boxes (often called ‘apples’ in studios) that even-out their height.

    If the band does want full body shots, play with perspective. Place the taller members further in the back and the shorter members closer to the front. A reverse V or U shape is an excellent idea!

    Thirdly, get creative with levels and props. My go-to – which tends to receive favorable reviews – is to place one member sitting on a chair and pose the rest of the band around the chair. The taller members can crouch on the ground at the corners of the chair while the shorter members can stand around the chair. The frontman or frontwoman sits in the chair.

    You can achieve a similar effect by posing on stairs, walls, rocks, or anything that allows one person to sit while the rest are crouched or standing.

    Killin’ Candace

    Everyone is wearing the same color clothing

    I photograph primarily heavy metal and rock music, so this is something I deal with daily. Everyone wants to wear black in a black studio, against a black wall. The result, when done right, is super cool. However, when done wrong, the image suffers from “floating head” syndrome.

    The real key here is to ensure that every article of clothing is a different texture from one another. Everyone can wear the same color, but try to encourage the band to wear different textures.

    For example, a shiny top with matte pants works great. If a band member has both a matte top and matte pants, throw in a textured scarf or a tie to break it up. Jewelry is also a great idea. The point is, the colors can all be the same, but the way the clothing photographs must be different from one another. This can affect pose positioning as well, as you don’t want the same texture to cross one another and look flat in an image.

    You can also use lighting to help separate the subject from the background. For example, shoot your studio lighting behind the band so that it creates a rim light, which pushes them off of the studio wall.

    Our Dying World

    Someone is dressed elaborately and someone is not

    Sometimes, a band member overdresses while others underdress. If you can’t swap out wardrobes or add accessories, then get extremely creative with posing.

    When I was pursuing my visual communications degree, I had a wonderful professor drill into my head that the key to an effective image is having the viewer’s eye move around the entire frame rather than settle on one central point.

    A great way to get the viewer to take in the entire image rather than settle on one point is to place the elaborately dressed band members around the less-elaborately dressed members on opposite ends.

    Another solution is to use the flashy wardrobe to create lines that the viewer can follow throughout the image. A good way to create a line is to have the overdressed band member stretch an arm out to the other band members to encourage the eye to travel.

    Bullet Height

    You are shooting a large piece band in a small, constricted space

    If you do backstage photography, you’ll run head-on into this issue (especially in Los Angeles. Unless the band is in a major theater like The Hollywood Bowl, your backstage experience will be cramped. Trust me on this one). The most efficient way to utilize small spaces is posing the band in levels. Have some crouching and some standing, some leaning on walls and some stretched on the floor! Think of keeping everyone in a square image ratio format. You’ll be able to pose even 11-piece bands in a small space (I’ve done it!).

    Trash Deity

    How does the lighting affect the pose?

    The lighting you are using will make a difference in how you pose the band. If you’re shooting outdoors and are at the mercy of natural lighting (but don’t have a reflector), you will need to adjust head, hand, arm, and leg positions in order to make the best of the conditions you are working with.

    For example, if you ended up shooting at high noon, keep chins up to avoid unflattering shadows on the neck. Likewise, make sure hands aren’t hidden in shadows so that they do not appear too dark.

    Jyrki 69

    If you are in the studio with more controlled light, this becomes a bit easier – assuming you have enough lights! Work with what you have, and find creative ways to pose the musicians in order to illuminate them in the most flattering way. If you don’t have enough lighting units to capture certain poses, avoid them altogether (unless you are a whiz at post-processing!).

    Karim Ortega

    (Pssst: reflectors are your best friend! Both indoors and outdoors. In outdoor situations, these help control the light. In indoor situations, if you don’t have enough budget for additional studio lights, you can use reflectors to bounce light and help it stretch further. Reflectors are budget-friendly solutions, and can even be made at home if you are DIY-savvy).

    Is hierarchy in a band a real thing?  

    Athanasia

    With some bands, it definitely is! Generally, you want the frontman or frontwoman as the center of attention with the rest of the band members posed around. Some bands have more than one vocalist, and often the vocalists tend to be the central figures (not to be confused with importance. All members are important. A band does not function without all of its contributing talents). Guitarists and bassists tend to find themselves beside the singers naturally, and other instruments such as percussion and keys even further off to the sides.

    Bullet Height

    Most of the bands that step into the studio are live performers; that is, they have experience playing on a stage together. As such, the first thing I do is have them stand in my studio the way that they would arrange themselves on stage. I use that as the basis of where I pose everyone in the lineup. Many bands organically step into the spots that they are meant to stand in.

    Posing a solo musician

    Brandon Rage

    Posing a solo musician opens up a door of massive possibility. Very little is out of your control here. However, remember, because you are photographing only one person, try to give the image as much interest and life as possible. Images are static; we have to make them move. The more dynamic the pose, the better, and the benefit of music photography is that you can get super-quirky with it!

    Grant Webb

    Remember that traditional posing rules also apply here. Flattering angles and flattering poses. Try to avoid harsh shadows on parts of the face or body that may make someone appear different than they are.

    Aimee Saturne

    Mess around with props as well. Props are great ways to give a client something to do with their hands or legs. They can also make an uncomfortable or nervous client much more comfortable as they have something to which to focus. Don’t assume that because a client is a musician that they love getting photographed – not everyone does. It’s your job to give them the best experience possible and make them love being in front of the camera with you.

    Aaron Lee

    My technique is to shoot with a high shutter speed and have the musician constantly move and change poses, encouraging even the weirdest of ideas to come through. More often than not, the weirder it seems, the better it looks. Also, making the client move continuously keeps them from pausing and overthinking.

    … with instruments

    Alexx Calise

    Including their instrument is a common request from musicians, especially solo artists. Band photography often steps into the realm of endorsement photography for the various instrument companies that may be sponsoring the project. With solo artists, it’s fairly easy to get them posed with their instruments as you don’t have to consider the spacing with other band members.

    Alex Crescioni

    The key with instruments, however, is to ensure that the instrument does not cover any important parts of the musician’s body such as their face! The instrument should fit in very organically and not feel forced or uncomfortable. It’s okay to have the band member pose with, say, a guitar hanging just a bit lower than they play it – as long as everything looks natural.

    Ace Von Johnson

    Commonly, I have the musician play the instrument to feel more comfortable with the lens being there. Often, those candid moments look amazing.

    Arielle Silver

    Posing an odd number of persons

    Posing an odd number of people in a band is arguably the easiest (outside of a solo musician). This is because you can adhere to many of the traditional (and very effective) band poses, such as the “U” formation, the “V” formation, and anything else that pushes the lead member to the front. The lead member that stands in front of the rest is a great baseline to use to pose the remaining band members. Moreover, you tend to keep your composition more even on either side as a result.

    Athanasia

    However, don’t let this fact make you lazy. Just because you can do a traditional “crowding around the lead” shot, doesn’t mean you should make it boring! After all, you’re photographing bands – play with various facets of music photography and keep it interesting.

    … with instruments

    The addition of instruments might seem daunting, but this is a brilliant opportunity to use the lines of the instruments to have your viewer’s eyes move around the frame. As well as that, this allows you to use the instruments as a way to direct the attention to the lead of the band.

    Posing an even number of persons

    Zeistencroix

    The most common even-number band is two. I love posing two-person bands. There is such a dynamic range of posing you can do. The connection between each member in a two-person band is also really cool and unique. There are lots to play off here. Honestly, get as quirky with this as possible!

    Batfarm

    An added benefit to two-people bands is that they don’t take up much space. Whether you’re in a studio or an outdoor location, two people take up less space than three or more. You can fit in a lot of wickedly cool shots in smaller spots.

    Ascent

    The main things to remember are that both members need an even amount of attention in the images. Don’t try to have one overpower the other. It doesn’t look right in an image.

    Our Dying World

    Now, the difficult even-number bands are those of four, six, or eight members. The primary difficulty is that you can no longer arrange them in “V” formations or have one member in front of the other because there isn’t an odd number! As such, try staircase poses or diagonal lines. You don’t want either side of the frame to feel too empty or too busy; you have to even it all out.

    The addition of a prop is an excellent idea to even out the composition. I like to pose even-number bands in a more square-ratio (and this isn’t just because of the rise of Instagram). This gives you more options for dynamic posing and is a good baseline to help pose even-numbered bands.

    … with instruments

    Much like with just the band members themselves, use the addition of instruments to comply with a square posing ratio even further. If you pose everyone straight, make sure that you have enough room for the guitar and bass necks. You can play with levels here too, like in the example image below.

    Our Dying World

    Bonus tips:

    • Straight backs! Pay attention to your client’s back and shoulders. If they are arching, straighten them out unless you’re going way more vogue and odd. In that case, over-exaggerate the arch.

    Alex Crescioni

    • Make sure there is nothing in anyone’s pockets. You will thank me for this one in the editing room.
    • Don’t allow someone’s pose to block out a key part of another person’s body.

    Brandon Rage

    • For the “stretching arms towards camera” pose, have the band member cheat and keep the arm lower. It may feel counterintuitive, but if they stretch out towards you organically, their face will be blocked.
    • Pay attention to how poses cast shadows on oneself and the people around them.

    Final takeaway

    In conclusion, all great posing arrangements start with a deep understanding of what your client is wanting and needing. Don’t be afraid to have some fun with it, but keep everything cool, flattering, and most of all – epic. This is the music industry after all!

    Do you have any other tips to add to this guide for posing bands in photography? If so, please share with us in the comments below (and your band photos)!


    The post Your Guide to Posing Bands in Photography appeared first on Digital Photography School. It was authored by Anabel DFlux.


    Digital Photography School