Blog

  • How Including People or Manmade Objects in Your Landscapes Can Add a Sense of Scale

    My natural instinct as a landscape photographer has always been to keep people and manmade objects out of my images. I want to create images of nature that are pure and free (or at least appear to be free) of human interference. That said, over the past few years, I have started to backtrack on this a bit, especially when the camera fails to show the true scale of a landscape. In this article, I’ll share a small collection of images from my portfolio that include situations where allowing people or objects into the scene made the image a success.

    Add a manmade object to show size

    Na Pali Coast Sunset Sony A7RII and Sony 16-35 f/4 | ISO 500, f/4.5, 1/800th.

    Here is (quite possibly) the most beautiful and rugged stretch of coastline on Earth, the Na Pali Coast of Kauai. I’ve photographed it from land, sea and air and still there is just no way to truly capture how incredible it is in person. On my most recent trip to the Garden Isle, I took my workshop group on a sunset cruise up to photograph whales and the Na Pali Coast.

    As we were taking in the incredible scenery, I noticed one of the many helicopters that tour the coastline cutting through the scene. Using my Sony FE 16-35 f/4 lens, I framed a shot with the helicopter (flying right to left) on the right side of the frame (it’s the tiny little white spot) with plenty of space on the left side to see where it was headed. Take away the helicopter and it’s still an incredible scene, but without the helicopter, there’s just no way to accurately communicate how massive these cliffs are.

    Use tourists to show scale

    Balanced Rock Sunset Sony A7 and Canon 16-35 f/2.8 | ISO 100, f/11, 1/20th.

    One of the easiest to reach landmarks in Arches National Park (located in Moab, Utah) is Balanced Rock. You just drive to the parking lot, and you’re pretty much there. But to get the sunset in the background, you’ll need to walk to the other side.

    As our group was getting into position for what was turning out to be a beautiful sunset, a tourist climbed right up onto the rocks and started taking selfies. Ugh. Well, instead of getting upset, I decided to make lemonade out of the lemons and yelled over to him, asking if he’d mind throwing his hands up in the air. We were able to get a shot showing just how huge this sandstone rock formation really is, and the pose of the tourist turned out quite nice.

    Go with the flow

    Grand Canyon Lookout Sony A7RII and Sony 16-35 f/4 | ISO 100, f/7.1, 1/10th.

    Like the previous image, sometimes you just have to go with the flow. As Bruce Lee so famously said, “Be water, my friend.”

    As the sun set over Grand Canyon National Park in Arizona, I was in position to walk away with some really nice shots of the pink glow over the canyon. And just like in Moab, I saw a tourist walk right into the frame as I was about to press the shutter. This time though, he was much closer to the camera and as luck would have it, he was dressed in a cowboy hat, boots, and a leather backpack. Perfect! I never said a single word to this guy, he just stood there looking out over the canyon holding onto the tip of his cowboy hat. I assume he posing for someone else, but I was plenty happy to steal a few frames for myself.

    Add yourself into the shot

    Delicate Arch Beneath the Milky Way Sony A7S and Sony 16-35 f/4 | ISO 4000, f/4, 30 seconds.

    You can’t always have people walk into your frame at the perfect time, wearing clothing that perfectly matches the location you’re photographing. Sometimes you have to take matters into your own hands, as I did here at Delicate Arch in Arches National Park.

    My workshop group and co-instructor Mike were down inside the “bowl” beneath the arch and I stayed up top to light paint the arch for them during their 30-second exposures. We had walkie-talkies and Mike would give me a countdown to begin painting the arch in different ways. Since I couldn’t really concentrate on getting any of my own shots, I set my Sony A7S on a tripod, put it in time-lapse mode and just hoped to come out with one or two shots at the end of the night.

    In the image above, that light shining under the arch is yours truly. I was standing beneath it, wearing a headlamp, so the students could get a silhouette of me looking up at the arch. After the shot, I looked over toward my camera (not on purpose though) and the direct light caused a starburst effect. This turned out to be my favorite image I’ve taken at this location by far. Not bad for the “set it and forget it” method!

    Conclusion


    Sometimes there just isn’t a good way to transfer a three-dimensional landscape to a two-dimensional photograph. Things always get lost in translation to some extent. At the end of the day, we are part of nature and if including a human or manmade object into an image help give the viewer a more accurate sense of scale, I say go for it.

    The post How Including People or Manmade Objects in Your Landscapes Can Add a Sense of Scale by James Brandon appeared first on Digital Photography School.


    Digital Photography School

  • Prynt Pocket, a pocket-sized photo printer for iPhone, is now available

    Prynt, the company that launched a phone case/printer through the crowdfunding website Kickstarter in 2015, has released its next-generation mobile printer, the Prynt Pocket. With Prynt Pocket, users can print a photo directly from their iPhone by inserting the handset into the printer, then snapping a photo. The related Prynt app also offers an augmented reality feature that plays a video within the physical photo print.

    Prynt Pocket utilizes Zink inkless photo paper and has a removable paper cartridge that holds up to ten sheets at a time. Once Pocket is attached to an iPhone, users can snap a photo and then make edits using the Prynt app, including adding stickers and text, and adjusting the lighting. The printer takes about half a minute to produce a photo.

    Unlike some competing instant cameras and mini printers, the Prynt app also leverages augmented reality to give users something a bit more modern and technical: 10-second looping videos that play when a Prynt photo is viewed using the company’s mobile app. The (optional) video is recorded when the photo is taken and is uploaded to the cloud, where it is then utilized whenever someone views the photo with the Prynt AR app feature. 

    Prynt Pocket is available from Prynt’s website now for $ 149.99. A 40-pack of photo paper retails for $ 19.99.

    Press Release:

    Meet the Prynt Pocket — The Device that Transforms your Phone into the Smallest and Coolest Instant Camera

    Now small enough to fit in the palm of your hand, Prynt’s second generation device is the easiest way to print and share life’s everyday moments while on-the-go

    SAN FRANCISCO, CA — (Marketwired) — 05/23/17 — Prynt, the company leading a new era of instant photography, today announced Prynt Pocket, a device that transforms your phone into the smallest and coolest instant camera. Small enough to fit in the palm of your hand, Prynt Pocket attaches directly to your phone, and lets you capture, print and share life’s everyday moments — from spontaneous to special occasions — while on-the-go. The Prynt Pocket also has innovative video capabilities for next-gen storytelling, giving you the option to embed augmented reality videos into your photos and bring them to life in a Harry Potter-like way. Check out the video.

    The phone in our pocket serves as our camera, photo album, and the way we share our lives digitally. But with the thousands of photos stored on our phones, there’s never been an easy way to print those photos, so they become lost in our phones and rarely looked at again. Prynt is changing this and giving everyone — from teens and millennials to young parents — the ability to turn their phone into an instant camera. Printing photos from your phone is now just as instant and exciting as posting a photo on Instagram or Snapchat.

    “We are thrilled to bring Prynt Pocket to market after the success we have had with the Prynt Case,” said Clément Perrot, co-founder and CEO of Prynt. “There is nothing cooler than being able to print a photo straight from your phone, and when you add in the augmented reality video feature, that takes photo sharing to a whole new level. By turning a phone into an instant camera, everyone gets to experience the shared enjoyment of reliving fun and spontaneous moments through a printed photo.”

    Using Prynt Pocket is easy. Simply attach it to your phone and you’re ready to print. Once you’ve taken a photo, you have the option to record a 10-second video that will be hidden within that photo. Before printing, the Prynt app enables you to edit and enhance your photo with fun, creative filters, text and memes. Then, whoever has a physical copy, can use the Prynt app to scan the photo and watch it come to life. Whether a marriage proposal, surprise announcement or selfie video, Prynt Pocket adds magic to any moment.

    The ultra-portable Prynt Pocket, Prynt comes in three colors — cool grey, graphite and mint — making it a fashion-forward accessory that fits any lifestyle. It uses inkless paper for vibrant, long-lasting, tear and smudge resistant photos. The paper has adhesive backing so you can peel and stick your photos anywhere — whether on an inspiration board, scrapbook or your desk at work. Through the Prynt app, users can also share their photos and video creations across all social channels, as well as print their favorite Instagram, Snapchat, etc. pictures directly from their phone.

    Prynt Pocket is now available for purchase on www.prynt.co/, Amazon.com and UrbanOutfitters.com for $ 149. In early June, it will also be available at Best Buy, with additional retailers to be introduced. Prynt Pocket is compatible with the iPhone 7 Plus, iPhone 7, iPhone SE, iPhone 6s Plus, iPhone 6s, iPhone 6 Plus, iPhone 5s, iPhone 5, and will be available for Android later this year.

    Articles: Digital Photography Review (dpreview.com)

  • Bamboo Architecture: 14 Sustainable and Spectacular Organic Structures

    [ By SA Rogers in Architecture & Public & Institutional. ]

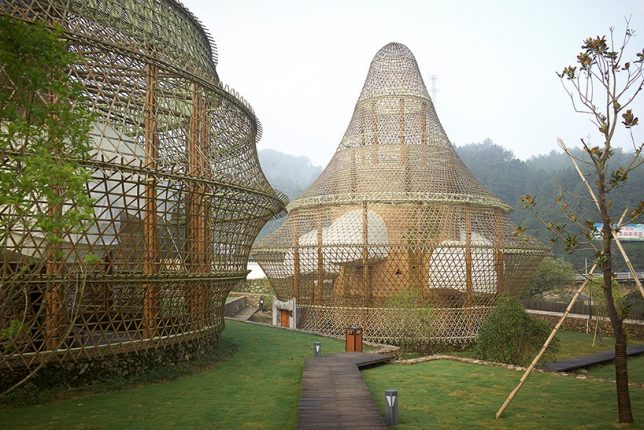
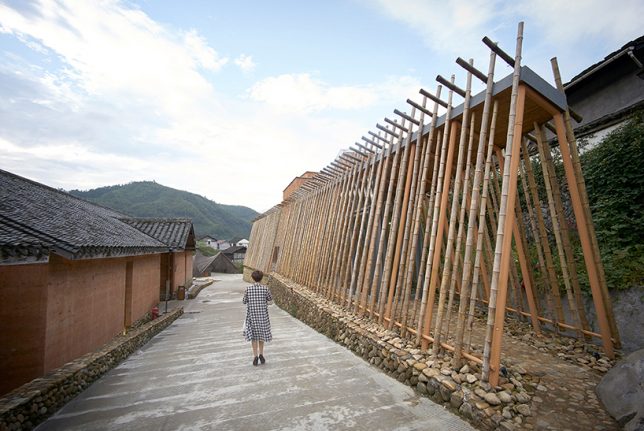
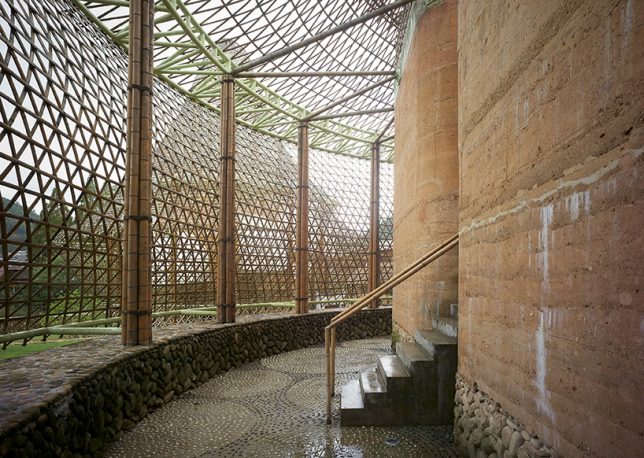
    Extraordinarily flexible yet strong, the fast-growing grass known as bamboo serves as a versatile medium for architectural projects with sculptural flair, especially when it’s bent or woven. These examples of artistic bamboo structures show off the material’s potential and hint at how it could play a role in futuristic yet sustainable architecture and infrastructure in the years to come.

    5 Incredible Structures at the Bamboo Architecture Biennale

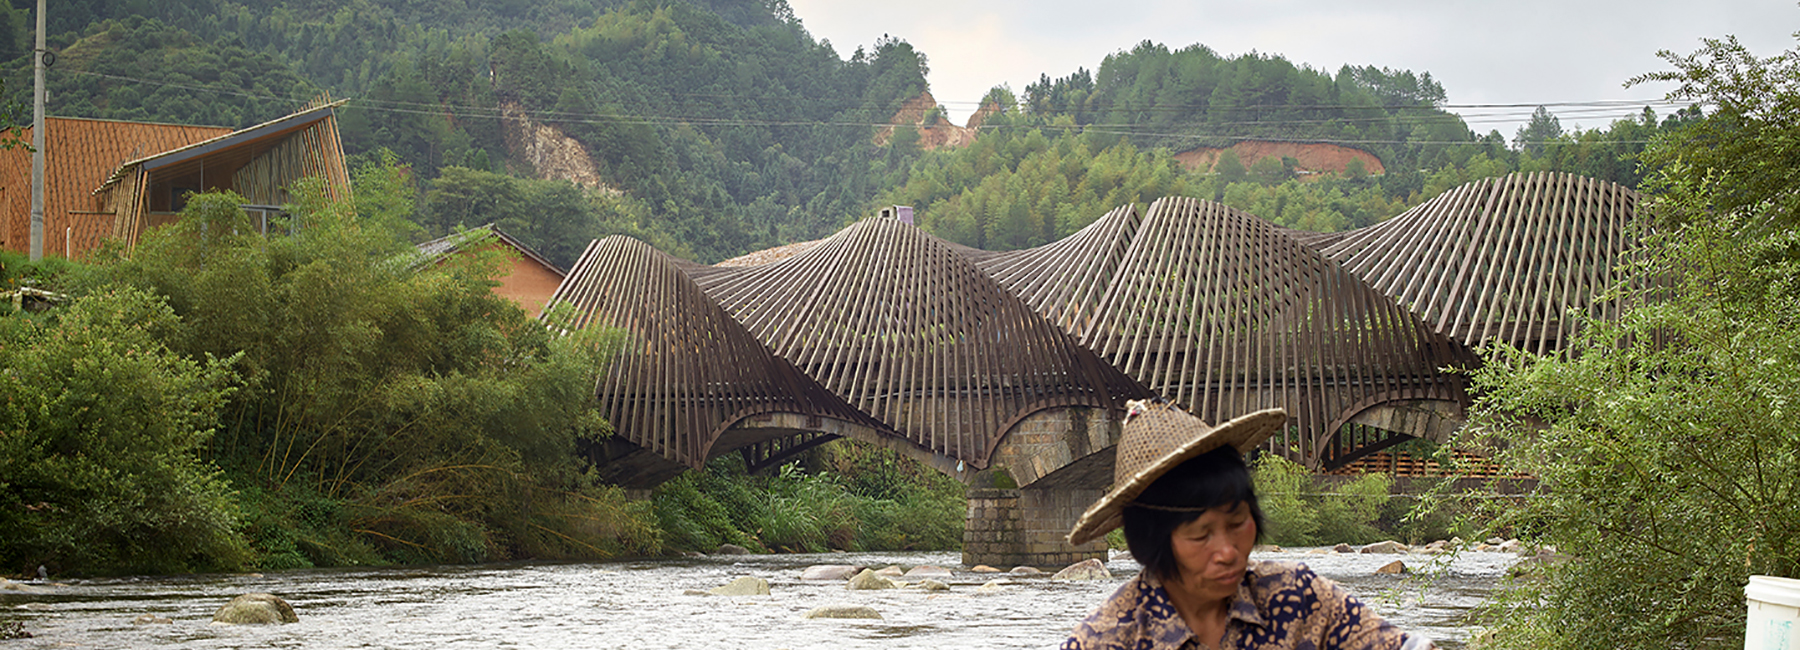
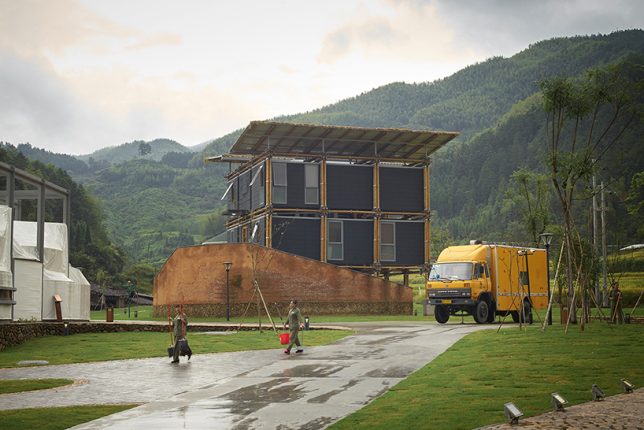
    At the first annual Bamboo Architecture Biennale in 2016, which was held in the village of Baoxi, China, 12 architects demonstrated different methods of bamboo construction, including Kengo Kuma, Simon Velez, Anna Heringer and Vo Trong Nghia. Each of the pavilions serves a certain purpose, like Kuma’s ceramics museum and Heringer’s youth hostel. The bamboo bridge (pictured top) by Ge Quantao is especially impressive.

    Wuxi Harbor Bridge by Mimesis Architecture Studio

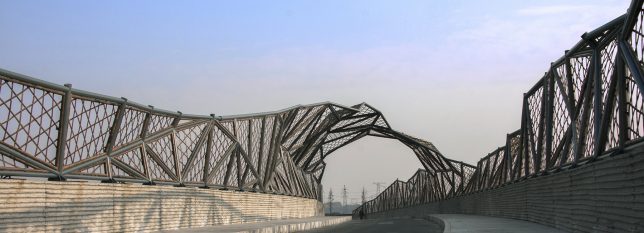
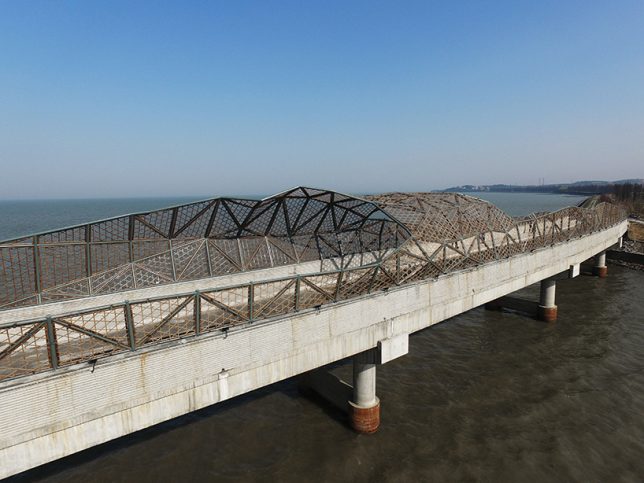
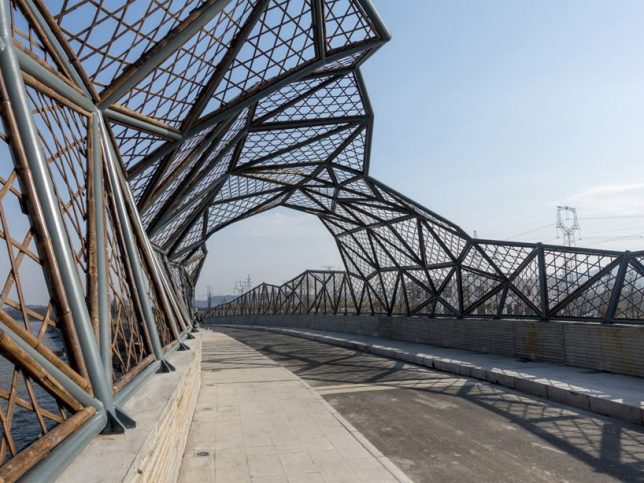
    Mimesis Architecture Studio shows how beautifully bamboo can augment structures made from other materials via the Wuxi Harbor Bridge, using it as formwork for the handrails of the deck and to create carbonized bamboo nets along the top of the bridge. These nets are weatherized and strong, not to mention easy and cheap to replace.

    Green Ladder: Temporary Pavilion by Vo Trong Nghia

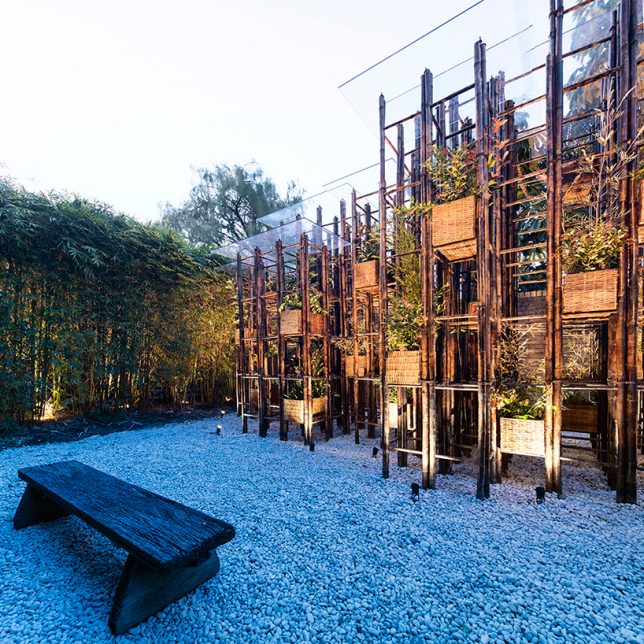
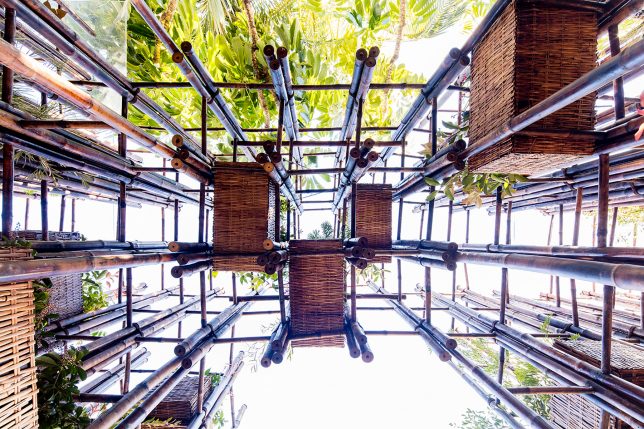
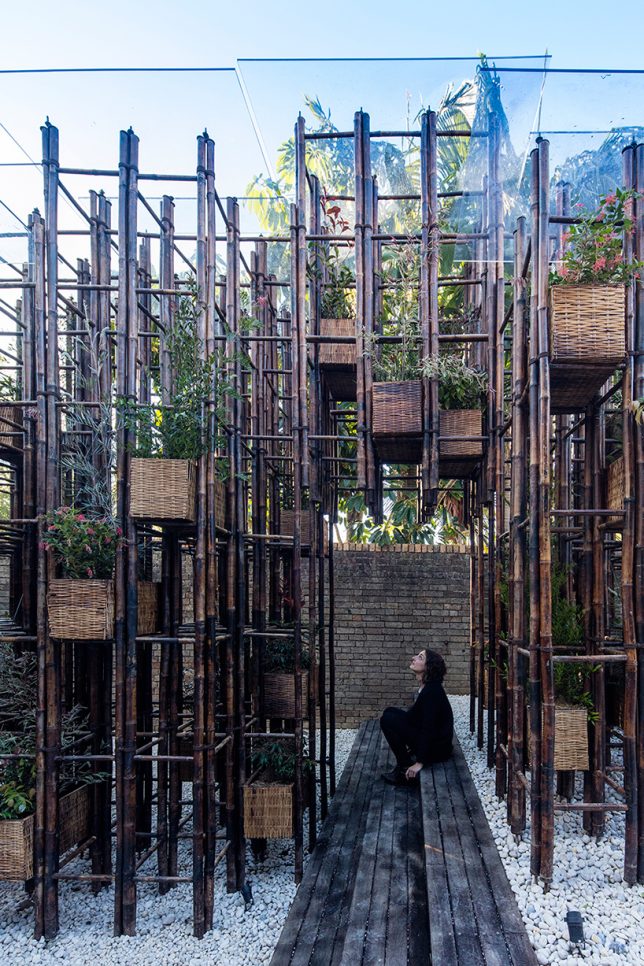
    Bamboo poles create a grid-like network supporting planter pots to bring nature back to the city in this pavilion by Vo Trong Nghia. The project aims to raise awareness about the importance of access to nature in cities, especially in vietnam, where green spaces are increasingly rare.

    Reconstruction of the Universe: Pavilion by Sun Xun

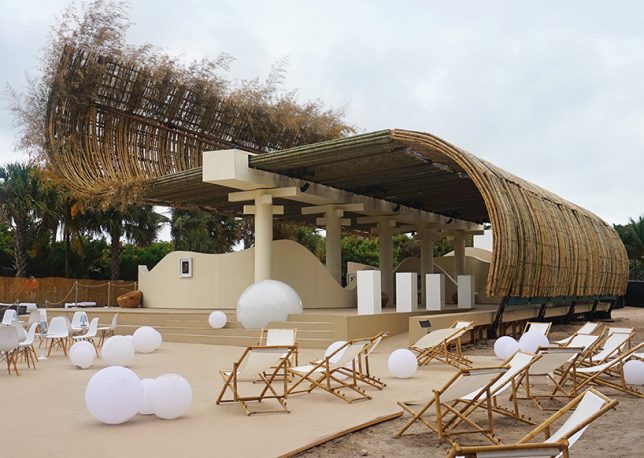
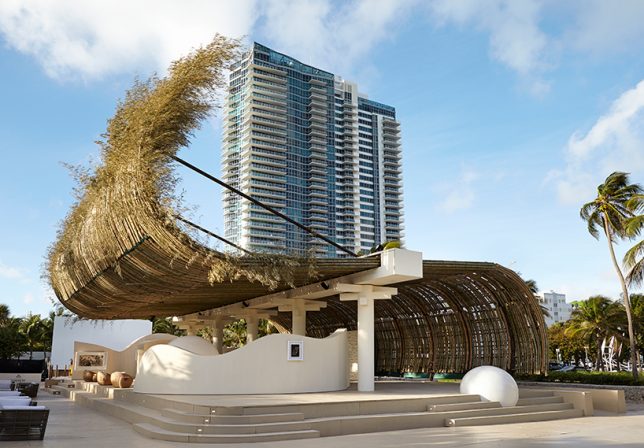
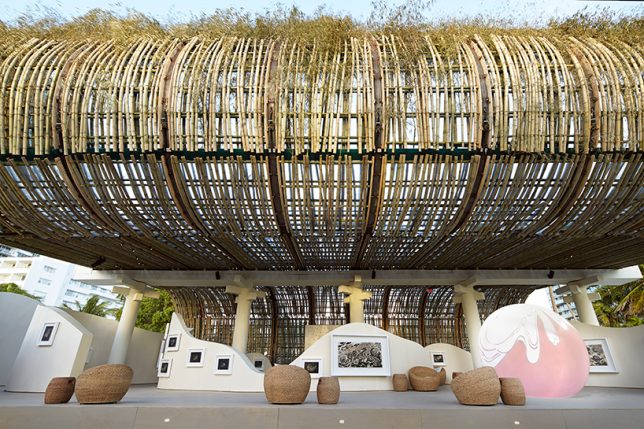
    Bamboo curls up and over an outdoor space to act as a shade-providing roof in this project by Chinese artist Sun Xun and Swiss watchmaker Audemars Piguet for Art Basel. It’s made of 1300 madame timber bamboo poles, facing the ocean.

    Next Page – Click Below to Read More:
    Bamboo Architecture 14 Sustainable And Spectacular Organic Structures

    Share on Facebook


    [ By SA Rogers in Architecture & Public & Institutional. ]

    [ WebUrbanist | Archives | Galleries | Privacy | TOS ]


    WebUrbanist

  • Underwater Photography: Tips And Equipment

    There is a lot of intrigue and mystery about underwater photography, but there is also also a lot of information out there about it.  Mostly what you will find when doing your research is information about wildlife photography, but it is still very useful when dealing with Fashion or Beauty Advertising Underwater photography.   I believe what is important is knowing Continue Reading

    The post Underwater Photography: Tips And Equipment appeared first on Photodoto.


    Photodoto

  • The DJI Spark is a $500 HD mini drone

    $ (document).ready(function() { SampleGalleryV2({“containerId”:”embeddedSampleGallery_4540153431″,”galleryId”:”4540153431″,”isEmbeddedWidget”:true,”standalone”:false,”selectedImageIndex”:0,”startInCommentsView”:false,”isMobile”:false}) });

    DJI unveiled the Spark mini drone this morning, an entry-level product aimed at casual users and enthusiasts. It is capable of 1080p HD video capture, features a 2-axis gimbal and uses a 1/2.3-inch 12MP CMOS sensor.

    The size of a soda can, the unit weighs just 300 g. Despite its small footprint, Spark can fly up to 50 kph, offers a 100 m range (when controlled by a smart device) and has a 16 min flight time. Other highlights include multiple sensors for accident avoidance, gesture control, micro-USB charging and DJI’s Intelligent Flight modes. The unit can be controlled via hand gestures alone, a smart device or a controller.

    A neat new feature called QuickShot shoots one minute of footage and automatically edits it down to 10 secs for sharing on social media. When using the Quickshot feature, Spark offers 4 different automatic flight patterns. One of them, called ‘Helix,’ sends the drone spiraling upward away from you. Spark also features a new panorama mode and a ShallowFocus mode.

    It comes in five colors including: Alpine White, Sky Blue, Meadow Green, Lava Red, and Sunrise Yellow. An accessory package will also be sold alongside the Spark which includes a physical controller, extra battery, propeller guards and a charging hub for $ 200.

    Both will be available June 15th. You can pre-order here.


    Press Release

    DJI Launches Spark, The Easy And Fun Camera Drone For Everyone

    The Company’s First Mini Drone Lets You Capture Special Moments From The Air Just By Moving Your Hands

    DJI, the world’s leader in civilian drones and aerial imaging technology, Wednesday launched Spark, an easy-to-use, fun-to-fly mini camera drone that lifts off from the palm of your hand to capture and share the special moments in your life on the go.

    Thanks to DJI’s powerful technology, Spark is the first drone that users can control by hand gestures alone, successfully removing the barriers between you and your camera in the sky. Even if you’ve never flown a drone before, flying Spark is easy because the only remote controller you’ll need is your hand.

    When Spark takes off from your hand, it automatically enters Gesture Mode. This features new advanced gesture controls like PalmControl, which lets users control Spark with hand movements.[1] In Gesture Mode, you can also send Spark up and away from you, take a selfie, and call it back with just your hands.

    “Controlling a camera drone with hand movements alone is a major step towards making aerial technology an intuitive part of everyone’s daily life, from work and adventure to moments with friends and family,” said Paul Pan, Senior Product Manager at DJI. “Spark’s revolutionary new interface lets you effortlessly extend your point of view to the air, making it easier than ever to capture and share the world from new perspectives.”

    Spark has been designed to be the perfect lifestyle accessory you can take anywhere. It fits easily in almost any bag and weighs just 10.6 ounces (300 grams) – less than a can of soda. Spark is ready to launch within seconds whenever inspiration strikes and can be operated by a remote controller, a mobile device, or hand gestures alone. Spark will be available in five different colors: Alpine White, Sky Blue, Meadow Green, Lava Red, and Sunrise Yellow.

    Visually Smart, Incredibly Intuitive

    Spark comes with new and exciting flight options that empower you to effortlessly capture and share your memorable moments. The new QuickShot Intelligent Flight Mode makes creating professional videos fun and easy. Select a QuickShot, and Spark will fly along a preset flight path while recording a short video and tracking a subject along the way.

    Four QuickShots are available: Rocket, sending Spark straight up into the air with the camera pointed down; Dronie, flying up and away from your subject; Circle, rotating around the subject; and Helix, spiraling away from a subject as it flies upward. For each QuickShot, Spark will automatically create a 10-second video from your flight that is ready to share on social media, where everyone can see your special moments.

    Previously introduced Intelligent Flight Modes such as TapFly and ActiveTrack can also be found on Spark. Developed based on DJI’s vision technology, a new TapFly sub mode called Coordinate allows Spark to fly to a location you tap on your mobile device screen. TapFly’s Direction Mode lets you keep flying in the direction you tap on the screen. Using ActiveTrack, Spark will automatically recognize and track an object you choose, keeping it at the center of the frame for perfect shots of objects in motion. Whether you are using TapFly or tracking a subject, Spark’s 3D Sensing System will actively sense obstacles in front of the aircraft.

    With the remote controller accessory, operators can switch to Sport Mode and unleash Spark’s speed potential of up to 31 mph (50 kph). Sport Mode sets the gimbal to first-person view (FPV) by default, so the camera moves with you as you fly. Spark will also be compatible with DJI Goggles for an immersive FPV flight experience.

    Shoot Like a Pro

    Spark houses an impressive camera with a 1/2.3” CMOS sensor that captures 12 megapixel photos and shoots stabilized HD 1080p videos. Spark’s 2-axis mechanical gimbal and UltraSmooth technology dramatically reduce shake and rolling shutter effect to capture cinematic shots effortlessly.

    Spark includes many previous DJI drone shooting modes with two new additions: Pano and ShallowFocus. In Pano Mode, the camera creates horizontal or vertical panoramas by automatically adjusting its gimbal and heading, taking a series of pictures and stitching them together. ShallowFocus allows you to put part of a picture into sharp focus while the rest of the image is softened, creating photographs with a shallow depth of field. An array of filters and automatic editing templates available in the DJI GO 4 app enables creators to quickly edit videos and share them directly to Facebook, YouTube, Twitter, Instagram, and other social media platforms.

    Fly with Safety, Accuracy, and Precision

    Spark’s FlightAutonomy system consists of the main camera, a downward-facing vision system, a forward-facing 3D Sensing System, dual-band GPS and GLONASS, a high-precision inertial measurement unit, and 24 powerful computing cores. These features allow Spark to hover accurately with vision system assistance at up to 98 feet (30 meters) and sense obstacles from up to 16 ft (5 m) away.

    Like all recent DJI drones, Spark can return to its home point automatically with a sufficient GPS signal. While using the remote controller, if the battery gets too low, connection is lost, or the operator presses the Return to Home (RTH) button, Spark flies back to the preset home point while sensing obstacles in its path. Spark also integrates DJI’s GEO System or NFZ geofencing to provide you with up-to-date guidance on areas where flight may be limited by regulations or raise safety or security concerns – helping you fly safely and responsibly.

    For optimal performance, Spark is powered by a high-energy density LiPo battery and has a maximum flight time of up to 16 minutes. When flying with the remote controller accessory, Spark allows for 720p real-time video transmission from up to 1.2 miles (2 km) away.[2]

    Price and Availability

    The US retail price of a DJI Spark, including an aircraft, a battery, a USB charger and three pairs of propellers, is $ 499 USD. The Spark Fly More Combo includes an aircraft, two batteries, four pairs of propellers, a remote controller, propeller guards, a charging hub, a shoulder bag and all necessary cables, with a US retail price of $ 699 USD. Pricing and availability of other accessories for Spark will be announced at a later date.

    Spark will be available for pre-order at store.dji.com, four DJI Flagship Stores, and authorized dealers. Spark pre-orders will start shipping in mid-June. Color options and Fly More Combo availability may vary at different sales channels.

    DJI Care for Spark

    DJI Care Refresh for Spark, a new one-year coverage plan, will enable Spark customers to obtain up to two full replacements that are new or equivalent to new, for a small additional charge. DJI Care Refresh for Spark is currently available in select countries, including China, Hong Kong, the United States, Canada, 28 European Union countries, and Australia.

    Articles: Digital Photography Review (dpreview.com)

  • Amsterdam Airbnb in a Metro Station Mocks Misleading & Harmful Hotels

    [ By SA Rogers in Boutique & Art Hotels & Travel. ]

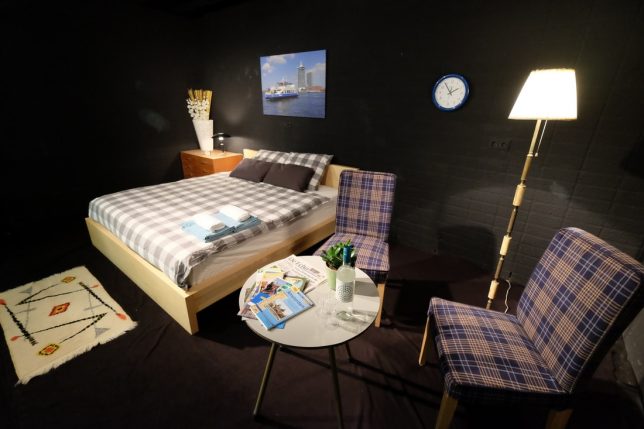
    Anyplace can be an Airbnb – including vans, sheds, housing that should rightfully be for rent to the city’s residents, and cozy rooms ‘by the metro’ that turn out to actually be in the metro station. In fact, the latter example is on display in the metro station Wibautstraat in Amsterdam’s city center right now, walled off with glass to put guests on full display of commuters in a commentary on how misleading and harmful listings on the travel accommodations website can be.

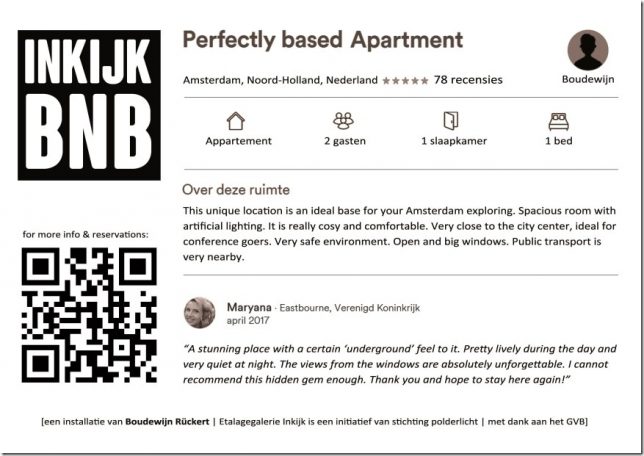
    Created by Dutch artist Boudewijn Rückert, the installation could be read in a variety of ways without context. If you didn’t know the artist’s intentions, you might think this was an advertisement, or an unconventional room made available by Airbnb as a promotional stunt. But lean in and take a close look at the placard accompanying the exhibition.

    The text reads, “This unique location is an ideal base for your Amsterdam exploring. Spacious room with artificial lighting. It is really cosy and comfortable. Very close to the city center, ideal for conference goers. Very safe environment. Open and big windows. Public transport is very nearby.”

    As Rücker notes on his website, roughly 15,000 homes are currently offered “as a permanent holiday” in the city, excluding them from housing and contributing to gentrification. Plus, the way these accommodations are typically styled makes them exceedingly generic in the sterile Silicon Valley aesthetic increasingly referred to as ‘Airspace.’

    The artist outfitted the room in furniture and decor you could find in any city around the world thanks to Ikea, along with “a butt-ugly vase with plastic flowers,” with nothing but a photo of an Amsterdam ferry on the wall to hint at the room’s geographic location.

    While he’s aware that the installation is bound to press the buttons of Airbnb fans and perhaps the company itself, he hopes it will stimulate conversation around how renting out all these rooms is affecting the lives of people who live in the host cities – a controversy that’s definitely not limited to the city of Amsterdam.

    Share on Facebook


    [ By SA Rogers in Boutique & Art Hotels & Travel. ]

    [ WebUrbanist | Archives | Galleries | Privacy | TOS ]


    WebUrbanist

  • Ricoh announces WG-50 rugged compact with 5x zoom, built-in macro lights

    Ricoh has introduced a new rugged compact camera – the WG-50 – which replaces the WG-30. The WG-50 offers a 28-140mm equiv. F3.5-5.5 lens. The WG-50 uses a 16MP BSI-CMOS sensor and is capable of recording Full HD video at 30 fps. It is waterproof for two hours at a depth of 14m/45ft, and can cope with being dropped from a height of 1.6m/5ft, will operate at temperatures as low as -10°C/+14F and can withstand 100kg/220lbs of force.

    As with Ricoh’s other recent rugged cameras, the WG-50 has an array of six LEDs around the lens that can be used to assist macro shooting, selfies and when using the 2MP digital microscope mode.

    The camera will go on sale at the end of June in a choice of orange or black, and will cost $ 279/£249. For more information see the Ricoh website.

    Press release

    RICOH COMPANY, LTD and RICOH IMAGING COMPANY, LTD. announced the launch of the RICOH WG-50 digital compact camera.

    This new model features a compact, lightweight body design, delivering exceptional waterproof and shockproof performance.

    Developed as a standard-class waterproof digital compact camera, the RICOH WG-50 provides dependable performance and outstanding operability in demanding outdoor conditions. The WG-50 is waterproof to a depth of 14 metres, shockproof against falls from a height of 1.6 metres, and freeze-proof to temperatures as low as -10°C. It also provides a range of features to facilitate all types of still-image and movie shooting, including approximately 16.0 effective megapixels and Full HD (1920 x 1080 pixels) movie recording capability. It also comes equipped with an outdoor friendly LCD screen on the brightness can be instantly adjusted to the lighting levels in a particular shooting situation.

    The RICOH WG-50 features a range of optional camera-mounting accessories allowing the user to fix the camera securely on a bicycle or watercraft. Using the camera’s creative shooting functions, such as interval shooting and Full HD movie recording, the user can capture unique images seen from a very different angle or viewpoint.

    RRP £249.99
    Availability: End June 2017
    Colours: Orange or Black

    Main Features

    1. Heavy-duty construction allowing underwater shooting down to 14 metres, for up to two hours of continuous operation (equivalent to IPX 8 or JIS Class 8). The RICOH WG-50 is also shockproof against falls from a height of 1.6 metres,* dustproof (equivalent to IPX 6 or JIS Class 6), freeze-proof to temperatures as low as -10°C, and crushproof against weights up to 100kgf (kilogram force). ** Thanks to this heavy-duty construction, the camera performs superbly and dependably even in difficult and demanding outdoor conditions.
    * Measured under RICOH IMAGING-original testing standards — from a height of 1.6 metres, onto a surface of 5cm-thick plywood — conforming to Method 516.5-Shock of the MIL-Standard 810F
    ** Measured under RICOH IMAGING-original testing standards

    2. Exceptional image quality
    The WG-50 comes equipped with a back illuminated CMOS image sensor, which delivers excellent high-sensitivity and low-noise characteristics and high-speed readout of image data signals. Coupled with a high-performance imaging engine, this image sensor delivers a top sensitivity of ISO 6400 and super-high-resolution images with approximately 16.0 effective megapixels. This model also provides advanced image processing functions, made possible by the latest super-resolution technology, to assure sharp, clear, high-resolution images. It also offers such innovative features as Hand-held Night Snap mode, which automatically captures several images of the same night-time scene from which it produces a single, blur-free composite image. Some advanced features have also been added to this model to facilitate and upgrade scenic photography. For example, white-balance optimisation in the Landscape shooting mode reproduces brilliant greens of trees.

    3. 5X optical zoom lens with a 28mm wide-angle coverage
    The WG-50 features a high-performance, five-times optical zoom lens with a focal-length coverage from 5mm to 25mm (equivalent to approx. 28mm to 140mm in the 35mm format) to accommodate a wide range of scenes and subjects, including sweeping landscapes. It also provides other convenient shooting functions, such as a macro mode to capture dramatic close-up images from a minimum focusing distance of a mere one centimetre; an Intelligent Zoom function to extend the zoom range to approximately 36 times (equivalent to 1008mm in the 35mm format) without compromising image quality and ideal for superior telephoto photography; and an interval shooting mode, which comes in handy for fixed-point observation.

    4. Underwater shooting mode
    Specifically designed for underwater photography, the Underwater and Underwater Movie shooting modes are programmed to optimise colour and contrast, based on the data of images actually captured under the water. These modes deliver sharp, true-to-life images by enhancing shades of red which are lost in underwater photography, while effectively compensating for the loss of contrast caused by the diffusion of light in water. During Underwater mode, the Flash Off + Flash On option, allows the user to consecutively capture two images — with a single shutter release — one without flash and another with flash.

    5. Six Macro Lights to assist close-up shooting, and a Self-Portrait Assist mode
    Ideally positioned around the circumference of the lens barrel for macro shooting, six LED Macro Lights allow the WG-50 to provide bright, uniform illumination on a subject when the Digital Microscope mode is selected.*** Using these Macro Lights, the user can clearly see a magnified view of the microscopic world on the camera’s LCD screen, normally undetectable by the naked eye, to effortlessly capture eye-catching, close-up images. In order to minimize camera shake and subject shake, the Instant Illumination Enhance function allows for the use of a higher shutter speed by automatically raising the discharge level of the Macro Lights at the moment of shutter release. The Macro Lights also provide other useful functions, such as a Self-Portrait Assist mode, which uses the blink of an LED lamp to check if the subject’s face has been safely captured within the picture frame, and the LED Lighting mode, which uses the Macro Lights as a lighting device in the dark.
    *** When this mode is selected, the image size is fixed at 2.0 megapixels (at 16:9 proportions).

    6. Full HD movie recording for extended shooting of high-quality movies
    The WG-50 provides Full HD movie recording employing the H.264 recording format. Users can capture high-quality, extended movie clips (1920 x 1080 pixels, 16:9 proportions) at a frame rate of 30 frames per second. To add some creative touches to movie recording, it also features a high-speed camera function**** for slow-motion playback of captured movie clips, and an interval movie function. A micro-HDMI terminal (Type D) is also provided on the camera body for simultaneous output of Full HD movie clips and sound to external audio-visual devices.
    **** When this function is selected, the recorded size is fixed at 1280 x 720 pixels.

    7. Triple anti-shake protection to prevent blurred images in all applications
    (1) Pixel Track SR mechanism
    When recording still images, this advanced shake-reduction mechanism effectively compensates for camera shake by digitally processing affected images.

    (2) Digital SR mode
    When the camera detects low-lighting conditions in still-image shooting, this mode automatically raises the sensitivity up to as high as ISO 6400, making it possible to use a higher shutter speed and effectively minimise the adverse effect of camera shake and subject shake when dealing with poor lighting conditions.

    (3) Movie SR mode
    During movie recording, this mode effectively compensates for the misalignment of images caused by camera shake through the use of exclusive software to produce beautiful, blur-free movie clips.

    8. 2.7 inch LCD screen with Outdoor View Setting mode
    The WG-50 comes equipped 2.7 inch LCD screen with horizontally extended 16:9 proportions and approximately 230,000 dots. The screen’s AR (Anti-Reflection) coating minimises annoying glare and reflections to deliver a sharp, clear on-screen image even in sunshine during outdoor shooting. It also comes equipped with such convenient features as the Outdoor View Setting mode, which easily sets the optimal screen brightness level for a given lighting situation.

    9. Other features

    • A range of WG-series mount accessories (optional) for a range of shooting situations
    • Two remote control receptors (one in front and another in the back) to widen signal coverage
    • Macro stand (included) to maintain a minimum focusing distance of one centimetre to the subject during extended observation and shooting of macro images
    • High-speed Face Detection function to capture as many as 32 faces in focus in approximately 0.03 seconds (minimum); Smile Capture function to automatically release the shutter when the subject’s smile is detected
    • Outdoor friendly Style Watch function to display the time on the LCD monitor, using an extended push of the OK button when the camera’s power is turned off
    • Delay-free, push-button start of the playback mode, using an extended push of the playback button
    • Auto Picture mode to automatically select the most appropriate shooting mode from 16 different scene modes
    • A choice of 12 digital filters
    • Pet detection function to automatically detect the face of a cat or dog

    Ricoh WG-50 specifications

    Price
    MSRP $ 279/£249
    Body type
    Body type Compact
    Body material Composite
    Sensor
    Max resolution 4608 x 3456
    Image ratio w:h 1:1, 4:3, 16:9
    Effective pixels 16 megapixels
    Sensor photo detectors 17 megapixels
    Sensor size 1/2.3" (6.17 x 4.55 mm)
    Sensor type BSI-CMOS
    Color space sRGB
    Color filter array Primary color filter
    Image
    ISO Auto, 125-6400
    White balance presets 6
    Custom white balance Yes
    Image stabilization Digital only
    Uncompressed format No
    JPEG quality levels Fine, normal, basic
    File format
    • JPEG (Exif v2.3)
    Optics & Focus
    Focal length (equiv.) 28–140 mm
    Optical zoom 5×
    Maximum aperture F3.5–5.5
    Autofocus
    • Contrast Detect (sensor)
    • Multi-area
    • Center
    • Tracking
    • Single
    • Continuous
    • Face Detection
    • Live View
    Autofocus assist lamp Yes
    Digital zoom Yes (7.2X)
    Manual focus Yes
    Normal focus range 50 cm (19.69)
    Macro focus range 1 cm (0.39)
    Number of focus points 9
    Screen / viewfinder
    Articulated LCD Fixed
    Screen size 2.7
    Screen dots 230,000
    Touch screen No
    Screen type TFT LCD
    Live view Yes
    Viewfinder type None
    Photography features
    Minimum shutter speed 4 sec
    Maximum shutter speed 1/4000 sec
    Exposure modes
    • Auto
    • Program
    Scene modes
    • HDR
    • Handheld Night Snap
    • Movie
    • High Speed Movie
    • Digital Microscope
    • Landscape
    • Flower
    • Portrait
    • Underwater
    • Underwater Movie
    • Interval Shot
    • Interval Movie
    • Surf & Snow
    • Kids
    • Pet
    • Sport
    • Night Scene
    • Night Scene Portrait
    • Fireworks
    • Food
    • Digital SR
    • Report
    • Green
    Built-in flash Yes
    Flash range 5.50 m (at Auto ISO)
    External flash No
    Flash modes On, off
    Drive modes
    • Single
    • Self-timer
    • Continuous
    • Burst
    • Remote control
    • Auto Bracketing
    Continuous drive 8.0 fps
    Self-timer Yes (2 or 10 secs, remote)
    Metering modes
    • Multi
    • Center-weighted
    • Spot
    Exposure compensation ±2 (at 1/3 EV steps)
    AE Bracketing ±2 (3 frames at 1/3 EV steps)
    Videography features
    Format MPEG-4, H.264
    Modes
    • 1920 x 1080 @ 30p, MOV, H.264, Linear PCM
    • 1280 x 720 @ 120p, MOV, H.264, Linear PCM
    • 1280 x 720 @ 60p, MOV, H.264, Linear PCM
    • 1280 x 720 @ 30p, MOV, H.264, Linear PCM
    Microphone Stereo
    Speaker Mono
    Storage
    Storage types SD/SDHC/SDXC card
    Connectivity
    USB USB 2.0 (480 Mbit/sec)
    HDMI Yes (micro-HDMI)
    Microphone port No
    Headphone port No
    Remote control Yes (Wireless)
    Physical
    Environmentally sealed Yes
    Battery Battery Pack
    Battery description D-LI92 lithium-ion battery & charger
    Battery Life (CIPA) 300
    Weight (inc. batteries) 193 g (0.43 lb / 6.81 oz)
    Dimensions 123 x 62 x 30 mm (4.84 x 2.44 x 1.18)
    Other features
    Orientation sensor Yes
    Timelapse recording Yes
    GPS None

    Articles: Digital Photography Review (dpreview.com)

  • How to Design a Wedding Album Simply and Painlessly

    I’ve been photographing weddings for about nine years now, and I’ve found this to be the most effective and efficient way of designing and delivering a client’s dream wedding album. The method that I am going to describe keeps you in control of the process and still gives the client what they want and need. You might be surprised to know that it only takes me about 30 minutes to design an album from beginning to end.

    In fact, just to test, I created an album right now for this article to see exactly how long it might take. I had 150 images to choose from; I used 118 images, created 31 spreads, and it took me 26 minutes. Let’s talk about how to achieve this, and how to work with your clients so you don’t find yourself dealing with wedding album orders months or years after the wedding.

    How to Design a Wedding Album Simply and Painlessly

    One spread of images created in Pixellu SmartAlbums2.

    1. Who is in Control of the Process?

    If a client has indicated at some point in the process that they want a wedding album, then the very first draft of the wedding album is 100% created by me. That includes the selection of images, design, the number of spreads created, etc. I have one friend, Tim Halberg, who creates a preview wedding album on the night of the wedding and has it ready for the clients the next day. He chooses the images and design all on his own.

    To a bride or groom, every photo is important to them. So telling them to choose their favorite photos for the album is a recipe for disaster. I don’t consult with my couples about which images I am going to use, how many images to use, or the number of page spreads they might want. How would a person ever know how many spreads he/she wants? 10? 100? It’s an abstract idea to anyone who has never made a wedding album before.

    In the same way, you probably don’t give your client all the raw files from their wedding day and let them choose the photos they want you to edit. The same philosophy applies to album design.

    How to Design a Wedding Album Simply and Painlessly

    The opening image for my sample album.

    The first time I made the mistake of giving my clients the option to pick their own images, they came back to me with about 300+ photos, many of which were almost duplicates of each other. I ended up just choosing the best images of those 300, which is what I should have done from the beginning. I also would have saved myself a month or so of waiting for the client to come up with their selections and saved them the hassle and stress of narrowing it down.

    My Process

    An average wedding album should have around 80 images that will fill about 20-30 spreads. Some album companies don’t even support albums beyond 30 spreads.

    Essentially, I do this:

    • Create a first draft of the album.
    • Tell the clients they get two rounds of edits where they can add, subtract or replace any photos.
    • Create a second draft of the album based on the first round of suggestions.
    • Let the client see their changes and decide on any final edits.
    • Make final edits to the album, and begin the ordering process.

    After a wedding, I tell my clients I will have a rough draft of the wedding album for them within a week or two. This puts me in control of the situation from the first moment.

    Now, let’s talk about how to create a wedding album in a quick and painless way.

    How to Design a Wedding Album Simply and Painlessly

    Some spreads have open space between the images. These are some of the getting ready images on one double-page spread.

    2. Before You Begin

    You’ll need three things to create your wedding album.

    1. Good software.
    2. A highlights gallery of about 100 images from the wedding.
    3. A family gallery of images (just the formal family photos).

    There are three software companies that I am aware of that most of my professional wedding photographer friends use to create their wedding albums:

    • Pixellu SmartAlbums 2 (this is the one I use)
    • Fundy Designer
    • KISS

    You can research online to see what might suit your needs best for software. You’ll have to pay to play the wedding album game, but you should earn back your investment in good software from your very first album sale. Don’t be cheap! Pixellu SmartAlbums costs about $ 300 and it was the best software purchase I have made (besides Lightroom) for my wedding business.

    If you had read my article on How to Edit and Deliver Wedding Photographs in One Day you would know my philosophy on creating a highlights gallery. Everyone should have one. Your highlights gallery will also be the foundation of your wedding album. The top 100 photos from the wedding will tell the best story of the day, and that is exactly what a wedding album is supposed to do.

    Export all of your images in Lightroom with these settings:

    How to Design a Wedding Album Simply and Painlessly

    Lightroom export settings.

    This will guarantee that every image will print properly on any spread of a 10×10 inch or 12×12 inch album. I personally like creating square albums (8×8 inches, 10×10 inches, 12×12 inches).

    3. Designing the Album

    When designing your album, go with your gut, and keep it simple. With my software, I can select a number of images, throw them into a spread and then quickly scroll through a number of arrangement options by simply pressing the up/down arrow on my keyboard. Here are some examples that show up when I use the same three images from the ceremony:

    How to Design a Wedding Album Simply and Painlessly

    Six random sample page designs that my album software created for me in under a minute.

    It’s really fun to scroll through the designs that the software creates for you. Simply press the up or down arrow to scroll through them. I like full bleed spreads so I chose the second option on the left. You can also grab any image and drag it to another position to swap the two images. You can see in the examples above that the software will also sometimes do square designs even if your image is horizontal or vertical. Sometimes it works perfectly and other times it doesn’t.

    Things to keep in mind when designing your wedding album:

    Keep a good visual balance and flow for each spread and throughout the album as a whole. Notice in the example above that I have two black and white images and two color images. In some spreads, I will do all color, or all black and white. Also, if I have a few spreads in a row with a multiple of four or more images, I like to break it up with one strong double-page-spread single image, like this:

    How to Design a Wedding Album Simply and Painlessly

    Try and create a balance of pages with many pictures and some with only a few pictures in your spreads.

    Side note: I didn’t export my images at 20 inches long for this sample album so you are seeing that exclamation warning in the bottom-right corner of the image because the software knows that the image is not large enough to print at the designated 12×12 inch size. If you see this warning on your images, check the sizes carefully.

    This part of the design process should only take about 20-30 minutes once you get the hang of your software. All the photos are imported into your album project and usually sorted by time, so you can start grabbing photos from each scene and putting them into your book.

    Don’t feel like you need to use every single image. Sometimes cutting something out makes the whole spread work better. In fact, like most things in life, less is almost always better. After you have finished your album design you should have the option to export and upload your album to the cloud for review.

    4. Feedback and Edits

    How to Design a Wedding Album Simply and Painlessly

    One spread of images made in Pixellu SmartAlbums 2

    These are the exact words I have used to explain to my clients about how the process will go when creating a wedding album:

    Okay, I have sent out draft number one! You should have an email with a link to be able to view the album and leave comments. If you haven’t seen that in your inbox please check your spam folder. Or, hey, I’ll just give you the link right now:

    View draft #1 of your wedding album layout here

    I do two rounds of edits, so if you see anything you want to replace, add, or delete from there let me know! I’ll make your first round of suggestions and then show you the updated version of the album online, and you can have one more go at it before I hit purchase.”

    Guiding your clients in this way gives them some options, but not too many. You are dictating the terms of the album making process and they get to participate in a healthy and helpful way. This is also an effecting parenting technique with a small child. Saying things like, “You can sleep with stuffed animal A or stuffed animal B when you go to bed right now” is nice because it embeds the idea that they are already going to bed (no question about it), but they have some power and free will in the matter (what animal they are going to sleep next to). This psychology can be used everywhere, including in a classroom, in your business, etc.

    Getting feedback and doing the edits

    With my software (and I’m assuming the others out there) your client can view the album and submit comments online for each individual spread. Each photo will have a number attached to it, so your client can easily say something like, “Love spread number 9! But let’s get rid of photo number 1 and replace it with one more of the two of us.”

    How to Design a Wedding Album Simply and Painlessly

    What your client sees after you’ve uploaded your album to the cloud.

    Once your client has written comments on each spread, they can submit that and you will receive an email that will take you to the album and their comments. At this point, the changes should be pretty straightforward. You will add, subtract, or swap out any images necessary.

    Then you can upload the next draft and let your client see the changes that they made. I would include language like this:

    “Okay, I’ve made all the edits you requested. I think the album looks awesome! If there are any last changes you think should happen let me know, otherwise I’ll submit an order for the album tonight and you’ll have it in your hands by next week.”

    Notice how my language is encouraging them to approve and finish the project. This makes the next round of changes feel like they should be made only if necessary, not like the first round.

    How to Design a Wedding Album Simply and Painlessly

    I don’t always have a lot of family photos in the highlights gallery, so I make sure to add family photos into the mix when creating the album. This is very important for your couples!

    5. Ordering the album

    The next step is to order the album. This is a very different process than the album design. There are many many companies out there that can do this. All of them have different benefits and drawbacks. I happen to use Miller’s Lab. They deliver albums extremely fast (within a week) and have great customer service.

    You need to use a special uploading software (usually free) to order your album. You can’t just order from the design software (unless you are building an album with KISS). For Miller’s Lab, there is a supplemental program to use called Miller’s Designer Plus. You tell it what project you want to create (12×12 inch leather bound album or book), drag all the exported photos into the program, and fill in each page.

    How to Design a Wedding Album Simply and Painlessly

    The final spreads are shown on the left. You need to create a new “fullpage” spread and drag each photo onto it to purchase your album

    After you have manually input each spread you can order your album. At this point, you will have to communicate with your client about what color leather they want on the album, and any other options they can choose. Again, keep the options limited. I usually offer black, tan, gray, or white, even though there are many other options available like blue, red, etc.

    Once they respond with a color and their address, your job is done! Order the album and have it delivered straight to their doorstep with some boutique packaging ($ 6 extra with Miller’s). If you want to deliver it yourself and make it pretty with some personalized packaging, then ship it to your own address.

    Sample albums for display

    The last thing to note is that you can also order discounted sample albums (check with your supplier) for yourself and your studio if you want to show potential clients how their album could look. I would highly recommend creating your first album for yourself and your studio so you can feel what this process is like from beginning to end. The sample albums are exactly the same as a normal album you would sell to a client, but they have a big stamp or sticker on the back page that says “Sample Album.” (Note: may vary from supplier to supplier).

    The final spread

    Summary – everyone wins

    So let’s get back to how this method will help you avoid dealing with wedding album orders much later. By following these steps and controlling the process you will not only help your clients to be less stressed and get their albums faster, but you will be less stressed as well.

    In order to have a smooth and happy album designing process it’s important to guide expectations from the very beginning of your conversation/process. It’s important that you take control of the conversation and let your clients know how the design process will go, according to what works best for you. You limit options but you still GIVE options. You make it easier for them to make decisions about the album and you can do this all from the comfort of your home using just your computer and the internet.

    Everyone wins in this process – the couple get their album super fast, they don’t have to spend hours pouring over their photos, and you don’t get 20 wedding album orders right before Christmas every year.

    That’s it! Happy designing ?

    The post How to Design a Wedding Album Simply and Painlessly by Phillip Van Nostrand appeared first on Digital Photography School.


    Digital Photography School

  • Formula for LomoChrome Purple 400 film reworked

    LomoChrome Purple 400 –  first announced in 2013 – has been reformulated and should now have improved sensitivity at ISO 400, a more refined grain and better rendering of red hues. Inspired by classic infrared film, it uses C41 processing, making it an accessible way for analog shooters to try their hands at this style of photography.

    Are these improvements to LomoChrome Purple 400 related to an overall increase in market demand for film? It’s hard to say. The good new is Purple 400 is now better than ever and will still shift your blues to green, greens to purple and yellows to pink.

    Articles: Digital Photography Review (dpreview.com)

  • Garmin announces the VIRB 360, a 5.7K waterproof 360-cam

    $ (document).ready(function() { SampleGalleryV2({“containerId”:”embeddedSampleGallery_7160503986″,”galleryId”:”7160503986″,”isEmbeddedWidget”:true,”standalone”:false,”selectedImageIndex”:0,”startInCommentsView”:false,”isMobile”:false}) });

    Garmin is entering the 360-camera market with the introduction of the VIRB 360, a dual camera device capable of 5.7K (30p) immersive video and 15MP spherical still images. Unlike most other 360-cameras, the VIRB 360 is completely waterproof. It also features a bevy of sensors, including GPS – information from which can be overlayed directly into 360-video in post.

    The camera will launch with a free mobile app and desktop software for editing, stabilizing and sharing 360 photos and video. There does not appear to be any in-camera stabilization, though users can stabilize their 5.7K footage in post, resulting in 4K 360 footage. The camera also has live streaming capability and footage should be compatible with all VR headsets currently on the market.

    Available in June, the suggested retail price is $ 799.99, putting the VIRB 360 at a substantially higher price point than other consumer 360 cameras.


    Press Release

    Introducing the VIRB® 360: An immersive 360-degree 5.7K camera experience from Garmin®

    OLATHE, Kan./May 24, 2017/Business Wire – Garmin International Inc., a unit of Garmin Ltd. (NASDAQ: GRMN), today announced the versatile VIRB 360, a compact, rugged and fully spherical 360-degree camera. The waterproof1 VIRB 360 is an easy-to-use camera that captures impressive high-quality video up to 5.7K/30fps, with four built-in microphones to ensure everything sounds as good as it looks in any direction. Whether users are kayaking down river rapids or mountain biking through rough terrain, the VIRB 360’s 4K Spherical Stabilization2 makes every video smooth and steady.

    With the VIRB 360, users capture video with automatic in-camera stitching up to 4K/30fps. Videos are easily uploaded for editing or sharing instantaneously. Taking advantage of its built-in GPS and numerous other sensors, the VIRB 360 provides owners with customizable G-Metrix™ data overlays in a captivating 360-degree augmented reality3 setting.

    “The VIRB 360 lets you relive personal experiences and share them with your friends – from a different point of view, every single time,” said Dan Bartel, Garmin vice president of global consumer sales. “VIRB 360 owners will no longer need to worry about trying to capture the perfect angle or setting up the perfect shot. The camera’s easy-to-use feature set will make even the most inexperienced users look like experts.”

    Garmin offers a free downloadable VIRB Mobile app and desktop software to edit, stabilize, share and add data overlays to any VIRB 360 video content – features that make the VIRB 360 easier to use than most other 360 cameras. Boasting conveniently simple one-touch button controls, the VIRB 360 also incorporates helpful voice control4 options to start and stop recordings, snap photos and more. And to make the most of “in-the-moment” experiences, the VIRB 360 features livestream5 capabilities to post to YouTube™ or Facebook Live with a compatible smartphone or tablet.

    The VIRB 360 offers a rechargeable, one-hour battery life while recording. Even more impressive, whether it’s a family event or a rigorous journey, the VIRB 360 is built to withstand overheating and wet conditions. Beyond video, the VIRB 360 can take stitched-in-camera, 360-degree, 15 megapixel spherical photos. Photo modes include single capture, burst shooting, and time lapse. Additionally, the camera is equipped with a sunlight-readable display for users to identify battery life, storage capacity and video modes. The VIRB 360 supports Wi-Fi®, Bluetooth®, ANT+™, and NFC (one-tap connection with Android™ devices) connectivity.

    Offering a wealth of flexibility and range, the VIRB 360 is compatible with industry-leading virtual reality headsets and live playback through the free VIRB Mobile app. What’s more, the camera is compatible with Apple® and Android devices, and comes with its own unique tripod/handgrip. The VIRB 360 uses replaceable microSD memory6 cards of up to 128GB (sold separately).

    The Garmin VIRB 360 has a suggested retail price of $ 799.99 and is expected to be available in June. For more information, visit Garmin.com/VIRB360.

    The Garmin VIRB 360 is the latest from the consumer automotive and camera segment of Garmin, the leading worldwide provider of portable navigation devices for automobiles, motorcycles and trucks. The company’s user-friendly navigation and action camera solutions have innovative features that provide time- and fuel-saving benefits to meet the demands of everyday driving and outdoor living.

    For decades, Garmin has pioneered new GPS navigation, advancements with camera solutions, wireless devices and applications that are designed for people who live an active lifestyle. Garmin serves five primary business units, including automotive, aviation, fitness, marine, and outdoor recreation. For more information, visit Garmin’s virtual pressroom at garmin.com/newsroom, contact the Media Relations department at 913-397-8200, or follow us at facebook.com/garmin, twitter.com/garmin, or youtube.com/garmin.

    1See Garmin.com/waterrating.
    2Stabillization is applied using VIRB Mobile app or VIRB Edit desktop software and is only available for videos stitched in camera.
    3Augmented reality overlays require mobile or desktop VIRB app before sharing.
    4Voice control available for English (US, UK), French, Italian, German, Spanish, Swedish, Japanese, and Mandarin.
    5Live streaming only available on compatible Apple devices.
    6See Garmin.com/VIRBcards for compatibility.

    Articles: Digital Photography Review (dpreview.com)