Blog

  • This USB flash drive looks like a miniature Leica M10

    Eager to get your hands on a Leica M10? While the camera itself hasn’t yet started shipping, a smaller, much cheaper rendition of it has appeared online: a 16GB USB flash drive in the shape of a tiny M10. The dongle is made from molded rubber and includes a keyring. Several online retailers are listing the USB drive, including B&H Photo, the Leica Store in Miami, Amazon, and Adorama. The unit is priced at $ 45.

    Via: LeicaRumors

    Articles: Digital Photography Review (dpreview.com)

  • Sandmarc launches Kickstarter for smartphone polarizer and ND-filters

    Sandmarc, a company that is primarily known for its range of GoPro filters among other action camera accessories, is taking its know-how to the smartphone sector. It has launched a crowdfunding campaign on Kickstarter in order to fund final development and mass production of a new smartphone polarizer and a range of ND filters.

    The filters are attached to the phone via a clip holder as it is often used with add-on lenses. The actual filter ring is then screwed onto the holder. Filters are stackable and according to the makers compatible with iPhone 4 and newer, including the dual-camera iPhone 7 Plus. They also work with Android phones, such as the Samsung S8 and S7 models, the Google Pixel or the LG G6. However, looking at the design there is no obvious reason why the clip would not work with most other phones as well.

    Sandmarc calls its polarizer Drama Filter. The kit includes a filter, clip mount and a filter case. The set of ND filters has been christened Scape Filters. Apart from clip and case it includes 2-stop, 3-stop and 4-stop ND-filters. A pledge of $ 25 currently secures you the Drama Filter. For the Scape Filters you’ll have to invest $ 49. Delivery is planned for August 2017. More information including sample shots is available on the Sandmarc Kickstarter page.

    Articles: Digital Photography Review (dpreview.com)

  • Optical Illusion Architecture: These 11 Buildings Are Not What They Seem

    [ By SA Rogers in Architecture & Public & Institutional. ]

    Pinched, warped, rippled, steeply angled and mirrored until they disappear into the sky, these buildings are not quite what they seem at first glance. Sometimes, it takes a nice long look at their outlines and proportions to determine where their facades actually begin and end, and how they can possibly be balanced so precariously.

    Rachel Raymond Mirror House

    In the space once occupied by the historic Rachel Raymond House in Belmont, Massachusetts, a beautiful mirrored illusion rose: ‘Mirror House’ by Pedro Joel Costa Architecture and design, which pays tribute to the original home’s modernism while looking to the future.

    The Dancing House, Prague

    Prague’s ‘Dancing House,’ also known as ‘Fred and Ginger,’ is actually the Nationale-Nederlanden building by architect Vlado Milunic, built in cooperation with Frank Gehry in 1996. One of the dual towers of the building appears to be warped and distorted, as if someone squished it up against the other.

    Australian Customs Service Building, Melbourne

    From most angles, it’s virtually impossible to tell what’s going on with the facade of the Australian Customs Service Building in Melbourne, clad as it is in an unusual graphic black and white pattern. The theme is reportedly repeated inside.

    Pinnacle at Symphony Place, Nashville, Tennessee

    The tall and thin mirrored Pinnacle at Symphony Place almost manages to disappear into the sky altogether when conditions are just right, becoming like a ghostly suggestion of a building instead of something decidedly solid and real.

    Lucid Stead by Phillip K. Smith III, Joshua Tree, California

    Alternating its logs with long stretches of mirror, artist Phillip K. Smith III makes his Joshua Tree installation ‘Lucid Stead’ blend with its environment so effectively it seems to be little more than a few dark brown lines floating in the desert.

    Next Page – Click Below to Read More:
    Optical Illusion Architecture These 11 Buildings Are Not What They Seem

    Share on Facebook


    [ By SA Rogers in Architecture & Public & Institutional. ]

    [ WebUrbanist | Archives | Galleries | Privacy | TOS ]


    WebUrbanist

  • A Quick Exercise to Help You Take Better Self-Portraits

    This article will give you some tips on how to take better self-portraits. That is different than doing a selfie – let’s have a closer look at the issue.

    A Quick Exercise to Help Improve Your Self-Portraits

    Thank you to dPS writer Hannele Luhtasela-el Showk for contributing her self-portrait to the article.

    The selfie – what not to do

    The selfie has become such an important part of our culture. The invention of the selfie-stick shows just how important this phenomenon has become. Everyone is snapping pics and posting them online. Phones make it convenient to share images and show people the events of your day. But I would argue these images barely scratch the surface. They don’t do much more than give people a brief glimpse into how happy you were while visiting the zoo with your children.

    Look back at your Facebook profile. Look at the pictures you’ve uploaded. If you are like the rest of us, I’m willing to bet you’ve filled your profile with images. Superficial images where you are smiling while hiking or maybe you’re shopping with friends. They don’t show much, do they? Sure you’re out having a great time, but there’s more to you than fun isn’t there? These smiling images don’t get at who you truly are. There’s a difference between a selfie and a self-portrait that shows something about you; an image that gets at who you are and tells your story in an intimate way.

    A Quick Exercise to Help Improve Your Self-Portraits

    We’ve all taken one of these images. You know the ones with terrible quality in low lit areas. This is a typical facebook selfie.

    I think this is a pretty typical selfie. We’ve all posted images like this. Even I am guilty. Two happy friends together somewhere.

    Self-portraits – take it up a notch

    So if you’re like me if you’re tired of the superficial smile, then it’s time to think about how you can step up the selfie game and graduate to full-fledged self-portraits. I’ve said it before, and I’ll say it again – good photography needs some forethought. There’s more to quality pictures than using the correct settings. Let’s take a look at a quick exercise you can use to help you create more meaningful, telling and compelling self-portraits.

    A Quick Exercise to Help Improve Your Self-Portraits

    This was shot after 12 hours working outdoors for a photo shoot. I was exhausted and wanted to show the toll my work took on me. Hopefully, I look exhausted.

    Exercise – Discover Treasured Objects

    I’m going to ask you to get out a pen and paper. Sorry, but it’s necessary, and I promise it won’t be too onerous. It’s time to do some brainstorming and soul searching.

    Let’s pinpoint the things that are really important to you. Think about all the physical objects you hold dear. Start by writing without restraint. Jot down the items that quickly come to mind. Try not to evaluate them too harshly. This is about fleshing out ideas. You can use your judgment later to question whether an object should stay on the list.

    If you want to create a list no problem. Or if you’re like me and none of your thoughts are ever linear then maybe an idea web (or word cloud, or a mind map) works better for you, just go for it. Write down your thoughts in the way you are most comfortable. Maybe one of the items you list is a treasured photograph of your grandmother or a plastic beaded necklace a friend gave you. It doesn’t matter just get it down on paper. Try to list at least 10 objects.

    A Quick Exercise to Help Improve Your Self-Portraits

    Thanks to dPS writer and team member Simon Pollock for contributing his self-portrait to the article.

    Here’s my mind map. I struggled to get 10 objects as I’m not someone who has a lot of physical possessions but I will bare my soul to you all.

    Here are my brainstorming efforts.

    Plan photos around your objects

    Now that you’ve got your mind map all worked out it’s time to consider the items you’ve jotted down. How could you incorporate one of these items into a photograph? How will you portray yourself to the world? Use these treasured objects to help you to craft meaningful self-portraits.

    Here’s the image I created after completing this exercise. I hate being in front of the camera so this was a big challenge for me. I spent an afternoon twirling around in my aunt’s deerskin dress. She often used this dress during sunrise ceremonies before she gifted it to me. The dress is an important part of my heritage. I wanted to show the world something about that part of my culture.

    A Quick Exercise to Help Improve Your Self-Portraits

    You don’t have to show your face to create self-portraits. Other details can tell a story.

    This is in contrast to the following image. I created this one with my cell phone. I shot it while sitting on my couch watching TV. Is there a story here? Or is this just a nice picture?

    A Quick Exercise to Help Improve Your Self-Portraits

    Ask yourself this question

    It might help to consider the following question when crafting your self-portrait.

    “How is this portrait I am creating a story, rather than just a visually interesting image?”

    I’m not sure who first asked me that question. It was probably some wise old grizzled photographer with years of knowledge. I wish I could remember. Use this question along with the exercise above to create a meaningful self-portrait.

    You can also make idea maps that show important relationships or meaningful thoughts. Be creative, but try to push your self-portraits past the mundane. You don’t have to shoot portraits with a DSLR you can use your cell phone, but take a few minutes to consider the shot before you push the button. Look at the story you’re telling and leave your mark. Show the world exactly who you are.

    dPS writer Sean McCormack took this self-portrait using a remote trigger.

    A Quick Exercise to Help Improve Your Self-Portraits

    Thanks to Hannele for contributing another image to the collection.

    A Quick Exercise to Help Improve Your Self-Portraits

    A self-portrait can be a silhouette. We don’t always have to see your face. Thanks, Simon for contributing this shot.

    The post A Quick Exercise to Help You Take Better Self-Portraits by Erin Fitzgibbon appeared first on Digital Photography School.


    Digital Photography School

  • Triggertrap open-sources mobile app code

    Following the demise of the company, Triggertrap has first open-sourced the mobile dongle hardware of its innovative remote camera control system. Now it has also published the source code of the accompanying Android and iOS apps on Github. This means there is a good chance the apps will be updated to work with future mobile OS versions and current owners of the Triggertrap hardware will be able to use it for a lot longer.

    Triggertrap founder Haje Jan Kamps said “I am so excited that even if the company doesn’t continue, that the software we made has a chance to live on and survive future iOS updates and changes in Android. Between that, and open-sourcing the hardware component of Triggertrap, I hope that the app is able to continue to help photographers for many years to come.”

    You can read Triggertrap’s full announcement on Medium and download the app code for iOS and Android from Github now.

    Articles: Digital Photography Review (dpreview.com)

  • Warning: Avoid This Scam Targeting Photographers

    Over at All Things Photo, I’ve shared a video detailing a scam targeting photographers selling prints online. Also included in the video are 7 tips to avoid being scammed online. While the video is on the long side it’s worth a listen to protect yourself and learn the limitations of fraud protection with your bank and insurance companies. If you’re driving you can also listen to the podcast recording via the All Things Photo podcast.

    If you haven’t already I welcome you to follow All Things Photo on YouTube, Twitter and Facebook.

    The post Warning: Avoid This Scam Targeting Photographers appeared first on JMG-Galleries – Landscape, Nature & Travel Photography.


    JMG-Galleries – Landscape, Nature & Travel Photography

  • Firmware update improves AF performance of Sigma 100-400mm F5-6.3 DG OS HSM lens for Canon

    Sigma has released new firmware for its 100-400mm F/5-6.3 DG OS HSM lens for Canon mount. According to Sigma, firmware version 1.01 improves the AF performance of the lens. When attached to the Sigma mount converter MC-11 AF performance will be improved as well. In addition the optical image stabilization mechanism can operate at faster speeds.

    As usual, Sigma lens owners with the Sigma USB Dock must first update the Sigma Optimization Pro software to, at minimum, version 1.4.1 (Windows) or version 1.4.0 (Mac) before downloading and installing the new firmware.

    Articles: Digital Photography Review (dpreview.com)

  • Platypod Ultra compact camera support launches on Kickstarter with more features than Pro model

    Platypod, the company behind the compact camera support of the same name, has launched a new product on Kickstarter called Platypod Ultra. This latest model is designed for mid-size and mirrorless cameras, unlike the larger Max model and original Pro model. Ultra is compatible with the majority of pro-tier tripod ball heads, according to Platypod, though the device itself is only about the size of a smartphone, making it ultra-compact.

    Platypod Ultra is thicker (4.6mm vs 4.0mm) and 10% wider than the original Platypod Pro, making it sturdier, according to the company. The Ultra model comes with four spiked, threaded feet with rubber tips on one end, enabling the device to be used at a variety of angles on both rough and smooth surfaces. The Platypod Ultra also features five threaded holes for greater balancing and positioning options.

    The company has also added three new openings to the Ultra plate so that it can be transported on bags using bungie cords or carabiners; there are also three countersunk holes for screwing the plate to a surface, such as a wood post. Finally, the plate also has two belt slots for strapping the tripod to irregularly shaped or vertical surfaces. The company is including a Velcro cinch strap with the kit.

    The company is also launching a multi-accessory kit with accessories for both the Ultra and Max models. This kit includes a non-slip pad, 36-inch cinch strap, 3-inch spigot adapter, and a riser for certain tripod ball heads.

    The Kickstarter campaign has exceeded its funding goal with more than two weeks remaining. The company is offering backers who pledge at least $ 49 a single Ultra unit, while a $ 69 pledge will also include the multi-accessory kit. Shipping to backers is estimated to start this upcoming July.

    Via: Kickstarter

    Articles: Digital Photography Review (dpreview.com)

  • Shiftcam for iPhone 7 Plus review

    The selection of accessory lenses for most iPhone models is pretty overwhelming. However, there is one exception: the iPhone 7 Plus dual-cam with its new 28 and 56mm equivalent lenses makes design and engineering of accessory lens solutions somewhat more complex than on the standard models. As a result, there still aren’t a lot of add-on lenses to choose from. Some time ago we tested the Kamerar attachment which adds more tele reach, macro capability and a fish-eye lens to the 7 Plus camera.

    Now, you can get behind a new option on the Kickstarter crowdfunding platform. The Shiftcam camera lens case offers a similar concept to the Kamerar but aims to take things one step further by adding even more lens options. The current prototype design includes the following three lens pairs that slide over the iPhone’s dual-camera lenses:

    • 120-degree Wide-angle / 2X Telephoto
    • 10X Macro / 20X Macro
    • 180 Degree Fisheye Lens / 2X Telephoto

    The makers of the Shiftcam are currently collecting funds for finalization of the design and mass production on the Shiftcam Kickstarter page, but got ahold of a prototype unit. Read on to find out how it performed in our testing.

    Operation and build quality

    The Shiftcam system consists of two parts: a protective case and the lens module that slides into a guide rail on the case. The module can be removed if you aren’t planning to use the lenses for a while and want to keep them in a safe place. The build quality is a far cry from the premium look and feel of the iPhone, but the Shiftcam’s plastic material feels solid and the design is functional. The lens module moves noticeably smoother than on the Kamerar, but still slots into place with reassurance. A small camera grip allows for comfortable holding and the corrugated surface ensures a safe grip. You can also attach a camera strap.

    As with the Kamerar, it is advisable to use a camera app that allows you to force the camera to use the tele-lens in lower light, such as Camera+ or Manual Camera for example. In dimmer conditions, the iPhone 7 Plus stock camera app will digitally zoom the wide-angle rather than using the telephoto lens, which means the Shiftcam lenses don’t line up properly with the iPhone’s camera modules anymore.

    Image quality

    As you can see in the samples below the add-on lenses only have a minimal impact on color response and exposure. Both wide-angle and fisheye are sharp at the center of the frame but fall off towards the edges. As you would expect, this fall-off is more drastic on the fisheye. Some vignetting is noticeable when photographing bright scenes on the wide-angle but the effect is within acceptable limits.

    Overall the optical quality of the Shiftcam wide-angle and fisheye is not outstanding, but decent for smartphone add-on lenses in this price range. Both lenses are useful for those situations when you want to squeeze more of a scene into your frame.

    iPhone 7 Plus wide-angle, ISO 20, 1/754 sec
    Shiftcam wide-angle, ISO 20, 1/2037 sec
    Shiftcam fisheye, ISO 20, 1/2179 sec

    The Shiftcam comes with two tele lenses, one combined with the wide-angle, the other comes in a pair with the fisheye. The two lenses offer an identical focal length multiplier but having two of them simply means you don’t have to change the position of the Shiftcam lens slider so often.

    However, on our prototype unit the image results of the two tele lenses were quite different. One lens showed a very noticeable softness across the frame while the other was much sharper. If Shiftcam manages to get the optical quality for both tele lenses on the same high level as our second telephoto sample shot below, it offers a great way of getting closer to your subject when shooting with an iPhone.

    iPhone 7 Plus tele lens, ISO 20, 1/2128 sec
    Shiftcam telephoto lens 1, ISO 20, 1/643 sec
    Shiftcam telephoto lens 2, ISO 20, 1/736 sec

    The Shiftcam case also comes with 10x and 20x macro lenses which are located next to each other on the lens slider. The 10x uses the iPhone’s wide-angle lens, the 20x is in front of the tele. Both lenses are capable of producing good sharpness in the focal plane and very useful levels of magnification.

    That said, depth-of-field is minimal and putting the focus where you want it is a real challenge. As you can see in the sample below, shooting handheld I did not quite manage to do so with the 10x lens, despite several attempts. My hit rate with the 20x was better and with the right subject it’s possible to capture very nice macro images. You’ll have to get very close to the subject though, so living creatures might be scared away. You also have to be careful to not shade the scene with your phone.

    Shiftcam 10x Macro, ISO 20, 1/1140 sec
    Shiftcam 20x Macro, ISO 20, 1/479 sec

    Conclusion

    The optical quality of the Shiftcam lenses is pretty much in line with typical add-on lenses in the lower price bracket. The wide-angle and fisheye are fine at the center of the frame but get pretty bad towards the edges. One of the tele lenses is pretty sharp, but the other one on our test unit appears to be slightly misaligned. The macro lenses can produce decent quality if focused correctly.

    However, the Shiftcam’s unique selling proposition is not optical quality but the fact that it combines all those lenses in a very easy-to-use lens case. Switching lenses is really quick and much less fiddly than with individual add-ons or even the Kamerar, which, despite a similar concept to the Shiftcam, uses 2 lens sliders instead just one.

    If you own an iPhone 7 Plus, the Shiftcam is a very affordable and convenient way of experimenting with add-on lenses and expanding the focal range of your built-in camera. Given that we were using a prototype unit, there is also a chance that optical quality will be further improved for production lenses. You’ve still got a few more hours to secure a Shiftcam case by pledging $ 59 on Kickstarter. The Shiftcam makers have also modified the original August shipping date and are now envisaging the first units to ship by the end of June.

    What we like:

    • Easy operation
    • Useful hand grip and good ergonomics
    • Good selection of lenses

    What we don’t like:

    • Strong corner softness on fisheye and wide-angle
    • One of the tele lenses is soft
    • Macro lenses difficult to focus

    Sample gallery

    There are 17 images in our Shiftcam for iPhone 7 Plus samples gallery. Please do not reproduce any of these images on a website or any newsletter / magazine without prior permission (see our copyright page). We make the originals available for private users to download to their own machines for personal examination or printing (in conjunction with this review), we do so in good faith, please don’t abuse it.

    Unless otherwise noted images taken with no particular settings at full resolution.

    $ (document).ready(function() { SampleGalleryV2({“containerId”:”embeddedSampleGallery_4825250164″,”galleryId”:”4825250164″,”isEmbeddedWidget”:true,”standalone”:false,”selectedImageIndex”:0,”startInCommentsView”:false,”isMobile”:false}) });
    Articles: Digital Photography Review (dpreview.com)

  • Photoshop Versus Lightroom: Which is Best for Beginners?

    If you’re new to photography, you’re likely wondering how to post-process or edit your photos. There is a wide selection of photo editing software to choose from, but the two that you probably hear debated the most are Adobe Photoshop versus Lightroom. So what are the main differences and which program is best for beginners and for you? Read on for a basic overview!
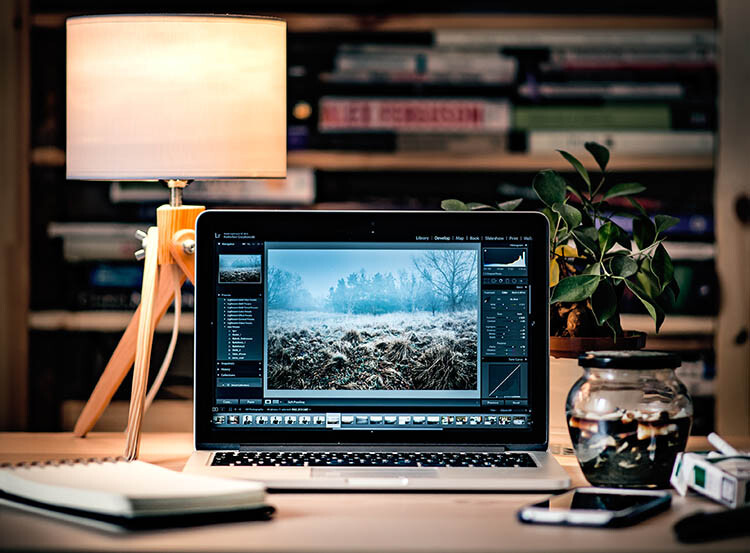
    Photoshop v Lightroom

    A Quick Note

    While going through this article, please keep three points in mind:

    1. This is not meant to be a thorough comparison review of the two programs. There are endless features to compare between Photoshop and Lightroom, but this article is meant to give beginning photographers a point of reference as to which program to start with first.
    2. Ever since the Creative Cloud rolled out, Photoshop and Lightroom are constantly being updated with new tools and features. So depending on which version of the programs you are using, some of the tools and features mentioned below may or may not be present in your version of Photoshop or Lightroom.
    3. There are many other comparisons written several years ago that aren’t up to date don’t reflect the new features and changes in Photoshop and Lightroom. So if you read other comparison articles (including this one), be sure to double check when they were published and if they have been updated. For reference, I have Lightroom CC 2015.10 and Photoshop CC 2017.0.1

    Get both Photoshop and Lightroom here and receive 20% off the Creative Cloud Photography membership now for dPS readers. 

    What is Adobe Photoshop?


    Photoshop Versus Lightroom: Which is Best for Beginners?

    What the photo editing layout typically looks like in Photoshop.

    Photoshop is a name that has become synonymous with photo editing. Today, thanks to its extensive functionality, Photoshop is used by not only photographers, but also by graphic designers, web designers, architects, and publishers.

    Photoshop is also a pixel-based image editor, giving you ultimate control of every single pixel that makes up your digital photograph. This means you have limitless options when it comes to manipulating your photos. Want to stitch your friend’s head to a frog’s body or swap out gray skies for sunny skies? These are instances when you would turn to Photoshop.

    What is Adobe Lightroom?

    If you take a look at the main Photoshop interface for the first time, you’re likely to feel overwhelmed. There is a seemingly endless array of tools and options to choose from, and it’s hard to know where to start. This is because Photoshop contains features not only for photographers but also for designers and those of other creative skillsets. So when it comes to easily finding the photo editing tools you need, this is where Lightroom typically excels, especially for those new to photo editing.

    Lightroom takes many of Photoshop’s features that are specific to photographers and puts them in an easy-to-find panel. Previous versions of Lightroom lacked extensive editing tools, but today, Lightroom contains many of the main image manipulation tools you need to process your photos.

    Another benefit to using Lightroom is that it is also a fantastic image management software. You can use it to import, organize, manage, and edit your photos. In essence, Lightroom is your all-in-one photo management and editing tool. On the other hand, if you want to manage and organize your images with Photoshop, you must use the accompanying software called Adobe Bridge (which automatically comes with Photoshop).

    Photoshop Versus Lightroom: Which is Best for Beginners?

    What you’ll typically see in Lightroom after you import some photos.

    Lightroom versus Photoshop?

    Not long ago, you had to purchase Photoshop or Lightroom individually, and it was truly a challenge to figure out which was a more worthwhile investment. Today, you now get access to both programs if you purchase a subscription to Adobe Creative Cloud. For around $ 10 a month, you can purchase the Photography Creative Cloud package, which gives you access to both Lightroom and Photoshop (with Bridge). If you need other Adobe software such as Illustrator, InDesign or Premiere Pro, you can upgrade to the $ 50 per month Creative Cloud subscription.

    However, the average photographer will be just fine with the simple plan that includes Lightroom and Photoshop. So from a financial perspective, it’s a no-brainer to get both photo editing programs. But in practice, here are some rules of thumb when deciding whether to use Lightroom or Photoshop.

    Use Lightroom if…

    You are brand new to photo editing

    Most beginning photographers will probably prefer the layout of Lightroom. It presents all of your main editing tools in an easy-to-find column, and it is pretty intuitive to figure out. In Photoshop, you have to do a little more customization to set up your workstation exactly how you want; this leads to more flexibility, meaning you can further customize what tools you choose to appear. However, this can be confusing for beginning photographers.

    Photoshop Versus Lightroom: Which is Best for Beginners?

    For comparison: Lightroom automatically presents your basic photo editing tools in a column.

    Photoshop Versus Lightroom: Which is Best for Beginners?

    On the other hand, you have to customize which photo editing tools appear in your Photoshop work area.

    You want to batch process multiple images

    If you have a bunch of photos that you want to batch process, it is much easier to do in Lightroom using presets and its smooth workflow. Batch processing can still be done in Photoshop using Actions, but Lightroom is arguably more straightforward.

     You value a smooth, straightforward workflow

    When it comes to workflow, Lightroom is arguably much better than Photoshop. Using Lightroom, you can easily create image collections, keyword images, share images directly to social media, batch process, and more.

    Photoshop Versus Lightroom: Which is Best for Beginners?

    In Lightroom, you can both organize your photo library and edit photos.

    Adobe Bridge - Photoshop Versus Lightroom: Which is Best for Beginners?

    If you want to organize or manage your photo library with Photoshop, you must use another program called Adobe Bridge.

    Use Photoshop if…

    You can’t do it in Lightroom

    This is the easy answer since Lightroom will truly meet the photo editing needs of most beginning photographers. With that said, there are a few instances in particular when Photoshop will outperform Lightroom.

    Advanced Retouching

    While the latest versions of Lightroom do include some basic retouching tools for patching and removing blemishes, you can do much more in Photoshop. Want to make a person look thinner, whiten teeth, and remove small objects? While you can do this in Lightroom, Photoshop’s retouching tools are much more powerful. It might take some extra time to figure out where these tools are within Photoshop and how to use them, but you’ll be able to enhance your photos much more than in Lightroom.

    Compositing

    Do you want to combine the elements of multiple images into a single one? This is termed as compositing, and you will want to use Photoshop to combine and further manipulate images.

    In Conclusion

    If you are a beginning photographer looking for a relatively intuitive photo editing software, Lightroom is generally best, to begin with. You can always add Photoshop to the mix later, if and when you’re in need of advanced photo manipulation techniques.

    What do you think? In the Photoshop Versus Lightroom debate, which is best for beginners? Why? Let us know in the comments below.

    The post Photoshop Versus Lightroom: Which is Best for Beginners? by Suzi Pratt appeared first on Digital Photography School.


    Digital Photography School