Blog

  • Photo of the week: Shooting the northern lights in Norway

    This image was taken in Skagsanden beach is—my favorite location in the Lofoten Islands—with one of my Lofoten workshop groups earlier this year. The Northern Lights were dancing wildly all over the sky, and I arrived at the beach after having shot another location earlier that night.

    This time around, I decided to try and shoot the Aurora with this beautiful stream and its black & white sand patterns in the foreground. Luckily, the lights were reflecting on the stream, emphasizing those patterns.

    To get the whole scene in the frame, I used the Canon EF 11-24mm F4L, one of my favorite lenses. Even though the lens is only an F4, the Aurora was very bright and there was some moonlight as well, both of which gave me enough light for a decent exposure.

    The final image above was focus stacked from two shots, both taken at 11mm and F4, with my Canon 5D Mark IV set to 8 seconds and ISO3200.


    Erez Marom is a professional nature photographer, photography guide and traveler based in Israel. You can follow Erez’s work on Instagram, Facebook and 500px, and subscribe to his mailing list for updates.

    Articles: Digital Photography Review (dpreview.com)

  • CineStill 50D Film in 120 format goes up for pre-order

    CineStill has launched its 50D film in 120 format, currently offering it for pre-order with an anticipated August 2017 shipping date. The 50D is a color-balanced daylight (5500K) color negative motion picture film; CineStill explains that its ‘Premoval’ process, which is proprietary, enables photographers to safely process the film at home or using standard C-41 chemicals. CineStill first introduced this film in late 2014.

    This fine grain ISO 50/18° speed film is ideal for landscape and portrait photography, according to CineStill, which claims that its 50D product offers ‘unrivaled highlight and shadow latitude.’ The company says this film has been tested to have a shelf life of up to 1.5 years, though buyers are advised to use it within 6 months after purchase; price is $ 11.99 per roll.

    The full list of features as provided on the 50D product page:

    • Color Balanced Daylight (5500K) color negative motion picture film stock for use as still photography film
    • ISO 50/18° in C-41 or ECN-2 Process
    • Factory spooled with self-adhesive labels inside
    • Remjet backing free, resulting in a unique halation effect
    • Unrivaled highlight and shadow latitude
    • Dynamic accurate color rendition
    • High resolution with maximum sharpness
    • Enhanced Scanning Performance
    • Great for portraits and landscapes
    • Recommended to process C-41 without worrying about remjet

    Via: PetaPixel

    Articles: Digital Photography Review (dpreview.com)

  • Rolling shutter explained with simple side-by-side examples

    We hold accurate technical knowledge in pretty high regard around here, which is why this video from YouTube channel SmarterEveryDay was such a pleasant surprise.

    In 7 minutes, engineer Dustin Sandlin does a fantastic job explaining rolling shutter with plenty of useful examples where he simulates the rolling shutter effect using high-speed camera footage and After Effects. In this way, he can actually show you how rolling shutter distortion happens; in fact, he can recreate it perfectly:

    In the example above, he basically recreates what happens in every single frame of a 24fps iPhone video when you’re recording an airplane propeller. As the green line moves down, it scans the prop… but the prop is moving, and so it’s causing this strange distortion known as the ‘rolling shutter effect.’

    In this example, he actually traces the lines as your camera is seeing them over the course of the exposure:

    You will capture different patterns depending on which way the propeller is rotating, but it’s not a guessing game. You can actually visualize it when you slow the footage way down the way Dustin has.

    But he doesn’t stop with propellers (which is where most breakdowns of rolling shutter end), he goes on to show you how this affects cell phone video of all kinds of things. Fidget spinners, a coin spinning on a table top, guitar and mandolin strings, you name it: the rolling shutter effect visualized and simulated/recreated by using high speed footage.

    Definitely check out the full video up top to really see rolling shutter in action. If you’ve always had a hard time conceptualizing how the rolling shutter effect worked, and why it produced the shapes it does, you won’t find a better side-by-side comparison than this.

    And if you like this, definitely check out Dustin’s YouTube channel. This is far from the only interesting, educational and just plain cool thing on SmarterEveryDay.

    Articles: Digital Photography Review (dpreview.com)

  • 3 things that will bug photographers about the Polaroid movie trailer

    If you want more proof that the youth are taking an interest in film photography, you’ll have to travel no farther than your local multiplex this summer. ‘Polaroid’ the film – but not that kind of film – arrives in US theaters this August, and promises plenty of ‘Ring’-style scares and thrills. In fact, it’s produced by the same minds that brought us ‘The Ring’ and ‘The Grudge,’ so you can pretty much guess how things go when a high school student stumbles across an antique Polaroid camera and starts photographing her friends.

    On the surface it looks like your average popcorn-friendly flick, but photographers may have a hard time looking past a few bothersome details we spotted in the trailer. Here they are in no particular order.

    The flash is comically bright and doesn’t do anything

    Is the flash on this camera powered directly by the sun? How has anyone who’s been photographed by this camera retained their eyesight? It’s unbelievably bright. On top of that, it doesn’t even seem to have any effect on the image – the first subject we see photographed looks to be lit only by the tungsten bulb next to her despite a blinding flash that lit up the whole room.

    The screeching flash capacitor

    Not only is it needlessly bright, the flash makes a piercing noise as the capacitor supposedly charges it. An entire studio of professional strobes all re-charging at once wouldn’t make that much noise. It’s way too loud for a small on-camera flash, and should be an obvious clue that demons inhabit this camera.

    The pristine instant film that comes with an antique camera

    This camera came out of a dusty old box with a bunch of film in mint condition? Okay, sure. Maybe possessed Polaroids have a much longer shelf life than the garden-variety stuff. If that’s the case, somebody let the Impossible Project know.

    Be sure to watch the full trailer (if you’ve got the stomach for it) and let us know in the comments if we missed anything.

    Articles: Digital Photography Review (dpreview.com)

  • Lee launches new set of high-end ProGlass IRND filters for stills shooters

    Two years in the making, Lee Filters has just announced that it is bringing its highly-regarded ProGlass IRND cinematography filters to the world of stills photography. The company calls these ‘a new standard’ in ND filters, claiming they are, “remarkably neutral, with almost no color shift and extremely accurate stop values.”

    The high-end filters will be available through the Seven5, 100mm and SW150 systems, and since they block both IR and UV pollution, they should deliver cleaner colors that require far less work in post-production.

    This example, available in interactive form on the Lee website, comes from an unedited RAW file:

    The new line will come in six different strengths: 2-stop, 3-stop, 4-stop, 6-stop, 10-stop, all the way up to an impressive 15-stop filter. And the 6, 10, and 15-stop models each feature additional foam light insulation to ensure there are no light leaks, no matter how long the exposure.

    Shot with a 0.6ND medium grad Shot with a 0.6ND medium grad and the 4.5ND (15-stop) ProGlass IRND

    For more information, and to watch a demo video, visit the Lee Filters website. The ProGlass IRND Filter systems are available to stills shooters today in Seven5, 100mm and SW150 versions for £132.00 ($ 172 USD), £150.00 ($ 195 USD), and £346.00 ($ 450 USD), respectively.

    Press Release

    ProGlass IRND Filters

    Two years in the making, the ProGlass IRND range from LEE Filters sets a new standard in neutral-density filters.

    ProGlass IRND filters were originally designed for the film industry, to meet the exacting needs of the world’s leading cinematographers, and have already been hailed as the best neutral-density filters on the market. Now, they are available to the stills photographer, in sizes to fit the LEE Filters Seven5, 100mm and SW150 systems.

    Advances in coating technology mean that the filters, which are manufactured from 2mm-thick, optically flat glass, are available not only in strengths of two (0.6ND), three (0.9ND), four (1.2ND) and six (1.8ND) stops, but also in ultra-long 10 (3ND) and 15-stop (4.5ND) versions. Not only this, but all filters in the range – whatever their strength – are designed to be free of colour casts, with extremely accurate stop values, ensuring consistency in all shooting conditions and allowing for absolute precision when exposing images. Their neutrality also means less time spent tweaking colour balances in postproduction.

    In addition, filters in the ProGlass IRND range are designed to block both infrared and ultraviolet pollution. As a result, blacks are rendered truly black, whites are clean, and results reveal a crispness that is second to none.

    The 6, 10 and 15-stop versions of the ProGlass IRND filters come with a foam seal to prevent light leaks during long exposures, and should be placed into the filter slot closest to the lens. While the 2, 3, 4 and 6-stop versions do not feature a foam seal, it is still recommended also to place them into the slot closest to the lens.

    All filters in the ProGlass IRND range can be used in conjunction with other filters, including neutral-density grads and the polariser.

    Pricing
    ProGlass IRND Filter (Seven5 System) – £132.00 each (Excl VAT)
    ProGlass IRND Filter (100mm System) – £150.00 each (Excl VAT)
    ProGlass IRND Filter (SW150 System) – £346.00 each (Excl VAT)

    For further information, contact LEE Filters on +44 (0) 1264 366245; sales@leefilters.com; www.leefilters.com

    Articles: Digital Photography Review (dpreview.com)

  • Rebuilding Memories: Meticulous Miniatures by Iraqi Immigrant Ali Alamedy

    [ By SA Rogers in Art & Sculpture & Craft. ]

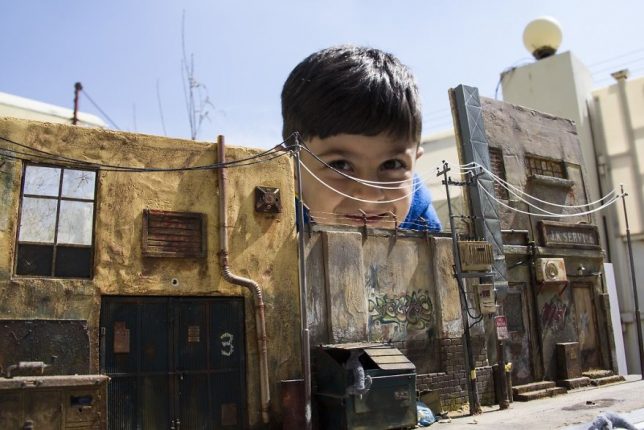
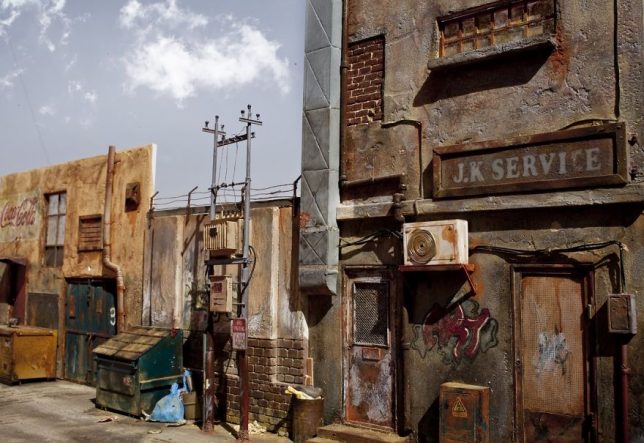
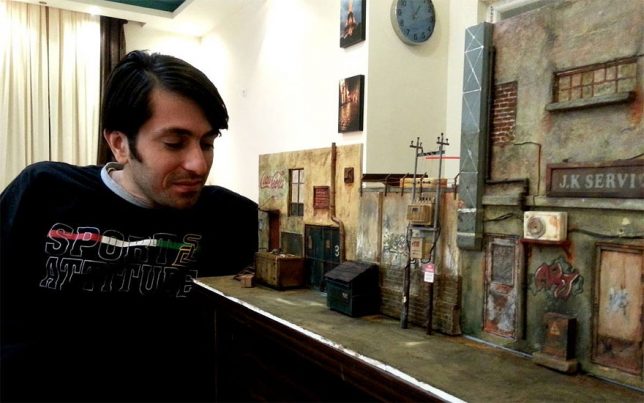
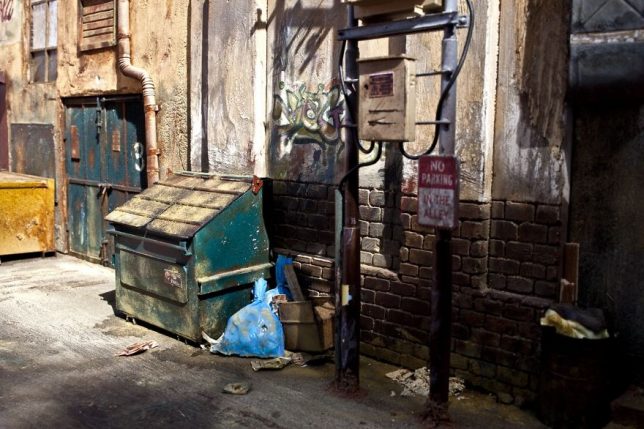
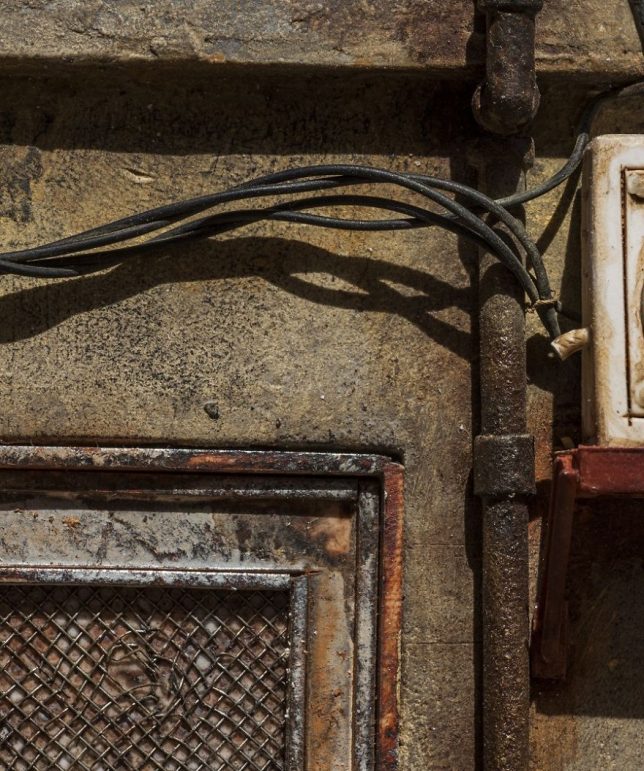
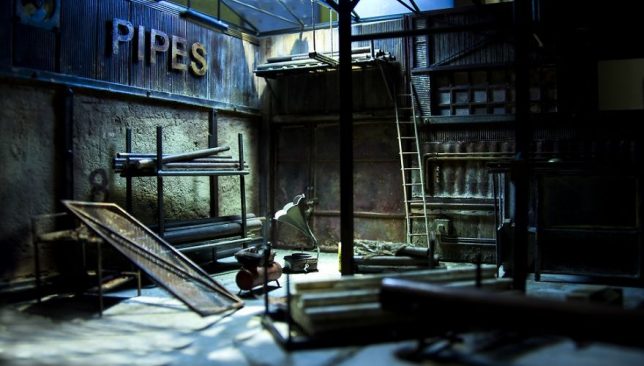
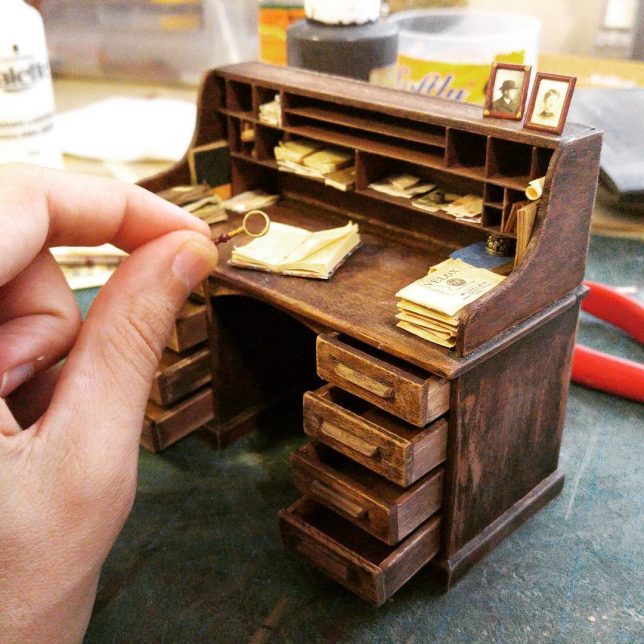
    Born in Karbala during the Iraq-Iran War while his father was imprisioned by Saddam Hussein as a dissident, Ali Alamedy turned to books as a means of escape, wishing he could transport himself into the fictional settings between the pages. Later, as an adult, he began to bring those scenes to life – along with places from his own memories, and recreations of places that only exist in his imagination – in finely rendered miniature. In Arabic, the word ‘miniature’ translates to ‘a small painting on paper,’ so he didn’t find out about the existence of dioramas outside of his own art until he started searching for these words in English on the internet.

    “When a budding artist has a burning desire to create a vignette, they don’t let the lack of building materials stop them,” he writes on Bored Panda. “This was exactly what happened to me when I started to make miniatures. I used any resource I could scrounge: aluminum foil, paper clips, plastic rods, foam board, coffee for weathering, anything that held possibilities.”

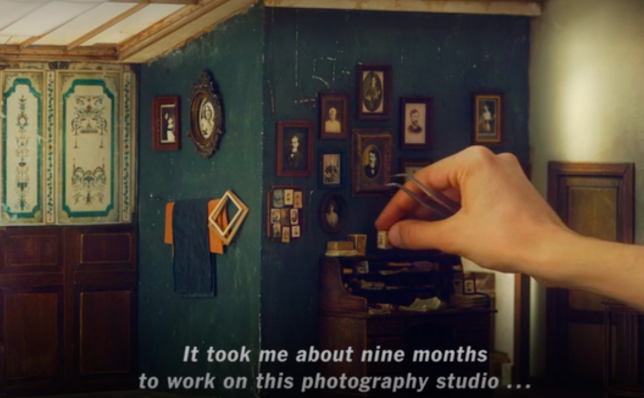
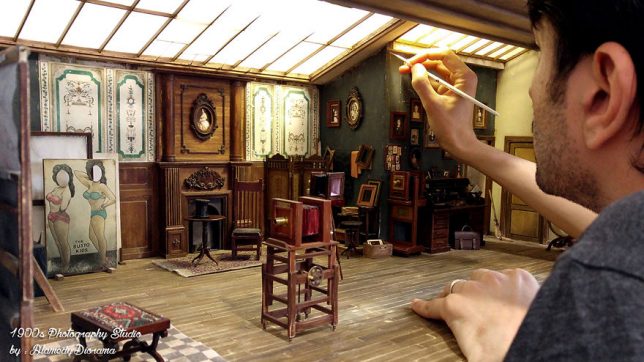
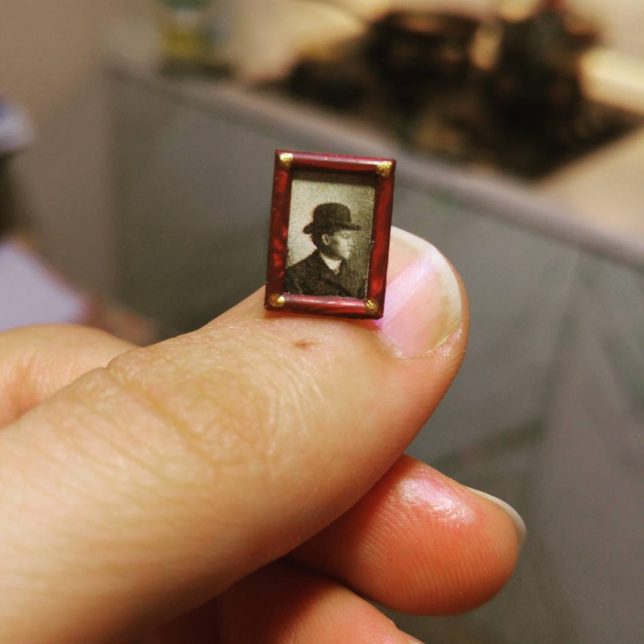
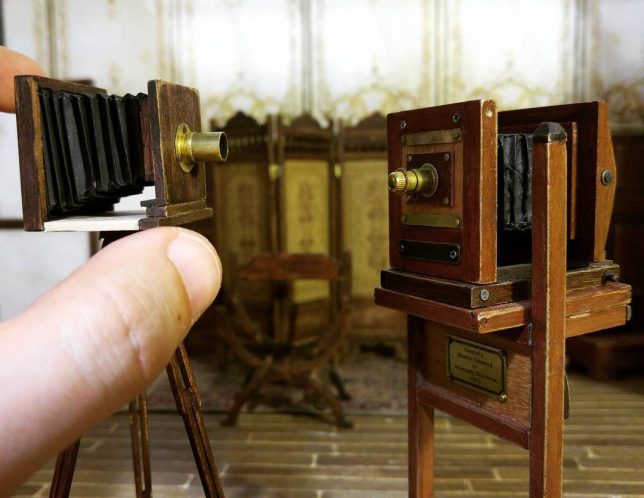
    He began posting his work on Facebook, attracting fans all over the world, and his work has grown more and more meticulous. His largest project to date is the 1900s photo studio he built in honor of an old photographer. He spent 9 months building more than 100 miniature objects from scratch based on historical photographs of real studios, which, he notes, was a particular challenge due to the fact that all the photos were in black and white.

    “The hardest part was how to recall the spirit of such a place in a small scale,” he says.

    The New York Times gets a deeper look into both Alamedy’s work and his past in a new video, and you can see lots more detailed images on his Instagram.

    Share on Facebook


    [ By SA Rogers in Art & Sculpture & Craft. ]

    [ WebUrbanist | Archives | Galleries | Privacy | TOS ]


    WebUrbanist

  • Embracing the Lensbaby Velvet 85’s glow

    I have to admit I was pretty excited when I heard about the newly-announced Lensbaby Velvet 85. When the Velvet 56 was released in 2015, I was convinced that I didn’t know how to shoot with it so I set my expectations low. I ultimately decided it was my 2015 Gear of the Year, largely because it forced me to let go of some of my self-imposed creative and photographic rules and shoot in a different way.

    With the Velvet 85, I already know the potential of the soft glow, balanced by pleasing sharpness at higher apertures when I need the satisfaction of crisp focus. And offering someone who favors longer primes the Velvet effects in an 85mm focal length? Yes, please.

    The obvious thing to do with the Velvet 85 would be to go out and shoot a bunch of velvety soft portraits with lovely compression and smooth bokeh. I didn’t do that. I was in the midst of experimenting with soft focus macros of flowers, so that’s what I shot. And then I took it with me on a street photography photo walk.

    Despite using the Velvet 85 in situations that might not be considered typical for a manual focus creative portrait lens, I like it. Quite a bit. I still struggle with shooting wide open, but just stopping down to F2.0 is enough for me to find a balance between glowing edges and sharpness that I can work with. Using the whole range of apertures gives me an enormous amount of flexibility in shooting everything from ethereal flower petals to detailed freckles sprinkled across a child’s nose.

    If you are still curious about how the Velvet 85 performs as a portrait lens, there are plenty of other photographers who are shooting portraits with it. In fact, Lensbaby partnered with photographer and educator Kevin Kubota to film a new video about shooting portraits with the Velvet 85 and other Lensbaby optics. (Note: You’ll need to register for Lensbaby University — it’s free — in order to watch the whole video.)

    And don’t forget to check out our gallery and let us know what you think. But before you say that you could get the same effect with a filter smeared with Vaseline, know that I tried it. It’s not the same.

    See our Lensbaby Velvet 85 sample gallery

    $ (document).ready(function() { SampleGalleryStripV2({“galleryId”:”0266755850″}) })

    Sample photoSample photoSample photoSample photoSample photo

    Articles: Digital Photography Review (dpreview.com)

  • Tips from a pro: photographing fireworks with John Cornicello

    Photographing fireworks with John Cornicello

    Seattle-based photographer John Cornicello specializes in portraits, but has been photographing fireworks for years. He’s presented a class on it for CreativeLive, and with the Fourth of July weekend upon us, we figured we’d take a look at some of the major takeaways from Cornicello’s class.

    For the nitty gritty details, check out Cornicello’s blog post on the subject here. All images and content used with permission.

    Location

    Once the show starts, you’re not likely to spend much time running around for different vantage points, although this of course depends on the length of said show. If possible, scout in advance, and look for clean views without power lines or trees in the way.

    Scouting in advance is particularly advisable because it’s harder to spot these distractions in the darkness, and if you’re not careful, you can have black silhouettes intruding in your otherwise perfect image.

    Looking for establishing landmarks can give your photos a little more context, to “establish a setting and help tell a story,” Cornicello says.

    Stability

    Most obviously, a tripod is the best tool for the job here. If you don’t have one and can’t get one in time, other options – outdoor furniture, fenceposts, the roof of your car – can all work in a pinch, but you won’t have the flexibility a tripod offers.*

    If you must use those other options, keep in mind you can adjust the height angle of your camera with whatever props you can find to wedge underneath it; a wallet and cell phone combination can be all you need to get your lens up to the correct height.

    If you have the means, a remote trigger can help keep the camera from moving at all from a press of the shutter button. Lastly, since you’ll be focusing near infinity and likely not moving much, it’s best to stabilize your focus by locking it in manual focus if your camera allows that.


    * It’s true that many cameras have extremely effective built-in image stabilizers these days, but few of them are up to multi-second shutter speeds, regardless of whether you’re zoomed out or in. The possible exception may be Olympus’ newer interchangeable lens models, but you’re still likely to get more keepers by stabilizing your camera externally.

    Exposure

    Now this is one that Cornicello says people tend to overthink. As he says, ‘Fireworks are bright!’ You don’t necessarily need to raise your ISO to astronomical levels or have a fast lens to get good results. So let’s switch into ‘Manual’ mode and get everything dialed in.

    Keep your ISO around 100 or 200 and stop down the lens – F8 is a good starting point, though Cornicello notes that displays have been getting brighter, so F11 or F16 may be necessary. Start with a 1/2-second or 1-second shutter speed time, and adjust your shutter speed from there as necessary depending on how many bursts you want to capture in a single image.

    Also, it’s okay to chimp here to check that your settings are working as intended – just don’t get too carried away and miss the whole show.

    And please, if your camera has a built-in flash, make sure it’s disabled. “The flash won’t help with the fireworks… but it will tend to annoy the people around you,” Cornicello says.

    Gear

    You’ll need a camera of some sort; having a full-frame DSLR or high-end mirrorless camera is obviously great, but even an app offering manual control of your smartphone camera will get you some usable images.

    Zoom lenses are great for fireworks, as they let you change up your framing without having to leave your carefully scouted location. And since we’re stopping down, even a kit lens with a basic interchangeable lens camera or fixed-lens camera will work fine.

    Cornicello points out that a zoom lens not only allows you to zoom to change your composition between shots, but you can also experiment with zooming during your exposure; you can also play with the manual focus during your exposure to mix things up further. We’ve touched on this earlier, but if your camera or lens features in-camera stabilization, it’s best to shut it off as they are mostly meant for handheld applications.

    A few other goodies to have on hand? Cornicello recommends a small flashlight to help you change settings in the failing light, as well as extra batteries and a large memory card. Earplugs are, of course, down to personal taste and requirements.

    The wrap

    Photographing fireworks can be a fun way to turn a social outing you were already planning for into a photo outing with relative ease. If you’re new to photography, or just got your first interchangeable lens camera or a pocket camera with manual controls, it’s a great way to experiment and become more comfortable with exposure settings.

    Head on over to John Cornicello’s blog for, in particular, more details on exposure and useful gear to have for the occasion.

    And of course, we mustn’t forget the most important piece of advice Cornicello has to offer: Have fun!

    Do you have any other tips or tricks you use when photographing fireworks? Have some images of your own you’d like to share? Let us know in the comments!

    Articles: Digital Photography Review (dpreview.com)

  • Metal Photo Print Stress Test

    It turns out the Metal Prints we make from your photos over at Parabo Press are just too blessed to be stressed.

    We put them up against water, fire, dirt, feet and A CAR.

    Read along to see who won each match up.

    Or, make a Metal Print of your very own.
    (…)
    Read the rest of Metal Photo Print Stress Test (276 words)


    © laurel for Photojojo, 2017. |
    Permalink |
    No comment |
    Add to
    del.icio.us

    Post tags:

    The post Metal Photo Print Stress Test appeared first on Photojojo.


    Photojojo

  • Sony a9 banding issue: fact or fiction?

    Recently, Jared Polin of Fro Knows Photo released a video showing images shot with the Sony a9 and 70-200mm F2.8 GM lens that displayed visible banding across parts of the image in 2% of his shots from a recent soccer match in Philadelphia.* Here’s what the banding looks like at 100%:

    This is a 100% crop of the Sony a9 banding issues that Jared Polin noticed in a small portion of his shots of sideline players at a recent soccer match. The bands themselves are 84 pixels in height, each composed of 7 12-pixel bands. Read on to understand why those numbers are significant when it comes to explaining the phenomenon.

    Photo: Jared Polin

    Blame the electronic shutter?

    Not so fast. Some commenters were quick to blame artificial stadium lighting, which can of course interfere with electronic shutters. However, the a9’s electronic shutter is no ordinary electronic shutter: it can scan across the entire sensor in a mere 1/160s (proven by our friend, and well-respected forum member, Jim Kasson here). What does that mean? Meanwhile, the a9’s mechanical shutter isn’t actually much faster – it takes 1/300s to sweep across the image plane.** That means that in typical artificial lighting, which tends to flicker at 60 or 120 Hz, the 1/160s shutter rate of the a9 is fast enough that it’ll only ever really see 1 or 1.3 pulses of the flickering light as the sensor is scanned. The a9’s electronic shutter is only one stop away from catching up to mechanical shutters.

    This means that even in the worst artificially-lit scenarios, you might see one large diffuse band across your image at very high shutter speeds (remember: shutter speed determines the intensity of such bands), but generally you’re unlikely to notice if just a quarter of your image happens to have a slight roll-off to a dimmer – or brighter – exposure.

    In other words, in the real-world, artifacts caused by the a9’s electronic shutter are rarely an issue under dominant artificial lighting. Furthermore, in this example the match was being played in a mixture of natural and artificial light, with natural light being dominant.

    So what caused the banding?

    A closer look at the LED advertising boards

    Look closely at the image above at 100%, and you’ll see the larger bands themselves are composed of bands 12-pixels high. 12-pixels… rings a bell. Jim Kasson’s work suggested the a9 reads its sensor out in 12-row chunks, possibly by using 12 parallel ADCs (analog-to-digital converters). That’s how it can scan across its entire full-frame sensor so quickly. This suggests the sensor readout is somehow implicated – but how?

    Take a close look at the LED advertising boards at 100%:

    A shot of the LED advertising boards clearly implicate them as the source of the banding. Each one of those aliased bands are 12 pixels high, and we know from Jim Kasson’s studies that the a9 reads it sensor out in 12-row chunks, using 12 parallel ADCs.

    Photo: Jared Polin

    The one thing common to Jared’s 2% of images is that the players are at least partially lit by the LED advertising boards on the sidelines. Those panels create an image by rapidly pulsing their red, green, and blue LEDs to allow for different colors and brightness, and it’s the first type of light source we’ve seen that has caused the a9 any grief.

    And by rapid switching we do mean rapid. The larger bands are 84 pixels in height, meaning there are about 48 of them across the entire 4000 pixel-high image. Since we know that full sensor readout takes 1/160s, that means those LEDs pulsed 48 cycles in 6.25 milliseconds, or at a frequency of ~7700 Hz.

    Even a mechanical focal plane shutter will experience this kind of banding with a light source cycling 7700 times a second. However, the a9’s banding is worse for two reasons:

    1. A mechanical shutter would take half as much time traversing the image plane, which means half as many bands (probably 24 larger bands would show up in these sorts of images).
    2. The a9’s electronic shutter proceeds in 12-row chunks; a mechanical shutter is more analogous to an electronic shutter proceeding line by line, which would yield smoother bands. Not the more hard-edged, lower frequency (and therefore more readily identifiable) 12-row bands that are visually more distracting than if they had been gradual, single-pixel rows transitioning from one color or brightness to another.

    This is the reason why Fro only sees banding in some of his photos, and why even in those it is limited to certain surfaces. The bands are most prominent wherever the LED boards were lending the most light to the subject.

    Is it a big deal?

    So does this matter? Is it as big a deal as some people are making it out to be?

    That all depends on how often you expect to run into this situation. These types of LED lights are relatively rare—basically only appearing in scoreboards and ad boards of the kind you see at sporting events. And even when they’re present, the board has to be casting a significant amount of light on your subject for it to cause any problems.

    Furthermore, your shutter speed has to be extremely high to make these bands prominent, and even mechanical shutters are likely not entirely immune to some effect from such LED boards.

    Even at an image level, the 84-pixel wide bands can be visually distracting if the LED boards are a dominant source of illumination for your (sideline) subject.

    Photo: Jared Polin

    All those considerations taken together explain why Fro only found banding in about 50 of the 1,905 images he shot.

    If you scrolled down here to the bottom to get the definitive answer to the source and cause of the banding, it’s this: very high frequency (>7000Hz) flickering LEDs combined with the 12-row parallel readout that allows the electronic shutter of the a9 to achieve almost mechanical shutter speeds.

    Granted, as a camera designed (partly) to satisfy the needs of sports photographers, the a9 is probably going to be found shooting in situations with LED signboards around where, after-hours, they might account for a significant portion of light on your sideline subjects. If that describes the situations you’ll be routinely shooting under, and you’re concerned about the 2% banding rate in sideline action, this may be something to add to your ‘cons’ list when considering this camera.


    *Note this is a different sort of banding than the rare striping we investigated in our full review (that results from the masked phase-detection rows of pixels).

    **Compare that to the a7R II’s 1/14s, or the Fuji GFX 50S’ 1/4s, electronic or ‘silent’ shutters.

    Articles: Digital Photography Review (dpreview.com)