Blog

  • The Weekly Photography Challenge – Architecture

    The post The Weekly Photography Challenge – Architecture appeared first on Digital Photography School. It was authored by Sime.

    “Architectural photography is about capturing the design and accurately representing a building, but to also have your photographs be aesthetically pleasing to your viewer’s eye”

    Now I’m no architecture photography, but I know a really good one (Hi Mike!) and love his work, it’s quite amazing, so that, combined with one of your suggestions that we try ‘architecture’ is the reason for this week’s photo challenge theme! #dPSArchitecture

    Don’t have access to some stunning, amazing architecturally designed skyscraper? Photograph your own house/apartment/caravan! Push that creativity and do your best! After this photo I’ve put a glut (is that a collective noun for url’s) of links to articles on dPS that might help!

    The Weekly Photography Challenge – Architecture
    Photo by Anders Jildén on Unsplash

    We have tried this theme before now, but it was a long time ago! Check out what people submitted back then, and here’s a great article on creative architecture photography techniques, could be handy! Perhaps you’re more of a storyteller and you’d prefer a different approach! Go for it! Lastly, here are 6 more ways to try your hand at making architecture photography stand out. That oughta do it!

    The Weekly Photography Challenge – Architecture
    Photo by Maarten Deckers on Unsplash

    Amazing photos above, huh! DO NOT let those put you off, they’re polished and stunning, but they’re there to inspire you to make yours the best it can be!

    Now how to get yours online…

    Great! How do I upload my photos?

    Upload your photo into the comments field (look for the little camera icon in the Disqus comments section below this post) and they’ll get embedded for us all to see. Or, if you’d prefer, upload them to your favourite photo-sharing site and leave the link to them.

    Weekly Photography Challenge – Looking Up

    The post The Weekly Photography Challenge – Architecture appeared first on Digital Photography School. It was authored by Sime.


    Digital Photography School

  • The Best Gear of 2021? TIPA Announces Its Winners

    The post The Best Gear of 2021? TIPA Announces Its Winners appeared first on Digital Photography School. It was authored by Jaymes Dempsey.

    2021 TIPA World Awards

    The Technical Image Press Association (TIPA) has released its 2021 World Awards recipients, celebrating the best cameras, lenses, and other photography gear released over the past year.

    Hailed as the “most coveted photo and imaging awards worldwide,” TIPA aims to “both recognize and honor [photography] industry companies and their products.” Winners are chosen by TIPA member magazine representatives, who vote for class-leading gear across dozens of categories, including Best APS-C Camera (Entry-Level, Advanced, and Expert), Best Tripod, Best Telephoto Zoom Lens, and much more. 

    All the usual suspects took prizes, with Sony grabbing an impressive six awards (including Best Full Frame Professional Camera, Best Photo/Video Camera (Expert), and Best Photo Smartphone). Sigma snagged four awards, Canon and Nikon each snapped up three, while Fujifilm and Tamron took two. 

    Olympus was notably absent for the second year running, but Pentax made the list – thanks to its K-3 Mark III – for the first time since 2015. 

    While the TIPA awards can only reveal so much, this year’s awardees do seem representative of the broader camera world – where Sony, Canon, and Nikon dominate headlines, Olympus and Panasonic cater to a niche audience, and third-party manufacturers such as Tamron and Sigma offer highly respected alternatives to Canon, Sony, and Nikon glass. 

    In fact, out of nine lens awards, six were handed to third-party lens manufacturers. And the trend is hardly new. Last year, six out of eleven lens awards went to third-party manufacturers, and the year prior saw six out of twelve. It highlights the outstanding products offered by “optics-first” companies such as Tamron, Sigma, and Laowa. 

    Below, I’ve included the full list of awards and the corresponding winners. Give it a read – and once you’re done, leave a comment. Did any equipment deserve to be awarded that was skipped? What do you think of TIPA’s picks? Share your thoughts!

    The TIPA World Awards 2021 winners

    • Best APS-C Camera (Entry-Level): Canon EOS M50 Mark II
    • Best APS-C Camera (Advanced): Fujifilm X-S10
    • Best APS-C Camera (Expert): Pentax K-3 Mark III
    • Best Full Frame Camera (Advanced): Nikon Z6 II
    • Best Full Frame Camera (Expert): Nikon Z7 II
    • Best Full Frame Professional Camera: Sony a1
    • Best Photo/Video Camera (Advanced): Sigma fp L
    • Best Photo/Video Camera (Expert): Sony a7S III
    • Best Medium Format Camera: Fujifilm GFX 100s
    • Best Prime Wide Angle Lens: Laowa 15mm f/4.5 Zero-D Shift
    • Best Prime Standard Lens: Sony FE 50mm f/1.2 GM
    • Best Prime Telephoto Lens: Canon RF 600mm f/11 IS STM
    • Best Wide Angle Zoom Lens: Nikon Nikkor Z 14-24mm f/2.8 S
    • Best Standard Zoom Lens: Tamron 17-70mm f/2.8 Di III-A VC RXD
    • Best Telephoto Zoom Lens: Tamron 70-180mm f/2.8 Di III VXD
    • Best Ultra-Telephoto Zoom Lens: Sigma 100-400mm f/5-6.3 DG DN OS | Contemporary
    • Best Portrait Lens: Sigma 85mm f/1.4 DG DN | Art
    • Best Macro Lens: Sigma 105mm f/2.8 DG DN Macro | Art
    • Best Vlogger Camera: Sony ZV-1
    • Best Professional Video Camera: Panasonic Lumix DC-BGH1
    • Best Fine Art Printing Solution: Hahnemühle Print – Protect – Authenticate Product Range
    • Best Photo Printer: Canon imagePROGRAF PRO-300
    • Best Imaging Software Expert: Zoner Photo Studio X
    • Best Imaging Software Professional: DxO PhotoLab 4
    • Best Lighting Technology: Profoto AirX
    • Best Portable Flash: Godox Pocket Flash AD100Pro
    • Best Tripod: Vanguard VEO 3GO series
    • Best Tripod Head: Gitzo Ball Head Series 4
    • Best Gimbal System: Manfrotto Fast Gimboom and Gimbal series
    • Best Enthusiast Photo Monitor: ViewSonic VP2768a
    • Best Professional Photo Monitor: LG UltraWide Thunderbolt 4
    • Best Professional Video Monitor: LG UltraFine OLED Pro
    • Best Photo Smartphone: Sony Xperia 1 III
    • Best Power Accessory: NITECORE SCL10 2-in-1 Smart Camera Light & Power Bank
    • Best Video Accessory: RØDE Wireless GO II
    • Best Photo Accessory: Hoya PROND GRAD Circular Graduated ND Filters
    • Best Retail Finishing System: CEWE Photocenter
    • Best Photo Lab: WhiteWall Room View
    • Best Photo Service: CEWE Photo Calendar A2 Gold Edition
    • Best Imaging Computer: Asus ZenBook Pro Duo 15

    The post The Best Gear of 2021? TIPA Announces Its Winners appeared first on Digital Photography School. It was authored by Jaymes Dempsey.


    Digital Photography School

  • Slideshow: The best entries so far for the 2021 Comedy Wildlife Awards

    The best entries so far for the 2021 Comedy Wildlife Awards

    Now in its 7th year, the annual Comedy Wildlife Awards showcases some of the funniest wildlife moments caught on camera. Here are some of the best entries, out of thousands submitted from around the world, so far, that the judges and organizers felt the urge to share with the public.

    ‘A lot of wildlife shown in these images are facing threats to their populations and habitats that are heart-breaking. With this competition, we wanted to capture people’s attention and energy by giving them a giggle. In order to protect animals, we need people to fall in love with them. We think these wondrous shots show a side of wildlife that we don’t often get to see. They remind us of the beauty, and comedy, in our natural world that needs protecting,’ says Tom Sullam, the competition’s co-founder.

    You still have six more weeks to enter the 2021 Comedy Wildlife Awards. Photographers are allowed to submit up to 10 images. The grand prize includes a safari to Maasai Mara in Kenya. 10% of the competition’s total net revenue will be donated to the Save Wild Orangutans charity.

    Entry: ‘Bald Eagle Gets a Surprise’ by Arthur Trevino

    Location: Hygiene, CO

    Animal Description: Bald Eagle & Prairie Dog

    Artist Description: When this Bald Eagle missed on its attempt to grab this prairie dog, the prairie dog jumped towards the eagle and startled it long enough to escape to a nearby burrow. A real David vs Goliath story!

    Entry: ‘Monday Morning Mood’ by Andrew Mayes

    Location: Rietvlei Nature Reserve, South Africa

    Animal Description: Pied Starling

    Arist Description: I took this shot while photographing a group of Pied starlings perched in a tree at the Rietvlei Nature Reserve in South Africa. It perfectly sums up my mood on most Monday mornings 🙂

    Entry: ‘ROFL’ by Giovanni Querzani

    Location: Serengeti National Park, Tanzania

    Animal Description: Young Lion

    Artist Description: A young lion in the Serengeti National Park, Tanzania, who apparently is laughing at my photography skills.

    Entry: ‘Quarantine Life’ by Kevin Biskaborn

    Location: South Western Ontario, Canada

    Animal Description: Raccoon

    Artist Description: Isolated inside with your family eager to get out and explore the world? These eastern raccoon kits are too. Just when you think there’s no more room in the tree hollow, mother raccoon appears and displays just how compact the space is. The babies clambered all over their mom and each another, struggling to take a look at the exact same time.

    This photo was taken in Southwestern Ontario, Canada. After exploring a particular area with numerous tree hallows, I identified it as a hot spot for raccoon families. Since raccoons will move from den to den, often not spending more than one night at a time in a particular den, locating an area with numerous options is key to locating the animals.

    I stumbled across this family and immediately worked on leveling the camera with the hole to prevent an upward angle. When the camera and tripod were ready, the baby raccoons were extremely curious (and cooperative), sticking their heads out for a closer look!

    Entry: ‘Yoga Bittern’ by KT Wong

    Location: Satay By The Bay, Singapore

    Animal Description: Yellow Bittern

    Artist Description: A Yellow Bittern was trying very hard to get into a comfortable hunting position. I got this shot when it was between 2 stalks of lotus flower.

    Entry: ‘Missed!’ by Lea Scaddan

    Location: Perth, Australia

    Animal Description: Western Grey Kangaroo

    Artist Description: Two Western Grey Kangaroos were fighting and one missed kicking him in the stomach.

    Entry: ‘Yay – It’s Friday!’ by Lucy Beveridge

    Location: Kgalagadi Transfrontier Park, South Africa

    Animal Description: Springbok

    Artist Description: A young springbok, all ears and spindly legs, caught in midair while pronking as the sun started to rise over the Kgalagadi Transfrontier Park. There’s not much information on why the Springbok pronk but some theories suggest it is a way of showing fitness and strength to ward off predators and attract mates. It has also been said that this small, dainty and largely unappreciated antelope also pronks out of excitement, jumping for joy!

    Entry: ‘Sweet Lips Are For Kissing’ by Philipp Stahr

    Location: Curaçao, Dutch Caribbean

    Animal Description: Boxfish

    Artist Description: This picture was taken at Curaçao, Dutch Caribbean. Usually box fishes are difficult to take pictures of, since they do not have a problem of a diver coming close, but if you show interest, they always turn the back and not the face to you. That’s why I tried to swim 0.5m above the fish and showing no interest at all to him.

    The same time I had my camera not in front of me, but below at my chest pointing to the bottom. When the right moment had come, I turned the camera 90 degrees to the front and just point and shoot, hoping to have the fish in focus. Never expected to have its beautiful lips that close!

    Entry: ‘Cranky Hippo’ by Rohin Bakshi

    Location: Vwaza Game Reserve, Malawi

    Animal Description: Hippo

    Artist Description: The baby hippo wanted his mother’s attention, but it seems he wasn’t getting any.

    Entry: ‘Happy’ by Tom Svensson

    Location: Falklands

    Animal Description: Penguin

    Artist Description: These penguins was surfing on the waves on to land and looked so happy each time.

    Entry: ‘Houston – We’ve Got a Problem!’ by Txema Garcia Laseca

    Location: Pantanal (Brazil)

    Animal: Amazon Kingfisher

    Artist Description: This fish is astonished when has been trapped for a fisher bird.

    Articles: Digital Photography Review (dpreview.com)

  • iPhone Live Photos: A Comprehensive Guide

    The post iPhone Live Photos: A Comprehensive Guide appeared first on Digital Photography School. It was authored by Simon Ringsmuth.

    iPhone Live Photos a comprehensive guide

    Baked into every iPhone is a neat trick – one that combines the serendipity of photos with the magic of video to produce a Live Photo. These aren’t the same as normal photos, but they’re not exactly videos, either.

    Live Photos are images that can be edited, adjusted, and shared just like any other image. But they are also tiny video clips: each contains three seconds of video showing a brief moment right before, during, and after you take the picture.

    To learn more about Live Photos, including how to use and edit them, keep reading!

    What are iPhone Live Photos?

    First introduced in the iPhone 6s, Live Photos are a great way to add a bit of context to your iPhone pictures.

    Instead of just taking a picture of your kids, you capture the photo – but you also get a brief clip of them running and laughing. Rather than photographing only a flower, your iPhone captures the flower, but it also displays the wind, moving insects, and background noise. A snapshot of your friend holding a freshly caught fish becomes a short clip where you can see the fish wiggling and flopping free.

    These short bits of video might not sound like much, but they can go a long way toward bringing a still scene to life. A simple Live Photo can trigger emotions and memories years later that you never knew you wanted to save. The best part about Live Photos is that you don’t have to do anything to create or view them – they’re captured automatically by your iPhone unless you turn the option off manually.

    That said, despite the prevalence of Live Photos, there’s still a great deal of confusion among iPhone users. For instance, how do you use Live Photos? How do you edit and share them? What are their benefits and drawbacks? That’s what I aim to cover in the rest of this article.

    iPhone Live Photos kids frozen lake
    I shot this as a Live Photo on my iPhone, so I get a bit of motion to go along with the still image.

    How to use Live Photos

    As with a lot of things in the Apple ecosystem, using Live Photos requires almost zero effort. Any time the camera interface is open, there is an icon in the top-right corner that looks like three concentric circles (pictured below). If there is a line through the icon, Live Photos is turned off. If there is no line, it means Live Photos is enabled. Tap the icon to switch between On and Off.

    activating the Live Photos feature
    Tap the concentric circle icon in the top-right corner to enable or disable Live Photos.

    When Live Photos is enabled, you don’t have to do anything different when you take a picture. Any time you press the shutter button, your iPhone automatically captures the picture and a bit of video. It’s almost like a short animation, or like a moving picture you might see in one of the Harry Potter movies.

    If you don’t want to toggle the Live Photos setting every time, navigate to Settings and then choose Camera>Preserve Settings. If you have Live Photo checked, the camera app will remember whether you had Live Photos enabled or disabled the last time you used it. That way you won’t have to click the Live Photos icon every single time you want to take a picture – it will be enabled or disabled depending on your previous settings.

    iPhone Live Photos preserve settings
    To make your iPhone remember whether you had Live Photos turned on or off, toggle the Preserve Settings>Live Photo option.

    Once the Live Photos setting is enabled, all you have to do is snap a picture and your phone takes care of the rest. There are no parameters to tweak, no options to configure, and no changes from one iPhone to the next. Every time you take a picture, your phone automatically saves a Live Photo.

    What can you do with Live Photos?

    Apple cofounder Steve Jobs once said that people don’t know what they want until you give it to them. Live Photos are kind of like that, in that they give you a tiny glimpse into the context of your images.

    People take pictures with their phones every day, but those images are devoid of the audiovisual context that Live Photos provide. Live Photos aren’t life-altering or world-changing, but the few seconds of video alongside each photo is so nice that it’s hard to give up once you’re used to it.

    In fact, the real benefit of Live Photos isn’t readily apparent until you start scrolling back through images from months or years ago. You see a picture of a parent, child, or loved one – and you suddenly realize you also have a few seconds of their voice and past life. That’s when Live Photos become indispensable.

    Personally, I don’t find Live Photos to be particularly useful for landscapes, animals, or everyday objects, but it’s those images of the people in my life that make me glad to have Live Photos as an option.

    kids looking in a box
    I didn’t remember what was going on in this picture of my relatives from several years ago. But since it was a Live Photo, all I had to do was tap and hold. Turns out they were caring for a small animal.

    How to view Live Photos

    While taking Live Photos is easy, viewing them can be a bit confusing. As you scroll through your photo library, there aren’t any indicators that separate Live Photos from normal photos. And when you tap on a Live Photo, all you see is a still image.

    Viewing a Live Photo sent by someone else can be tricky, too, because it looks like any other picture.

    iPhone photo library
    When scrolling through your iPhone photo library, there isn’t any way to automatically distinguish Live Photos from normal photos.

    The key to viewing Live Photos lies in the key to operating your phone: You have to use your fingers. So to view a Live Photo, whether in your own photo library or one sent to you in a text message, you have to press and hold. The pressure will activate the Live function and start playing the video.

    (Note: If you are viewing Live Photos on a Mac computer in the Messages or Photos apps, you have to click and hold on with the mouse cursor.)

    Viewing Live Photos is one thing, but what about finding them in the first place? With scant visual clues to separate Live Photos from normal images, locating them can be confusing. Fortunately, you can use the Media Type option in your iPhone photo library to show all Live Photos; this eliminates the need to scroll through all your images in the hopes of randomly stumbling across a Live Photo.

    iPhone Live Photos albums
    Open the Photos app on your iPhone, then tap Albums. Finally, scroll down to Media Types to see all your Live Photos.

    There are also a few hints embedded in every Live Photo to help you know what you’re looking at: Every Live Photo has the word “Live” in the top-left corner, along with the Live Photos bullseye icon. And when you receive a Live Photo over text message, you won’t see the word “Live” – but you will see the Live Photos icon, which means you can tap and hold to view the clip.

    How to edit Live Photos

    One of the most compelling features of Live Photos is how they can be edited and tweaked just like any other image.

    You can use the iPhone Photos app to crop, adjust color, change brightness, add a vignette, and even use filters such as Mono, Silvertone, Dramatic, and more.

    You can also change the Key Photo – the image that shows up when you first view a Live Photo (before video playback begins).

    editing a Live Photo
    When editing a Live Photo, you can tap and drag the horizontal bar at the bottom of the screen to change the displayed still photo (also known as the Key Photo).

    I’m a fan of Live Photo editing capabilities; they reinforce the idea that Live Photos aren’t to be treated differently from any other picture. Editing prohibitions or restrictions would be a big drawback – but at present, the only thing you can’t do with a Live Photo is use markup effects to draw on it.

    (If you do want to add markup, the Live Photo is discarded and you’re left with a still image. It’s not necessarily a bad tradeoff, just something to keep in mind.)

    Apple also gives you some fun ways to edit your Live Photos that go beyond what you can do with normal images. When viewing a Live Photo, you can tap the Share button to save it as a movie, which can then be sent to anyone for viewing on any device – iPhone, Windows computer, etc. You can tweak things even further with some fun effects, too.

    For instance, tap and hold on a Live Photo, then – without letting go – swipe upward. This brings up an Effects menu, where you can make a Live Photo loop, bounce back and forth from the end to the beginning, or create a long exposure that blurs all the frames together. These can be shared like other Live Photos, exported as movie files, or uploaded to websites like Giphy.com, which can turn the content into animated GIFs.

    Live Photo separated into HEIC and MOV files
    If you sync your pictures to iCloud then download a Live Photo to your computer, you get two files: a still image and a movie, which is the Live Photo.

    If you have your iPhone pictures synced to your Mac via iCloud, you can even separate a Live Photo into its component parts: a single HEIC image file and a QuickTime movie file. (HEIC files are similar to JPEG files, but they offer more color information and better compression.) You can then edit and share each file individually, or you can use software such as iMovie or Adobe Premiere to stitch multiple Live Photo QuickTime movies into a single video.

    Drawbacks to Live Photos

    There are a few caveats to keep in mind when using Live Photos.

    For one, while Live Photos are a great way to add a bit of context to your memories, they do take up more storage space than traditional photos. The exact file size varies, but Live Photos are generally about twice as large as normal photos. Even if you have 256 GB or 512 GB of storage space, Live Photos can eat through this pretty quickly.

    That’s not to say you shouldn’t take Live Photos; just be aware of your storage limitations.

    iPhone storage
    If you find yourself running low on iPhone storage, it’s possible that Live Photos are part of the problem.

    Also, Live Photos exist only within the Apple ecosystem. Other Apple users can see the entire three-second clip – but if you send a Live Photo to an Android user, they’ll only receive a single JPEG image. There is a process you can use to export a Live Photo as a movie clip or animated GIF file, but those extra steps are an obvious inconvenience.

    And Live Photos offer no customization options, which might bother folks who enjoy tweaking things to fit their own preferences. Every Live Photo is exactly 3 seconds – no more, no less. Every Live Photo is also shot at the same resolution and quality settings, and these limits can be somewhat frustrating. It would be nice if Apple had the option to shoot longer Live Photos, but I wouldn’t count on that changing anytime soon.

    iPhone Live Photos kids tennis
    This still image turned out great. But what if I had just a few seconds of him swinging at the tennis ball? Thanks to Live Photos, I do. Once you start using Live Photos, you might never want to go back to still images.

    iPhone Live Photos: final words

    Live Photos are a great way to get more enjoyment out of everyday images.

    While drawbacks exist, the benefits mostly outweigh the negatives – and it can be incredibly rewarding to look back on these brief video snippets years later. You will find yourself enjoying your images in a whole new way, and the creative sharing options might open up new doors you never knew existed.

    Now over to you:

    What do you think of iPhone Live Photos? Do you plan to use them often? Do you prefer them to still images? Share your thoughts in the comments below!

    iPhone Live Photos kids frozen lake

    Live Photos FAQ

    How do I turn on Live Photos?

    With your camera app open, tap the little bullseye icon in the top-right corner. If the icon is yellow, then Live Photos are enabled. If the icon is white, Live Photos are disabled.

    How much storage space do Live Photos use?

    As a rule of thumb, Live Photos are about twice the size of a normal image. Most Live Photos are about 6-7 MB in size, though this varies depending on the subject you’re shooting.

    How do I share a Live Photo to an Android phone?

    When you tap the Share button, use the “Save as Video” option. This will convert your Live Photo into a movie file, which you can send to an Android phone (or share with someone who uses a Windows computer).

    How can I turn a Live Photo into an animated GIF?

    Your iPhone can’t do this by itself, but you can save a Live Photo as a movie and then upload the movie to a GIF website such as Giphy. The GIF website will convert your movie into an animated GIF, which you can share with others.

    The post iPhone Live Photos: A Comprehensive Guide appeared first on Digital Photography School. It was authored by Simon Ringsmuth.


    Digital Photography School

  • Sony releases stunning wide-angle footage shot on its upcoming Airpeak drone

    Sony first announced its official entry into the drone sector early this year at the Consumer Electronics Show (CES). Though there still aren’t solid details on a release date or pricing for its Airpeak drone, the company recently unveiled some stunning wide-angle footage captured over Okinawa, Japan’s, remote island called Irimote. Besides the scenery, the video also showcases the Airpeak drone in action carrying both Sony’s a7S III and FX3 cameras.

    What’s revealed, as well, is how the drone is able to carry a payload that includes their new 14mm F1.8 GM lens. Although rather large in size for a drone, Sony claims that the Airpeak is the smallest model available that is able to carry its Alpha line of cameras. For comparison’s sake, Freefly Systems has been working on its Astro drone, which is compatible with Sony’s a7R IV camera, but hasn’t been released yet.

    One issue pointed out about the Airpeak is that it is a quadcopter. For comparison’s sake, DJI’s Matrice 600 is a hexacopter. If one rotor fails on the Matrice 600, the drone will still remain airborne. That’s not the case with a quadcopter, and Sony camera’s aren’t exactly cheap. We can also see from the latest video that two batteries are needed to power the drone. This is a typical failsafe, also found in DJI’s Inspire 2, should one battery fail during flight.

    Much like a drone of its class, the Airpeak also has an additional front-facing pilot’s camera as well as obstacle avoidance sensors on the front and back of the aircraft. There aren’t any sideways sensors but unlike a DJI Phantom or Mavic series drone, which is constrained by a 3-axis gimbal that only tilts up and down, the AirPeak doesn’t need those additional sensors since it only needs to fly forwards or backwards since the camera can also rotate from side to side.

    It also looks as though Sony hasn’t created a gimbal for the Airpeak yet. Instead, the Gremsy T3V3 3-axis camera stabilizer is attached. It is unclear whether or not Sony will develop their own gimbal. The remote is clearly made by Sony, since the branding is there, and a tablet is attached – suggesting, for now, that a built-in screen won’t be available.

    The software being used to power the drone is built on Mapbox, which also powers self-driving cars. What this means is that Airpeak users will be able to pre-plan flights.

    This isn’t the first teaser video Sony has released for its Airpeak drone. Sony also introduced a VISION-S concept car at CES. The Airpeak was featured in the video, above, where you can see its landing gear extensions retract upward, after takeoff, to give a fuller field of view for the camera. Wind resistance is another pain point for drone users. Sony recently created a wind tunnel to illustrate how well the Airpeak handles gusts up to 45 mph.

    As mentioned above, a definitive release date and price point has yet to be announced. Sony is still looking for professional drone videographers and photographers, its target audience, to test out the Airpeak. You must be located in the United States or Japan to participate at this time.

    Articles: Digital Photography Review (dpreview.com)

  • How to Make a Photoshop Collage (in 9 Simple Steps)

    The post How to Make a Photoshop Collage (in 9 Simple Steps) appeared first on Digital Photography School. It was authored by Natalia Robert.

    how to make a Photoshop collage

    Looking to make a collage in Photoshop? You’ve come to the right place.

    In this article, I’m going to give you an easy, step-by-step process for creating a stunning collage – one that looks like this:

    final collage

    (It’s a perfect way to share photos from an event, a real-estate shoot, or even a family photo session!)

    Let’s get started.

    Step 1: Choose your collage photos

    Before you actually create the collage, you’ll need to pick your collage photos – and you’ll need to do this carefully.

    I recommend selecting images connected by a theme (such as a location, an event, or even a concept). Include a mix of subjects at different scales; for instance, pick some wide shots that show the entire scene, as well as some detail photos that show lots of texture and personality. Without one or the other, the story won’t be complete. And it won’t carry the level of emotion that you’re after.

    Speaking of storytelling: It often does help to focus on the story you’re trying to tell. Do you want to offer a narrative surrounding an event? Do you want to clearly convey a meaningful concept? Make sure to take this into account when picking photos!

    One more tip: If possible, include at least three photos and no more than eight. Too few photos, and you won’t be able to tell the full story. Too many photos, and you’ll confuse the viewer with clutter (plus, it’ll be tough to show off individual details).

    Step 2: Open the selected images in Photoshop

    Once you’ve picked your photos, open them all in Photoshop.

    To do this, you can drag and drop files directly onto the document window, or you can select File>Open and click on the relevant images.

    opening your images

    You should see the photos as separate tabs in the document window, like this:

    the collage images open in Photoshop

    Step 3: Create a new file for your Photoshop collage

    Every Photoshop collage needs a background file where all the images will eventually be assembled.

    While you can use an old collage template, if you’re making your first-ever collage, you’ll need to create a new document.

    So select File>New in the Menu bar (or tap Ctrl/Cmd+N):

    creating a new file

    A New Document window should pop up, and you’ll need to dial in your file preferences.

    selecting dimensions for your new file

    The specifics will depend on what you plan to do with the collage as well as the sizes of your chosen photos. If you’re working with big JPEGs and you aim to print, you should probably pick a 5000+ pixel width and height. If you want to display your collage on a standard web page, however, a 1500 pixel width and height will do just fine (though you can always start big and resize later, as discussed in Step 8 below).

    (I do recommend you make the file size a bit larger than the size you want in the end; that way, you can do a final crop to deal with any arrangement issues.)

    Step 3: Add your images one at a time

    Head to your first open photo, then select it.

    To do this, you can drag with the Marquee tool:

    marquee tool how to make a Photoshop collage

    Or you can hit Ctrl/Cmd+A. You should see the marching ants around the border of your image:

    selected image

    Then choose Edit>Copy (or tap Ctrl/Cmd+C):

    copying an image

    Finally, head over to the new document, then choose Edit>Paste (or tap Ctrl/Cmd+V):

    pasting an image

    This will add the photo to the blank document, but on its own layer.

    Depending on the size and resolution of the new image, you may need to make some adjustments with Edit>Free Transform (or Ctrl/Cmd+T). For instance, my first photo was way too large:

    a too-large photo how to make a Photoshop collage

    So I used the Free Transform option to scale it down:

    using Free Transform

    (Once you’ve activated Free Transform, simply drag the edge nodes until you get the result you’re after. You want an image that’s small enough to be comfortably moved around the canvas.)

    Then repeat the above instructions for all the remaining collage photos.

    Step 4: Arrange your photos

    After you’ve added all the collage photos to your document, it’s time to do some arranging. This is where you shift the photos around until they tell your story.

    After doing several collages, you’ll start to discover your preferred style; personally, I like to create symmetrical layouts as well as interlocking puzzles. But each story does have slightly different needs, so don’t be afraid to experiment!

    To adjust the photo positions, you can select the Move tool (or tap V):

    the Move tool

    Then drag around all the images until you get a good result. If you’d like to resize any photos, use the Free Transform option discussed above.

    With my pet collage example, I first tried a more symmetrical arrangement:

    one version of the pet collage in Photoshop

    But I settled on a puzzle-type composition:

    another version of the pet collage in Photoshop

    Step 5: Add image spacing

    Once you’ve determined the layout and you’ve sized all the images, I recommend giving the design some space. It’s personal preference, but the effect is generally nice.

    In other words, instead of a collage like this:

    collage without spacing

    You want one like this:

    collage with spacing

    It’s pretty easy to do; you simply create a thin, white border between the images. You can select each photo, then use the mouse or arrow keys to drag until you see white space. Or you can double-click on each image in the Layers panel:

    selecting an image in the Layers panel

    This will open the Layer Style menu, where you can select the Stroke option:

    selecting Stroke

    Make sure the Position is set to Inside, the Blend Mode is set to Normal, and the color is set to White:

    adjusting the Stroke settings

    Then increase the Size until you see a nice border appearing around your images.

    changing the Stroke size

    Unfortunately, this will crop the images somewhat – but depending on the look you like, it might be worth it.

    Step 6: Merge all layers

    At this point, you should have your collage laid out with perfect photo spacing.

    Which means you’re ready to merge all the layers.

    Simply select Layer>Merge Visible (or tap Ctrl/Cmd+Shift+E):

    merging visible layers how to make a Photoshop collage

    And the layers will merge into a single beautiful Photoshop collage!

    Step 7: Crop the final image

    Before you resize and export your collage, I recommend cropping any extra white space around the edges (you want the design to look even).

    Just hit C or select the Crop tool:

    selecting the Crop tool

    Then drag at the edges of the photo to get rid of any unwanted areas:

    cropping away unwanted space

    Step 8: Resize

    This step depends on your goals for the collage. If you want to print, you’ll need to resize based on printing requirements (which will generally involve leaving the image pretty large). If you want to post your collage on Facebook, Instagram, or Pinterest, however, consider sizing down to a maximum of 1500 pixels on the long end.

    So select Image>Image Size (or tap Alt/Opt+Ctrl/Cmd+I):

    adjusting the image size

    Then dial in your preferred width and height.

    Step 9: Save and export your collage

    Last but not least:

    Save and export!

    You’ll want to select File>Save As:

    saving your collage

    Then choose a location and file name, make sure that Save as type is set to JPEG, and hit Save:

    saving as a JPEG

    And select your preferred image quality (I usually go for around 8):

    JPEG options

    And you’re done! Photoshop will save your collage in the specified location.

    How to make a Photoshop collage: final words

    Well, there you have it:

    A simple process for creating a collage in Photoshop. It’s bound to look great, so don’t be shy; share it all over your social media pages!

    the final collage in Photoshop

    Now over to you:

    Have you made any collages previously? Have any additional tips? Please share your advice (and collage photos!) in the comments below.

    The post How to Make a Photoshop Collage (in 9 Simple Steps) appeared first on Digital Photography School. It was authored by Natalia Robert.


    Digital Photography School

  • How to Capture Motion Blur in Photography (6 Tips)

    The post How to Capture Motion Blur in Photography (6 Tips) appeared first on Digital Photography School. It was authored by Darren Rowse.

    capture motion blur in photography

    Are you looking to capture motion blur in your photography?

    While photographing motion blur might seem difficult, it’s actually pretty easy; with a bit of camera know-how, you’ll be taking stunning photos like a pro.

    capture motion blur photography

    And that’s what this article is all about: giving you the tools and techniques you need to get beautiful results!

    Note that motion blur can look great in any photography genre, so don’t try to limit yourself. Instead, embrace the power of the blur!

    1. Slow down your shutter speed

    Here’s the fundamental motion blur tip:

    Use a slow shutter speed.

    You see, the reason for motion blur is simply that your camera’s shutter remains open for a significant period of time. In other words: you get motion blur when your shutter speed is long, whereas you freeze the action when your shutter speed is short.

    So the number one tip for capturing movement is to select a longer shutter speed.

    motion blur in front of buildings

    If your shutter speed is too fast (e.g., 1/4000s), you’re not going to capture much movement. But if you dial in a lengthy shutter speed (e.g., five seconds) you won’t need your subject to move much at all before you start to see blur.

    How long should your shutter speed be? Here, the speed of your subject comes into play. A moving snail and a moving racecar will give you very different results at the same shutter speed. The slower your subject, the slower the shutter speed needs to be to create blur.

    The other factor that comes into play when determining shutter speed is how much light exists in the scene. A longer shutter speed lets more light into your camera and runs the risk of blowing out or overexposing your image. Below, we’ll cover some ways to let less light in (so you can use long shutter speeds without overexposure concerns).

    Bottom line:

    There’s no one-size-fits-all shutter speed for motion blur. It’ll depend on the speed of your subject, the brightness of the scene, and how much motion blur you want to capture. The key is to experiment!

    2. Stabilize your camera

    There are two ways to get a feeling of motion in your images:

    1. Have your subject move.
    2. Have your camera move.

    But for the type of photo we’re after today, it’ll be the subject that’s moving. In such cases, you need to do everything you can to keep your camera perfectly still. Otherwise, you’ll capture a blurry subject – but you’ll also end up with a blurry background.

    How do you stabilize your camera?

    boats in the water

    A tripod is ideal, but you can also place your camera on some other steady object (e.g., a table or a bench). I’d recommend using a remote shutter release or a self-timer mechanism; that way, you can trigger the shutter without touching your camera (because the more you touch your camera, the more likely it is that you’ll introduce blur).

    3. Try Shutter Priority mode

    As you know, the shutter speed is crucial to achieving a beautiful blurred look. Even small changes will have a big impact upon your shot – so you should use a camera mode that gives you full control over your camera’s shutter.

    You have two options. First, you can switch your camera to full Manual mode. It’ll work well, and it’s a good idea for more experienced photographers – but in Manual mode, you’ll also need to select your aperture and ISO (and you’ll need to make sure that the shutter speed, aperture, and ISO interact to create a perfect exposure). So if you don’t yet feel confident working in Manual mode, you have another option:

    Shutter Priority mode.

    With Shutter Priority, you set the shutter speed (and the ISO, if you so choose), but your camera will set the aperture to ensure the shot is well exposed. It’s a very handy mode for motion blur photography because it ensures you get the movement effect you’re after while also capturing generally well-exposed images.

    motorcyclist motion blur photography

    How to compensate for long shutter speeds when there is too much light

    Remember what I said about a long shutter speed?

    The longer the speed, the more light that will get into your camera, and the brighter your photos will be.

    So unless you compensate for this, whenever you try to capture motion blur, you’ll end up with overexposed shots.

    Below, I’ll suggest three easy methods for preventing this overexposure.

    (Note: A fourth method is to simply wait for the light to change – i.e., for it to get darker. Many shots that incorporate blur are taken at night or at dawn/dusk for this reason.)

    1. Use a small aperture

    Here’s the first, and simplest, method of preventing overexposure:

    Narrow the aperture.

    Because the narrower the aperture, the less light that will hit the camera sensor.

    If you’re shooting in Shutter Priority, your camera will actually narrow the aperture for you. As soon as it detects a slow shutter speed, it’ll close down the aperture and deliver a well-exposed shot.

    But if you’re shooting in Manual mode or Aperture Priority, the aperture can generally be changed via a dial on your camera.

    One thing to bear in mind:

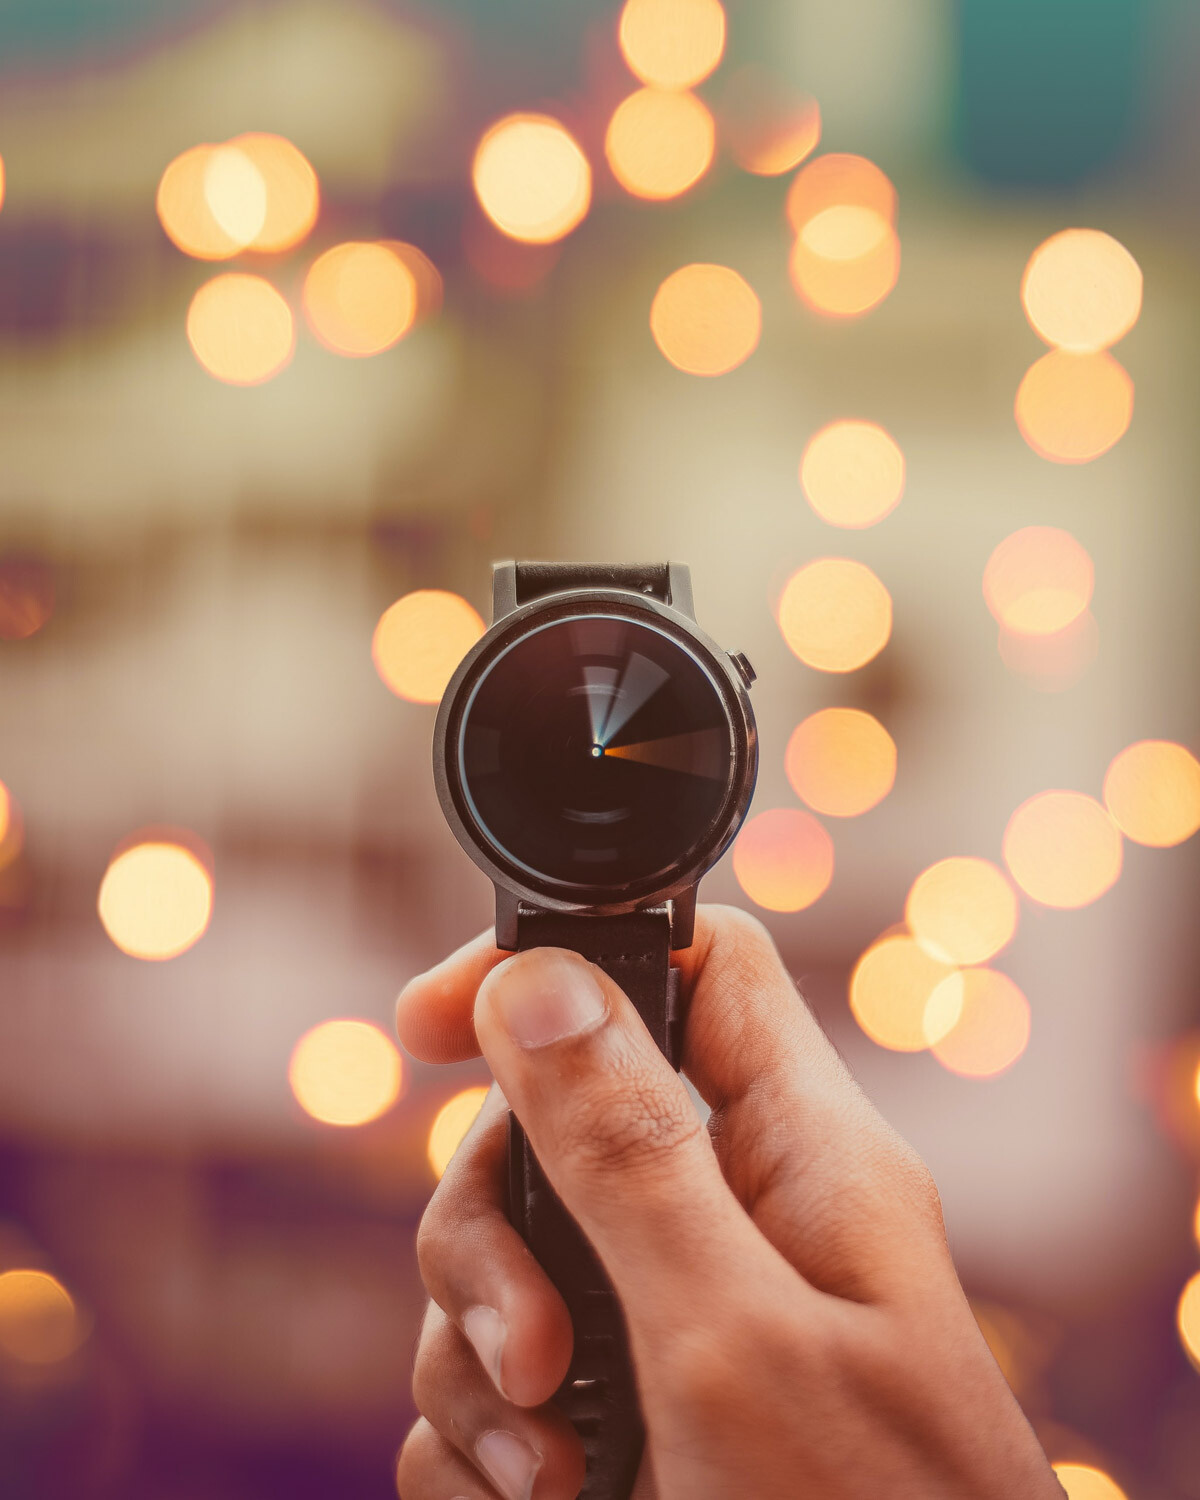
    Adjusting the aperture won’t just affect your photo’s exposure. Aperture also affects the depth of field, which refers to the amount of the scene that’s sharp. A wide aperture creates a limited depth of field, like this:

    watch with spinning hands capture motion blur photography

    Whereas a narrow aperture ensures the entire scene is sharp throughout:

    capture motion blur photography car driving

    So while it’s easy to combine a deep depth of field with a well-exposed motion blur image, working with a shallow depth of field while also ensuring well-exposed motion blur can be tough. If you’re after a shallow depth of field effect, you’ll need to counteract overexposure another way, as I explain in the next section:

    2. Decrease your ISO

    If you’ve tried narrowing your aperture and still aren’t getting you the results you need, or if you’re after a shallow depth of field, here’s an alternative method for preventing overexposure:

    Drop your ISO.

    ISO impacts the sensitivity of your digital camera’s sensor to light, where a higher number will induce greater sensitivity (and therefore a brighter exposure) and a lower number will induce less sensitivity (and therefore a darker exposure).

    train moving fast with platform

    You can adjust your ISO in Manual mode or Shutter Priority mode, so simply dial in a low ISO (such as 100) and watch as your exposure decreases. Of course, there’s a limit to how low you can drop your ISO; once you get to ISO 100 or ISO 50, your camera won’t allow you to go any further. But it’s always worth checking whether a lower ISO is an option because it’s a simple way to prevent overexposure.

    3. Try a neutral density filter

    Say you’re after a motion blur photo, but you just can’t get the exposure dark enough. You’ve narrowed the aperture, you’ve dropped the ISO, but your shots keep coming out overexposed.

    You still have another, more dedicated option:

    A neutral density filter. It’s a piece of glass that blocks light from passing through your lens – sort of like sunglasses – and lets you use a long shutter speed while preventing overexposure.

    For example, if you’re shooting a seascape in bright sunlight and you want to blur the water, you’ll end up with a blown-out, overexposed scene – even with a narrow aperture and low ISO. But pop a neutral density filter over your lens, and you can slow the shutter speed right down while keeping a perfect exposure.

    long exposure seascape blur

    (By the way, a polarizing filter can have a similar effect, though it’ll also impact the look of your images by cutting out reflections.)

    Note that neutral density filters come in many strengths. You can get a basic, subtle ND filter, one that’ll slightly darken the scene. Or you can buy an ultra-powerful, 10-stop ND filter, which will allow you to dramatically lengthen your shutter speed in bright sunlight.

    A quick note: two more creative techniques to try

    If you want to capture images with motion blur but you’re looking to come away with uniquely artistic results, here are two other techniques to consider:

    • Slow sync flash. This lets you capture a relatively sharp subject while creating a moving, blurry background, and it’s a great way to create in-your-face shots.
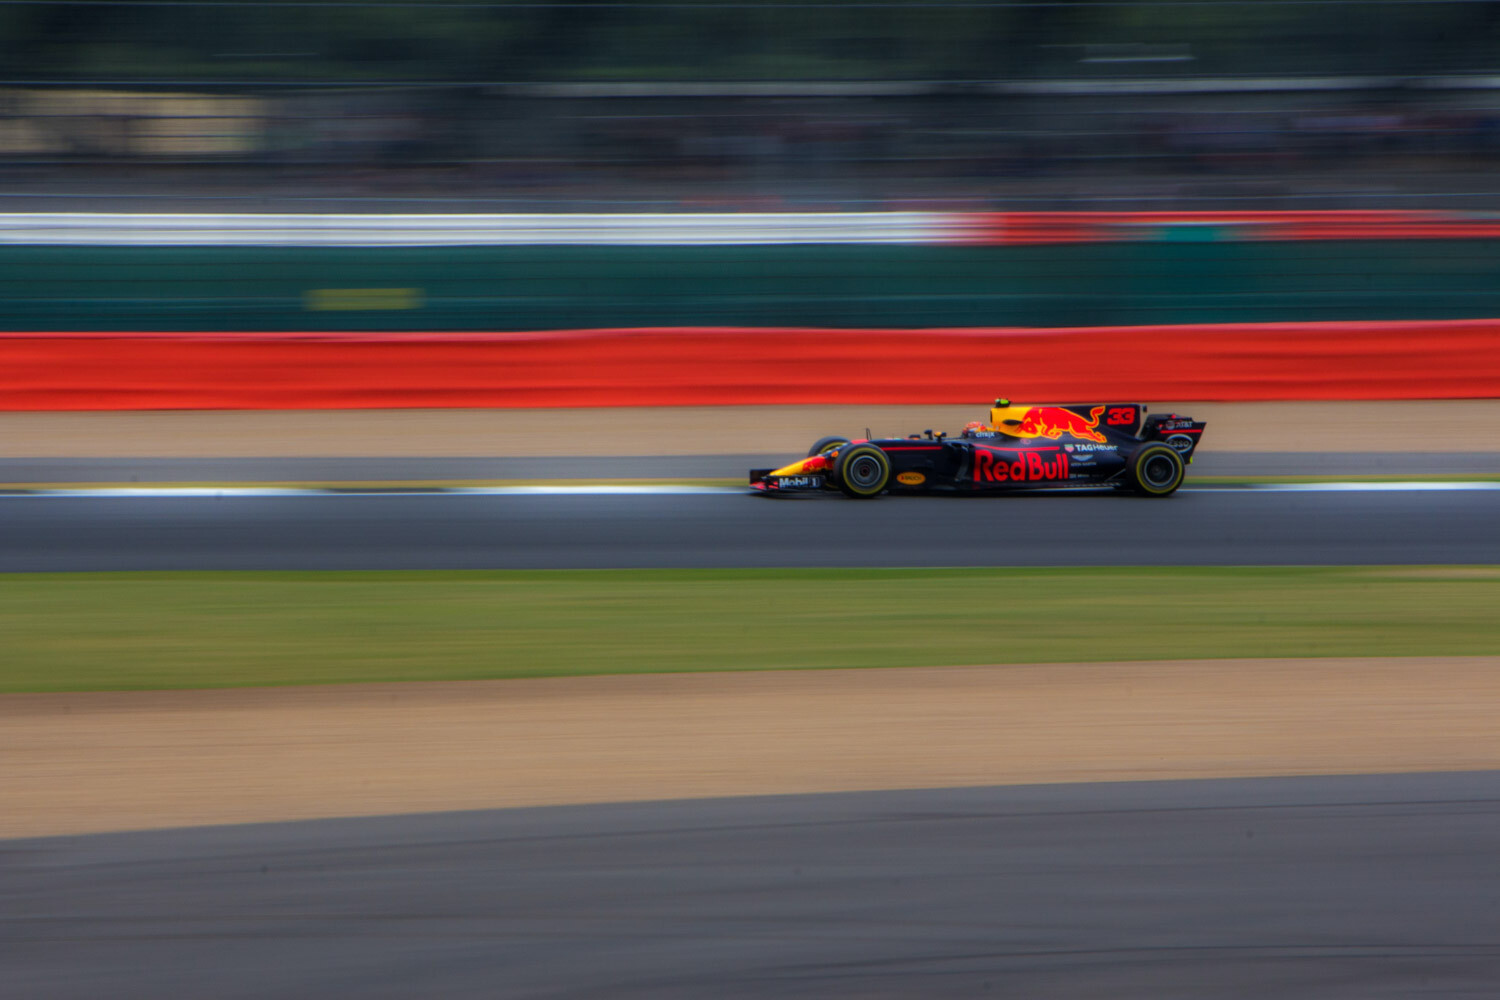
    • Panning. Here, you simply follow a moving subject with your camera; the subject will generally come out nice and sharp, while the background stretches and blurs.
    panning with motorcycle

    Motion blur in photography: conclusion

    Well, there you have it! Six easy tips to capture motion blur in photography.

    So remember these tips. And the next time you’re after some creative motion blur photos, you’ll get stunning results!

    Now over to you:

    Have you tried taking motion blur photos? Did it go well? Do you have any tricks or tips? Share your thoughts (and images!) in the comments below!

    capture motion blur photography racecar

    The post How to Capture Motion Blur in Photography (6 Tips) appeared first on Digital Photography School. It was authored by Darren Rowse.


    Digital Photography School

  • Hello world!

    Welcome to WordPress. This is your first post. Edit or delete it, then start writing!


    photowalking.org

  • Halide camera app comes to iPad with revamped interface, ‘Pro Mode’ and more

    Lux, the team behind the popular iOS camera apps Halide and Spectre, has announced a major update to Halide that adds support for Apple’s iPad tablets.

    The Halide experience on the iPad will be familiar to those who have used the iPhone version thanks to a similar design language, but the interface has been redesigned from the ground up to make to a more streamlined shooting experience on the larger display.

    As a whole, the interface is more spread out across the edges of the display and Lux’s custom typeface is now bolder for easier viewing. Lux even took into account the radius of the iPad screen’s corners so they could match the radius of the buttons to neatly nest into the interface for minimal distraction. To minimize the need to reach across the screen when changing settings, Lux has included what it calls an ‘expandable honeycomb’ next to the shutter button that brings up the most commonly needed settings and tools

    Since iPads tend to be more two-handed devices, Lux has also added a feature that will ‘flip’ the interface so it’s left-hand oriented for the southpaws out there.

    $ (document).ready(function() { SampleGalleryV2({“containerId”:”embeddedSampleGallery_5947884917″,”galleryId”:”5947884917″,”isEmbeddedWidget”:true,”selectedImageIndex”:0,”isMobile”:false}) });

    Lux has also addressed the issue of the iPad’s unusual aspect ratio that can sometimes make for a confusing experience when shooting. It’s called ‘Pro View,’ and what it does is shrink the liveview display into the center of the screen so it’s easier to see the entire scene and compose a shot. Doing this also adds extra space on the display to more prominently display the histogram, waveform, manual focus and other pro features, ensuring nothing overlaps with the liveview. Pro View can be toggled on and off in the bottom left-hand corner of the interface (bottom right-hand if you’ve flipped the interface).

    The iPhone version of Halide has also been updated with bug fixes and other improvements, including a few UI changes inspired by the iPad update.

    You can download Halide for free in the iOS App Store. An in-app purchase will unlock additional features for $ 1.99 per month or $ 9.99 per year.

    Articles: Digital Photography Review (dpreview.com)

  • 9 Takeaways After Shooting With the Tamron 150-500mm Di III VC VXD

    The post 9 Takeaways After Shooting With the Tamron 150-500mm Di III VC VXD appeared first on Digital Photography School. It was authored by Jaymes Dempsey.

    9 takeaways after shooting with the Tamron 150-500mm

    Tamron recently unveiled the 150-500mm VC VXD for Sony E-mount, a compact, low-priced, ultra-telephoto zoom packing plenty of eye-catching features.

    It certainly sounded like a stellar lens for bird and action photography (after reading the press release, I wanted a copy!), but as all experienced photographers know, the specifications are only half the story. To really understand a lens – and to determine whether it’s a worthy addition to your camera bag – you have to see how it holds up in practical, real-life, everyday situations.

    Which is why I recently sat down with Ken Hubbard, Tamron’s Field Services Manager and resident bird photography extraordinaire. Ken’s been using the new 150-500mm for quite some time now, so I knew that he could give me the low-down on its real-life capabilities. He didn’t disappoint! 

    What follows are key takeaways from my discussion with Ken, covering the lens’s performance, its usefulness for bird and action photographers, plus some bird photography tips for good measure.

    hawk flying forward

    1. The 500mm focal length lets you get frame-filling shots in the wild

    In bird photography, you frequently need the longest lens you can afford. And as many beginners quickly realize, even a 70-300mm zoom doesn’t cut it – especially when you’re shooting distant and unapproachable subjects such as birds of prey or tiny subjects such as songbirds.

    That’s where the Tamron 150-500mm comes in handy.

    Zoomed in to 500mm, you can get ultra-close to birds, even those that are skittish or small. You can capture birds in flight, and you can produce gorgeous, detailed shots of songbirds such as orioles and goldfinches. Ken shared a few of these beauties with me:

    goldfinch in a tree
    oriole landing on perch

    You also have a shorter 300-400mm range just in case you need it. If you’re shooting at your backyard feeders or at a location where birds have become acclimated to humans, you can just zoom out to capture the perfect frame. 

    Also, if you’re after more environmental images, you might even try working at 150-300mm.

    Quick tip: When you’re photographing a perching bird, don’t frame it too tightly. It might spread its wings, which will get clipped by the frame’s edges (a big no-no in bird photography!). Leave a bit of space around the bird; that way, when you get a nice wing spread, you can capture the pose.

    2. The incredible optics provide ultra-sharp feather detail

    Here’s a simple fact about the Tamron 150-500mm:

    It’s really, really sharp, even at its widest apertures. 

    In fact, the phenomenal sharpness was the first thing Ken noticed upon viewing his images. 

    For bird photographers, this is a big deal, because birds offer lots of tiny details worth capturing (feathers!), plus you’ll sometimes want to crop in for a frame-filling final result. And if the sharpness isn’t there, your photos just won’t pass muster. 

    Take a look at the feather detail on this owl:

    owl perching

    Another problem that bird photographers often face – especially when shooting darker birds against a bright sky – is chromatic aberration. It appears as colorful fringing along high-contrast edges such as bird wings, and it looks terrible.

    Fortunately, chromatic aberration on the 150-500mm is negligible, certainly not enough to cause problems (even for a serious bird shooter like Ken). 

    3. Thanks to the lens’s lightweight build, you can handhold without trouble

    Ultra-telephoto lenses tend to be insanely heavy. Which means that handholding for long periods of time is often out of the question. 

    The problem, of course, is that handholding can be useful, especially if you like the freedom and flexibility of pointing your lens in every direction from every reachable perspective, or you just don’t want to carry a tripod on top of cameras and lenses and other accessories. 

    But as it turns out, the Tamron 150-500mm is surprisingly lightweight (it comes in at 60.8 oz or 1725 g). Yes, it feels like a lens, and it’s not exactly a feather, but you should be able to handhold without issue. 

    Photographers will also appreciate the lens’s three Vibration Compensation modes, which keep your shots sharp when handholding at slower shutter speeds. In fact, two of the modes – Mode 2 and Mode 3 – seem tailored to birds and other action subjects, which means you can shoot sharp action images even in low light. 

    4. A small minimum focusing distance guarantees close-ups of tiny objects (such as songbirds)

    Imagine this: 

    You’re standing in a clearing, surrounded by beautiful yellow warblers. As they hop from branch to branch, getting closer and closer, you wait with your camera – but then, just as one tiny subject fills the frame, your lens fails to focus

    So you miss the shot. And the next shot, and the one after that, because your lens just can’t focus close enough. 

    You see, every lens has a particular minimum focusing distance (or MFD). Once your subject crosses the MFD, a lens won’t be able to focus any closer, and your shots will turn out blurry. 

    This becomes especially important when photographing tiny subjects such as songbirds and shorebirds. If you want to fill the frame, you need a lens with a small minimum focusing distance (in other words, you need a lens that can focus close). You do have the option of purchasing extension tubes, but these can be annoying to carry around and use.

    The Tamron 150-500mm, however, is an unusually close-focusing lens. Its minimum focusing distance is 70.9 in (1.8 m) at 500mm, which means you can create intimate portraits of tiny goldfinches, or you can capture tight headshots of larger birds such as owls.

    It’s how Ken manages to capture images like this: 

    owl close-up

    And this:

    barred owl face close-up

    (As an aside, you can also create some great photos of insects and flowers. While the Tamron 150-500mm isn’t a true macro lens, it can still get you pretty darn close!)

    5. An Arca-Swiss compatible mount makes for easy tripod use

    Earlier, I explained how the 150-500mm lets you handhold in low light. 

    But sometimes you’ll want to consider working with a tripod. Tripods are great for smooth panning, and they’re also nice for situations where you’re photographing in the same position for hours on end.

    Unfortunately, working with telephoto lenses on a tripod can be a pain. You don’t want to mount the lens to the camera and the camera to the tripod; that can put stress on the lens and camera mount, which is definitely a bad thing. So instead you need to put a tripod collar on the lens, which then attaches to an Arca-Swiss plate, which mounts to the tripod head and balances the whole setup.

    Some of the above does apply to the Tamron 150-500mm. It comes with a tripod collar, which slips around the lens. But very conveniently, the collar includes an Arca-Swiss compatible foot. So you can forego the Arca-Swiss plate and instead attach your Tamron 150-500mm directly to the tripod head.

    (Quick tip: The tripod collar contains strap holes, so if you plan to hang the rig around your neck, make sure to thread your camera strap through. That way, your strap can connect to the lens, and you’ll get a better-balanced setup.)

    6. The f/5-6.7 maximum aperture provides wing-to-wing sharpness

    When you’re photographing birds in flight, here’s a good goal to strive for:

    Getting the entire bird sharp, including the wings. 

    falcon flying

    The same is true for perching birds, except you simply need to get the body in focus (there are no spread wings, after all!).

    falcon perching

    But how do you do this?

    You’ll often want to keep your aperture relatively narrow, because a narrow aperture gives a deeper depth of field and hence keeps the full bird in focus. Ken often shoots in the f/6.7-f/8 range for this reason; it’s how he gets optimal detail in his bird photography.

    The Tamron 150-500mm offers a maximum aperture of f/5 on the wide end, which increases to f/6.7 by 500mm. And as you can see from the photos above, this works out great!

    Would it be nice to have an f/4 aperture for low-light shooting? Sure – but as Ken explains, a wide maximum aperture comes with tradeoffs, such as size (f/4 ultra-telephoto lenses tend to be huge), weight, and price. So if you’re after a more compact lens that still reaches those ultra-telephoto distances, the Tamron 150-500mm is a stellar option.

    7. You can use the flexible Zoom Lock to keep a constant focal length

    I’ll admit: 

    The Zoom Lock wasn’t a feature I had thought about until Ken mentioned it. I knew what it did – it lets you lock the lens focal length in place – but not why it was useful.

    However, once Ken explained it to me, I realized that it was a neat little addition, especially for shooting birds high up in trees. 

    You see, heavy zooms tend to suffer from something called lens creep, where the lens barrel starts to contract as you aim the lens upward (and extend as you aim the lens downward). In other words: when you shoot eagles against the sky at 500mm, you may notice your focal length dropping over time. It can be frustrating, especially if you’re photographing subjects from a consistent distance. 

    The Zoom Lock, however, prevents lens creep. Once you’ve settled on a focal length, you simply push the zoom ring forward, and it locks the zoom mechanism in place. Then, once you’re ready to adjust the focal length again, you pull the zoom ring back to disable the Zoom Lock.

    While you won’t always use this feature, it’s nice to have – and in certain situations, it’ll be a huge help.

    8. You can focus on fast-moving birds with the VXD mechanism

    As you’re likely aware, birds are speedy. Which means that photographing moving birds can be a challenge, especially if your equipment isn’t up to snuff.

    So going into the discussion with Ken, I wanted to know, point blank: Does the Tamron 150-500mm focus fast? 

    Ken confirmed that yes, it does focus fast. In fact, thanks to Tamron’s VXD technology, focusing is both ultra-fast and super accurate. The lens stops on a dime, and it can lock onto moving subjects with ease. (It’s also very quiet, in case you’re shooting in situations where you don’t want to be noticed.) 

    It’s great for birds in flight: 

    hawk flying toward the camera

    As well as birds taking off:

    bald eagle taking off from branch

    Now, it is worth noting that focusing depends on three things:

    1. Your technique
    2. Your lens
    3. Your camera

    The 150-500mm won’t guarantee you perfect focus, the same way a world-class guitar won’t guarantee you beautiful music. But if you refine your technique, and you use a reasonably fast-focusing camera (most of Sony’s recent full-frame or APS-C cameras will work great), then the 150-500mm will give you that final variable in the focusing equation. 

    Speaking of focusing technique, I asked Ken to share how he gets photos like those featured above. 

    He explains that focusing begins with your camera settings. Put your camera into AF-C mode so that it continues to focus as long as you hold the shutter button. If you have it, activate Animal Eye AF. You’ll also want to choose an AF area mode that works for moving subjects, such as Sony’s Zone AF, and you should select the fastest-available burst mode.

    Then, if your subject is perched on a branch, pre-focus. Get your AF zone over the bird, and be locked and ready to go. As discussed above, make sure your framing isn’t too tight – remember, you don’t want to clip the wings! – then as soon as the wings extend, fire off a long burst of shots. Track the bird with your camera, continuing to shoot as it flies by. 

    Capturing a bird already in flight is harder, but still doable. Use all the same settings as above: AF-C, burst mode, and an optimized AF area mode. Put your eye to the viewfinder, but – here’s the trick! – keep both eyes open. One eye should be looking through the viewfinder, while the other eye searches the wider sky. 

    Then move your lens to follow the bird, and half-press your shutter button to lock on. Keep your framing loose, and try to center the bird (you can always crop later!) – then fire off burst after burst.

    falcon flying in the forest

    (Note: If you really want to maximize your accuracy, try using back-button focus. It decouples focusing from the shutter button, so you can maintain focus even when your finger comes off the shutter.)

    Ken shares that you’ll end up with a huge number of shots, and only a few of them will actually look good, with a well-lit head, a nice wing position, and a nice background. 

    But that’s okay, he says. Because you can easily go through your photos later on the computer; the good ones will stick out, you can flag them, and get rid of the rest. 

    (One more tip: Buy the fastest memory cards available. Without fast cards, your camera won’t be able to shoot long bursts, which can lead to missed photos in critical situations.)

    9. The strong build quality is perfect for outdoor photography

    Bird photography (and outdoor photography in general) can get pretty rough. 

    You’re often traveling in dusty conditions, lying in mud, and/or dealing with high humidity. And the best shots tend to come from the worst weather: when you’re standing in the cold, getting soaked by rain or snow. 

    So you need a camera setup that can handle the elements. 

    Of course, I (and Ken) can’t speak to your camera. But the Tamron 150-500mm offers very solid build quality – it’s likely the first thing you’ll notice when you pull it out of the box.

    Plus, thanks to its moisture-resistant construction, you can shoot in messy weather without worry (though I still recommend you use a waterproof cover!).

    Tamron 150-500mm takeaways: final words

    Well, there you have it:

    The nine key takeaways after shooting with the Tamron 150-500mm Di III VC VXD. Ken is a huge fan of the lens, and I can see why: It’s an affordable, fast-focusing zoom that bird, wildlife, and action photographers will love. Ken’s experiences – as well as the photos in this article, all taken with the 150-500mm – make that clear.

    Note that the lens will start shipping on June 10th, though it’s currently available for preorder at Tamron-authorized in-store and online retailers.

    So if you’re a Sony shooter looking for a stellar ultra-telephoto lens, I highly recommend you take a look!

    northern cardinal perching on a branch

    Tamron is a paid partner of dPS.

    The post 9 Takeaways After Shooting With the Tamron 150-500mm Di III VC VXD appeared first on Digital Photography School. It was authored by Jaymes Dempsey.


    Digital Photography School