Blog

  • How to Photograph the Northern Lights (Aurora Borealis)

    The post How to Photograph the Northern Lights (Aurora Borealis) appeared first on Digital Photography School. It was authored by Christian Hoiberg.

    how to photograph the northern lights

    Want to know how to photograph the northern lights?

    In this article, I’m going to share plenty of northern lights photography tips and tricks – so that you can capture stunning aurora shots of your own.

    This advice comes from lots of experience; I’ve had the pleasure of watching and photographing the northern lights, also known as the aurora borealis, for years (and I still find myself shouting in awe when I see them elegantly dancing in the sky!).

    So if you’re ready to become an expert, then let’s get started.

    How to see the northern lights

    The first step in photographing the northern lights is, obviously, finding them. It’s simply not possible to see the aurora whenever and wherever you want – you must be in the right region and follow a few simple steps, as I discuss below:

    1. Be in the Northern Hemisphere

    The northern lights aren’t visible all over the world. As the name indicates, they are a phenomenon visible in the Northern Hemisphere. 

    Places such as northern Norway, Iceland, and Alaska are typical areas you can witness the northern lights.

    While you generally want to be north of the Arctic Circle (or close to it), you can witness the lights further south during extreme solar storms. But this is not as common and the display is rarely as impressive compared to “northern” northern lights.

    When planning your trip to the north, you’ll need to bear one more fact in mind:

    The northern lights season lasts from late fall to early spring. After all, northern lights are only visible in the night sky, and in the Arctic, the sun doesn’t set during the summer months – so there’s no darkness and no northern lights.

    the northern lights over the ocean

    2. Get away from light pollution

    It’s nearly impossible to see the northern lights from the downtown of a large city. You might catch a glimpse if the northern lights are strong, but the display won’t be nearly as impressive as if you leave the city lights behind.

    To increase your chances of capturing the northern lights, you should get away from light pollution and find a location where you can clearly see the stars.

    There are a few different tools you can use to find areas with minimal light pollution. Dark Sky is a great website for this purpose; it shows a detailed map of light pollution.

    the northern lights over ice

    3. Look for clear skies (and a high Kp-index)

    In order to see the northern lights, you need to see the stars – so cloudy nights aren’t good for aurora borealis photography. If the sky is cloudy, you might as well enjoy the comfort of a warm cabin.

    Fortunately, when you’re north of the Arctic Circle, clear nights typically mean you will get a glimpse of the northern lights. The display might not always be strong, but chances are high that you’ll at least get a nice arch across the horizon. 

    Keep in mind that weather conditions change quickly in the Northern Hemisphere. Just because it’s cloudy one moment doesn’t mean it’ll be cloudy in an hour, so you should keep a close eye on the forecast and stick your head outside from time to time. 

    Also, a quick tip: To predict the aurora display strength, refer to the Kp-index. Note that the higher the Kp-index, the stronger the display. (There are other factors involved in predicting the northern lights, but the Kp-index is the easiest and most convenient.)

    the northern lights over a mountain

    How to photograph the northern lights

    Once you’ve found the northern lights, how do you actually photograph them? It’s easy to get overly excited and forget about the technicalities – after all, the northern lights are stunningly beautiful – but I urge you to study the next few steps so that you’re as prepared as possible when the sky explodes.

    1. Use a tripod and a remote shutter release

    Photographing at night means that you’re working with long exposures (i.e., slow shutter speeds). It’s therefore essential that you mount the camera on a tripod. This will make sure that your camera stays still for the duration of the exposure.

    You should also consider using a remote shutter release when you’re photographing the northern lights. This removes any chance of the vibrations caused when you press the shutter.

    An alternative is to use the camera’s self-timer – but sometimes you want to capture the image at an exact moment with no delay, which is why I highly recommend a remote release.

    the moon and the aurora borealis

    2. Use a wide-angle lens with a large aperture

    I generally encourage photographers to experiment with different focal lengths, but there’s no getting around it: an ultra-wide-angle lens is ideal for photographing the northern lights. 

    A wide-angle lens allows you to capture both the landscape and the sky in one shot. That way, you can incorporate the northern lights into a good composition.

    Also, when you first experience the northern lights, you’ll realize that they can fill up the entire sky. It’s impossible to capture all this beauty with a narrow focal length lens (in fact, even wide-angle glass isn’t always enough!).

    It’s also important to use the widest possible aperture. A wide aperture means more light reaches the sensor, allowing for a brighter exposure.

    For that reason, apertures such as f/2 and f/2.8 work well for night photos. You can get away with f/4 if your lens doesn’t open to f/2.8 – but you’ll need to increase the ISO or extend the shutter speed to pull it off, neither of which are great for northern lights photography.

    aurora borealis over a river

    3. Adjust the shutter speed and ISO according to the northern lights

    Guides such as the 500 rule or the NPF rule are great indicators of the shutter speed you should use for night photography – but these do not work for northern lights.

    Why?

    Because the best shutter speed completely depends on how active the northern lights are. I’ve experienced extreme displays where I’m using a 1/2s shutter speed and an ISO of 200, yet I’m still overexposing the sky!

    Therefore, you need to adapt the shutter speed to the situation and make changes throughout the night. I typically use a shutter speed between 4 and 20 seconds. 

    Now, a fast-moving northern lights display requires a faster shutter speed. The bright light moving across the sky will quickly get overexposed. But when the display is slower, you get away with a longer shutter speed.

    The ISO also depends on how bright the night sky is. I typically use a value between ISO 1600 and ISO 6400. That said, on rare occasions, I go all the way down to ISO 200.

    I’ll admit that it does require some experience to get your settings right from the very beginning. But keep an eye on the image preview between every few shots, and you’ll learn exactly what to adjust for great results.
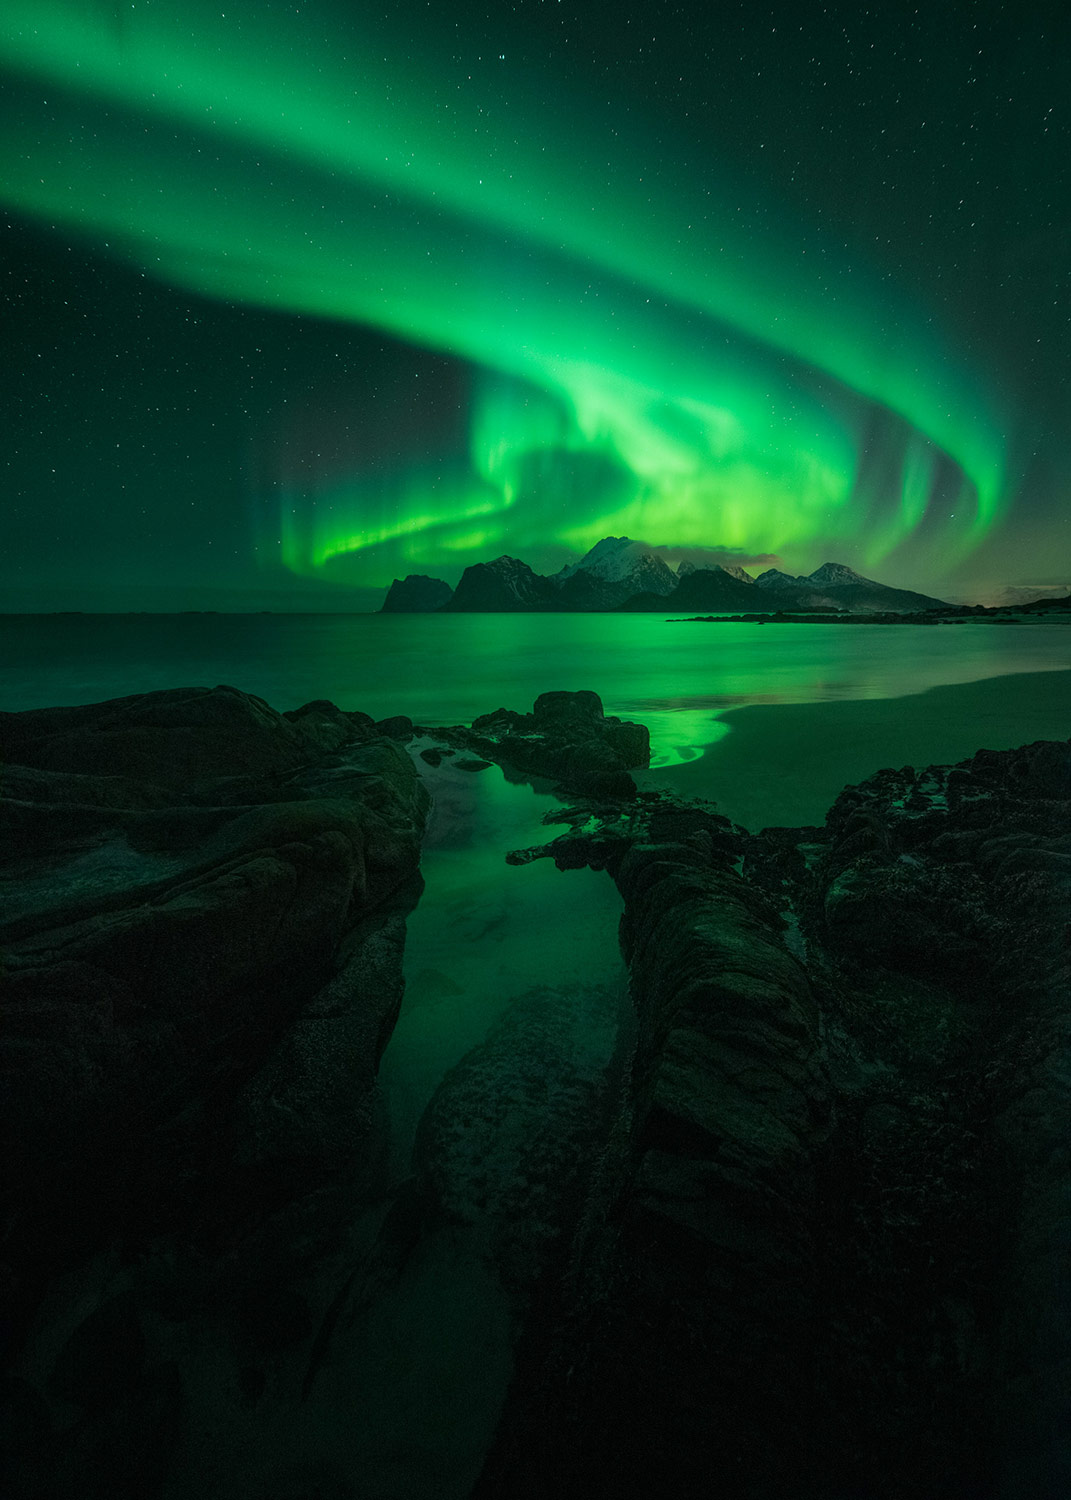
    the aurora borealis over a mountain how to photograph the northern lights

    4. Use a cold white balance (3000-4000K)

    I know that the white balance technically doesn’t matter if you’re shooting in RAW, but I’m someone who prefers to make the photo look as good as possible in-camera.

    So when photographing the northern lights, avoid using Auto White Balance or preset modes. While these often do a great job during the day, they’re less consistent at night. You might get some okay results with Auto White Balance, but it won’t always work.

    I recommend that you set the white balance manually – use Kelvin mode and chose a value somewhere between 3000K and 4000K. This will produce a colder and more natural-looking sky.

    (Using values above 4000K makes the green in the northern lights look muddy and strange, which is something you want to avoid.)

    purple and green aurora borealis how to photograph the northern lights

    5. Bring something warm to drink!

    The winter nights in the Northern Hemisphere can be quite cold and miserable. It’s essential that you stay warm when you’re outside waiting for the northern lights. Good clothes (and several layers) help a lot, but it’s also nice to bring a thermos with a warm drink.

    Once you get too cold, it’s hard to stay motivated. Especially if you’re planning to shoot for a while or make a timelapse.

    How to photograph the northern lights: conclusion

    Now that you’ve finished this article, you should be well-equipped to photograph the northern lights.

    That said, if you want to learn more about northern lights photography – so you can start creating images like those in this article, fast – I highly recommend my course, Northern Lights Photography Made Easy. I teach all the essentials of capturing and processing stunning images of the night sky’s most amazing feature. So check out the course here!

    how to photograph the northern lights

    The post How to Photograph the Northern Lights (Aurora Borealis) appeared first on Digital Photography School. It was authored by Christian Hoiberg.


    Digital Photography School

  • How to Take Great Group Photos: 12 Easy Tips

    The post How to Take Great Group Photos: 12 Easy Tips appeared first on Digital Photography School. It was authored by Darren Rowse.

    how to take group photos

    If you’re looking to take beautiful group photos, you’ve come to the right place.

    In this article, I’m going to share 12 simple tips for capturing stunning photos of groups. Specifically, I’ll discuss:

    • How to pose a group like a pro
    • A simple trick to capture everyone in the group looking their best
    • How to pick the perfect group photo location
    • Much, much more!

    So if you’re ready to become a group photography expert, then let’s get started!

    1. Prepare ahead of time

    There is nothing that will make group photo subjects turn on you faster than you not being prepared. People don’t like to be kept waiting, so plan ahead.

    Here’s what I recommend you do several hours (or days) before the photo:

    • Scope out the location of your shot beforehand
    • Think about how you will pose people and frame your shot

    Then, a few minutes before the photo:

    • Make sure everyone you want in the shot knows that you want them in the shot
    • Make sure your camera is on and has charged batteries
    how to take group photos three women

    2. Carefully choose the location

    The group photo location is important for a number of reasons.

    First, it can give the photo context. For example, a shot of a sports team on their playing field says more than a shot of the team in front of a brick wall.

    Second, the location can help emphasize your group – or it can draw the eye. To make the group stand out, you’ll need a location with no distractions.

    So choose a place where your group will fit, where there is enough light for the shot, and where there are no distracting surroundings. Also, avoid setting up a group shot directly in front of a window where the light from your flash might reflect back in an unpleasant way.

    group posing on a mountain

    3. Take multiple shots

    Sometimes, it’s tough to get everyone looking just right at the exact same time.

    That’s why I highly recommend you take multiple photos quickly; I often switch my camera to continuous shooting mode and photograph in short bursts. The first shot is often no good – but the shot or two directly after gives a group that looks less posed and more relaxed.

    On a related note, shoot some frames before everyone is ready. Sometimes, the organization of a group shot can be quite comical and image-worthy (as people tell each other where to go and jostle for position).

    kids in a group waving

    Also, mix up the framing of your shots a little. If you have a zoom lens, try capturing some shots at a wide focal length and some shots that are more tightly framed.

    4. Get in close

    Try to get as close as you can to the group you’re photographing (without cutting out group members, of course!). The closer you can get, the more detail you’ll capture in their faces – something that can really elevate a shot.

    If your group is small, step in and take some head and shoulder shots. Another effective technique is to get everyone to lean in; that way, you can move even closer without cutting out subjects. You might also try moving everyone out of a one-line formation and placing some people in front and behind.

    5. Pose the group

    how to take group photos people in uniforms looking up

    In most cases, your group will pose itself pretty naturally (after all, we’ve all been in a group shot at some point). Tall people will go to the back, short people to the front. But there are other things you can do to improve the photo’s composition:

    • If the event is centered around one or two people (like a wedding or a birthday), make the hosts the focal point by putting them right in the middle of the group (you can add variation by taking some shots of everyone looking at the camera and other shots of everyone looking at the person/couple).
    • For formal group photos, put taller members toward the back center of the shot, with shorter people along the edges.
    • Try not to make the group too deep (i.e., keep the distance between the front line of people and the back line of people as small as you can). This will help keep everyone in focus. If the composition does end up being deep, use a narrow aperture.
    • Tell everyone to raise their chins a little; they’ll thank you later when they see the shot without any double chins!

    6. Time your group shot well

    Carefully pick the moment for your photo. Try to choose a time that works with what is happening at the gathering. I find it best to do a group shot when people are already close together and when there is a lull in the proceedings.

    The start of an event can be a good time to shoot; everyone is together, they all look their best, and if there is alcohol involved, it hasn’t significantly affected the group yet.

    girls on a hill

    7. Think about the light

    In order to get enough detail in the final shot, you need to have sufficient light. The way you should do this varies from situation to situation – but consider using a flash if the group is small enough and you are close enough for it to take effect, especially if the main source of light is coming from behind the group.

    If it’s a bright, sunny day and the sun is low in the sky, try not to face your subjects toward the light – otherwise, you’ll end up with a collection of squinting faces.

    group in the ocean

    8. Take control

    I’ve been in a number of group photos where the photographer almost lost control of their subjects. It happened for two reasons:

    1. They weren’t quick enough.
    2. They didn’t communicate well with the group.

    When shooting a group photo, it’s important to keep talking, let the group know what you want them to do, motivate them to smile, tell them that they look great, and make clear how long you’ll need them for.

    It’s also important to give your subjects a reason to pose for the photograph (and to listen to you). At a wedding, you might motivate people by saying “The happy couple has asked me to get some group shots.” At a sporting event, you could say, “Let’s take a group photo to celebrate our win.” When you give people a reason to pose, you’ll find they are much more willing to stand for a few minutes while you snap photos.

    Here’s another very useful line to use with a group: “If you can see the camera, then it can see you.” This one is key if you want to be able to see each person’s face in the final image.

    If there are other photographers, just wait until they’ve all finished their shots, then get the attention of the full group. Otherwise, you’ll get everyone looking in different directions.

    Of course, you don’t want to be a dictator when posing your group – otherwise, your group shots will include some very angry expressions. The best photographers know how to get people’s attention and communicate what they want, while also keeping people relaxed and having fun.

    how to take group photos girls in a line

    9. Get up high when photographing large groups

    Large groups of people can be very difficult to photograph. Even with careful staggering and tiering, you’ll struggle to fit everyone into the shot.

    One solution is to elevate yourself. If I’m photographing a wedding and the couple wants one big group shot, I’ll arrange for a ladder to be present, or I’ll find some other way to get up high (I’ve even climbed up onto church roofs!). A high vantage point lets you fit a lot of people into the frame while still remaining quite close to the group. It also gives an interesting perspective, especially if you’re using a nice, wide focal length.

    10. Use a tripod

    kids posing for a group photo

    There are a number of reasons why tripods are great for group photography.

    First, a tripod communicates your seriousness and can help get the group’s attention (it’s amazing what a professional-looking setup can do!).

    Second, a tripod gives you more freedom to pose your subjects. Simply set your camera on a tripod, set the exposure, and set the focus. Then guide your subjects through different poses – and when everything looks just right, you can quickly press the shutter button!

    11. Use an assistant

    If you have a very large group, an assistant can be super helpful. For one, they can get the group organized – tell people when to come, where to stand, etc.

    An assistant is also incredibly handy if you are taking multiple group shots (like at a wedding when you’re photographing different configurations of a family). In such a case, I often ask the couple to provide me with a family member or a friend who can ensure we have everyone we need in each shot.

    Having a family member act as your assistant ensures you don’t miss anyone (assuming they’re related to members of the group). Plus, the group will be familiar with them and will therefore respond well when the “assistant” orders them around.

    12. Smile

    Yes, you should smile! During a group session, there’s nothing worse than a grumpy, stressed-out photographer. Have fun and enjoy the process of getting your shots, and you’ll find the group will, too.

    In fact, after photographing a wedding, I usually come home with an incredibly sore face from all the smiling I’ve done! I find the best way to get the couple and their family to relax and smile is to smile at them. It really does work.

    business group photo

    Bonus tip: Let your imagination run wild!

    One more quick tip. Get a little creative! You don’t always have to use standard compositions; instead, you can capture more imaginative, unusual photos.

    women posing in a bathtub

    How to take great group photos: conclusion

    Group photos might seem difficult, but they’re really not!

    Just follow the tips I’ve given you, and your group photos will turn out stunning.

    Now over to you:

    Have you had success taking group photos? Share your shots in the comments below! Also, if you enjoyed this article, subscribe to the dPS newsletter!

    The post How to Take Great Group Photos: 12 Easy Tips appeared first on Digital Photography School. It was authored by Darren Rowse.


    Digital Photography School

  • The Weekly Photography Challenge – Toys

    The post The Weekly Photography Challenge – Toys appeared first on Digital Photography School. It was authored by Sime.

    This week our challenge is inspired by some posts I’ve spotted over on THIS website showcasing some great product photography! After reaching out, we have a handful of images to share for a little inspiration!

    A big thanks to Oziii Obsessions Photography for his help with this challenge!

    oziiiobsessions_toy_photography

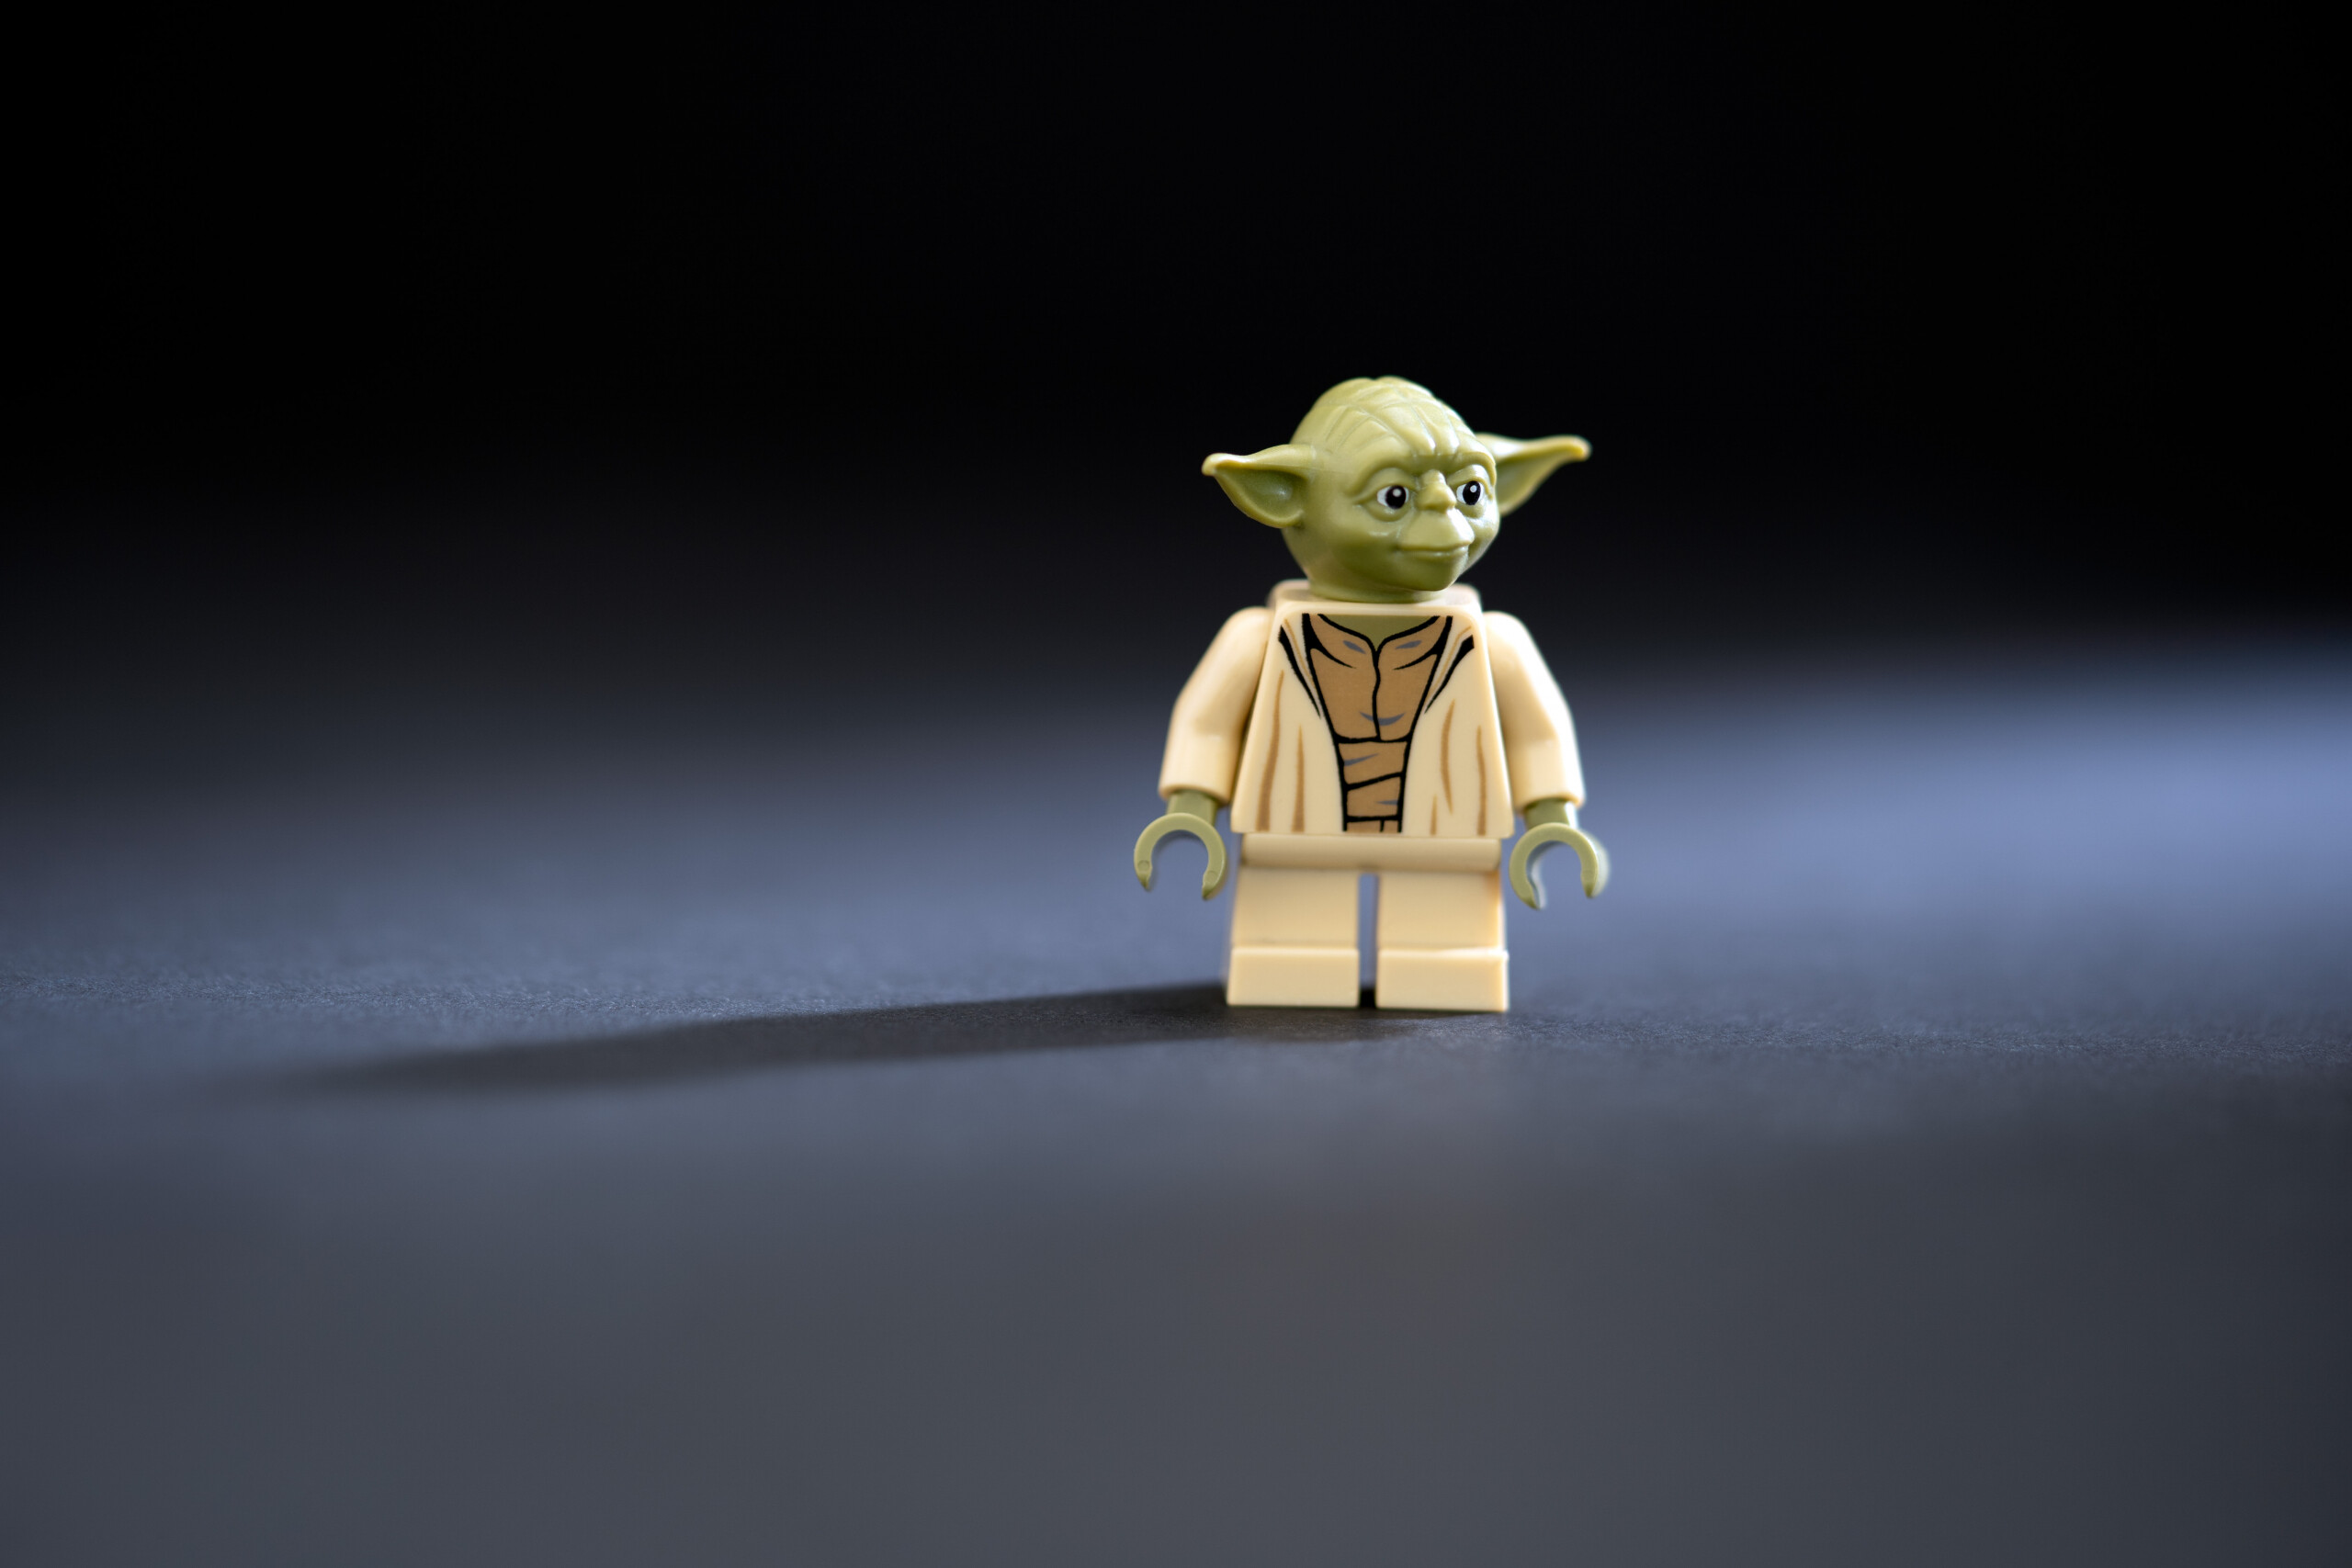
    Toy photography is super fun! you can make it as realistic or as far from realistic as you like, and just have fun with it! Toys, Jedi, Dolls, , Lego, Cars..

    I’ve just found a small plastic man wearing a hiking backpack on my desk, I don’t know what adventures he’ll have this week, but I’ll be posting them in our Facebook group if you’re interested!

    The Weekly Photography Challenge – Toys
    The Weekly Photography Challenge – Toys

    Toy photography isn’t about merely taking a toy, snapping a photo and “job done” it’s well, have a read over here! ‘Getting Started in Toy Photography on dPS’

    Don’t have time for a read, here’s a summary “The challenge of Toy Photography is to make the toy “lifelike”; to remove that “plastic-feel” to it and to make it more human. Most Toy Photographers put their subjects into everyday, mundane scenes. You are limited only by your imagination”

    The Weekly Photography Challenge – Toys

    Still stuck? There’s another great article over here – clickety click – that might give you a splash of inspiration.

    Make sure to use the hashtag #dPSToyPhotoChallenge if you’re posting on social media, or share your photo in the comments on this post, you can find details on how to do that below.

    Great! How do I upload my photos?

    Upload your photo into the comments field (look for the little camera icon in the Disqus comments section below this post) and they’ll get embedded for us all to see. Or, if you’d prefer, upload them to your favourite photo-sharing site and leave the link to them.

    Weekly Photography Challenge – Looking Up

    Most of all, make a NEW photo for this challenge and have some creative fun with it!!

    –Simon

    The post The Weekly Photography Challenge – Toys appeared first on Digital Photography School. It was authored by Sime.


    Digital Photography School

  • When To Use APS-C Lenses Over Full Frame Lenses

    There is an ongoing discussion within the photography world on the pros, cons and when exactly it is best to use APS-C lenses rather than full frame lenses. When you come to choose a new lens for your camera, deciding between an APS-C or full frame lens can have a significant effect on the images you produce. Understanding the differences Continue Reading
    Photodoto

  • The Sony a6900 Will Debut Before the Month Is Out: Here’s What We Know

    The post The Sony a6900 Will Debut Before the Month Is Out: Here’s What We Know appeared first on Digital Photography School. It was authored by Jaymes Dempsey.

    Sony a6900 to debut before the month is out

    For weeks, SonyAlphaRumors has been dropping information regarding the so-called Sony a6900, which will debut in “late May” as an a6600 successor. 

    While the “a6900” moniker is not yet confirmed, a “trusted” SonyAlphaRumors source has said that the new camera “will not be named ‘a6700,’” with another SAR source offering the a6900 label.

    So what do we know about this new a6900?

    SonyAlphaRumors confidently states that the a6900 will replace the a6600, but will feature an APS-C sensor and a body similar to the full-frame a7C. It will “be branded as [a] ‘vlogger’ camera,” which suggests several blogging-friendly specs: a fully articulating screen, for one, but also impressive video capabilities (at least 4K/30p plus mic/headphone jacks) and a compact design.

    Sony a6900 release
    The Sony a6900 will look much like the compact a7C.

    Indeed, various rumors suggest that the a6900 will feature 4K/60p video, a notable upgrade over the 4K/30p offered by the a6600. Interestingly, rumors also point to a new high-resolution sensor – several SonyAlphaRumors sources have suggested 32 MP – in a surprising break from Sony’s string of 24 MP APS-C models. 

    Here are additional specs suggested by (unconfirmed) SAR sources:

    • Improved rolling shutter performance
    • 20 frames-per-second continuous shooting
    • 2.36M-dot EVF
    • The “same tilt screen” as the a7C
    • Upgraded in-body image stabilization (compared to the a7C)
    • A7C-like price ($ 1798 USD)

    Most of these items seem pretty standard and don’t offer any major improvements over the a6600. The exception is the 20 fps continuous shooting rate, and I’ll admit that I’m skeptical; after all, it’s a feature matched only by Sony’s highest-level full-frame models and is wholly unnecessary for vloggers.

    Of course, you can also expect Sony’s standard autofocusing capabilities, including its vaunted Real-time Eye AF, plus outstanding subject tracking and generally speedy focusing, all of which will appeal to vloggers and still shooters alike.

    So be sure to keep an eye out for further Sony a6900 news, especially if you’re interested in a compact, vlogging-focused camera; we should get an official release before the month is out.

    Now over to you:

    What do you think of the Sony a6900? If the rumored specifications are right, would you be interested? Are there any key features that the camera is missing? Share your thoughts in the comments below!

    The post The Sony a6900 Will Debut Before the Month Is Out: Here’s What We Know appeared first on Digital Photography School. It was authored by Jaymes Dempsey.


    Digital Photography School

  • Video: Starry time-lapse at the ESA’s Ariane 6 rocket launch site

    The European Space Agency (ESA) recently published a stunning time-lapse of the star-filled night sky at the ESA’s Ariane 6 launch site in French Guiana, South America. Europe’s Spaceport in French Guiana is preparing for the arrival of Ariane 6, ‘Europe’s next-generation launch vehicle.’

    The Ariana 6 rocket will come in two versions depending on mission requirements. The A62 has two strap-on boosters, while the A64 has four. The Ariane 6 is 207′ (63m) tall with a diameter of 18′ (5.4m). The mass of the rocket ranges from 1,170,000-1,900,000 lbs (530,000-860,000kg). Replacing the Ariane 6 launch vehicle, the Ariane 6’s maiden test flight is scheduled for 2022 following several delays.

    You can see what a typical Ariane 6 mission might look like in the ESA’s video below. Ariane 62 can launch payloads of approximately 9,920 lbs (4,500kg) into a geostationary orbit and 22,700 lbs (10,300kg) into low Earth orbit. By strapping on an additional two boosters, Ariane 64 can launch payloads of around 25,350 lbs (11,500kg) into geostationary orbit and 45,400 lbs (20,600kg) into low Earth orbit. With a full payload, Ariane 6 weighs about the same as one and a half Airbus A380 passenger airplanes.

    The development of Ariane 6 has comprised an industrial network of more than 600 companies in 13 European countries, including 350 small- and medium-sized companies. The development is led by prime contractor ArianeGroup. The Ariane 6 launch facilities in French Guiana, seen in the time-lapse video above, are being prepared by France’s space agency, CNES.

    Artist’s rendition of the two configurations of Ariane 6, the two-booster A62 and the four-booster A64. Image credit: ESA

    The modular design of Ariane 6 means that it will be suitable for a wide range of missions, including Earth observation, telecommunications, meteorology, science and navigation. Adapters have been developed to allow Ariane 6 to carry multiple small satellites at once, allowing small companies more cost-effective access to the space industry. For more information on Ariane 6, click here.

    Articles: Digital Photography Review (dpreview.com)

  • Chromatic Aberration: What It Is and How You Can Avoid It

    The post Chromatic Aberration: What It Is and How You Can Avoid It appeared first on Digital Photography School. It was authored by Joshua Burke.

    chromatic aberration what is it and how you can avoid it

    Chromatic aberration is a huge image-quality killer – but many photographers don’t know what it is and how it can be prevented.

    In this article, I’m going to share everything you need to know about chromatic aberration, including:

    • Why it happens
    • How to identify it
    • Four simple strategies to minimize its effects

    So without further ado, let’s discuss how to deal with that pesky chromatic aberration once and for all.

    What is chromatic aberration?

    Chromatic aberration (also known as color fringing or dispersion) is a common problem in lenses that occurs when colors are incorrectly refracted (bent) by the lens; this results in a mismatch at the focal point where the colors do not combine as they should.

    Confused? Don’t be. To help understand this a bit better, remember that the focal plane is your sensor’s point of focus, where all the light from your lens should join together to be correctly captured and recorded. But depending on the construction of your lens, your chosen focal length, and even the aperture that you’ve used, certain wavelengths (colors) may arrive at points in front of or behind the focal plane.

    Take a look at the diagram below. Do you see how the red, green, and blue light hits the sensor in different spots? That’s chromatic aberration at work.

    What is chromatic aberration and why it happens.

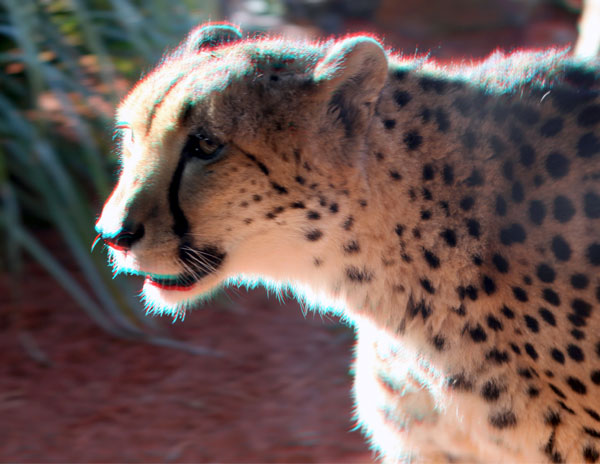
    When CA occurs, you end up with telltale color fringing around the edges of your photograph. Check out the photo below. The left-hand side shows red and green fringes along the sharp edges of the subject. As you can see, it doesn’t look so great.

    Chromatic Aberration example

    But although you can edit out low levels of chromatic aberration in Photoshop and Lightroom, the reality is that it’s annoying to remove CA from each and every photo, plus every moment you spent touching up a photo is one moment less that you have for photography.

    Cheetah Chromatic Aberration Comparison

    Why does chromatic aberration occur?

    Chromatic aberration happens because your lens acts as a prism. It bends light, and much like the triangle-shaped prism made famous by Pink Floyd, colors passing through the lens are split at different angles.

    Why does chromatic aberration occur

    Here, it’s important to remember that light is actually made up of several different wavelengths (colors). So for your camera’s sensor to detect the combined color of light, your lens needs to make all wavelengths of that particular ray hit the exact same point on your sensor.

    It may sound simple, but various wavelengths (and thus various colors) strike your lens all at once, and each of these wavelengths will behave slightly differently depending on the lens glass that it is passing through.

    The feat of engineering required to correctly align all of these different light rays is usually achieved by the manufacturer’s use of a lens array. In fact, if you were to pull your lens apart, you’d probably find upward of 16 lens elements – all designed to correct for various things along the light’s journey between your lens and your sensor.

    Lens elements

    Unfortunately, this is also where chromatic aberration tends to rear its ugly head. Hidden within the design of these lens elements are defects – either in the glass or the design of the lens itself – which, under specific conditions, may cause your photos to exhibit CA.

    Now, I’m not saying you need a pro-level lens. In fact, a key point is that all lenses suffer from chromatic aberration in one form or another, no matter the cost. What matters is whether or not your lens exhibits visible chromatic aberration, and whether the amount of visible CA is a dealbreaker for your particular needs.

    Also, even if you’re stuck with a CA-prone lens, you can still take steps to prevent image-quality issues, as I discuss in the next section.

    How to avoid chromatic aberration defects: 4 strategies

    Chromatic aberration is a major problem, especially on cheap lenses. But the good news is that, if you are stuck working with a lens that exhibits some form of visible chromatic aberration, there are several easy-to-understand strategies to remove or minimize its effect on your photos.

    1. Avoid high-contrast scenes

    CA Cheetah High Contrast

    Chromatic aberration tends to flare up when shooting high-contrast scenes. Particularly problematic are darker subjects surrounded by white backdrops, landscapes against a bright sunrise, or – as in the example of the cheetah above – heavily backlit subjects.

    There’s no easy in-camera method of avoiding contrast. So there’s often nothing you can do here except adjust your composition. Swap your backdrop out to something that more closely matches your subject’s tones, or simply wait for more favorable lighting conditions.

    If you absolutely must capture an image as-is, then shoot in RAW and prepare for a touch-up in post-production.

    2. Adjust your focal length

    Chromatic Aberration Focal Length

    Although it’s nice to have access to a wide range of focal lengths, the fact is that most zoom lenses exhibit chromatic aberration at their focal length extremes. So setting the focal length toward the middle of your lens’s range will usually help remove the offending CA.

    Note that using a zoom lens at its widest will usually introduce various other defects in your image. So if you’re set on a wide-angle perspective, choose a prime wide-angle lens to handle the job, or make a panorama at a longer focal length, then join the photos in post-processing.

    3. Stop down your aperture

    CA Aperture

    Although the result will depend on the type of lens you are using, stopping down your aperture helps minimize most lens defects, including chromatic aberration.

    (You’ll need to consider reducing the shutter speed or boosting the ISO to compensate for the light loss.)

    So instead of using an f/2.8 or f/4 aperture, try going to f/8 or f/11 – then take a few test shots to see if the chromatic aberration has disappeared.

    4. Reframe with your subject at the center of the image

    chromatic aberration rhino reframe

    Chromatic aberration is often more noticeable toward the edges of the frame, not the center.

    (This is generally due to the curvature of the lens elements.)

    Therefore, if you reframe your shot but put your main subject closer to the middle, you’ll often end up with little-to-no chromatic aberration on your subject.

    Of course, you may still have noticeable CA around the edges of the frame, but you do have the option to crop this away. It’s not ideal if you need to retain every pixel in your photo (e.g., for large prints), in which case you should consider one of the other preventative measures discussed above. But if you’re creating small prints or you plan to distribute your photo online, cropping shouldn’t be a big issue.

    Chromatic aberration: final words

    Well, that’s it:

    Everything you need to know about chromatic aberration, including what it is and how to avoid it.

    Now you know how to keep your images free of CA. And you can capture stunning photos – even with cheaper lenses.

    Over to you:

    Are you struggling with chromatic aberration in your photos? Have you tried any of the measures discussed above? Share your thoughts (and images) in the comments below.

    The post Chromatic Aberration: What It Is and How You Can Avoid It appeared first on Digital Photography School. It was authored by Joshua Burke.


    Digital Photography School

  • How to Batch Resize in Photoshop: A Step-by-Step Guide (2021)

    The post How to Batch Resize in Photoshop: A Step-by-Step Guide (2021) appeared first on Digital Photography School. It was authored by Helen Bradley.

    how to batch resize in Photoshop: a guide

    What’s the easiest way to batch resize in Photoshop?

    In this article, I’m going to take you through a simple, step-by-step process for resizing your images. It’ll take seconds – and when you’re done, you’ll be able to resize dozens (or hundreds!) of photos at once.

    Let’s get started.

    Batch resizing in Photoshop: step by step

    Batch resizing isn’t hard, and it takes very little knowledge.

    To start, make sure you open some files in Photoshop (though note that you don’t need to open all the files you’re aiming to resize; a random file or an empty canvas will do just fine). As you can see below, I’ve opened a blank document:

    a blank canvas in Photoshop

    I’m going to cover the Image Processor method of batch resizing. Pretty much anyone can do it, and it generally works well. However, if you have more complex batch resizing requirements, consider writing an action; that way, you can tailor the resizing to your particular needs.

    Now let’s take a closer look at the batch resizing process, starting with:

    Step 1: Open the Image Processor

    Choose File>Scripts>Image Processor.

    selecting the Image Processor option

    The Image Processor dialog box will open, where you’ll see a simple, four-step process for resizing your images:

    the Image Processor dialog box

    Step 2: Select your images for batch resizing

    In the first section of the Image Processor dialog box, you’ll need to identify the images you want to batch resize.

    You can choose to resize all open images by selecting Use Open Images:

    how to batch resize in Photoshop choosing the images

    Or you can pick a folder from your hard drive via the Select Folder button:

    choosing the images to batch resize

    If you do select a folder, you can tell Photoshop to resize images in all subfolders as well; just hit the Include All sub-folders checkbox:

    selecting the Include All sub-folders option

    Step 3: Determine your export location

    Now it’s time to determine where you want your resized images to go.

    To save the resized versions alongside the originals, simply select Save in Same Location:

    selecting the location for the resized images

    Then, when the resizing begins, Photoshop will create a subfolder next to the original files. (Because your resized versions will retain the names of the original files, creating a subfolder – rather than simply saving the images in the original folder – prevents any overwriting.)

    Alternatively, you can select a different folder for the resized files:

    choosing an export location

    Step 4: Input your preferred image sizes

    This is the most important step of the entire process:

    The moment where you dial in resize settings for your files.

    First, determine your output file type. You can choose from JPEG, PSD, and TIFF (JPEG is the default and generally works well, but if you’re working with layered files, then PSD is a good choice).

    selecting Save as JPEG

    If you do decide to save JPEGs, you can adjust the output quality; 12 will give you large, great-looking photos, whereas 1 will give you tiny, low-quality results.

    For better color when displaying your photos on the web, select Convert Profile to sRGB:

    selecting Convert Profile to sRGB

    I also recommend checking the Include ICC Profile box at the bottom:

    selecting Include ICC Profile

    Finally, select Resize to Fit, and type in your preferred file size!

    selecting Resize to Fit

    Note that the dimensions you dial in are maximums. So if you type in 300 for the width and 300 for the height, the files will be resized so that the longest side of every image is 300 pixels.

    (In other words, the images won’t be cropped or skewed to fit your preferred dimensions; they’ll be scaled up or down for the most natural-looking results.)

    how to batch resize in Photoshop typing in a width and height

    Also note that the width and height measurements don’t have to be the same. You could specify a width of 400 and a height of 300 – then all images would be constrained to a width of 400 or a height of 300, whichever comes first.

    By the way, you do have the option to save your images in a second (or third) format, as well. Just select the Save as PSD or Save as TIFF checkboxes, and PSD and/or TIFF folders will be created alongside your JPEG folder!

    Step 5: Run the script

    When you’re ready, click Run.

    hit the Run button

    The images will be automatically opened (if they’re not open already), resized, saved, and closed again.

    To find your resized images, simply head to the folder you specified in Step 3 (above). If you chose to save JPEGs, the images will be in a subfolder called JPEG; if you chose to save TIFFs, the images will be in a subfolder called TIFF, etc.

    Like this:

    finding the resized photos

    How to batch resize in Photoshop: final words

    how to batch resize in Photoshop

    Well, there you have it:

    The easiest way to batch resize your images in Photoshop.

    So whenever you need to resize a lot of images for uploading on the web, use the Photoshop Image Processor.

    It makes the job quick and painless!

    Now over to you:

    Do you have a favorite method of batch resizing images in Photoshop? If so, share it in the comments below!

    The post How to Batch Resize in Photoshop: A Step-by-Step Guide (2021) appeared first on Digital Photography School. It was authored by Helen Bradley.


    Digital Photography School

  • HP launches new ZBook G8 laptops with Intel 11th-gen processors, RTX GPUs

    Amid the launch of Intel’s new 11th-generation processors, many new laptops are hitting the market, including the Razer Blade 15 refresh we wrote about earlier this week. Not to be left out, HP has announced new ZBook G8 laptops, only nine months after its ZBook Firefly models were announced. Updates are fast and furious these days. The new ZBook G8 range includes a trio of models, including 15.6″ and 17.3″ variants.

    The ZBook Studio and Power models come only in 15.6″ versions, while the Fury model is also available with a 17.3″ display. Displays come in Full HD and 4K flavors, including brightness up to 1,000 nits, which should be suitable for an HDR workflow. Processor options include Intel Zeon or 11th-gen H-series processors up to the Core i9 CPU. Storage is available up to a whopping 2TB.

    Left to right: ZBook Studio G8, ZBook Fury G8 and ZBook Power G8

    There are a lot of options, and caveats, too. While a display with 1,000 nits of maximum brightness is available, that’s only true of the 15.6″ model with a Full HD display. If you want 4K, the maximum brightness darkens to 600 nits (or 550 nits in the case of the 17.3″ display). The ZBook Studio has the most GPU options to choose from and is the only model in the new range to include Nvidia RTX 3060 to 3080 graphics cards. The ZBook Fury offers AMD Radeon Pro graphics instead. The maximum RAM varies among the different models, with the Fury offering up to 128GB RAM, whereas the Studio and Power models top out at 32GB and 64GB, respectively.

    There’s a lot to keep track of, so let’s refer to HP to learn more about the target audience for each model. HP says that the ZBook Studio G8 offers ‘performance in a transformative size; designed for mobility – at home or on the road.’ The ZBook Fury G8, on the other hand, goes all-out: ‘Content creators get unthrottled performance and full expandability in a more portable design – desktop-level performance in a mobile form factor.’ Rounding out the lineup is the entry-level option, the ZBook Power G8, which is ‘HP’s most affordable mobile workstation’ and ‘makes the power and pro certifications of a ZBook more accessible and ideal for STEAM students.’

    ‘Professional creators and power users need a curated, personalized software and hardware experience that aligns to the different ways they work and collaborate,’ said Jim Nottingham, general manager and global head, Advanced Compute and Solutions, HP Inc. ‘With the ZBook Studio being the most powerful workstation of its size, and the ZBook Fury offering full expandability in a portable design, HP is giving the professional community access to cutting-edge technology, unthrottled performance, and the versatility to make the next creative breakthrough a reality.’

    The HP ZBook Studio G8 has a full RGB keyboard

    Looking closer at the HP ZBook G8 Studio, the notebook is designed to ‘free the creative mind.’ To that end, it’s a purpose-built machine aimed to meet the demanding needs of creative applications and workflows. HP’s DreamColor displays cover 100% of DCI-P3 and include Pantone validation. The Studio includes Nvidia RTZ A5000 or GeForce RTX 3080 laptop GPUs and 11th-gen Intel Core i9 vPro processors.

    The Fury is the world’s most expandable 15″ and 17″ mobile workstation, per HP. The Fury packs desktop-class performance into a sleek, slim notebook design. The display is a next-gen DreamColor display with Pantone validation. The chassis is constructed using aluminum and includes tool-free expandability plus a wide array of ports, including Thunderbolt 4, HDMI, Mini DisplayPort, USB-A and more. With Intel Core i9 and Xeon processors, Nvidia RTX graphics, and up to 128GB of 3200MHz system memory, the Fury promises high-end performance.

    HP’s most affordable mobile workstation, the ZBook Power, is all about delivering performance at lower prices. The aluminum notebook includes various enterprise-level security features, such as ISV certifications, HP Security Suite and Tile device location. It includes 11th-gen Intel processors, up to 64GB of memory, PCIe G4 and Nvidia RTX A2000 laptop graphics.

    While we know that the ZBook G8 Power will be the most affordable of the three new HP ZBook models, HP has not published official pricing information. The Power G8 will be available starting next month, while the Studio G8 and Fury G8 will launch in July.

    Articles: Digital Photography Review (dpreview.com)

  • Photography Aspect Ratio: What Is It and Why Does It Matter?

    The post Photography Aspect Ratio: What Is It and Why Does It Matter? appeared first on Digital Photography School. It was authored by Andrew S. Gibson.

    photography aspect ratio a quick guide

    What are aspect ratios in photography? How does an aspect ratio affect your images? And how can you change the aspect ratio once you’ve taken a photo?

    In this article, I’m going to give you a quick introduction to photography aspect ratios – so that, by the time you’ve finished, you’ll understand what they are and how you can use them to improve your own images.

    Let’s get started.

    photography aspect ratio comparison

    What is a photography aspect ratio?

    An aspect ratio is the dimensions of an image expressed in a ratio form. You determine the aspect ratio by comparing an image’s width and height, then writing it as a width:height ratio (such as 3:2 or 4:5).

    The aspect ratio of your images is initially determined by the dimensions of your camera’s sensor. Because sensor dimensions are fixed, it’s easy to take the aspect ratio of your images for granted.

    But it is important to think about the aspect ratio when taking photos. Your camera aspect ratio has compositional implications – and I highly recommend you consider this when out with your camera.

    Also, a quick note: While your camera aspect ratio is technically fixed, many newer digital cameras allow you to change the aspect ratio in the camera’s menu. Plus, you have the option of adjusting an image’s aspect ratio in post-processing, so it’s more flexible than you might think!

    Why does aspect ratio matter?

    Different aspect ratios will produce different types of compositions.

    For instance, a square, 1:1 aspect ratio tends to produce very balanced, often confined images.

    A 4:5 or a 3:2 aspect ratio offers a bit more space within the frame.

    And a 16:9 aspect ratio gives a lot of room for expansion along the image edges.

    Of course, the effect of the aspect ratio depends somewhat on the type of scene you’re photographing, and certain scenes naturally lend themselves to certain aspect ratios. That’s why it’s essential to think carefully about the aspect ratio before pressing the shutter button; different aspect ratio choices can dramatically affect the composition.

    Common camera aspect ratios

    Virtually every camera sensor offers one of two aspect ratios:

    3:2 aspect ratio

    A 3:2 aspect ratio is used by 35mm crop-sensor and full-frame DSLRs, some Leica medium format cameras, most mirrorless cameras, high-end compact cameras, and most 35mm film cameras. This aspect ratio has been with us ever since Leica made the first 35mm film cameras in the early 20th century.

    3:2 aspect ratio

    Now, a full-frame 35mm sensor measures 36 mm x 24 mm. You can express this figure as a ratio: 36:24. Mathematicians always like to simplify ratios so the relationship between the two numbers is easy to visualize, and in this case, you can divide both dimensions by twelve.

    That gives you 3:2.

    As you’re likely aware, crop-sensor cameras have smaller sensors, measuring approximately 22.5 mm x 15 mm (though the exact measurements vary depending on the brand and model). Despite the different sensor sizes, the ratio between the width and the height remains the same, conforming to a 3:2 aspect ratio.

    4:3 aspect ratio

    The 4:3 aspect ratio is used by Micro Four Thirds cameras, many compact cameras, some medium format digital cameras, as well as medium format film cameras using the 6 cm x 4.5 cm format.

    4:3 aspect ratio

    3:2 vs 4:3 aspect ratio

    Now let’s compare the two common camera aspect ratios. In the diagram below, you can see the 4:2 aspect ratio (left), plus the additional space included by a 3:2 sensor:

    4:3 vs 3:2 aspect ratio

    Clearly, the 3:2 aspect ratio used by most DSLRs and mirrorless cameras is slightly longer than the 4:3 aspect ratio used by Micro Four Thirds cameras. The difference may not seem like much, but it has a major effect on the composition. Take a look at the following images to see why.

    Here’s the original shot, taken with a 3:2 aspect ratio:

    3:2 camera aspect ratio

    And here’s the same image, but cropped to the 4:3 aspect ratio, as if it had been taken with a Micro Four Thirds camera:

    4:3 camera aspect ratio

    Do you see the difference? It’s subtle, but it’s there. The 35mm frame is longer.

    And that can be challenging when it comes to composition because you have to find a way to effectively fill that length.

    Landscape photography, in particular, often benefits from a compressed frame, and that’s one of the reasons for the popularity of 7:6 medium format cameras and 5:4 view cameras among landscape film photographers.

    Here’s what the same landscape would look like cropped to these formats:

    5:4 photography aspect ratio
    7:6 photography aspect ratio

    For me, the 7:6 aspect ratio is too short, but 5:4 is a very pleasing aspect ratio to work in.

    Aspect ratio examples

    Now, after seeing the photos above, you might be thinking that the difference between aspect ratios is not a big deal. And often, when you are shooting in the landscape format (i.e., with the camera positioned so that the frame is horizontal), the difference is minimal. It’s not so difficult to work with any of the aspect ratios I’ve presented above.

    But if you switch to the portrait format (i.e., with a vertical frame), it’s a different story. A 3:2 frame suddenly becomes a lot harder to fill effectively, and the composition often benefits from cropping to a shorter rectangle. Here are some examples to show you what I mean:

    2:3 aspect ratio example
    3:4 aspect ratio example
    4:5 aspect ratio example

    The difficulty I had with the landscape above is that there was too much empty sky in the original image. I solved the problem by cropping off the top, and the final 4:5 aspect ratio seems to work nicely.

    Of course, not all images will benefit from this type of crop. But if you find yourself struggling to fill the frame, especially if you have a 35mm camera with a 3:2 frame, you may want to try a different aspect ratio.

    By the way, here is the first image cropped to a couple more common aspect ratios.

    The panoramic format (16:9):

    16:9 aspect ratio example

    And the square format (1:1):

    1:1 aspect ratio example

    Adjusting the aspect ratio in-camera

    As I mentioned above, many digital cameras let you adjust the aspect ratio in the camera menu. And if you have a camera with an electronic viewfinder, you may see the cropped image in the viewfinder itself.

    If your camera doesn’t have an electronic viewfinder, you’ll need to use Live View to take advantage of the aspect ratio function. The camera will display the cropped image on the rear LCD screen.

    But there’s a major caveat:

    If you use a non-native aspect ratio while shooting in JPEG, your camera will crop the image when you take the photo, and there’s no way to resurrect the edges of the frame. So if you later decide that you want a 3:2 aspect ratio instead of a 1:1 aspect ratio, you’re out of luck.

    However, if you use a non-native aspect ratio while shooting in RAW, the camera will save the entire image in the original aspect ratio, and you can change your mind about the crop in post-processing.

    Cropping in post-processing

    It’s often easier to crop in post-processing than in the field. Plus, if your camera doesn’t have an aspect ratio function, cropping during editing is the only way to adjust the aspect ratio.

    In pretty much every dedicated editing program, cropping is easy.

    For instance, in Lightroom, just click the Crop icon, then select an aspect ratio from the Aspect menu:

    adjusting the aspect ratio in Lightroom

    Photography aspect ratio: conclusion

    As you now know, aspect ratio is a big deal. It’s always a good idea to think about aspect ratios while shooting – and then, if necessary, adjust the aspect ratio in post-processing.

    Now over to you:

    What’s your favorite aspect ratio? And do you think about aspect ratio while taking photos? Share your thoughts in the comments below!

    Which aspect ratio is best?

    There is no one best aspect ratio – it all depends on the look you’re after! Some scenes benefit from square (1:1) aspect ratios, whereas others look great with a 4:3 or a 5:4 aspect ratio. I’d recommend playing around in a program like Adobe Lightroom.

    What aspect ratio do professional photographers use?

    That depends on the photo. As discussed in the article, landscape shooters tend to favor squarer aspect ratios such as 4:5, though if you’re a panorama photographer, a 16:9 frame (or wider!) might be preferable. Portrait photographers tend to avoid narrow aspect ratios, but there are times when a portrait looks good as a 9:16 composition.

    What is the aspect ratio of 8×10 photos?

    8×10 photos have a 4:5 aspect ratio.

    The post Photography Aspect Ratio: What Is It and Why Does It Matter? appeared first on Digital Photography School. It was authored by Andrew S. Gibson.


    Digital Photography School