Blog

  • Best Photos of 2018 by JMG-Galleries Blog Readers

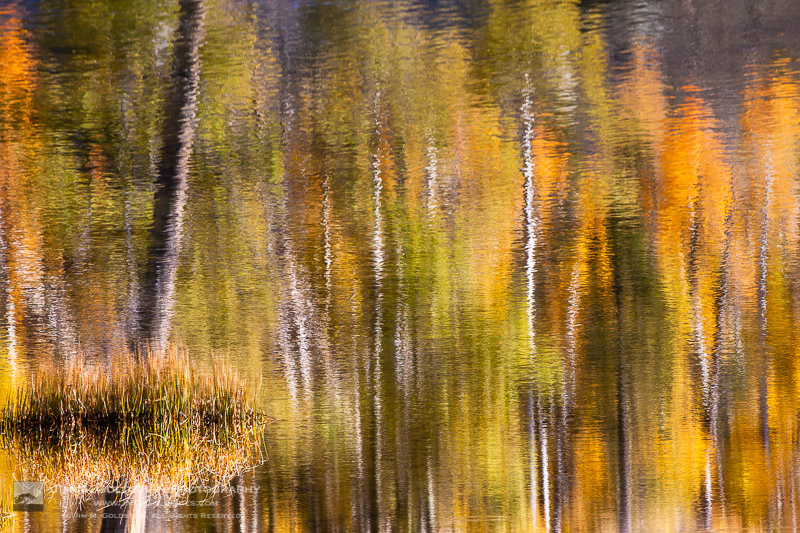
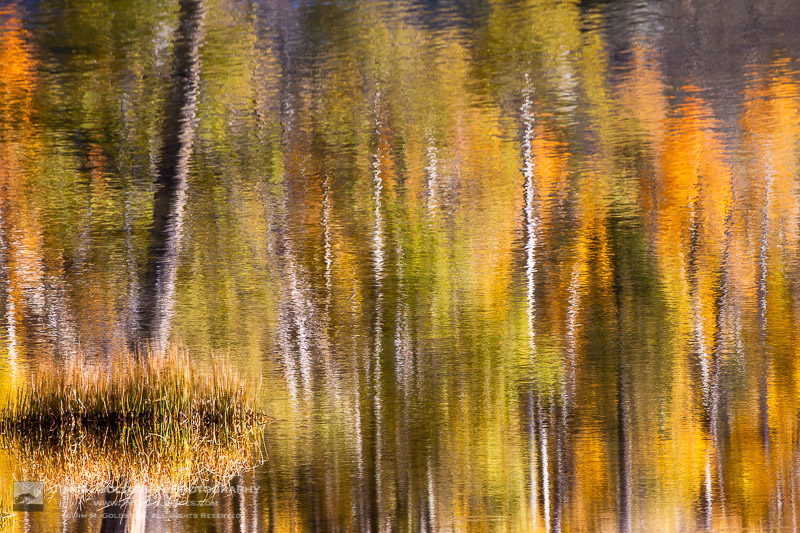
    Fall Color AbstractI’m excited to share the results of my 12th annual Best of Photos project.  115 photographers from around the world (amateur and professional alike) have shared their best photos of 2018.  I’m always amazed at the quality of work shared and I hope it’s a source inspiration to you for the coming year.

    For those who are new to my blog project, photographers taking part span the gamut of photo enthusiasts to professionals. The great thing about photography is that no matter what your skill level we all can relate equally in our love for the art of photography and visually exploring. With that in mind I encourage you to reach out to photographers whose work you enjoy to keep sharing & growing as an artist.  I am incredibly thankful that this tradition has been embraced and enjoy seeing how familiar faces have evolved their work & grown over the years.  I hope reviewing your best photos of the year and comparing them to years pasts keeps you inspired and aware of your progress as a photographer.

    If you’d like to take part next year and be informed when submissions open for the “Best Photos of 2019” blog project add your name to my mail list. You won’t be spammed. I send out newsletters quite infrequently.

    Thank to everyone who took part!  I invite you to visit each link below as I have and introduce yourself to many of the participating photographers.

    Best Photos of 2018

    1. Jim Goldstein – Best Photos of 2018 by Jim M. Goldstein
    2. Michael Russell – My Top 10 Photographs Of 2018
    3. Dave Wilson – Best of 2018
    4. Joseph Smith – 2018 Favorites – A Baker’s Dozen
    5. Randy Langstraat – My Ten Favorite Photos of 2018
    6. Chuq Von Rospach – Chuqui 2018 Best Of Photos
    7. Rachel Cohen – Best of 2018
    8. Lucy Autrey Wilson – A Thousand Words
    9. Romain Guy – Best of 2018
    10. Alexander S. Kunz – My Favorite Photos from 2018
    11. Stefan Baeurle – Top 10 Favorites of 2018
    12. QT Luong – 2018 in Review
    13. Jenni Brehm – Best pf 2018 – Changing Perspectives
    14. Sean Bagshaw – My Favorite Photos Of 2018
    15. Johann A. Briffa – 2018: A Photographic Retrospective
    16. Exploring Light – 2018: A Year In Review
    17. Drake Dyck – Top Ten (favourite) Images of 2018
    18. Richard Wong – Fine Art Photography Prints – 2018
    19. Ramen Saha – 2018 – Ten moments
    20. Martin Quinn – Quinn Images 2018 Favorites
    21. TheDarkSlides – TheDarkSlides Best of 2018
    22. Denise Goldberg – top photos :: 2018
    23. Peter Carroll – Favourites of 2018
    24. Jeff Hubbard – Ten Favorite Photos 2018
    25. Gary Crabbe – My Favorite Landscape Photos of 2018 – A Year-End Retrospective
    26. Harold Davis – Harold Davis – Best of 2018
    27. Werner Priller – My Favorite Images of 2018/
    28. Phil Colla – Natural History Photography – Best Photos Of 2018
    29. Aaron Hockley – Tech Photo Guy: Best Photos of 2018
    30. Dan Baumbach – 2018 in Review
    31. Jao van de Lagemaat – Jao’s best images of 2018
    32. Pete Miller-USKestrel Photography – Favorite Images of 2018
    33. Shikha – Eastern Sierra – My favorite images of 2018
    34. Bruce Leventhal – Reflecting on 2018
    35. Christopher Sheppard – The Stories Behind My Favorite Photographs of 2018
    36. Alan Majchrowicz – Photo Highlights 2018
    37. Tom Whelan – Nature Diary
    38. Todd Henson – Best Photos of 2018: My Favorites of the Year
    39. Khürt Williams – Island in the Net
    40. Patricia Davidson – My Top 10 Favorite Photos of 2018
    41. Russ Bishop – 2018 – The Year in Pictures
    42. Jim Coda – Some of My Favorite Images from 2018
    43. Steve Cole – Birds Eye View of 2018
    44. Fred Mertz Photography – Best Photos of 2018
    45. Martijn van der Nat – Best of 2018
    46. Graf Nature Photography – Twenty Eighteen Wanderings
    47. Scott Thompson – My Top 10 Tahoe Area Photos of 2018
    48. Kyle Jones – 2018 Favorites
    49. Clint Losee – My Best Landscape and Nature Photos of 2018
    50. Caleb Weston – Caleb Weston – Dubland Media
    51. Greg Clure – Best of 2018
    52. Rick Holliday – Favorites from 2018
    53. J.J. RAIA – J.J. RAIA Best Photos of 2018
    54. Francis Gagnon – Francis Gagnon Best Photos of 2018
    55. Mike Chowla – My Ten Best of Images of 2018
    56. Carl Donohue – 2018 in photos
    57. Kurt Lawson – 10 Favorites of 2018: From Lava Rivers in Hawaii to Yosemite Snowstorms
    58. William Bean – William Bean
    59. T.M. Schultze – My Favorite Photographs of 2018
    60. Andrew Thomas – Aerial Adventures – Best of 2018
    61. Matt Conti – 2018 Top 20 Photos
    62. Daniel Leu – Favorites – 2018
    63. Carol Schiraldi – Best of 2018 from Carol’s Little World
    64. Alan Dahl – 2018 Favorite Photos
    65. Milan Hutera – 2018 in Pictures
    66. Kathy Barnhart – Flickr Sensing Light Best of 2018 Album
    67. Greg Russell – Alpenglow Images 2018 Year in Review
    68. Derrald Farnsworth-Livingston – Top 10 Favorite Images from 2018
    69. Kevin Ebi – Living Wilderness: Best of 2018
    70. Jackson Frishman – Favorites of 2018
    71. Greg A. Lato – My Favorite Photos of 2018
    72. Mike Shipman – Mike Shipman’s Best of 2018
    73. Beth Young – Best Photos of 2018
    74. Dale Grosbach – My Favorites – 2018
    75. Brent Huntley – Photography and Travel
    76. Charlie Russell – Best Wildflower Photos for 2018
    77. Bryan William Jones – Jonesblog
    78. Tony Wu – Favorite Photos of 2018
    79. Adrian Klein – 2018 Photo Retrospective
    80. Scott McGee – Top 10 of 2018
    81. William Neill – My Favorite Photographs of 2018
    82. Thomas Yackley – Yackley Photo
    83. Anne McKinnell – Best Photos of 2018
    84. Holly Davison – Top Ten of 2018
    85. Brian Knott – Brian Knott Photography 2018 Year In Review
    86. Anna DeStefano – Affirmation Photography’s Best of 2018
    87. Ingeborg Fernau – Magicalglow Photography Blog
    88. Emil Powella – Top 10 of 2018
    89. Elduro Tuco – Elduro Tuco
    90. Eric Chan – Favorites From 2018
    91. TP Chapman – Best of 2018
    92. Ilias Katsouras – Okrivadas
    93. Molly Dean – Best Photos of 2018
    94. Sarah Marino – 2018 Wrap-Up and a Few Favorite Photographs
    95. Michael Frye – My Top Photographs of 2018
    96. Jim Stamates – Memories of 2018
    97. Tim Aston – Favorites from 2018
    98. Samantha Decker – My Best Photos of 2018
    99. Bryn Tassell – Bryn Tassell favourites of 2018
    100. Mike Cleron – 2018 Favorites
    101. Carla Overduin – Best Photos of 2018
    102. Peter West Carey – Best Photos of 2018
    103. Simon C Ponder – SponderPoints
    104. Ron Niebrugge – Favorite Photos from 2018
    105. Steve Cozad – Best of 2018
    106. Björn Göhringer – My Top 15 Photos From 2018
    107. Neil Corman Photography – 12 Favorite Images from 2018
    108. Maurice O. Weaver – Best Photos of 2018
    109. Michael McCloskey – Best Photos of 2018
    110. Stephen L. Kapp – Best Photos of 2018
    111. Robin Black – Best Photos of 2018
    112. Kelly Castro – 10 FROM 2018
    113. Jeff Sullivan – My Top 10 Photos of 2018
    114. David Leland Hyde – Landscape Photography Blogger/Best Photographs of 2018
    115. Larry Angier – A collection of my best/favorites from 2016


    Have a great 2019!

    The post Best Photos of 2018 by JMG-Galleries Blog Readers appeared first on JMG-Galleries – Landscape, Nature & Travel Photography.


    JMG-Galleries – Landscape, Nature & Travel Photography

  • The Insta360 Titan is an 11K 360-degree camera with 8 Micro Four thirds sensors

    Insta360 has most user types of 360-degree cameras covered, offering cameras from the consumer-level One X all the way up to pro-level 8K models. However, it seems there is demand for even more powerful cameras with higher resolutions.

    With the new 11K Titan camera Insta360 is catering to VR cinema professionals with the highest demands. The camera features eight lenses with Micro Four Thirds sensors, which is the largest sensor size on any stand-alone VR camera.

    The camera supports 10-bit color and in video mode can shoot 11K or 10K 3D at 30 fps, 8K at 60 fps or 5.3K at 120 fps. In still mode it can capture 11K 360-degree images in 3D and monoscopic.

    To cope with the amounts of image data that is captured, each lens/sensor combo requires a high-speed SD card. Gyroscopic metadata for Insta360’s FlowState stabilization and low-resolution proxy files, which can be used for quicker editing with Insta360’s Adobe Premiere Pro plug-in, are stored on an additional card.

    In addition to the company’s very efficient FlowState stabilization, the Titan also supports Insta360’s Farsight radio technology which allows for remote control of the camera and was first introduced with the Pro 2 model. The CrystalView conversion tool can be used to play back and watch the camera’s 11K video output.

    This much technology does not come cheap, of course, and priced at $ 14,999, the Titan is squarely aimed at the VR professionals camp. If you think the camera could be a profitable investment for your business, you can reserve one now with a $ 150 deposit. Shipment is expected for April. If you’d like to get an idea of the image quality the camera is capable of, head to the Insta360 Youtube channel for resolution, low-light and stabilization comparisons.

    This Is Titan: Insta360 Opens Reservations on 11K, Eight-Lens VR Cinema Camera

    Insta360 today opened reservations for the Insta360 Titan, an eight-lens cinematic VR camera that captures 360 photos and video at up to 11K resolution.

    The Titan uses eight Micro Four Thirds (MFT) sensors, the largest sensors available in any standalone VR camera. These sensors maximize image quality, dynamic range, low-light performance and color depth, raising the bar for realism in high-end professional VR capture.

    Insta360 will show the new camera at the CES show in Las Vegas this week. The Titan is set to ship in April, following a pilot program with select filmmaker partners.

    Creators can reserve their Titan here today to secure a priority shipment in the first batch.

    Introducing Insta360 Titan: https://youtu.be/9VhxtmV7mZQ

    Turn it up to 11.

    The Titan is the first standalone 360 camera ready to record in 11K. Key shooting modes include 11K at 30 FPS, 10K 3D at 30 FPS, as well as 11K 360 photos in 3D and monoscopic formats.

    Additional shooting modes include 8K at 60 FPS and 5.3K at 120 FPS.

    A sensor so good you’ll want eight.

    360 cameras use an array of sensors to cover every direction of the action. Most use small sensors on par with those found in smartphones or action cameras — useful for installing in a smaller camera body but not for maximizing image quality.

    The Titan bucks this trend, sporting eight optimized Micro Four Thirds sensors that combine the benefits of a large sensor area with a relatively compact design. These high-performance sensors are the key to achieving a cinematic image quality that’s been unattainable to VR creators until now.

    Natural light and color.

    The Titan supports shooting in 10 bit color, allowing for billions of color combinations and extreme color accuracy, while its high dynamic range lets creators capture natural lighting and low-light scenes to achieve an unparalleled realism in VR.

    Make your move with FlowState Stabilization.

    The Titan uses Insta360’s signature onboard FlowState Stabilization technology, allowing for gimbal-like 9-axis stabilization with no accessories or added effort from the user. Onboard stabilization lets creators achieve the stunning dynamic shots necessary to tell a compelling story in VR.

    Not in the shot. But still in the action.

    The Titan comes standard with Insta360’s Farsight live monitoring system, consisting of a transmitter and a receiver that can be easily attached to a phone or tablet.

    Using Farsight, VR filmmakers can easily preview and control their shoots remotely. VR directors used to have to yell “action” and then jump behind a tree to avoid ruining the shot. Farsight saves them the sweat.

    Deliver what you shoot.

    Ultra-high-res VR content presents a distribution challenge. Most playback systems aren’t ready to decode immersive video at higher than 4K, let alone 11K.

    CrystalView, Insta360’s proprietary playback tech, lets creators deliver what they really shot. It renders in real time exactly the part of a video a viewer is watching – with no computing power wasted on displaying what’s behind their head — so that even mainstream smartphones can play back full-quality Titan content.

    Reservations open now.

    Starting today, VR filmmakers can reserve their Insta360 Titan and be among the first owners when the camera ships this April.

    The Titan is priced at $ 14,999 USD, and the reservation is confirmed with a fully refundable deposit.

    Articles: Digital Photography Review (dpreview.com)

  • Mapplethorpe movie trailer arrives ahead of film’s US theatrical premiere

    A new trailer has given the public its first look at Mapplethorpe, a biopic chronicling the life of controversial photographer Robert Mapplethorpe, whose provocative work earned him fame in 1970s America. The movie, which was written and directed by Ondi Timoner, first debuted to a limited audience at the Tribeca Film Festival last year, but will receive a wider release in US theaters on March 1, 2019.

    Mapplethorpe was best known for his black-and-white portraits and photographs of New York’s underground scene. The photographer’s first solo exhibition took place in 1973 at the Light Gallery in New York City featured photos captured with a Polaroid camera. Mapplethorpe later transitioned to a Hasselblad medium format camera. The photographer’s fame flourished through the 1980s up to his death from AIDs in 1989.

    The biopic stars Matt Smith of Dr Who fame as Robert Mapplethorpe, Marianne Rendon as Patti Smith, and Hari Nef as Tinkerbelle.

    Articles: Digital Photography Review (dpreview.com)

  • Nikon updates its lens roadmap with 3 lenses confirmed for 2020, 7 listed for 2021 release

    Nikon has released an updated lens roadmap for its Nikon Z system that includes a number of amendments from the original roadmap shared in August 2018.

    The new roadmap now makes clear the 20mm F1.8 S, 50mm F1.2 S and 14-24mm F2.8 S will ship some time in 2020. The 24mm F1.8 is expected to ship in 2019, a bump up from the original 2020 release timeframe.

    Nikon also dropped a ‘TBA’ lens from its 2021 timeframe, dropping to seven lenses from eight.

    Articles: Digital Photography Review (dpreview.com)

  • Secret Camera Settings that Supercharge your JPEG Photos

    The post Secret Camera Settings that Supercharge your JPEG Photos appeared first on Digital Photography School. It was authored by Simon Ringsmuth.

    Shooting pictures in RAW definitely has its advantages, but there are plenty of good reasons you might want to shoot using the JPEG format as well. It really comes down to personal preference, and both types of file formats have their pros and cons.

    One of the biggest assets of the RAW format is that you can adjust your images as much as you want in programs like Lightroom or Luminar. Whereas the lossy compression algorithms used to create JPEG files leave much less room for post-processing flexibility. For this reason, to get the most out of your JPEG files, there are some important settings in your camera you should learn and customize to get your photos looking their best.

    When you use RAW, you have access to the full data readout from your camera’s sensor. None of the data used to create your image was tossed out by your camera to compress the image and save memory card space. When shooting JPEG, your camera makes a series of determinations on the fly. It calculates what it thinks are the best values for various settings to get a pleasing photo almost like following a recipe to bake a cake. You can tweak that recipe to get the final output to be more customized to your taste. Doing so can be extremely helpful in many different photography settings.

    White Balance

    White balance is perhaps the most critical setting for JPEG shooters to understand. Getting this right can have a massive impact on how your images look. If you notice your images looking slightly yellow or blue, it’s likely due to the white balance not being calibrated correctly. Most people only use the Auto White Balance option which leaves the heavy lifting up to the digital brain inside your camera.

    However, it’s straightforward to set the white balance by yourself and get much better results, particularly in tricky lighting situations. Especially indoors.

    Setting the white balance at this cat show was really tricky due to the old fluorescent lights at the venue. Several of my auto white balance shots had a yellow tint, so I set the proper white balance in my camera and was able to achieve much better results.

    It only takes a few seconds to set the white balance when shooting JPG and it can save you a lot of hassle in the long run. All DSLR and Mirrorless cameras, as well as most point-and-shoots, come with a variety of white balance settings. You can specify these if you know a little bit about the lighting conditions in which you are shooting. Many cameras have options such as Sunlight, Cloudy, Incandescent, Shade, even different types of fluorescent lighting. These can be selected to help make your photos look as good as possible.

    The Overcast white balance setting gave me just the right look I was aiming for in this shot.

    In my experience, the Auto white balance setting works great outdoors. However, when shooting inside, even the latest cameras can get tripped up by the many different types of artificial light. If you’re at a school, office, sporting event or another indoor setting with fluorescent lights, just choosing that option in your White Balance menu can make a huge difference to how your photos turn out. Try different settings and see what you like. Chances are, one of the pre-selected settings can help a great deal if you notice your photos looking a little blue or orange.

    The picture I wanted to take was not what I ended up with. I missed a good opportunity largely due to improper white balance settings. A richer, more natural tone was what I wanted, but the image came out much cooler than I intended because I did not take a few seconds to set a proper white balance.

    Finally, you can go all out and set a white balance of your own, which isn’t as big of a deal as it might sound. Every camera has its way of doing this. As long as you have a mostly white surface to point your camera at you should be all set (ideally it works if the surface is just slightly gray). Once again, the actual procedure is going to be different on every camera, and if you’re unsure do an internet search of your camera model and “custom white balance.” You should find the information you need.

    Sharpening

    While you adjust White Balance for various photography situations, Sharpening is a setting that you fine-tune to your taste and leave as-is. Of course, each photographer is different, but I’ve found I like a certain level of sharpening on all my JPG photos. This is because I have a particular type of look that I’m trying to achieve. Sharpening can’t fix an out-of-focus image. However, it can give your photos a certain level of pizzazz or clarity that you might have seen in other pictures but aren’t quite sure how to achieve on your own.

    I ramped up the in-camera sharpening to get a clean, crisp image of these crayons. The foreground and background are just slightly out of focus due to shallow depth of field, but the middle is tack sharp.

    Be careful not to set the sharpening too high though. Over-sharpening can lead to images that look fake and over-processed. However, you might find that with a few tweaks to the sharpening setting you can get your images to look much better.

    Contrast

    Adjusting the contrast slider can make dull images come to life and punch-up an otherwise boring image. Either you or your camera, depending on your shooting mode, makes decisions about how bright or dark your images are based on the exposure settings. The contrast becomes the overall difference between the brightest and darkest portions of your pictures. Dialing up the contrast makes bright parts brighter and dark parts darker, whereas lowering the value will have the opposite effect.

    Adjusting the contrast value helped me get the shot I was aiming for.

    Contrast may seem like such a simple thing and, for the most part, it is. But it’s something that often gets overlooked by casual photographers. They may want to have nice JPEG shots straight out of their cameras and not worry about fussing with all the technical details. You might find that you prefer your photos to have a little contrast lending an interesting dynamic element to them. Or, perhaps you want your images to be a bit more subdued. Try adjusting the contrast slider, and you might realize that it does the sort of thing you have always been trying to achieve but never quite knew how to get.

    Saturation

    If you have ever played around with filters on apps like Instagram you probably noticed that some of them make your colors pop and stand out while others have more subdued, muted tones. This effect is due in large (but not exclusive) part to saturation adjustments. You can fine-tune this on your camera to customize the look of your images. Some photographers prefer an over-saturated look – especially when taking nature or landscape pictures. It also works well for certain types of portraits too.

    Adjusting your saturation after you take a picture can work, but it’s best to get it right in camera if possible.

    Some photographers like a softer touch and prefer their JPEG files to be less saturated for a calm, timeless look. It’s all based on personal preference of the photographer. It can be useful and time-saving to change the saturation in-camera instead of in an image editing program. Adjusting the saturation is as simple as increasing or decreasing the value in your camera. You may find, after several test shots, that you prefer your images to be somewhat over or under-saturated. Either way, it’s worth giving it a try to see what you end up liking.

    Other settings

    Most cameras have additional custom settings you can change in addition to the basic ones covered so far. They can include things like film simulations, grain effects, highlight/shadow adjustments, and noise reduction, which can be very handy when shooting at higher ISO levels. If you have never explored these settings before, it’s a good idea to dive into your camera menus and do some experimenting.

    If you dig into your camera menus you will find many other settings you can change to get just the right look you are going for.

    Change some numbers, take some test shots, and see how the results compare to your normal shooting mode. It’s a good bet that you’ll end up with some appealing results. At the very least, you may learn more about your camera than you did before.

    Custom Banks

    A feature offered by many cameras is the ability to save banks of custom settings you can activate at will. Even my old Nikon D200, which came out in 2006, had this ability. The same is also true for every camera I own today. You can save specific values of most of your image adjustments such as Saturation and Contrast to a bank that you can recall at will. Using these custom settings means you don’t have to change individual values every time you want to shoot with a specific style.

    This Fuji X100F has seven custom banks where you can save a huge variety of settings. You can switch between each bank with the touch of a button.

    Think of this method as creating custom presets in Lightroom that you can apply to your camera with the touch of a button. If you’re shooting outdoors, you may have an in-camera preset with greater saturation and contrast. Perhaps you find yourself shooting school basketball games, so you create a preset with custom white balance and sharpening levels. If your camera does offer this feature, you can find it in the menus, or you can search online for your camera as well as the phrase “custom setting bank.”

    Wrap up

    I know not everyone shoots in JPEG, but if you do, some of these custom settings can come in handy and save you a lot of time. However, be aware that it’s difficult to undo them afterward. Unlike RAW, your JPEG files contain much less wiggle room and if you crank up the saturation and contrast in your camera, it’s challenging to undo these changes on your computer. Still, if you pay attention to what you are doing and make your adjustments carefully, you might be surprised at how useful these settings can be.

    The post Secret Camera Settings that Supercharge your JPEG Photos appeared first on Digital Photography School. It was authored by Simon Ringsmuth.


    Digital Photography School

  • Black Eye launches its 4th-gen universal Pro mobile lenses in North America

    European mobile camera lens company Black Eye has announced the launch of its fourth-generation universal Pro lenses for smartphones in North America. As of now, Black Eye’s portfolio features nine mobile lenses across three product series, as well as a new Travel Kit G4, an upcoming Pro Kit G4 bundle and new cases for the iPhone 7 and later.

    Black Eye was founded by professional photographer Arto Ekman and professional snowboarders Fredu Sirviö and Eero Ettala. The company’s mobile lenses center around a simple universal attachment system that can be clipped onto most smartphones and similar mobile devices, such a laptop’s webcam.

    Black Eye’s most recent product lineup includes the Pro-series Portrait Tele G4, Cinema Wide G4, and Fisheye G4 lenses, as well as the regular wide, macro and combo G4 lenses. The company also recently launched the Travel Kit G4, a bundle featuring a case and the Wide G4, Macro G4 and Pro Portrait Tele G4 lenses.

    In addition to its existing products, Black Eye will release a new Pro Kit G4 in the first quarter of 2019. This kit features all three Pro-series G4 mobile lenses and a durable case for $ 249.99 USD. In Q1 2019, Black Eye will also release protective iPhone cases for the iPhone 7 and later models for $ 19.99 USD.

    Articles: Digital Photography Review (dpreview.com)

  • 10 Tips to Make Lightroom Classic CC Run Faster

    The post 10 Tips to Make Lightroom Classic CC Run Faster appeared first on Digital Photography School. It was authored by Darina Kopcok.

    Making Lightroom Run Faster-Darina kopcok-DPS

    Lightroom is an excellent program editing and managing your image files. When it comes to organizing and developing your photos, Lightroom can’t be beaten. However, there are times when it slows down; like when it renders previews. To address this, here are ten tips that will make Lightroom Classic CC run faster.

    10 Tips to Help Lightroom Classic CC Run Faster-Darina Kopcok-DPS

    Update Lightroom regularly

    Let’s start with the simplest tip: update Lightroom regularly.

    Word is that Adobe has been working diligently behind the scenes on improving the performance of Lightroom, so it’s important to keep it updated.

    To check for updates, click on -> Help in the top menu bar in Lightroom and then click on -> Updates to install them.

    Help-Updates-Lightroom-DPS

    Optimize your Catalog

    Lightroom continually updates the catalog file, but eventually, the data structure can become less optimal.

    Lightroom has an “optimize catalog” option you can enable to improve performance.

    To access this option, go to Lightroom -> Preferences and click on -> Performance.

    Then click on -> Optimize Performance.

    Set up Lightroom to back up on a regular schedule, and set it to optimize the catalog following the backup.

    You can backup as often as you like. Ensure you always have the latest backup in case your Lightroom catalog becomes corrupt.

    Be sure to discard previous backups to keep them from slowing down your computer.

    More on this in a bit.

    Optimize Catalog in Lightroom-DPS


    Store your Lightroom Catalog and Previews on your main hard drive

    Lightroom stores your catalog and preview files on your main hard drive by default.

    To check where the catalog and previews files are stored, go to Lightroom -> Catalog Setting (Mac) or -> Edit -> Catalog Settings (PC).

    The Catalog name is an .lrcat file and its location can be found under the -> General tab.

    The preview file is an .lrdata file and it is stored in the same location.

    Lightroom Catalog Location-DPS

    Check your hard drive space

    If your computer’s main hard drive is running low on space, Lightroom will slow down, as will any other programs that you’re running simultaneously, like Photoshop.

    Your main hard drive needs at least 20% free space for Lightroom to run optimally.

    Keep in mind that Lightroom can actually be one of the reasons you’re running low on space!

    If you have Lightroom set to back up your catalog every day or every time you close it down, that can result in a lot of space being taken up by backup files.

    Delete all of these backup files except the last couple of backups you have made.

    It’s important to have the latest backup in case your Lightroom catalog becomes corrupt, but that is all you really need.

    Convert your images to DNG when importing into Lightroom

    DNG is short for Digital Negative. It’s a RAW file format created by Adobe.

    When you convert a file into DNG, Lightroom ads Fast Load Data to the file, which results in a partially processed preview that allows Lightroom to render faster previews in the Develop module.

    Adobe claims that a DNG file with Fast Load Data can load up to eight times faster.

    Another benefit of converting to DNG files is that they are smaller files than other RAW formats and take up 20% less space on your hard drive.

    You must enable this Fast Load Data under your Lightroom Preferences tab.

    Go to -> File Handling and check off Embed Fast Load Data. Make sure you have DNG selected as the file extension.

    Fast Load Data-Lightroom-DPS

    Edit your images using Adobe’s recommended Adjustment Steps

    The panels in the Develop module are organized according to a suggested workflow.

    Adobe also recommends that adjustments in Lightroom follow a certain order to maximize performance. They are as follows:

    1. Spot Healing
    2. Lens Correction
    3. Transformations
    4. Global Adjustments
    5. Local Adjustments
    6. Sharpening
    7. Noise Reduction

    Whenever you make an edit, Lightroom applies it and calculates the previous adjustments that have been made. The more adjustments you apply, the more Lightroom slows down.

    This helps keep track of your edits but slows down your system because Lightroom is calculating adjustments as you edit.

    I personally stick to this order, except that I start by adjusting my white balance.

    I also leave detailed edits for Photoshop. For example, as using the spot healing brush repeatedly can slow Lightroom down significantly. You are better off using this tool in Photoshop, which is also more precise.

    Also, editing your images in the order they appear in your Lightroom filmstrip can have an impact on speed.

    Lightroom caches images for faster performance in the Develop module.

    It will automatically load the next and previous images in the filmstrip below your photos in the memory.

    In the screenshot below, the active image is highlighted with a lighter grey background. The images on either side have also been loaded into memory for quick access.

    LR Edit Order-Darina Kopcok-EP

    Build standard  previews on Import

    Lightroom offers several preview settings for your images.

    Although there are differing opinions as to which is the optimal preview setting, I suggest building standard previews on import.

    This will slow down the import process, but it will make the Library module more responsive when you review the imported images. Lightroom renders the previews from your SSD, rather than building them from the RAW files.

    Make sure your previews are set close to the width of your screen.

    For example, I work on a 27-inch iMac with a 5120 x 2880 built-in retina display. This means my display should be set at 5120 pixels.

    To make this adjustment, go to the -> Catalog Settings and choose -> File Handling.

    Choose the previews size under -> Standard Preview Size.

    Display-Lightroom-DPS

    Make your Camera RAW cache larger

    Lightroom has a Preview Cache, which is stored with your Catalog file and used in the Library view.

    It also has a Camera RAW cache, which loads the image date when you’re in the Develop module.

    The default size for this is 1GB, which slows down performance due to Lightroom swapping images in and out of its cache while you’re editing.

    I suggest setting the Camera RAW cache to 20 or 30GB.

    To set this option go to your Lightroom -> Preferences and click -> Performance.

    Set your desired maximum size RAW cache Settings.


    Disable XMP Writing

    Lightroom keeps track of the edits you make in the Develop module in its catalog. If something happens to this catalog, you can lose all your data.

    Lightroom can be configured to write the develop setting data into an XMP file. This a small file that contains the edit information and is written to your computer’s hard drive in the same place as your original RAW file.

    The problem is that writing changes into this file can really slow your computer down.

    I suggest disabling this feature and make sure that you always have a current backup instead.


    Pause Address and Face Lookup features

    Lightroom allows you to look up image address based on the GPS data, or the ability to search for faces.

    However, allowing these options to run in the background can slow Lightroom down. So it’s best to pause them while you’re actually editing your photos.

    You can start them up again if they’re relevant to your editing process.

    For example, as a food photographer, I don’t use these features so I have mine set permanently on “pause”.

    To access these features, go to where your name appears in the top left-hand corner of the Lightroom interface and click on the arrow beside it to access the drop-down menu. Choose -> Pause.

    In Conclusion

    When it comes to archiving, organizing and all-around management of your photos, Lightroom is an amazing program.

    Hopefully, these tips help you get the most out of the program and speed up its performance so you can spend less time editing and more time shooting!


    The post 10 Tips to Make Lightroom Classic CC Run Faster appeared first on Digital Photography School. It was authored by Darina Kopcok.


    Digital Photography School

  • Venus Optics announces 9mm F2.8 lens with DL mount for DJI cameras, drones

    Venus Optics has the Laowa 9mm F2.8 DL Zero-D, the widest lens available for DJI X7 cameras and Inspire 2 drones.

    The lens, which is identical in design and specs to the Fuji X, Sony E and Canon EF-M mount versions, features a 113-degree field of view and ‘close-to-zero distortion.’ Venus Optics notes the widest DL lens currently available, the DJI 16mm f/2.8 ASPH ND, has a diagonal field of view of just 80-degrees, meaning X7 and Inspire 2 users are able to get much more in the frame than previously possible, as seen int he comparison video below.

    The lens weighs only 210g (0.46 lbs) and measures 60mm (2.36 in) long. It’s constructed of 15 elements in 10 groups with two aspherical elements and three extra-low dispersion elements. The front filter thread has a diameter of 49mm and it uses a seven-blade aperture diaphragm.

    Below is a collection of sample footage captured by Ling Chen and shared by Venus Optics that shows the lens onboard a DJI Inspire 2 drone, as well as a sample gallery of still images shot by Liu Su Pei and shared by Venus Optics.

    $ (document).ready(function() { SampleGalleryV2({“containerId”:”embeddedSampleGallery_2899289038″,”galleryId”:”2899289038″,”isEmbeddedWidget”:true,”selectedImageIndex”:0,”isMobile”:false}) });

    The Laowa 9mm F2.8 DL Zero-D retails for $ 499 USD, but Venus Optics notes pricing may vary from country to country. It’s available now from Venus Optic’s online shop and authorized Venus Optics resellers.

    Articles: Digital Photography Review (dpreview.com)

  • Alleged 2019 iPhone renders show triple-camera arrangement

    It’s still a long way to go until Apple’s usual iPhone launch month of September but it looks like iPhone photography fans will have a triple-camera setup to look forward to. A series of renders shared by @Onleaks in cooperation with digit.in shows alleged renders of a 2019 iPhone model with a Huawei Mate 20 Pro-style square camera setup, featuring three lenses.

    Two of the lenses are vertically aligned, with the third lens offset to the right under the flash LED. It also looks like the phone’s rear panel is made from glass.

    Onleaks notes the device is still in its EVT phase (Engineering Validation Test), so some design details are subject to change as we near the launch. We also don’t know what the function of the third camera will be, but with Huawei, LG and Samsung now all offering triple-camera smartphones with super-wide-angle and tele options, it’s likely Apple will want to go down the same route.

    It’s still early in the year for new iPhone renders but @Onleaks has an excellent track record and is widely regarded a credible source, so there is a good chance one of the 2019 iPhones will look very similar to the renders. Given the latter are showing a triple-camera setup, were are likely looking at a top-end model here.

    Articles: Digital Photography Review (dpreview.com)

  • Canon reveals VIXIA HF G50 4K UHD, W10, and W11 camcorders at CES 2019

    Canon has launched three new VIXIA consumer camcorders at CES 2019, the most notable being the VIXIA HF G50 with 4K/30p recording and 20x optical zoom. This is the first G-Series camcorder to offer UHD recording, making it ideal for advanced amateurs and projects requiring a higher level of quality, according to Canon.

    The VIXIA HF G50 features a Canon 29.3 – 601mm 20x optical zoom lens, 8-blade aperture for still image bokeh, 4K 1/2.3-inch sensor, DIGIC DV 6 image processor, Dual-Pixel CMOS AF five-axis OIS, dual-card SD slots, a 3-inch LCD touchscreen, and a tilting EVF.

    In addition to Full HD and UHD, the camcorder supports slow and fast recording with a range of 0.4x to 1200x. The model retains the same general design as the previous HF G40 camcorder model. Canon will offer the VIXIA HF G50 4K camcorder in April for $ 1,099.99 USD.

    Joining the HF G50 are the new VIXIA HF W11 and HF W10 rugged camcorders targeted at adventurers and general consumers. Both models feature shockproof, dustproof, and waterproof (to 5m / 16.4ft) construction; they can be used in temperatures down to -10C / 14F. Likewise, both the HF W10 and HF W11 offer 40x optical zoom, 60x digital zoom, Full HD 1920 x 1080 AVCHD recording, 5-hour battery life, and a 3-inch touchscreen.

    The two models differ in internal storage capacity: the W11 has 32GB, whereas the W10 only has 8GB. Users can expand the capacities via a removable SD card. As well, the W11 model features an automatic LED light. Both models will be released in April for $ 399.99 USD (HF W10) and $ 449.99 USD (HF W11).

    Articles: Digital Photography Review (dpreview.com)