Blog

  • 3 Basic Steps for Photographing Motion, Moving Objects and the Art of Panning

    Photography is one of the most powerful arts of all time. It gives time a meaningful value, some might say even more valuable than memories. Photos can express deep emotional features of places, things, people, and objects. They are part of our legacy to the future generation. But it’s not all about the future, or the past. It’s about capturing Continue Reading

    The post 3 Basic Steps for Photographing Motion, Moving Objects and the Art of Panning appeared first on Photodoto.


    Photodoto

  • 5 Awesome Ways to Improve Your Clothing Photography

    Clothing photography… it’s chic, it’s in demand, and it can score you a pretty penny if you prove yourself. What’s even better is that clothing photography has weaved itself into numerous popular industries and niches, ranging from fashion and runways (duh), to Ecommerce stores, all the way to social media and its influencers – there is no shortage of gig Continue Reading

    The post 5 Awesome Ways to Improve Your Clothing Photography appeared first on Photodoto.


    Photodoto

  • 11 Tips for Shooting Travel Stock Photography to Make Money

    The post 11 Tips for Shooting Travel Stock Photography to Make Money appeared first on Digital Photography School. It was authored by Kav Dadfar.

    Stock photography is a tough industry to master. The competition is fierce and prices have been falling over the last decade. But if you are willing to put the effort in and have a long term plan, you can certainly reap the rewards. As a photographer who has been involved in stock photography for over a decade, I have certainly seen the highs and lows. So here are my top tips for shooting travel stock images and how to make money from it.

    shooting-travel-stock-photography

    1. Include people

    Picture buyers are always looking for something new and fresh. Including a person can often be what makes your images unique to the thousands of others that already exist. Including a person in the shot also gives the image some context and shows more of an experience rather than just documenting a place.

    Some scenes are busy enough that you don’t need someone to pose. But if you do need someone, don’t be afraid to ask a stranger. Rarely have I found that anyone says no. I always offer to send them a copy of the image to sweeten the deal. This doesn’t mean you shouldn’t take the more generic-type shots. It more about maximizing your sales potential by shooting a variety of different images.

    shooting-travel-stock-photography

    2. Get a model release

    So once you have included a person when shooting travel stock photography, it is a good idea to get a model release. If the person or people are mainly unrecognizable, or if you intend to sell your shot for editorial purposes only, you won’t require one. But be aware that some stock agencies will require a model release even if it is someone’s hand showing in a photo. Of course, there are times where it simply isn’t feasible, for example, if you are photographing a crowd of people. Getty Images have a great model release form that you download here.

    shooting-travel-stock-photography

    3. Shoot portrait and landscape

    When shooting travel stock photography, you should always shoot a landscape and portrait version. Not all scenes work in both landscape and portrait, so sometimes it might not be possible. But if you can, it will come in really useful.

    But not only portrait and landscape, try to capture some different compositions. For example, place your point of interest on the left or right. Leave room above and below. You are already at the location so you might as well cover as many possibilities as you can. You never know when a buyer will ask if you have that image in a different crop. Doing this will mean that for example, your image may get used as a double-page spread or a front cover.

    11 Tips for Shooting Travel Stock Photography to Make Money

    4. Leave space for copy

    It is important to shoot images with dead space to allow for copy or headlines to be put in. Sometimes this can mean breaking those all-important rules of composition you have spent years perfecting. But it’s worth it to make those sales.

    As mentioned above, you can always shoot multiple versions of the same shot. Try to imagine where and how your image will be used in a publication (or even a website), and compose your shot with that in mind.

    Image: There was plenty of free space at the top of this image for the copy to be placed.

    There was plenty of free space at the top of this image for the copy to be placed.

    5. Choose the right agency

    This might be pretty obvious, but it’s important to submit your images to the correct stock photography library. If you shoot travel stock photography, then a specialist travel site is best. If you shoot still life, then an agency that specializes in this would be more successful.

    Beyond that, spend some time researching the agency that you are thinking of submitting to. For example, are you happy to see your images sold for a few cents? Consider what your commission rate will be as well as they vary greatly from one agency to another.

    shooting-travel-stock-photography

    6. Think carefully before submitting to Microstock

    Every single person I have ever spoken to who submitted to microstock sites regrets doing so down the road. Of course, there are probably some photographers out there who are very happy with their returns. The problem is that you will need such a huge collection of images with a wide coverage to see any returns that will be worth your time. This is because microstock sites sell images for cents. Ask yourself, would you prefer to sell one image at $ 25 or 250 at 10 cents?

    11 Tips for Shooting Travel Stock Photography to Make Money

    7. Find fresh angles

    If you really want to make your images stand out and catch the buyer’s eye, photograph it differently! Every picture buyer has seen the classic shot of the Eiffel Tower, and it has been on the cover of hundreds, if not thousands, of publications. So the same is not likely to catch many prospective client’s attention. It’s not always easy, but if you can capture something different or unique, you might end up with a few sales from it. This could be as simple as photographing something from lower down or higher up.

    11 Tips for Shooting Travel Stock Photography to Make Money

    8. Unique location

    As well as finding fresh angles, find new locations. Iconic locations such as London or New York, are constantly changing, so there are always potential new places from which to capture photos. This could be from a new rooftop bar with a unique view of Manhattan or new art installation on the streets of London. Even if your location isn’t ever-changing, finding somewhere with a view that not everyone photographs can be very useful.

    shooting-travel-stock-photography

    9. Quality over quantity

    This is often a bit of a contradiction when it comes to stock photography because stock photography is a numbers game. The more images you have, the better your chances of making a sale. However, the key is that they have to be quality shots that people would be willing to pay for. This is the reason that it will take most stock photographers a few years to get a wide enough coverage of images to see a decent return.

    Try to always shoot the best locations at the best possible time of day. More often than not, this will be sunrise or sunset, but you will need to assess each scene individually. Your aim should be to capture each shot in a way that you can sell it.

    11 Tips for Shooting Travel Stock Photography to Make Money

    10. Stay local

    Shooting good travel stock photography doesn’t always mean jetting off to far-flung locations. You can often produce great travel stock images a lot closer to home. If, like me, you are lucky enough to live near an iconic place (for me it is London), then you already have endless photo opportunities.

    Shooting locally has other benefits as well.

    You can revisit locations easily if the weather wasn’t great. You don’t have to worry about the additional travel expenses that eat into your profits. In fact, you will probably find that your local shoots end up having a far better ROI (return on investment) than traveling to other places.

    11 Tips for Shooting Travel Stock Photography to Make Money

    11. Do something different

    Another way that you can try to capture different types of images is to use different technology. For example, drones have now been around a while and can offer a completely new and unique view of something that may have been photographed a lot. But there’s no denying it’s getting harder and harder to fly drones in many places. So if it’s something you are interested in, it’s probably a good idea to get a license. But drone images do sell pretty well, so it is worth considering.

    shooting-travel-stock-photography

    Conclusion

    For most people stock photography will never be the main source of income. However, with some preparation and planning, you can certainly make some extra money from your hobby or profession. The key to being a successful travel stock photographer is to treat it like a business as much as possible. Keep your costs as low as you can, and shoot as often as you can.

    Do you have any other tips you’d like to share? Do you make money from shooting travel stock photography? Share with us in the comments!


    shooting-travel-stock-photography

    The post 11 Tips for Shooting Travel Stock Photography to Make Money appeared first on Digital Photography School. It was authored by Kav Dadfar.


    Digital Photography School

  • Westcott FJ400 is a sleek 400ws portable flash head with cross-platform radio trigger

    Lighting and accessory manufacturer Westcott has announced a studio-style battery operated portable flash head that it claims has a recycle time of less than a second at full power, and which can be triggered by a wireless controller that’s compatible with the TTL flash system of ‘virtually any camera brand’. The Westcott FJ400 is a mono-block style head that takes Bowens S mount modifiers and which is powered by a 4400mAh lithium polymer battery that is said to deliver more than 480 full power bursts per charge. The heads also come with an AC power lead.

    A dial on the side of the unit allows the power to be adjusted over a 9-stop range in full or 1/10th stop increments, and flash duration varies between 1/1280sec and 1/19,000sec depending on output levels and the mode set. The head can pulse to match a 20fps camera drive and allows high speed sync with shutter speeds as short as 1/8000sec. The wireless system in driven by a particularly powerful 2.4GHz radio communication network that the company says has a range of 300m/985ft, and heads can be organised in 10 groups over 16 channels.

    A large display panel on the side of the flash allows users to see at the glance the unit’s settings and a 20W LED modelling lamp helps to preview the look of the light before the shutter is pressed. Westcott has mounted the flash tube well away from the body of the housing to push light out at a wide angle and a diffuser dome is supplied in kits as an accessory to soften the light before it enters the modifier.

    Westcott has also introduced wireless controller for the head that it says is compatible with a wide range of flash systems from different camera manufacturers. Each Westcott FJ-X2m Universal Wireless Flash Trigger is said to work with Canon, Nikon, Sony (with adapter), Fuji, Panasonic Lumix, and Olympus cameras, as well as the Canon RT flash system. It is powered by its own lithium ion battery that is good for over 200,000 triggers per charge, and sits in the camera’s hotshoe. The controller is also supplied with a Bluetooth connection that allows it to be adjusted remotely using a smartphone app.

    The Westcott FJ400 basic kit costs $ 569.90 and the FJ-X2m controller costs $ 99.90, and both are due to ship in late October. For more information see the Westcott website.

    Articles: Digital Photography Review (dpreview.com)

  • A Step-by-Step Guide to Sky Replacement Using Photoshop

    The post A Step-by-Step Guide to Sky Replacement Using Photoshop appeared first on Digital Photography School. It was authored by Simon Ringsmuth.

    Picture this if you will: you’re out in nature with your hopes, dreams, and a camera to capture it all. You see the beauty of creation stretching out before you, so you carefully and patiently set up your gear to get the perfect shot. Finally, the sun moves to just the right spot, and you hold your breath while you press the shutter button. Then you realize the clouds are all wrong. You can wait for hours for the ideal opportunity to present itself, or you can do sky replacement using Photoshop to drop in another one. It’s not as difficult as it might seem and can lead to some exciting results.

    sky-replacement-using-photoshop

    The building is in Oklahoma, and I combined it with a long-exposure sky I shot in Kansas.

    Before you get started with this operation, you will need two pictures: one with a boring sky and one with a breathtaking sky. If you’re just getting started, I recommend using two pictures shot at a similar time of day under similar conditions. If you replace a sunny sky with storm clouds, the lighting will be all different, and the results will look, well, Photoshopped.

    Image: A scenic view in the middle of Kansas. The sky could use some clouds though.

    A scenic view in the middle of Kansas. The sky could use some clouds though.

    After finding a picture with a nice foreground, you need to get another picture with an interesting sky.

    Image: I shot this in the Tallgrass Prairie Nature Preserve in another part of Kansas. These clouds...

    I shot this in the Tallgrass Prairie Nature Preserve in another part of Kansas. These clouds would look great in the first image, and Photoshop can help.

    The plethora of screenshots below might seem overwhelming, but this entire process is quite easy and a lot less complicated than it seems. Fire up Photoshop, follow along carefully, and you should have some good results in no time at all.

    Step 1: Get rid of the boring sky

    Open your picture with the sky you want to replace in Photoshop. If you’re not familiar with Photoshop, you’ll see that the Layers panel on the right side has your picture as the Background layer. It’s locked, meaning you need to unlock it or make a copy. Go with the latter route by right-clicking and selecting Duplicate Layer.

    Image: Always work on a copy of the background layer so you can revert to it if you need to.

    Always work on a copy of the background layer so you can revert to it if you need to.

    Click the new layer in the Layers panel to make sure it’s actually selected. You will know it’s selected by the outline that you can see around each corner of the layer thumbnail.

    Image: The currently selected layer has white borders around each corner of its thumbnail. Make sure...

    The currently selected layer has white borders around each corner of its thumbnail. Make sure the original Background layer is hidden by clicking the eye icon to the left of its thumbnail.

    Click the eye button next to the original Background layer to make it invisible. It’s still there if you need it for any reason, but if all goes well, you should be able to do the rest of this entire process using the duplicated layer.

    The next thing you need to do is remove the sky, which you can do with a technique known as layer masks. Start by clicking the Selection tool and holding it down until the pop-up menu appears. Click “Quick Selection Tool.” While not perfect, this is a great starting point for people who are new to sky replacements. You can do some fine-tuning to get things just to your liking.

    A Step-by-Step Guide to Sky Replacement Using Photoshop

    Now click and drag in the sky and watch the selection grow until it covers your entire sky.

    sky-replacement-using-photoshop

    Use the Selection tool to create a selection around the sky in your original image.

    This selection isn’t going to be perfect, but it’s a good place to start. You can refine things once you create your layer mask. As long as you have most of the sky selected, you’ll be good to go. You can also use the Magic Wand tool to select portions of the sky, and hold [shift] to keep adding new parts to the selection. This works well if you have clouds or other elements besides just the color blue in your sky.

    With the sky selected, click the Add Layer Mask button at the bottom of the Layers panel.

    Image: Click this button at the bottom of the Layers panel to create a Layer Mask. This lets you sho...

    Click this button at the bottom of the Layers panel to create a Layer Mask. This lets you show and hide different parts of a layer.

    The result might surprise you – everything in your picture is now gone except for the sky! (If you still see the original image, remember to click the eye to the left of the Background layer. This will make it invisible, but not remove it from Photoshop.)

    sky-replacement-using-photoshop

    The initial layer mask shows the sky, which is not exactly what you want for this operation. It’s a good starting point though.

    Removing everything but the sky is the opposite of what you want to do! The fix for this is simple: invert your layer mask. Select your new layer mask by clicking on the black-and-white thumbnail in the duplicated background layer.

    A Step-by-Step Guide to Sky Replacement Using Photoshop

    Now invert the mask by pressing Control-I (Command-I on a Mac) or choosing Image -> Adjustments -> Invert from the menus at the top of your screen. Now we’re really making some progress since the sky is gone but the foreground remains intact.

    sky-replacement-using-photoshop

    Invert the layer mask to show only the foreground. With the sky out of the way you can now insert a new sky into the background.

    If clouds, birds, or other elements of the original sky are still intact, you can remove them by using the Brush tool on your layer mask. (See Step 3 for details on how to do this.)

    Step 2: Insert a better sky

    There are a couple of ways to do this next step, and I’m sure you will probably develop your own workflow over time. Since this is just a tutorial to get you started though, it should work for most basic sky replacement.

    Choose the File menu and then select Place Embedded. Navigate to the folder on your computer with the image you want and double-click on it. This loads the replacement sky picture into your current Photoshop document. You can then tweak the results to get just the right image you want. The image will load on top of the previous image, and you’ll see it at the top of your Layers panel.

    Image: When you place a new image into your Photoshop document it will appear at the top of the list...

    When you place a new image into your Photoshop document it will appear at the top of the list of layers, which means it’s the only thing you will see in the main image editing screen.

    Photoshop layers work like a stack: whatever is on top is, literally, whatever you see on top of your picture. If you want something to appear underneath something else, just click and drag the layers to your liking. In fact, that’s what you have to do with your replacement sky. Click the layer you just inserted and drag it below the duplicated background layer.

    Image: Click and drag the sky replacement layer so it’s beneath the copy of your background.

    Click and drag the sky replacement layer so it’s beneath the copy of your background.

    Now look at your sky picture! Just like magic, the original sky has gone and the new sky shows up in its place.

    A Step-by-Step Guide to Sky Replacement Using Photoshop

    Step 3: Clean things up

    At this point, there are two common issues that generally need fixing. One is that the foreground has some errors that need correcting, like trees or other objects that are cut off or otherwise not showing up properly. The other is that the replacement sky doesn’t quite fit the empty space.

    You can harness the power of Layer Masks to fix the first issue. Tap the Z key to switch to the Zoom tool, and click on your picture a few times to zoom in for a close-up view. Hold the space bar to switch to the Hand tool, and click-and-drag the picture to see the spots that need fixing.

    Image: These trees don’t really need fixing, but I want to remove them for a cleaner horizon.

    These trees don’t really need fixing, but I want to remove them for a cleaner horizon.

    Make sure you select your Layer Mask and tap the B key to switch to the Brush tool. Right-click to adjust the size of your brush and other parameters like hardness and shape.

    Image: Using the brush tool on the Layer Mask will show or hide specific parts of the layer.

    Using the brush tool on the Layer Mask will show or hide specific parts of the layer.

    Now click on the parts of the foreground you want to either remove from the picture or add to the picture. (Press the X key to switch between remove and add mode.) What you’re actually doing is painting white or black on the layer mask: everywhere you paint white is shown, and everywhere you paint black is hidden. You don’t actually see the white or black colors, just the results of painting them onto the image.

    Image: A few clicks on the Adjustment Layer and the trees have gone!

    A few clicks on the Adjustment Layer and the trees have gone!

    If you find that your sky doesn’t quite fill the empty space, you can solve that by just adjusting the size of the sky layer. Click the top layer, the one with the foreground, and adjust the opacity to 30%. That way you can see the background layer, the one with the sky, along with the foreground layer.

    Image: Set the opacity of the duplicate background layer to 30%.

    Set the opacity of the duplicate background layer to 30%.

    The result looks like some kind of weird double-exposure error, but it will look fine once you finish the operation.

    Image: You can now see the replacement sky and the foreground. This will help you adjust the replace...

    You can now see the replacement sky and the foreground. This will help you adjust the replacement sky size and position to your liking.

    Select the layer with the replacement sky and choose Edit -> Free Transform, or press Control-T (Command-T on a Mac). Then use the handles at the corner of the sky layer to enlarge it until it fills the empty space.

    sky-replacement-using-photoshop

    After pressing Transform, click and drag on the squares in the corner of the layer to change its size. Click and drag in the middle of it to change its position.

    After you have resized the sky layer, press the [return] key to lock in the transformation. Then go back to the foreground layer and increase its opacity to 100%. This same process is also a great way to adjust the sky in the background even if there isn’t necessarily anything wrong with it. One example of this is if you want to adjust the sky to emphasize a certain portion where the clouds happen to be more interesting.

    sky-replacement-using-photoshop

    The same image as before, but with the sky zoomed in (i.e. Transformed) to create a more interesting picture.

    Once you get the hang of this process, it’s pretty simple. You can do a lot of custom work simply by editing the layer mask you create in the first step. You can also do this just for fun, like the picture below where I replaced the blue sky behind this building with a giant squirrel. If you have kids, or if you just want to have some fun experimenting on your own, this is a great way to explore some of the capabilities of Photoshop.

    sky-replacement-using-photoshop

    Attack of the Giant Mutant Killer Squirrels!

    Once you try sky replacement using photoshop on your own, I’d love to see some examples of your work. Leave the results in the comments below!


    sky-replacement-using-photoshop

    The post A Step-by-Step Guide to Sky Replacement Using Photoshop appeared first on Digital Photography School. It was authored by Simon Ringsmuth.


    Digital Photography School

  • The Fujifilm X-Pro 3: Marvellous or Mistake?

    The post The Fujifilm X-Pro 3: Marvellous or Mistake? appeared first on Digital Photography School. It was authored by Carl Spring.

    Image: A marvelous innovation or a stupid mistake? Whatever your opinion, the new Fuji X-Pro 3 defin...

    A marvelous innovation or a stupid mistake? Whatever your opinion, the new Fuji X-Pro 3 definitely has people talking.

    Cameras are pretty similar these days. We all want the same things. Better dynamic range, better high ISO performance, and better autofocus. 

    Really, if you look at the majority of cameras out there at the moment, there are few things that set them apart. That was until Fuji dropped the X-Pro 3. 

    They did what with the screen?

    In an incredibly bold move (or stupid, depending on which blogs you read), Fuji has done away with the standard rear LCD screen of the camera. They’ve replaced it with a much smaller screen.

    It simply displays the key exposure information, or in a nod to the film cameras of days gone by, an image of the film simulation you are using.

    The rear screen is not entirely gone though (although they apparently considered it). Instead, it is hidden from view and accessed via flipping it down from the rear of the camera.

    Fuji claim this is to stop photographers spending time “chimping” and spending more time with the viewfinder to their eye instead, concentrating on making images.

    Pure photography

    Fuji launched the camera at the recent Fuji Summit where the Fujifilm X-Pro 3 was announced with a theory of Pure Photography.

    The 3 elements of pure photography are:

    Carry and access

    You need to carry the camera and access the subject. This stated the camera has to be small, light and discreet. They state the camera should be an extension of your eye. This is then followed by talking about the durability of cameras.

    Find and frame

    You need to find the subject and frame it to get the best composition. Fuji stated that the viewfinder is the most important part of finding your composition.

    Shoot to express

    This is simply pressing the shutter and capturing the photograph. You don’t need to check a rear screen or distract yourself, you simply need to press the shutter. 

    This concept is definitely summed up in the Fujifilm X-Pro 3. Personally, the idea of removing distraction is appealing, and I’m sure I’m not alone. However, whether this camera has mass-market appeal remains to be seen. Fuji’s X-Pro line (including the x-Pro 1 and X-Pro 2) has always been a favorite of street photographers, and this is how Fujifilm are marketing the camera and the pure photography concept. They are marketing to those who want discretion and to focus purely on making the image.

    I can imagine many wedding photographers loving this camera too. Not only for the discretion it offers when shooting, but for the fact that you will be thankful for the lack of a screen every time a tipsy relative asks, “give us a look.” It may even suit travel photographers.

    OK, they killed the screen, but what else?

    The Fujifilm X-Pro 3 had a couple of other things that are worth mentioning – starting with the choice of materials.

    The use of titanium is something that Fuji has surprised many with. Titanium is more durable and lighter than the alloys seen in most modern cameras. Titanium is also notoriously hard material to work with, so we should applaud Fuji by the use of this in the X-Pro 3.

    This means that the XPro 3 should stand up to the beating a working professional will give it.

    Not only is it made of titanium, but it gives you three color options. You can get the X-Pro 3 in black, DURA black and DURA silver. DURA is a special type of coating that is ten times stronger than stainless steel in terms of scratch resistance.

    It feels like Fuji built this camera for war zones.

    Image: Available in 3 different finishes, two of which are designed to make the titanium body even m...

    Available in 3 different finishes, two of which are designed to make the titanium body even more resistant to wear and tear.

    The X-Pro 3 has Fuji’s hybrid viewfinder system. Fuji has upgraded this for the new model. It is set to be clearer, with a wider field of view and less distortion than previous models. The electronic viewfinder is also upgraded (as you would expect) to offer a higher frame rate, higher contrast, and a wider color space – finally, a set of specs that fit into the traditional camera upgrade.

    The lack of a screen is something that differentiates the X-Pro 3 in Fuji’s camera lineup. In fact, this differentiates them from the camera market as a whole right now. Fuji has aimed this camera at a specific type of photographer. It remains to be seen whether there are enough of their market to allow this camera success.

    If you want to watch the whole of the XSummit announcement, you can view it below. If you’re just interested in the X-Pro 3, skip to about 1:10 or so.

    What are your thoughts on the Fujifilm X-Pro 3? Is it something that you are intrigued by? Or, did Fuji just make one hell of a mistake? Let me know in the comments below.

    fujifilm-x-pro-3

    The post The Fujifilm X-Pro 3: Marvellous or Mistake? appeared first on Digital Photography School. It was authored by Carl Spring.


    Digital Photography School
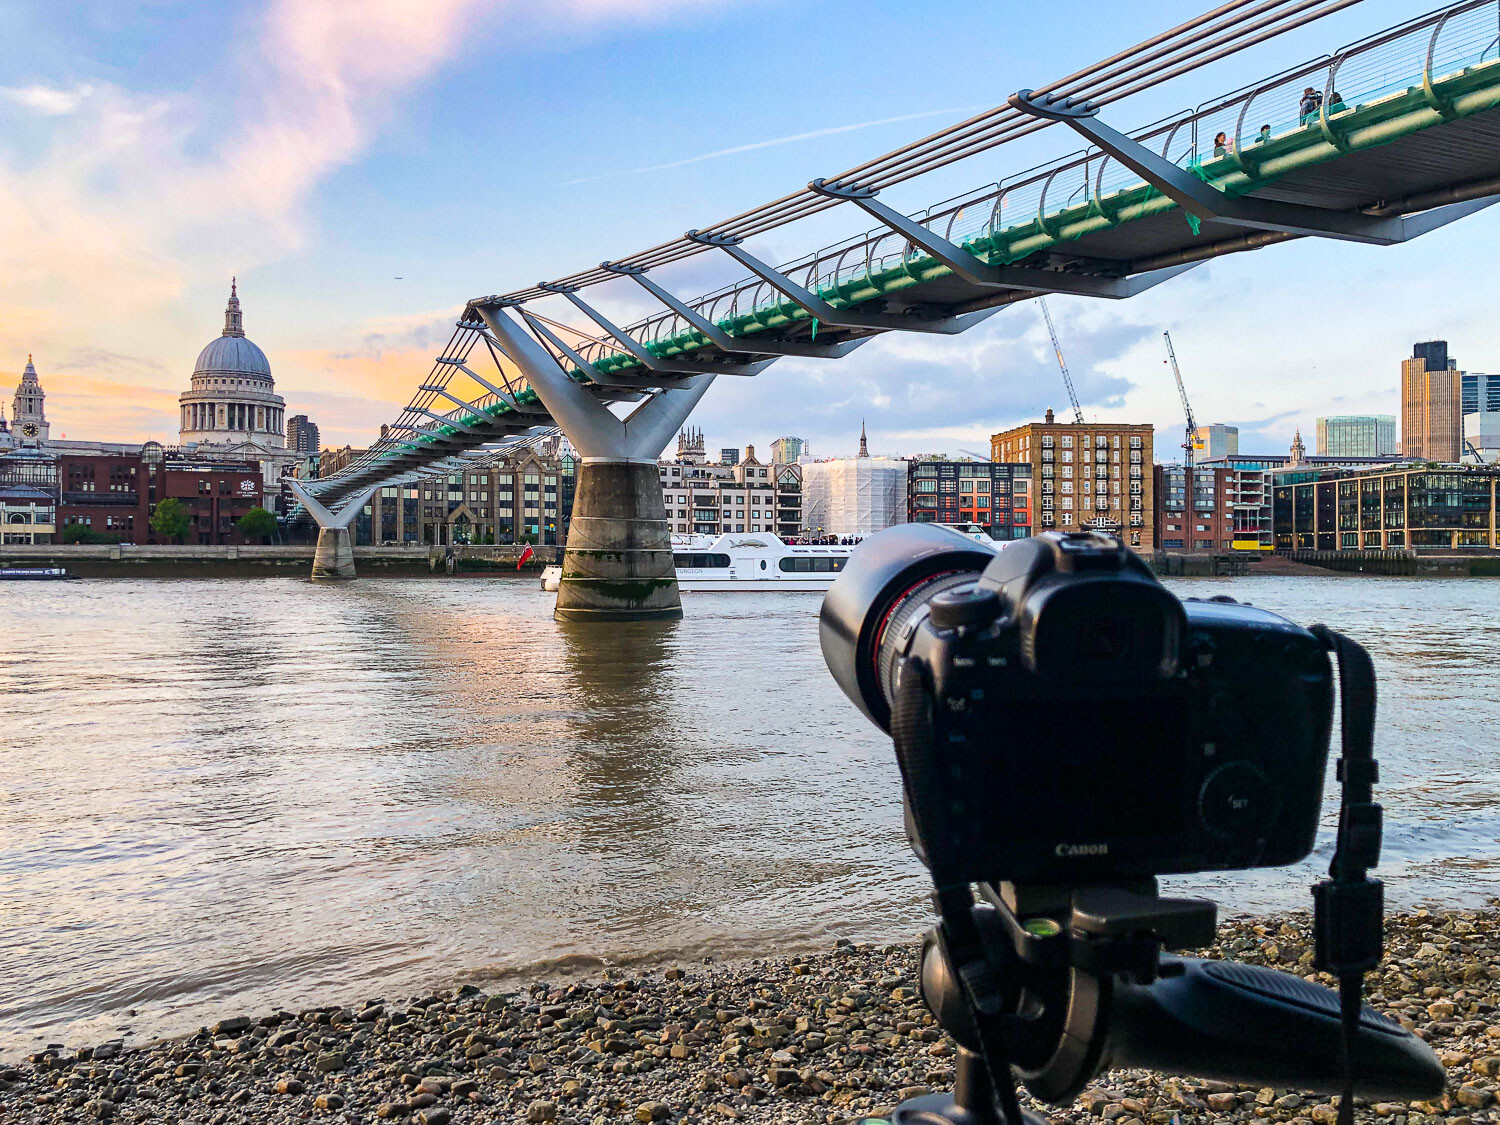
  • iPhone 11 sample gallery

    $ (document).ready(function() { SampleGalleryV2({“containerId”:”embeddedSampleGallery_7185418017″,”galleryId”:”7185418017″,”isEmbeddedWidget”:true,”selectedImageIndex”:0,”isMobile”:false}) });

    It’s missing the telephoto camera that the Pro model is equipped with, but the iPhone 11 has plenty to offer between a new ultra-wide camera, Night Mode and an updated Portrait Mode. We’re testing out some of these features in more detail, but for now take a look at the image quality Apple’s latest generation of phones is capable of.

    See our iPhone 11 sample gallery

    Articles: Digital Photography Review (dpreview.com)

  • Landscape photography with a drone: the advantages – part 2

    In the previous article in this series, I elaborated on the compositional advantages of the drone compared to land-based shooting. I claimed that the drone offers infinitely more compositional opportunities, which results from the fact that the photographer isn’t bound to the ground. This allows better perspectives and separation of the compositional elements.

    In this article I’d like to talk about two more advantages of shooting with a drone, which particularly relate to the comparison with manned-aircraft based shooting: the drone’s availability and its ability to take off and land anywhere.

    The Springs of Ojos Del Campo, Argentina. The only way of seeing this scene from the air is using a drone. DJI Mavic II Pro, 1/400 sec, F8, ISO 100. Puna De Argentina

    Availability and Running Costs

    I would be remiss if I neglected to state that in tandem with its ability to fly, the drone’s availability is the very thing that made the drone change the world of photography forever.

    Today’s drones are amazing machines. An idiot-proof, tiny, light, foldable quad-copter can easily fit in your photo bag with several spare batteries and the remote control, while leaving room for a your entire DSLR and lens arsenal. Each of these batteries can last for up to half an hour (!) of flight. Under favorable conditions, you can send the drones 5 kilometers or more away and 500 meters high while maintaining connection (in theory, that is, as it’s illegal in most countries to fly higher than 120m and out of sight).

    An aerial perspective exposes the beautiful contour and layers of the shore of the Dead Sea.
    DJI Mavic II Pro, 1/20 sec, F4, ISO 200. Ein Gedi, Israel

    You can bring a drone with you to any shoot, fly it in any terrain and in harsher weather that you think. You can fly it while sitting comfortably inside a heated car, with the spare batteries charging quickly as you fly. It’s portable enough to hike or even climb with. For the experienced drone user, it can take less than 3 minutes to set up and be airborne, when time is of the essence.

    This light on the top of a huge iceberg was disappearing and reappearing with the horizon clouds obscuring the sun to the north west. With the drone, I had the choice of when exactly to fly to optimize my photography and get the best light.
    DJI Mavic II Pro, 1/30 sec, F7.1, ISO 100. Kangia Fjord, Greenland

    Needless to say, a manned aircraft is not always available. Some natural landscapes one wishes to shoot are far in the back country with no airport or heliport nearby. With a drone, you are free from these worries. An hour of flight in a Cessna can cost hundreds of dollars, and yours truly has once been given a quote of $ 4200 per hour (Or $ 70 per minute. Yes, that’s right) for a helicopter flight. Flying a drone is virtually free.

    This river of lava burst out of the mountain side before my eyes. After picking up my jaw from the floor, I grabbed my drone and sent it right to the source of the flow.
    DJI Phantom 4 Pro, 1/100 sec, F6.3, ISO 400. Kilauea Volcano, Island of Hawaii

    Ability to take off and land anywhere

    This ability is a particular aspect of the drone’s unmatched availability. Due to the drone’s minuscule size, it is not only possible to fit it in a camera bag, take it out and have it airborne within minutes. It is actually possible to do so without the need for a helipad – or any kind of takeoff/landing surface whatsoever – after a bit of training, takeoff and landing can be done from the pilot’s hand. This often neglected fact can make a world of difference when the area a photographer is based in is something like a small boat, a place with uneven ground (for example a lava-field or snowy earth) or a roofed area such as a cave.

    A typical Targa speed boat in Greenland. There’s no really comfortable place to take off or land, but there’s plenty of space to do so from the pilot’s (or someone else’s) hand.

    Taking off from a boat isn’t easy, especially when the open area is crowded or too small. Boats often are loaded with antennas, which makes takeoff from the roof problematic. But the photographer can launch the drone from his hand while standing in the front or back of the boat, thus giving the drone the necessary space for a safe takeoff.

    Hand-landing on a boat is a bit more challenging, to say the least. The pilot needs to direct the drone slowly and carefully toward the boat’s open space, then catch the drone in midair by hand. This can be difficult in a number of ways. Firstly, boats tend to sway side to side, and the drone is ideally fixed in its aerial position, thus its course relative to the boat is chaotic. Secondly, the drone’s sensors tend to block it from getting too close the pilot’s hand. Luckily, the sensors can be disabled.

    This boat had a much more comfortable open space to take off and land, but it was challenging nevertheless.

    Personally, I’ve had more than my share of less-than-pleasant experiences when hand-landing a drone on boats. While the DJI Phantom series has handle-like landing gear which makes it very easy to catch the drone, the Mavic series does not, and a lot can go wrong when trying to maneuver and catch the drone while standing on a swaying boat. The propellers can cut and bruise your fingers or cut through your clothes, and a wrong movement or failure to catch the drone can result in it hitting the boat or worse – taking a nosedive into the water.

    A gigantic arched iceberg dwarfs our boat in Disko Bay, Greenland.
    DJI Mavic II Pro, 1/30 sec, F8, ISO 100

    There’s not much that can be done about this other than practice taking off and landing the drone from your hand. Remember that while a drone can be lost at any moment, images last forever.

    For a bit more about flying from a boat, check out my friend Ian’s video about our trip to Greenland earlier this year. Ian suffered a brutal attack by his drone, but survived to tell the tale! Yours truly had plenty of drone fails as well, and the shenanigans meter was on the high side throughout the trip.

    In the next article I will conclude the discussion of the drone’s advantages with perhaps the most exciting of its traits: the ability to remain totally fearless in the face of danger!


    Erez Marom is a professional nature photographer, photography guide and traveler based in Israel. You can follow Erez’s work on Instagram and Facebook, and subscribe to his mailing list for updates.

    If you’d like to experience and shoot some of the world’s most fascinating landscapes with Erez as your guide, take a look at his unique photography workshops in The Lofoten Islands, Greenland, Namibia, the Argentinean Puna, the Faroe Islands and Ethiopia.

    Erez offers video tutorials discussing his images and explaining how he achieved them.

    More in This Series:

    • Landscape Photography with a Drone – Part 1: Forward / What is a Drone?
    • Landscape Photography with a Drone – Part 2: Advantages of the Drone (i)

    Selected Articles by Erez Marom:

    • Parallelism in Landscape Photography
    • Winds of Change: Shooting changing landscapes
    • Behind the Shot: Dark Matter
    • On the Importance of Naming Images
    • On Causality in Landscape Photography
    • Shooting K?lauea Volcano, Part 1: How to melt a drone
    • The Art of the Unforeground
    • Whatever it Doesn’t Take
    • Almost human: photographing critically endangered mountain gorillas

    Articles: Digital Photography Review (dpreview.com)

  • Fujifilm X-A7 pre-production sample gallery (DPReview TV)

    $ (document).ready(function() { SampleGalleryV2({“containerId”:”embeddedSampleGallery_1438399920″,”galleryId”:”1438399920″,”isEmbeddedWidget”:true,”selectedImageIndex”:0,”isMobile”:false}) });

    This week’s episode features images shot with the X-A7 from the Beakerhead festival in Calgary, along with some colorful fall scenery. It all feels pretty apropos, given that October is right around the corner. All images are straight-out-of-camera JPEGs; this X-A7 is not running final firmware and should not be used to judge final image quality.

    Articles: Digital Photography Review (dpreview.com)

  • A Photography Shootout: the iPhone 11 Pro vs the Canon 5D Mark IV

    The post A Photography Shootout: the iPhone 11 Pro vs the Canon 5D Mark IV appeared first on Digital Photography School. It was authored by Jaymes Dempsey.

    The iPhone 11 Pro has just been released, with a triple-camera setup (including a telephoto lens, a wide-angle lens, and an ultra-wide lens), a new Night Mode, and an upgraded front-facing camera.

    A Photography Shootout: the iPhone 11 Pro vs the Canon 5D Mark IV

    But despite all the new bells and whistles, iPhone image quality continues to lag far behind that of full-frame DSLRs and mirrorless bodies. And professional photographers simply don’t find iPhone photos up to their standards.

    Right?

    That’s what wedding photographers, Lauren and Jamie Eichar set out to test. They did a photoshoot with their new iPhone 11 Pro and their top-of-the-line Canon 5D Mark IV, then compared the images.

    And the results are surprising.

    In fact, this is relevant to anyone wondering about the future of smartphone photography.

    So I suggest you watch the video to see the images, side by side. As you look at the images, see if you can tell the difference. Ask yourself:

    • How would I feel about my images if I were only shooting with an iPhone 11 Pro?
    • How would I feel if I had my wedding photographed by an iPhone 11 Pro?

    ?

    I’ll admit:

    I’ve never been a fan of iPhone image quality. Low light performance is, frankly, terrible, and even the noise levels in good light leave a lot to be desired. Plus, the tiny sensor makes good bokeh practically impossible to achieve, and Apple’s attempt to rectify that (Portrait mode) is frustrating and unpredictable.

    That said, these photos left me pleasantly surprised.

    For one thing, Apple seems to have given Portrait mode a significant upgrade. Portrait mode on the iPhone XS frequently failed to find the edges of the main subject, which resulted in strange spots of blur and other image inconsistencies. But in the hands of these professional wedding photographers, the iPhone 11 Plus Portrait mode performs well. Certainly better than on the iPhone XS – though you’ll notice that zooming in on the Portrait mode shots does reveal frequent problems along the subject’s edges.

    Also, the Portrait mode blur looks more authentic. While the bokeh produced by the Canon 5D Mark IV setup is clearly superior, the iPhone blur isn’t as far behind as it once was.

    As for noise and sharpness, I don’t notice any issues when viewing the photos at a normal viewing size. But viewing the images large (which can be done here) shows significant noise and lack of clarity in all of the iPhone images. While this might not seem like a problem when posting small files on the internet, it becomes more serious if you decide to print your photos, especially if you’re looking to print large.

    Also, note that Lauren and Jamie tested the iPhone in good light. My guess is that noise levels would increase significantly if doing photography indoors.

    So again, ask yourself the questions I posed earlier. How would you feel about your images if you were only shooting with an iPhone 11 Pro? How would you feel about the results if you had your wedding photographed by an iPhone 11 Pro?

    And share your response in the comments!

    The post A Photography Shootout: the iPhone 11 Pro vs the Canon 5D Mark IV appeared first on Digital Photography School. It was authored by Jaymes Dempsey.


    Digital Photography School