Blog

  • 004

    Some cool visual art images:

    004
    visual art
    Image by asterix611
    SPAIN ART FEST ’10 / Spain Culture New York – Times Square, Manhattan NYC – 10/06/10

    012
    visual art
    Image by asterix611
    SPAIN ART FEST ’10 / Spain Culture New York – Times Square, Manhattan NYC – 10/06/10

    007
    visual art
    Image by asterix611
    SPAIN ART FEST ’10 / Spain Culture New York – Times Square, Manhattan NYC – 10/06/10

  • 5 Gotchas in the Lightroom Print Module

    When you’re setting up single or multiple image printing in the Lightroom Print module here are some things to be aware of:

    1. Nonexistent Drag and Drop

    You can drag and drop pictures onto a print template in Lightroom in some circumstances but not in others. This can be confusing but there is some logic behind it.

    When you select a Lightroom template from the Template Browser, make sure to open the Layout Style panel on the right at the same time. Templates can be one of three layout styles and each operates differently. Knowing what style a template is will help you understand its behavior.

    If it is a Single Image/Contact Sheet template then you must select images on the filmstrip to add them to the contact sheet and they appear in the layout in the order they appear in the filmstrip. You can’t drag and drop images from the filmstrip into a Single Image/Contact Sheet layout.

    If the template is a Custom Package then you can drag and drop an image into any of the containers on the screen. You can also drag and drop an image into any position in the layout and it will sit on the screen even overlapping other images.

    If a template is a Picture Package, then you can fill it by clicking an image in the filmstrip. A picture package prints multiple images on a single sheet of paper. If you select two images in the filmstrip, you’ll then have two pages in your picture package – one for each of the selected images. You can drag and drop an image into a Picture Package but when you do, you’ll create all sorts of issues. Not only will you add a new image to the layout page you are seeing on the screen but you’ll do the same for all the pages in the current layout. It’s generally best not to drag and drop images into an already tightly designed picture package layout.

    5_gotchas_lightroom_print_module_1.jpg

    5_gotchas_lightroom_print_module_1a.jpg

    2. Understand Border Behavior

    If you have a Photo Border enabled for a either a Custom Package or a Picture Package then the width of the border will make the image smaller. The color of the border is the color of the page background if you have a page background selected. If not, it will be white. If you set an Inner Stroke then it too will reduce the size of the image but it can be set to your choice of color.

    So, for example, if you want a black page background but a white border around your images, set the page background color to black and use the Inner Stroke rather than the Photo Border to apply the white border to the image.

    5_gotchas_lightroom_print_module_2.jpg

    5_gotchas_lightroom_print_module_2a.jpg

    3. Identity Plate Behavior

    When you add an Identity Plate to a Custom Package it appears once on the page and you resize it to suit and place it where you want it to go. However, it only appears once in the layout so, if you add a second page to the print layout, the identity plate will appear only on the first page.

    Alternatively you can add the identity plate to every image by selecting Render On Every Image. Now the identity plate will appear on each image rather than on each page but it will appear in the very middle of the image and you can’t move it.

    So, if what you want is your name on each printout as an Identity Plate, create a Custom Package design with an Identity Plate but not set to render on every image. Make sure the identity plate is in the correct position and fill the page with images and print or save it. Then fill it again with a new set of images and output the result and repeat as required.

    On the other hand, an Identity Plate added to a Single Image/Contact Sheet prints on every page of the document in the place you position it in.

    5_gotchas_lightroom_print_module_3.jpg

    5_gotchas_lightroom_print_module_3a.jpg

    4. Any Size JPG Output

    You can print your layout to a JPG file that you can then upload to the web or send out for printing. To do this, from the Print Job panel, click the Print To: dropdown list and choose JPEG File.

    Set the File Resolution and then the Custom File Dimensions for the page. Then, when you’re done assembling the images, click Print to File to print the layout to an image file rather than to a printer.

    5_gotchas_lightroom_print_module_4.jpg

    5. Crop your images

    When you’re working with a Single Image/Contact Sheet, if the image is set to Zoom To Fill it will be made large enough to fill the container on the page. If the image height and width does not match the size of the container then part of the image will be removed. You can adjust the positioning of the image within the container by dragging on it with the mouse.

    5_gotchas_lightroom_print_module_5.jpg

    If you have a Picture Package or Custom Package selected you can move an image within its container also, but to do so you must hold the Ctrl key (Command) on the Mac.

    The different behaviors of images within what appear to be similar layouts in Lightroom can be confusing but once you understand that different layout styles bring with them different key combinations and behaviors you’ll be on your way to creating great looking prints in Lightroom.

    Post originally from: Digital Photography Tips.

    Check out our more Photography Tips at Photography Tips for Beginners, Portrait Photography Tips and Wedding Photography Tips.

    5 Gotchas in the Lightroom Print Module


    Digital Photography School

  • Photo Tips and Advice from Documentary Photographer Daniel Milnor

    Documentary photography Daniel Milnor shares his process for shooting great photographs in the field and provides tips for all levels of photographers.

    Join Scott Kelby, Matt Kloskowski and RC Concepcion as they walk you though the basics of using Google Plus for Photographers. Brought to you by KelbyTraining.com www.kelbytraining.com/gplus
    Video Rating: 4 / 5

  • Harper’s Bazaar Arabia October Issue

    My first Harper’s shoot from my recent trip to Dubai

    Harpers Bazaar Goth 1

    Last month I was in Dubai where I shot for Harper’s Bazaar Arabia again. In two weeks I shot 4 editorials and an additional “What Bazaar is Wearing” feature as well. Working with fashion editor Sally Matthews is always a treat because she’s not only a very cool girl, she’s got a great eye for fashion and we have very similar tastes. My first shoot with Sally was a “Gothic Abaya” editorial. An abaya, which literally means “cloak”, is a loose over-garment, like a robe that is worn by some women in the Islamic world. I think it’s a common misconception here in the West to think that the traditional clothing worn by the Muslim women are simple, rather plain or ordinary looking. Well, that’s just not the case and we set about in this shoot to convey the message that some of the traditional clothing worn by women in Saudi Arabia is quite beautiful and often times, very glamourous.

    Harpers Bazaar Arabia

    Sally has the great ability to find exotic locations that haven’t been shot in before in Dubai. And so we found ourselves in a resort located about 30 minutes outside of Dubai. The area was more dense in greenery than most Dubai hot spots, which is what Sally wanted because she was looking to do a very Goth-like, forest story with the Abayas. I had the good fortune to work with the talented Kate Goodwin, who had just flown in from London the night before to do the hair and make up. And our model was the gorgeous Masha who was an absolute delight to work with. Tall, thin, gorgeous and man, she could move! We had a grip of equipment with us but ended up using reflectors for most of the day. Dubai is pretty bright, even in a dense garden or tree-lined area. I mean, after all, it is in a desert! So additional flash in the outdoors would have taken the story in a totally different direction.  I made the decision to use the natural light and add reflectors when needed to bounce in some even fill. Dubai not only is pretty bright, in September it was very hot. Temperatures were up in the 100 degrees Farenheit!! We had to take mini breaks in between shots because it was too hot to move on quickly to the next shot. But even given these small obstacles, we were able to pull off the 8 page spread with absolute no problems. That’s pretty much due to working with a professional team that pulls together to make the best possible shoot against any and all odds! And that’s why I love working with Sally and make up artist Kate. They jump in and help out and there’s no ego or drama. So important when you’ve got elements against you (sun, rain, heat, mosquitos, etc.) and time restraints (8 pages in 5 hours or you go in to paying overtime).

    Harpers Bazaar Arabia

    I had every lens in the kit on this shoot, but ending up using the 85mm and the 50mm throughout the day.  We changed lenses in the air-conditioned house and guess what obstacle we had to deal with when going outside where the temperature was 100 F?  Yep, the lenses fogged up. So any filters had to be taken off quickly, the lenses had to be wiped off carefully, filters had to be put back on and then the shots needed to be shot quickly because the model was going to faint, running in that heat! Although Masha didn’t complain once! In fact, she was ready and willing to go longer with each shot because she loves doing what she does and she is indeed a real trouper!

    Harpers Bazaar Arabia

    Shooting on location has it’s obstacles. Shooting on location in Dubai definitely wasn’t easy but the moral of the story is when you have a great team that works together instead of against each other, you end up with a great shoot and a feeling of accomplishment. As we rode home in the early evening light, exhausted from the sun and rush to get all shots done and done well, we all had a smile on our faces because we knew we had accomplished it! And that to me is a great feeling and something I sort of “live for” as a photographer.

    Harpers Bazaar Arabia

    I have more editorials to blog about and those will be coming up shortly here on the blog. I also want to give you all a heads up. In response to a ton of emails and requests, I will be doing workshops again next year in 2012. I will have 4 next year. A Winter, Spring, Summer and Fall Fashion Photography 2 Day Workshop. I’m working out the details now and will post it along with a link to order the tickets coming up very soon. The first one will most likely be in January and it will be held in Ft. Lauderdale, Florida. So look out for that if you’re one of the people who is interested in attending. Happy Shooting!!

    Harpers Bazaar Arabia


    Fashion Photography Blog – A Resource for Fashion Photographers, Created by One.

  • Choosing Extension Cords for Plug-In Strobes


    Before considering an expensive battery pack or generator for your big lights, don't overlook the obvious. Extension cords are a cheap and reliable way to get power to your studio strobes.

    A couple hundred feet of power cable and a little advance scouting will solve the vast majority of your location needs. But be careful not to skimp. Here's how to choose a good extension cord for your strobes. Read more »


    Strobist

  • Fujifilm announces pricing and availability of the X10 enthusiast compact

    Fujifilm has announced its X10 enthusiast compact will start shipping from November 2011 at a recommended retail price of $ 599.95. Announced last month, the retro-styled camera features a bright F2.0-2.8, 28-112mm-equivalent lens and is built around the company’s 12MP 2/3" (6.6 x 8.8mm) EXR CMOS sensor.
    News: Digital Photography Review (dpreview.com)

  • Photoshop Elements 9 and Photoshop Cs5-Converting the background to Black and White

    Photoshop Elements 9 and Photoshop Cs5-Converting the background of the photo to Black and White
    Video Rating: 5 / 5

    In this video you will learn how to adjust skin tone as well as using the clone tool on the face. Pick up my DVD with 46 Elements Videos for only .00 at: www.jackstechcorner.com
    Video Rating: 4 / 5

  • The Lazer Collection 5

    Shoop da…uh…five. Shoop da five. Yes. Written, Animated, and Music by Dom Fera www.dfearstudios.com http — Jack and Dean: www.youtube.com Bing: www.youtube.com Tomska: www.youtube.com Robert Benfer: www.youtube.com Jason Steele: www.youtube.com

  • 3D Dance zone charts 2011 Nadia – Virtual Game (3D Anaglyph Red/Cyan) +

    The blond temptation Nadia is the new addition to the Bulgarian music company of DesSlava – “NewMusic Stars”. Her first video and song “Virtual Game” is now broadcasting on music television channels in Bulgaria and in the Internet. The talented singer is hoping that people will appreciate not only her appearance, but also her voice. “I do not think that soon I heard someone singing R & B better than Nadia. She is a rare combination of beauty and talent. I hope to help her because she deserves and has all the qualities to become a great singer “- categorically said DesiSlava. Nadia’s dream is to be loved singer and pop music to succeed in Bulgaria. www.desislava.es www.dstv-bg.com http ?????? ????????? Nadia ? ?????? ?????????? ?? ??????????? ???????? ?? ????????? — „NewMusic Stars”. ????????? ? ????? ? ???? „Virtual Game” ???? ? ?? ??????????? ????????? ? ????????. ???????????? ?????? ?? ?????? ?????? ?? ?????? ?? ???? ??????? ? ???, ? ? ????? ?. „?? ?????, ?? ????? ??? ?????? ?????, ????? ?? ??? R&B ??-????? ?? Nadia. ?? ? ????? ????????? ?? ??????? ? ??????.

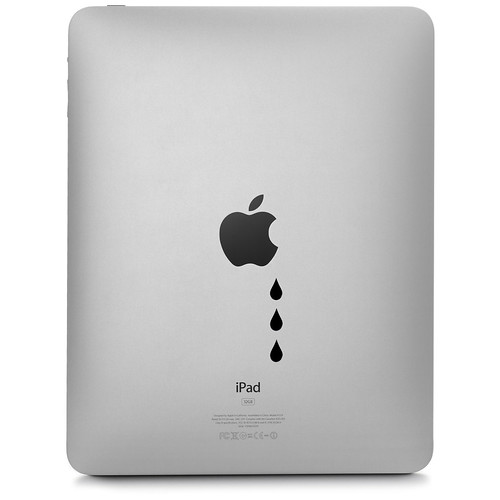
  • Steve Jobs 1955 – 2011


    Steve Jobs , originally uploaded by Nello Latini.

    Catchy Colors Photoblog