Blog

  • 4 Tips for Connecting and Photographing Kids More Naturally

    We’ve all seen family photos where everyone is happy, kids are smiling, and the whole brood looks like they are having the time of their lives. Photos like this seem so natural that it’s easy to think they required almost no work at all, when in reality the photographer was likely working like crazy behind the scenes trying to get the perfect pictures.

    Shooting photos of adults is one thing, but working with kids brings a whole new set of challenges to the table. Whereas adults generally take directions and respond to requests, kids can be running all over the place, and getting kids to cooperate can be a bit like trying to herd cats. If you have ever had an experience like this, or if you are thinking about getting into family photography, here are four tips for photographing kids that might come in handy.
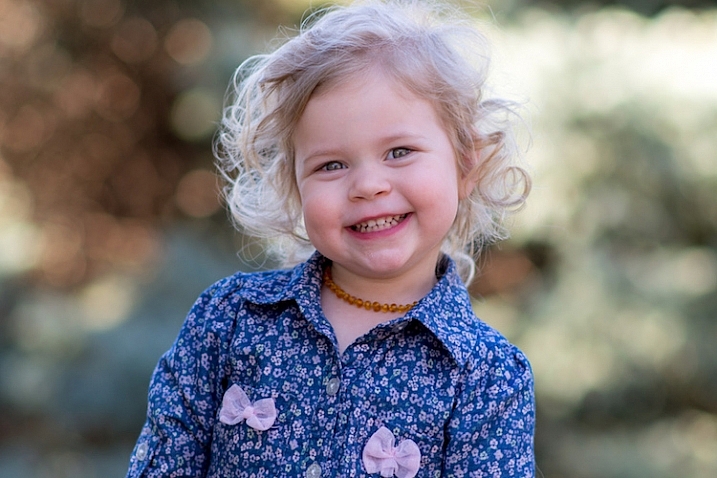
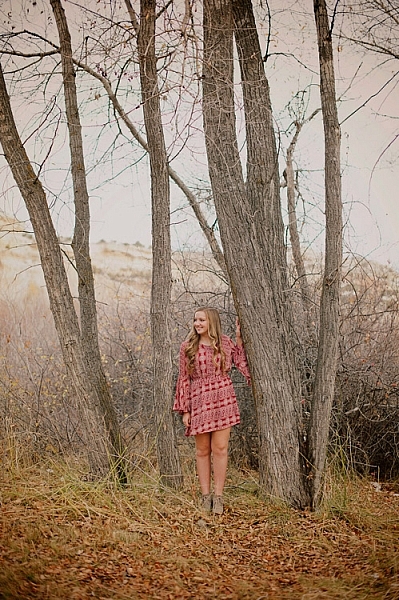
    photographing-kids-girl-purple-dress

    These usually help when I’m doing a family photo session, and if you struggle when taking pictures of kids, some of these tips might be just the ticket for that elusive perfect photo.

    Get to know the children

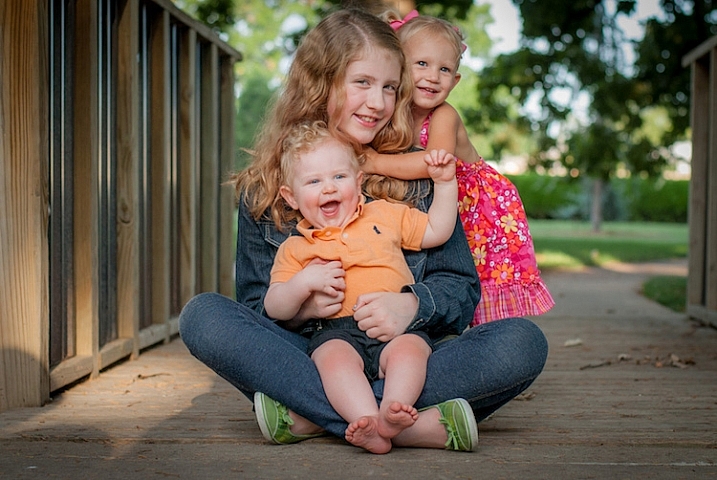
    Anyone who has spent time doing family photos already knows this rule, but I have seen plenty of photographers fail to get the shots they were aiming for, because they did not do this simple initial step. The first thing I do when taking family pictures is spend a few minutes getting to know the kids. I ask them what their names are, their age or year in school, and have them tell me a little bit about their lives. Ask them specific questions, otherwise you’ll get answers that are too general and unhelpful. “Do you have pets? What are their names? What’s your favorite kind of ice cream? What’s your favorite movie?”
    photographing-kids-bridge

    By learning a bit about these kids they felt more comfortable working with me and I got much better pictures as a result.

    Don’t stop there though. Use these first few minutes as a chance to build a relationship with the kids, and tell them a bit about yourself too, so they see you as a friendly photographer, and not a scary adult with a giant camera lens. One trick to doing this is answering the questions you pose to them after they have had their turn. I like to get a little goofy and set a fun tone for the shoot by giving fake answers that usually make kids laugh. “I’ve got a pet iguana named Mr. Pickles. I like peanut butter and green bean ice cream.” You might feel a bit silly doing this, but it accomplishes two very important things:

    1. It helps establish a relationship and sense of trust between you and the kids, making them much more likely to cooperate during the rest of the session.
    2. It shows the parents that you care about their kids, which can make all the difference between a successful shoot, and a series of awkward moments that will haunt you for weeks.

    photographing-kids-two-boys

    Have them bring something special

    Once you have a foundation built with the little ones, it’s time to actually take some pictures. This can be a little difficult because kids aren’t used to doing things that you usually want them to do when taking photos. You might have a specific pose or composition in mind, but the kids would much rather be running around or climbing trees.

    One of my favorite tricks is to have children bring artifacts from their own lives such as books, stuffed animals, or a favorite toy. Not only will it give them something on which to focus their attention during the photo shoot, but it gives you something you can talk about to build a good working relationship for your brief time together. Have them tell you a bit about their stuffed animal, ask if you can read a few pages from the book, or spend a minute playing with their toys together.

    It may seem silly to have thousands of dollars of camera gear sitting idle while you and the kids are pretending to play house with stuffed bunnies, but think about the big picture (ha!) here: by doing this you are sowing the seeds for a successful session and impressing the adults at the same time. And that can be worth a lot when they call you for more pictures in the coming years.

    photographing-kids-boy-book

    This boy’s grandfather told me this was his favorite photo of his grandson, partially because of the book which was a family favorite.

    Take some information and twist it

    One of my favorite tactics to get kids to smile and laugh, is taking something they already told me when I was getting to know them, and asking about it later on, but with a twist. I purposely get some basic facts incorrect.

    If a little girl brought along her favorite toy truck, ask her about her airplane. “It’s not an airplane, it’s a truck!” she will often reply with a huge grin. If a boy told you he is five years old, ask him how he likes being seven. When he corrects you, tell him you’ve always been bad at math so you might keep forgetting.

    My favorite trick is to make up my own words. A couple of kids brought their well-worn copy of the children’s classic Green Eggs and Ham, but when I talked with them about it I pronounced it Green Freggs and Fram. These little intentional screw-ups almost always make the kids laugh and smile, and it also gives them a chance to teach you something in return, which kids almost always like doing. Let them correct your mistake and show you how to do it properly, and they will start to feel like they have a true back-and-forth relationship instead of seeing you as just another adult bossing them around. In doing so you will find the kids to be much more cooperative when you really do have instructions for them to follow.

    photographing-kids-girl-smiling

    Embrace the absurdity

    As adults we have all too many inhibitions when it comes to expressing ourselves. We worry about what people will think, how our clothes look, and what everyone around us is doing, and as a result we generally don’t like to make waves, cause a ruckus, or deviate from the norm. Most kids have no such filters, and the results can make for some hectic and stressful photography sessions – if you let it. If you’re the kind of photographer who relishes control and order, perhaps photographing kids is not your particular cup of tea. If you can learn to accept the absurd serendipity of kids, you will not only get some better photos as a result, but you and your clients will have a much better time as a result.
    photographing-kids-family-walking

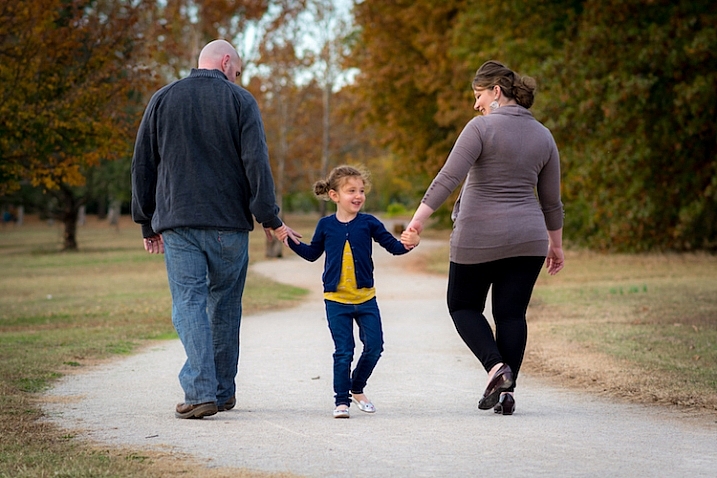
    This girl was so bubbly that she rarely stood still, and by embracing her goofiness I got some pictures that her parents were thrilled with.

    Rather than telling kids what to do and how to pose, let them just be themselves and capture pictures in the moment. Shots of them playing, goofing around, and jumping on each other might not be what you had in mind initially, but these are the kind of pictures parents, family, and friends often enjoy the most. If your clients do want some specific poses try to get them done first, and then let the kids have fun and loosen up a bit.
    photographing-kids-boys-flowerpot

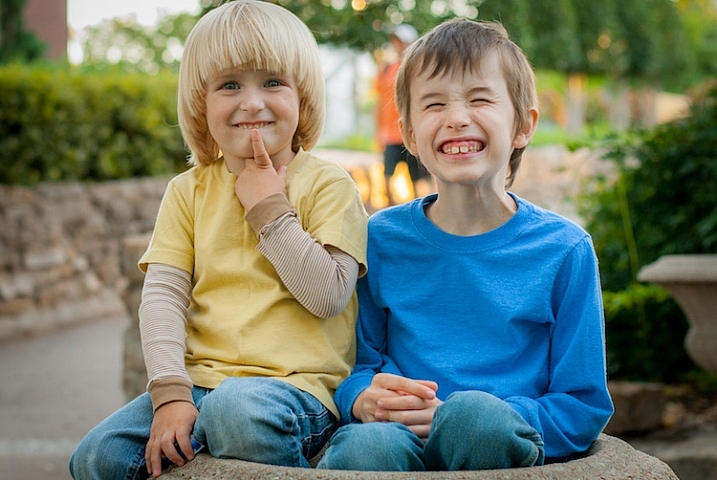
    “Mr. Ringsmuth, can we take some photos in a flower pot?” “Sure boys, why not?”

    One point to remember is that you’re not just taking pictures but creating and capturing memories. Months down the road when clients show your photos to their friends and family, they will often discuss the photo session itself, and how you treated them and their kids. Even if your photos are stunning, your clients will often sour the moment with a bit of commentary about you as an individual. “Yeah this photo is nice but the guy who took it was such a jerk! He practically yelled at our kids to get them to smile.” You want them to be saying things like “We are so happy with the pictures, and our kids had such a fun time with the photographer. She really connected with them and made them laugh.” Not only are your clients more likely to appreciate their pictures, they will be more willing to book future sessions with you, and sing your praises to their acquaintance,s which will often lead to more customers.

    What about you? What are your favorite tips and tricks for taking pictures of little ones? Share your thoughts in the comments below, along with any examples of your favorite kid photos.

    googletag.cmd.push(function() {
    tablet_slots.push( googletag.defineSlot( “/1005424/_dPSv4_tab-all-article-bottom_(300×250)”, [300, 250], “pb-ad-78623” ).addService( googletag.pubads() ) ); } );

    googletag.cmd.push(function() {
    mobile_slots.push( googletag.defineSlot( “/1005424/_dPSv4_mob-all-article-bottom_(300×250)”, [300, 250], “pb-ad-78158” ).addService( googletag.pubads() ) ); } );

    The post 4 Tips for Connecting and Photographing Kids More Naturally by Simon Ringsmuth appeared first on Digital Photography School.
    Digital Photography School

  • Botswana: Zu Fuß unterwegs im Okavangodelta

    Okavangodelta © Dennis Wehrmann

    Ein Beitrag von: Dennis Wehrmann

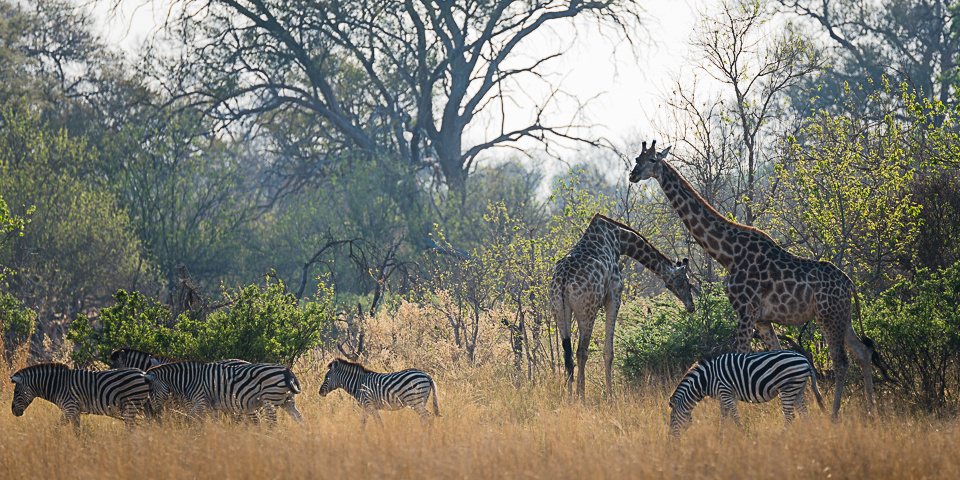
    Das Okavangodelta ist definitiv eines der letzten Paradiese auf unserem Planeten Erde. Leider aber auch ein sehr bedrohtes. Und das Schönste, das ich bisher in meinem Leben an Natur erleben durfte. Eine Reise in dieses Paradies kann ich nur jedem Naturliebhaber empfehlen.
    kwerfeldein – Fotografie Magazin | Fotocommunity

  • Rain or shine: Fujifilm XF 35mm F2 R WR real-world sample gallery

    Fujifilm’s XF 35mm F2 strikes an appealing balance between size, cost and durability. It’s sealed against moisture and dust, making it a great candidate for use with the weather-resistant X-T1, and at $ 399 is a fairly affordable ‘normal’ prime for Fuji’s X-system. The Pacific Northwest is just the place to test weather-resistant gear, though thankfully we’ve had enough unseasonably dry and sunny days to put together a real-world sample gallery with the 35mm F2. Read more

    Articles: Digital Photography Review (dpreview.com)

  • Bio-Wearables: Tech Tattoos Put Working Circuits on Your Skin

    [ By WebUrbanist in Gadgets & Geekery & Technology. ]

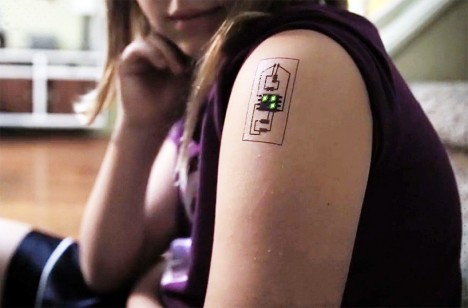
    wearable circuit board tattoo

    Tech Tats use conductive inks to create a circuit board right on your skin, providing a passive and unobtrusive alternative to standard wearables. Smartwatches and fitness trackers tend to stand out (worn on wrists or around necks) and need to be taken off and put back on daily, whereas these tats (while temporary) can be applied indefinitely.

    The wearable can be used to monitor body temperature, blood pressure, stress levels and heart rate, then transmit data wirelessly to a mobile app or computer.

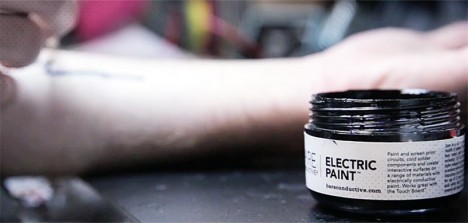
    wearable electric ink paint

    Lying effectively flat against the surface of your skin, these complete circuits are easy to conceal or reveal depending on whether or not you want to show off your ink.

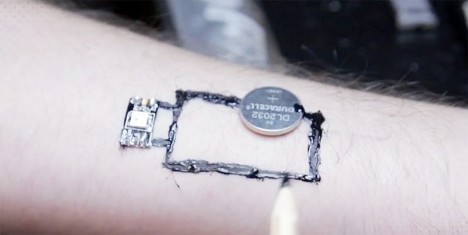
    wearable tech example development

    The DIY-friendly design uses LED lights, a microcontroller and conductive ink – for now, the result is intentionally temporary, but permanently-inked versions could work as well.

    wearable tech app wireless

    The applications are numerous, starting with medical but expanding to financial as well as other identification-oriented use cases. A wearable wallet could be tied to your banking information, for example, or you could apply a Tech Tat to your child during an outing to a busy place, providing an easy way to track them in case you get separated. Chaotic Moon is currently developing both the wearable circuitry tech as well as related applications.

    Share on Facebook


    [ By WebUrbanist in Gadgets & Geekery & Technology. ]

    [ WebUrbanist | Archives | Galleries | Privacy | TOS ]


    WebUrbanist

  • 8 Creative Ways to Make Money with Your Photography

    Photography doesn’t just have to be a hobby, in fact, it can be a brilliant way to gain some extra money – and quite a lot at that! I’ve put together a list of my favourite ways of making money through photography, and with the ideas ranging from a couple of hours a week to a part-time project, you may find something that catches your eye.

    1. Shoot Microstock

    Picture 0

    Stock image – © Olly Stabler

    There are many different microstock sites out there, including Shutterstock and iStock Photo, and by uploading your images you may well be able to earn some extra money. If you excel at taking commercial images, this will be a great idea for you as these are the types of photographs that sell the most. If you are considering this option, make sure you don’t let your passion for photography die out, through a focus on sales statistics and selling stock shots.

    2. Network to be a Second Shooter

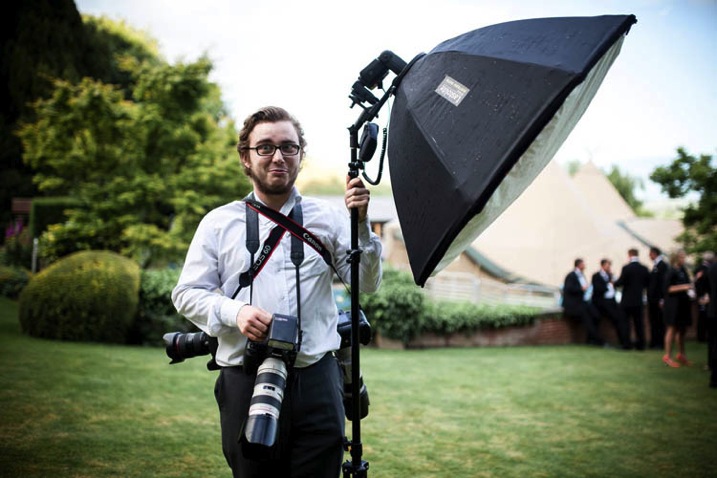
    Through networking using social media, events, and photography clubs, you can build relationships with other photographers. Opportunities will often arise through the relationships you have built, such as requests to work as a second shooter on a project. It may be that a fellow photographer is working an event, and needs you to join them to take photos to build a complete portfolio of photographs from the day. Weddings are probably the most common occasions that require second shooters, so keep an eye out for these jobs.

    Picture 1

    Me as a second shooter – © Scott Choucino

    Alternatively, those you have networked with may have to turn down work that is too low-budget for them, and will ask you to work on them instead. Never underestimate the job opportunities that will become available to you through networking. This article tells you everything you need to know about the importance of being a second shooter.

    3. Sell Prints

    Picture 2

    The first of my photos to make it to print – © Olly Stabler

    There are many different ways you can sell prints; choose framed copies for larger amounts of money, print on canvases to create a professional look, or prints on their own for those who want to spend less. This will also open up the opportunity to place your work in stores and exhibitions. Having hard copies of your photographs will prove helpful whether you have already received sales, or are searching for prospects.

    If you shoot in a studio, I would advise hanging your prints on display, and the larger the prints, the better. Your clients will always take note of them hanging in your studio and these prints will showcase the work you can create, encouraging sales. Upselling to your clients can create big money, with bigger prints bringing in big profit margins. To ensure that your photos print perfectly, check out Image Size and Resolution Explained for Print and Onscreen.

    4. Become a Photo Booth Service

    Photo booths are a similar price to a full frame DSLR body plus lens, and are extremely easy to operate. There are an unlimited amount of events and options available if you choose this route including parties, weddings, corporate affairs and events. Offering a photo booth service might not be the best option for a budding photographer as artistic photo opportunities are extremely limited, but nevertheless, it is a surefire way to earn money through photography.

    Chris Guillebeau

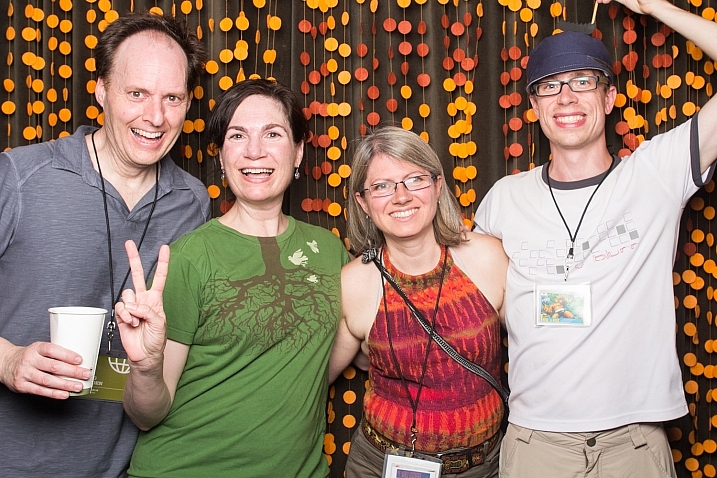
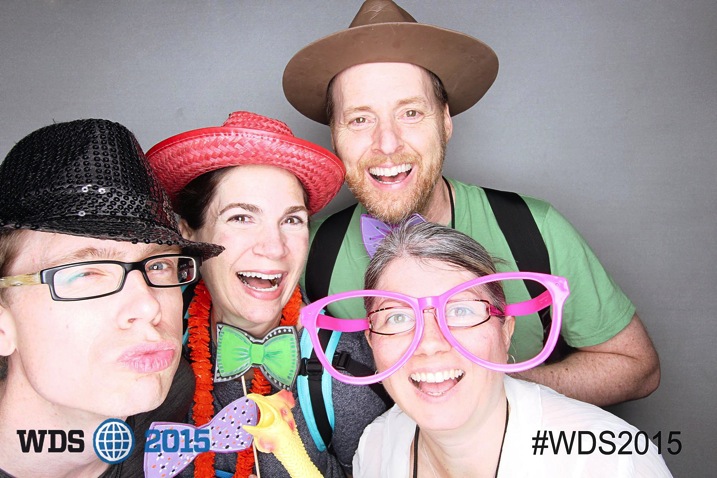
    By Chris Guillebeau – Yes that is your very own Managing Editor Darlene Hildebrandt in a Photo Booth at an event in Portland in 2012

    IMG 0653

    Same group, same event – 2015!

    5. Sell an eBook

    If you want to share your passion with others by talking about your experiences and discussing hints and tips, creating an eBook may be the way forward for you. This idea will involve little costly investment, but will require a lot of time. There are many benefits of writing an eBook including the fact that it will help you to make a name for yourself within the industry. The best way to encourage the success of your publication would be to outreach to bloggers and ask for reviews; the power of word of mouth is invaluable.

    6. Hold a Portrait Party

    Picture 3

    A headshot taken in my studio – © Olly Stabler

    The idea is simple. Invite friends, bloggers, colleagues, and clients to your studio and tell them to bring a couple of friends. This concept will also work in your lounge, your friend’s front room, or pretty much any location you fancy. Shoot portraits of them all throughout the night, you can even put on a show with entertainment and food.

    You can then give them the option to buy their photographs, or book a session. Giving out a few free prints will also work in your favour, as you are thanking them for their time; this will also give them examples of your work to show people they know, and could end up resulting in a lot of business.

    7. Photograph in Nightclubs

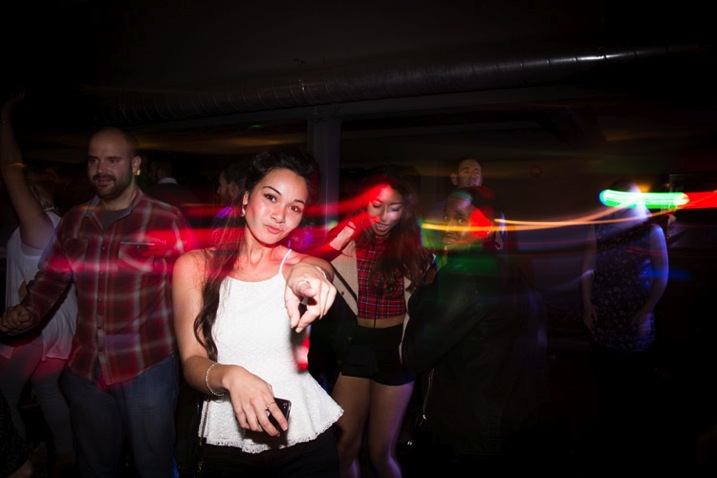
    Picture 4

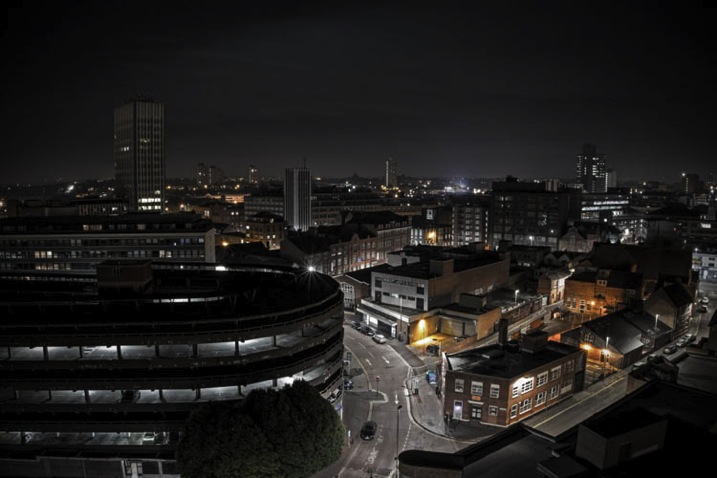
    A photograph taken from my nightclub days – © Olly Stabler

    Photographing in clubs will help you to learn a lot of skills that you will need for higher paid and more complex jobs. If you are reasonably new to photography, and want to earn extra money as well as build your skill set, this is the one for you. Although the pay isn’t brilliant, you can end up earning a decent amount if you photograph a few student nights a week in university towns and cities. This will also help you to build confidence as a photographer as you will be forced to interact with a lot of people at the same time – an essential quality for a photographer.

    Becoming a nightclub photographer is extremely easy to get into, you just need to make sure you have a flash – you can find my recommended products on Amazon.com. The cheaper versions of these flashes do not work with ETTL, which means you will learn how to control flash manually, giving you a full understanding of how flash lighting works – something that is essential if you want to move into higher paying work.

    8. Enter Competitions

    There are plenty of photography competitions floating around, all with various prizes dependent on those running the feature. Try looking for those that offer a cash prize and enter as many as you can. If you are regularly photographing, you should have a portfolio of images you can enter into competitions. You only need to spend an hour each day searching and applying for these, which may make this option a favourite if you only have a small amount of time to spare. A good place to start is by utilizing databases such as this photo competition website. Remember though, this idea does not guarantee a payout and can be an unpredictable way of making money.

    Editor’s note: be sure and read How To Evaluate Photo Contests Before Submitting Your Images And Cash before you enter any contests.

    So those are just a few ways you could use your photography to make a little extra money, or start to make the move towards full-time professional. Do you have any other ideas or things you’ve tried? Please share in the comments below.

    googletag.cmd.push(function() {
    tablet_slots.push( googletag.defineSlot( “/1005424/_dPSv4_tab-all-article-bottom_(300×250)”, [300, 250], “pb-ad-78623” ).addService( googletag.pubads() ) ); } );

    googletag.cmd.push(function() {
    mobile_slots.push( googletag.defineSlot( “/1005424/_dPSv4_mob-all-article-bottom_(300×250)”, [300, 250], “pb-ad-78158” ).addService( googletag.pubads() ) ); } );

    The post 8 Creative Ways to Make Money with Your Photography by Olly Stabler appeared first on Digital Photography School.

    Digital Photography School

  • Blue Lights Out: 10 Closed & Abandoned Kmart Stores

    [ By Steve in Abandoned Places & Architecture. ]

    abandoned-kmart-0
    Attention Kmart shoppers… would the last one out the door please turn off the blue lights? These 10 abandoned Kmart stores have rung up their last receipt.

    abandoned-kmart-1d

    abandoned-kmart-1b

    The first Kmart opened on March 1st, 1962, in Garden City, Michigan – one of 18 Kmart stores to open that year. It wasn’t long before “Attention Kmart shoppers!” and the Blue Light Special entered the realm of pop culture. All good things must come to an end, however, though the end for Kmart has been especially long and messy.

    abandoned-kmart-1a

    abandoned-kmart-1c

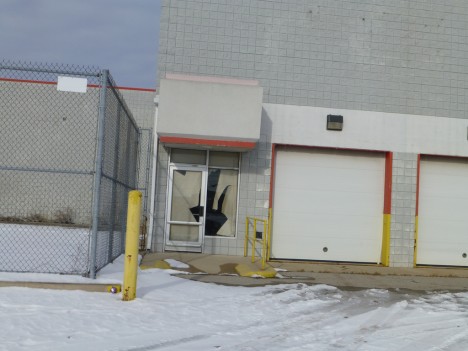
    Down to 979 stores (as of January 2015) in 49 states and territories, Kmart’s decline has left hundreds of abandoned buildings in its wake including the one above, abandoned since 2008 in Defiance, Ohio. Kudos to Flickr user Nicholas Eckhart for snapping and posting the images above.

    Z-Mart

    abandoned-kmart-2

    Sign of the End Times? The Walking Dead of retail? This disturbing “Kmart from Hell” sign stands (as of January 31st, 2013) in front of the abandoned former Kmart Super Center at Winchester and Riverdale in Memphis, TN. Built in 1995, the store only lasted ten years before management threw in the towel. Flickr user l_dawg2000‘s photo highlights “some sort of lo-jac device (bottom left on the sign) to discourage stealing it!”

    Close the Palm Bay Doors

    abandoned-kmart-3a

    abandoned-kmart-3c

    abandoned-kmart-3b

    abandoned-kmart-3e

    abandoned-kmart-3d

    Call it a combo of dedication and obsession: Flickr user Albertsons Florida Blog photo-documented the decline and fall of Kmart #3710 in Palm Bay, Florida (opened 1979), in 217 photos (and two videos) dating from January 28th of 2014 through September 9th, 2015.

    Because of Winn-Dixie?

    abandoned-kmart-4b

    abandoned-kmart-4a

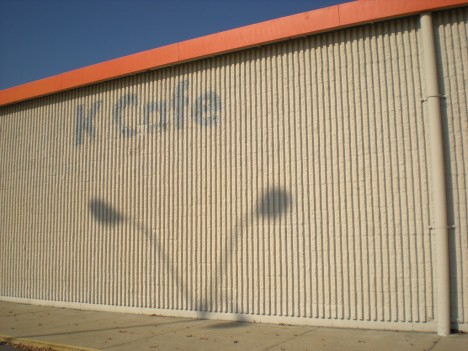
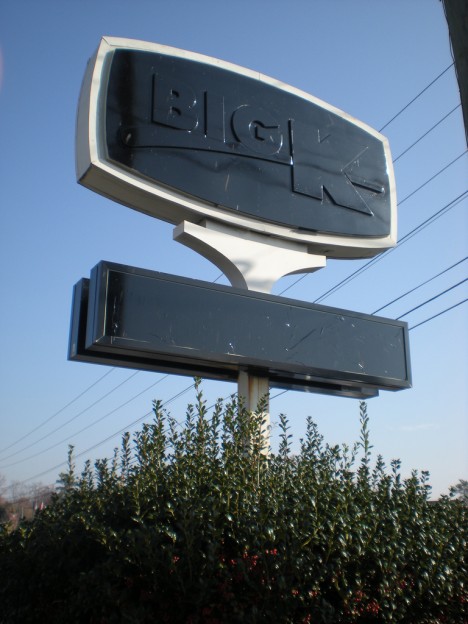
    Too big to fail? Nope! Flickr user Ryan (RetailByRyan95) brings us this abandoned Big Kmart (complete with enticing K Cafe) department store at 5432 Glenside Drive in Richmond, VA. The store opened as a regular Kmart in 1977; in 1998 it expanded into the space formerly occupied by a neighboring Winn-Dixie supermarket that had closed the previous year.

    abandoned-kmart-4c

    Black signs don’t matter. Newly incarnated as a “Big Kmart”, the store soldiered on until August 2012 when the doors slammed shut for the final time and the sign was blacked out.

    Next Page – Click Below to Read More:
    Blue Lights Out 10 Closed Abandoned Kmart Stores

    Share on Facebook


    [ By Steve in Abandoned Places & Architecture. ]

    [ WebUrbanist | Archives | Galleries | Privacy | TOS ]


    WebUrbanist

  • Getting the Most Out of Each Portrait Location Spot

    159

    Some photographers are very inefficient when it comes to shooting in a portrait location. They will take a photo here by this tree, then move over to another tree, then by the pathway, and one at the rock. Then they can’t figure out where to shoot next, because they’ve already used every “backdrop” they can see in that area, and they only have a handful of shots to show for their efforts.

    I’d like to share a few tips with you for using your locations fully and completely, without leaving any leaf, tree, stone, or pose unturned. You’ll speed up your sessions, and get a lot more useable photos by adopting these habits.

    158

    First, find a background that you like. Look for good light, elements that frame your subject, colors that complement, something to lean or sit on, etc. Once you’ve found a spot or background to start with, use it completely and quickly before you move on to a new spot.

    161

    I’ve created a few lists that can help you remember all the ways that you can pose your subject(s), and use a background fully, before you move on. Use these ideas to create your own list that you can carry with you until “wearing each spot out completely” becomes second nature.

    All subjects with any background

    • Standing
    • Seated
    • Smiling
    • Serious
    • Laughing
    • Looking away
    • Close-up
    • Far away
    • Portrait (vertical) orientation
    • Landscape (horizontal) orientation
    • Full body
    • Head shot
    • With a prop
    • Without a prop
    • Unexpected composition (such as subject on the very edge of the frame, subject centered right in the middle, etc.)

    162

    Families, couples, or groups with any background

    • All looking at the camera  and smiling
    • Looking at each other
    • Hugging
    • Laughing
    • All sitting
    • All standing
    • Some sitting, some standing
    • Parents
    • Kids
    • Boys
    • Girls
    • Parent with child
    • Individual portraits of each family member
    • Couple hugging facing each other
    • Couple hugging, one behind the other
    • Holding hands
    • Walking towards you
    • Walking away from you

    171

    Individual with trees or walls (something to lean against)

    • Shoulder leaning on a wall or tree
    • Back to the wall or tree, looking at the camera
    • Hand to the tree or wall
    • Head leaning on the tree or wall
    • Arms folded
    • Hands in pockets
    • Hand on hip
    • Sitting against the tree or wall
    • Any of the above, looking away from camera
    • Funny/silly looking around tree or wall

    169

    If you move quickly through each of these poses, your subject won’t feel like she’s stuck in one place forever, but you will have so many options to choose from when you are sorting through the photos later. You might not choose to edit every pose, in every location. But, you may find as you go through the photos later, that you really like the serious face in one location, and you really love the close-up in a different location. Shooting so many options in each location at that moment gives you that choice, instead of being stuck with the one and only option you thought of in that moment.

    168

    Some of your photos may end up looking very similar to each other, but you may decide that you really like the full body pose better than the tighter shot. If you had only shot that location with a cropped pose, you wouldn’t have that option. Alternatively, if you don’t shoot a cropped-in pose at that time, youhave the option to crop it later, but you will lose photo quality by cropping it the file smaller.

    173

    As you learn to use each location fully, you will find that you can get many more useable photos in much less time, with less effort, and in locations that you might not have even noticed before. One tree and one person could be one photo, or it could end up being a hundred photos if you are extremely creative and efficient.

    Give yourself a challenge to figure out at least 10 different photos in one location spot, and share a couple of your favorites in the comments! I’d love to see what you come up with.

    googletag.cmd.push(function() {
    tablet_slots.push( googletag.defineSlot( “/1005424/_dPSv4_tab-all-article-bottom_(300×250)”, [300, 250], “pb-ad-78623” ).addService( googletag.pubads() ) ); } );

    googletag.cmd.push(function() {
    mobile_slots.push( googletag.defineSlot( “/1005424/_dPSv4_mob-all-article-bottom_(300×250)”, [300, 250], “pb-ad-78158” ).addService( googletag.pubads() ) ); } );

    The post Getting the Most Out of Each Portrait Location Spot by Melinda Smith appeared first on Digital Photography School.


    Digital Photography School

  • 29. November 2015
    Das Bild des Tages von: Anne Puhlmann

    Eine Frau sitzt auf einem Steg

    Im Ausblick: Ein wunderbar ruhiges Selbstportrait.
    kwerfeldein – Fotografie Magazin | Fotocommunity

  • PIX 2015: Robert Hurt and the hidden universe

    Robert Hurt might just have the coolest job in the galaxy. He’s a visualization scientist with NASA, helping to interpret research data from space telescopes and NASA missions into photography. In short, he helps reveal the hidden universe that exists beyond the realm of human vision. In his PIX 2015 talk, he shares his insight on how his images are created and what kinds of things we can hope to discover when the unseen world becomes visible. Read more

    Articles: Digital Photography Review (dpreview.com)

  • Die 5 Artikel des Monats

    Grüne kaputte Schreibmaschine

    „Hab’ ich mich gerade verlesen? Es ist schon Ende November?“ Richtig. Die Zeit rast an uns vorbei und Weihnachten auf uns zu. Und bevor nun der November komplett vorüber ist, empfehlen wir Euch fünf Artikel aus unserem Fundus der letzten Wochen.
    kwerfeldein – Fotografie Magazin | Fotocommunity