Blog

  • Pocketable APS-C: Fujifilm X70 real-world samples

    Fujifilm’s new X70 compact camera puts the 16MP APS-C sensor from the X100T into a much smaller body, omitting an EVF but adding a 28mm equiv. F2.8 lens and articulating touch-sensitive screen. The X70 is certainly one of the nicest compact cameras to look at, and its specifications are pretty impressive, but what kind of images can it produce? We spent the weekend shooting with a production-quality camera.

    Articles: Digital Photography Review (dpreview.com)

  • Find Love Through Your Lens: 3 Ideas for a Valentine Photo Shoot

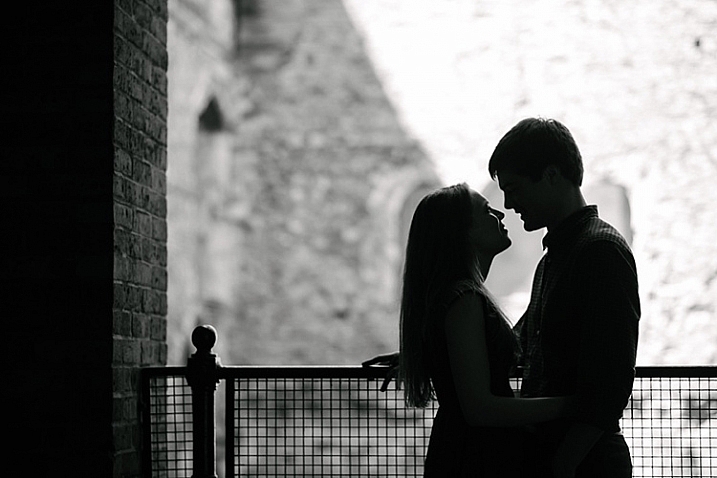
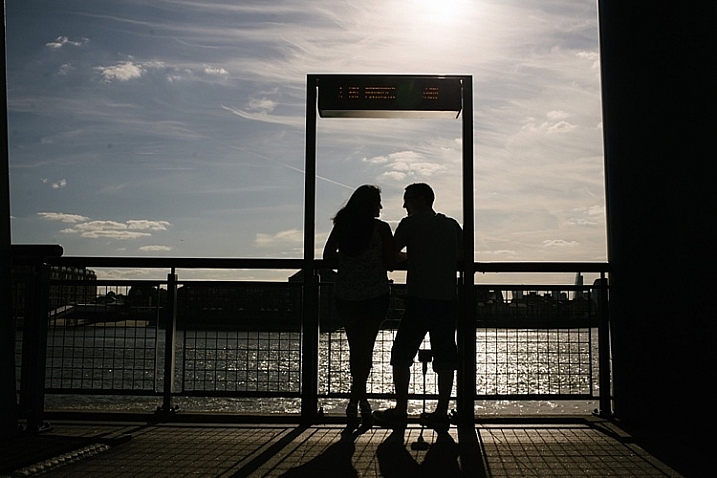
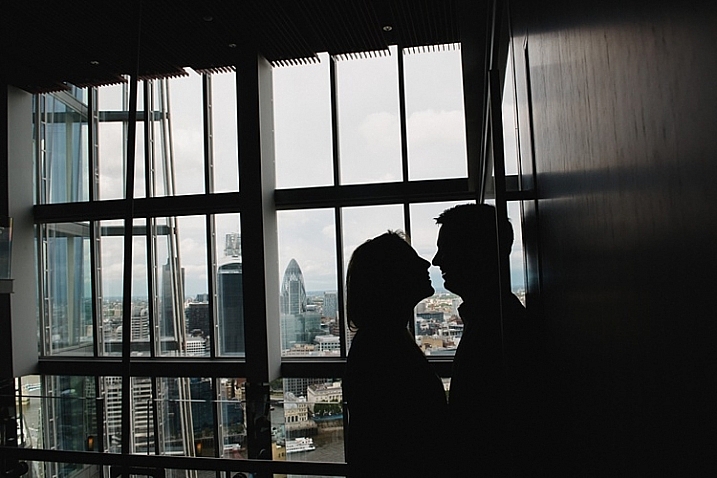
    Editor’s note: Valentine’s Day is a good opportunity for aspiring portrait photographers to practice love story and romantic / family photo shoots. Below you can find three practical tips and ideas for a Valentine photo shoot from our regular writer, a portrait photographer, Barbara Stitzer. *** Ahhh, Love. It can be giddy, maddening, complacent, jealous, warm and gooey, and downright Continue Reading

    The post Find Love Through Your Lens: 3 Ideas for a Valentine Photo Shoot appeared first on Photodoto.


    Photodoto

  • Fujifilm X-E2 firmware 4.00 brings Classic Chrome and other X-E2S features

    It may be over two years old, but that doesn’t mean Fujifilm has given up on the X-E2.

    Fujifilm has released its promised firmware update for its X-E2 mid-range mirrorless camera. The firmware update adds a host of feature and operational improvements, including the Classic Chrome film simulation and AF upgrades from the recent X-T models, as well as a revised user interface and multiple Auto ISO settings.

    The firmware update for the over two-year-old model continues Fujifilm’s habit of supporting existing users and brings the camera into line with most of the latest X-series models.

    The changes are so significant that, rather than publishing an addendum, Fujifilm has released a new version of the camera’s owner’s manual.


    Press Release:

    Substantial firmware updates for the X-E2, delivering a new AF system for better capture of moving subjects among other improvements and function enhancements

    [ Improvements and function enhancements with this firmware update ]

    1. New AF System

      (1) New AF system with Zone and Wide/Tracking modes for effortless capture of moving subjects
      (2) Improvement of AF accuracy
      (3) Eye Detection AF
      (4) Auto Macro mode
      (5) AF improvement in the Movie mode

    2. Function enhancements

      (6) High-speed electronic shutter with a maximum speed of 1/32000sec.*
      (7) White Balance Bracketing
      (8) Enhanced ISO Auto Setting to AUTO1/AUTO2/AUTO3
      (9) Exposure Compensation control in Manual.
      (10) Natural Live View function is just like the naked eye.
      (11) Finer lines on the framing grid enhances visibility
      (12) New Video Frame rates (50P / 25P / 24P)
      (13) Manual Shooting in Video mode
      (14) Phase detection AF support for Instant AF
      (15) Expansion of shutter speed in Program Shift mode

    3. Operability improvements

      (16) The new user interface
      (17) Improved Shutter Speed Dial operation
      (18) Name of Silent mode changed to avoid confusion
      (19) Direct selection of AF area
      (20) Unlocked AE-L / AF-L Buttons
      (21) Variable Focus Area during MF
      (22) Q. Menu customization
      (23) Interlocking of Metering and Focus areas
      (24) Movie Recording

    4. Other changes with the update

      (25) Supports focus limiter function for XF100-400mmF4.5-5.6 R LM OIS WR
      (26) “BACKGROUND COLOR” menu
      (27) The maximum number of images taken in the continuous shooting mode

    Articles: Digital Photography Review (dpreview.com)

  • Quick Overview of How to do Macro Photography

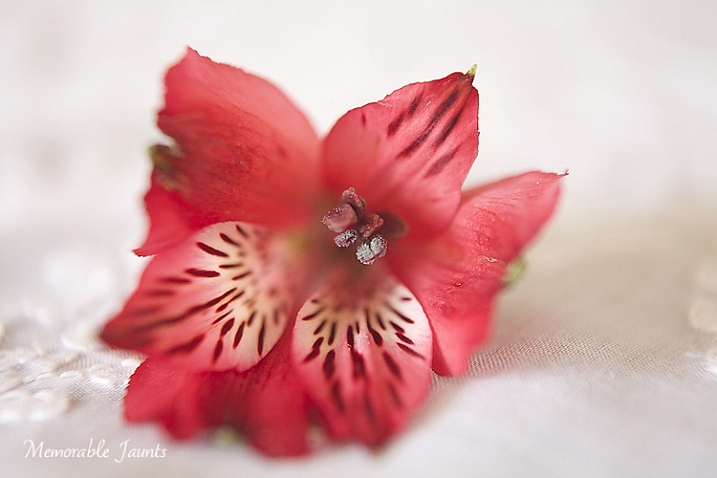
    In the photography domain, macro photography is defined as the art of magnification of subjects. It is a very interesting form of photography, which seems to have an application in almost every genre.

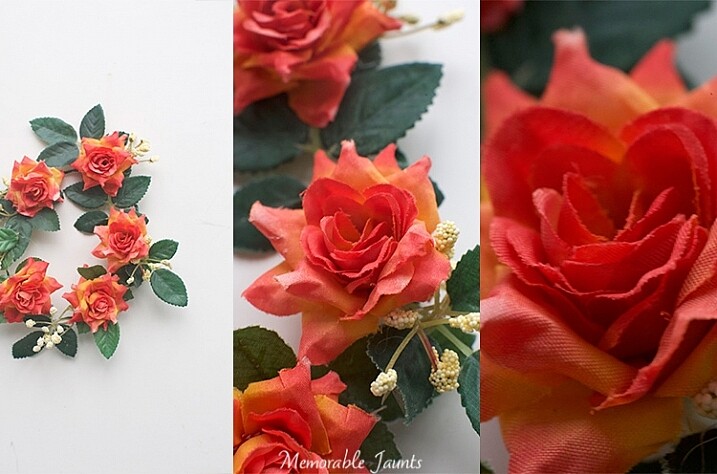
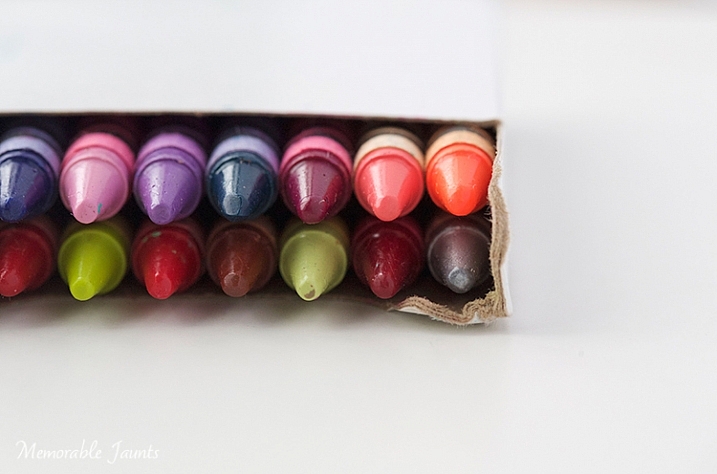
    Memorable Jaunts Macro Photography Article for DPS 05

    For wedding photographers, it’s a great way to highlight wedding details like rings, the invitation suite, certain aspects of the bridal bouquets, and boutonnières. For nature photographers, it is a great way to get up close and personal with many interesting subjects like bugs, insects, and small animals. For food photographers, a macro lens is one of the ultimate tools to highlight their craft because it’s such a great way to emphasize textures, patterns, and details. Even portrait photographers are known to favor the long focal length macro lens, as it gives them the flexibility of getting close details of their subjects, without invading a client’s personal space, especially when dealing with camera-shy children and adults.

    Gear choice

    There are several options in the marketplace in terms of gear choices for the macro photographer. Extension tubes, macro (or close-up) filters, as well as specific macro lenses are available for every budget. Based on the macro lens used, you can achieve magnification anywhere from around half to four or five times life-size, of the object being photographed.

    Memorable Jaunts Macro Photography Article for DPS

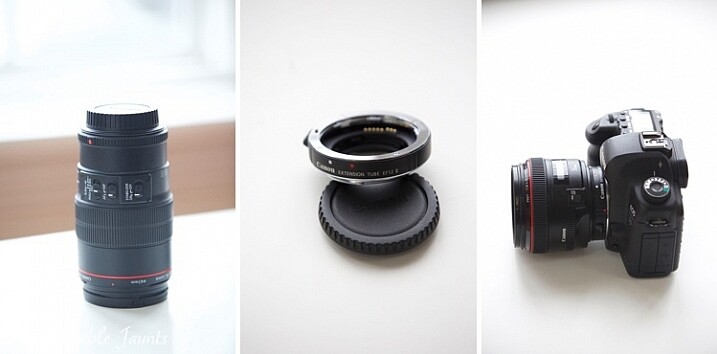
    Left image: 100mm f/2.8L IS Macro Lens
    Middle: Canon 12mm Extension Tube
    Right: Canon 5D MkII with 50mm lens and extension tube attached

    1. Speciality Lens – Macro lenses come in various focal lengths. Short macros are typically lenses in the 30-50mm range. Standard macro lenses are in the 60-105mm focal length range, and tele-macro lenses are in the 150mm-200mm range. These macro lenses tend to perform better than extension tubes and macro filters, since they are build specifically for close-up photography. They work great at short focal lengths as well as longer ones. The main disadvantage with these lenses tends to be the price point. Most of the dedicated macro lenses are upwards of $ 500 (or more) and that can be a limiting factor for someone just getting into macro photography.
    2. Extension tubes are hollow tubes that fit between your lens and your camera mount. They don’t have any glass elements within them, they simply move the actual lens further from the camera, and the front element of the lens closer to the subject, thus offering a certain amount of magnification to the subject. Extension tubes tend to be less expensive than traditional macro lenses and can be mounted on any lens. But they tend to work best with shorter focal lengths. The main disadvantage with extension tubes is that your lens looses the ability to focus on distant objects, since it works only on close-up magnifications. There is also some light loss, which can be compensated by increasing the ISO or by using a slower shutter speed. The camera sensor is also exposed to dust, and the external elements, every time you remove or add the extension tube to the front of your lens.
    3. Macro filters are similar to other types of filters that attach to the front of your lens. They come in different sizes, and different magnification ratios, so if you want to use them on various lenses, then you will need to invest in a variety of filters. They tend to be relatively inexpensive, and can be stacked one on top of one another, in order to get a variety of magnification factors for your subjects. Macro filters also tend to lose light, especially when used as a multiple stack. Hence these cannot be used very effectively with wide apertures. They work best when apertures are stopped down (higher f-stop number).

    My initial choice for macro photography was the Canon extension tube EF12 II. As a wedding photographer, I wanted something small and inexpensive for photographing details and ring shots. Since then I have migrated to the Canon 100mm f/2.8 L-series macro lens, and find myself reaching for this beautiful lens more often than not. I have used it for portraits, food photos, as well as still life details.

    Technical tips

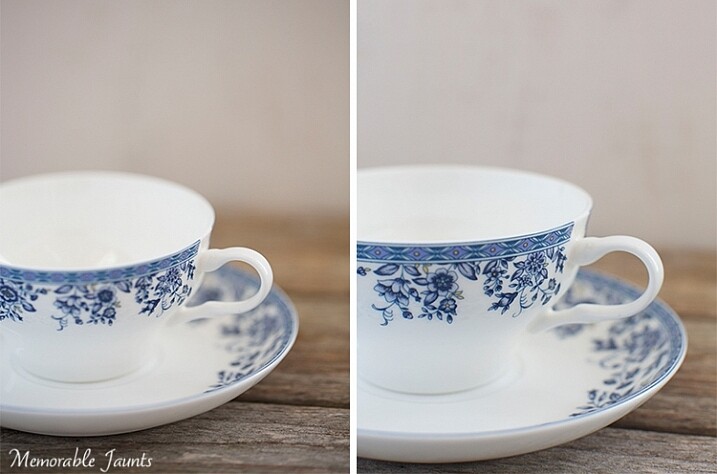
    The key thing to note in macro photography, is that depth of field (DOF) depends primarily on two factors: aperture value and magnification. For any given aperture value, the higher the magnification ratio, the smaller the DOF will be, hence the DOF tends to be very shallow for macro photography (higher f-stop).

    Memorable Jaunts Macro Photography Article for DPS 04

    Both images were shot at f6.3 – the one on the left is using the 50mm with extension tube, right image is with 100mm macro lens

    Memorable Jaunts Macro Photography Article for DPS 02

    The left image is a pull back using a 50mm lens
    Middle is using the 50mm + extension tube
    Right is using the 100mm macro lens (all other settings are fairly standard across all three images)

    From an application perspective, focus on the main point of the subject that you want to target. If your camera supports live view, use it to zoom-in and ensure that the image is sharp. Set the aperture around f/11 (feel free to experiment to find the optimal setting for your lens, filter, extension tube combination). If you want a greater depth of field (more of the subject is in focus) use a smaller aperture like f/16 or f/22.

    Another thing to note is that when photographing objects that tend to move suddenly, like bugs and insects, a higher shutter speed is advantageous to stop motion and freeze the subject. As a rule of thumb try not to drop below 1/400th or 1/500th shutter speed.

    Memorable Jaunts Macro Photography Article for DPS 07

    One of the most popular uses of macro lenses is in food photography. Left image using 50mm with extension tube, right image using 100mm macro lens. Both have shallow depth of field because I wanted to blur out the food in the background.

    Mirror lock-up

    Most DSLR cameras have a mirror inside, which allows you see the image in the viewfinder. The mirror flips out of the way when you press the shutter button, and this action itself can introduce camera shake, and cause your image to be blurry. You can reduce the chances of blurry images by turning “ON” the mirror lockup function (look for it in your camera’s manual). On most cameras that means you will press the shutter button once and it will flip up the mirror, pressing it again takes the exposure. If you have a mirrorless camera then this does not apply to you.

    Diffraction

    In Photography, diffraction is the bending of light as it passes by the small sharp edged blades, which form the aperture opening. The light gets squeezed together, or blends together. Diffraction is worse with smaller aperture settings like f/16 to f/22. This causes the image to be less sharp, especially at the edges, even more so in macro photography when you are often shooting at smaller apertures. You can avoid diffraction by not dropping below f/16, or by using selective focus over multiple images, and stacking (focus stacking) them together in post-production to get an overall sharp image.

    Practical Applications

    Contrary to popular belief, macro photography is not restrictive to images of bugs, leaves, flowers and food. They can be an effective tool to highlight any form of detail, texture and pattern. Specific macro lenses also double up as great portrait lenses, extending their use beyond just macro photography.

    Memorable Jaunts Macro Photography Article for DPS 06

    Memorable Jaunts Macro Photography Article for DPS 03

    Left image is pull back of the ring
    Middle is with 50mm + extension tube
    Right is 100mm macro. F-stop was around f/9 and shutter speed was around 1/50 (I was loosing light very fast and had my ISO up to 2500).

    So the next time you want a little boost of creativity, use macro photography to get a fresh, up close perspective on things!

    googletag.cmd.push(function() {
    tablet_slots.push( googletag.defineSlot( “/1005424/_dPSv4_tab-all-article-bottom_(300×250)”, [300, 250], “pb-ad-78623” ).addService( googletag.pubads() ) ); } );

    googletag.cmd.push(function() {
    mobile_slots.push( googletag.defineSlot( “/1005424/_dPSv4_mob-all-article-bottom_(300×250)”, [300, 250], “pb-ad-78158” ).addService( googletag.pubads() ) ); } );

    The post Quick Overview of How to do Macro Photography by Karthika Gupta appeared first on Digital Photography School.


    Digital Photography School

  • Modern Japanese Architecture: Sunny Minimalism by Tomohiro Hata

    [ By Steph in Architecture & Houses & Residential. ]

    hata reslope 3

    Expertly blending the minimalist aesthetics of traditional Japanese architecture with modern sensibilities to meet the needs of contemporary residents, architect Tomohiro Hata graces each of his cleverly-designed homes with his own distinctive style. Haha is particularly skilled at producing sunny, airy residences that feel luxurious, dynamic and fresh despite tight budgets, challenging sites and building regulations.

    Re-Slope House
    hata reslope 1

    hata reslope 2

    hata reslope 4

    hata reslope 5

    hata reslope 6

    hata reslope 7

    hata reslope 9

    hata reslope 8

    hata reslope 10

    hata reslope 11
    Modern Japanese architects have found creative ways to enable privacy in densely packed urban residential areas without cutting off access to sunlight, and to balance a cozy cave-like atmosphere in one part of the home with an airy, almost entirely open facade. In the case of Tomohiro Hata’s ‘Re-Slope House,’ the plot is set into a rocky Kobe hillside, cutting off access to light and air in the back half of the house.

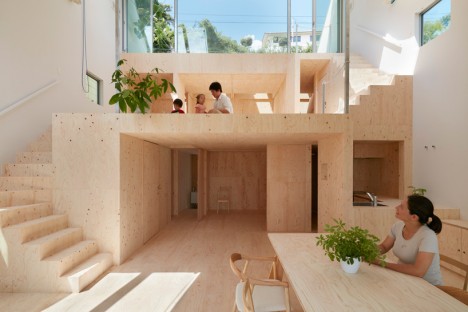
    Hata’s adaptive design is a wedge-shaped metal volume that follows the slope of the hill, placing oversized windows at the front and inserting wooden platforms inside for varying access to the light. Three open-plan terraced platforms mimic an oversized set of stairs, stepping from a sunny room adjacent to the windows down into the more private rooms. Skylights let the sun pierce through to the back of the home, and sliding glass doors offer access to a top-floor terrace and a set of metal scaffolding on the hillside for plants. The street-facing facade is windowless; nearly all of the glass looks out onto the landscape, blocking the interior from the view of neighbors.

    Complex House
    hata complex 1

    hata complex 2

    hata complex 3

    hata complex 4

    hata complex 5

    hata complex 6

    hata complex 7
    The narrow profile of this plot of land in Nagoya created a challenge for Hata in designing a single-family residence that feels open and spacious, yet also private. The architect’s solution was to create a sharply angled, jagged silhouette pointing most of the windows up to the sky. The series of voids created by alternating pitched roofs brings sunlight in from all directions at various times of day as well as entirely walled-in courtyards.

    The clever layout lets the occupants look out without providing passersby with a view into their home, creates a dynamic flow of foot traffic inside and has a far more interesting appearance from the curb than a simple box. The use of simple metal cladding keeps costs down and gives the home a minimalist, streamlined vibe.

    Next Page – Click Below to Read More:
    Modern Japanese Architecture Sunny Minimalism By Tomohiro Hata

    Share on Facebook


    [ By Steph in Architecture & Houses & Residential. ]

    [ WebUrbanist | Archives | Galleries | Privacy | TOS ]


    WebUrbanist

  • 5 Creative Ideas to Improve and Inspire Your Photography

    If you are a photographer who takes pictures day in and day out, perhaps because it is your livelihood or you are a keen hobbyist, there are times when you may want to digress from the day to day, and do something new on your day off. You can do this purely for the fun of it, or to set yourself some new learning challenges. This is a good practice to implement regularly because it pushes you to think outside the box, hone your skills, enlarge your vision, and challenge your creativity.

    Here are some creative ideas on what you can do to take a break or depart from the usual, even just for a day.

    layering-creative-photography-tip-01

    1 – Vertical only please

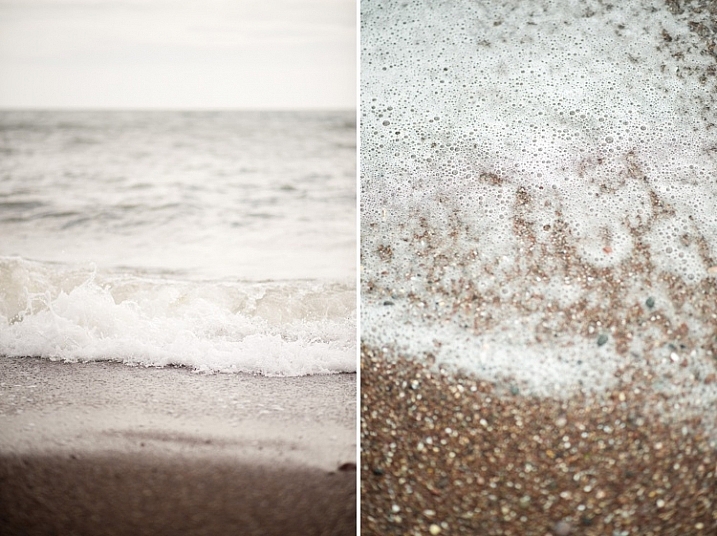
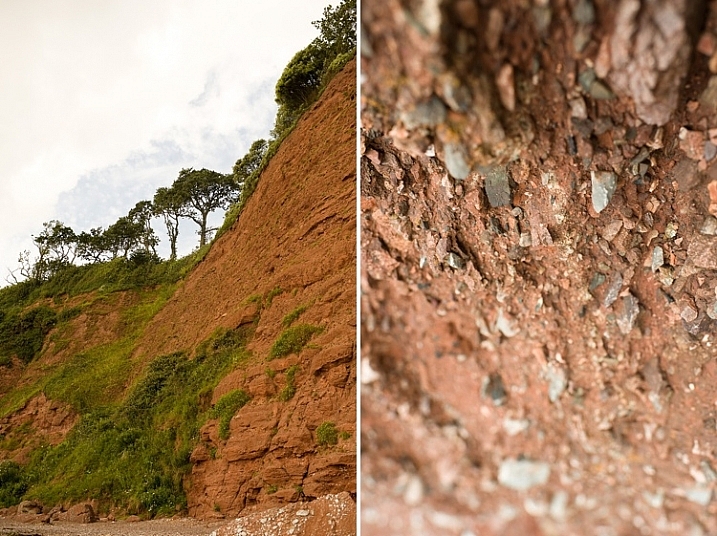
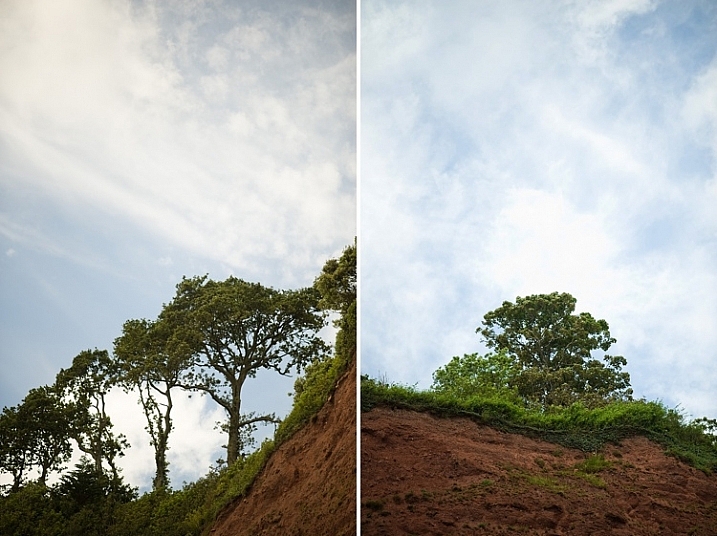
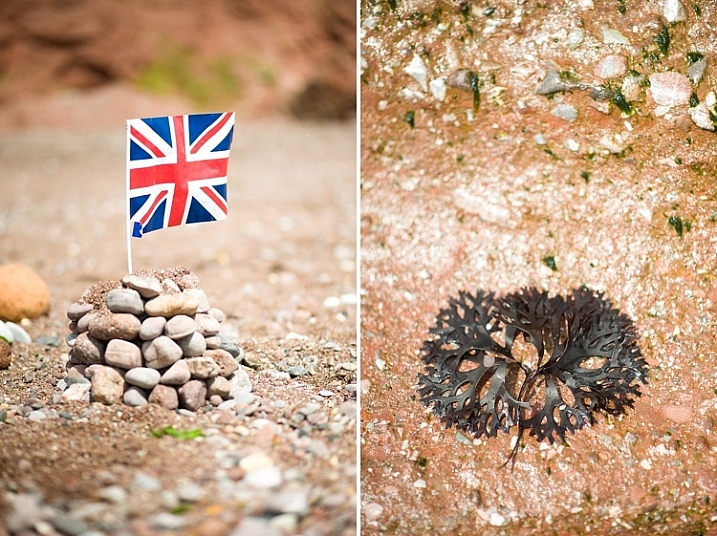
    These vertical images below were taken from a beach summer holiday when I decided to do this particular photography challenge, purely as a fun visual exercise in composition. All I had was a D700, a 35mm f/1.4 lens, and a few meters of beach.

    vertical-photography-tip-01

    Photographing solely in the vertical orientation can be quite tricky. Your view and vision are more constrained. If you are photographing a landscape scene for instance, with the vertical orientation you are limited to pretty much the sky or the earth.

    vertical-photography-tip-02

    vertical-photography-tip-03

    Things that you are always used to seeing in a landscape (horizontal) format will look different, and therefore you will begin to see with a fresh eye. This forces you to look for more intriguing views and items to photograph, as well as to compose in such a way that the photograph is still interesting, despite the limited width.  You could be confronted with some quite unnerving compositions which make the picture more striking, or at the very least elicit an unusual or unexpected reaction.

    vertical-photography-tip-04

    vertical-photography-tip-05

    2 – No eyes allowed

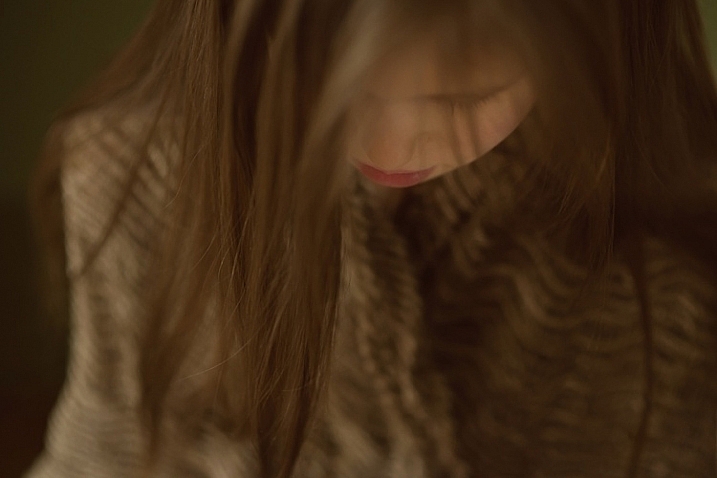
    It is said that the eyes are the window to the soul. This challenge is to try and capture a someone’s personality, without photographing their entire face. There are many more things to a person than just a face. For this challenge focus on anything but the eyes, and see how much of the person’s personality you can capture.  You can focus on physical aspects, clothes, or objects that the person loves.

    personality-photography-tip-01

    personality-photography-tip-03

    Some people have developed icons of themselves: things they are known and recognized for. For example, someone who always wears sunglasses on their head, or a person who only wears striped socks, or someone’s tattoo or jewellery style. Find something distinctive about the person. You can also focus on actions. Perhaps the person is adventurous or has a fun-loving, bigger-than-life personality.

    persosnality-photography-tip-08

    You may want to ask them to do something they love, or hold something that reflects their persona, and find a way of capturing that without photographing the face. Focus on the running motion of their feet, or waving hands, or a big smile cropped in an interesting composition. Color could be another thing. Ask the person to wear their favorite color and find a location that has the same tones.

    persosnality-photography-tip-09

    You can also set something up that reflects the quirkiness of the person, or choose a location that does the same. A country-loving person might be walking in muddy boots, on a long road that seemingly leads to nowhere. Give it some thought with a person in mind, and you may be surprised how many ideas you can come up with that will potentially truly capture their personality.

    personality-photography-tip-07

    3 – Through a glass, darkly…

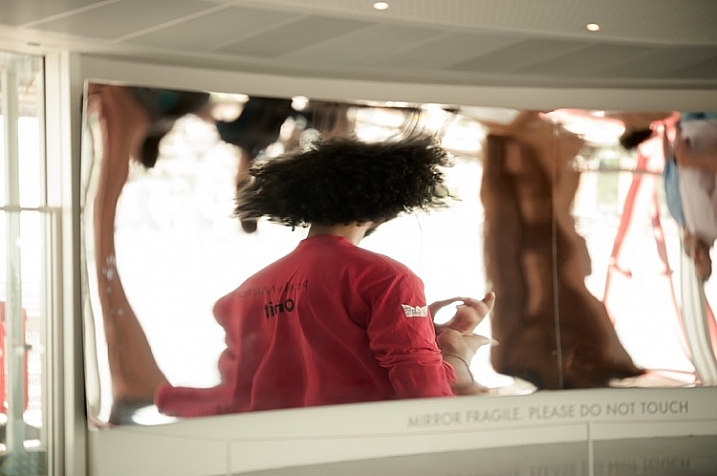
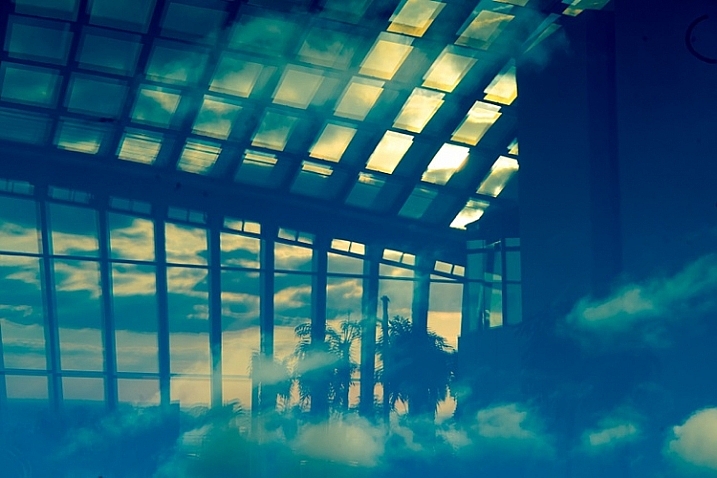
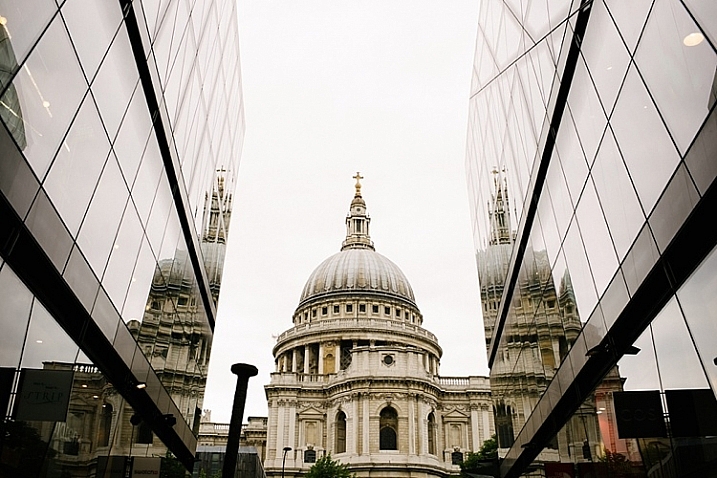
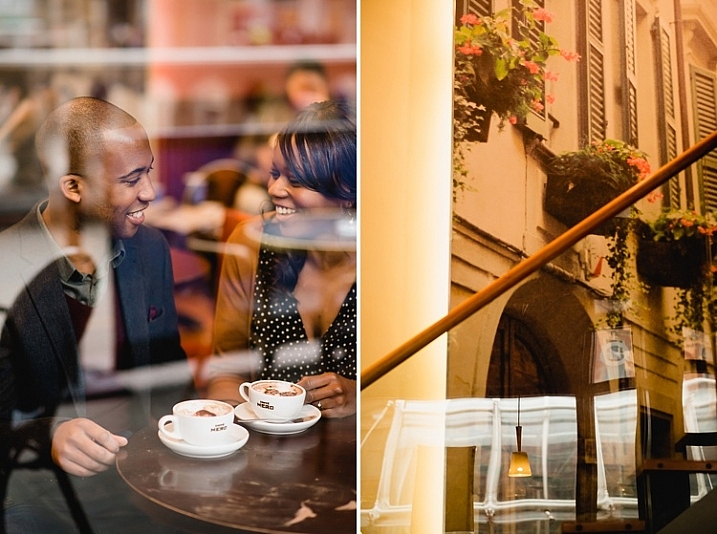
    Consider utilizing reflection to make your images more enthralling and thought-provoking. You can impose a rule that you can only photograph a reflection and never the person or the object, or you can use both subject and reflection for a refreshing take on an image, making them more captivating.

    reflection-photography-tip-01

    reflection-photography-tip-01

    reflection-photography-tip-02

    Some reflector ideas include: mirrors and shiny reflective objects, water, reflective glass or plastics, windows – even clear windows can have reflections. Raindrops can be great reflectors although you may have to pull out your macro lens to capture the reflection. Photographing reflections can open up a whole new world, such as seeing and capturing surreal or abstract images with the blending of forms and colors, as well as igniting your imagination, and filling you with a new sense of wonder.

    relfection-photography-tip-04

    relfection-photography-tip-04

    relfection-photography-tip-06

    4 – Black is the new hue

    Silhouettes are fun to photograph, and not that difficult to execute. But the bigger challenge is to find a striking silhouette concept. The main thing to remember is to find good contrast – a very bright background, preferably bigger than the subject, and put the subject in front of the light area. Expose for the bright background so that your subject is so severely underexposed that they look very dark or black.  Here is a really good article with a simple step-by-step guide on how to take stunning silhouettes.

    silhouette-photography-tip-01

    silhouette-photography-tip-02

    silhouette-photography-tip-03

    5 – Layering

    Layering is a really subtle, but extremely effective, photographer’s trick to convey depth, mystery, and mood in a photograph.  It is especially useful if you are a photojournalistic or documentary photographer, as it makes the viewer feel that they are looking through someone else’s lens, and are present in the moment but inconspicuous, much like a fly on the wall.

    layering-photography-tip-01

    layering-photography-tip-02

    There are three basic things to remember when composing a photograph with layering in mind: foreground, middle ground and background.  Most of the photographs we see often have two layers – the subject and the background.  Incorporating a foreground in your composition not only adds three-dimensionality to your photograph but also makes it more visually compelling.

    layering-photography-tip-03

    Choosing the right foregrounds can be used to frame your subject – as a leading line to direct attention to your subject, therefore making your image more dynamic, or as a tool for emphasis and composition amongst many others. There are times when finding an obvious foreground is next to impossible. One solution is to physically hold an object, such as a leaf or paper, in front of your lens just enough to be in the frame, but not to obscure the subject.

    layering-photography-tip-04

    layering-photography-tip-04

    You can also layer by simply using your lens and the effect of a very wide aperture such as f/1.4. By employing your lens’s ability to blur the foreground, while keeping the middle ground in sharp focus, and then blur the background again, can make an otherwise dull image enchanting. Even something as simple as a patch of stones or sand can look layered using this technique.

    layering-photography-tip-06

    I hope you will enjoy doing these creative challenges. Do you have other creative photography ideas to share? Please do so in the comments below.

    googletag.cmd.push(function() {
    tablet_slots.push( googletag.defineSlot( “/1005424/_dPSv4_tab-all-article-bottom_(300×250)”, [300, 250], “pb-ad-78623” ).addService( googletag.pubads() ) ); } );

    googletag.cmd.push(function() {
    mobile_slots.push( googletag.defineSlot( “/1005424/_dPSv4_mob-all-article-bottom_(300×250)”, [300, 250], “pb-ad-78158” ).addService( googletag.pubads() ) ); } );

    The post 5 Creative Ideas to Improve and Inspire Your Photography by Lily Sawyer appeared first on Digital Photography School.


    Digital Photography School

  • Ready for its close-up: X-Pro2 defines a new era of video for Fujifilm

    Video has previously been one of the great weaknesses of Fujifilm’s X-Trans cameras but that’s all changed with the X-Pro2. We’ve shot our test scene, pounded the streets of New York and captured all the visual clichés we could, to show you what the X-Pro2 can do

    The X-Pro2’s headline video specs are broadly unchanged compared to previous models but the quality has moved forwards dramatically. It’s still not going to be the first choice for professional use but it’s now more than competitive amongst its 1080-shooting peers. Add in the ability to apply Film Simulations to your shooting and video becomes another storytelling tool in the camera’s arsenal.

    Articles: Digital Photography Review (dpreview.com)

  • List of Resources for Making a Photography Website

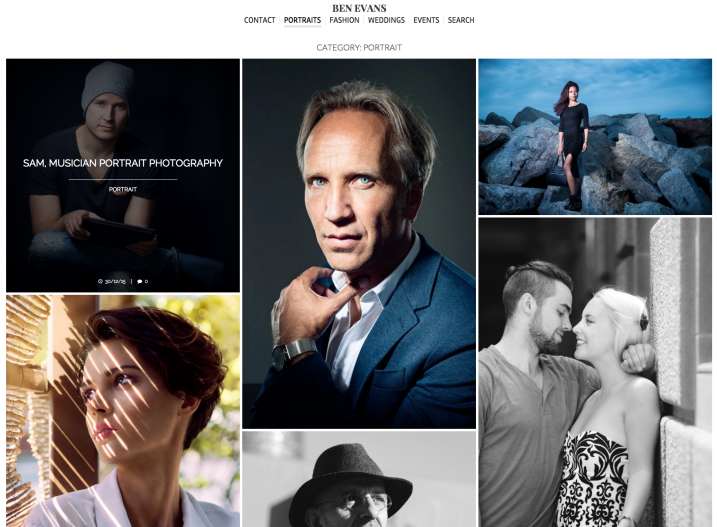
    I’ve just made a new photography website for my fashion, portrait, and event photography. This meant researching the different options currently available (as of December 2015) for creating photography websites. So whether you’ve just gotten your first camera, or are a seasoned pro looking to update your photography website, here are some options to consider.

    I’ll make some recommendations about specific companies that I’ve used. Most articles would make money on these through affiliate links; but there are no affiliate links here (I get no benefit recommending them), these are just companies that I’ve been happy with.

    Editor’s note: none these companies have not been researched or checked by dPS, and are solely the recommendations of the author. As with any purchase please do your own due diligence, read online reviews, and do trial periods where possible, before choosing your web suppliers. dPS is not responsible for any issues that may arise if you follow these suggestions.

    make-photography-website8727-2

    Why make a photography website?

    Now that the majority of photos aren’t printed, sometimes they can get lost in your hard drives and forgotten. Sharing the pictures you make with family and friends is much easier when your photos are online. Depending on the photography website you use, you can also get useful feedback on your pictures, or even sell them to buyers around the world. Now is also the best time to start getting followers, if you haven’t already done so.

    As well as sharing, developing, and selling your photography online, having a photography website helps encourage you, and gives you a sense of accountability so you keep practicing. Old photos are also one of the most valuable things we own, professional or amateur, and photo albums are often what most people would choose to save in a fire. Keeping your memories online not only shows you how your photography has improved, but also keeps them safe in the cloud. When my Western Digital hard drive arbitrarily malfunctioned and lost all of my photos, I was thankful to have uploaded my favourite ones online.

    Make a photography website for free

    Alan O'Rourke

    By Alan O’Rourke

    There are several excellent free options to get your photography online.

    • Flickr – Like a resurrected giant, Flickr offers a huge 1 TB of complimentary storage and has a thriving community.
    • Facebook – A humble Facebook page (not your personal profile but a business page) for your pictures is an ideal way to start to gain a following.
    • Google Plus – Less popular lately, but better quality, and good if you want to be found online by the Google search engine.
    • Instagram– Even if this isn’t your main site, it’s very useful to have as a photographer.
    • Tumblr – A clean, free way to create a blog and feature your most recent photography.
    • 500px – A relative newcomer, the 500px design is clean and contemporary; their free option is fine.
    • Behance – A professional space for your best photos that looks more prestigious.

    Make a photography website

    As well as the free options, you might like to make a photography website that you have more control over. Personally after much research I opted for a self-hosted WordPress site using a pre-designed theme that I customized. To do so you will need;

    A Domain name

    The domain name is your address on the internet. For example: http://digital-photography-school.com is the domain name, or URL for dPS. I get my domain names from www.Internet.bs or www.NameCheap.com.

    Hosting

    This is your real estate on the internet. You need a place to park your site, that is called hosting. Your host online is where all the files for your site will be stored (hosted).

    I use www.LiquiLayer.com (really excellent, personal support) and www.HostDeal.com. I’ve heard good things about www.HostGator.com, www.DreamHost.com and www.HostWinds.com, but haven’t used any of those personally.

    make-photography-website_1413

    Content Management System

    This simplifies building your website tremendously. I use WordPress and highly recommend it. Most web hosts will give you options to install it very easily.

    WordPress Theme

    This provides a structure for your website. There are both free and paid options available, which allow you to make a great looking site faster. Here are my favourites:

    SLR Lounge’s WordPress Theme – I recently discovered this free WordPress photography theme and used it to build my latest website. It has a clean, simple style and creating the site took a few days.

    Screen Shot 2016-01-30 at 1.16.20 PM

    Home page of my new site

    Screen Shot 2016-01-30 at 1.17.21 PM

    Portrait page

    MySiteMyWay’s InFocus Theme – (Paid theme) I’ve used MySiteMyWay’s themes for several websites. As well as the design, I’ve been incredibly happy with the ongoing support, which has saved me a huge amount of time, and allowed me to do things I wouldn’t otherwise have been able to do.

    Screen Shot 2016-01-30 at 1.22.01 PM

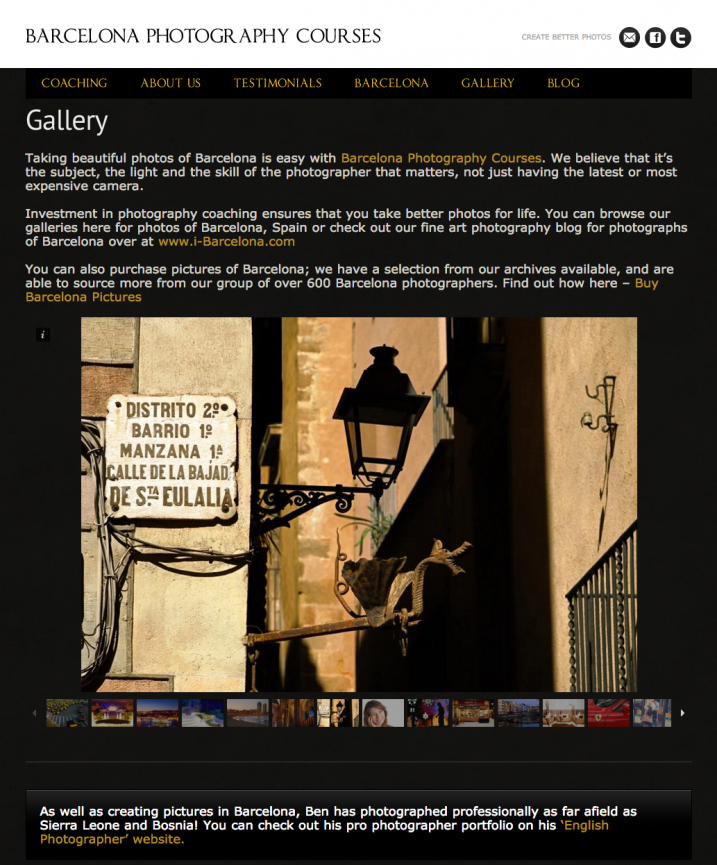
    Home page

    Screen Shot 2016-01-30 at 1.22.31 PM

    Gallery page

    The X Theme – (Paid option) It’s a silly name, but this Premium WordPress theme looks good, and they have done very well with updating it. There is a lot of features available here for more advanced internet users and web designers.

    Screen Shot 2016-01-30 at 1.28.18 PM

    Themeforest – (Free and paid options) Themeforest is the marketplace for WordPress themes online. Because they are constantly being released and updated, and because creating a website can be quite a personal choice, it is worth having a look here to see which themes are currently rated highly.

    Designers

    It can be helpful to hire a designer/ coder to help you with creating your photography website.

    • Fiverr – This is my go-to site for getting help with websites and so on. It’s cheap, fast, and so far I’ve been very happy with the results.
    • Elance – More professional than Fiverr; expect to pay more as well.

    Pay monthly for a photography website

    If designing a site isn’t for you, there are quite a few companies that can help. I don’t use these options personally because I like being able to move my website to another hosting provider if I want, or archive a site and bring it back later.

    • Smugmug – An established player that will allow you to show, share and sell your photos.
    • SquareSpace – The choice of many top professionals, although caveat emptor, several are sponsored. It’s quite pricey, but the designs it offers for photographers really look incredible, and it’s the easiest way to get a good looking photography website online quickly and easily.

    Some bonus photography related companies

    While we’re on the subject, here are a few companies that are very useful for photographers.

    • WeTransfer – Ideal for sending large files or even whole photoshoots. Their free option is excellent, and the paid version is great for photographers who want more options.
    • Dropbox – Very well integrated, and a great way to back up your photos online.
    • Google Drive – Again, an excellent option to save and send photos.
    • PicSurge.com – I use this a lot. It’s a well-designed site that allows you to show photos in good looking galleries that remain live for years. It lets you password-protect your images, and allows clients/family/friends to download files individually or collectively – and it’s free!

    Conclusion

    So those are some of the main options to consider if you want to make a photography website in 2016, and some reasons why you might want to consider doing so if you haven’t already. Hopefully this has been useful – please feel free to share your own websites in the comments below!


    Editor’s note: please see this page for website resources, personally recommended by dPS founder and chief, Darren Rowse, over on his other site dedicated to blogging – ProBlogger. If you’re really interested in blogging you may wish to sign up there to get free weekly blogging tips.

    googletag.cmd.push(function() {
    tablet_slots.push( googletag.defineSlot( “/1005424/_dPSv4_tab-all-article-bottom_(300×250)”, [300, 250], “pb-ad-78623” ).addService( googletag.pubads() ) ); } );

    googletag.cmd.push(function() {
    mobile_slots.push( googletag.defineSlot( “/1005424/_dPSv4_mob-all-article-bottom_(300×250)”, [300, 250], “pb-ad-78158” ).addService( googletag.pubads() ) ); } );

    The post List of Resources for Making a Photography Website by Ben Evans appeared first on Digital Photography School.


    Digital Photography School

  • Suspended: 13 Hung-Out-To-Dry Abandoned Cable Cars

    [ By Steve in Abandoned Places & Architecture. ]

    abandoned-okutama-cable-car1
    Suspended in time and place, only eagles dare go where these abandoned cable cars once reached as these glorified zip lines lost their zip long ago.

    abandoned-okutama-cable-car6

    abandoned-okutama-cable-car4

    abandoned-okutama-cable-car3

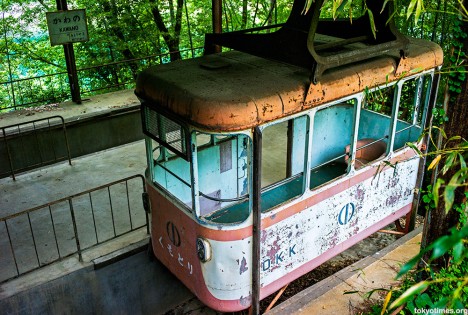
    If you build it, they will come… or not, as was the case of the ill-conceived Okutama Ropeway. Constructed in 1962 at an artificial lake west of Tokyo, the two-car transportation system operated for only four years before shutting down for good. Perhaps the builder/owner was unaware of plans to construct a bridge that would make his pride & joy redundant.

    abandoned-okutama-cable-car7

    abandoned-okutama-cable-car5

    That said, the cars and associated infrastructure have held up remarkably well over the past half-century! Kudos to Lee Chapman of Tokyo Times for visiting this long-forgotten relic and photo-documenting its current (as of July, 2013) status. This video by Riding Japan explores the abandoned and, to quote the videographer “quite eerie” station.

    Georgia On My Mind

    abandoned-gagra-cable-car1

    Lovely “Seaside Park” in Gagra, Abkhazia suffered significant damage during the early-1990s Abkhaz-Georgian Conflict; the still unsettled political situation and a chronic lack of funding has constrained any moves toward restoration. A single yellow gondola remains in place – its red-painted partner was blown up some years ago during the filming of a movie.

    High Wire Act

    abandoned-moscow-cable-car1

    abandoned-moscow-cable-car2

    abandoned-moscow-cable-car3

    Can a cable car system that’s lost its cars still move you? Yes it can… figuratively speaking. Flickr user philm1205 snapped the spindly remnants of an abandoned Soviet cable-way in August of 2007, fifteen years after the fall of communism. One thing about the commies, at least they made the cable cars run on time – or run, period.

    “Top Of Youth”

    abandoned-Berlin-cable-car1

    It’s the “Top of Youth” and the bottom of the barrel in Berlin, courtesy of Flickr user TheSleeping03 and the photo above. Taken on February 6th, 2014 at an old abandoned theme park in the German capital, the image presents the permanently-grounded gondola in a raw yet oddly appealing light.

    Next Page – Click Below to Read More:
    Suspended 13 Hung Out To Dry Abandoned Cable Cars

    Share on Facebook


    [ By Steve in Abandoned Places & Architecture. ]

    [ WebUrbanist | Archives | Galleries | Privacy | TOS ]


    WebUrbanist

  • How to Add a Texture Overlay to Your Images for a Stunning Effect

    Adding a texture overlay to your images is an amazing creative tool. It adds another dimension of depth in the image; it makes it dreamy and adds a painting flavor. It also creates a timeless feeling, especially useful when you want to give a vintage look to your pictures.

    You will really love this effect, it can be used in your personal work, and also sometimes in your commissioned work when you have some creative freedom over the result.

    Adding a texture overlay is very easy. In this article I will explain how to create your own textures, then how to edit them to have infinite creative possibilities.
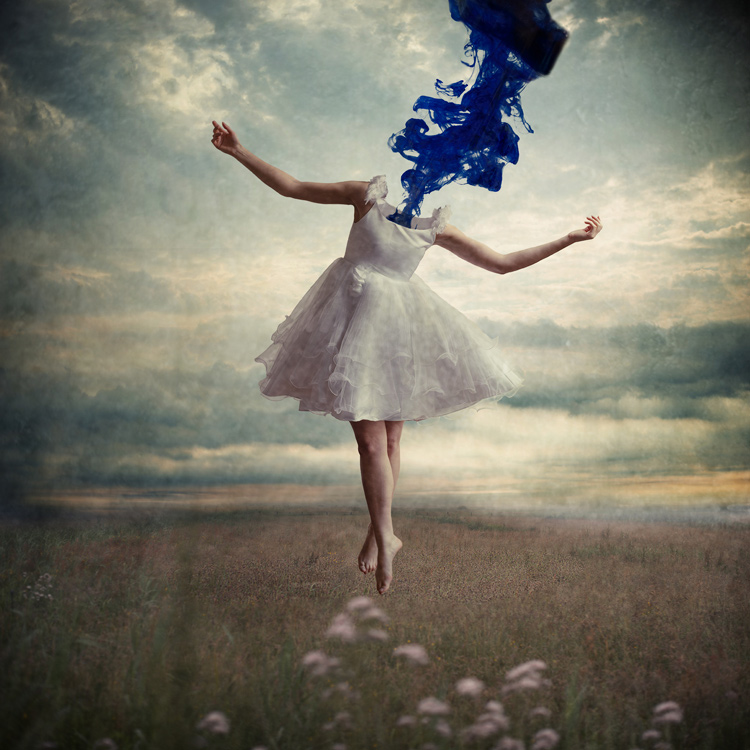
    05 texture 100 percent

    First – shoot your own textures

    You can find many free textures online, for example on Deviant Art, or on any stock photo website. This is east, and sometimes helpful, although you can have copyright issues. The textures you will find online for free, are not always at high resolution. You will mainly find small files, not always the best to work with. But, I must say that so far I have never had any issues regarding textures size, even when printing my work in large format.

    Shooting your own textures can be very fun, and a great creative exercise. Okay sometimes you will feel weird because people will not understand what you are shooting down on the pavement, nor they will see the point in photographing an old and dirty rain gutter. But it is well worth it.

    It is very easy to find great textures around you and build you own texture stock. You only have to take a walk with your camera to find textures. Look for some old painting on the walls, wood on the doors, or any bench in the street. You can also find metal objects with great texture and colors. You are looking for whatever has scratches, and can add an organic and natural feeling to your work. You can use stones, such as marble or granite, but also canvas or any other fabric with a nice texture as well.
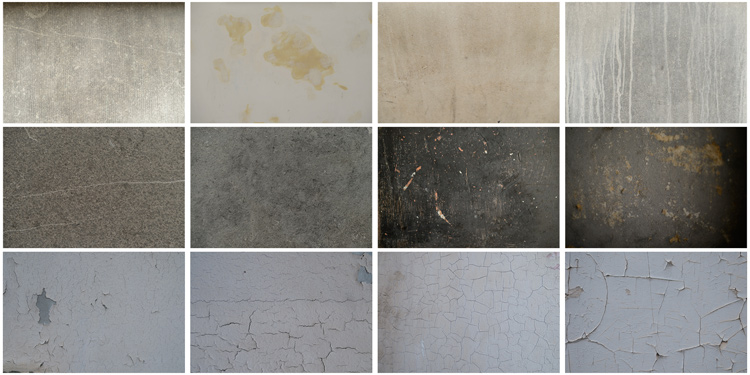
    01 textures

    When shooting your texture, pay attention to your exposure compensation, as you want to have a contrasty, image to get more difference between the darks and lights. Also, you want to make sure everything is more or less sharp, so pay attention to your focus, depth of field, and angle from which you are shooting. This way the texture will be more homogeneous on your final image (and as you will see later in this same article you can adjust the texture in many ways).

    To help you start your own textures library, you can find a link to download some textures you can use for free at the bottom of this article. I found many good textures for free online, so it is my way to pay forward this kind of generosity I found among photographers.

    You can create your own textures at home

    In Brussels it is freezing cold and rainy during the winter, so maybe you are the same as me, you do not want to go outside.
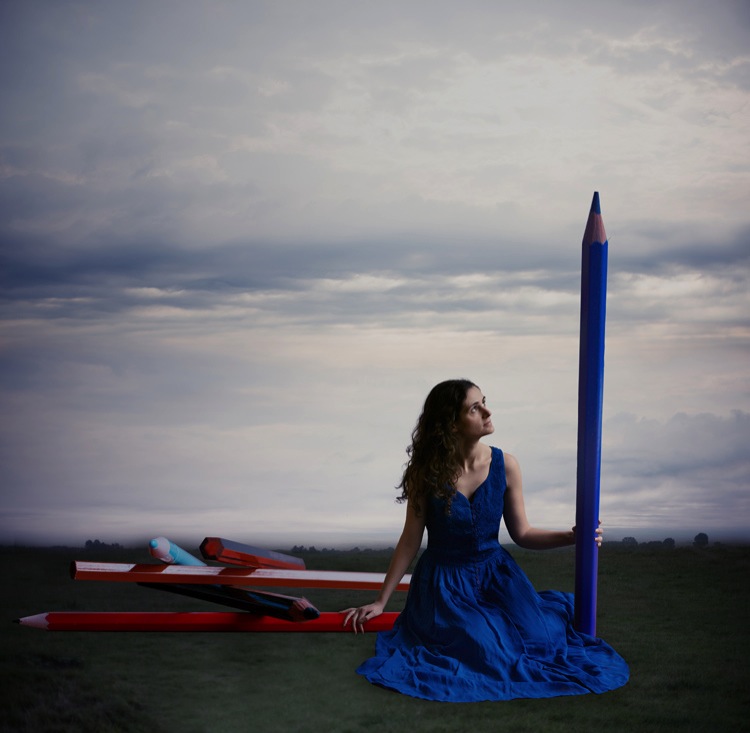
    03 blue tale 01 no texture

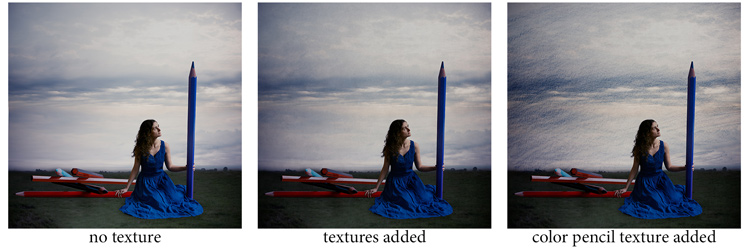
    When you look for a specific effect you can make your own specific textures. For example, in the picture A Blue Tale (above) I wanted to play with a pencil color effect. Therefore I created the following texture to be added to the clouds.

    I simply colored a piece of paper with a blue pencil crayong to have those lines and a texture effect. In this case, the preparation of the texture is fully part of the creative process, to put all those details together to create the image.

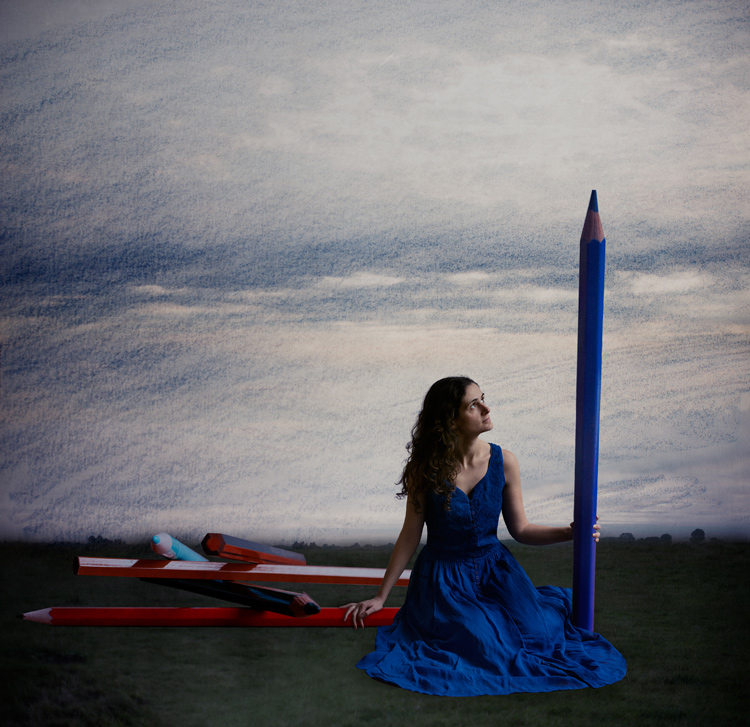
    02 color pencil texture

    03 blue tale 03 color pencil texture added

    03 blue tale textures

    You can also play with paper, painting, burn some paper (although I recommend being very careful).

    Now that you have your textures ready to be used, let’s open them in Photoshop. You can also use the ones that I shot for you down my street. To add a texture you can simply grab your moving tool and drag and drop it on your picture – or by doing copy/paste on your image.

    Play with the Blend Modes

    You can change the Blend Mode to change the look. When you add a texture to your image it will first look as follows, you see only the image of the texture on top of your image.
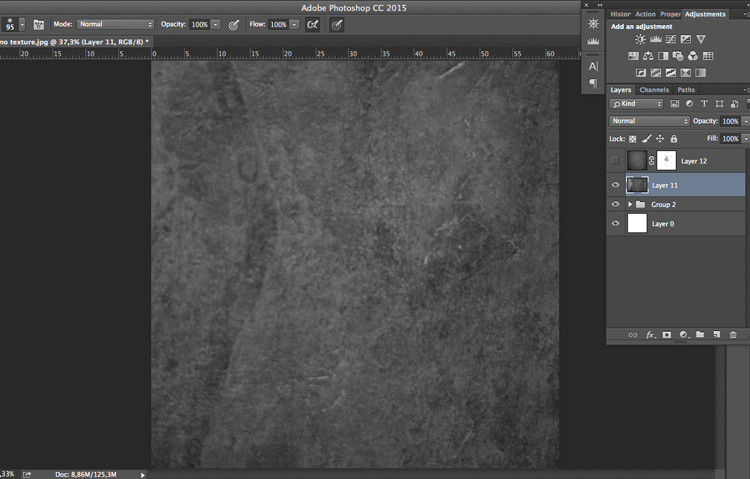
    04 texture normal 100 percent

    Play around with all the options Photoshop offers. Some texture/image combinations it will look weird, and others will look amazing.

    Select your texture and hold down the Shift button, and + or –, to change quickly Blend Modes to go through them one by one, and test on your image. It allows you to see what every single Blend Mode will do to your texture – great way to quickly learn which one you like best.

    • The darkening group will help you to get rid of all light tones.
    • The lightening group will allow you to get rid of your darks.
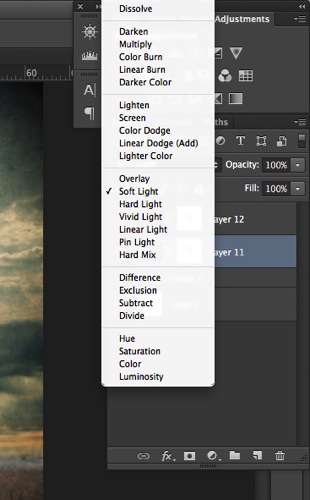
    04 Blend Modes panel

    Most of the time, I choose the Soft Light Blend Mode – but you can choose any option, depending on your taste and the sought-after effect.
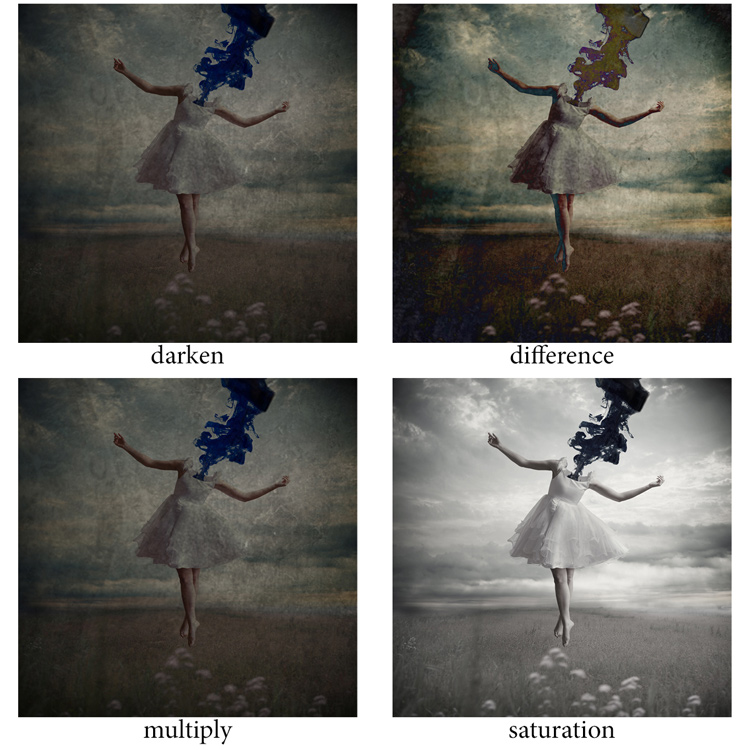
    04 Blend Modes

    Modify your texture

    Move and resize the texture layer. Grab your Move Tool to place the texture as you wish on the image. Use Cmd/Ctrl+T to activate the Free Transform Tool and resize the texture layer, or flip it, to adjust it to the underlying picture.

    You can add a Levels Adjustment with Cmd/Ctrl+L, to add some more detail contrast in your texture. You can also adjust the color. Usually I add the color in my image and prefer a desaturated texture. Hit Cmd/Ctrl+U to play with its color – if you want to desaturate it or change the color tones.

    Play with the layer opacity

    Turn down the opacity to see what best suits the chosen texture and image, in this case we’ll turn it down to 82%. Once you have found the right opacity you can always go back and change it whenever you want.
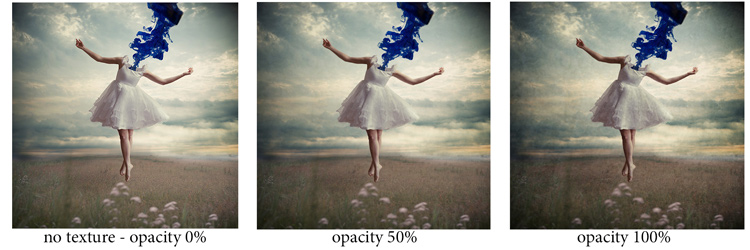
    05 opacity

    Add a layer mask on the texture layer

    Applying texture over the whole image is great to give an artistic feel when the person is far away or it’s applied on a landscape. But, usually you want to avoid strong texture on your main character, especially if it is a close-up portrait, so you will want to soften the texture, or to erase it completely on areas such as the skin and eyes.
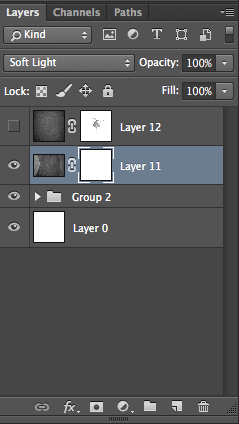
    06 add layer mask

    Add a layer mask on the texture layer and paint in black, playing with your brush opacity, size, and hardness to erase the texture where you want. Paint white your layer mask with a very soft edge brush, and low opacity, to bring back some texture on the subject edges to blend it with the background.
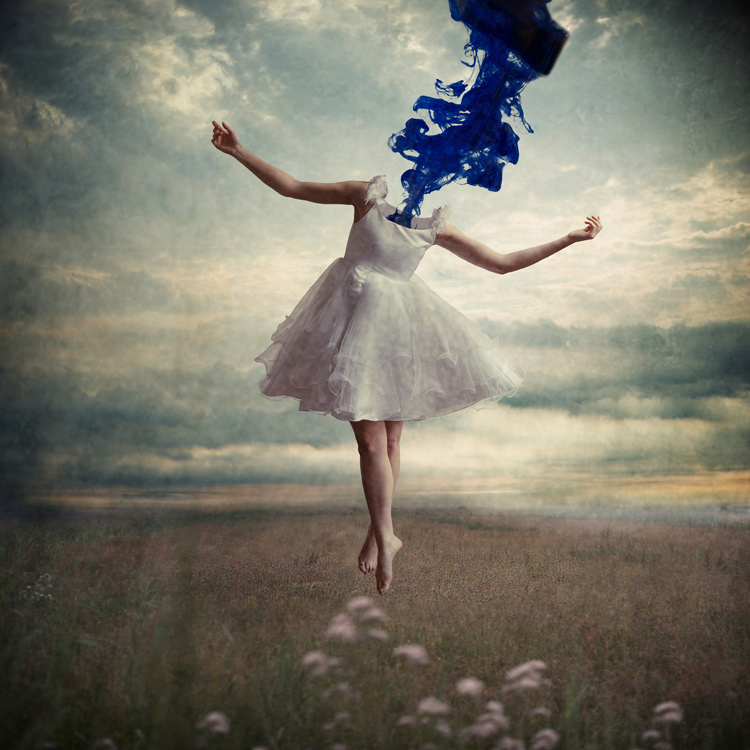
    05 texture 100 percent

    Add some more textures

    You can lower the opacity of your textures and add as many of them as you whish to get the visual affect you want. If you want to see the full edit of this picture you can have a look at my speed editing video below:

    I hope you will now want to add texture overlays to some of your work, or at least give it a try. It’s a great technical and creative exercise.

    You can start with the free textures I prepared for you (click here to download them), and with some time start to shoot your own. Feel free to share the results or your technique in the comments below.

    Editor’s note: if you have questions or issues downloading the textures, please contact Amelie on her site as they are not being hosted here on dPS so we cannot sort that for you. Thank you.

    googletag.cmd.push(function() {
    tablet_slots.push( googletag.defineSlot( “/1005424/_dPSv4_tab-all-article-bottom_(300×250)”, [300, 250], “pb-ad-78623” ).addService( googletag.pubads() ) ); } );

    googletag.cmd.push(function() {
    mobile_slots.push( googletag.defineSlot( “/1005424/_dPSv4_mob-all-article-bottom_(300×250)”, [300, 250], “pb-ad-78158” ).addService( googletag.pubads() ) ); } );

    The post How to Add a Texture Overlay to Your Images for a Stunning Effect by Amélie Berton appeared first on Digital Photography School.


    Digital Photography School