Blog

  • New arrival: Tamron SP 85mm F1.8 launches later this week

    Tamron has announced pricing and availability for its recently released SP 85mm F1.8 Di VC USD. According to the company, the lens will launch this Thursday, March 24 in Canon and Nikon mounts for $ 749. Tamron also plans to launch a Sony mount lens later this year, but has not provided a launch date at this time.

    The 85mm F1.8 lens features an Ultrasonic Silent Drive and full-time manual focus override, and produces, among other things, a ‘balanced bokeh’ for emphasizing a photo’s foreground subject. The SP 85mm model uses both low dispersion and ultra low dispersion glass elements to produce sharp and clear high-fidelity color photos with minimal color fringing, while eBAND and BBAR lens coating technologies reduce ghosting and lens flares to what Tamron says is ‘imperceptible levels.’

    Other features include a moisture-resistant body, a water and oil-repellant fluorine coating on the front element and support for the Tamron TAP-in Console. Notably, the Nikon mount version features the electromagnetic diaphragm system that has been a Canon mount standard feature.

    Articles: Digital Photography Review (dpreview.com)

  • A Beginner’s Guide to Focus Stacking

    Other than for special effect, photographers generally do not want out-of-focus images. But sometimes, regardless of which camera settings are used, not every detail of an image can be captured tack sharp. Depth of field (DOF) can be so shallow, that interesting aspects of the photos are without sharpness. Setting to a smaller aperture may be used to increase DOF, but moving the aperture farther from a lens’s sweet spot introduces lens diffraction into the image, again resulting in some fuzziness. Also, if stopping down the camera’s aperture, shutter speed will need to be increased and blurry images may result. Increasing ISO to help with the exposure will introduce digital noise to the image.

    So, how do you shoot with the best aperture and shutter speed combination, and get sharp images from front to back of an image? A technique that can help resolve this problem is called focus stacking. Here’s some helpful info about this technique.

    13 image Focus Stack

    13 image focus stack

    What You Need

    • A tripod.
    • A DSLR camera, capable of shooting in manual mode. It is possible to use a point and shoot camera, but it must have manual mode and manual focus capabilities.
    • Depth of Field iPhone app (helpful but not required).
    • Photoshop or another focus stacking software.

    How to Shoot for Focus Stacking

    Focus stacking is similar in principle to HDR. However, with focus stacking, images are captured with different focus points, and later combined in Photoshop, to create an image with more DOF than would be possible with a single exposure. Landscape and macro photography are two genres of photography that benefit most from using this procedure. Be warned – calm winds and reasonably stationary objects are a must!

    Before beginning to shoot, it is always helpful to know a lens’s sweet spot, defined as the aperture that the lens produces its sharpest image. (It is usually found about two to three stops from wide open.) Experiment until this important setting is determined.

    6 image Focus Stack

    Landscape

    There are two basic scenarios when shooting landscapes, that may benefit from focus stacking. The first is when the subject is a close foreground object, with an interesting background, both desirable aspects to be in sharp focus. The second, is when using a telephoto lens (which typically has a shallow depth of field) and the subject covers multiple distances, that may be brought into sharper focus. (FYI: If shooting a landscape with a wide angle lens, the DOF may be adequate enough to capture a sharp image that has no benefit in being processed by focus stacking.)

    Tip: Here is a little trick to find out if focus stacking will benefit an image when photographing a scene or subject. After composing the image, set the focus point about one third into the image. Then, using Live View, enlarge the image and check to see if the foreground and background are sharp or blurry. If either or neither are in focus as sharply as desired, the image could benefit from focus stacking.

    Steps for Shooting Landscapes for Focus Stacking

    1. Place the camera on a sturdy tripod – a must!
    2. Frame the subject and compose the shot.
    3. Determine exposure for the scene, and set the camera to manual mode, to ensure that the exposure is constant for every image.
    4. Set the camera to Live View and aim the focus point on the nearest object desired to be in focus. Use the camera’s zoom (+ button, not zoom on the lens) to preview the focus through Live View. Then switch to manual focus and use the focus ring to fine tune for sharpness if necessary.
    5. Take the first exposure.
    6. Without moving the camera or adjusting any settings, move the focus point to an object mid-way in the image and refocus.
    7. Take the second exposure.
    8. Again, without changing anything, refocus on an object at the farthest point of the intended image.
    9. Take the third exposure.
      To capture landscapes, three images are generally all that is necessary to create sharp focus stacking images, but it’s completely fine to take extra images to make sure that the entire scenee is covered. A rule of thumb would be to add more images for longer focal lengths. Be aware that extra images will take longer to process in post-production. If available, check the DOF with a Smartphone app, in order to figure out how many images will be necessary, to get every aspect of the photo in focus.
    Using three images focus stacking. The first image was focused on the fence, the second was focused mid-way into the image, and the third was focused on the front of the house.

    The first image was focused on the fence, the second was focused mid-way into the image, and the third was focused on the front of the house.

    Macro Photography

    Macro photography can benefit from focus stacking more than any other type of photography, because a macro lens has an extremely shallow depth of field.

    1. Place the camera on a sturdy tripod – a must!
    2. Frame the subject and compose the shot.
    3. Determine the exposure for the subject, and set the camera to manual mode to ensure that the exposure remains constant for each and every image.
    4. Set the camera to Live View and aim the focus point on the nearest object desired to be in focus. Use the camera’s zoom (+ button, not zoom on the lens) to preview the focus through Live View. Then switch to manual focus and use the focus ring to fine tune for sharpness if necessary.
    5. Take the first exposure.
    6. Without moving the camera or adjusting any settings, move the focus point to a distance slightly farther away from the lens. Remember that DOF in macro will be measured in fractions of an inch, instead of feet, as in landscape photography.
    7. Repeat step 6 as many times as needed to cover every aspect of the subject’s DOF. This could range from as few as six images to 30+ images. Make sure the entire subject is covered or the results may be unusable. If available, check the DOF with the iPhone app (www.setmycamera.com), in order to figure out how many images will be necessary to get every aspect of the photo in focus.
    By focus stacking the flowers only and leaving the background out of focus makes the flowers stand out in the final image.

    Focus stacking the flowers only makes the flowers stand out from the background.

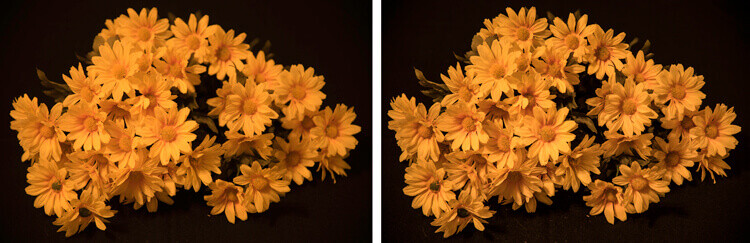
    Image on right is a single image capture at 85mm focal length. Image on right is a 12 image focus stacked image. Each image had a DOF of less than one inch.

    The image on right is a single image capture at 85mm focal length. The image on right is a 12 image focus stack. Each image had a DOF of less than one inch. Note the additional detail in the image on the right, compared to the single image.

    Tip: As often used when capturing HDR images, take a shot with your hand in front of the camera before and after each series of images. When working with the images later, this will make it easier to tell where each series starts and ends.

    Use you hand to mark the beginning of each series of images, this will make processing you images much easier.

    Use your hand to mark the beginning of each series of images. This will make processing your images easier.

    Processing the Final Images

    Processing the files to accomplish the final image may seem like the most difficult part of creating a focus stacked image, but it’s really very simple to do in Photoshop. Here’s how:

    1. Open Photoshop
    2. Get each image on a separate layer: Under File, choose Scripts and Load files into stack. Click Browse and select all the images.
    3. Check the box for Attempts to Automatically Align Source Images.
    4. Click OK and each of the images will open into a new layer in Photoshop.
    5. Open the Layer palette and select All Layers.
    6. Under Edit, select Auto-Blend Layers.
    7. Check the box for Stack Images and Seamless Tones and Colors. Optionally, select Content Aware Fill Transparent Areas, which will fill any transparent areas generated by aligning images in step 3. (Be aware this will increase processing time. Generally, I do not choose this option; rather, I just crop the image slightly later, if necessary.)
    8. Click OK
    9. Flatten the image by selecting Layer/Flatten image and save.

    Focus-stacking-1

    Note: If you are using a Lightroom and Photoshop workflow, after importing your images into Lightroom, instead of following steps 2 through 5, you can simply add all your images into Photoshop layers by selecting all your images, then go to Photo/Edit in/Open as Layer In Photoshop. This will open all the selected images as layers. You will then have to Align your images by selecting all the layers in the layer palette, then go to Edit/Auto Align Layers. Then continue at step 6 above.

    Summary

    It is nearly every photographer’s intention to capture the sharpest images possible, and focus stacking can be another tool to help you achieve this goal. The trick to this whole process is to take enough focused images, to create a final photo that is in focus from foreground to background. The results can be amazing once you get the hang of it! Give it a try and post your results and any questions you have here.

    googletag.cmd.push(function() {
    tablet_slots.push( googletag.defineSlot( “/1005424/_dPSv4_tab-all-article-bottom_(300×250)”, [300, 250], “pb-ad-78623” ).addService( googletag.pubads() ) ); } );

    googletag.cmd.push(function() {
    mobile_slots.push( googletag.defineSlot( “/1005424/_dPSv4_mob-all-article-bottom_(300×250)”, [300, 250], “pb-ad-78158” ).addService( googletag.pubads() ) ); } );

    The post A Beginner’s Guide to Focus Stacking by Bruce Wunderlich appeared first on Digital Photography School.


    Digital Photography School

  • On Assignment: Leaf and a Dish

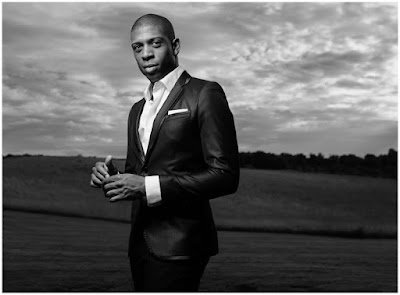
    As photographers, we often have to do outdoor portraits. And if we are lighting, that means hauling a lot of gear, fighting a lot of sun and dealing with the wind. But lately I've been working to pare the gear pack down to something that is reasonable in terms of cost, size and weight.

    The photo above is a good example of what can be done with a minimal amount of well-chosen gear. With a little advance thought, you can overpower the sun, have good mobility and not have to worry about the wind.

    Read more »
    Strobist

  • Beginner’s Guide to Water Droplet Photography

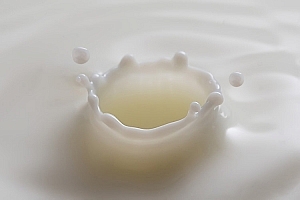
    Have you ever looked at those great water droplet or splash images and found yourself scratching your head wondering how did they do that?
    10

    Well, those great images are usually done in studios, with electronically programmable eyedroppers, and motion triggers that fire the camera at an exact split second, allowing the photographer to freeze motion on that exact perfect moment. All that specialized gear makes all this process controllable, but if you own a camera and an external flash, you can also give this type of photography a try.

    Water drops are an interesting subject to photograph, as it gives you the opportunity to explore techniques you wouldn’t normally do, and will probably give you some great images to add to your portfolio.

    In this article, I will give you some interesting tips on how to get started with water droplet photography, with just some basic equipment.

    Gear

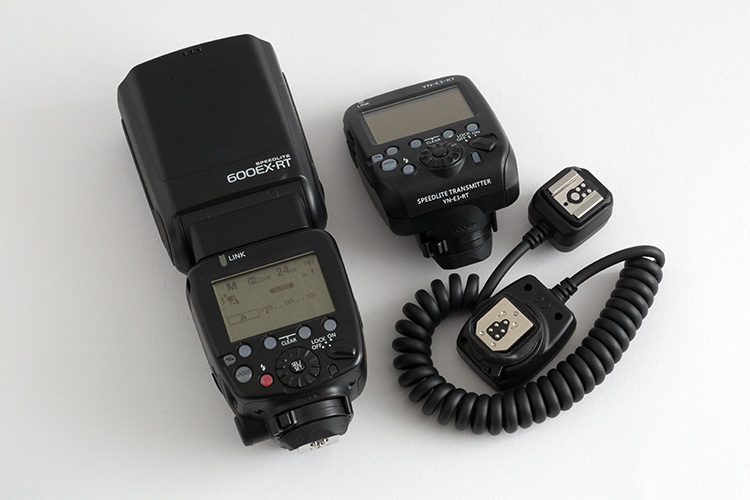
    Besides your camera and lenses of choice, you will need an off-camera flash, and a wireless trigger or dedicated extension cable.
    01

    Even though you can get great images without it, flashes with the high-speed sync (HSS) function will allow you to use shutter speeds above 1/250th, and freeze the motion much better.
    02

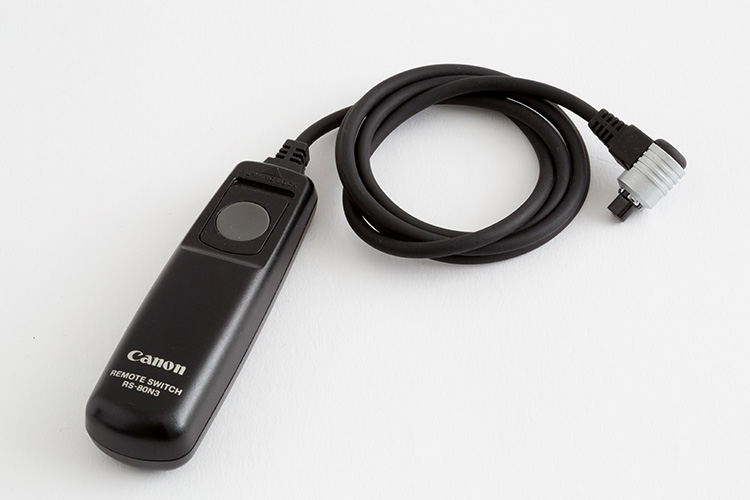
    A shutter cable release is also a good accessory to use, as it will allows you to fire your camera without touching it.
    03

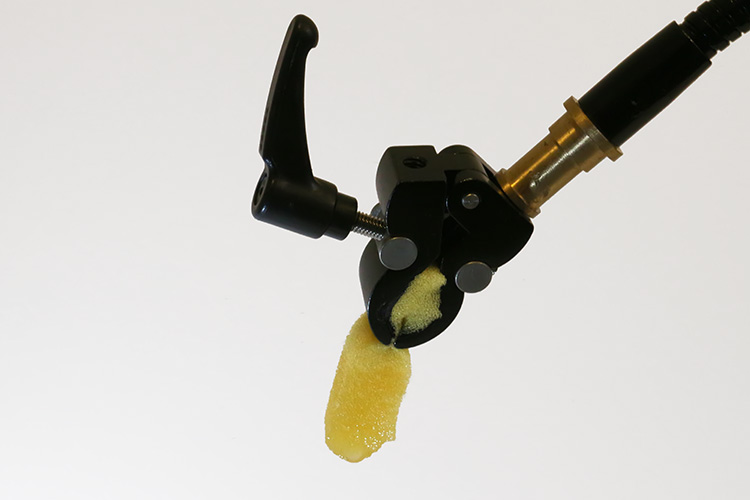
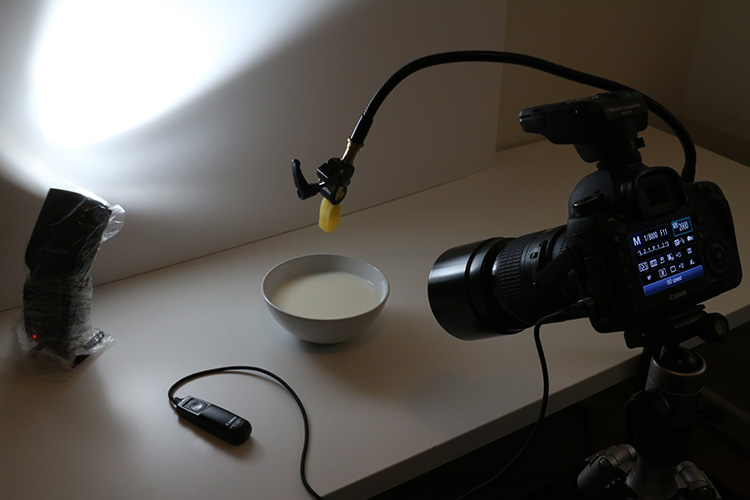
    Finally you will need an eyedropper, or a wet sponge, with a system to hold it in place above a container with water. Usually I prefer to use a sponge, as it can produce bigger drop. I use a nano clamp and a gooseneck, attached to a tripod, to hold things in place.

    Here is the complete setup:
    04

    Safety

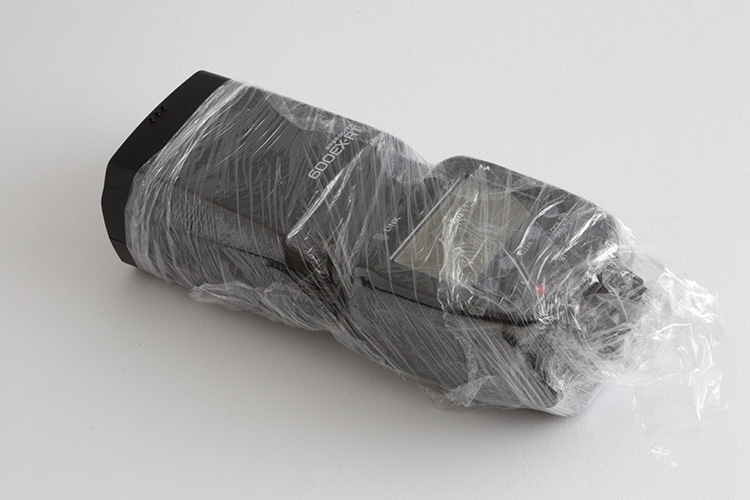
    Electronics and water don’t get along very well, so will need to be extra careful when doing this type of photography. Safety first, so a good piece of advice, is to protect your equipment with cellophane wrap, so any accidental water spillage won’t damage it.
    05

    Lighting

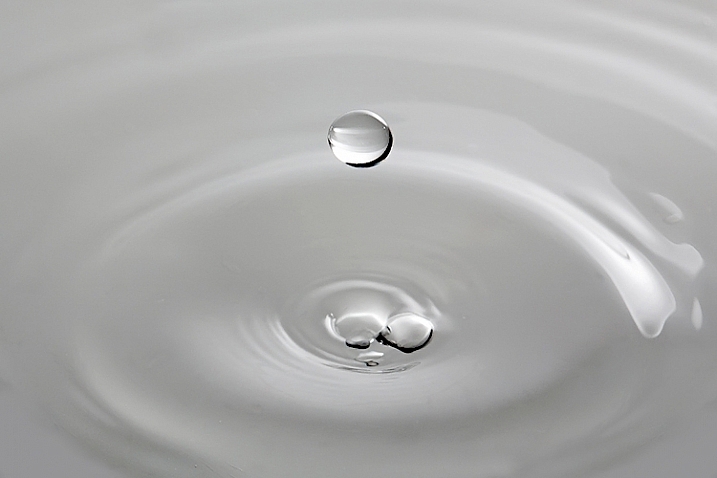
    The first step is to keep in mind, that water is a specular surface, so you should not light the water but rather what the water reflects. Here I’m using white cardboard to bounce the light that reflects on the water surface.
    06

    Exposure: ISO 2000, 1/8000, f/11

    The f/11 aperture allows me to have some depth of field, and the 1/8000 shutter speed, together with the flash at full power on HSS mode, allows me to freeze the action.

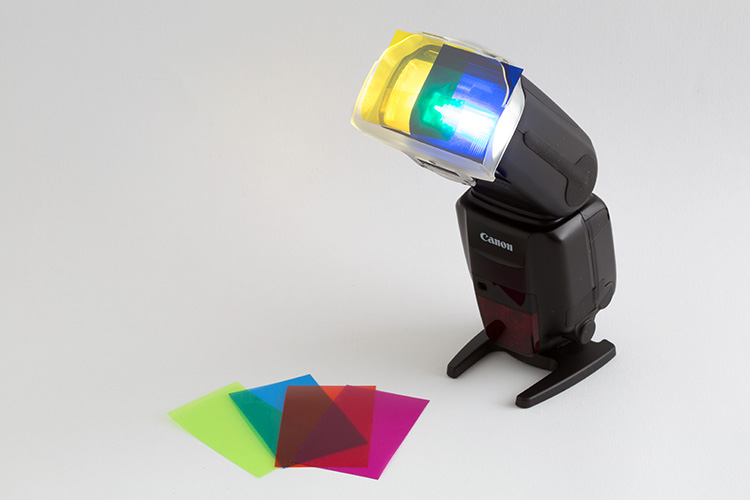
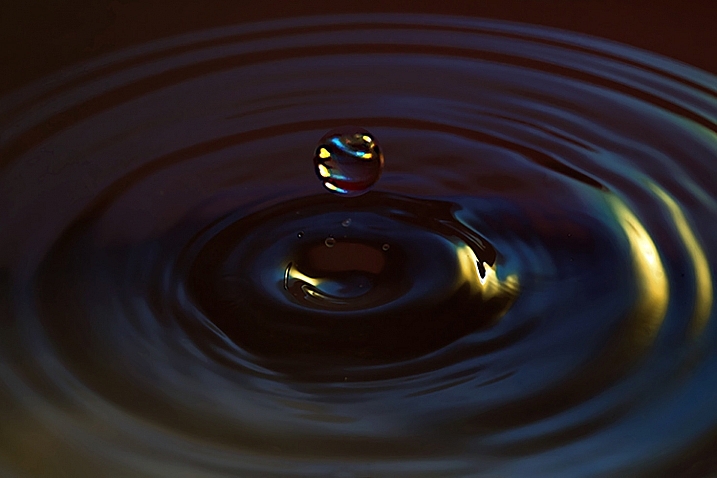
    You can get a lot of different effects with slower shutter speeds and different apertures. This is a plain simple image, but you can get creative in a lot of ways here. One thing I use a lot is colored gels in front of the flash, to create some dynamics in the image.
    07

    Here I am mixing yellow and blue gels to create this colorful image.
    08

    Timing

    The perfect timing to press the shutter release is something really hard to accomplish, as it’s humanly impossible to be that accurate. But, with some practice, and a little bit of luck, you will end up some great shots. To be honest, the random nature of the results is something that I really enjoy.

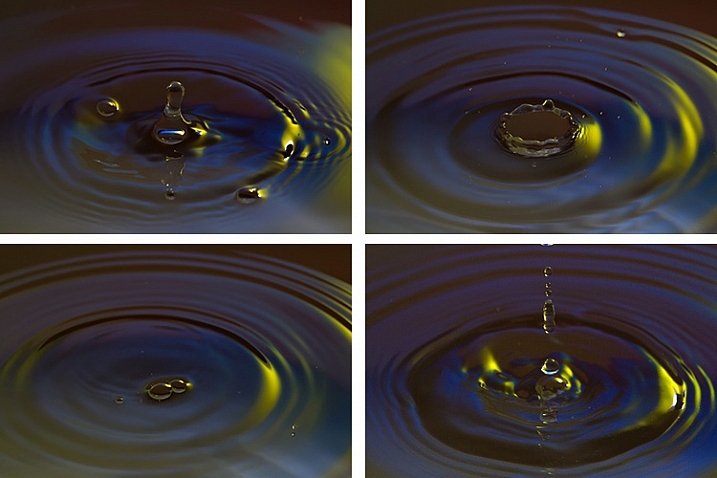
    Here is a sequence of images that didn’t work as good as the last one.
    09

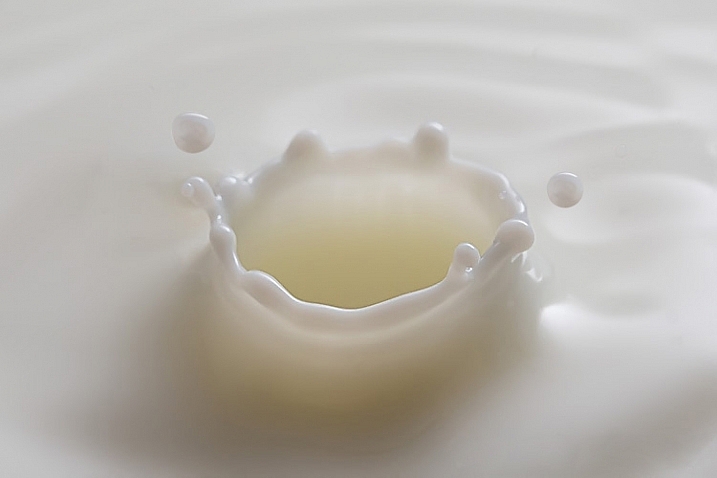
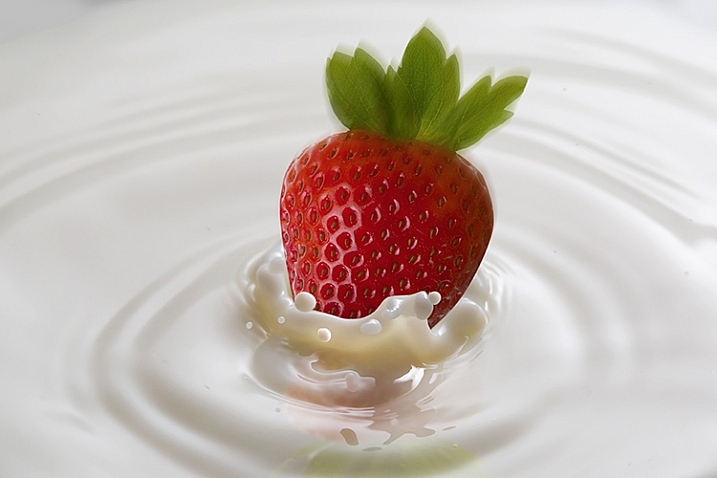
    Once you get the hang of it, you can experiment with food colorants and different liquids. Milk is a good choice, as it gives you drops with more consistency, and therefore best splashes.
    10

    You are only limited by your imagination here. With some basic Photoshop skills, you can take your images to the next level with some photo composites, like this image I created for a strawberry yogurt advertisement campaign.
    11

    So, there are some basic techniques to produce great water droplet images, without specialized equipment or motion triggers. Give it a try, I’m sure you’ll get great results!

    This week on dPS we are featuring articles on special effects. Check out the others that have already been published here:

    • How to Photograph the Full Band of the Milky Way
    • Fire Spinning with Steel Wool – A Special Effects Tutorial
    • Special Effect – How to Create Multiple Flash Exposures in a Single Frame
    • Stacking Light Trails for Night Photography Special Effects
    • 26 Unique Special Effects Photos to Spark Your Creativity
    • Weekly Photography Challenge – Special Effects
    • Tips for Shooting Through Objects to Create a Special Effect
    • How to Add Vintage Frame Overlays Using Alien Skin Exposure X
    • 8 Steps to Great Long Exposure Landscape Photography
    • How to Create In-Camera Double Exposures

    googletag.cmd.push(function() {
    tablet_slots.push( googletag.defineSlot( “/1005424/_dPSv4_tab-all-article-bottom_(300×250)”, [300, 250], “pb-ad-78623” ).addService( googletag.pubads() ) ); } );

    googletag.cmd.push(function() {
    mobile_slots.push( googletag.defineSlot( “/1005424/_dPSv4_mob-all-article-bottom_(300×250)”, [300, 250], “pb-ad-78158” ).addService( googletag.pubads() ) ); } );

    The post Beginner’s Guide to Water Droplet Photography by Ivo Guimaraes appeared first on Digital Photography School.


    Digital Photography School

  • How to: iFixit disassembles the Fujifilm X100T

    Fujifilm X100T iFixit disassembly guide

    Curious about what lies beneath the black (and maybe silver) panels of your Fujifilm X100T? Wonder no more, as iFixit has just published a disassembly guide. With nary more than a Phillips #00 screwdriver, tweezers and a heavy-duty spudger you’ll be well on your way to unlocking the mysteries of Fujifilm’s beloved mirrorless model. See some of the highlights here, and be sure to check out the full guide at iFixit.

    Fujifilm X100T iFixit disassembly guide

    An easy but important first step – removing the camera battery to ensure you make it through the disassembly process unscathed, whether or not your camera does. 


    All images courtesy of iFixit

    Fujifilm X100T iFixit disassembly guide

    A nylon spudger is recommended to nudge the edge of the leather skin up, so that you don’t scratch the surface of the camera. From there, it can be carefully peeled back by hand.


    All images courtesy of iFixit

    Fujifilm X100T iFixit disassembly guide

    Starting on the bottom, you’ll put the screwdriver to work removing the screws securing the cameras side and bottom plates.


    All images courtesy of iFixit

    Fujifilm X100T iFixit disassembly guide

    After removing many tiny screws, the back panel can be pulled back from the camera body, revealing a scene that looks like this. The LCD and back panel can both be removed by gently pulling on the ribbons that connect them to the camera body.


    All images courtesy of iFixit

    Fujifilm X100T iFixit disassembly guide

    With a couple more screws removed, a silver frame covering the guts of the camera can be pulled back. You’ll use a plastic opening tool to pry the orange ribbon connecting this component the main part of the camera.


    All images courtesy of iFixit

    Fujifilm X100T iFixit disassembly guide

    After removing even more screws, the top panel can be lifted from the camera body, and detached using a plastic opening tool.


    All images courtesy of iFixit

    Fujifilm X100T iFixit disassembly guide

    Before long, you’ll find something that looks like this. You’re looking at the back side of the sensor and its associated circuitry, beyond which lies the lens.


    All images courtesy of iFixit

    Fujifilm X100T iFixit disassembly guide

    With the sensor out of the way, the next step is to remove the covering on the back of the lens.


    All images courtesy of iFixit

    Fujifilm X100T iFixit disassembly guide

    With that removed, you’ll remove some more screws to reveal a coiled spring. We were a bit puzzled by this one, but our friend Roger Cicala over at LensRentals had some insight, as usual. The X100T’s focus motor only drives the focusing element in one direction, so the spring works to push the element back the other way. Using this kind of system probably saves a bit of battery life and reduces size. You learn something new every day, right?


    All images courtesy of iFixit

    Fujifilm X100T iFixit disassembly guide

    Here’s the X100T’s motherboard, freed from the body of the camera. iFixit recommends metal tweezers to pull the orange ribbon from the component and detach it.


    All images courtesy of iFixit

    Fujifilm X100T iFixit disassembly guide

    If all goes well, your disassembly will result in something like this. Don’t worry, you can put the whole thing back together again by following the directions in reverse.


    All images courtesy of iFixit

    Articles: Digital Photography Review (dpreview.com)

  • 80,000 Tiles Tell Story of Amsterdam’s Growth in New Bike Tunnel

    [ By Steph in Art & Street Art & Graffiti. ]

    bike path tiles

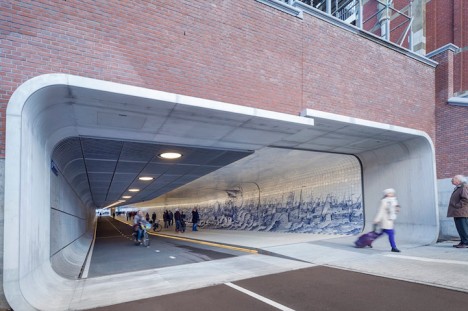
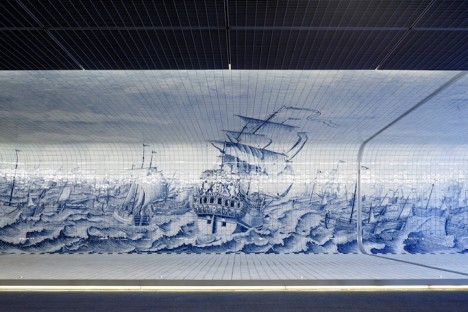
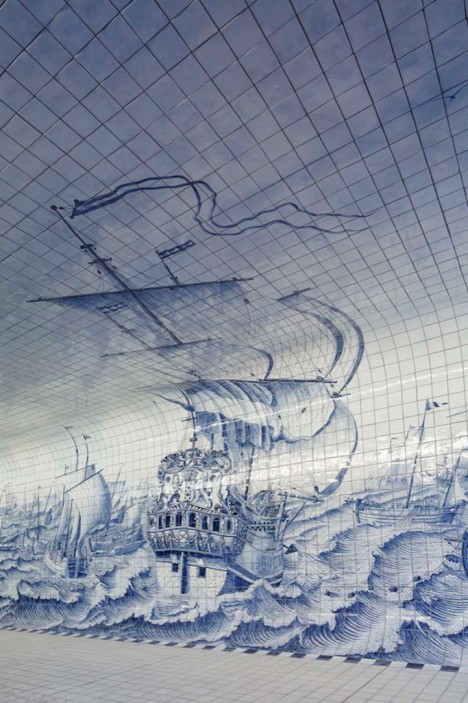
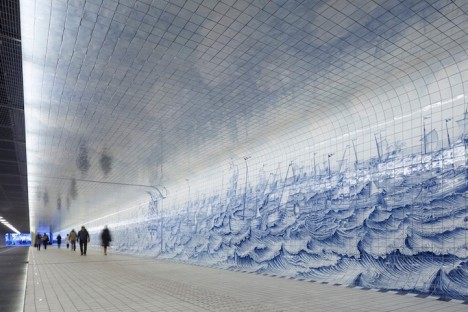
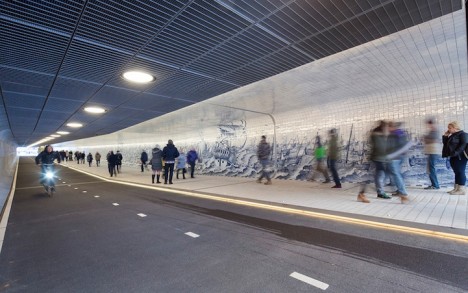
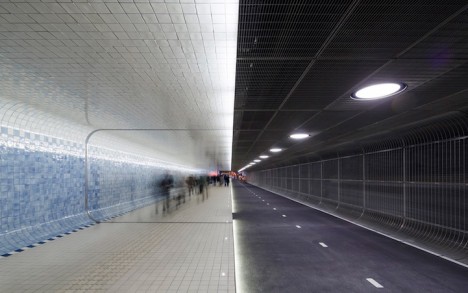
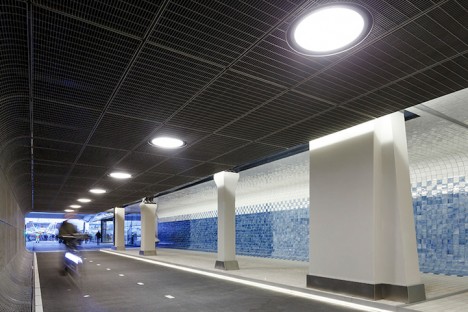
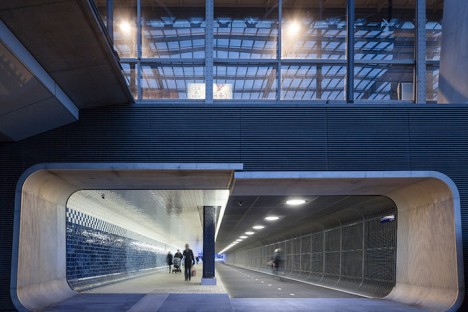
    A 361-foot tunnel connecting the historic city center of Amsterdam to its revitalized industrial waterfront district symbolically links past and present with a stunning mural made up of 80,000 tiles. Design firm Benthem Crouwell used iconic Delft blue tiles to paint a picture of a fleet of ships on treacherous seas, taking inspiration from 18th century Rotterdam tile painter Cornelis Boumeester.

    bike path tiles 2

    bike apth tiles 3

    bike path tiles 4

    Stretching the entire length of the Cuyperspassage tunnel, which is open only to pedestrians and cyclists, the mural bears a striking resemblance to Boumeester’s depiction of the Warship Rotterdam and Herring Fleet, completed in 1725.

    bike path tiles 5

    bike path thiles 6

    This traditional view of the Netherlands starts to shift and change the further you walk or bike into the tunnel. The illustrative style starts to get pixelated about halfway through, growing more and more abstract until it’s simply an arrangement of blue-hued tiles.

    bike path tiles 7

    bike path tiles 8

    It’s a beautiful way to symbolize the growth and change the city has experienced over the past few centuries, with the potential to become as large a part of the nation’s cultural and artistic identity as the work that inspired it.

    Share on Facebook


    [ By Steph in Art & Street Art & Graffiti. ]

    [ WebUrbanist | Archives | Galleries | Privacy | TOS ]


    WebUrbanist

  • iPhone SE is a compact-sized iPhone 6s

    When Apple launched the iPhone 6 in 2014, some users weren’t happy about the new model’s 4.7-inch screen and the device’s overall larger dimensions than its iPhone 5s predecessor. With today’s launch of the Apple iPhone SE, Apple once again has a compact option with top-end specification on offer. Read more

    Articles: Digital Photography Review (dpreview.com)

  • Apple launches 9.7-inch iPad Pro with 12MP camera

    Apple’s latest iPad Pro variant combines the 9.7-inch form factor of the iPad Air series with the desktop-level processing power of the original iPad Pro, providing an alternative for those who find the latter’s 12.9-inch display and overall dimensions too large. Read more

    Articles: Digital Photography Review (dpreview.com)

  • Showing dynamism: EOS 80D breaks new ground for Canon low ISO DR

    Our testing shows that Canon’s EOS 80D features a sensor with greatly improved Raw dynamic range. The results appear to confirm the company has moved to a new sensor design with lower read noise.

    Previous Canon sensors have conducted the analogue to digital conversion step away from the sensor, an approach that contributed noise that limited dynamic range at low ISO settings (while still allowing the excellent high ISO performance that Canon’s CMOS chips built a reputation with). The sensors in the EOS 80D and EOS-1D X Mark II appear to have an on-chip ADC design that conducts the conversion within the sensor, shortening the electronic path and preventing this noise building up. Let’s take a look at the 80D’s Raw DR performance in a couple of our studio tests.

    Exposure Latitude

    In this test we look to see how tolerant of pushing exposure the 80D’s Raw files are. We’ve done this by exposing our scene with increasingly lower exposures, then pushed them back to the correct brightness using Adobe Camera Raw. Examining what happens in the shadows allows you to assess the exposure latitude (essentially the dynamic range) of the Raw files.

    Because the changes in this test noise are primarily caused by shot noise and this is mainly determined by the amount of light the camera has had access to, the results are only directly comparable between cameras of the same sensor size. However, this will also be the case in real-world shooting if you’re limited by what shutter speed you can keep steady, so this test gives you an idea of the amount of processing latitude different formats give.

    $ (document).ready(function() { ImageComparisonWidget({“containerId”:”reviewImageComparisonWidget-19311969″,”widgetId”:327,”initialStateId”:2216}) })

    As you can see, the 80D is contributing less noise to its images than the 70D did, and this difference will be evident when you try to pull shadows up. It isn’t quite a match for the Nikon D7200$ (document).ready(function() { $ (“#imageComparisonLink2211”).click(function() { ImageComparisonWidgetLink(2211); }); }), but it’s enough that in real-world use, the files should have similar – if not slightly more – processing flexibility than the Canon EOS 5DS$ (document).ready(function() { $ (“#imageComparisonLink2215”).click(function() { ImageComparisonWidgetLink(2215); }); }), despite the latter’s larger sensor! 

    Articles: Digital Photography Review (dpreview.com)

  • How to Create In-Camera Double Exposures

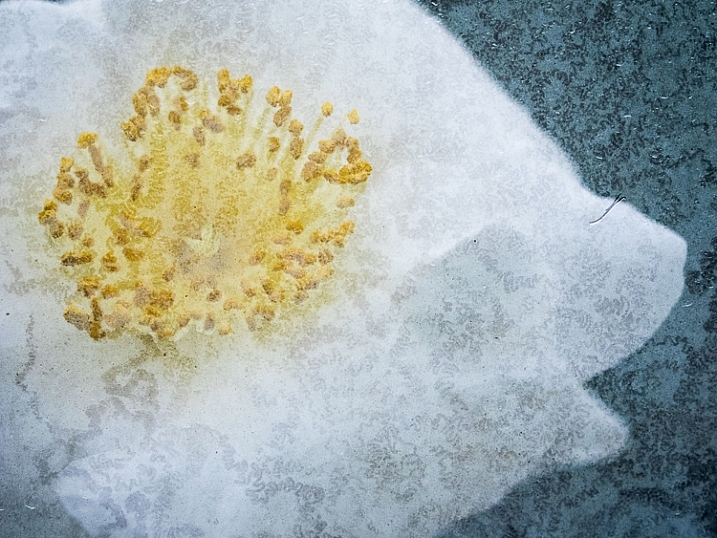
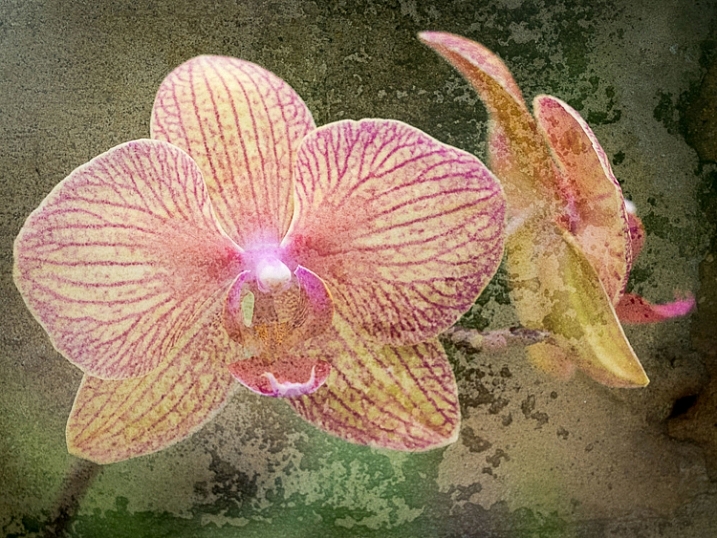
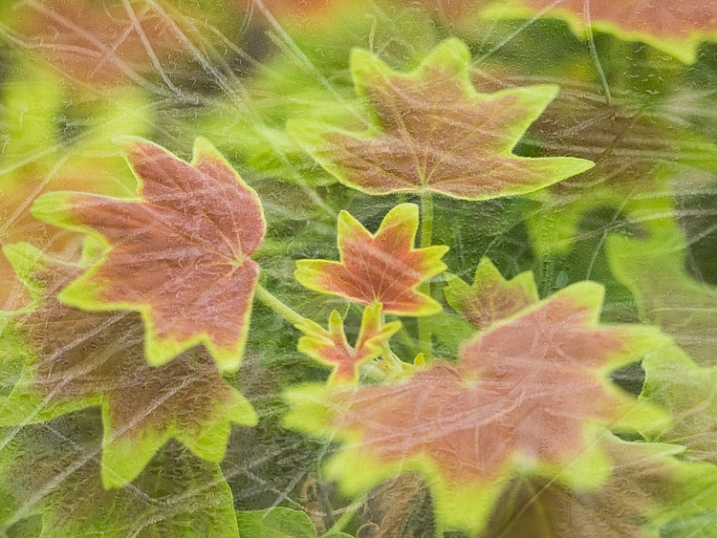
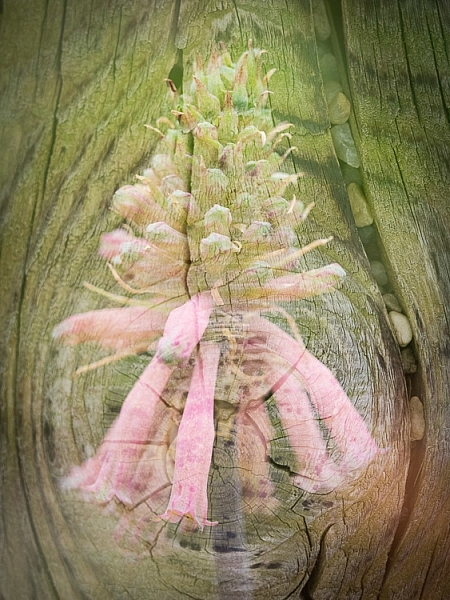
    It was yet another snowy day in New York, so I headed to the Arboretum to work on macro photography. Tripod slung over one shoulder, with my Olympus mirrorless gear in tow, I approached the door only to be stopped in my tracks. “No tripods” she said, pointing to the sign.

    I’ve been here plenty of times with a tripod, but on holidays and weekends the rules change. Since it was President’s Day, the ban was in place. I put the tripod back in the car and decided to use the limitation as opportunity. Instead of close up studies, my plan changed to in-camera double exposures.

    This is a feature that I loved with my old film camera (Canon Elan 7). While my switch to digital was a revelation, the lack of double exposure capability was a huge let down. It was only recently that camera manufacturers started including it again. Not only has it been added to most current bodies, but the functionality has been further enhanced. Some may consider it cheating, but I look at the updates as an opportunity to be even more creative.

    When you take your first shot, you can see an imprint of it in the viewfinder, while looking for shot number two. This makes it possible to line things up carefully, instead of leaving it to chance. It takes a little time to get used to it, sort of the way the depth of field preview button is a bit odd at first. After some practice however, you start to realize the incredible potential of this feature. Scenes that were once ordinary, become a treasure trove of artistic possibility.

    In addition to the standard double exposure mode, the Olympus E-M1 has an overlay feature that lets you choose a RAW file from your SD card as shot number one. You then shoot as many frames as you like, to find the perfect image for shot number two. I found this to provide even greater control over the final image. I’m not sure what other manufacturers offer this feature, so be sure to check your manual. With this setting turned on, I set out to create some interesting images.

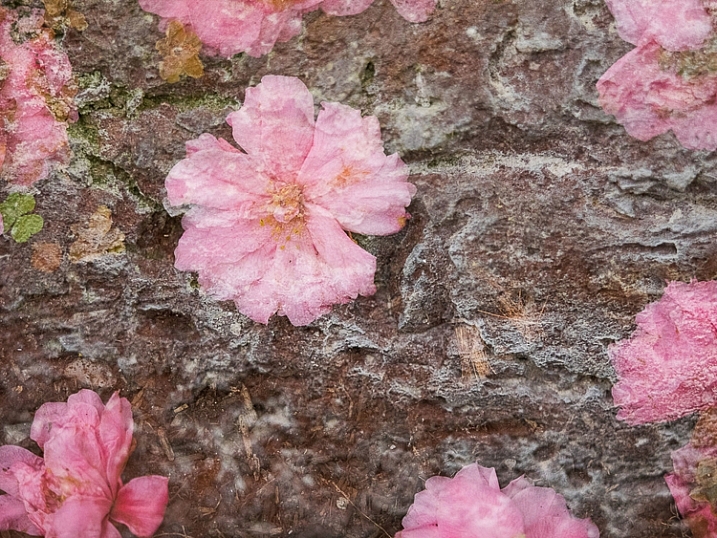
    Ultimately I was looking for texture in shot one, as it would be complementary to the subject in shot number two. The possible outcomes are limitless, with every shot being completely unique. Rather than simply shooting a static flower, it’s possible to create a special piece of art. Today, as more people have cameras than ever before, the ability to make a shot has become even more important. This is not something you can do with a phone camera.

    You may be wondering why I wouldn’t just do this in post-production by layering two shots in the computer. First, it wouldn’t be nearly as fun – I enjoy working with my camera more than pushing pixels around in Photoshop.

    Next, there is something serendipitous about doing it in the field. You work harder, and really tune in to all the possibilities around you. A textured brick becomes more than a wall, but a perfect layer of texture. A crack in the pavement is not merely an imperfection in the floor, but a possible part of an exciting composition. By working deliberately like this, you have no choice but to slow down, and really exercise your vision. You pay attention to the smallest details, focusing on things that most people would walk right past. Isn’t that what creating art is all about?

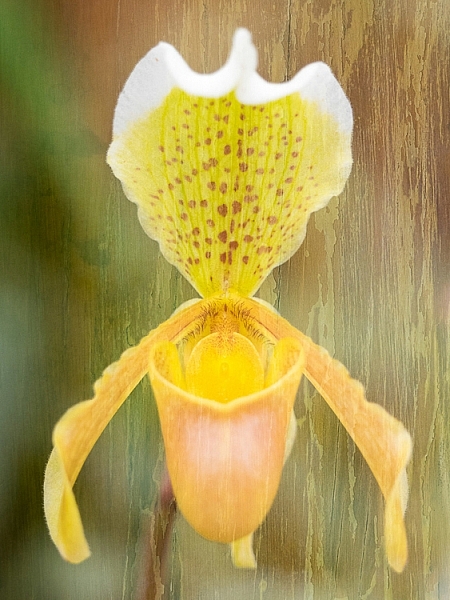
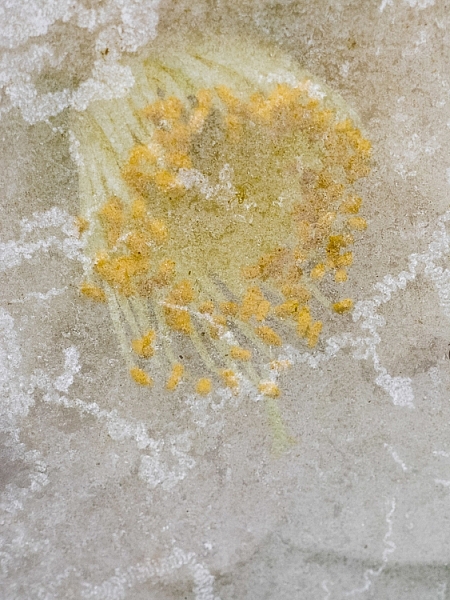
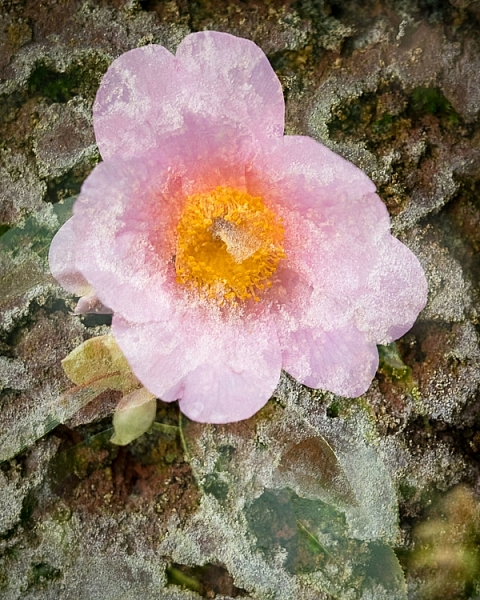
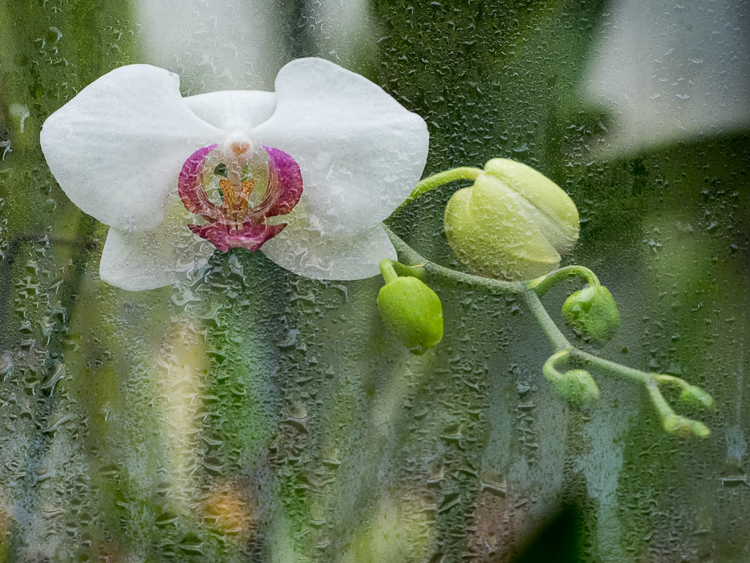
    Will there be shots that don’t work? Absolutely! To create these six images I took 200 photos, over two hours. I don’t regret a single moment of this experience however. Each one is a unique work of art that can never be reproduced. Still, you must be patient, and set aside a good amount of time to do this. If you are rushing through, you’ll miss potentially great opportunities.

    With winter upon us (spring coming soon in some areas of the Northern Hemisphere), and outdoor expeditions limited, now is the perfect time to explore this form of photography. You just may create something spectacular. The only way to find out is to give it a try.

    Have you tried in-camera double exposures before? Please share your results and questions in the comments below. If your camera has a cool double exposure feature – please tell us about it.

    This week on dPS we are featuring articles on special effects. Check out the others that have already been published here:

    • How to Photograph the Full Band of the Milky Way
    • Fire Spinning with Steel Wool – A Special Effects Tutorial
    • Special Effect – How to Create Multiple Flash Exposures in a Single Frame
    • Stacking Light Trails for Night Photography Special Effects
    • 26 Unique Special Effects Photos to Spark Your Creativity
    • Weekly Photography Challenge – Special Effects
    • Tips for Shooting Through Objects to Create a Special Effect
    • How to Add Vintage Frame Overlays Using Alien Skin Exposure X
    • 8 Steps to Great Long Exposure Landscape Photography

    googletag.cmd.push(function() {
    tablet_slots.push( googletag.defineSlot( “/1005424/_dPSv4_tab-all-article-bottom_(300×250)”, [300, 250], “pb-ad-78623” ).addService( googletag.pubads() ) ); } );

    googletag.cmd.push(function() {
    mobile_slots.push( googletag.defineSlot( “/1005424/_dPSv4_mob-all-article-bottom_(300×250)”, [300, 250], “pb-ad-78158” ).addService( googletag.pubads() ) ); } );

    The post How to Create In-Camera Double Exposures by Chris Corradino appeared first on Digital Photography School.


    Digital Photography School