Blog

  • Review: Fujifilm X-Pro2 Mirrorless Camera

    Ever since Fujifilm unveiled their debut consumer camera in late 2010, the fixed-lens x100, the brand has become a favorite for professionals, and enthusiasts who seek an advanced digital camera experience, that still retains much of the look and quality of the classic film era.

    Fujifilm’s very first mirrorless interchangeable-lens camera, the X-Pro1, was released in March 2012 to much praise from critics and users, and was recently replaced with its successor, the X-Pro2. Given the four year gap between camera models, there are many upgrades and improvements in the new X-Pro2, all achieved without adding significant weight or bulk to the camera. Prices are clearly a big differentiator at this point, with the older X-Pro1 going for as little as $ 799, and the X-Pro2 currently set at $ 1,699. But pricetag aside, just how many more features are packed into the X-Pro2, and is it worth it?
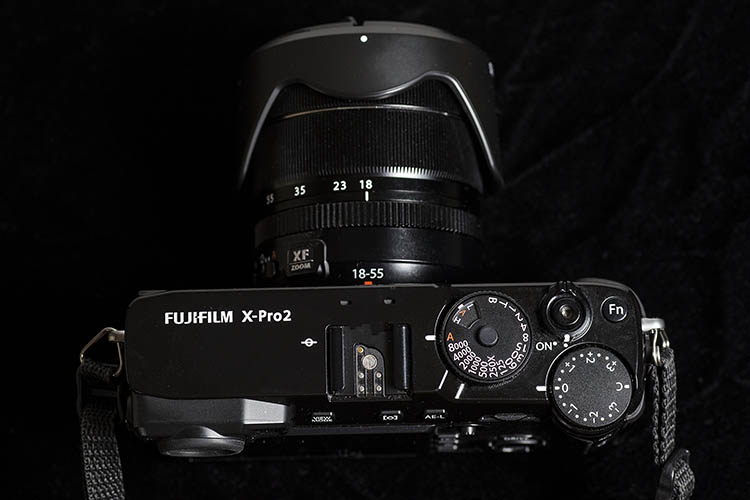
    Fujifilm X-Pro2 Review

    What’s in the Box

    The Fuji X-Pro2 can be purchased body-only for $ 1,699; this basic kit comes with the following accessories in the box:

    • NP-W126 Li-Ion Battery Pack
    • BC-W126 Battery Charger
    • Body Cap
    • Shoulder Strap
    • Strap Clip
    • Clip Attaching Tool
    • Protective Cover

    Recommended Accessories

    While the X-Pro2 has a slightly better battery life than its predecessor, it’s still on the low side. As a result, it doesn’t hurt to have a spare NP-W126 Li-Ion Battery, or two, on you for longer shoots. Since the X-Pro2 has dual SD card slots, having one or two memory cards is also handy, although in testing I never fully maxed out a single 32GB SD card.

    In terms of lenses, this X-Pro2 was tested specifically with the Fujifilm 35mm f/2 WR, a beautiful prime lens that equates to about 56mm on a crop sensor, and the Fujifilm 18-55mm f/2.8-4, a compact mid-range zoom that’s about 28-88mm on a crop sensor. Both lenses are relatively affordable ($ 399 and $ 699 respectively) and together made for a solid, compact, travel photography kit. Lens preference will, of course, depend on your shooting style, and Fujifilm has many other lens choices available.
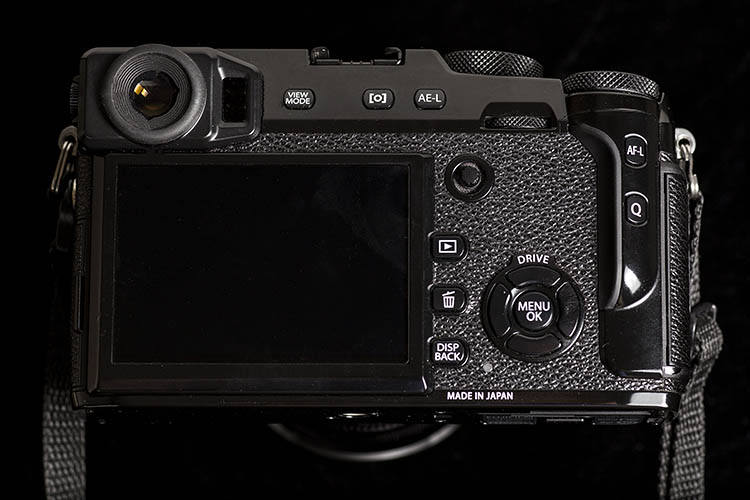
    Fujifilm X-Pro2 Review

    Technical Specs

    Sensor and Image Capture

    First, let’s review the X-Pro2’s specs, which are vastly improved over its predecessor.

    • The X-Pro2 has an upgraded 24.3MP CMOS III APS-C sensor, giving it a significantly higher pixel count compared to the X-Pro1’s 16.3MP CMOS I sensor.
    • The processor is also the new X Processor Pro.
    • Native ISO range has also increased from 200-12800 (or 100-51200 in expanded mode).
    • Continuous shooting on the X-Pro2 is also slightly faster at 8fps, up from 6fps on the X-Pro1, and a continuous high buffer of up to 83 JPEG frames compared to 21 frames on the X-Pro1.
    • Metering is still 256 zone TTL, but besides Multi, Spot, and Average metering, the X-Pro2 adds Center-Weighted metering, which was absent on the X-Pro1.

    Fujifilm X-Pro2 Review

    Sample image shot at sunset. No tripod or extra lens filters.

    Perhaps one of the biggest feature additions on the X-Pro2 is a shutter that allows for both mechanical and electronic capture; the latter allows for more flexibility. The mechanical shutter speed has increased to as high as 1/8000th, compared to 1/4000th on the X-Pro1. The X-Pro2 also enables the use of an electronic shutter speed with an even wider range of one second to 1/32,000. The X-Pro2 also includes Face and Eye Detection, meaning it will seek out faces and eyes when shooting. This is a very handy feature for photographing people, and it proved to be highly accurate during test shots.

    Viewfinder and LCD

    While both viewfinder and LCD sizes really didn’t change much in terms of physical size, both received a bump in resolution, and an updated User Interface in the X-Pro2. The viewfinder also finally allows for diopter adjustment, and the electronic viewfinder (EVF) has a wicked fast refresh rate of 85 frames per second. Still absent is a pop-out LCD screen.
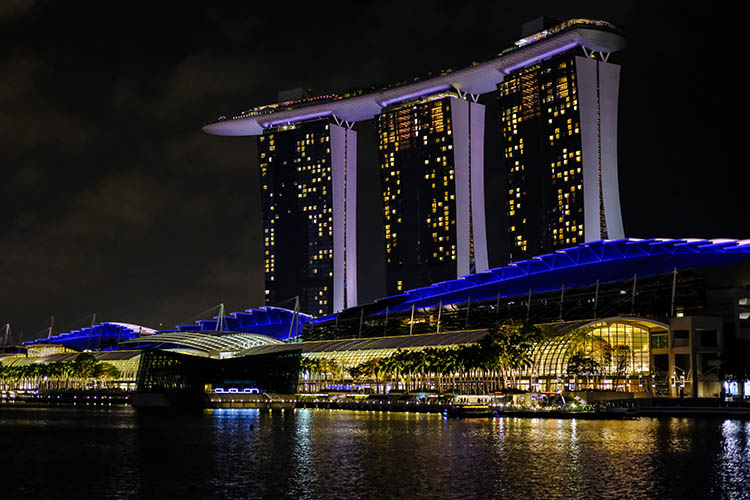
    Fujifilm X-Pro2 Review

    Sample image. Shot handheld without a tripod.

    Autofocus

    The X-Pro2 has made some pretty giant leaps in the realm of autofocus. This camera now has 273 autofocus points, which is quite a bit more than 49 on X-Pro1. It also includes single, zone, wide/tracking autofocus modes, all of which were lacking on the X-Pro1. Finally, the X-Pro2 adds a physical feature that Canon DSLR users will find familiar: a mini joystick button which Fujifilm calls the focus lever. Besides acting as a button, the focus lever enables quick selection for all 273 autofocus points, and also helps you navigate through the menu.

    Body and Handling

    When it comes to the X-Pro2’s build, it is still comprised of a sleek, half matte black body, with a distinctly retro look. However, the build material is now magnesium-alloy versus aluminum for the X-Pro1. Despite using lighter material, the X-Pro2 is still slightly heavier than its predecessor, weighing in at 495 grams (17.5 oz.) versus 453 grams (16 oz.). In terms of dimensions, the X-Pro2 is a tiny bit wider and deeper, but it still looks about the same size as the X-Pro1.

    The battery life on the X-Pro2 has been slightly improved, up to 380 frames, versus 300 frames on the X-Pro1. That’s still on the low side, so carrying a spare battery or two certainly won’t hurt. Camera startup time is a hair faster at 0.4 seconds, compared to 0.5 seconds. Also, the X-Pro2 now has dual SD card slots, which will certainly help with the increased size 24.3MP files. A built-in flash is still not included, but flash sync speed is now at 1/250 of a second, up from 1/180.

    WiFi has been added to the X-Pro2 allowing for geotagging, wireless image transfer, and remote camera control. Finally, the X-Pro2 comes with improved weather sealing with 61 points of dust, water, and cold resistance. This doesn’t make the X-Pro2 waterproof, but it does allow for shooting in more diverse conditions.

    Fujifilm X-Pro2 Review

    Sample image shot with the Fujifilm 35mm f/2, handheld without a tripod.

    Is It Worth It?

    This is a difficult question to answer, given the plethora of vastly different digital camera options available today. Whether you go for the X-Pro2 or not, will really come down to your personal preferences and budget.

    Personally, I loved the image quality of the X-Pro2, as well as its retro buttons and controls. With that said, the retro controls are unique to Fujifilm digital cameras, and can take some getting used to if you’ve been using a point and shoot, DSLR, or another brand of mirrorless camera. It’s also worth noting that while the X-Pro2 is definitely not as bulky and heavy as a professional DSLR, it’s not as compact and lightweight as other mirrorless cameras such as the Sony a6300, which has very similar technical specs, packed into a much smaller body.
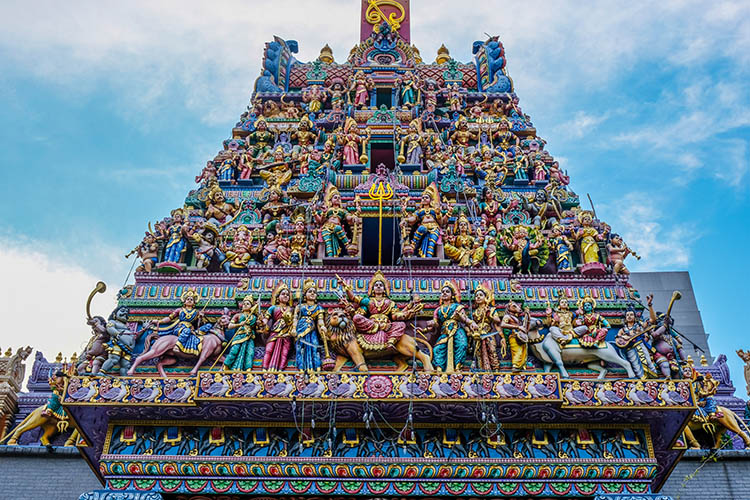
    Fujifilm X-Pro2 Review

    Sample image shot outdoors, handheld with no extra filters.

    Overall Thoughts

    With higher shutter speeds of 1/8,000 or even 1/32,000 using the electronic viewfinder, higher ISO ranges, vastly improved autofocus, and enhanced weather sealing, the X-Pro2 has officially become a serious contender for professional photographers. If you’re looking to invest in a Fujifilm mirrorless interchangeable camera, it’s hard to go wrong with the X-Pro2. While deals can certainly be had with the older X-Pro1 model, the significant upgrades in the X-Pro2 make it a worthy investment if you have the money to spare.

    googletag.cmd.push(function() {
    tablet_slots.push( googletag.defineSlot( “/1005424/_dPSv4_tab-all-article-bottom_(300×250)”, [300, 250], “pb-ad-78623” ).addService( googletag.pubads() ) ); } );

    googletag.cmd.push(function() {
    mobile_slots.push( googletag.defineSlot( “/1005424/_dPSv4_mob-all-article-bottom_(300×250)”, [300, 250], “pb-ad-78158” ).addService( googletag.pubads() ) ); } );

    The post Review: Fujifilm X-Pro2 Mirrorless Camera by Suzi Pratt appeared first on Digital Photography School.



    Digital Photography School

  • Pop Arch: Improbable Design Illustrations Made with Autocad

    [ By WebUrbanist in Art & Drawing & Digital. ]

    impossible architecture

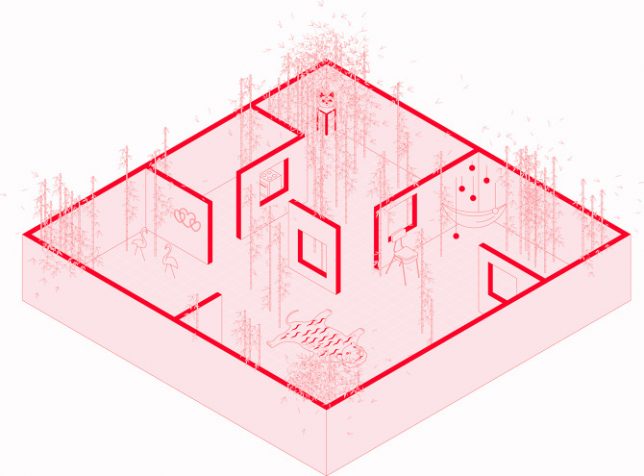
    Used by architects and engineers, Autocad and other computer-aided design (CAD) programs have a long history as boring and blunt instruments of drafting, but this architectural illustrator has breathed new life into these drawing and rendering tools.

    house on fire

    Fabiola Morcillo Núñez is a young Chilean architect who builds imaginary landscapes inspired by exotic architecture and pop art, a sort of modern-day Escher intent on blurring the improbable with impossible.

    water world

    Many of her scenes play on elements believable at first look, like a deconstructed isometric or axonometric drawing of a house … but on fire, or flooded or featuring an impossible room or staircase.

    stacked scene

    “Architecture as a discursive tool has helped me a lot in constructing my own form of representation,” she says of her work. She is interested in deconstruction, spatial limitations, layers and multiplicity.

    view from above

    posterized

    MADERA

    Her pieces borrow from various sources of inspiration in the media and world around her: “I like to take several references, be alert to life itself, be very observant and have a broad sense of understanding of beauty and the tools of creation that are presented throughout the day, for example; the internet, books, movies, the street, travel, personal stories, aesthetic preferences, dreams, philosophy etc.”

    artistic landscape

    human figure

    Beyond her artistic explorations, Fabiola’s work is an implicit statement about how the tools we use, even the ones with less-rich histories of creative expression, can be turned to new and inspiring purposes.

    Share on Facebook


    [ By WebUrbanist in Art & Drawing & Digital. ]

    [ WebUrbanist | Archives | Galleries | Privacy | TOS ]


    WebUrbanist

  • Review: Panasonic Lumix DMC-GX85 impresses with image quality, versatility

    Key Features

    • 16MP Four Thirds MOS sensor
    • Electromagnetically driven shutter
    • Depth from Defocus AF
    • 2.76M-dot field sequential EVF
    • 1.04M-dot tilting touchscreen display
    • 4K video / photo
    • 5-axis image stabilization with Dual I.S.
    • Bouncable pop-up flash
    • Wi-Fi

    The Panasonic Lumix DMC-GX85 is a mid-range interchangeable lens camera sporting a 16MP Four Thirds sensor and 4K video capability. In markets outside of North America the GX85 is sold as the GX80; in Japan it is sold as the GX7 Mark II.

    Sliding in directly below the flagship GX8, the GX85 is targeted toward enthusiast photographers and videographers. It doesn’t use the new 20MP Four Thirds chip we saw in the GX8, instead it sticks with the familiar 16MP sensor used on many other Micro Four Thirds cameras. It also does not have the tilting EVF, weather-sealing or microphone input offered by the GX8. 

    Still, the GX85 shares many of its big brother’s features like 4K photo mode, Post Focus, Depth from Defocus AF, and Dual I.S.. It also has a redesigned shutter mechanism. Shutter-induced blur (‘shutter shock’) was an issue we encountered on the GX8, which used a motor and spring arrangement in its shutter mechanisms. The new electromagnetic shutter found in the GX8 resolves this problem.

    The GX85 also has no anti-aliasing filter, a first for Panasonic cameras. This should lead to better detail retention at the pixel level, but can also lead to moiré. However, Panasonic claims that the new Venus Engine image processor is specially tuned to combat moiré and false color and in use, we’ve found that it does so pretty well.

    Like the GX8, the GX85 offers Dual I.S., combining sensor-based image stabilization with lens-based IS. But unlike the GX8, which has 4-axis sensor IS, the GX85 offers 5-axis sensor IS with rotation correction. Another advantage over its big bro: the GX85 can also use Dual IS during 4K video capture, something that the GX8 cannot.

    Compared to its peers

      Panasonic GX85 Panasonic GX8 Panasonic GX7 Olympus PEN-F  Sony a6300
    Sensor 16.0MP Four Thirds CMOS  20.3MP Four Thirds CMOS 16.0MP Four Thirds CMOS  20.3MP Four Thirds CMOS  24.0MP APS-C CMOS
    Anti-aliasing filter  No  Yes Yes  No  Yes
    Image stabilization Sensor-shift (5-axis) + Dual I.S.
    Sensor-shift (4-axis) + Dual I.S. Sensor-shift (2-axis) Sensor-shift (5-axis) In-lens only
    AF system  49-pt CDAF 49-pt CDAF 23-pt CDAF 81-pt CDAF Hybrid AF
    (with 425 PDAF points)
    Flash x-sync  1/160 sec  1/250 sec   1/320 sec 1/250 sec  1/160 sec
    Burst rate
    (with C-AF)
     6  fps   6 fps 5 fps 5 fps   11 fps
    EVF res/type 2.76M-dot field sequential LCD 2.36M-dot tilting OLED 2.76M-dot tilting field sequential LCD 2.36M-dot fixed OLED 2.36M-dot fixed OLED
    EVF magnification  0.7X 0.77x  0.7x 1.23x  0.7x
    LCD type/res 3″ tilting touch 1.04M-dot LCD 3″ vari-angle touch
    1.04M-dot OLED
    3″ tilting touch
    1.04M-dot LCD
    3″ vari-angle touch
    1.04M-dot LCD

    3″ tilting
    921.6k-Dot  LCD

    Built-in flash  Yes  No  Yes No *  Yes
    Video 2160/30p @ 100MBps 2160/30p @ 100MBps 1080/60p @ 28MBps 1080/60p @ 77Mbps  2160/30p @ 100MBps
    Mic/headphone sockets No / No Yes / No No / No No / No Yes / No
    Weather-sealing No Yes No No  Yes
    Battery life  290 shots 330 shots 320 shots 330 shots 400 shots 
    Dimensions 122 x 71 x 44 mm 133 x 78 x 63mm 123 x 71 x 55mm 125 x 72 x 37mm 120 x 67 x 49 mm
    Weight (CIPA) 426 g 487 g 402 g  427 g 404 g
    * External flash included in box 

    It’s arguable whether the GX85 should be called the little brother of the GX8 or the true replacement to the GX7. And the different regional naming conventions for the GX85 only add to the confusion. The chart above seems to give support to both ways of looking at it: the GX85 uses the same field sequential EVF as the GX7 (although it doesn’t tilt), and what is presumably the same sensor (sans AA filter). And like the GX7, it lacks weather sealing and microphone/headphone ports but has a pop-up flash.

    However, aside from its sensor and EVF, the GX85 also shares a lot of core components and specs with the GX8, such as its 49-point AF system, 4K video capture and 6 fps burst with AF. So whichever way you view the GX85, it certainly stacks up nicely to its Panasonic peers, as well as to the competition.

    Part of the family: The GX85 (top) alongside its Lumix stablemates, the GX7 and GX8.

    Pricing and availability 

    Kitted with the collapsible 12-32mm F3.5-5.6 zoom lens, the GX85/GX80 will run you $ 799/£599/€699. In the UK and Europe it’s available body-only for £509/€599 and with both the 12-32mm F3.5-5.6 and a 35-100mm F4-5.6 for £729/€899.

    Articles: Digital Photography Review (dpreview.com)

  • Amazing underwater 4K footage from Canon EOS-1D X Mark II

    Backscatter Underwater Video & Photo in Monterey CA is the world’s leading supplier for underwater imaging equipment. But as well as selling underwater photography gear, the staff at Backscatter also put it to good use.

    Staff member Russ Sanoian has been diving with the Canon EOS-1D X Mk II for a little while and you can check out the results of his dives in the video below. We spoke to Russ about what makes a good underwater camera, and why he thinks the EOS-1D X Mark II is a good option for stills and video shooters.

    What do you do at Backscatter?

    Backscatter is the largest underwater Photography store in the world. We dive, shoot and service everything we sell and all employees are underwater videographers and photographers. I am our Product Manager and responsible for sales of underwater equipment. 

    What makes a good underwater camera?

    Large sensors and High ISO are critical for good underwater performance as it’s typically a low light environment. Artificial lights or strobes can help with macro/close up, but for wide-angle photography. To shoot with the EOS-1D X Mark II I’m using a Nauticam 1D X Mk II housing with a Small HD Monitor.

    What has impressed you about the Canon EOS-1D X Mark II underwater?

    I owned and shot with the Sony a7R II before the 1D X Mk II, but the Canon shoots 4K at 60p, which is a big deal. It’s great in low light and ISO at 2500 footage is incredibly clean.

    I’ve also found that Canon cameras are the best for manual white balance underwater, they will nail a custom white balance setting at any depth and have the best blues in the industry even edging out RED cameras. So far I have shot the EOS-1D X Mark II with the Canon EF 100mm F2.8L IS USM Macro IS and the Canon EF 8-15mm F4L Fisheye USM attached.

    Can you share some quick tips for underwater photography?

    Always shoot in manual mode, and lock focus manually. This can be extremely challenging for macro subjects but is the best way to shoot with such a narrow depth of field. The 1D X Mk II has incredible autofocus and I have been testing it but so far it’s just not accurate enough for underwater work.

    Articles: Digital Photography Review (dpreview.com)

  • Tiny Apartment’s Rooftop Terrace Features Flat-Folding Deck Chairs

    [ By SA Rogers in Design & Fixtures & Interiors. ]

    deck-chairs

    A cramped, stale and long-neglected 400-square-foot studio apartment in Hong Kong feels downright luxurious with the addition of a rooftop terrace and some pretty cool space-saving features. Design firm Liquid Interiors maximized the space, which is essentially one big room with a combination bedroom/living room, by hiding many features behind sliding doors to keep clutter to a minimum. But their smartest innovation is upstairs, where a pair of wooden deck chairs fold flat into the floor when not in use.

    rooftop apartment 2

    rooftop apartment 3

    The terrace serves ash an outdoor exercise and meditation space, complete with a full-sized canony bed on a wooden platform, a minimalist stone table and a projector screen for watching movies outdoors when the weather is cooperative. The deck chairs pop up when the residents want to lounge in the sun, and blend into the wooden decking when more floor space is desired. A green wall adds a splash of color and helps capture some of the heat. Two iron safes used as bedside tables match the iron door that leads back into the apartment.

    rooftop apartment 4

    rooftop apartment 5

    The architects wanted to “create a sanctuary right in the middle of Central” for the owner, who’s a pilot and and often sleeps at odd hours. With the need to block out daylight in mind, they integrated double-glazed, sound-insulating windows, 100% blackout blinds and a smart circadian lighting system for minimal disruption to the biological sleep cycle.

    rooftop apartment 6

    rooftop apartment 7

    In the kitchen, the skin, refrigerator and all tableware and implements are hidden behind stainless steel cabinet doors, while the table in the center packs in multiple functions including cooktop, dining table and workstation. A television and beanbag seats can be pulled out from similar cabinets in the bedroom when the residents just want to hang out.

    Share on Facebook


    [ By SA Rogers in Design & Fixtures & Interiors. ]

    [ WebUrbanist | Archives | Galleries | Privacy | TOS ]


    WebUrbanist

  • Kerlee 35mm F1.2 is ‘World’s fastest’ 35mm for full-frame SLRs

    $ (document).ready(function() { SampleGalleryV2({“containerId”:”embeddedSampleGallery_4732756521″,”galleryId”:”4732756521″,”isEmbeddedWidget”:true,”standalone”:false,”selectedImageIndex”:0,”startInCommentsView”:false,”isMobile”:false}) });

    Industrial lens manufacturer Shenzhen Dongzheng Optics Technology has announced the Kerlee 35mm F1.2 – which it claims is the fastest 35mm designed for full-frame SLR cameras. The lens is manual focus and features a choice of clicked or silent aperture operation to suit both stills and movie photographers. The company says it will produce units with mounts in Canon EF, Nikon F, Sony E and Pentax K fittings.

    The lens uses 11 elements in 10 groups and includes two high refractive index lenses and one ED low dispersion element. The company says the closest focusing distance is 0.3m / 1ft, but optical performance is said to be at its best when the subject is 1-5m / 3.2-16.4ft from the camera. The smallest aperture is F22 and a depth of field scale is provided.

    Pricing has yet to be released, but more information can be found on the Dongzheng Optics website.


    Press release:

    The world’s first SLR full frame camera support large aperture lens 35mm f/1.2

    KERLEE 1.2/35 lens, specially developed for all lovers of photography,
    is of high performances featuring large aperture, soft Bokeh effect and rich colors.

    Features:
    1. Minimum focus distance is up to 0.3.
    2. Optional switchable aperture lock, allowing for smooth adjustment in video mode.
    3. The optimal distance is within 1-5 meters with the best image quality
    4. Smooth focusing feel, appropriate damping and superior experiences.
    5. ED lens effectively improve image/color differences.
    6. It’s globally the first 35mm F/1.2 large aperture lens that supports single-lens reflex full-frame cameras. When taking an image, set the aperture to Maximum f1.2 can conspicuously emphasize the subject on the background, producing a nice picture atmosphere.
    7. Excellent rendering effect in dim light, also enhance shutter speed to complete a shot

    Articles: Digital Photography Review (dpreview.com)

  • 5 Tips to Help Build Your Confidence in Photography

    Think of your last bad day of photography, a time where you just blew a whole batch of portraits, or even a couple’s wedding day images were spoiled. As photographers you can’t go back and fix that. Yes if you use RAW, you can get some info back from under or over exposed shots, and editing tools these days can be incredibly useful. But, when you spend more time behind the computer than with you camera it can be a real confidence buster. It may even be taking away from future business, if not your enjoyment of photography.

    So how do you build your confidence?

    confidence in photography

    These DPRK soldiers show confidence and loyalty guarding the DMZ and the 38th parallel of Korea. The soldiers at Buckingham Palace don’t flinch, and that takes practice.

    Having confidence exudes confidence, but where does real confidence come from. Well it doesn’t just come from nowhere, that is often called arrogance. It comes from the awareness of your emotional state relative to your cognitive abilities.

    If you use your emotions to create, you are being confident. If your emotions are overwhelming you during your shot or photo series, you are likely under-confident. By the book, you may know everything there is to know about the exposure triangle, rule of thirds, color theory, etc., but when you are actually shooting do they do more to help, or do they hinder you?

    Confidence is a delicate balance between what you know, and how well you are capable of performing. So let’s look at a couple of examples and analogies to help build your confidence as a photographer.

    #1 – Confidence isn’t always consistent

    Real confidence is never consistent, and has its slumps. Professional sports is a great example, even superstars have an off night.

    So when you have an off night, remember another night is just 12 hours away. If it is the morning, it is still 12 hours away. Even a broken clock is correct twice a day, so don’t beat yourself up. In the short run you may have really blown a photo shoot, or missed the animal of your dreams because you were not being conscious about your settings, or you were simply absent minded. But that is the short term, and as long as you get right back out there, the better off you are going to be.

    The best of the best all fail, but what keeps them on top of their game is the arduous task of owning up to being human, and going out to find a solution to your goof. In the long run, they will be memories that you get to look back on with a laugh.

    confidence in photography

    Baseball is a national pastime in Cuba. Although it was my first time shooting baseball in the barrios of Havana, it wasn’t my first time shooting it.

    #2 – Learn from your mistakes

    Few people are perfect photographers from birth. Generally, talent comes through sweat, tears, and sometimes even blood. If you make mistakes you can learn from them. Confidence has a conspiracy with failure. So take two steps forward, and one step back. Stay committed, and speaking of commitment and blood, I am not the only photographer who has taken a tumble, and when people ask you if you are okay, you respond with, “Yes the camera is fine”, while your knees and elbow are bleeding.

    confidence in photography

    Continuing with the baseball theme, after striking out, it only took one big swing to make the winning home run. Don’t give up, live, learn and keep swinging for the fences.

    #3 – Be vulnerable

    Enter a photo contest, and don’t expect to win. It is a final process of completing the photography and artistic conceptual circle. Letting your photo hang on a wall, while others look at it, even for a few minutes, is a scary prospect for some. But think of leaving your freshly baked pie on the dinner table, and just looking at it. We don’t do that with food, nor should we do that with our photography.

    People will love it, like it, dislike it, or downright hate it, but that doesn’t mean you are wrong. It means you have succeeded in making the photography world just a little more interesting. You also never know who you will inspire. Your vulnerability will soon become a strength that will help build your confidence.

    confidence in photography

    After years of holding on to this photo, I finally entered it into a regional photography competition. It got in, and although I was not a recipient of anything, another gallery called a month later and wanted to host my work for a show.

    #4 – Learn from others BUT don’t compare yourself to them

    There is a world of knowledge available, and many people who you can learn from. Use them, ask them questions, share ideas – but don’t compare yourself to them. Generally when you compare your own work to others, it may leave you with a sense of there’s more to be desired, and a sense of failure. So learn from their perspectives, their tutorials, and their stories, but don’t get caught up in who is better.

    A happy photographer is the best photographer. Furthermore, over time you will begin to see the merits in some of your earlier experimental work. Perfection is not the goal, it is the journey to becoming a more enriching photographer.

    IBQ 0174
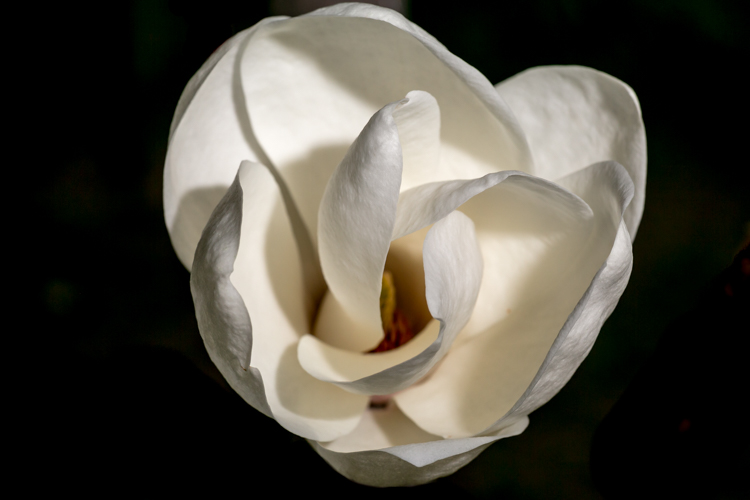
    This Magnolia opening in spring was taken in full sunlight. I saw a series of flowers on a photo stream, and realized I had not taken a photo of something beautiful in a long time. This helped me learn to see, and if our images were side by side, I am sure theirs was better. But I enjoyed doing something different than what I normally shoot.

    #5 – Avoid gear envy

    There will always be something bigger and better, wait another year and the next new version will be out. So don’t get intimidated by other photographers’ gear, and more importantly don’t let your photos depend on your gear. Think of it as a challenge.

    confidence in photography

    Taken with a 50mm, manual focus lens from my father’s box of forgotten things, that I found rummaging through his old stuff. Lenses and cameras are fun to have, and fun to buy, but they don’t make the photo.

    A small trick I use when the next new thing comes out, and I get in that spiral of getting all gear-junkie about it is to look at some of the classic photographers from 100 years ago or read up on some color theory. This gets me back to the basics, try it yourself.

    So if you realize that every showing will not be your best, you can get over thinking that your gear dictates the success and failure of your photos, if you can start to learn from your mistakes, and begin to hang photos on a wall – then guess what? Your confidence will begin to grow, you will have more control (and more power) over photography (situations, light, camera gear, etc.). As your confidence grows it builds and builds on itself.

    The next six areas are examples of how confidence will help you in that style of photography. Part one is developing confidence, and part two is a set of examples of how confidence can help in different situations.

    How confidence can help you take better photos

    In portraiture, confidence helps you connect with, and calm your subject, to bring out their inner spirit. There is little worse than a nervous model and a nervous photographer. Even if you are not 100% sure what you’re doing, show confidence, take your time, and slowly adjust your settings to get things closer to your ideas. Try and keep from getting frustrated and making large adjustments wildly to your gear.

    confidence in portrait photography

    This young girl in North Korea had never seen an American before, but after me keeping my cool she was much more approachable.

    In wildlife photography, confidence lets you trust your gut, and get in the right place at the right time. Luck is important, but perseverance will ultimately lead to success. Having confidence will give you the extra optimism to keep you going, as you wait patiently.

    confidence in wildlife photography

    On a long road trip from east to west across the US, I hadn’t run into any large animals. In Wyoming I decided to go for another shot at an indiscrete state park, and there were buffalo everywhere.

    In travel photography, confidence helps you see beyond the postcard shot. Confidence allows you to see your journey, not the one that is in the travel books. It helps you see the subtleties, and personalize your travel story, rather than trying to just take the photo that everyone else wants you to take.

    confidence in travel photography

    This sassy little Cuban was just parading on her porch. I walked by without grabbing my camera, then discreetly turned around and caught her exuding luxury, Cuban style.

    In fine art photography, confidence will allow your creative side to flow. It will allow you to access what is sometimes referred to in sports as “being in the zone.” This zone, or flow is your brilliance at its best, and confidence supports your ambitions as an artist.

    IMG 2012 Edit Edit

    One of my favorite images from India, where cricket matches were being played. Using multiple exposures, then giving it a symmetrical clone, I produced something that I cherish. Maybe only you like your photo, but that is what being true to yourself is all about.

    In bad weather confidence helps you see the silver lining. For all types of photography we rely on light. A great source of light is outdoors, and when that golden hour turns to wind and rain you have a choice – pack up and go, or think outside the box. Confidence helps you control your surroundings, even when they are out of control, so you can begin to work within them, and use them to your advantage.

    IBQ 4876 Edit Edit 2
    I can’t say that the weather was bad here, but the timing was. I was just getting to a ghetto outside of San Jose, Costa Rica at night. I wanted to get in and out before I felt compromised, unsafe. So regardless of if it’s bad weather, or bad timing, confidence can help you to push through.

    In tough times confidence gives you the grit to continue. Really, this is what a lot of photography comes down to – do you have the gumption to get up early for sunrise, or not? Can you give a genuine smile to your client, even when you are not having the best day? Can you be satisfied with the gear you have, and not think about the next lens you want to get? Can you be the best photographer you can be?

    confidence in photography

    Symbolically this Burmese woman has had a few more tough times than I have. Confidence in photography will help you put things into perspective.

    Confidence is hard to gain and can take years to attain. It is a process, and is easier for some than others. But if you work at it, it will build. Just as you work on other aspects of your photography, your emotions need work to. Confidence is an emotion, so practice with your feelings, and let them grow alongside the cerebral aspects of photography. Be mindful of your emotions, not fearful of them.

    Do you have any other confidence building tips? If so, please share them in the comments below.

    googletag.cmd.push(function() {
    tablet_slots.push( googletag.defineSlot( “/1005424/_dPSv4_tab-all-article-bottom_(300×250)”, [300, 250], “pb-ad-78623” ).addService( googletag.pubads() ) ); } );

    googletag.cmd.push(function() {
    mobile_slots.push( googletag.defineSlot( “/1005424/_dPSv4_mob-all-article-bottom_(300×250)”, [300, 250], “pb-ad-78158” ).addService( googletag.pubads() ) ); } );

    The post 5 Tips to Help Build Your Confidence in Photography by Branson Quenzer appeared first on Digital Photography School.


    Digital Photography School

  • Apple Photos gets smarter in iOS 10, macOS ‘Sierra’

    On the first day of its annual Worldwide Developers Conference, Apple has announced new features for its Photos app on both iOS 10 and macOS ‘Sierra,’ scheduled for release this fall.
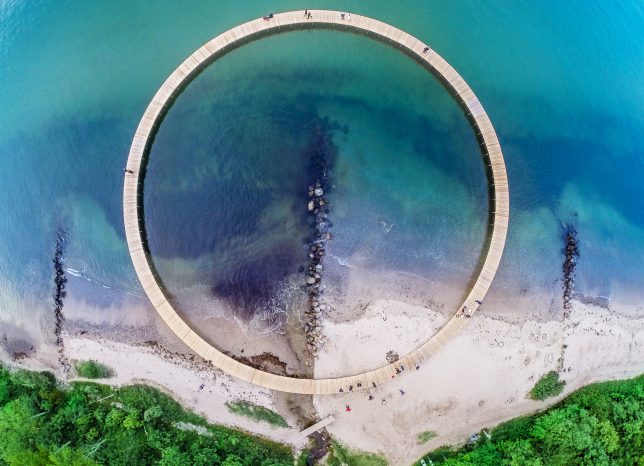
    The updated Apple Photos apps will use ‘advanced computer vision technology’ to identify people, objects and scenes in order to allow for intelligent searching and automatic sorting based on content. Most notably, a new Memories feature will use this information to automatically create movies and shareable collections of photos based on data such as people, places and events such as a trip or holiday.
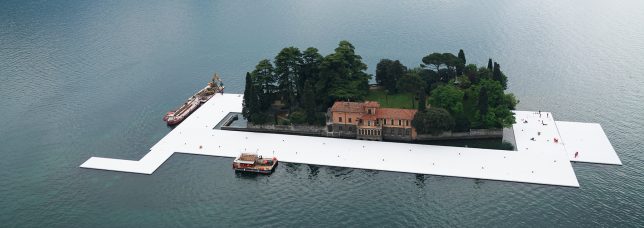
    Additional features leveraging the new technology include a People album, which automatically groups photos based on who is in the shot, a Places album, which plots your photos on an interactive world map, and Intelligent Search, which allows searches based on the content of photos.

    Although Google has provided similar features through its Google Photos service for some time, Apple’s offering includes one feature that may appeal to many users: instead of sending photos to the cloud for analysis, Apple will use on-device intelligence to analyze and categorize photos in order to protect user privacy.

    For more information about the new Photos apps head on over to Apple’s website.

    Articles: Digital Photography Review (dpreview.com)

  • Walk on Water: 13 Interactive Aquatic Art Installations

    [ By SA Rogers in Art & Installation & Sound. ]

    infinite bridge main

    Vital yet dangerous, shifting its shape and obscuring what lies beneath, water is an ideal conduit for illusion, and artists take advantage of these qualities to produce works that confuse our senses and seem to give us superpowers. These aquatic art installations allow people to walk on water and breathe beneath its surface, and ask us to confront its mysteries, navigating flooded spaces in pitch blackness or edging dangerous whirlpools.

    Floating Piers on Italy’s Lake Iseo by Christo and Jeanne Claude

    water art floating piers 1

    water art floating piers 2

    water art floating piers 3

    water art floating piers 4

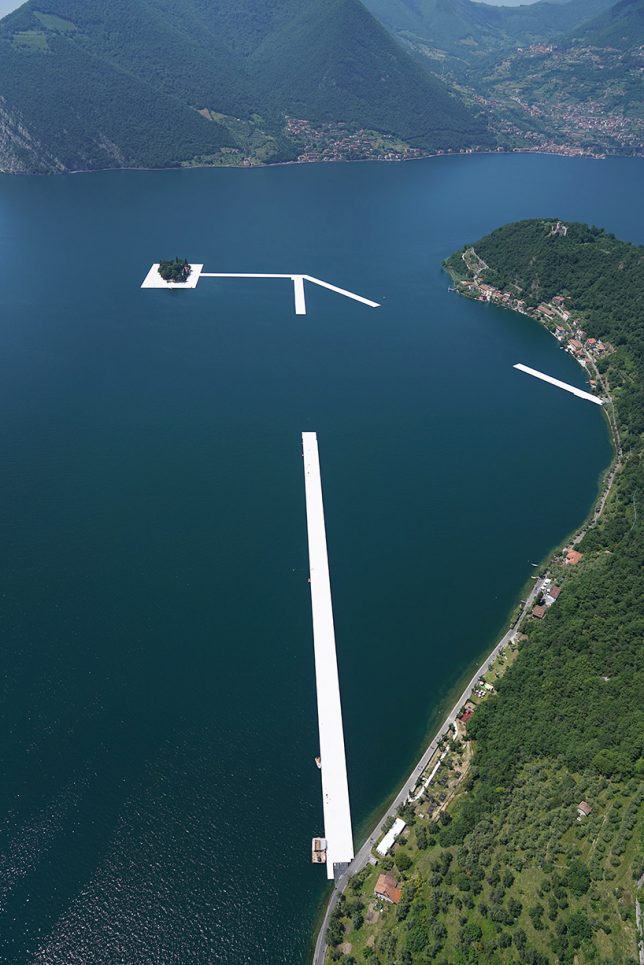
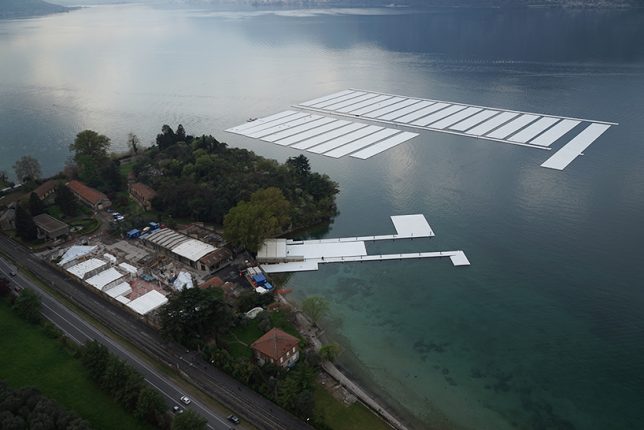
    A modular floating dock system comprised of 220,000 polyethylene cubes will allow visitors to walk all the way to an island from the shore of Italy’s Lake Iseo. The first work by Christo and Jeanne-Claude in Italy in over 40 years, ‘The Floating Piers’ are still under construction and will ultimately be covered in a shimmering yellow fabric that will continue for a mile on land through the pedestrian streets. In the works for decades, it’s Christo’s first piece to be completed since the death of his partner Jeanne-Claude in 2005. The exhibition will be in place for 16 days and then all components will be industrially recycled. “Like all of our projects, ‘The Floating Piers’ is absolutely free and accessible 24 hours a day, weather permitting,” says Christo. “There are no tickets, no openings, no reservations and no owners. The Floating Piers are an extension of the street and belong to everyone.”

    Intentionally Unstable Floating Pavilion

    water art unstable pavilion 1

    water art unstable pavilion 2

    water art unstable pavilion 4

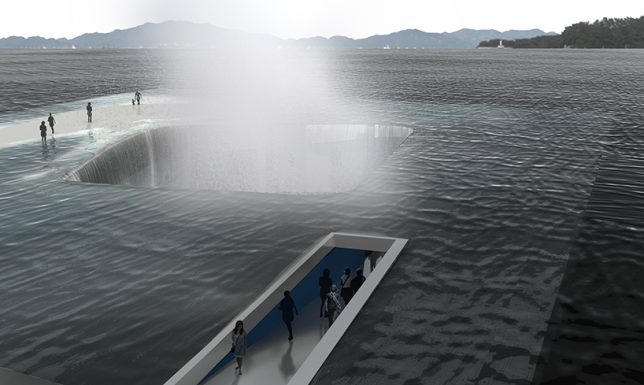
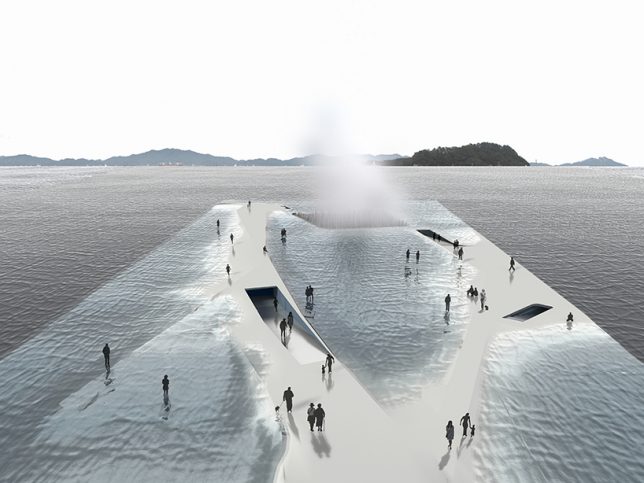
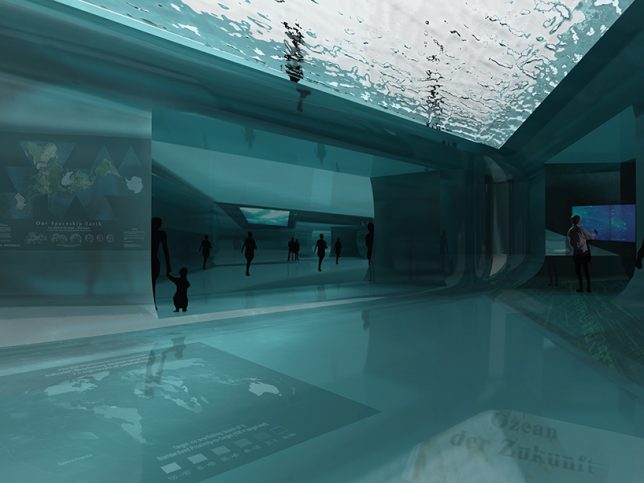
    Just barely peeking above the surface of the sea in a few strategic places, this sunken pavilion lets you walk right out onto the water, with dry paths appearing and disappearing according to the movement of the waves. ‘Thematic Pavilion’ gently rocks back and forth as visitors move from the top level to the nautical exhibition space below the surface. Hydraulics of the same sort used for submarines keep the structure from sinking to the bottom, and raise it all the way up after the exhibition so it can be used like an ordinary boat.

    Glass Topped Swimming Pool by Leandro Erlich

    water art swimming pool 1

    water art swimming pool erlich 2

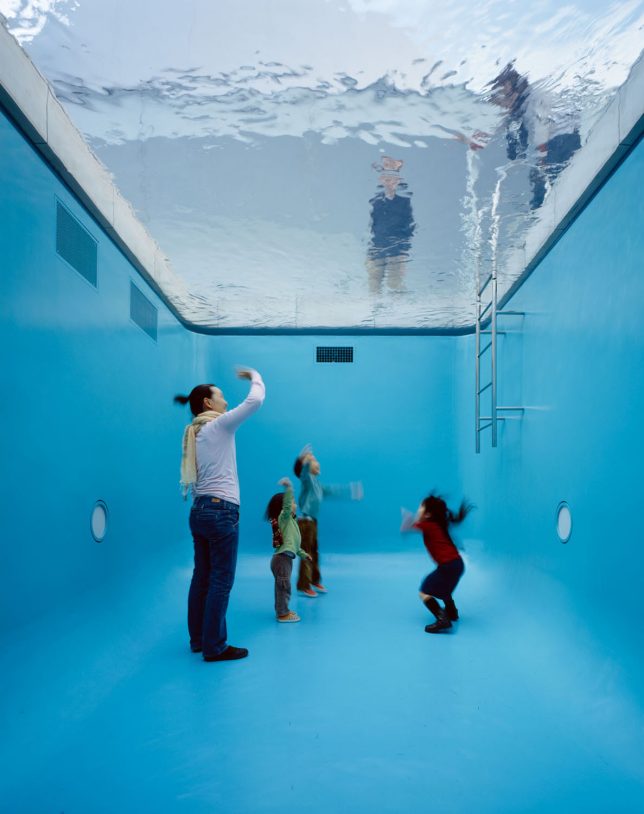
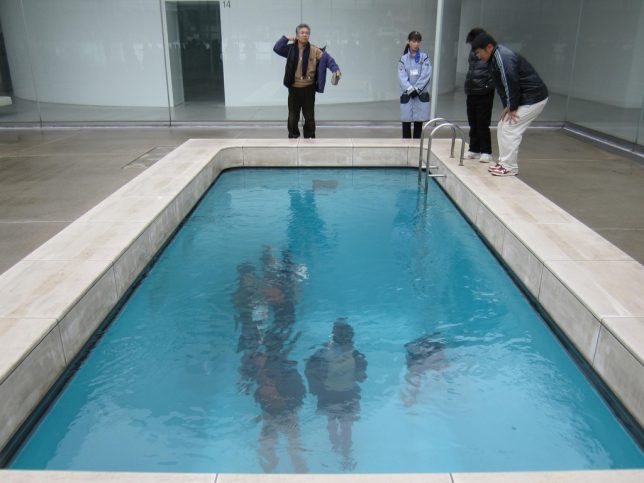
    Glimpsed through the surface of a swimming pool, groups of people standing on the bottom seem irrationally calm – not to mention dry. That’s because a thin sheet of glass actually separates them from the extremely shallow water, creating the illusion that they’re submerged. Artist Leandro Erlich uses perspective, mirrors and glass to create optical illusions that shake our sense of what’s up and what’s down.

    Boat Tour Through a Flooded Art Museum

    water art flooded museum 1

    water art flooded museum 2

    water art flooded musem 3

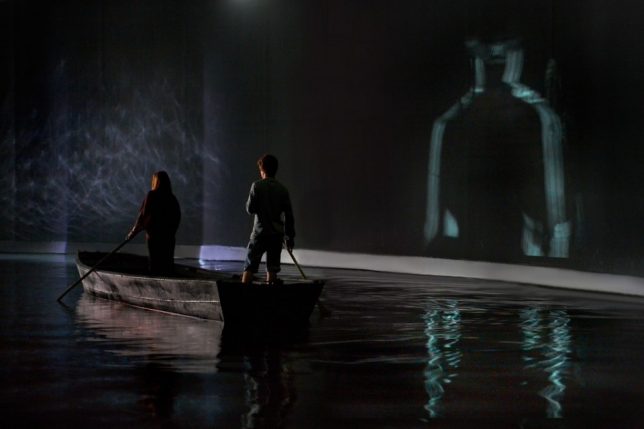
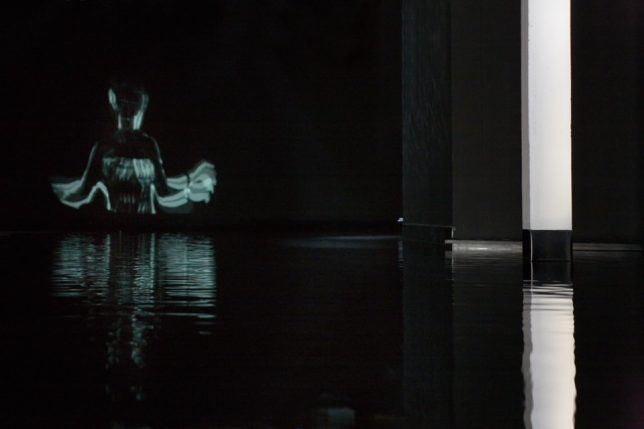
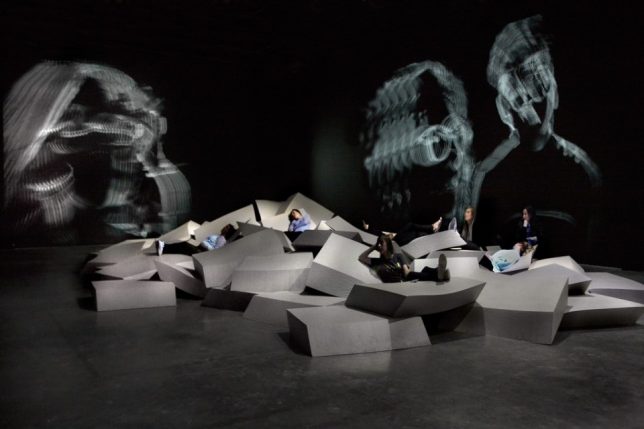
    Visitors to the Palais de Tokyo have to navigate dark waters inside the museum itself, as if in a post-apocalyptic scenario, for this installation by Celeste Boursier-Mougenot. ACQUAALTA takes its name from the annual flooding event in Venice, imagining what would happen if this same flooding were to affect Paris. Standing or sitting in their boats, visitors row through the nearly pitch-black space before disembarking onto jagged foam landscapes.

    Next Page – Click Below to Read More:
    Walk On Water 13 Interactive Aquatic Art Installations

    Share on Facebook


    [ By SA Rogers in Art & Installation & Sound. ]

    [ WebUrbanist | Archives | Galleries | Privacy | TOS ]


    WebUrbanist

  • STG Uploader app allows Sony cameras to upload directly to Google Photos

    A new unofficial app called STG Uploader enables Sony cameras compatible with PlayMemories Camera Apps to upload content directly to Google Photos. Running the application will prompt the user to set up a Wi-Fi access point, after which the user will authorize the app to place an oAuth token on the camera’s SD card, a safer alternative to saving the user’s Google username and password on the camera.

    Full instructions on installing the app are located on the Sony-PMCA-RE Github. Once installed and set up, users are presented with a simple screen that shows how many photos are ready to be uploaded to Google Photos and how many have already been uploaded. An upload status bar is provided, as well as an option for erasing the upload database.

    According to a user at SonyAlpha Rumors, the app uploads photos in full resolution. Images uploaded directly will appear in Google Photos with the name ‘SonyUpload’ followed by the date. Note that formatting the SD card will cause the oAuth token to be erased and the app setup process will have to be repeated.

    Via: SonyAlpha Rumors

    Articles: Digital Photography Review (dpreview.com)