Blog

  • Sigma 30mm F1.4 DC DN Contemporary Micro Four Thirds Lens Review

    The Sigma 30mm F1.4 DN DC Contemporary was announced February 2016, and sits atop Sigma’s line of DN mirrorless lenses, with a two-stop advantage over their previous 30mm F2.8 offering.

    As a Micro Four Thirds lens, it is one of only several current autofocus F1.4 prime lenses available, with its closest competitor being the Panasonic Leica Summilux DG 25mm F1.4. While the Panasonic offers a field-of-view equivalent to a ‘classic’ 50mm lens, the Sigma ends up around 60mm. While that makes its focal length possibly a bit long for street shooting, it helps a little when it comes to portraiture and close-up work.

    Let’s see how the basic specifications between the Panasonic Leica 25 and Sigma 30 compare:

      Panasonic Leica Summilux DG 25mm F1.4 Sigma 30mm F1.4 DC DN | C
    Price $ 598 $ 339
    Image Stabilization No No
    Max Aperture F1.4 F1.4
    Minimum Aperture F16 F16
    Aperture Ring No No
    Diaphragm Blades 7 9
    Minimum Focus 0.30 m (11.81?) 0.30 m (11.81?)
    Maximum Magnification 0.11x 0.14x
    Motor Type Micromotor Stepper motor
    Full Time Manual Yes No
    Weight 200 g (0.34 lb) 265 g (0.58 lb)
    Dimensions (DxL) 63 mm (2.48?)  X 55 mm (2.15?) 65 mm (2.56?) X 73 mm (2.87?)
    Sealing None None
    Filter Thread 46mm 52mm

    Regardless of where it sits in terms of focal length and usability, the Sigma enters the opposite of a crowded marketplace as an autofocus F1.4 Micro Four Thirds prime. It also gets the advantage of being the cheapest autofocus F1.4 Micro Four Thirds prime available, even undercutting the price of some F1.8 options as well. 

    Thankfully, the Sigma doesn’t feel entirely cheap. The barrel is well made with a satin black finish and ridges for grip when mounting or removing the lens. Sadly, the plastic hood feels a little inexpensive, and doesn’t feel like it clicks in to position with much confidence. Build quality of the lens itself is on par with the Pana-Leica, with both having smooth, sturdy focus rings with rubberized ridged grips.

    The extra bit of diameter and length on the Sigma make it a bit bulky and unbalanced when mounted to some of slimmer Micro Four Thirds cameras, like the Olympus PEN series, or the E-M5 II. When mounted to a larger SLR shaped body, like the GH4, the Sigma fits nicely.

    We’re assuming the extra size, relative to the Panasonic stems from it needing to be large enough to cover an APS-C sized sensor, in its E-mount incarnation.

    Does the discounted price mean the Sigma comes with discount performance? Can it shake off past stigmas about third party lenses and go toe-to-toe with a lens touting one of the most revered names in the business? Let’s take a closer look at the numbers.

    Articles: Digital Photography Review (dpreview.com)

  • 4 of the Most Important Elements of the Lightroom Library Module

    When I read through photography forums or talk to other photographers the topic of image editors often comes up. People give various opinions and thoughts about which one they prefer. Photoshop, Lightroom, Apple Photos, Capture One, GIMP, and a host of other options from companies like ON1 and MacPhun are all capable of doing various types of small and large edits to your images.

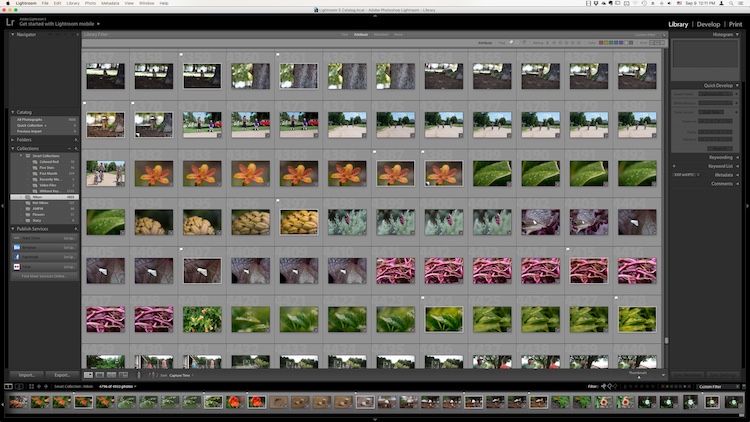
    However, one advantage Lightroom has over some other programs is that it not only lets you edit your pictures but categorize them, sort them, tag them, even compare different pictures to see which one you prefer. All this happens in the Library module which is a key part of Lightroom’s workflow. It is essential to understand the Lightroom Library module if you want to get the most out of this program.

    The Library module. No late fees here, just lots of ways to manage your images.

    The Library module. No late fees here (library pun), just lots of ways to manage your images.

    While the Library module does many different things, to get an understanding of the basics it’s good to narrow your focus down a bit. There are a few key areas of the photographer’s workflow that are served by this part of Lightroom; organizing, sorting and viewing…with a dash of editing thrown in just for fun. Let’s look at each one by one.

    Organization of images in Lightroom

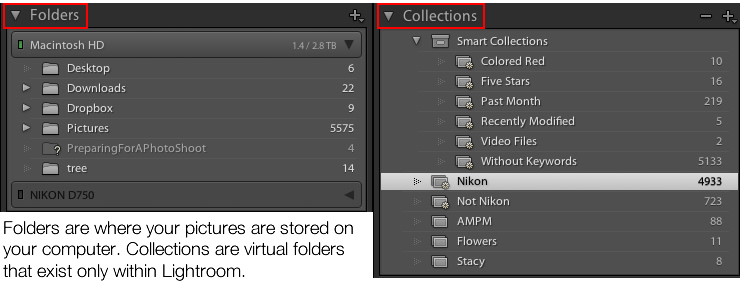
    One aspect of Lightroom that is often misunderstood is how it handles your actual picture files, whether JPG, RAW, DNG, or any other format. Contrary to what some people think, it doesn’t actually do anything with your files whether you are categorizing them, sorting them, or editing them. Wherever your pictures are stored on your computer, that is precisely where they will remain when you import them into Lightroom. What you can do, however, is use the Library module to organize and manage your pictures within the program itself. The best way to do this is to put your pictures into what’s known as Collections, or virtual folders that contain sets of images.

    Collections are a powerful and efficient method of sorting and organizing your pictures in Lightroom, while leaving them fully intact and untouched on your hard drive.

    Collections are a powerful and efficient method of sorting and organizing your pictures in Lightroom while leaving them fully intact and untouched on your hard drive.

    How Lightroom sees your pictures

    When you import your pictures into Lightroom you are essentially just telling Lightroom where to look for the images that are sitting on your hard drive. Remember back in the days of using the card catalog in a public library? The books weren’t stored in the massive grids of tiny filing cabinet drawers. But those thousands of little cards did tell you where to locate each book as well as a bit of information about each one. That’s sort of how the Collections feature works in the Library module. You can use it to create virtual filing cabinets to organize the images on your hard drive without actually moving, renaming, or otherwise altering your original images.

    For example, let’s say you shoot a wedding for your friends Jim and Pam Halpert and come back to your computer with over a thousand images to edit. You can copy all their images to your computer into one folder, and then use Collections in Lightroom to organize them in a way that makes sense to you. Then you can create a Collection Set called “Halpert Wedding” and then within that create additional collections such as “Ceremony,” “Reception,” and “Candids.” Because you are not actually moving the images into different folders on your computer or duplicating the actual picture files, you can put the same picture into multiple collections. You could have the same shot of Jim’s buddy Dwight in both the Reception and Candids folder.

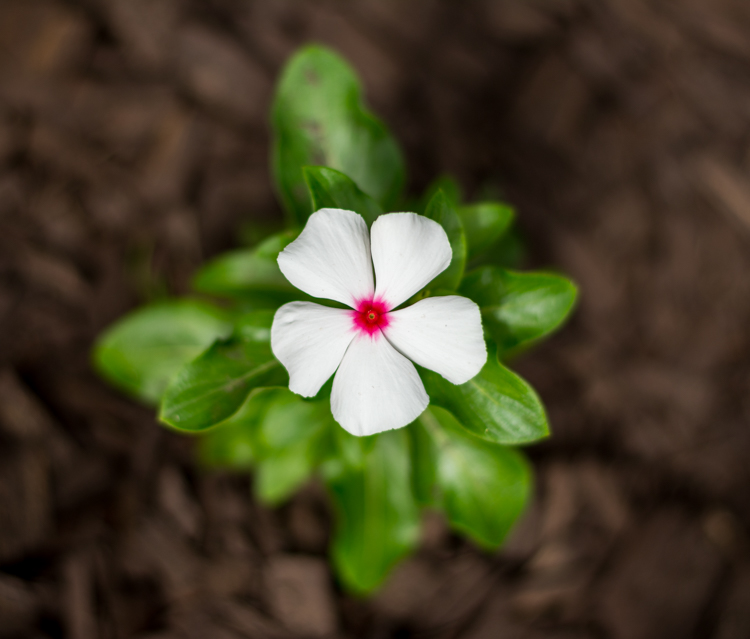
    This picture of a periwinkle flower could go into a collection called "Flowers," another one called "Nature," and another one with only pictures of periwinkles. All at the same time.

    This picture of a periwinkle flower could go into a collection called “Flowers,” another one called “Nature,” and another one with only pictures of periwinkles. All at the same time.

    Smart Collections

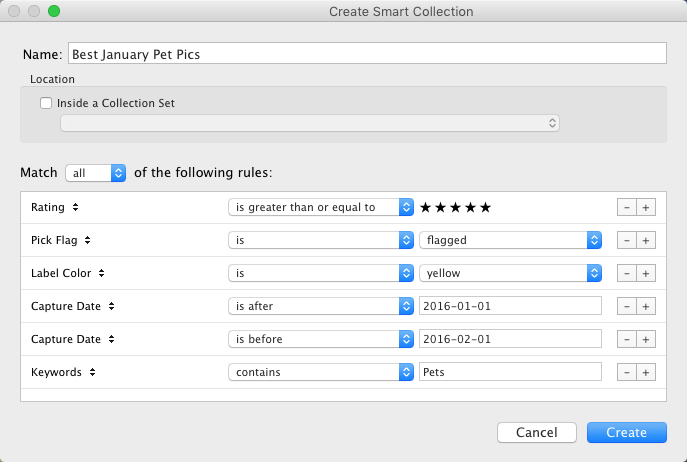
    While Collections themselves are quite flexible, you can go a step further by utilizing Smart Collections which is a way of automatically putting pictures in various collections based on criteria that you specify. There are a staggering number of criteria at your disposal, and you can choose whether the Smart Collection should meet any, all, or none of them. These collections are updated dynamically so as soon as a picture in your Library meets the specifications for a given Smart Collection it is automatically inserted into that Collection.

    lightroom-library-module-smart-collection


    Collections remain one of the hallmark features of the Library module and serve to make Lightroom far more versatile than other programs that simply let you edit your pictures. They work hand-in-hand with the many sorting options as well to give you even greater control over your images.

    Sorting images in Lightroom

    Have you ever gone through your closet and wished that you could snap your fingers and instantly see all your red shirts, tan pants, or gym shorts that still fit? Better yet, what about immediately seeing only the red shirts you actually like? The Library module allows you to do just that. With the click of a button or press of a keystroke, you can hone and filter your images to see precisely the ones you want, then easily reset everything back the way it was. Pressing the “\” key (while in the Library module), or going to “View > Show Filter Bar” brings up a bar at the top of your screen that allows you to dynamically sort your images based on criteria you specify at will.

    lightroom-library-module-filter-bar

    Using the filter bar tools

    The Filter Bar lets you sort by criteria such as whether photos are marked as Picks or Rejects, have a color or star rating, or are associated with specific keywords. Click any of the icons in the Filter Bar to see the results in real-time, and your images will be immediately pared down to reflect the criteria you want.

    To remove any of the filtering criteria just click the button again and Lightroom turns it off. You can also change the type of filtering by clicking the “Text/Attribute/Metadata” options in the middle of the top of your screen which will give you additional parameters. If you don’t want to constantly turn the Filter Bar on and off there is also a persistent mini Filter Bar at the bottom of your screen with many of the options as the full-featured one. I use these filters constantly to sort through my images and find the ones I need for any given project.

    Using Keywords to sort your images

    lightroom-library-module-keywords

    Keywords are a handy way to add sorting criteria to your photos.

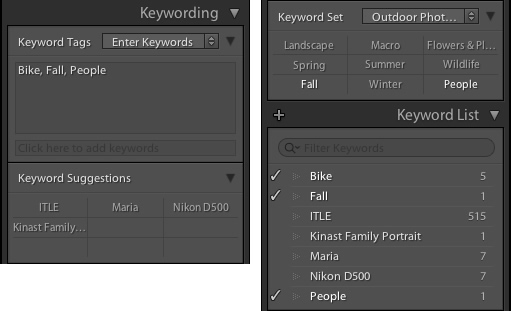
    The Keywords feature is another aspect of Lightroom that allows you to sort through your images. On the right side of the Library module is a panel that you can use to assign keywords to images such as “Birthday,” “Nature”, “Summer”, “Uncle Mike”, or any other words you want. To assign a keyword, or multiple keywords, to a picture, just start typing them in the Keyword box or select them from the Keyword Suggestions or Keyword Bank frames. To assign keywords to multiple images at the same time, select them first and then enter your keywords in the box.

    Whether you have dozens, hundreds, or thousands of pictures to sort, the options in the Library module can help.

    Whether you have dozens, hundreds, or thousands of pictures to sort, the options in the Library module can help.

    Viewing images in the Library module

    As your photo collection grows larger it’s essential that you have a way to actually view and manage all of the images. Thankfully Lightroom has a robust system in place to let you do exactly that. Of course, you can use collections and sorting criteria, but you also have some useful tools at your disposal to actually view the pictures too. The icons at the bottom-left of your screen let you change between four different views; Grid, Loupe, Compare, and Survey.

    View modes

    Click Grid to see a bird’s-eye view of all the pictures in the Collection you are currently viewing. Use the Thumbnail slider in the bottom-right (if it’s not visible tap the T key to hide/show the tools bar) to change the size of the thumbnails depending on your preference.

    Grid, Loupe, Compare, and Survey let you view your pictures in useful and creative ways.

    Grid, Loupe, Compare, and Survey let you view your pictures in useful and creative ways.

    Loupe is a term borrowed from the days of developing pictures in a darkroom. It refers to the small glass viewer, sort of like a magnifying glass without a handle, that a technician would use to see a given image in greater detail. Click the Loupe view to see one image at a time and then click anywhere on the image with your cursor (which has now turned into a magnifying glass with a + inside) to zoom in closer. Hold [alt] or [option] on a Mac to click and zoom out, and use the zoom level options in the top-left corner of your screen to change the magnification level. This is particularly useful if you want to check if a given picture is sharp and in focus.

    Compare and Survey view modes are related in that they let you see two or more pictures at a time in order to choose the one you prefer. These modes are especially handy if you have multiple similar images, such as after a portrait session, and are trying to pick the best one out of a bunch.

    I had about two dozen nearly identical shots, but Lightroom's view and sorting options helped me find just the photographic needle in the memory card haystack.

    I had about two dozen nearly identical shots, but Lightroom’s view and sorting options helped me find just the photographic needle in the memory card haystack.

    Quick Develop in the Library module

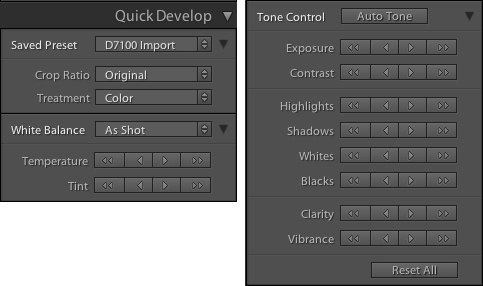
    I like to think of the Library’s Quick Develop options as extra credit for a class assignment. They are an added touch that lets you do a bit of editing with your pictures without going to the full-fledged Develop module, and will often give you just the right amount of editing that a picture needs. Nestled on the right-hand side of the Library module is a little toolbar called Quick Develop which does exactly what you might think. It allows you to quickly and easily adjust a few essential parameters such as White Balance, Exposure, Highlights, Shadows, and a few other settings.

    lightroom-library-module-quick-develop

    Clicking on the single arrow for any given parameter adjusts things just a little bit. While clicking the double arrow adjusts things a lot. For example, the single right-facing arrow for Exposure will increase the value by 1/3 stop, whereas the double arrows will increase the value by a full stop. You don’t get anywhere near the fine-grain control that you do in the actual Develop module, but if you need to quickly make some basic edits to an image you might find Quick Develop to be quite handy.

    lightroom-library-module-rainbow

    Conclusion

    These four elements aren’t all that the Library module has to offer, but learning them will give you plenty to work with as you begin to expand your knowledge of this powerful program. Do you have any favorite tips you’d like to share? Are there features you think I missed that others should know about? Please leave your thoughts in the comments below.

    googletag.cmd.push(function() {
    tablet_slots.push( googletag.defineSlot( “/1005424/_dPSv4_tab-all-article-bottom_(300×250)”, [300, 250], “pb-ad-78623” ).addService( googletag.pubads() ) ); } );

    googletag.cmd.push(function() {
    mobile_slots.push( googletag.defineSlot( “/1005424/_dPSv4_mob-all-article-bottom_(300×250)”, [300, 250], “pb-ad-78158” ).addService( googletag.pubads() ) ); } );

    The post 4 of the Most Important Elements of the Lightroom Library Module by Simon Ringsmuth appeared first on Digital Photography School.


    Digital Photography School

  • Zaha Hadid’s Legacy: Proposal for London by the Architect’s Final Students

    [ By SA Rogers in Architecture & Cities & Urbanism. ]

    bishopsgate-proposal-2

    The legacy of famed architect Zaha Hadid continues to unfold months after her death at age 65 as a long list of her final projects continue in various stages of development, from those currently under construction to concepts that may forever remain unbuilt. But even putting aside the many outstanding and unrealized designs remaining on her firm’s docket, Hadid’s influence on modern architecture lives on through the work of her students at the Yale School of Architecture.

    bishopsgate-proposal-8

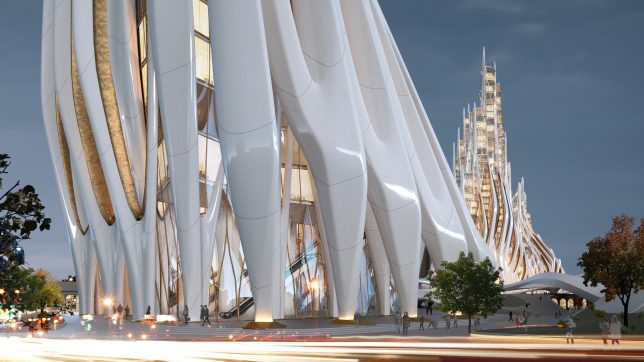
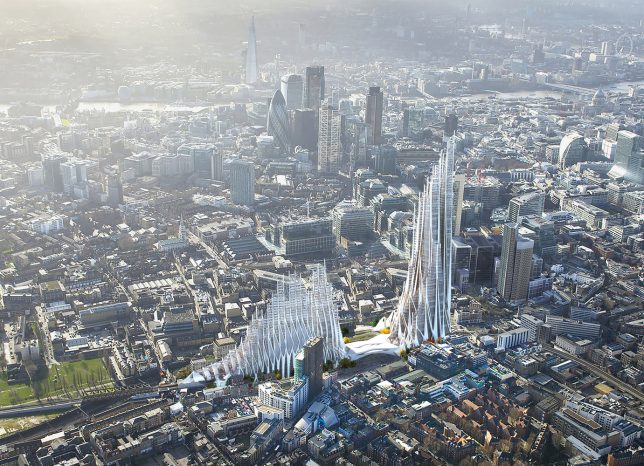
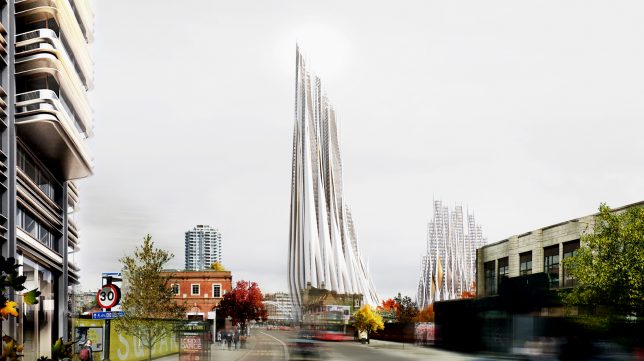
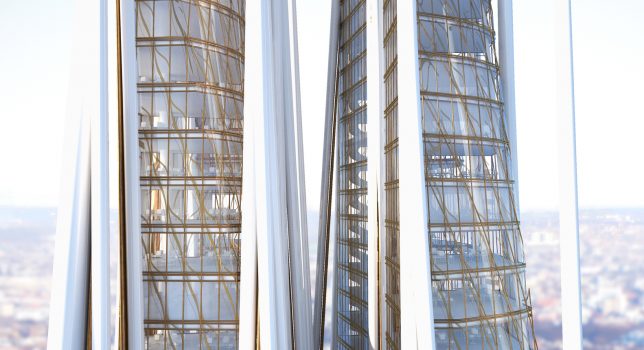
    During their semester-long project at Zaha Hadid’s final studio course, a group of students envisioned a striking new development for London’s Bishopsgate Goodsyard, a flowing white complex in the architect’s signature biomimetic style. Consisting of a high-density residential tower, a mid-rise block and a train station acting as a bridge between the two, the proposal adds some height and visual interest to the largest undeveloped piece of land remaining in central London.

    bishopsgate-proposal-1

    bishopsgate-proposal-5

    Lisa Albaugh, Benjamin Bourgoin, Jamie Edindjiklian, Roberto Jenkins and Justin Oh present a futuristic network of  gleaming white structures with a skeletal appearance, as if someone took the carcass of some extinct megabeast and reassembled it into a deconstructed approximation of a Gothic cathedral. The spaces between the rib-like columns are filled in with wavy walls of glass decorated with veinous ribbons of gold.

    bishopsgate-proposal-3

    bishopsgate-proposal-4

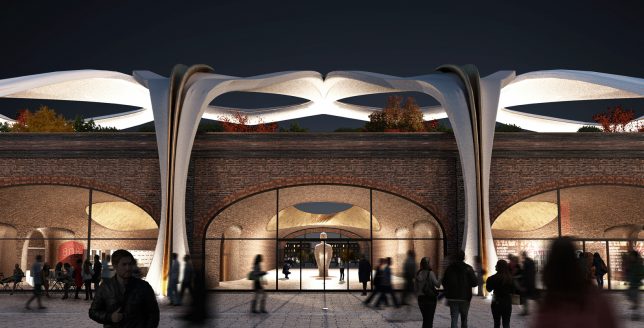
    Viaducts at the base act as access points to a series of public spaces, including a park landscape, connecting the various functions within the complex. All of the different elements that would normally be contained within a traditional tower core are instead spread into individual ‘strands,’ like the elevators, stairs and mechanical systems, freeing up the tower’s center for unusual cross-views out of all that glass.

    bishopsgate-proposal-6

    bshopsgate-proposal-7

    It would seem that the proposal is pure fantasy, given that the developers of the site, Hammerson and Ballymore, have already produced their own proposal. But Londoners have made it clear that they aren’t too keen on that design, with over 11,000 residents signing a petition against it. Critics argue that the developers’ proposal “would result in unacceptable and avoidable significant negative impacts” to the neighborhood.

    Share on Facebook


    [ By SA Rogers in Architecture & Cities & Urbanism. ]

    [ WebUrbanist | Archives | Galleries | Privacy | TOS ]


    WebUrbanist

  • Google publishes gallery from upcoming Pixel smartphone

    $ (document).ready(function() { SampleGalleryV2({“containerId”:”embeddedSampleGallery_0409860841″,”galleryId”:”0409860841″,”isEmbeddedWidget”:true,”standalone”:false,”selectedImageIndex”:0,”startInCommentsView”:false,”isMobile”:false}) });

    Google’s camera product manager Issac Reynolds has posted the first gallery from the company’s upcoming Pixel smartphones, which received the highest DxOMark Mobile score to date. While we can’t be sure if any processing has been conducted, we think the results  look promising. You can view and download the originals on Reynolds’ Google Photos page.

    Articles: Digital Photography Review (dpreview.com)

  • In Europe? You Don’t Want to Miss Pop_UP Berlin in Three Weeks

    At the end of the month, GPP PopUp is coming to Berlin. If you are in Northern Europe, this city is within reach for you. And for a variety of reasons, it’s almost certainly the last time Pop_UP will be held in Europe.

    Here’s why you shouldn’t miss it.

    A Compact, Info-Filled Weekend

    This will be my third time teaching at Pop_UP. Over the course of one weekend—two days—the instructors there work hard to bring you a learning experience that centers on photography, but hits it from four unique and different perspectives.

    That’s important, because no two photographers’ environments are the same. And learning from people who have successfully navigated various waters in different ways can be very valuable.

    The sessions are all pretty fast paced. We each have a lot to cover and only a few hours to do it. For that reason, we each tend to step back from the daily cacophony and concentrate on things that might spark you to think about your own situation in a different way.

    I wouldn’t expect to learn 500 things. If past Pop_UPs are a guide, I think the more likely experience is that you’ll get a deeper look into a couple dozen new concepts—many of which will be things that you have never really considered before.

    People don’t learn sequentially. Accumluated knowledge kind of builds up, then something causes that dam to burst and important concepts come together in a very concentrated way. Which is why there are times when you suddenly realize multiple things at once.

    Creating those intersections is the main goal of my session at Pop_UP. But more on that in a minute.

    Greg Heisler is a One-Off

    Consider Greg Heisler. And yes, I realize there is a Joe and a Zack involved. But they each have their own online venues to talk about their approach to Pop_UP. But Greg really doesn’t.

    So let’s talk about him for a minute.

    First, Greg is one of the world’s pre-eminent portraitists. You’ve grown up seeing his work. And you think there is this gap, for lack of a better word, that separates his work from yours. And in some ways you are right. The technical gaps are there, because he has a mastery of photography and lighting and color that few can match.

    But what I have learned, watching him teach in his very open way, is that the camera-related gaps only partly explain the difference between his work as compared to that of the average “good” photographer.

    I have learned that there are other gaps. Important gaps. Probably more important than the photography-related gaps that we can easily identify.

    His work ethic, his thought ethic, his approach to dealing with the people in front of his camera, his respect for (and knowledge of) the history that came before us as photographers—all of that is at least as important as his mastery of photography or lighting.

    Probably more important, actually.

    Spending a half a day seeing that is something that is hard to put a value on. You go in expecting F/stops and you coming out realizing the important stuff had nothing to do with F/stops. If you have read 50 Portraits, you already have some idea of what I am talking about.

    (And if you own his book, bring it. Get him to sign it. In 100 years, no one is going to remember me. But Greg Heisler will still be alive and well in the lexicon of photographers.)

    Yes, he will almost certainly be shooting at Pop_UP. And it will be a learning experience to watch him work. He might use a Profoto light, or he might use a cheap fluorescent tube from a local hardware store. To Greg, it’s all just light. His versatility and unflappability is a lesson in itself.

    Lastly, back to the idea of this being a one-time opportunity. Because for the most part, Greg has been taken off of the market.

    Syracuse University in upstate New York has very wisely snapped him up to keep largely for themselves. He loves it there. It’s a wonderful college town with a steady stream of curious (and lucky) young minds for him to mold.

    Which means he almost never teaches externally these days. And because of his academic schedule, when he does teach it is generally close to home.

    If you are in Europe, this might well be the only chance you have to learn from him.

    And I Have to Follow That

    I have taught in a lot of places—many cities, many countries. And suffice to say that following Greg Heisler in any kind of teaching environment is its own little nightmare. Not unlike the one where you show up at school without pants.

    It stems from a deep-seeded fear of relative inadequacy, something I readily confess as a “lighting guy” in the context of Greg. So you can damn-well be sure I won’t be talking about lighting.

    “What an amazing cooking presentation by Julia Child! Please stick around for David Hobby, who is next and will show you how to make toast…”

    No.

    So my class on Sunday afternoon will be more about the things that surround photography:

    • How do you find the areas in photography where you are particularly well-suited?

    • How do you identify—and create—areas of extreme competitive advantage?

    • How do you create the ecosystems that, in turn, create the positive feedback loops you need?

    • Which “outputs” from those systems do you optimize for? (Not just money.)

    • Is it a good idea to optimize for money? (Not usually.)

    • What balance do you need to create to foster sustainability?

    • Where do your best ideas come from?

    • Is it possible to engineer a stream of strong incoming ideas? (Yes, definitely.)

    I have watched for ten years as my particular field—editorial/photojournalism—has largely collapsed. Many assignment fees today don’t even cover the cost of periodic gear replacement. It’s crazy.

    So my last ten years have been spent studying and practicing new ways to approach the “new” world of photo and its related professions. To learn to adapt to a world that has completely shifted under my feet, and to anticipate those changes still yet to come.

    This is not something I write about on this site, simply because it is way out of the lighting niche. But it is something that I feel is existentially important for photographers to understand.

    That’s the deep dive we’ll be taking on Sunday afternoon.

    So That’s One Day

    Like I said, I’ll let Joe and Zack speak for themselves. Feel free to ping them on Twitter if you have any Q’s. But for those of you joining us in Berlin, this is what’s on tap for your Sunday.

    Pop_UP is not a forever thing. We have been to UK, Asia, US—and this month, EU. If it continues, it would almost certainly be in South America or Africa.

    If you are in Europe, and you want to attend one, this is your chance. Come join us.

    And if you have photo friends in Europe, please help to spread the word. None of us live there, so we would very much appreciate your help in that way.

    Thanks—and see you there,
    David

    :: GPP Pop_UP Berlin, Oct 29-30 ::
    Strobist

  • Google Panoramio to shut down on November 4

    Google will be shutting down Panoramio, its website for sharing photos of the world, on November 4. Now that Google Maps and Local Guides both have a photo-uploading feature, says Google, ‘we’ve decided to move forward with closing down Panoramio,’ something the company first announced plans for back in 2014. Many users were unhappy with the original announcement, and little has changed now that the shutdown is weeks away.

    Panoramio was an early Web destination for photographers and travelers to share location-specific photos, enabling anyone to pull up a location on a world map and view any available images of it. That same feature is now available on Google Maps; in fact, Panoramio users who have shared content will Google Maps will still have their photos appear on the latter service after Panoramio shuts down.

    Panoramio accounts linked to a Google account will automatically have their photographs uploaded to Google Album Archive at full resolution, the company says. In addition, Panoramio users will retain access to their account photos (within Panoramio) until November 2017, though new uploads and interactions with photos will be restricted. Google is encouraging Panoramio users to sign up under its Local Guides program.

    Users who want to abandon Google entirely can export their Panoramio photos via Google Takeout if they have a Google account. The only exception are legacy Panoramio accounts; in this case, photos can be exported as a zip file via account settings > ‘Data Liberation’ > ‘Get photos’.

    Via: CNET

    Articles: Digital Photography Review (dpreview.com)

  • The Power to Change: 12 Brilliantly Reclaimed Energy Stations

    [ By SA Rogers in Architecture & Public & Institutional. ]

    reclaimed-power-plants-gasholder-park-1

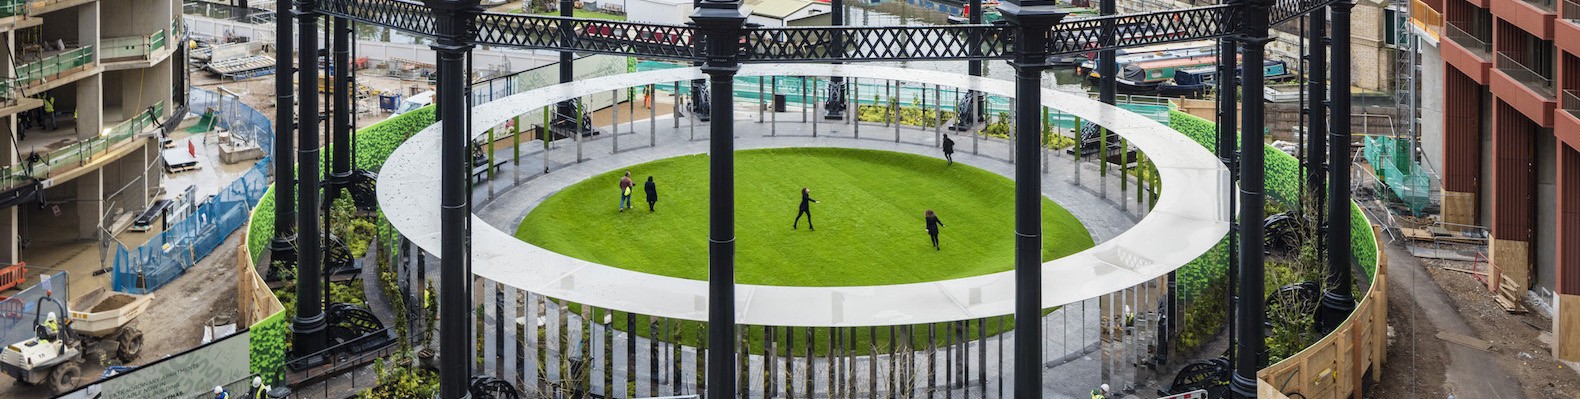
    As cities grow and their power needs change, the historic and often surprisingly beautiful structures holding turbines, generators, coal and gas are decommissioned, becoming prime candidates for redevelopment. A recent wave of power stations built at the turn of the 20th century, packed full of period details, have been transformed into cultural centers, hotels, apartments and more, including London’s stunning Battersea Station.

    Power Plant to Cultural Art Space by Renzo Piano, Moscow

    reclaimed-power-plant-renzo-piano

    reclaimed-power-plant-renzo-piano-2

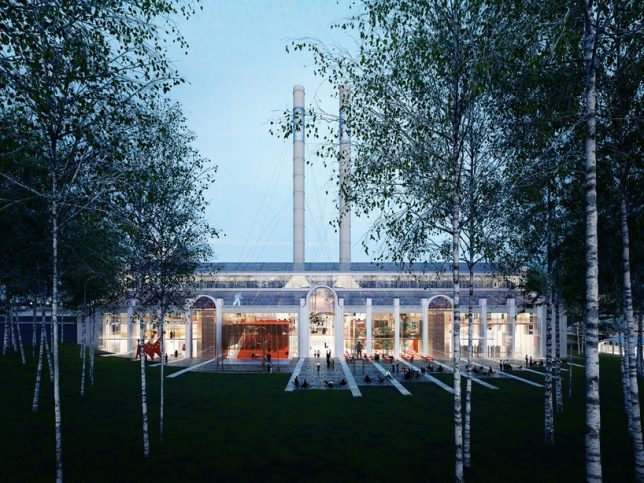
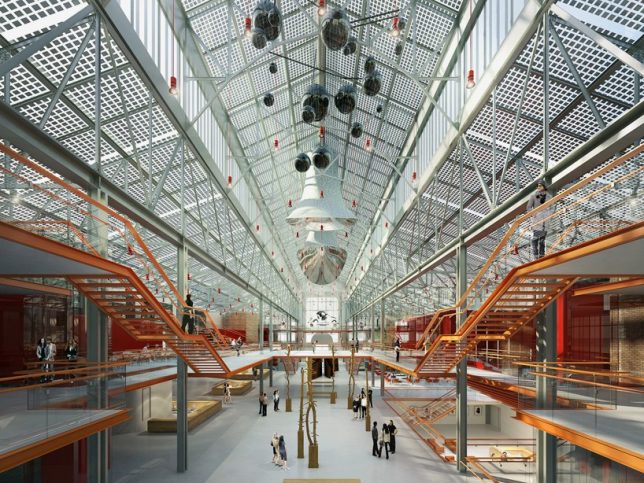
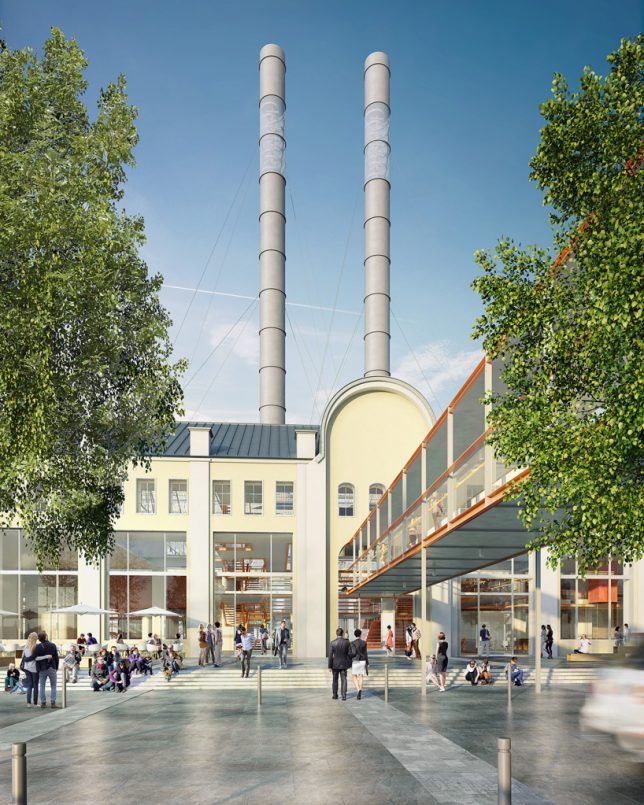
    A historic power plant on the banks of the Moskva River in Moscow will become a new cultural center, transformed as part of a larger contemporary art site by architecture firm Renzo Piano Building Workshop. The main building was built between 1904 and 1907 and will be extensively renovated to add lots of glass, while the original towers remain intact to provide natural ventilation.

    Battersea Power Station to Residential Tower, London

    reclaimed-power-plant-renzo-piano-4

    reclaimed-power-station-battersea-1

    reclaimed-power-station-battersea-2

    reclaimed-power-plant-battersea-3

    battersea-foster

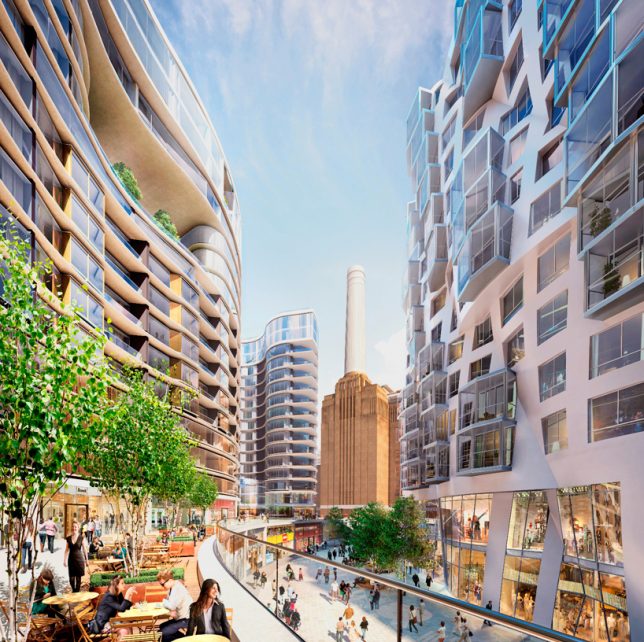
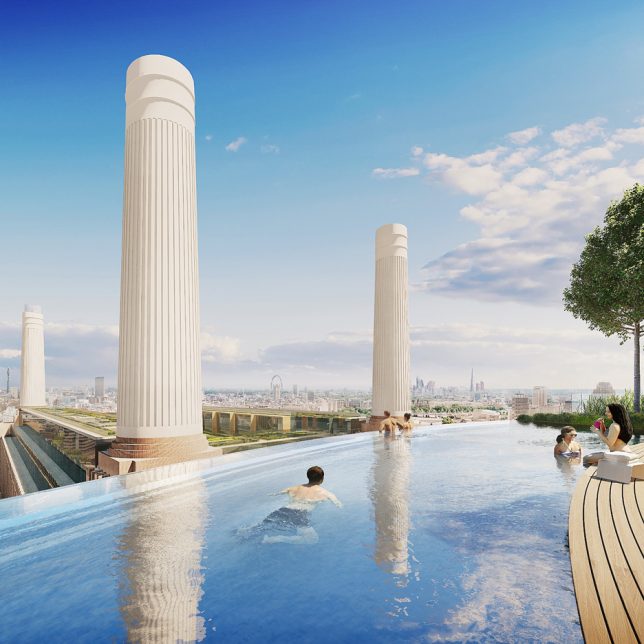
    A pair of twin coal-fired power station buildings set on the edge of the Thames River in London were decommissioned way back in 1983, but are considered such an important landmark in London, they’ve been preserved, awaiting the perfect redevelopment plan that takes advantage of their beautiful Art Deco interior fittings and decor. One of the largest brick buildings in the world, Battersea Power Station has been the subject of many proposals, including turning it into an eco-dome or an amusement park, all of which have ultimately fallen through. The latest places the original building at the center of a mixed-use complex by architects Norman Foster and Frank Gehry, which includes both luxury residences and affordable homes, a hotel, a gym, and a series of shops, cafes and restaurants.

    Brick Power Station to 5 Star Hotel, South Africa

    reclaimed-power-station-south-africa-1

    reclaimed-power-station-south-africa-2

    reclaimed-power-station-south-africa-3

    reclaimed-power-station-south-africa-4

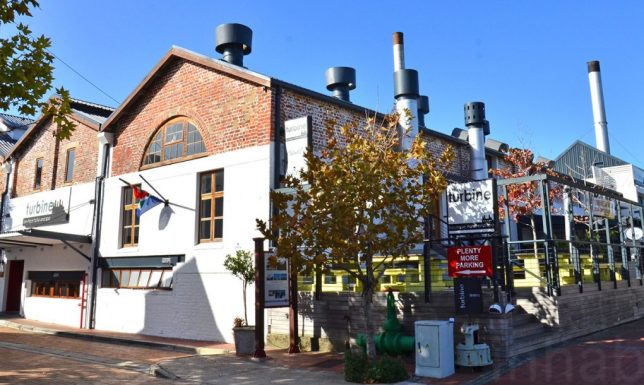
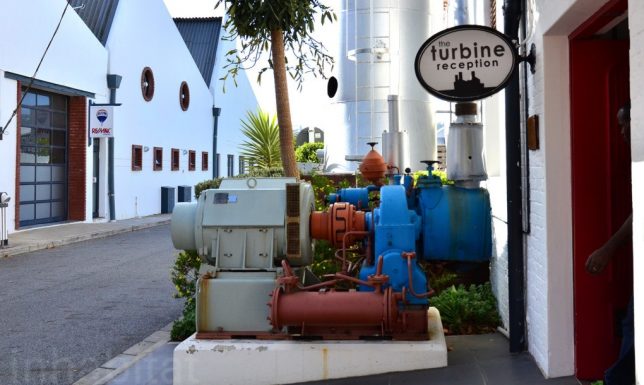
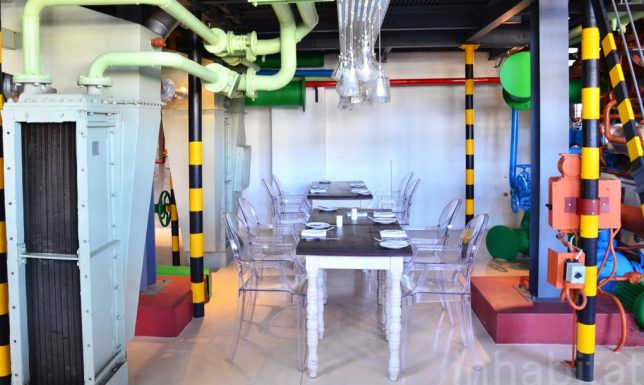
    Decommissioned since 2001, this old power station on Thesen Islands in South Africa once used waste timber to power huge turbines, which supplied electricity to nearby Knysna and Plettenberg Bay. Now, it’s part of the 5-star, 24-room boutique Turbine Hotel by CMAI Architects, redesigned to keep as much of the original structures and equipment intact as possible. Mechanical equipment, operating panels, piping and the original turbines are all incorporated into the new complex, and things like gauges and dials were worked into various parts of the hotel. The entire development scheme is considered a ‘living museum,’ where guests can clearly see what it used to be while experiencing it in a new way.

    Coal-Burning Power Plant to College Learning Center

    reclaimed-power-plant-beloit

    reclaimed-power-plant-beloit-2

    A coal-burning power plant in a small Wisconsin town will become part of Liberal Arts institution Beloit College as a leaning and wellness center. With Chicago-based Studio Gang Architects at the helm, the project will preserve the industrial feel of the site while offering a coffee shop, conference hall, lounges, lecture hall and theater as well as a competition swimming pool, 3-lane track, 10,000-square-foot fitness center and 17,000 square-foot gymnasium. It’s set to be finished in 2018.

    Next Page – Click Below to Read More:
    The Power To Change 12 Brilliantly Reclaimed Energy Stations

    Share on Facebook


    [ By SA Rogers in Architecture & Public & Institutional. ]

    [ WebUrbanist | Archives | Galleries | Privacy | TOS ]


    WebUrbanist

  • 12 Sources Where You Can Make Money in Photography

    It can be a daunting task when you first start looking for ways to make money in the photography world or find photography jobs. On one hand, there seems to be, and are, many different avenues you can take to achieve an income, but on the other hand, each of these avenues can be difficult to break into.

    I created this list to help focus you on your path to finding the right way to achieve income through your work. Take your skill level, your location, your situation, your short-term goals, and your longterm goals all into account and choose the strategies that you think will be most effective. Hit those strategies hard. There is no need to waste your valuable time on the other stuff.

    1. Friends, colleagues, and family
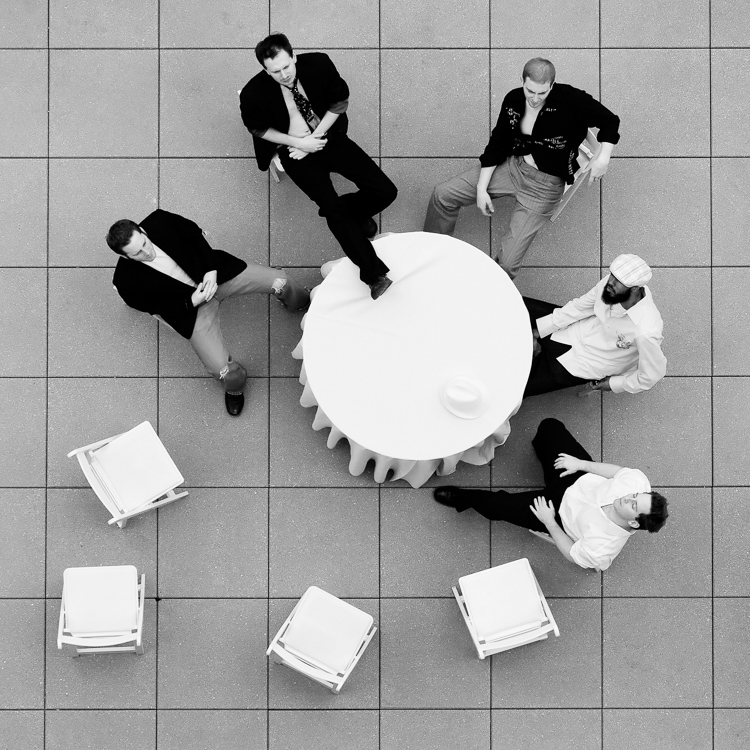
    Band Photography

    Band photography

    There are few photographers that I know who did not gain their first photography jobs through friends and family. Your friends, colleagues, and family already know you and your work ethic (which I hope is strong). They trust you and will be willing to recommend you. Some will even hire you. Everyone needs photography in some way and people often want to work with a person they know. Let that person be you.

    Think about how your network can help propel you where you want to go. Who might they know who can help your career? Ask for an introduction. If you want to do business or law firm portraits, ask your friends who work for those type of companies to put you in touch with the person who hires photographers. In addition, influential people (connectors) can be a big boon to your business. Reach out to any of these people that you might know or seek out an introduction from a friend who might know them.

    Send out an official announcement about your business. Create a mailing list, and send out a professional looking email that talks about your services and how you can help people. It’s one thing to talk in passing to your friends and family about it, but it’s another to be official and explain how you can help them or the people they know while showing your accompanying work.

    2. Assisting and internships

    Business Portrait

    Business portraiture

    Besides your personal network, assisting and internships are the other primary way that you can effectively break into the photography business. Be prepared to make coffee and sweep floors (tip: if you learn to make good, strong coffee, everyone on a photo shoot will love you). Doing this will allow you to learn about how a true photography business runs quicker than at any photo school. It will give you a nuanced insight that you cannot get in any other way.

    If you assist a portrait photographer, you will learn about lighting really well because you will be in charge of setting up the lights. If you assist for a wedding photographer, you will likely be a second shooter. In that role, you will gain invaluable wedding experience without the risk of shooting a wedding for the first time without any support.

    It will allow you to build a new network around you. The photographers you work for will pass along jobs that they cannot do. You will make friends with the other assistants and you can help each other out in the future when you all start shooting on your own. The relationships and skill building that happens in these environments is invaluable.

    3. People that need photographs for their wall
    Canvas Print

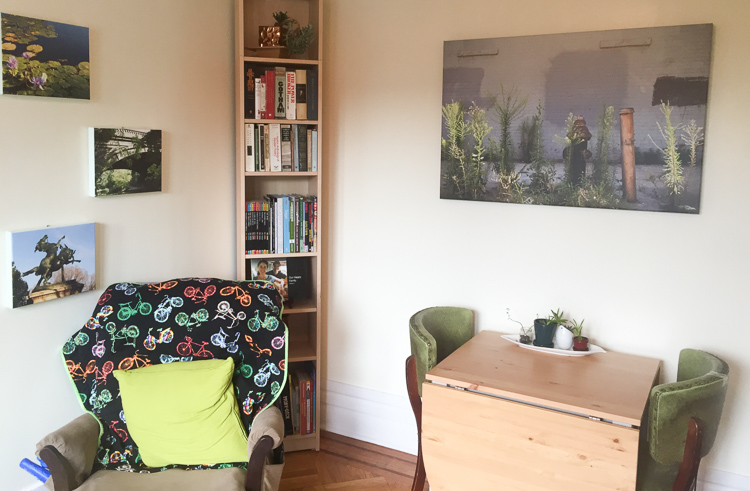
    Canvas wall print

    If you are aiming to sell your photographs, you can market directly to businesses, restaurants, local galleries, everyday people, collectors, and your network. You can be a go-to person for gifts. However, keep in mind that this is a very hard way to make money. It can take years of dedicated work to build up and you will need to actively market yourself.

    Studying marketing and selling is important for anything you do on this list, but particularly if you are aiming to sell your work. Most photographers choose other ways to make a majority of their income at first while building up a print sales business over time.

    4. Local businesses

    Business Portrait

    Business portraiture

    You know the needs of your local businesses well, and most likely you already know the people who own them. Figure out what they might need, whether it’s business portraits, shots of their food or products, event or conference photography, or work for their walls. Approach them with a plan in mind, and ask to set up a meeting to discuss your ideas and how they can benefit.

    Better yet, if you know anyone that works for the business or has a relationship with someone who does, ask for an introduction first. Introductions will give you a huge advantage.

    5. Couples, weddings, and engagement photography
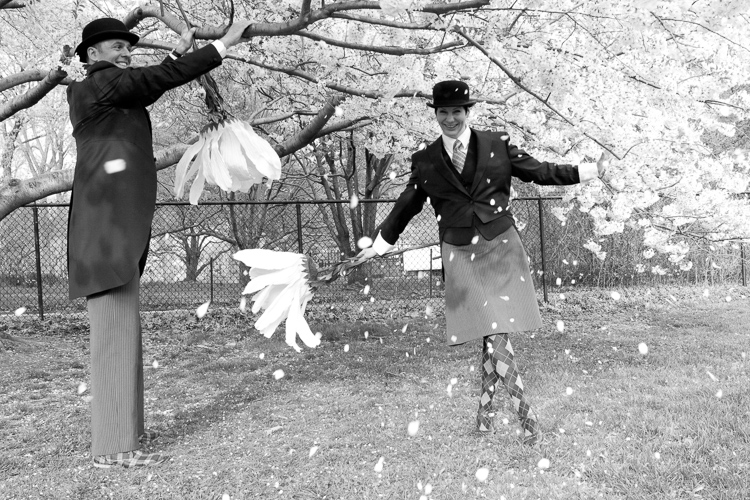
    Engagement Photography

    Engagement photography

    Wedding photography is a big business for photographers. It takes a lot of time to get good and is very hard to do well, but it is one of the best ways to make a good living at photography. If you are aiming to start off with wedding photography, I suggest trying to at least work as a second shooter for a while to gain a portfolio and skills.

    But there are other ways you can take advantage of this as well. You do not have to be a wedding photographer to be an engagement photographer. Couples and family photography is a very viable business wherever you live and engagements are a big part of that, whether or not you are a wedding photographer. Learn the best locations in your area to photograph and market to families and newlyweds. This may also be a good first-step to transition into the wedding world.

    6. Travelers
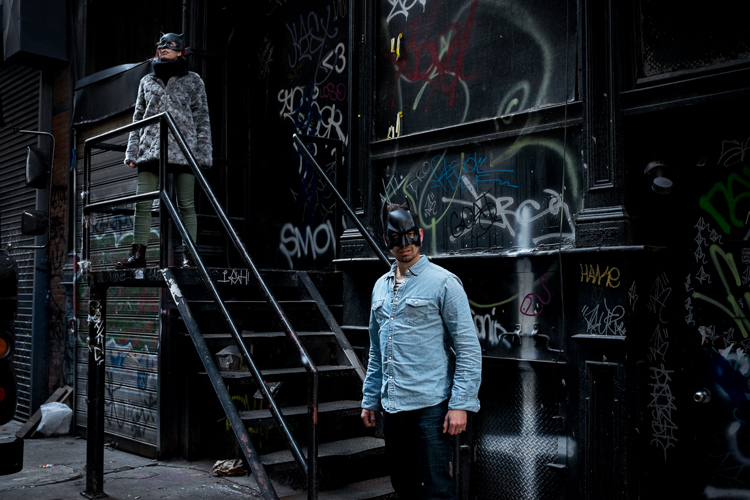
    batman_couple

    Tourists from a workshop

    If you are in an area that gets any sort of tourism, you can become a photography tour and workshop leader. Learn about all the best locations in the area and the best times to photograph them. Learn some history too. Just because you are running a photography tour does not mean that history isn’t important. People should be able to get to know more about what they are photographing. They want to learn that stuff. Market yourself through hotels, tourism companies, local tourism boards, and Google.

    7. Actors, artists, and students
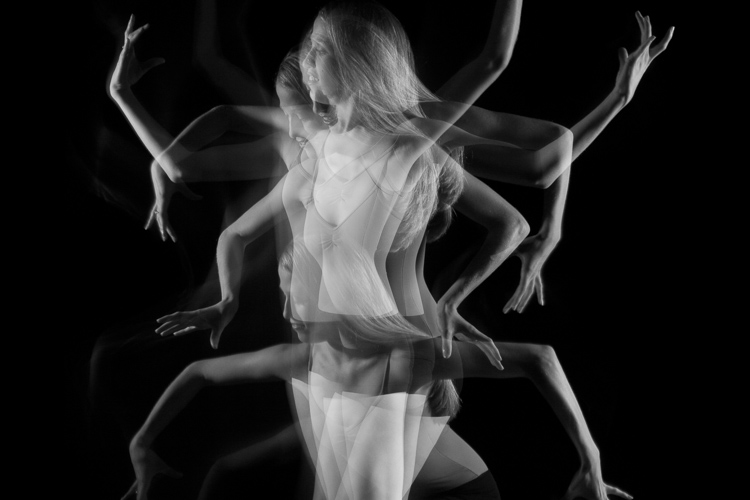
    Dancer

    Dancer

    There is a whole photography sub-industry that caters to creatives and students. These genres do not usually pay as much as working with business firms, but they can as you improve and move up. Go advertise where these people hang out. Find a connection at your local schools. Learn which of your friends have high school age children that need photos taken, then begin to work with their network of friends. Try to get into acting or art schools.

    8. Conferences and events
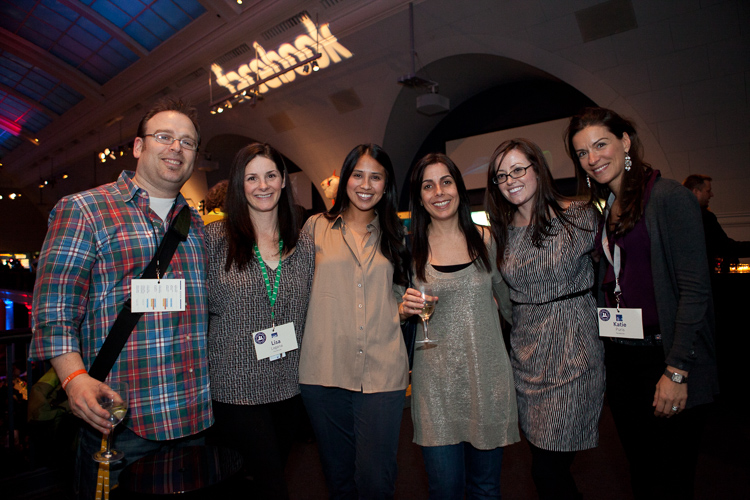
    Conference and Event Photography

    Business Conference

    Event photography is another way that photographers can start making money right away. Event photography is on the easier and less stressful end of the photography spectrum, as long as you are okay with the socializing. There is not as much pressure involved as shooting a wedding, and the technical skills are not as difficult to master as other forms of photography. Learn to use your camera, your flash, how to shoot in low light, and how to get people to smile in photos and you’ll be good to go.

    9. Trade and art shows – networking events

    Trade Show

    Trade event

    Seek out all of the trade shows whose members you think you might be able to work with. Whether it’s a business related show or a local tourism event, many of the attendants will need your services. Meet people, get to know them, don’t come on too strong, and let them know that you’re there if they ever need your services. The more you attend these different events, the more people will recognize and get to know you. Just this exposure can be very valuable in the long run.

    In addition, many areas have arts and crafts fairs and shows. This is a great way to get your work seen by your community. It’s a lot of work, so plan carefully and try not to go overboard at first. Do your research coming in, and use the time at the show not only to sell your work but to get to know people in your community. Even if someone is not ready to buy your work, it doesn’t mean that they will not want to in the future or for a gift. Get to know them, and see if they want to sign up for your mailing list, so you can keep your work in front of them in the future.

    10. Organic: Google and social media
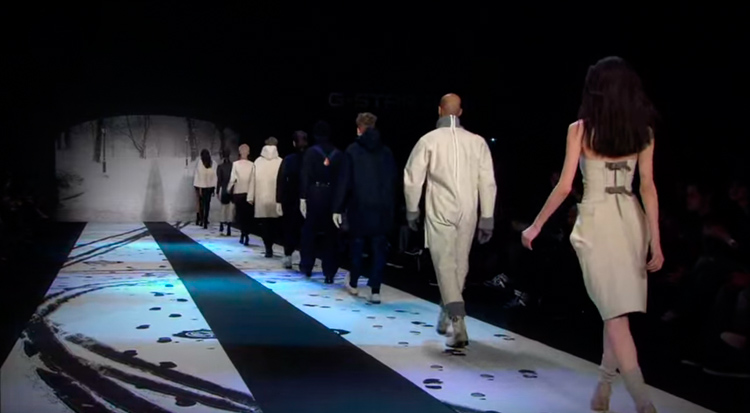
    GStar Fashion Show

    An image used as a fashion show backdrop

    Due to all the competition, ranking highly in Google is tougher than it used to be. But with some focus and time, it is very doable. Learning how to rank higher in Google involves too much information to do the topic justice here, but you should follow resources and websites such as problogger.com (our own Darren Rowse’s other site), which will help you learn to make more of your living through the internet. You will need a website of course. Also keep in mind that besides a variety of unique factors, Internet links are the lifeblood of ranking highly in Google, so it is necessary to figure out how to get other people to link to your site and mention your work.

    In addition to your email list, build a Facebook business page and an Instagram page to grow your following. This will help you keep your work in front of people so that they will remember you the next time they need your services.

    11. Local internet marketing

    Business Portrait

    Business photography

    You can market your work to all types of business on the internet. However, local websites can be the most important. Local news sites, blogs, or wherever your community hangs out on the internet are important to become a part of.

    Think about how you might be able to work with these websites or be of value to them. If you join certain communities, you do not want to go crazy marketing to them. Join the community, be a valuable member, answer questions and offer advice, and just get to know people. That’s how you market in these situations. If you do this the right way, they will like and trust you and will want to work with you in the future.

    12. Other photographers

    There is so much competition between photographers that it can get incredibly frustrating. Other photographers share the same passions that you do, and they are going through the same trials and tribulations. Seek out the good ones and become friends with them. Offer to help them if they need. Pass along jobs if you can’t fulfill one. Grow together.

    Over time, you will surround yourself with an invaluable community and you will all be stronger together. The photographers who feel too competitive to give you the time of day will then not have the advantages that the rest of you do.

    Conclusion

    Making money in photography can be challenging and hard especially when you’re getting started. These tips should give you some ideas to move forward with in your photography career. If you have any other ideas that have worked for you please share them in the comments below.

    googletag.cmd.push(function() {
    tablet_slots.push( googletag.defineSlot( “/1005424/_dPSv4_tab-all-article-bottom_(300×250)”, [300, 250], “pb-ad-78623” ).addService( googletag.pubads() ) ); } );

    googletag.cmd.push(function() {
    mobile_slots.push( googletag.defineSlot( “/1005424/_dPSv4_mob-all-article-bottom_(300×250)”, [300, 250], “pb-ad-78158” ).addService( googletag.pubads() ) ); } );

    The post 12 Sources Where You Can Make Money in Photography by James Maher appeared first on Digital Photography School.


    Digital Photography School

  • 10 Tips for Better Interior Photography

    Whether it’s because of a love of seeing what other people do with their homes, or because we’ve got a friend in real estate, loads of us are turning to real estate photography. Of course anyone can run around and shoot a house in a few minutes. It may be useable, but better images command a better price for a house, either for sale or rental. So what can you do to make your interior photography stand out from the others?

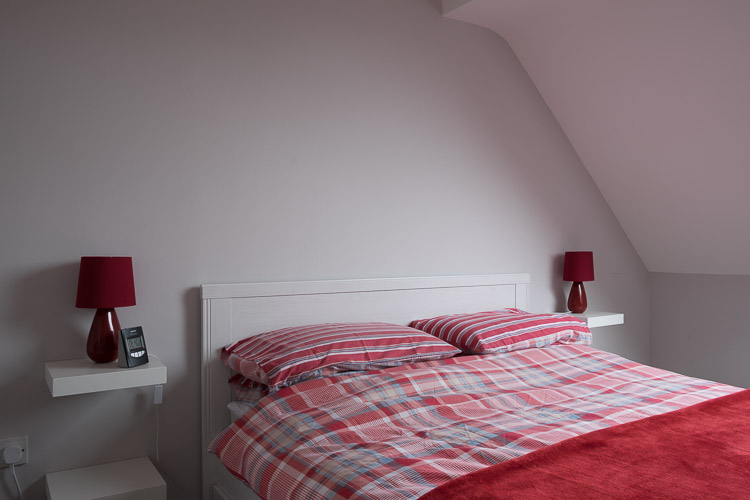
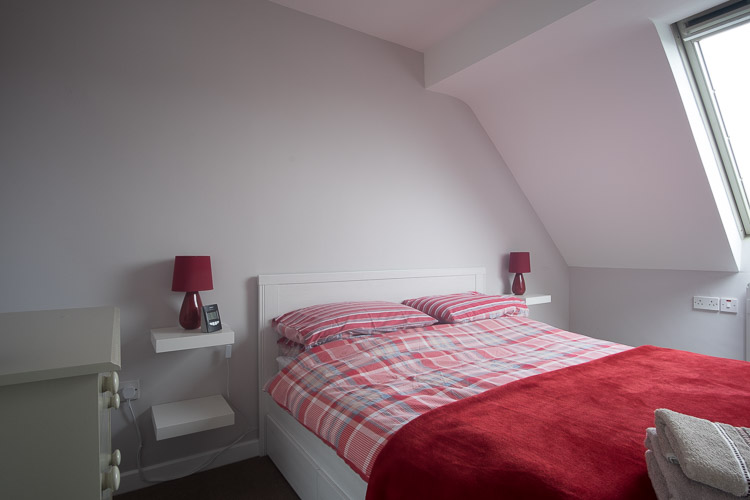
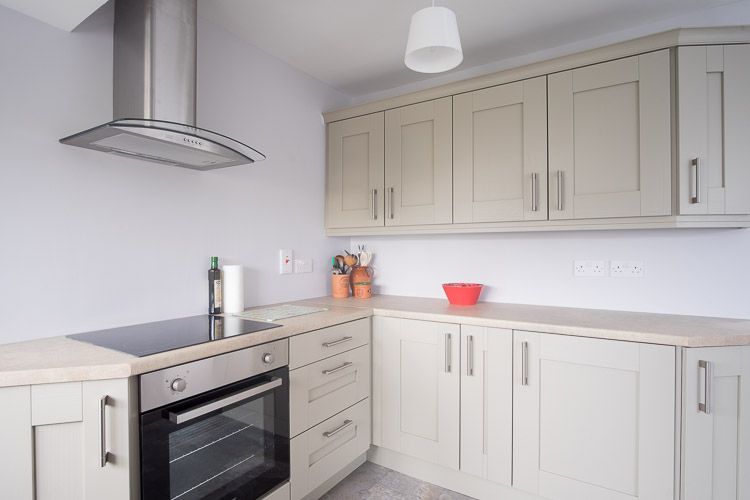
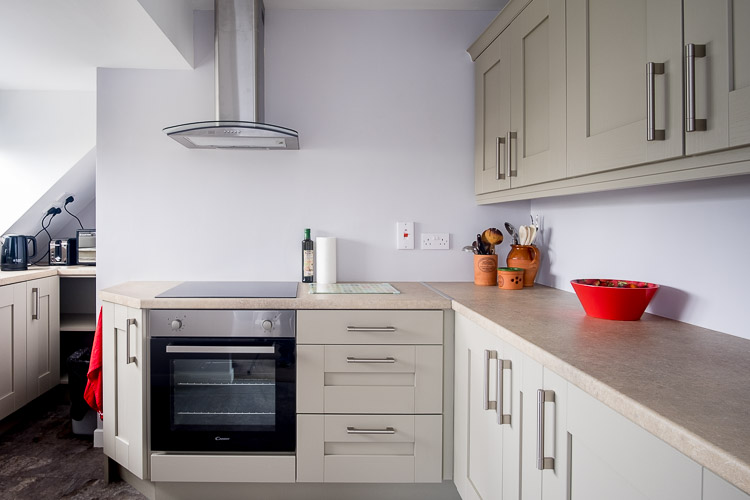
    Well, quite a lot actually. Some of it just boils down to a basic understanding of what an interior shot requires. Great angles, straight walls, and even light make a massive difference to the shot. We’re not talking about high end, multi-light setups with tilt shift lenses here, just getting better shots.

    #1 – Use a tripod

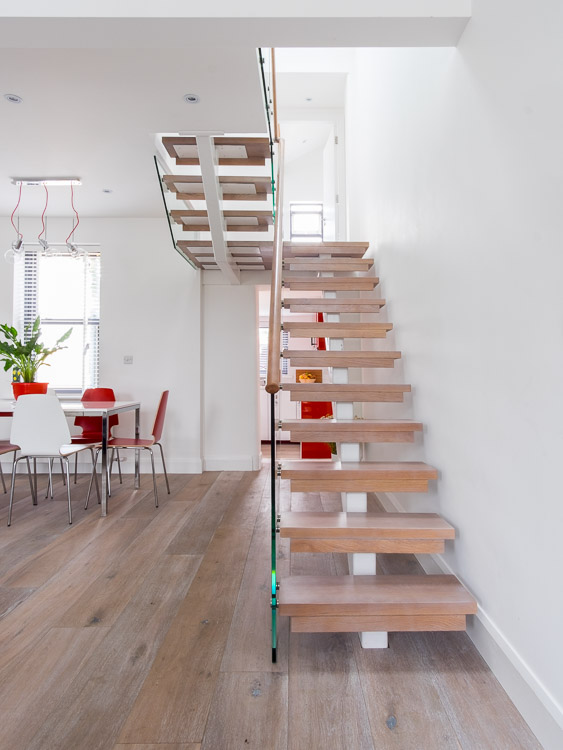
    Tips for better interior photography 1

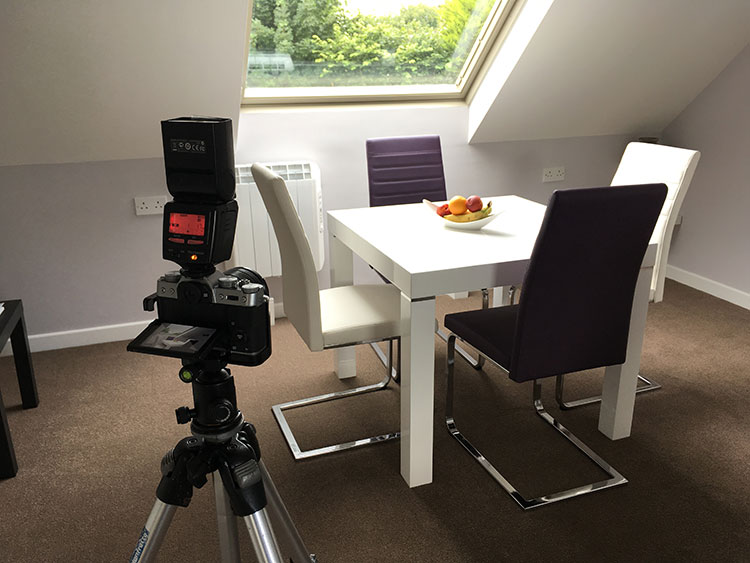
    You can nip around and shoot handheld, but for many houses, you may need longer exposures. High ISO will just introduce too much noise, so a tripod is the best option. It does slow you down, but it also makes you concentrate on the shot more. You can use the time to check around the frame for stray cables, or clutter, and create the composition before you hit the shutter button. A few of the other tips benefit from using a tripod as well.

    #2 – Use Live View

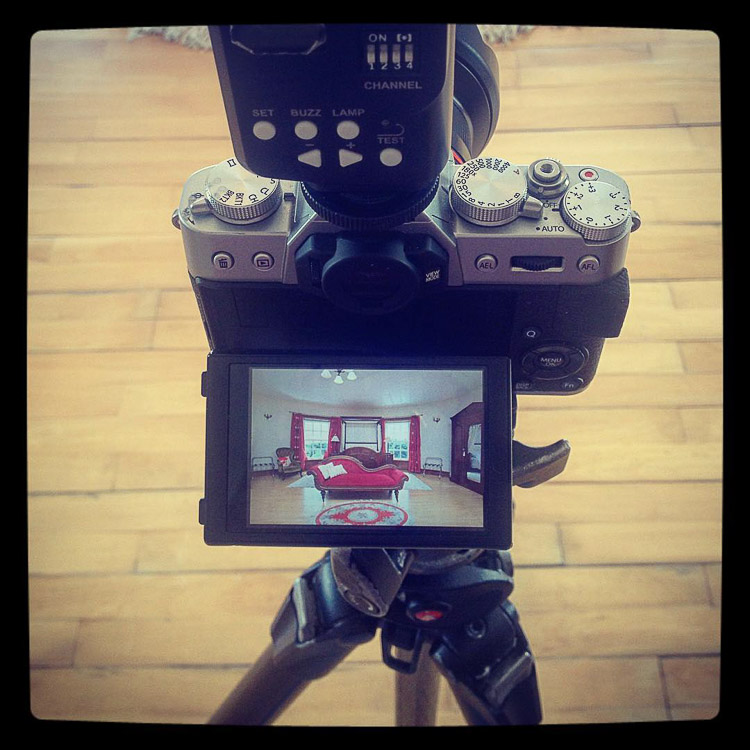
    I shoot with a Fuji X-T10, so everything is live view, either by screen or by electronic viewfinder. Most cameras have a Live View option (if your camera has a video mode you likely have Live View), meaning you can see the shot before you take it. It’s even better if the camera has a tilt screen.

    Tips for better interior photography 2

    #3 – Go wide

    Shooting wide can make the room look great, though you need to be careful that you don’t over do it. Sitting tight into one corner while you try to get the other three corners in just looks wrong. Don’t do it. Anything in the 16-24mm range on full frame (or the crop equivalent which equates to 10-16mm approx.) is great. You also don’t need to show everything. Our eyes and brain will fill in gaps, so half a cabinet and the pillows section of a bed work fine in a photo. I use the Samyang 12mm lens (check prices for that lens on Amazon or B&H Photo) for my wide interior work.

    Tips for better interior photography 3a

    Tips for better interior photography 3b

    #4 – Shot one or two point perspectives

    There are standard views you can shoot. A 1-point perspective is shooting so the sensor plane is parallel to a wall. It shows the side wall leading into the back wall and helps set a scene. A 2-point perspective is where you’re shooting into a corner. The corner doesn’t need to be centered in the frame, but don’t try and show three walls.

    Tips for better interior photography 4a

    Tips for better interior photography 4b

    #5 – Shoot from mid-room height

    We can’t all afford a tilt-shift lens to keep perspective in check, so it’s a really good idea to shoot with the camera at or slightly above mid-room height. This means you can keep the camera aimed out straight to keep the walls vertical. While the perspective distortion you get can be corrected in post-production, it’s much easier to get it right in camera. This is another reason to use a tripod as well.

    #6 – Use a bubble level

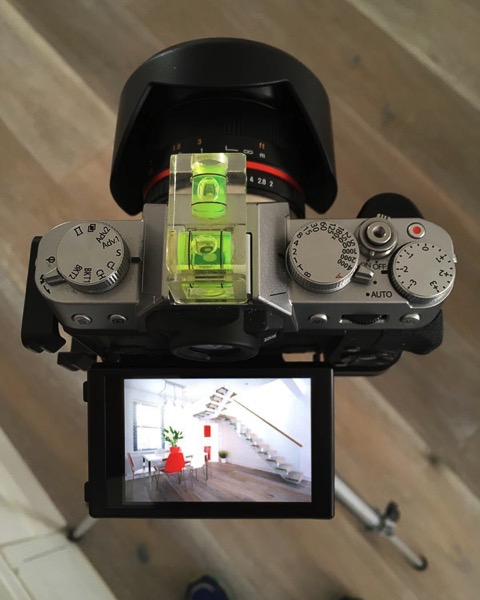
    Most cameras have an electronic level, but not all. Even then, some only work for the horizon line, and don’t show tilt. There’s also a question of tolerance too. I find a little hotshoe bubble level to work great, and you see exactly when the camera is level, both side to side and up and down. The latter is essential to keep the walls looking straight.

    Tips for better interior photography 6

    #7 – Bracket, bracket, bracket

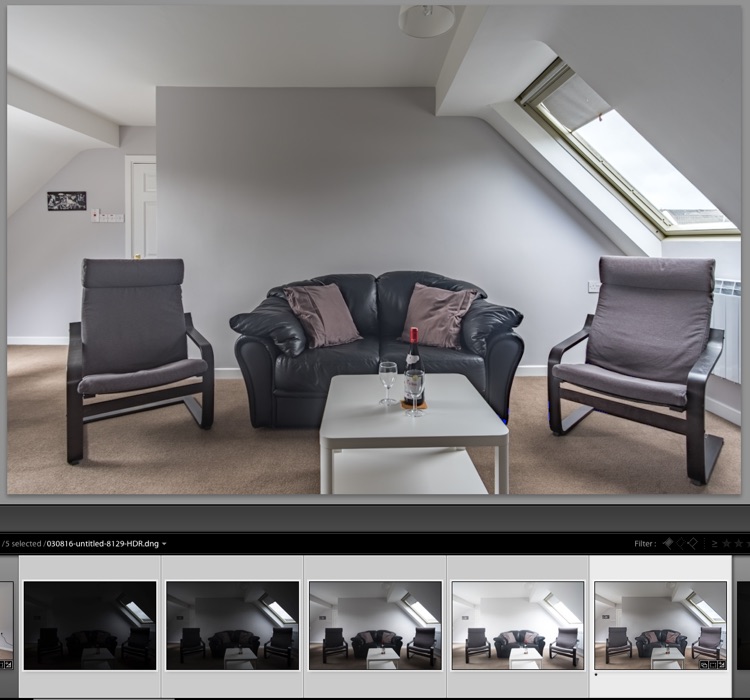
    When shooting interiors, there’s often a huge range of light in a room. From the light outside to the darkest corners of a room. Often it’s more than your camera can capture in one shot. Bracketing is your friend here. This means you’re taking a normal exposure, a shot 2 stops underexposed, and one 2 stops overexposed. Lightroom’s Merge to HDR function can be used to combine the shots for more editing leeway. You can also opt to use more shots (4 stops under and overexposed if you want even more latitude) for example, when you want to show the view outside a window.

    Tips for better interior photography 7

    #8 – Use fill flash

    Another way to bring down the dynamic range is to use bounced flash to fill in the shadows. By aiming your flash at the ceiling and walls behind you, you can lessen the shadows in the area in front of you. It’s possible to do this on-camera, but it works well off-camera too. You can even just hold the flash in your hand pointed at the ceiling.

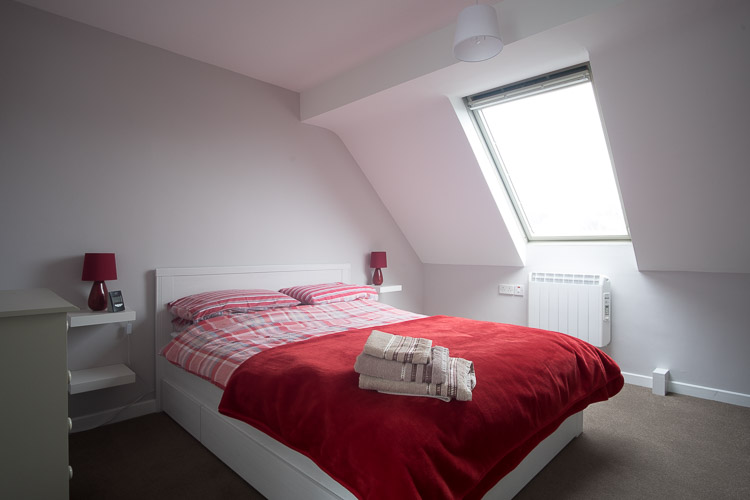
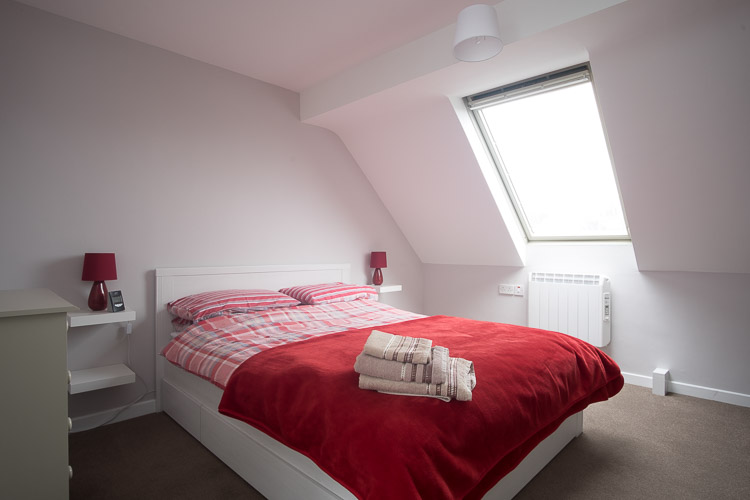
    You’ll need a radio trigger for the flash, or a system with built-in triggers like the Cactus RF-60 (price on Amazon and B&H Photo) and V6ii trigger. See the difference in the towels and the near part of the bed in these photos? That’s what fill flash does. It’s subtle, but lifts the light in the room.

    Tips for better interior photography 8a

    Tips for better interior photography 8b

    #9 – Go vertical for magazines

    With so much interior work viewed on the web, there’s been a shift towards horizontal images in the interior photography world. But print magazines are still out there, and if you want your work published, you’ll need to shoot verticals for single magazine pages. Verticals usually mean letting the eye fill in gaps, so make use of composition to show hints of the room.

    Tips for better interior photography 9

    #10 – Post-processing magic

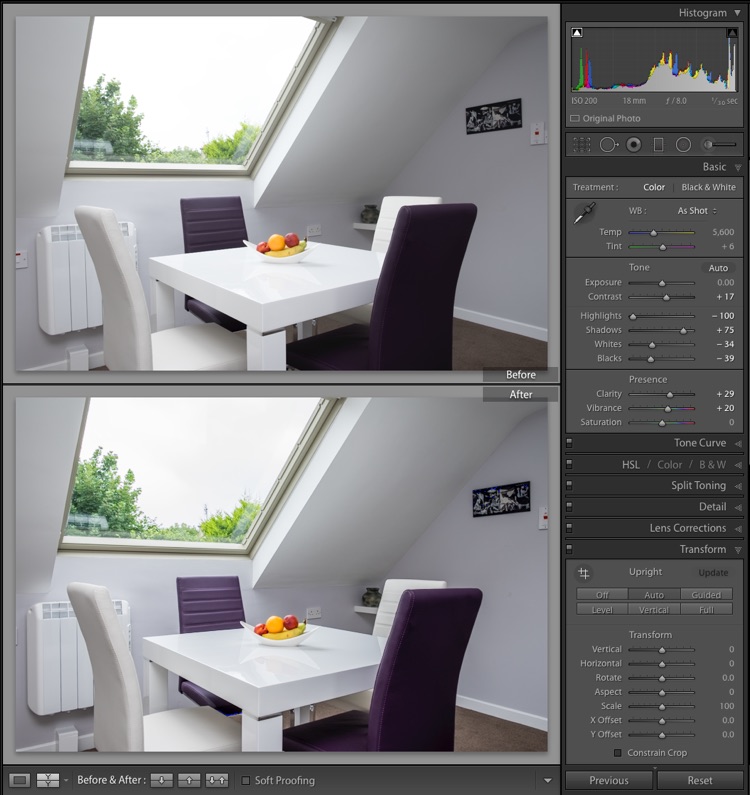
    Get as much right in-camera as possible, but do edit your Raw files to bring out their best. When post-processing in a program like Lightroom, you should bring the Highlights down and open up the Shadows. Next bring the Blacks down to ensure that the contrast lost from opening up the Shadows doesn’t impact the image too much. A little Clarity can also help. Find a Lens Profile in Lens Corrections to correct for distortions. Use Lightroom’s Upright tool to fix perspective issues in the image that can happen.

    Tips for better interior photography 10

    Conclusion

    Hopefully you’ve found these tips helpful for getting started doing interior photography. If you have any others to share please do so in the comments below.

    googletag.cmd.push(function() {
    tablet_slots.push( googletag.defineSlot( “/1005424/_dPSv4_tab-all-article-bottom_(300×250)”, [300, 250], “pb-ad-78623” ).addService( googletag.pubads() ) ); } );

    googletag.cmd.push(function() {
    mobile_slots.push( googletag.defineSlot( “/1005424/_dPSv4_mob-all-article-bottom_(300×250)”, [300, 250], “pb-ad-78158” ).addService( googletag.pubads() ) ); } );

    The post 10 Tips for Better Interior Photography by Sean McCormack appeared first on Digital Photography School.


    Digital Photography School

  • Winter is Coming: Here are some tips on what and where to shoot when it gets cold

    Winter is Coming

    Winter is only a month or two away and many photographers will find it challenging to press on through the dreary winter months; especially those of us that live in Seattle or other areas where wind, rain, sleet and snow pound the region for months on end.
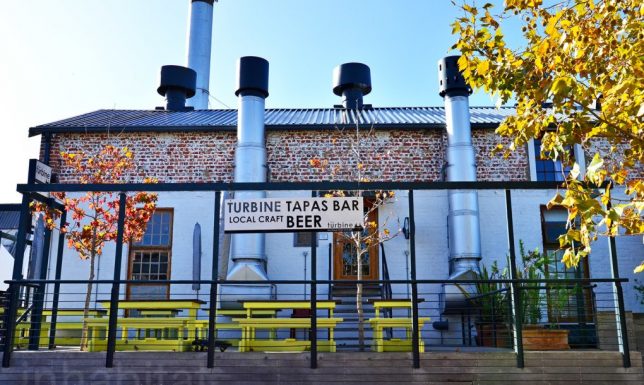
    In this article I’ve outlined some tips to keep your landscape photography fresh when the weather starts to head south.

    Photograph Transitions

    The transition between fall and winter offers up a unique opportunity to photograph fall color under a fresh dusting of snow. If the forecast is calling for snow toward the end of fall, head out and see what you can find!

    The warmer colors of the fall leaves and foliage will be presented in stark contrast against the cold tones of the snow and can make for very interesting and dynamic images. The above image was taken in the central Cascade mountains of Washington state at the end of Fall.

    Head to the Desert

    This may sound like a weird tip, but if you have any sort of opportunity to visit the desert or the canyon lands of any kind during the winter, do it! Places like Bryce Canyon in Utah (pictured above) and the Grand Canyon in Arizona offer very unique conditions and compositions that the average tourist won’t get to see during the summer months.

    Snow can add a nice color contrast to the desert landscape and can also add soft textures to the arid environment. As an added bonus you won’t have to deal with the crazy crowds and 100 degree temperatures.

    Icy Waterfalls

    Shooting waterfalls during the winter months can often times make even popular and well shot locations look refreshing and new. Multnomah falls is one of the most recognizable waterfalls in Oregon and even it can take on a different appearance during the winter.

    The frozen spray from the falls can add some really nice textures and visual elements to your images. The snow can also contrast well with the icy blue water flowing over the falls.

    • If you plan to shoot waterfalls or any sort of moving water during the winter definitely invest in a good set of micro-spikes (for traction) to give you an extra edge for hiking and climbing.
    • Trekking poles (your tripod can work in a pinch) are also a great idea to help with stability and balance while transversing icy terrain. 
    • If your tripod comes with metal spikes or feet it’s always good idea to bring them along as they may work better (or worse) depending upon conditions.
    • Hip-waders and Gortex can definitely help keep you dry and comfortable.

    Let’s face it, slipping and falling into a river or on a rocky slope isn’t something you really want to do in cold weather.

    The Mountains are Calling

    Snow and the winter weather that comes with it can really add depth and layers to your images. Heading to the mountains with a longer focal length lens can really help to emphasize winter weather conditions such as fresh snow, low clouds and fog. 

    When the weather looks to be heading south I love to head up to the mountains to check out how the conditions are shaping up for sunset and sunrise.

    • Bring waterproof and breathable layers, snow shoes and any other supplies that you may need when you find yourself hiking in cold conditions.
    • Packing a Jet Boil (or another source of heat) and some instant meals can be a lifesaver if you’re in a pinch.
    • A GPS can be your best friend if your tracks get covered by fresh snow.
    • Check the weather forecasts often and do some research to ensure that you don’t find yourself in the wrong place at the wrong time.

    Chase the Storms

    The sunsets that often follow winter storms can offer some of the most intense and gorgeous light that you can capture. To really take advantage of this try heading to the coast just as a low pressure system has begun to move on shore. It takes a bit of planning but the sunset/sunrise conditions on the back edge of the storm can be absolutely spectacular! The above image was taken in late winter at Cape Kiwanda on the Oregon Coast.

    • Check the weather forecasts hourly when planning a trip like this.
    • The National Weather Service here in the US is a great place to track weather and believe it or not the Weather Channel website offers some of the most accurate forecasts you can find on the internet. 
    • The NOAA Hi-Def radar smartphone App can give you a great deal of insight into minute by minute precipitation and cloud cover forecasts.

    As an added bonus you won’t have to deal with that pesky marine layer that often plagues the west coast of the US during the summer months. 

    Stay Close to Home

    If the conditions are just too dangerous or you just don’t have time to plan a trip, look to areas near you for unique vantage points and compositions that can offer up very different photographic results during the winter months. This was taken near my home in Snoqualmie, WA. 

    Get creative in your surroundings! This shot was taken with my Canon 70-300mm F4-5.6L IS lens. Using longer focal lengths in your area can really open up new and exciting compositional opportunities. 

    Articles: Digital Photography Review (dpreview.com)