Blog

  • Just a Reflector: Upside-Down Mural Looks Right in the Water Below

    [ By WebUrbanist in Art & Drawing & Digital. ]

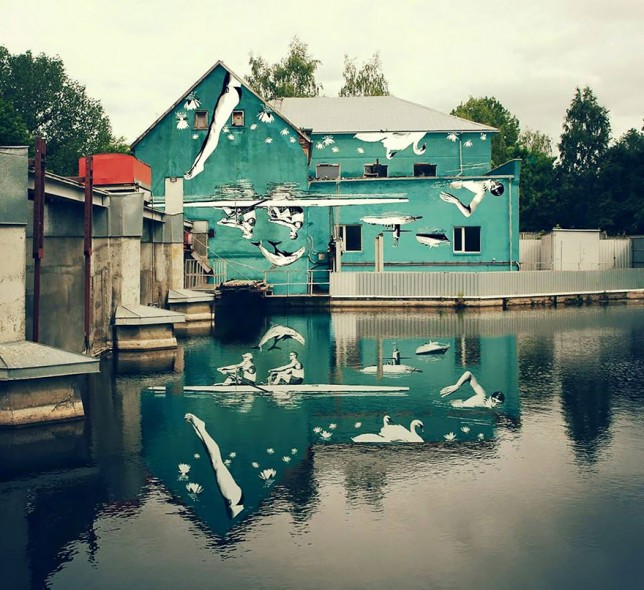
    mural painting actual

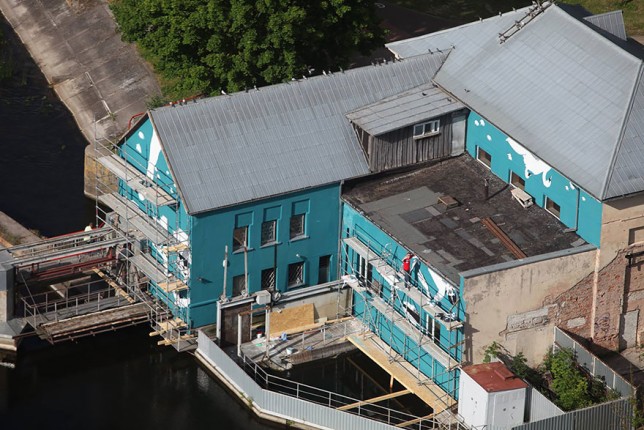
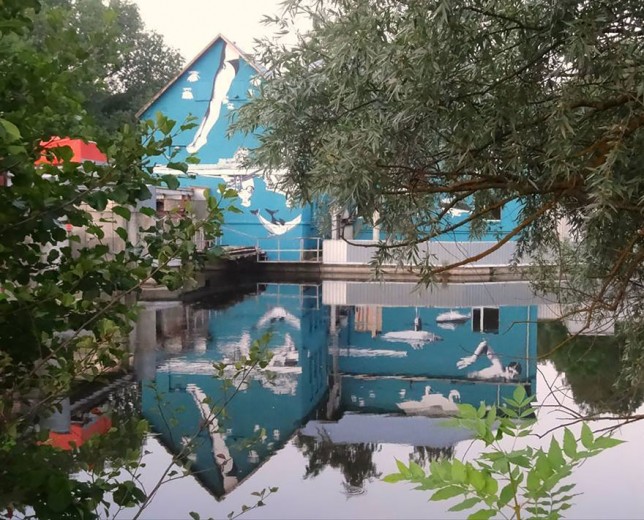
    Designed to look right-side-up when reflected off the water below, this series wall murals features a series of nautical themes, including depictions of swimmers, rowers and swans. While the image above is accurate and untouched, a modified photo (shown below) shows a more idealized version that does not really reflect reality.

    photoshopped reflective water mural

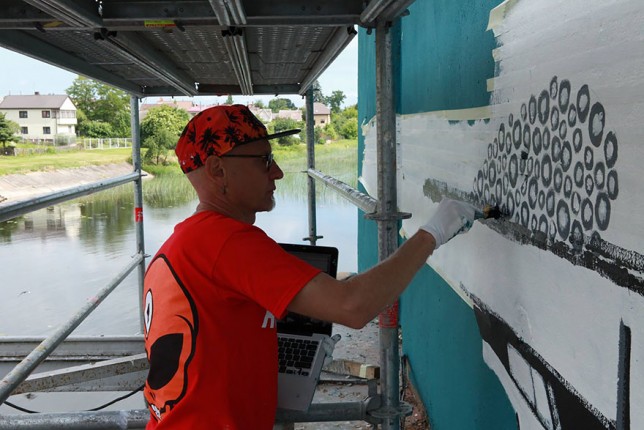
    New York-based Ray Bartkus made this mural for the Lithuanian city of Marijampole, set alongside the river Šešupe, which flows through the city’s center. The artist is known for other works that rely on mirrors and reflections as well.

    mural artists work

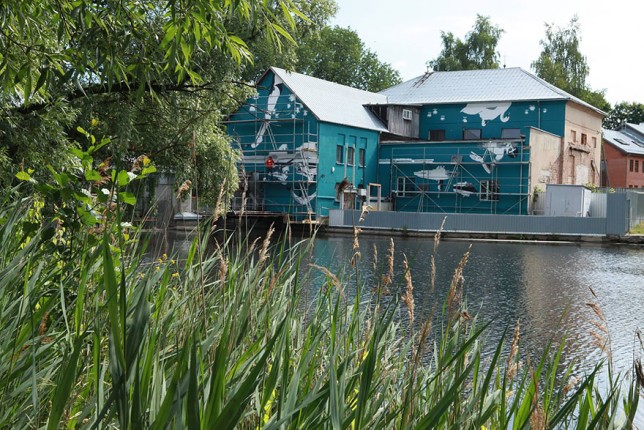
    mural under construction

    mural painting process

    A bit like a trompe l’oeil illusion, the viewer’s position changes the composition, and their is an ideal spot for the optical effect in relation to the various vertical planes onto which the murals were painted.

    Share on Facebook


    [ By WebUrbanist in Art & Drawing & Digital. ]

    [ WebUrbanist | Archives | Galleries | Privacy | TOS ]


    WebUrbanist

  • 10 Non-Technical Ways to Improve Your Street Photography

    The technical side of street photography is incredibly important to master, because if you do not understand your camera, then you will not be able to do the tips in this article well. You want to be able to know your camera so well that you forget it is even there.

    However, it is the non-technical tips, thinking beyond the camera, that can help you to improve to the next level. So here are 10 of my favorite tips to help improve your street photography.

    1. Be spontaneous
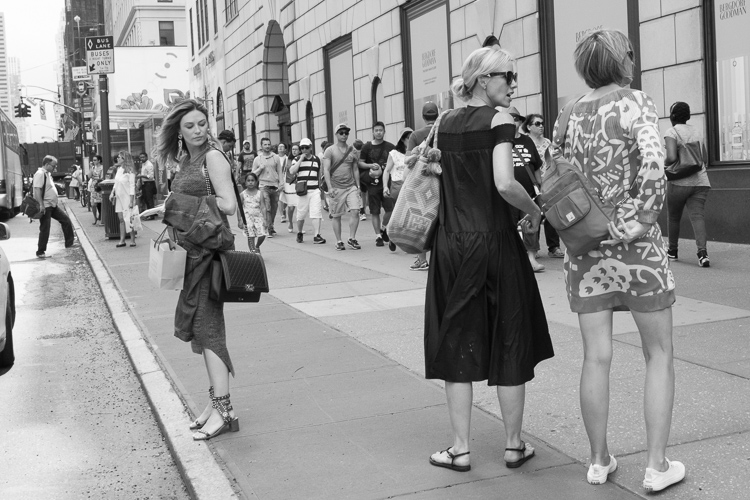
    5th Ave, New York Street Photography

    While out shooting, I hear photographers all too commonly worry about cutting people’s legs off in the photo, not composing it right, or skewing the photograph by accident. Of course, these are technical issues to keep in mind when you review your work later. They can be important, but wasting your energy thinking about this nitpicky stuff while shooting can kill your ability to notice and capture those quick and wonderful moments that constantly appear.

    Try to turn the analytical side of your brain off when you’re out photographing. Enjoy the process, and spend your time seeking out your subjects and looking at the light. Allow some spontaneity and chance in how you compose and shoot your photographs. Let your instincts take over. The more you train these instincts, the better they will become. William Eggleston only takes one photograph of every scene that he comes across. While you don’t have to go that far, many photographers do the opposite, try to ease any tension when you’re out there shooting and let your instincts guide you.

    Garry Winogrand skewed more of his photographs than not, and everyone cuts off peoples legs constantly, but none of these factors alone have ever ruined a great photograph. By shooting more spontaneously you might miss a few shots, but the good ones will be even that much better.

    2. Slow down and look
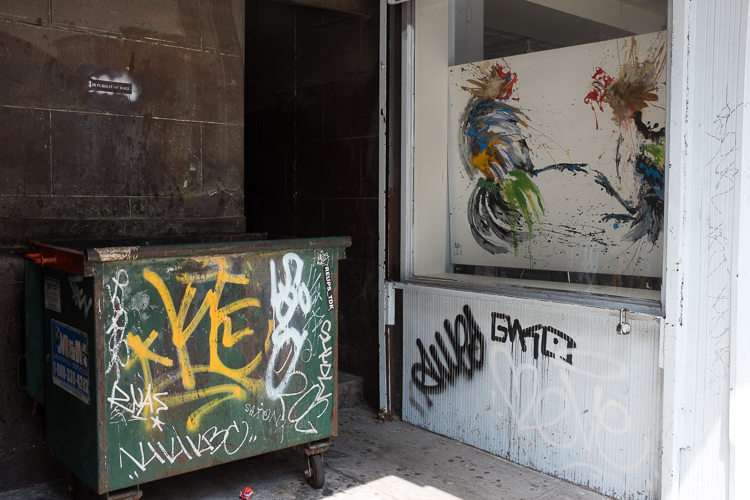
    Graffiti and Gallery, 14th Street.

    There is no need for a brisk pace when out photographing. Doing this will hurt your ability to notice your surroundings. Many people will come across an area and completely disregard it and move on to the next spot before they give it a proper chance. They just keep moving on and hoping for that magical location. But magical locations usually don’t swoop down on you like that. All of the places that you immediately disregard have a good photograph somewhere, maybe even a great one, you just need to find it. Those elusive photographs can be more interesting than the ones that immediately pop out at you.

    Instead of spending your energy walking, spend it looking. Go high, get low, look left, and look right. The more you might disregarding an area, the more you have to ask yourself why you feel that way, and the more you should push yourself to try and get a good photograph there.

    3. Do not be afraid of taking bad photographs
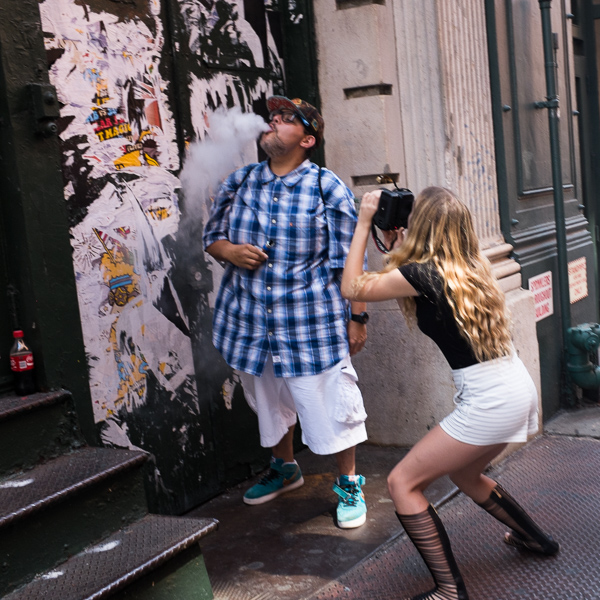
    Smoke, Prince Street, SoHo

    Photographing this way will yield many bad photographs, and it will also yield incredibly interesting ones that many people will not understand. But try to not let this affect how you photograph and how you feel when you are out shooting. Do it for yourself.

    The bad photographs come constantly, but it is important that you spontaneously take them, because it means you are getting yourself ready for the moments when those incredible images will briefly appear before you. Shooting the bad ones will help you to better notice the good ones, and those bad photographs are just practice for those rare and elusive moments that you do not want to miss.

    4. Notice the light
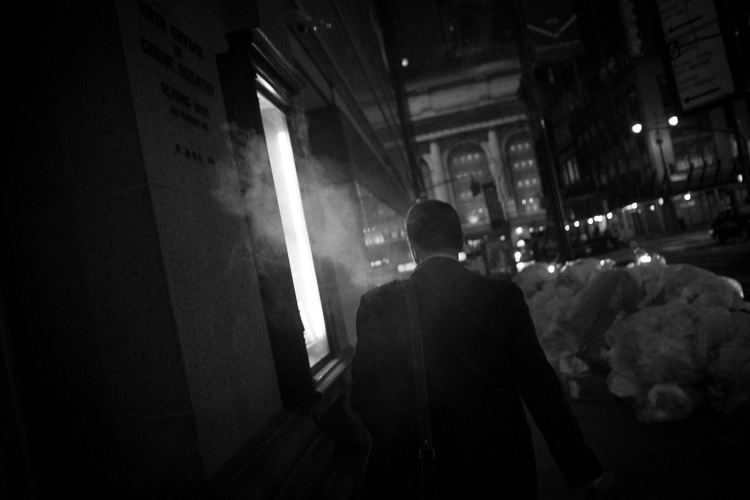
    Smoke, Grand Central Terminal

    The more you slow down, the more aware you will become of your surroundings. This will help you to better understand and work with light. Light dictates how the scene will look in the camera, so you need to pay attention to its strength, the locations of the light sources and how they hit your subjects, the color of the light, and any contrasty areas with significant differences between the shadows and highlights.

    Light is not necessarily the first thing you should notice, though. The subject needs to be the first thing that catches your eye, but you should always be aware of the light when entering a new location. If you are aware of the light, then you can work with it in a spontaneous way as well.

    5. Notice people from afar
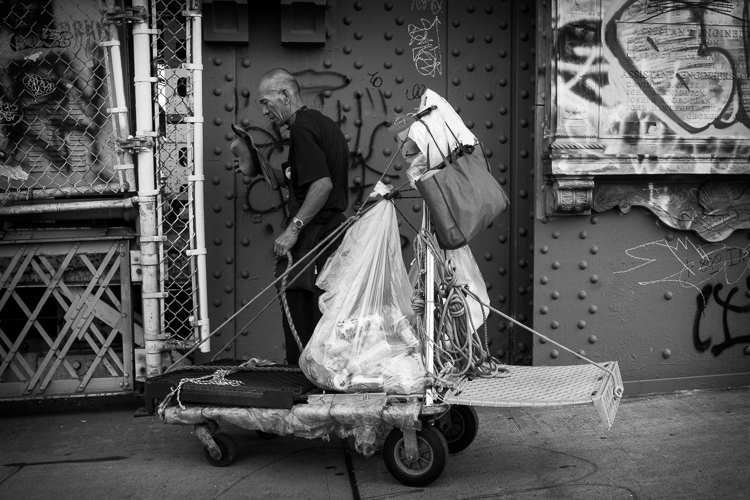
    Sailboat, Manhattan Bridge.

    While street photography is not only about capturing people, candid photographs of people are at the heart of street photography. When you slow down and pay attention to your surroundings, you will now find yourself with the ability to pay more attention to everyone walking around you, along with their interactions. Try to go beyond just noticing people as they cross your immediate path. Try to look farther away to see people who might be interesting. The earlier that you notice them, the easier it will be to get the shot when you both intersect.

    Really watch people. In street photography, your eyes are the true viewfinder, and the better you do at locating your subjects before you look through the viewfinder, the better your photography will be.

    6. How will your work age?
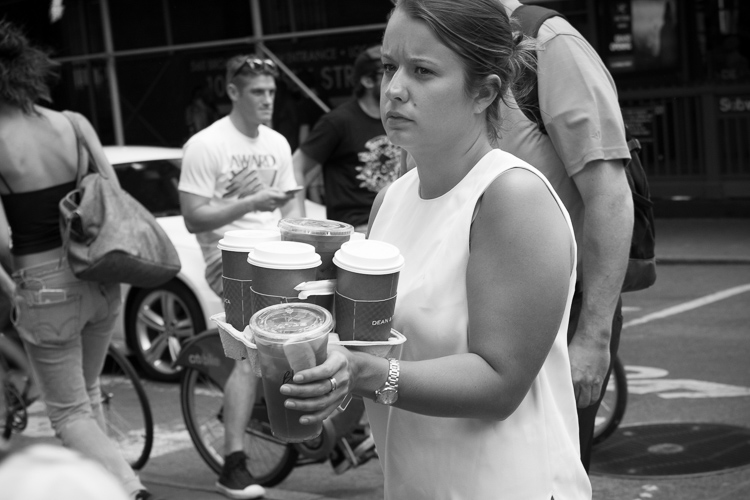
    Prince and Broadway, SoHo.

    Try not to take anything for granted. We all wish we could go back 50 years in time to photograph for a day. If we were able to do that, everything we saw would look so foreign and interesting to us, but back then they were just going about business as usual. They thought about their surroundings in they way that we think about ours today.

    Think about how the photographs you take today will look in 50 years. What do we take for granted that people in the future will love? What will go out of style, what will seem weird and foreign, and will everyone still be staring at a mini handheld computer while walking down the street? These are not the types of photographs that most people take, and so they will stand out much more in the future.

    7. Be consistent
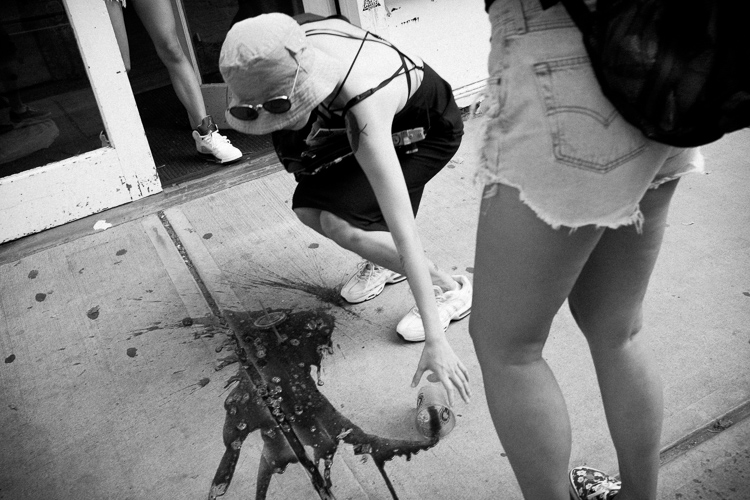
    SoHo, New York Street Photography

    Consistency is the real key. Street photography is such a difficult skill to master, and it’s easy to get rusty if you don’t do it often enough. Try to figure out a way to integrate a consistent shooting schedule. Maybe it’s a half day once a week, maybe it’s 30 minutes a day during your lunch break or after work, or maybe it’s in 10 minute increments constantly throughout your day.

    Keeping some level of consistency will not only get you better photographs because you are giving yourself more of a chance to come across them, but you will improve much more consistently. Over time, your style and what you like to photograph will begin to emerge as well.

    8. Use the camera as a key
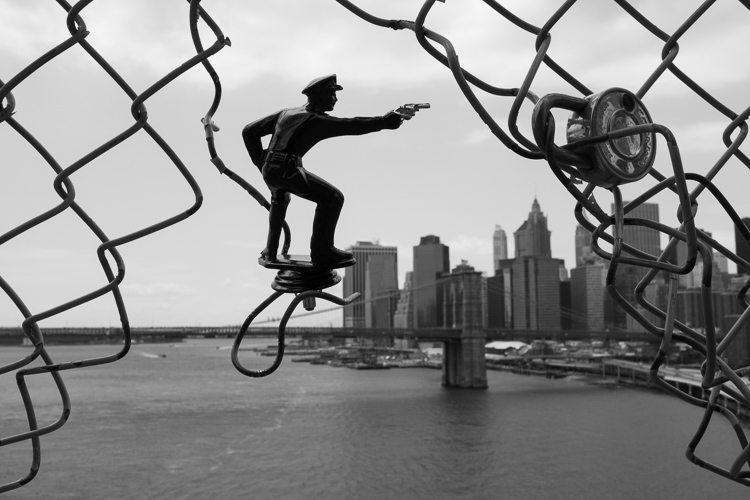
    cop_manhattan_bridge

    The beauty of a camera is that it acts as a key to new experiences. It forces you to go out at times when you would normally be watching TV. It makes you photograph at night, in the rain, in a snowstorm, and in the worst weather. It makes you want to explore places that you would normally be too tentative to try to get access to. When people see you with a camera, many of them will understand and let you do things that they would otherwise be suspicious of. Use that to your advantage. Try to get access to areas that you would normally not take the effort to see.

    In addition, a camera is a key to making new friends. This does not only apply to other photography enthusiasts. People love cameras, so use yours to break the ice. Take a portrait. Make some new friends and get yourself into new situations to photograph. This access will help to improve your photography in profound ways.

    9. Expression, gesture, and emotion
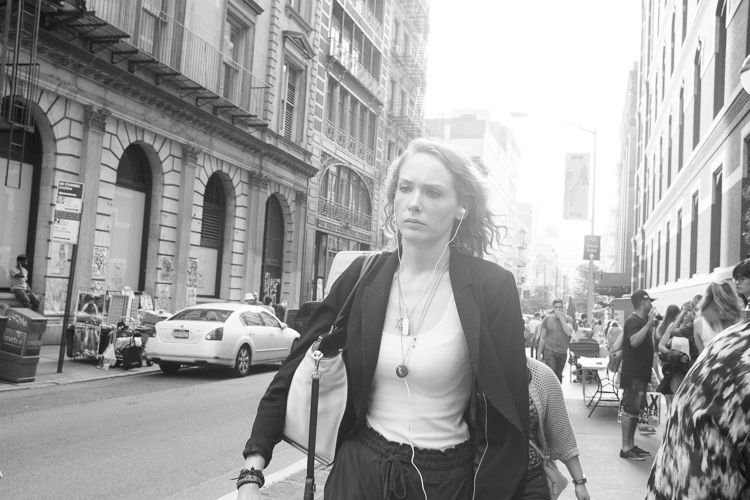
    Prince Street, New York Street Photography

    Photography is about bringing out some sort of emotion in a viewer. Capturing expressions or gestures in people are extremely important ways to achieve this. The look in someone’s eyes or the stance that they hold can create a powerful feeling and make or break a picture.

    The surface is so important to a photograph, but so is what lies beneath it. Try to see what might be hiding or hinted at under the surface of your photos. Questions will keep the person interested in the image over the longterm. You do not need to give them the answers. They will come up with some themselves.

    10. Photography books

    Look for inspiration outside of your own work. Purchase books from the masters to read through at night. This will give you more ideas about what you can possibly achieve when you are out there shooting. Try to find books with all different styles to shake you up a bit, such as one from Garry Winogrand and another from William Eggleston.

    Over to you

    Do you follow any of these ideas? Or maybe you have some other suggestions that have worked for you. Please share your thoughts in the comments below.

    googletag.cmd.push(function() {
    tablet_slots.push( googletag.defineSlot( “/1005424/_dPSv4_tab-all-article-bottom_(300×250)”, [300, 250], “pb-ad-78623” ).addService( googletag.pubads() ) ); } );

    googletag.cmd.push(function() {
    mobile_slots.push( googletag.defineSlot( “/1005424/_dPSv4_mob-all-article-bottom_(300×250)”, [300, 250], “pb-ad-78158” ).addService( googletag.pubads() ) ); } );

    The post 10 Non-Technical Ways to Improve Your Street Photography by James Maher appeared first on Digital Photography School.


    Digital Photography School
  • Pentax 55-300mm F4.5-6.3 ED PLM WR RE real world sample gallery

    The Pentax 55-300mm F4.5-6.3 ED PLM WR RE is a new variable aperture ultra telephoto zoom that is the first Pentax lens to use their new ‘Pulse Autofocus Motor’. Although it is a bit darker than the old 55-300, autofocus is much faster and virtually silent. Take a look at our samples to see how sharp this handy new zoom is.

    Articles: Digital Photography Review (dpreview.com)

  • ‘I don’t use my camera as my memory’: we interview Graham Nash

     Graham Nash, photographed by Amy Grantham.

    From Lancashire to California, Graham Nash’s journey has been a long and winding one, both as a musician and a photographer. 

    As he prepares for his keynote talk at this week’s Photo Plus Expo in New York, we spoke to Graham Nash about his career as a photographer, and his role in developing modern digital photographic printing.


    Graham – most people probably know you primarily as a musician, but when did you start taking photographs?

    I’ve been a photographer for longer than I’ve been a musician. The first portrait I took was a picture I took of my mother when I was 11. And it was at that moment that I knew that I saw differently to most people.

    You and I both grew up in Northern England. I was born in Yorkshire and you were raised in Lancashire, in Salford.

    It’s alright, I’ll still talk to you!

    So you’re from L.S. Lowry country – dark, satanic mills, and all that. How did growing up in Salford influence your visual style?

    I think it did wonders for me as a person, not necessarily in terms of any talent I may have. When you grow up in that kind of area after World War II, your feet are on the ground. You’re thankful that you’re still alive, that your friends are still alive, and that your house is still standing. Because when I was younger, that wasn’t always the case.

    Once you have this sense of having survived, it’s a sense of accomplishment. And also, you know, don’t complain to me about the room not being the right temperature. Talk to me about something more important.

     Johnny Cash, Nashville, TN. 1960. Photograph by Graham Nash, used with permission. 

    So being raised in the industrial north of England, coming to America in the 1960s must have been a mind-blowing experience?

    Mind-blowing and joyful. I had sunshine, I had music, David (Crosby) and Stephen (Stills) and I were just forming our relationship and falling in love with each other, and each other’s music. Having all that music to make, and records to make, and sunshine and beautiful weather… it was an extraordinary time.

    ‘I’m interested in those little surreal moments that happen in front of me’

    And just visually – even now, America isn’t like anywhere else…

    It’s an incredible country. The first time the Hollies came to America, we came to New York. But where I went to live, and where I really thrived was Los Angeles.

    The people are very interesting to look at, the countryside is beautiful, but I’m not really one of those photographers. I’m more interested in those little surreal moments that happen in front of me, and they seem to happen in front of me daily. I’m not interested in pictures of kittens with balls of wool, or making an image to match the color of my couch. I don’t take landscapes, and I don’t use my camera as my memory.

    Nash’s bandmate David Crosby. Photograph by Graham Nash, used with permission.

    So you’ve been taking pictures now for more than 50 years. What would you say the biggest difference – technically or culturally, between when you started taking pictures, and now?

    I think it’s more mindless now. People are taking pictures of everything. And nothing is that important. I don’t want a picture of me at Disneyland, pulling the sword out of the stone, or any of that stuff. I’m not interested. I’m not interested in selfies. I’ve been taking self-portraits since 1968. It’s so mindless now and I experience it daily. There’s not a show when I don’t get approached afterwards by someone with 20 albums to sign and a selfie that they want taken, immediately. And often they don’t even ask for permission.

    ‘I draw inspiration from moments’

    As a photographer, do you draw more creative inspiration from people, or from places?

    Neither, actually. I draw inspiration from moments. I’ve had so many pictures taken of me, I know when a lens is being turned on me. I know that look. And I can’t stand it. If I take portraits, I want to take pictures when they have no idea when I’m there.

    Girl with Uzi, North Hollywood, CA. 1998. Photograph by Graham Nash, used with permission.

    What were your earliest photographic influences?

    My father was an amateur photographer. He used me and my sister’s bedroom as a darkroom, and it was his enthusiasm and his passion that remains with me even today. I’m still thrilled by the magic of photography, and it really is magic.

    For the last 15-20 years I’ve been collecting daguerreotypes. The world’s first photographic format. Daguerre invented himself into a corner, because there was no negative to reproduce the image. That’s what Henry Fox Talbot did – he invented the negative, and therefore invented himself into the future.

    ‘Fox Talbot invented himself into the future’

    You’ve been very influential in the development of what we now call digital photographic printing. Can you give me some context around that?

    It was pure selfishness. I used to live with Joni Mitchell, and Joni always loved my images, but I never shared them because I thought of myself as a musician. She had had a really good experience with a gallery in Tokyo. The Parko Gallery. She said why don’t you send them some of your photographs?

    I was very hesitant to do that, but she told me to send some pictures to this gallery and see if they’d be interested in doing a show. So reluctantly I made 5 or 6 prints and sent them off, and forgot about it. And then they called me and said they’d love to do a show. They wanted 50 images, which was fine, but they wanted them printed about 3 or 4 feet square, which was a problem.

    Dennis Hopper, Kentucky Derby, Louisville KT, 2002. Photograph by Graham Nash, used with permission.

    At the same time as I was pondering how to do that, I was introduced to the Iris Printer. And when I saw what that printer was capable of doing, I asked the owner two questions. Could it print in black and white? And would the inks last more than ten minutes?

    I bought the machine, it cost about $ 125,000, and my partner Mac Holbert and I voided the warranty immediately because we were modifying it and forcing it to do what we wanted it to do. We opened Nash Editions in the early 90s after a couple of years of research, and we’re still in business.

    At that time, in the late 1980s and 90s, as I understand it, the abilities of computers to generate digital images had exceeded the ability of printers to output the files. Is that right?

    Exactly. You couldn’t get them off the screen. The honor of having our first printer put into the Smithsonian Museum of American History was a real thrill.


    Graham Nash will appear at the Photo Plus Expo 2016 this week, in a conversation with photographer and musician Mark Seliger on October 20th.

    Articles: Digital Photography Review (dpreview.com)

  • How to Take Cool Food Photos in Your Refrigerator

    Nothing gets me more excited creatively than coming up with different scenarios or ideas to further develop and hone my photography skills. For me, this is what makes photography so interesting and never dull. Yes, it can be frustrating and challenging. However, there are so many ways and endless possibilities for capturing images.

    title

    Bottled water in a refrigerator.

    A picture is worth a thousand words, as the phrase goes. But I also like the story behind the photograph or image. Recently, I came across online the work of Mexican photographer, Felix Hernandez Rodriguez, who has a wonderful behind the scenes (BTS) video of his “The Love Car | The Making Of”.

    I won’t spoil it for you by describing it in words. Instead, I feel It is best that you watch it for yourself at your leisure (see below).

    Got lemons – make lemonade

    Anyway, I had the misfortune back in July during a hot spell, of my refrigerator (or fridge is the term I use for this apparatus), deciding to just quit. I got a replacement and the first thing I noticed was the LED light inside. So it got me thinking, could I possibly use that one light source and produce decent enough shots with it?

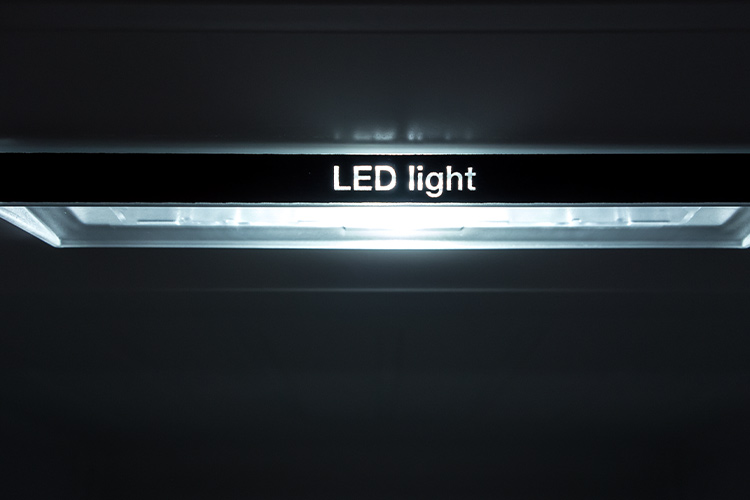
    led-light

    An LED light inside a refrigerator.

    Taking photos inside a fridge sounds a bit daft, I hear you say. However, for this article I will show you that even a daft idea can be cool. (Pun intended)

    Shooting inside a fridge

    I approached this project in five ways:

    1. Taking photos of the food or items just using the LED light source inside the fridge.
    2. Try to create decent food shots while working with two major constraints, time and size. Time: I couldn’t leave the fridge door open for long periods of time, which meant I had to set up my scenes and shoot fast.
    3. Size was another factor, especially in trying to get different POV shots
    4. Get imaginative and create a shot that the viewer doesn’t realise it was taken in a fridge.
    5. Just go with the flow.

    Preparation

    My fridge is relatively small in comparison to refrigerators in the US or Canada, so taking the food items out and storing them in a cooler bag for an hour or so wasn’t an arduous task. However, if you have a huge refrigerator, the next time time you do a clean out of your refrigerator may be the time to try out this project.

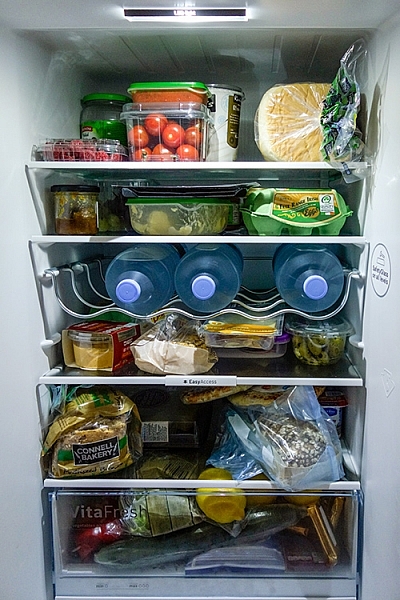
    full-fridge

    A packed refrigerator full of food items.

    The space I was working with was really small, 19” x 19” x 33”, so I decided I would use my Sony RX100 which has a 35mm focal range equivalent of 28-100mm.

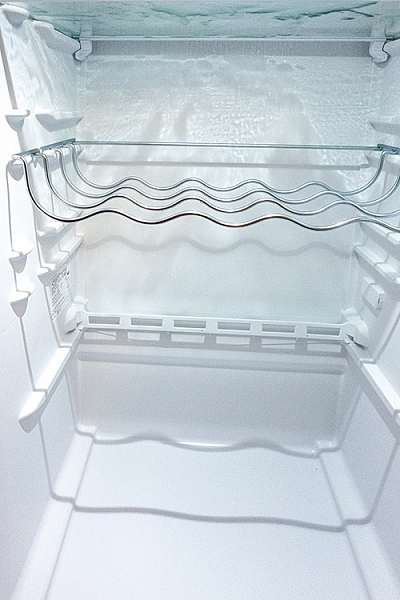
    empty-fridge

    The inside of my fridge which is relatively small in comparison to refrigerators in the US and Canada.

    Initial shots

    My initial test shots were random, in order to test the lighting and to determine what camera settings I would end up using. Shooting in RAW, I settled on an aperture of f/2.8, ISO 400 and a shutter speed of 1/50 – 1/60 and handheld the camera. I didn’t want to go higher with the ISO, as to keep noise down to a minimum. A wide open aperture allowed for the background to remain out of focus.

    I left everything in the fridge and took some random shots of food items.

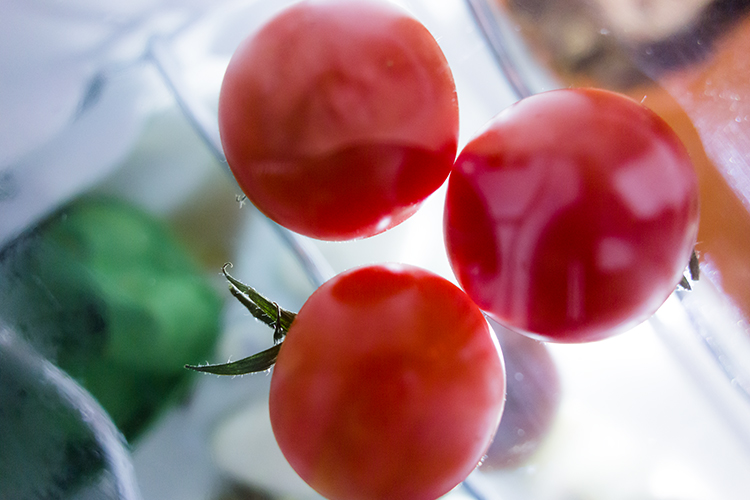
    cherry-tomatoes-taken-underneath-glass-shelf

    Cherry tomatoes taken from underneath a glass shelf in the refrigerator.

    The Shots

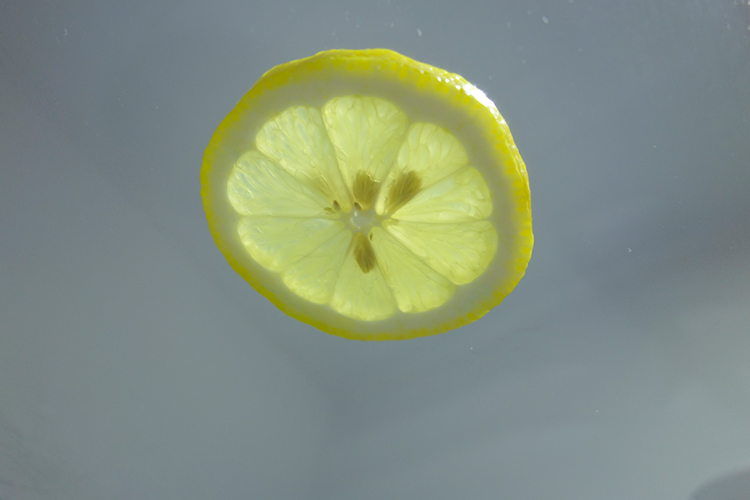
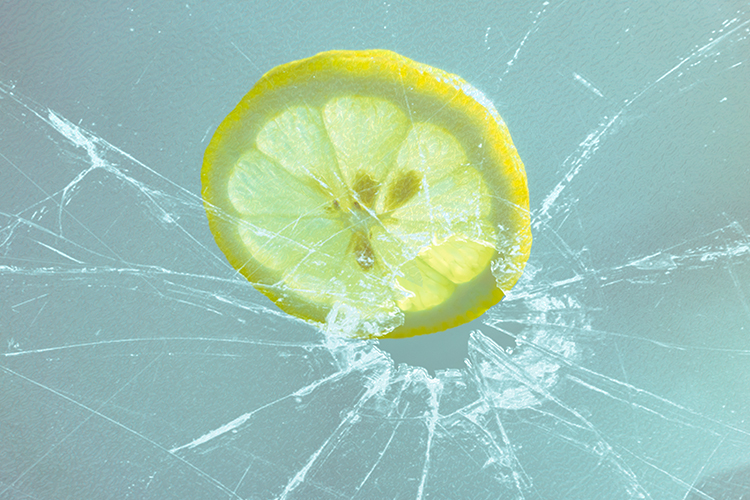
    Next was to take everything out of the fridge and start with just the top shelf left. It was nearest the light source and I wanted to see what type of shots I would get. From taking many shots at different angles, an idea sprung to mind. I wanted a slice of lemon shot from underneath the glass shelf. Later in post-production, I added in the frosted glass along with the broken glass effect to give it more zest! (Sorry pun intended again).

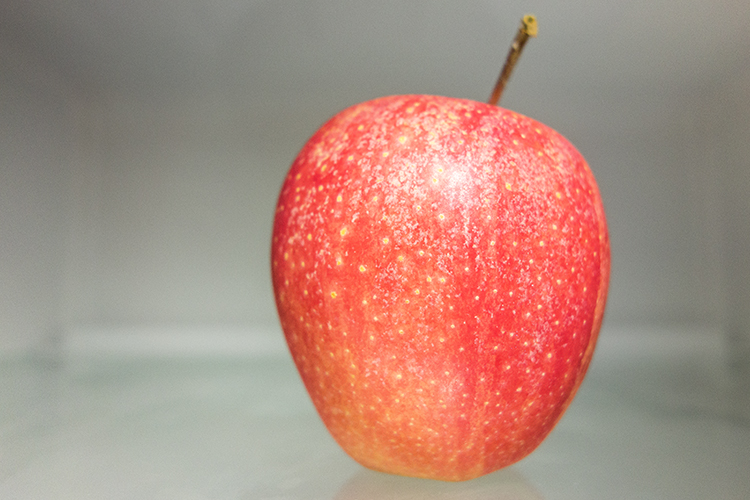
    apple

    A red apple taken sitting on a shelf inside a refrigerator.

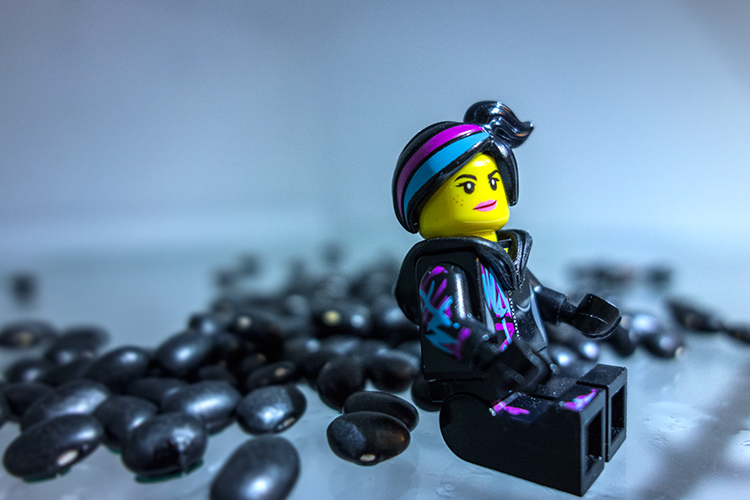
    lucy-with-turtle-beans

    A test shot with Lucy and some turtle black beans.

    lemon-sooc

    A slice of lemon taken from underneath a glass shelf. This is straight out of the camera.

    lemon-with-broken-glass

    This is the same shot as above but I added a frosted glass and broken glass effect for impact in the editing process.

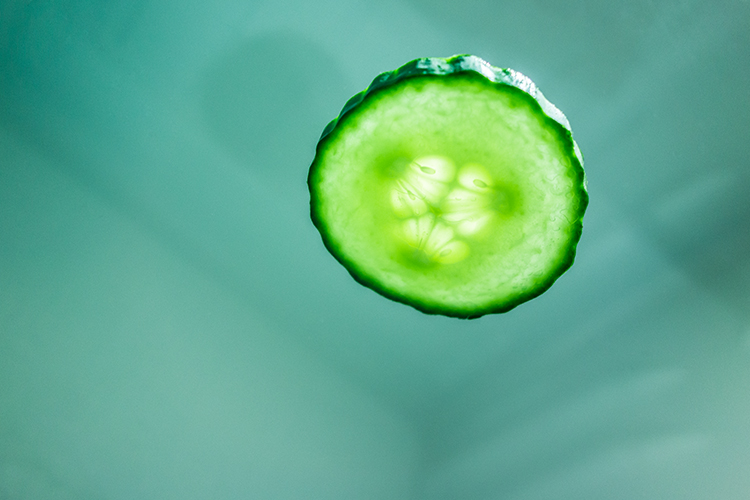
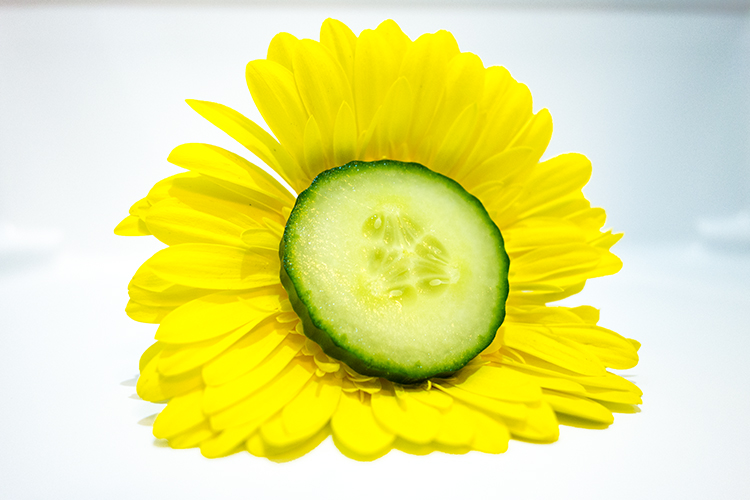
    I also took a slice of cucumber. Notice how it appears to have a sad face?

    cucumber

    A poor sad looking cucumber!

    Second setup

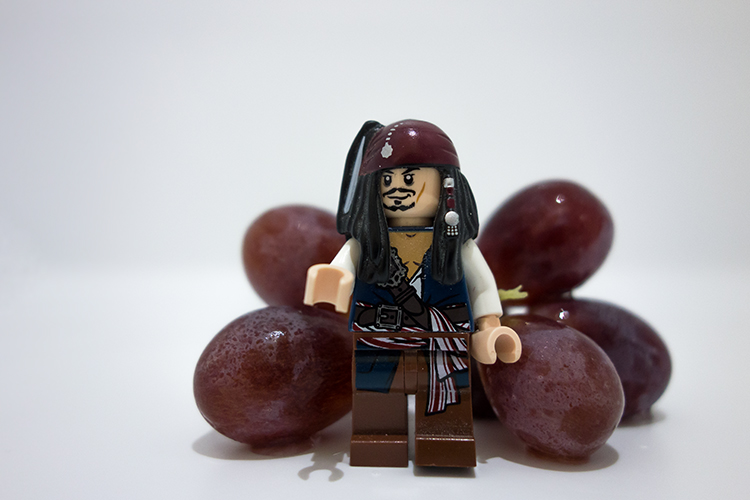
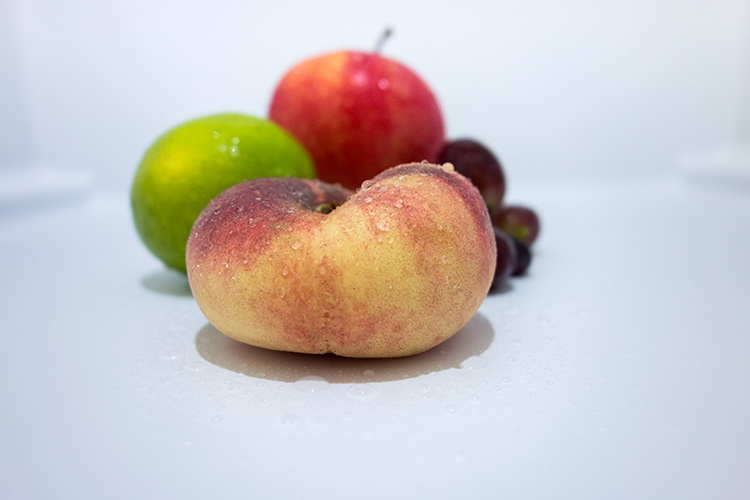
    The next plan of attack was placing items on the bottom part of the fridge, as in the furthest point away from the light source. I wasn’t really expecting to get any decent shots. But I was pleasantly surprised. I felt the shots had an almost ethereal feeling to them.

    jack-sprat-with-grapes

    A Jack Sparrow lego figure with a bunch of red grapes.

    fruit-composition

    A fruit composition sprayed with a little water inside the refrigerator.

    flower

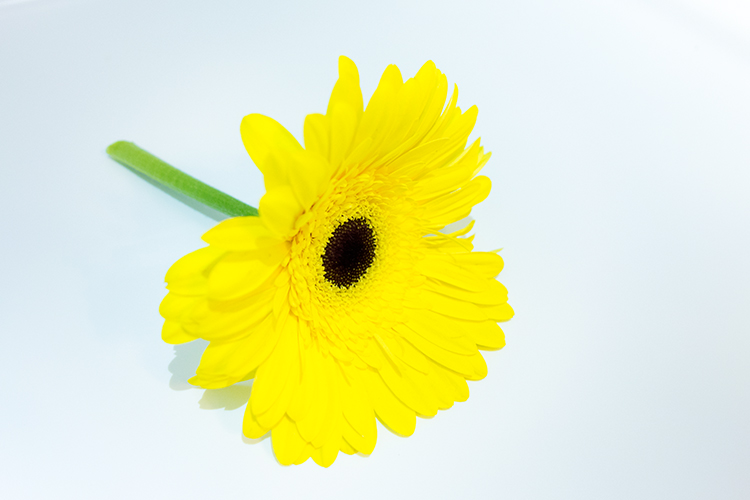
    A yellow flower taken inside the refrigerator.

    flower-and-cucumber

    The sad looking slice of cucumber looked happier against the flower!

    Key Takeaway Points

    Unless you have a moderately small refrigerator, this project is most likely not for you. Was it worth doing? In my opinion, any excuse to take photographs is well worth doing.

    I found it was better to take the shots over a few days. This allows for planning what type of shot and what food or other items to use. Plus you need the least amount of time to have the fridge door opened. Spray water on the food so that the light catches the water droplets to add depth to the shot.

    Have you had a crazy idea for a personal project? If so please leave a comment or share your images and story below.

    googletag.cmd.push(function() {
    tablet_slots.push( googletag.defineSlot( “/1005424/_dPSv4_tab-all-article-bottom_(300×250)”, [300, 250], “pb-ad-78623” ).addService( googletag.pubads() ) ); } );

    googletag.cmd.push(function() {
    mobile_slots.push( googletag.defineSlot( “/1005424/_dPSv4_mob-all-article-bottom_(300×250)”, [300, 250], “pb-ad-78158” ).addService( googletag.pubads() ) ); } );

    The post How to Take Cool Food Photos in Your Refrigerator by Sarah Hipwell appeared first on Digital Photography School.


    Digital Photography School
  • The Cheapest and Easiest Lightbox Macro Photography

    Have you ever done macro photography? If you have, there is little doubt that your first experiences with it were magnificent. What a cool aspect of photography! If you haven’t, give it a go and experience the world up close and super personal. Some photographers go crazy about it and although I have taken my fair share of macro photos, and have even purchased a dedicated lens for macro photography, I don’t want to spend wads of cash on a photographic style that is not my main niche. That doesn’t mean I don’t strive for the best photos I can get, it just means I need to be a little more creative.

    Lightbox macro photography 001 toad

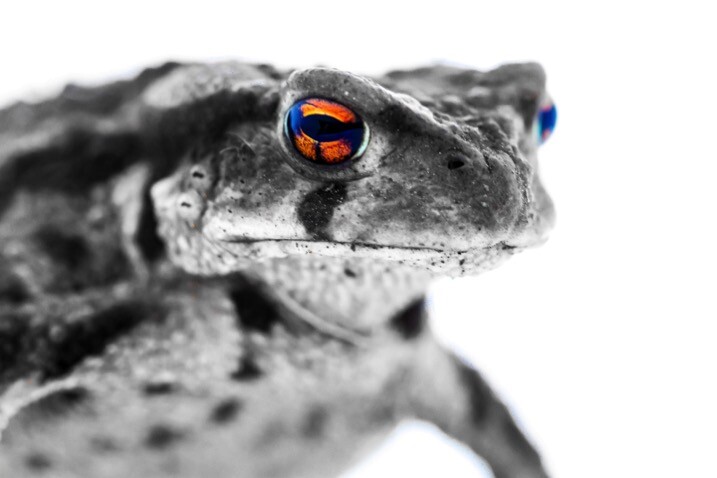
    A toad I stumbled upon on a mountain trail.

    There are so many gadgets and gizmos that you can buy to help modify light such as flashes, soft boxes, reflectors, etc. Attachments like slide rails can also help you image stack in post-processing. However, I use macro photography simply as a change of pace and to help me keep honing my skills. So, I would like to share a very simple trick that I use that you can to without having to spend a penny. So what is it? Well, let’s first look at an important concept about macro photography so you will get the best results when you are experimenting based on this tutorial.

    Lightbox macro photography 002 fuzzy

    Depth of field

    The first tip and technique that we need to think about before I reveal my simple method, is depth of field (DoF). Generally, in macro photography, you will be really close to your subject, especially if you use a designated macro lens. If you use a telephoto lens with an extension tube, you may not be as close but due to the focal length you will still have a very narrow depth of field.

    So to keep in true macro fashion your best option to increase your depth of field is to increase the f-stop. Thus you will need plenty of light. For my trick, the sun is all you will need. No need to spend any money. If you want to brush up on all the parameters that go into depth of field then please check out this articles: Depth of Field and the Importance Distance to Subject Plays.

    The trick is – a white paper bag

    So what is the trick? Well, it is a large white paper bag. The best ones I’ve found are the shopping bags that you get from mid-range clothing stores which are made of fairly thin white paper. Yep, that is it, a white paper bag and you have your own lightbox or white box.

    Jeffrey Beall

    By Jeffrey Beall


    A smaller sack would work too, but obviously, that limits the size of what can be placed inside. Fold your bag up and out the door you go to find, critters, animals, flowers and fauna, or beach treasures.

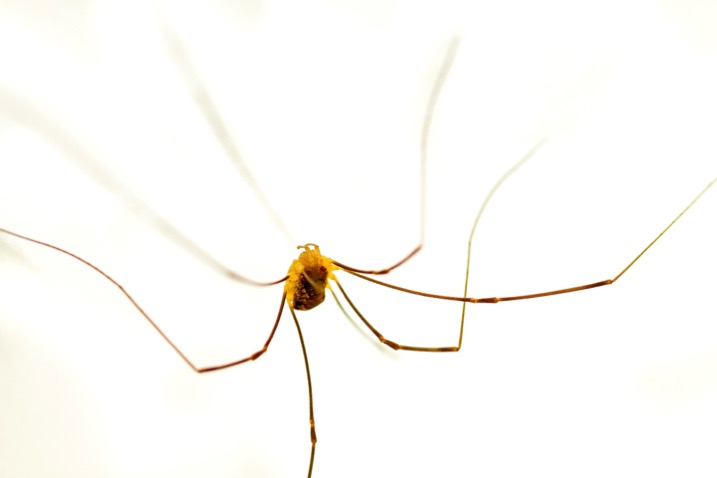
    The white paper is translucent so light will permeate the bag and create a white-box, also known as a lightbox. If you shoot when there is strong sunlight, there will be enough light to give you shadows. And because the light source (the paper bag) is so close to the subject the shadows are extra soft and very pleasing. Thus, you can create fantastic results with something you may already have in your cupboard or closet.

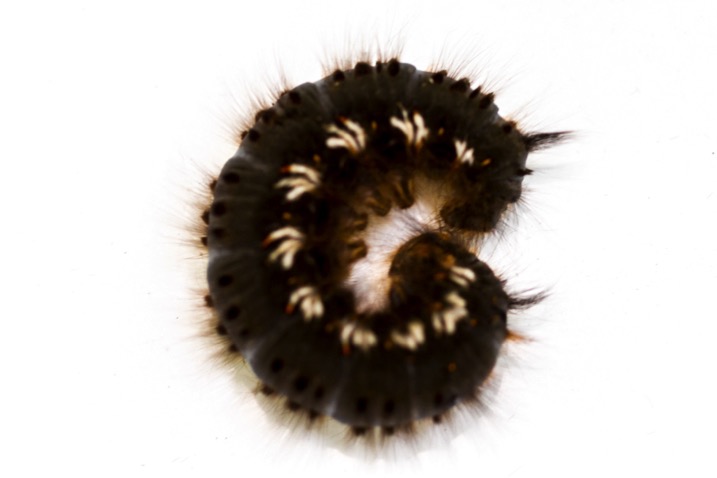
    Lightbox macro photography 003 spider

    Working with small critters

    The second tip is about the bugs, butterflies or animals that you choose to place in your bag. The anxiety of a living creature is most likely going to be high after you capture them and stick them into a foreign environment. For the sake of the creature, let it calm down. Place it in your paper bag, close it and let the creature calm down for a minute or two.

    This will also give you time to get your camera in the proper shooting mode and adjust the settings. From a photography standpoint, giving your subject time to become calm will allow it to slow down or even become still. Thus you will have a good opportunity to get crisp, clear and clean shots. Remember to kindly capture and release any living thing back into their habitat.

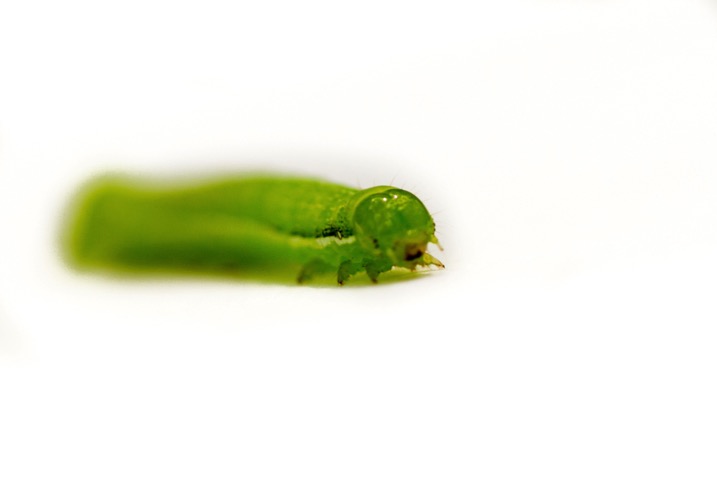
    Lightbox macro photography 004 green

    Use exposure compensation

    The third tip is another technical one and is about exposure compensation. The bag is white so you need to increase your exposure compensation by a minimum of a plus half a stop to get the best results so that the white bag will appear white.

    Remember your camera does not have a brain and will automatically adjust your exposure to 18% grey. The goal is to achieve a nice clean white background, so you need to increase your exposure compensation. If you’re in manual mode make sure that you have adjusted your settings to overexpose your photo (plus side). Even if you completely overexpose parts of the white bag, as long as your subject is properly exposed you will be okay.

    The goal is a white background with subtle shadows from the subject. If you need to refresh your understanding of exposure compensation you can check out the following: How to Use Exposure Compensation to Take Control of Your Exposure.

    Lightbox macro photography 005 overhead

    Other uses for the bag

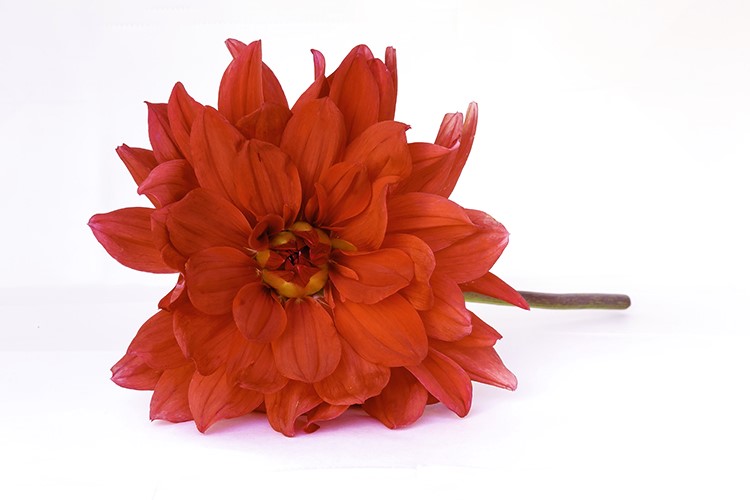
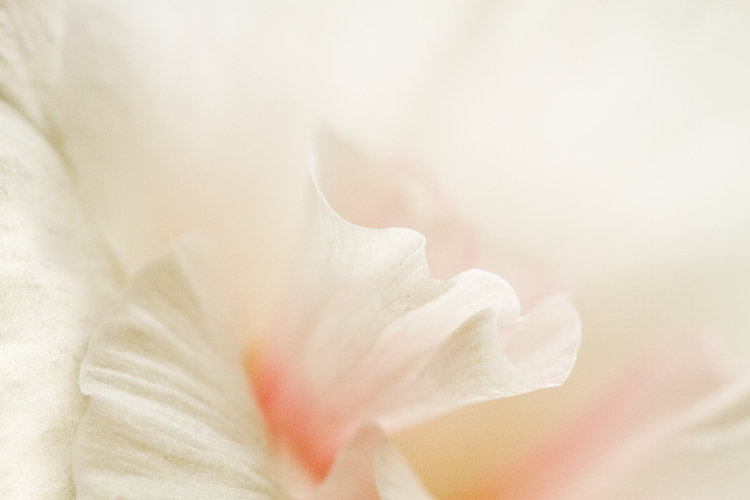
    This cheap and easy lightbox can be used for all kinds of subjects. Even for product photography if you are in a pinch. It works best in strong, full sun, so the light can penetrate the paper and let you keep your ISO settings low.

    Lightbox macro photography 06

    Lightbox macro photography 08

    Lightbox macro photography 07

    Lightbox macro photography 02

    The only subjects that this method really doesn’t work for are white subjects (e.g. sun bleached seashells).

    Your turn

    Now you have few excuses but to get out into the field and get some cool new photos. Please share your white bag photos below along with your comments or question.

    googletag.cmd.push(function() {
    tablet_slots.push( googletag.defineSlot( “/1005424/_dPSv4_tab-all-article-bottom_(300×250)”, [300, 250], “pb-ad-78623” ).addService( googletag.pubads() ) ); } );

    googletag.cmd.push(function() {
    mobile_slots.push( googletag.defineSlot( “/1005424/_dPSv4_mob-all-article-bottom_(300×250)”, [300, 250], “pb-ad-78158” ).addService( googletag.pubads() ) ); } );

    The post The Cheapest and Easiest Lightbox Macro Photography by Branson Quenzer appeared first on Digital Photography School.


    Digital Photography School
  • Modest Updates: Nikon D3400 Review

    Key Features

    • 24MP APS-C CMOS sensor
    • 11-point phase detect auto-focus system
    • 1080/60p video capability
    • Fixed 3″ 920k-dot LCD screen
    • 5/fps burst shooting
    • Bluetooth LE for image transfer

    The D3400 is a very modestly updated version of the D3300. It’s an entry level DSLR targeted toward first-time ILC shooters and those who are ready to move on from their smartphones to a more advanced shooting platform.

    The camera is built around the same 24MP APS-C CMOS sensor found in its predecessor along with an ‘EXPEED 4’ image processor, Full HD video capture and an 11-point autofocus system. Unfortunately the camera doesn’t have Wi-Fi, but it does have Bluetooth LE connectivity for transferring images from the camera to a smart phone via the ‘SnapBridge’ app.

    Nikon packs a lot of very desirable features into the D3400 for the price.

    In terms of competition, the D3400’s sits between the Canon Rebel T6 and the Canon Rebel T6i. The D3400’s $ 649 launch price for a kit with the new AF-P 18-55mm F3.5-5.6 VR lens puts it between the $ 549 list price of for the T6/EOS 1300D kit and the significantly more expensive $ 899 MSRP for the T6i with the 18-55mm VR zoom. The T6 has a lower resolution, 18MP sensor but its lower price makes it a threat at this price-sensitive point in the market.

    Specs Comparison

    The table below illustrates that not much has changed from the D3300 to the D3400. The biggest changes seen in the D3400 are in battery life (which we suspect is due to the less powerful flash), weight and the new built in Bluetooth LE that works with SnapBridge to enable photo sharing. The D3400 also tends to come kitted with a new ‘AF-P’ version of the 18-55mm VR lens which uses a new focus motor to offer improved performance in live view and video.

    For beginning DSLR shooters the elimination of the external mic port (if video is important to you) and, more notably, the Ultrasonic Sensor Cleaning from the D3400 is something to definitely keep in mind when deciding which camera to purchase.

    If you’re not wedded to the idea of owning a DSLR, the Fujifilm X-A3 (which features an articulating touchscreen LCD and twin control dials), and the Sony a5100 (which acts more in the way of a point and shoot), are both mirrorless cameras. These offer excellent features and image quality in a much smaller package. These are definitely two other options to also consider looking at before making a purchase.

    It is worth noting that the traditional DSLR still holds some key advantages over mirrorless rivals. They offer much better battery life and lens selection, for example. The optical viewfinder is another important factor for many photographers. For more on the subject, read our primer.

      Nikon D3300 Nikon D3400 Canon Rebel T6i (EOS 750D) Pentax K70 Fujifilm X-A3
    Price (MSRP) $ 649.95 w/18-55mm kit $ 649.95 w/18-55mm kit

    $ 899.00 w/18-55mm kit

    $ 899.95 w/18-135mm kit $ 599.95 w/16-50mm kit
    Sensor 24.2MP 24.2 MP 24 MP 24 MP 24 MP
    Image Processing EXPEED 4 EXPEED 4 DIGIC 6 PRIME MII EXR Processor II
    LCD Fixed 3.0″ 921k-dot LCD Fixed 3.0″ 921k-dot LCD Fully Articulated 3.0″ 1.04M-dot LCD Fully Articulated 3.0″ 921k-dot LCD Fully Articulated 3.0″ 1.04M-dot touchscreen LCD
    AF System 11-point (one cross-type) 11-point (one-cross type) 19-point (all cross-type) 11-point (9-cross-type) 77-point
    Viewfinder
    magnification (coverage)
    0.85x (95% coverage) 0.85x (95% coverage) 0.82x (95% coverage) 0.95x (100% coverage) None
    ISO Range 100-12,800 (expansion to 25,600) 100-12,800 (expansion to 25,600) 100-12,800 (expansion to 25,600) 100-102,400 200-6400 (expansion 100-25600)
    Connectivity  With optional WU-1a Mobile Adapter Bluetooth LE Wi-Fi with NFC Wi-Fi Wi-Fi
    Video Capture max res. 1080/60p 1080/60p 1080/30p 1080/30p 1080/60p
    Continuous Shooting 5 fps 5 fps 5 fps 6 fps 6 fps
    Built in Flash
    (Range)
    Yes (12m) Yes (7m) Yes (12m) Yes (12m) Yes (7m)
    Sensor Cleaning Ultrasonic No Ultrasonic Ultrasonic Ultrasonic
    External Mic Port Yes No Yes Yes No
    Weather Sealing No No No Yes No
    Battery Life 700 shots 1200 shots 440 shots 410 shots 410 shots
    Dimensions 124 x 98 x 76mm 124 x 98 x 76 mm 132 x 101 x 78 mm 126 x 93 x 74 mm 117 x 67 x 40 mm
    Weight 460g 395g 555g 688g 339 g

    Articles: Digital Photography Review (dpreview.com)

  • 4 Tips to Help People Photographers Shoot Interior Spaces

    As a people photographer, I am not a specialist in photographing still forms like architectural structures and interior spaces. However, because I photograph weddings, I often take photos of interiors and locations as part of the wedding photos I give my clients. This is essentially how I learned to develop an eye for detail, form and structure as part and parcel of my work.

    4-tips-photographing-interiors-tutorial_0008

    Let me share with you a few tips I have learned that will hopefully get you started in photographing interior spaces and architecture if you are a people photographer.

    #1 Use natural light

    One of the advantages of still photography is simply that – nothing moves. You can leverage this by playing with your settings, especially the shutter speed. With the camera rested on a tripod or a table, you can play around with very slow shutter speeds to maximize capturing ambient light even in very dark corners, limited light, or night interior photography. If there are lamps and lights that make up the overall ambiance of the room, include them and take advantage of slow shutter speeds and long exposures. You can also keep your ISO low this way and have the bonus of clean noiseless images.

    It is important to remember that for interiors, you should aim for balanced lighting. Meaning there are no overly dark shadows or overly bright highlights. You want to see the detail in dark areas but not blow out the light areas altogether. Because we are talking about natural light, think about which times of the day which best feature the interior space. Early morning and late afternoon light are the softest. Overcast days produce soft light. Bright super sunny days produce harsher light especially midday and therefore you may want to take into consideration shadows produced in the interior from harsh outside light. In contrast to photographing people, I would normally use these shadows as an artistic element of the photo. Interior spaces however are different and this may not always be appropriate.

    Early morning and late afternoon light are the softest. Overcast days produce soft light. Bright super sunny days produce harsher light, especially midday. Therefore you may want to take into consideration any shadows produced in the interior from harsh outside light. In contrast to photographing people, I would normally use these shadows as an artistic element of the photo. Interior spaces, however, are different and this may not always be appropriate.

    4-tips-photographing-interiors-tutorial_0008

    #2 Don’t forget your 50mm lens

    Not only is the 50mm lens the closest lens that resembles the human eye (when using a full frame camera), it is also the perfect lens to separate some areas and details of the space without going in too close. In a way, it is an excellent “portrait” lens for spaces, whereas my 85mm is my choice of portrait lens for people.

    When using wider lenses, I find I have to correct quite a lot of distortion on the edges of the frame. With the 50mm this is hardly an issue. The results are pleasing to the eye and it evokes a very natural look, making you feel like you are within the actual space yourself.

    4-tips-photographing-interiors-tutorial_0008
    4-tips-photographing-interiors-tutorial_0008

    #3 Get the white balance right

    This is tricky and the nemesis of many photographers. Most non-photographers are oblivious to white balance. This is especially obvious in weddings where the bride’s dress looks blue and people’s faces register as magenta, yet hardly anyone notices.

    When I sold my house a few years back, the real estate agents who boasted of great property photography sent a photographer to my house to take some professional pictures. She arrived with a camera on the tripod and a flash head pointed slightly upwards. The lens used was very wide – I guessed around 10mm or 14mm. It took many days before the photos were up online, when finally I saw them, they were all very blue. My home felt so cold and not homely. One of the reasons for that was the incorrect white balance.

    Personally, I prefer a warm feel to all my photos so I tend to edit towards that side. But do be careful that the whites still look white and not yellow or cream. Remember that what often draws people to an image is a feeling or emotion. Your image becomes all the more powerful if it reminds the viewer of a sentiment, experience, or something that resonates with them. White balance is key in helping achieve this kind of engagement with your viewer.

    4-tips-photographing-interiors-tutorial_0008
    4-tips-photographing-interiors-tutorial_0008

    #4 Remember to go close, not just wide

    Nowadays, when you browse through interior design catalogues or blogs, you will come across many interior details, arrangements and vignettes that do not show the entire space. Everyone is doing it from high street department stores to high end interior designers. There must be a good reason for it. In order to reinforce engagement and a connection to your audience, details are essential.

    Imagine walking into a space, or that you are viewing a house for the first time. Before you walk though the door, you survey the outside look of the property and its surroundings. You do the same as you walk in, surveying the overall scene before your eyes. But when you are inside you get closer and see the details.

    You may want to touch and feel the walls, flip some switches on if they work, or sit on the sofa with fluffy scatter cushions. You want to get close, touch and feel things. It is not only a visual connection then, it becomes physical. This is the sense you want to achieve with your images when the viewer is not physically in the space. That is why close up shots and details are important.

    4-tips-photographing-interiors-tutorial_0008
    4-tips-photographing-interiors-tutorial_0008

    Conclusion

    With photography, aim to connect with your viewers not only by using visual senses but also with the power of emotion. If you can add a virtual physical touch to this engagement, all the better. When viewers look at your images and say, “I feel like I was actually there.” take that as one of the highest compliments.

    I hope you enjoyed this little beginner’s journey into interior photography. Of course there are many more tips like straightening horizons and shooting through doors. If you have any other awesome tips, do share them here in the comments below.

    googletag.cmd.push(function() {
    tablet_slots.push( googletag.defineSlot( “/1005424/_dPSv4_tab-all-article-bottom_(300×250)”, [300, 250], “pb-ad-78623” ).addService( googletag.pubads() ) ); } );

    googletag.cmd.push(function() {
    mobile_slots.push( googletag.defineSlot( “/1005424/_dPSv4_mob-all-article-bottom_(300×250)”, [300, 250], “pb-ad-78158” ).addService( googletag.pubads() ) ); } );

    The post 4 Tips to Help People Photographers Shoot Interior Spaces by Lily Sawyer appeared first on Digital Photography School.


    Digital Photography School
  • iLUUN Air is a wireless USB 3.0 flashdrive for your smartphone

    The iLUUN Air is designed to look and work just like any USB 3.0 flash drive. However, it also allows you to share files with your smartphone or tablet via a wireless connection. Seeking funding on Kickstarter, if the iLuun Air is brought to production it can be used to create a Wi-Fi network that you can connect to with your mobile device. You can then use it to store or share images and videos, transfer files and stream movies or music using the iLUUN app that is available for Android and iOS.

    The storage device will be available in versions with 32, 64, 128 or 256GB of storage and can wirelessly share content with up to six users simultaneously. There is also a backup & restore function that lets you free up storage space on your phone by transferring files to iLUUN and built-in encryption makes sure your content is safe.

    The iLUUN Air looks like an interesting option for those who frequently run out of local storage space or like sharing content with multiple users without making use of cloud services. Pledging $ 42 on the iLUUN Kickstarter page will get you a 32GB version, for the 256GB variant you’ll have to invest $ 149. Delivery is planned for March 2017.

    Articles: Digital Photography Review (dpreview.com)

  • Well Wheeled: 12 Luxury Bike Accessories for the Discerning Cyclist

    [ By SA Rogers in Design & Products & Packaging. ]

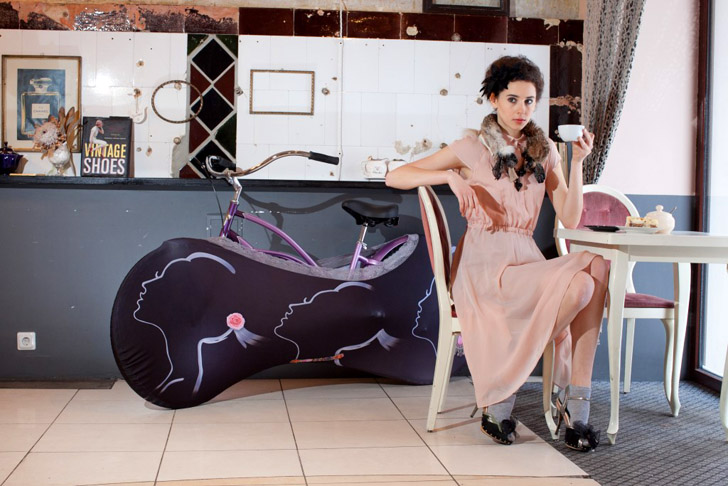
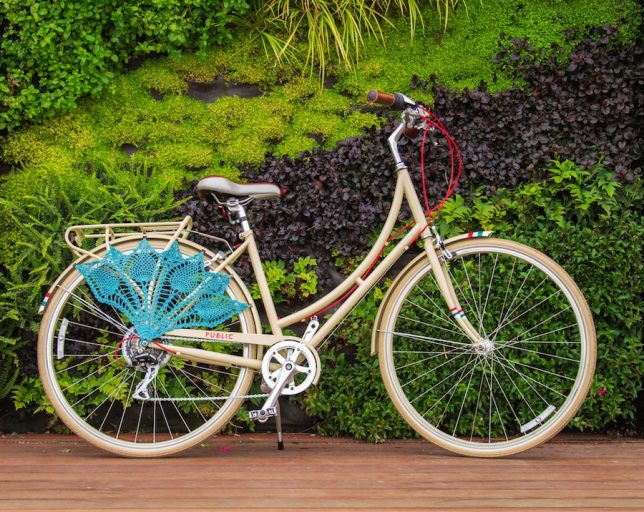
    bike-life-velo-sock-2

    Ride your bike in style with crocheted skirt guards, leather beer carriers, hand-carved saddles and picnic sets that cost more than your car. These luxurious bicycle accessories will make sure you’re ready for drinks at the park or a fashion shoot with Vogue while also outfitted in top-of-the-line practical gear worthy of even the most serious cyclists.

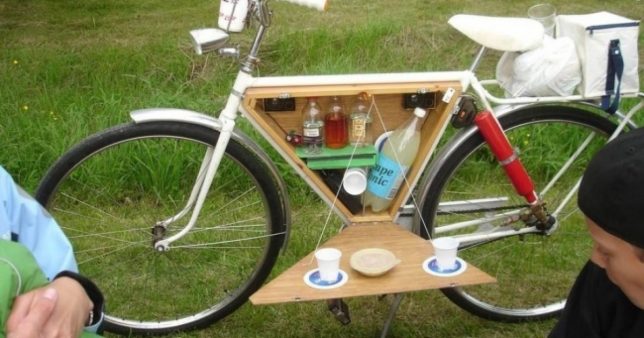
    DIY Built-In Bike Bar

    bike-life-built-in-bar

    This DIY mini bar is built right into the unused section of a bike’s frame, packed full of coasters, cups, bar tools and mixers with a lid that folds down to become a tiny triangular table. It’s a pretty clever idea for picnics – just don’t drink and bike. Want one of your own? You’ll have to make it yourself, since it’s so particular to the individual shape of your bicycle.

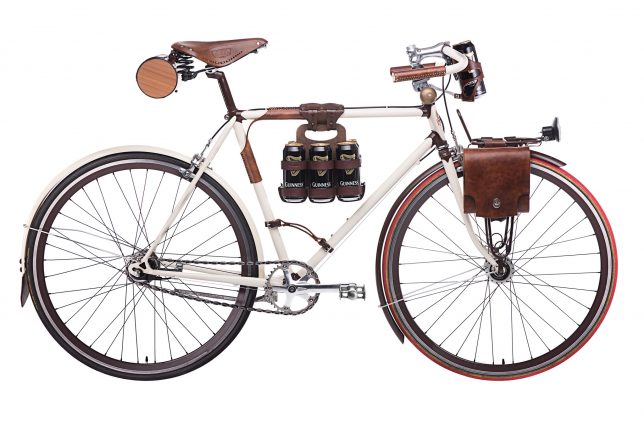
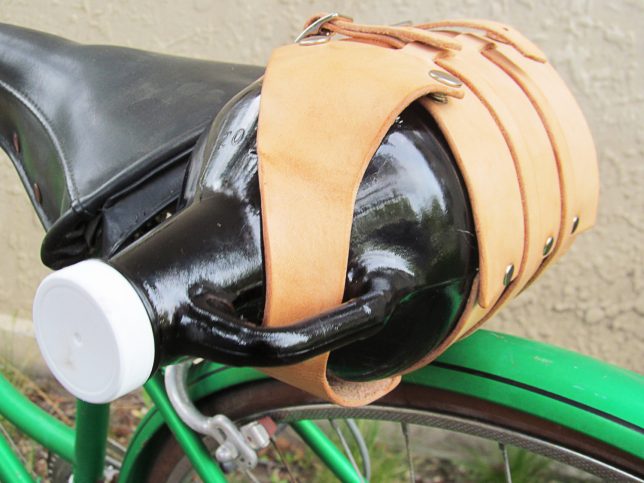
    Leather Growler & Six Pack Carriers

    bike-life-six-pack

    growler-carrier

    If beer is more your (bike) speed, there are options for that, too – like a fancy lather carrier that holds either a six-pack or an entire growler and mounts to your saddle or frame. The full-grain leather growler coozie by Cicada Leather Company fits most 64-ounce glass growlers, and Walnut Studio’s ‘Bicycle Beer Combo’ comes with a ‘frame cinch’ design, which can be used to carry anything with a handle on the top tube of your bike.

    Crocheted Skirt Guard

    bike-life-skirt-guard

    Why sacrifice your fashion sense while biking? Not only does this crocheted add-on make your bike look fancy, it enables you to wear skirts and dresses without worrying about them getting caught in your spokes. Made by Knits for Life, it comes in two sizes and snaps onto the fender with included clips.

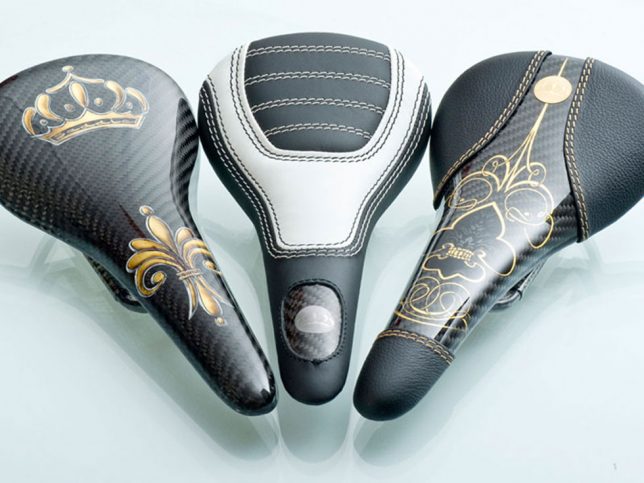
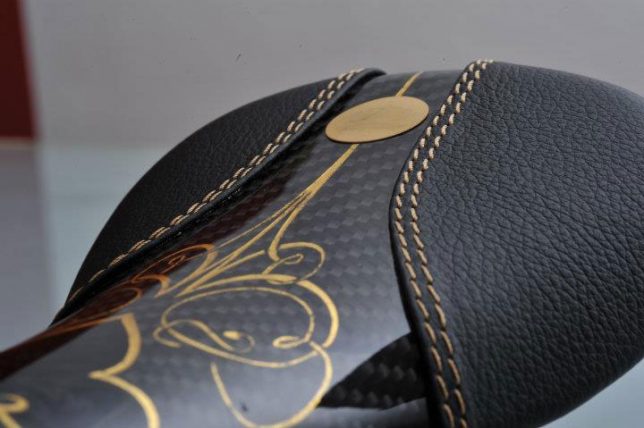
    World’s Most Expensive Bicycle Saddle

    bike-life-crown-saddle

    bike-life-crown-saddle-2

    If you can’t afford the whole Fendi shebang, but still want to drop a giant wad of cash on your ride, replace your saddle with one of three designs by Crown Saddles – the Graf Ludwig, the Konig Friedrich or the Herzog Eberhart. The priciest saddles in the world, with the Herzog boasting a price tag of €1554 Euros (around $ 1700 USD), the saddles are made of lightweight carbon fiber and Kevlar Rowling with airbrush finishing.

    Next Page – Click Below to Read More:
    Bike Life 12 Luxurious Accessories For The Discerning Cyclist

    Share on Facebook


    [ By SA Rogers in Design & Products & Packaging. ]

    [ WebUrbanist | Archives | Galleries | Privacy | TOS ]


    WebUrbanist