Blog

  • Manfrotto launches new FluidTech Base and monopod kits for stills and video

    Accessory-maker Manfrotto has introduced a new series of monopod kits called XPRO Monopod+ and a new FluidTech Base to help videographers to achieve smooth pan, tilt and swivel motions. The new Monopod+ models come in a choice of four or five sections. The legs are made of aluminum or carbon fiber and kits are available with and without heads. The actual monopods are the same as the existing XPRO models but they come with the FluidTech base included.

    The new base is slightly larger than the one it replaces and offers three-way motion instead of just support for panning. The rotation can be locked off to allow only panning or unlocked to support smooth action in three directions. The base attaches and detaches by screwing it to the foot of the monopod, and while the base will hold the monopod upright on its own Manfrotto doesn’t suggest using it self-standing with a camera attached.

    The new FluidTech Base will be $ 99.99/£74.95 and the kits including a monopod will start at $ 189.99/£144.95.

    For more information visit the Manfrotto website.

    Press release:

    Introducing the new FLUIDTECH – Full Fluid Base: first of its kind 3D-movement for the smoothest video footage

    • Easy, instant locking and adjustment with the Quick Power Lock system
    • Superior stability and portability thanks to powerful lightweight aluminium & carbon fibre
    • Flexibility to switch from photo to video thanks to the accessory base

    October 2016: Manfrotto, world leader in the photography, imaging equipment and accessories industry, presents a new offering featuring high-performance monopods for professional videographers and photographers: the new XPRO Monopod+ family.

    When volume and weight need to be minimal, set-up speed is of primary importance, in crowded places where there’s no room for a tripod, or for creative, overhead footage – whenever a tripod is not the option, monopods are the solution. They enable users to quickly and easily move from one shooting point to another, providing stable support to video and photo equipment, ensuring incredibly smooth footage, ultra-sharp photos and creative shooting perspectives.

    This exciting new generation brings image makers the ground-breaking FLUIDTECH – Full Fluid Base, making Manfrotto XPRO Monopod+ the first of its kind on the market featuring fluidity on all 3 axes to deliver ultimate smoothness in an extremely compact solution for advanced video shooting.

    Articles: Digital Photography Review (dpreview.com)

  • Camera components represent 9.5% of total iPhone 7 material cost

     Image: Chipworks-TechInsight

    Analyst firm Chipworks-TechInsight has published its iPhone 7 reverse engineering report, which includes some interesting cost and technology information for more engineering-minded photographers. The analysts estimate the total bill of materials for the iPhone 7 with 128GB of built-in memory to be $ 275. $ 26, or approximately 9.5%, of that total sum are spent on camera and imaging components. This includes the Sony-made Exmor RS image sensors and lenses in front and rear cameras and all processing hardware.

    The most expensive component in the device, that retails in the US for $ 749, is Apple’s A10 Fusion CPU at $ 40.  The display and touchscreen add $ 37 to the cost. Given how advanced smartphone camera technology has become, it is surprising that it only represents a relatively small percentage of the total cost of a device (though Apple is famous for its high margins.)

    We’d expect the dual-cam in the iPhone 7 Plus to be quite a bit more expensive than the single-lens version in the standard iPhone 7. However, Chipworks has to publish its report on the larger iPhone model. For now, you can download the iPhone 7 report on Chipworks website if you’re happy to provide your contact information and email.

    Articles: Digital Photography Review (dpreview.com)

  • Keep calm and carry on: tips for safely transporting spare camera batteries

    If you read too much news you might believe that Samsung Galaxy Note 7 smartphones are exploding all around the globe like miniature incendiary devices. You might even think that lithium-ion batteries are the work of an evil empire intent on spreading terror throughout the civilized world. Indeed, these combusting batteries have caused a good deal of concern, if not terror, and many consumers are questioning how safe the lithium-ion cells we use in our cameras are.

    It is worth pointing out at this stage that of the over 2.5 million Galaxy Note 7s that were shipped before they were withdrawn only around 90 had over-heated, and fewer again had actually caught fire. A 90 in 2.5 million hit rate wouldn’t be reported if we were talking about the phone’s microphone not working, but as the potential is a pocket, handbag, house or hand actually catching fire the frequency of occurrence is obviously way too high. 

    The good news is that the lower capacity batteries you pack in your camera bag are much less likely to cause a newsworthy scene than that in the Note 7, and by following some simple precautions you’ll be just fine.

    What makes lithium batteries catch fire?

    Smartphones need an astonishing amount of power to run the processors that control their multitasking activities, and the battery in the Samsung Galaxy Note 7 is rated at 13.48Wh. That’s a lot more powerful than most camera batteries – the EN-EL15 used to power the Nikon D810 for example is 11.8Wh.

    Seen here: a Samsung Galaxy Note 7 that did not burst into flames.

    The Note 7 battery is designed to be used in a device that Samsung wants to be as thin and as light as possible, so the battery has to be as thin and light as it can be made. That means we have a lot of charge in a very tight space. Lithium-ion cells are ideal for this sort of task as they are able to hold twice the charge of traditional metal cells such as nickel-cadmium and they are much lighter – lithium is the lightest metal element.

    Problems arise in batteries for a number of reasons, but most center around some sort of short circuit between the positive and negative electrodes. Such short circuits allow energy to flow through the cell un-resisted which causes a build-up of heat that can lead to a fire.

    In a lithium-ion cell the cathode (positive) and anode (negative) electrodes are immersed in an electrolyte conductive fluid and are kept apart by a porous barrier called a separator. During charging, and while the battery is being used, lithium-ions use the electrolyte fluid to travel between the anode and the cathode, passing through the porous separator on their way. At the same time, electrons pass between the anode and cathode via the device the cell is powering or the charger. If the separator is flawed it might allow electrons to travel between the two electrodes – a short circuit. If this happens the cell will begin to overheat.

    This spiraling build-up is called ‘thermal runaway’ and the immense heat generated can make the cell and battery expand or explode

    Problems can occur if the electrolyte fluid in the cell is contaminated with metal particles or if the separator is just too weak to do its job. The separator can also begin to break down when external temperatures are very high. The breakdown of the separator and the consequent unimpeded contact between negative and positive electrodes within the cell lead to a build-up of heat that can’t be dissipated, which subsequently leads to further break down within the structure of the cell. This spiraling build-up is called ‘thermal runaway’ and the immense heat generated can make the cell and battery expand or explode.

    As most battery packs contain multiple cells to build voltage the breakdown in one will often overheat its neighbors and the reaction will be permeated through the entire unit.
    The cell doesn’t need to have a manufacturer’s flaw to catch fire either, as any physical damage to the battery can rupture the separator or the individual chambers, allowing electrons to flow freely within the cells creating a short circuit. It only takes a tiny breach of the separator for thermal runaway to occur, as any breach will create heat that will further damage the separator and make a tiny hole bigger as the temperature rise accelerates.

    How does this effect camera batteries?

    Camera batteries tend not to pose such a high risk as they don’t contain as much energy as phone batteries do, but they can still be the cause of a fire if they aren’t treated correctly. Airlines allow lithium-ion batteries to be carried in carry-on luggage as if there is a fire it can be dealt with more easily in the cabin than it can in the hold. There are however restrictions on how many batteries can be carried in one place.

    Some airlines recommend that the contacts are covered with electrical insulating tape to prevent them coming into contact with anything that might create a short circuit. 

    Mail services tend to be most concerned about batteries rated above 100Wh. This doesn’t affect still camera batteries, which tend to be around 14Wh, but some larger video camera batteries can come into this bracket. These need special markings on the outside of the package. You might be required to pack each battery in its own plastic pouch, though taping contacts should be enough. Check with the company you are mailing or flying with for exact requirements. For an example, here are Delta airlines requirements:

    Lithium Batteries
    As you probably know, traveling with consumer electronic and medical devices containing lithium cells or batteries (e.g. watches, calculators, cameras, cell phones, laptops, camcorders, hearing aids, etc.) is allowed onboard as carry-on. Spare lithium batteries are allowed as carry-on only, and must be individually protected to prevent short circuits.
    Tips to properly transport spare lithium batteries:
    * Pack spare batteries in carry-on baggage.
    * Keep spare batteries in the original retail packaging to prevent unintentional activation or short-circuiting.
    * If original packaging is not available, effectively insulate battery terminals by isolating spare batteries from contact with other batteries and/or metal.
    * Specifically, place each battery in its own protective case, plastic bag or package, or place tape across the battery’s contacts to isolate terminals.
    * Take steps to prevent crushing, puncturing, or putting a high degree of pressure on the battery, as this can cause an internal short circuit, resulting in overheating.
    Size Limits for Lithium Batteries:

    Passengers are permitted to travel with lithium-ion batteries that contain a maximum of 160 watt hours per battery. Any lithium-ion battery containing more than 160 watt hours is prohibited from carriage on all passenger aircraft. lithium-ion batteries installed in a personal electronic device can be transported as checked or carry on baggage. lithium-ion batteries not installed in a device (spares) must be in carry-on baggage and no more than two (2) spares between 100 and 160 watt hours are allowed.

    Keep calm and carry on (your spare batteries)

    Fortunately there is no cause for alarm on the part of most photographers. We need to remember that lithium-ion batteries pose a risk if not taken care of and if we are careless about where we buy them. Chances are that if you use the battery that came with your camera and spares from the manufacturer or a well-known third party, you will never have an issue. Just be careful not to puncture the cell and to handle damaged batteries with extreme caution.

    Another point worth noting is that the battery in the Galaxy Note 7 was installed in the phone and not designed to be removed, so it had a softer, less protective exterior shell. Most camera batteries are packed in hard plastic casing and are unlikely to split or rupture, or become critically damaged internally as a result of impact.

    Camera batteries can catch fire like those used in the Samsung Galaxy Note 7, but you’ll have to go out of your way to make them do so. They won’t explode on their own accord and they are pretty unlikely to even overheat unless you forget to treat them with the respect they are due. 

    Articles: Digital Photography Review (dpreview.com)

  • Hasselblad introduces keystone and local highlight recovery in Phocus 3.1

    A before and after example in which the highlight recovery tool has been applied via a mask over the sky in the right-hand image

    Hasselblad has released the latest version of its Phocus software that is designed to manipulate images from its H and X series cameras, and the CFV digital back. The 3.1 version adds a new perspective control palette that allows both vertical and horizontal corrections against grid-pattern guide lines, which is something users have been requesting for some time. This should make life easier for those shooting architectural subjects, flat coping and product photographers, among others.

    A second new feature is a highlight recovery tool that can be used via a selection on an adjustment layer. A mask is painted over the area that needs drawing back and a slider control pulls in the over-bright detail.

    The company has also added a pair of new settings for its Reproduction menu that governs color and contrast settings in the display. Reproduction Low Gain creates a lower contrast image while Negative inverts colors and tones – which will be useful for creating film negatives for other processes.

    Version 3.1 of Phocus is available for download on the Hasselblad website.

    Manufacturer information:

    Phocus 3.1

    The eagerly awaited update to our rich image processing software has just been released, bringing with it additional features and benefits.

    Keystone Perspective Correction
    The new Keystone tool enables you to perform high quality perspective corrections directly in Phocus. This can be done both via a simple guideline interface or via manual slider adjustments. Additionally, the dual-axis correction capability is extremely useful when copying flat artwork.

    Local adjustment of highlight recovery
    Highlight recovery has now been added to the palette of local adjustment tools, allowing for quick and precise correction without the need for manual masking.

    Viewer background and margin options
    It’s now possible to configure both margin and background color options for the viewer. This can be done separately for both the normal and a newly added proof mode.

    Added camera response options
    In the reproduction tool you now have the choice of 2 additional response modes. Reproduction Low Gain enables an even higher quality linear response. The new Negative response is suitable for reproduction of black and white negative film.

    Phocus tutorials now available
    We have partnered with UK professional photographer Karl Taylor to produce a series of Phocus Tutorial videos. They can be accessed through the Phocus product page and you will need to log in to view them.

    Articles: Digital Photography Review (dpreview.com)

  • Hot set: Benjamin Von Wong’s latest shoot features a model on lava flows

    $ (document).ready(function() { SampleGalleryV2({“containerId”:”embeddedSampleGallery_4250438260″,”galleryId”:”4250438260″,”isEmbeddedWidget”:true,”standalone”:false,”selectedImageIndex”:0,”startInCommentsView”:false,”isMobile”:false}) });

    Photographer Benjamin Von Wong, never one to shy away from extreme conditions to get a shot, has released a new set of images and behind the scenes information from his most recent shoot among the lava flows of Hawaii’s Big Island. Setting out at midnight, he and his crew trekked several miles through rough terrain to reach the glowing lava, where they set up to capture a model backlit with a battery-powered monolight. Using a Sony a7R II and FE 16-35mm F4, Von Wong worked quickly – the intense temperatures meant his model could only stand in position near the lava for very short periods of time. 

    You can see some of the resulting images above. For more behind-the-scenes info, head to Von Wong’s blog. Images from the shoot are for sale, with profits benefiting victims of Hurricane Matthew. 

    See Benjamin Von Wong’s PIX 2015 talk

    Articles: Digital Photography Review (dpreview.com)

  • Kodak-branded Ektra smartphone embraces the company’s roots

    The Bullitt Group, one of the companies licensing the Kodak brand name, has launched the Kodak Ektra smartphone. Named after Kodak’s 1941 Ektra rangefinder, the phone’s design attempts to mimic the look of a vintage analog camera. The back of the device features a small camera grip and is covered in leatherette. There is also a two-stage shutter-button and optional accessories include a range of retro-style leather pouches and cases.

    Despite the camera-centric exterior, underneath the hood the Ektra is smartphone business as usual. The camera comes with a 21MP sensor, F2.0 aperture and optical image stabilization. A 26.5mm equivalent lens is offered, as is PDAF, 4K video and a dual-tone flash. A 13MP camera can be found at the front. The camera app features manual control over most shooting parameters and a wide range of filter effects for both videos and still images.

    Other specifications include a 5” 1080p screen, Helio X20 chipset, 3GB of RAM and 32GB of internal storage that is expandable via a microSD slot. The 3000mAh battery should provide more than enough juice for a day of shooting. Overall the Kodak Ektra comes with a good mid-range smartphone specification but is mostly about the vintage camera looks. It will be available in the UK this December for £450 (approximately $ 550). There are also plans to make the device available in the US in early 2017.

    KODAK EKTRA Smartphone is Designed for Photographers – from Enthusiasts to Experts

    Photography-led smartphone features powerful imaging and editing capabilities

    Rochester, NY, Thursday, October 20, 2016

    Eastman Kodak Company and Bullitt Group today unveiled the KODAK EKTRA Smartphone, a photography-led smartphone designed for those with a passion for photography, from enthusiasts to experts. The KODAK EKTRA Smartphone fuses the best of Kodak’s rich history in imaging with the latest innovations in smartphone photography. Launching soon across Europe, the KODAK EKTRA Smartphone lets keen photographers capture exceptional images, whatever the environment, with an incredibly fast smartphone, tuned for the best in image quality and media management.

    Jeff Clarke, Kodak Chief Executive, said: “Kodak has a rich history in imaging technology and the launch of the KODAK Smartphone today demonstrates our ongoing commitment to bringing the latest advances in photography to consumers. The original KODAK EKTRA Camera was launched in 1941 and in its latest reincarnation, opens up a world of creative opportunities to all who care about photography.”

    At the heart of the KODAK EKTRA Smartphone is a 21-megapixel fast focus camera sensor with f2.0 aperture, and an industry leading 13-megapixel front-facing camera with Phase Detection Auto Focus PDAF and f2.2 aperture. The custom built camera app is controlled by an intuitive haptic touch, SLR-style Scene Selection Dial, where adjustments are made in real time via a range of settings including HDR, Landscape, Portrait, Macro, Sport, Night-time, Panorama and Bokeh, alongside a Smart Auto mode which auto-selects the best conditions for your photographs. In Manual mode, more advanced users can adjust exposure, ISO, focus, white balance and shutter speed, with the results being visible on the screen as changes are made.

    The KODAK EKTRA Smartphone has an ergonomically weighted and high quality industrial design, underlining its camera styling and featuring a dedicated dual press shutter button in the horizontal style of traditional cameras. The device also features a Super 8 app, providing professional effects reminiscent of Kodak’s iconic Super 8 film stocks.A lightning-fast HELIO X20 Decacore processor powers the ANDROID Marshmallow smartphone.

    The KODAK EKTRA Smartphone includes editing software from SNAPSEED, providing exceptional tools to edit images on-the-go, without having to download any additional apps. This enables users to transform images with professional results similar to many popular desktop image editors. Sharing the results in real time is also easy with integrated social media apps and the Prints app is a simple way to select your best shots to be professionally printed.

    “It has been a joy to work with Kodak, their clear brand direction and photography knowledge, combined with our customer and technology insight has culminated in the beautiful and powerful KODAK EKTRA Smartphone,” said Peter Stephens, CEO Bullitt Group, mobile device licensee for Kodak. “We are excited to reach out to this dynamic and engaged photography category and look forward to getting this camera phone into people’s hands.”

    KODAK EKTRA Smartphone key features:

    • ANDROID 6.0 (Marshmallow)
    • Professional results from a 21MP fast focus camera sensor with F2.0, PDAF, OIS, Dual LED Flash
    • 13MP phase detection auto focus front-facing camera with F2.2 PDAF
    • Helio X20 2.3GHz Decacore processor with 3GB RAM
    • 32GB memory, expandable with MicroSD cards
    • Advanced Manual Mode – adjustable on Exposure, ISO, Focal Length (Manual/Auto), White Balance, Shutter Speed, Aperture (fixed f2.0 main camera)
    • Familiar scene selection dial experience – includes scene modes Smart Auto, Portrait, Manual, Sports, Bokeh, Night-time, HDR, Panorama, Macro, Landscape, Film / Video
    • Integrated high quality printing app
    • Super 8 Video Recorder
    • Integrated social media sharing
    • 3000mAh, with USB 3.0 Type C fast charger

    The KODAK EKTRA Smartphone will be priced at £449 and available across Europe later this year.

    To find out more visit; www.kodak.com/go/ektra
    Register for updates on www.kodakphones.com

    Articles: Digital Photography Review (dpreview.com)

  • An Introduction to Photoshop Layers Possibilities and Properties

    When Photoshop was first introduced to the world in 1990 it could only do the most basic of image editing tasks such as clone a selection, crop a picture, and work with some filters such as Blur, High Pass, and Sharpen. However, for its time it was incredibly advanced and the ability to work with digital pictures in this manner was practically unheard of for desktop computers, most of which were still using black and white screens. It wasn’t until late in 1994 when version 3 hit store shelves that the program included a key feature which continues to be the foundation for nearly all image editing programs to this day – layers.

    Understanding how layers work is essential for anyone who wants to upgrade from a program like Apple Photos or Microsoft Pain. But learning how to use them with all the hundreds of icons, buttons, and menu options competing for your attention in Photoshop, can seem completely overwhelming. Getting the hang of a few basic concepts will set you on your way to image editing success, and help you figure out many of the other options Photoshop has to offer as well.

    photoshop-layers-couple

    Basic concept of layers

    To wrap your head around the concept of layers, think back to when you were in grade school and your teacher worked out math problems on an overhead projector. She probably started with a sheet of transparent plastic that had equations printed on it and then used a washable marker to perform the required multiplication, division, or other operations to solve it. The bottom layer, the transparency itself, never changed but the teacher was free to alter what students saw on the projector screen by writing on top of the acetate layer.

    You could even stack transparencies on top of one another and end up with a background layer and a few plastic sheets stacked on top of it. Each layer could be drawn or written on which would alter the final image shown to the students on the projector screen. But the layers existed separately from one another and could be edited individually without affecting the actual content of the underlying or overlying layers. Layers in Photoshop function in much the same way.

    First layer – Background
    photoshop-layers-background-only

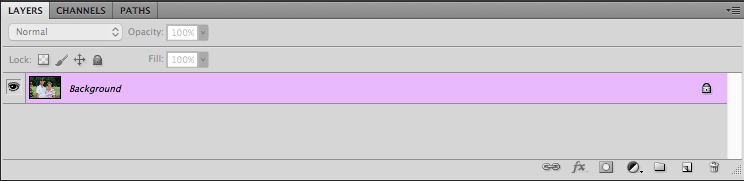
    When you open a picture in Photoshop the first thing you will see in the Layers panel is a background layer with a small thumbnail of your image on it. It’s always given the label “Background” and on the right-hand side of the panel is an image of a padlock. Photoshop uses this icon this to indicate that the image is to be the foundation on which all future edits are built but the picture itself is not to be altered.

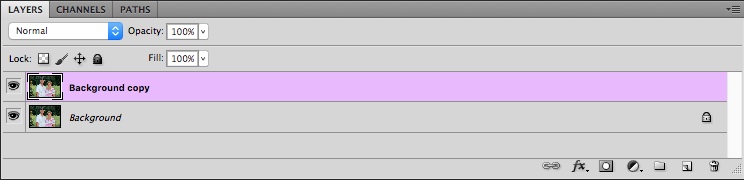
    It is the transparency sheet that your math teacher would write on; the edits and other operations you can perform on it are stacked one on top of the next, but the bottom layer is sacrosanct and never to be changed. Icons that let you adjust opacity, fill, blending mode, etc., are grayed out so you might be wondering just how to actually edit the picture. One place to start is by right-clicking on the background layer and choosing the “Duplicate Layer” option.
    photoshop-layers-background-and-duplicate

    Duplicate layers

    As soon as you create a copy of the Background layer a whole new world of creative possibility opens up. You now have access to tools like Opacity and Fill, you can change the Blend Mode, add Layer Masks, and hundreds of other options as well. The choices are staggering, and it’s important to remember that there is no one correct way of using layers in Photoshop. Each photographer has his or her own approach, and what works well for you may not be good for someone else. So don’t get caught up thinking you have to use a certain process when working with layers or anything else in Photoshop. The important thing is to find a solution that works for you.

    How layers work

    To dive a little deeper into the concept of layers and illustrate how they work, I’m going to start with the image of the husband and wife above. I’ll remove them from the garden in which they were photographed, and insert them into another location (new background). The first issue when doing any type of edit like this is that your computer doesn’t know that the people are separate from the background. It treats everything as one cohesive image but you can use layers in Photoshop to separate, remove, add, and otherwise edit the various parts of the picture.
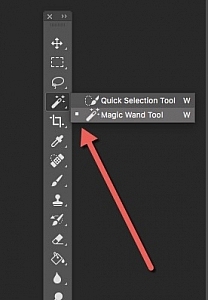
    quick-selection-tool-3In the image above, the subjects are clearly distinct from the background with highly contrasting colors so an operation like this is pretty straightforward. But if your subjects blend in a little more with the foreground or background it can get a little tricky. Press the “W” key to access the Magic Wand tool. Then click [shift]+w until you end up with the Quick Selection tool (or you can access it on the toolbar see the screenshot to locate it). Now click and drag the Quick Selection tool around your subjects until they are outlined with a cycling dotted line that looks like black and white ants marching in a loop.

    photoshop-layers-couple-selected

    Refine the selection

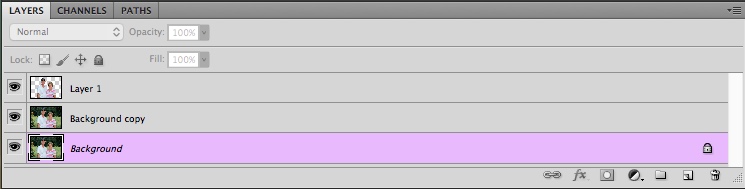
    If you try this operation and you aren’t quite getting your subjects selected how you want, you can use the Refine Edge (Select > Refine Edge in older versions, Select > Select and Mask in the newest Photoshop CC 2015.5) option to get your selection precisely how you need it. Once you are satisfied with your selection, choose Layer > New > Layer via Copy (you can also use the keyboard shortcut Cmd/Cntrl+J) and you will now see a third layer on the layer panel consisting of just the subjects and nothing else.
    photoshop-layers-couple-no-background

    Now the real fun begins! Click the eyeball icon to the left of all the layers except the new one with just your subjects and you will see everything else disappear.
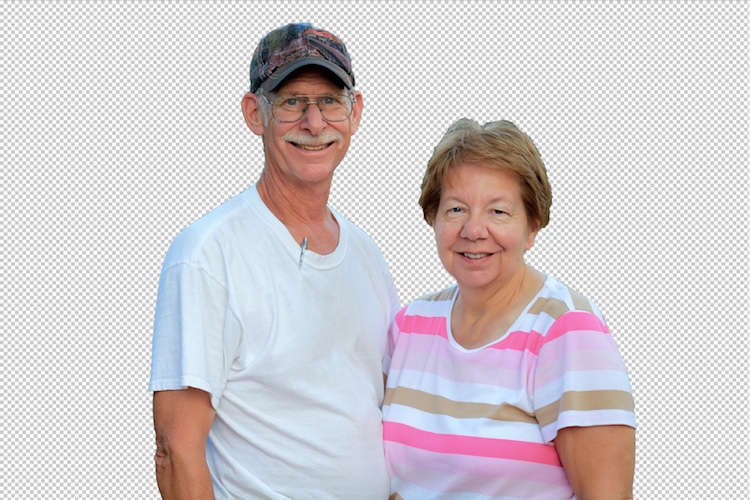
    photoshop-layers-couple-blank-background

    How Photoshop sees layers

    Pause for a moment and consider what is happening here. Your computer now sees the image not as one cohesive whole, with two people in front of a meadow, but as two distinct layers. One is a layer with just the people and the other layer below that is the background (the meadow). Technically there is a third layer, the locked background layer, but we’re ignoring that since we don’t do anything with it.

    Add a new image as a new layer

    To move the people to a different location all you have to do is insert an image as a new layer and place it below the layer with just the people. For this example, I’m going to put the couple in front of a photo I took with some trees and a bridge crossing a stream.

    photoshop-layers-bridge

    In Photoshop you can drag and drop images directly into your composition or use the “File > Place” command. When I insert the image of the bridge into the document with the couple I now have a new layer that I can manipulate like all the rest. You can also start to see the vertical structure of layers and how they are mixed together.

    The Layers panel functions from a top-down perspective in that whatever layer is at the top of the panel is literally the top-most layer in the entire composition. Layers below it are arranged in descending order. In this example, it’s essential that the layer with the two people appears as the top-most layer in the Layer panel itself, followed immediately by the new background.
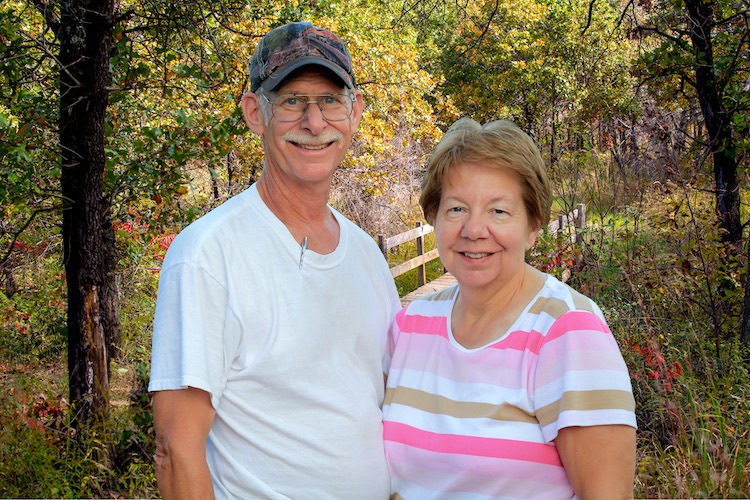
    photoshop-layers-couple-bridge

    Voila! The couple now appears in an entirely different location, all with just a few mouse clicks in Photoshop. If you are still trying to wrap your head around the concept of layers, here’s an extruded view of what you are seeing in the above image.
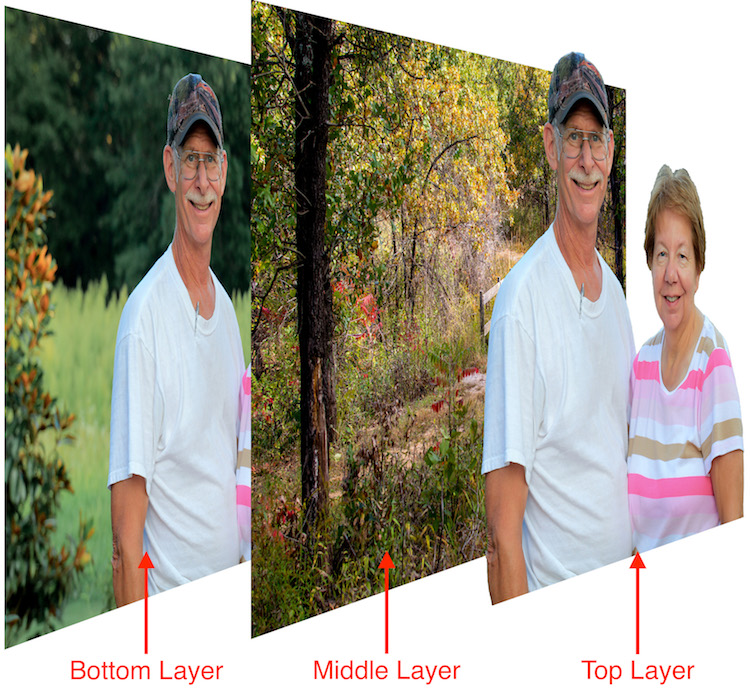
    photoshop-layers-3d-breakdown

    Cover your bases, keep all layers

    I could remove the bottom layer entirely but I left it in place because I don’t like to delete any layers when making a composite image like this. You never know when you might need to go fetch an errant strand of hair that you overlooked from the original layer, or use it for a bit of color correction later on down the line. If I want I can add more pieces to this image just by using layers and stacking things on top of each other, and using layer masks to refine and edit things even more.

    You can also edit the new background separately from the people such as adding a blur effect or desaturating it slightly. If you convert to a Smart Object any editing you do on that layer can be altered or changed later. But if you apply it directly to the layer it cannot. Make sure to match color balance when combining images for a more realistic look.

    layers-photoshop

    Additional adjustment layers have been applied to the background to shift the color, blur it in some areas, and darken the edges.

    Conclusion

    This type of switch-out-the-background edit is just a small taste of what you can do when using layers in Photoshop. Add empty layers by going to “Layer > New > Layer” and then using the Brush or other tools to start creating in them. You can re-order layers by clicking and dragging them up and down in the Layers panel. You can show and hide layers, adjust the opacity of a given layer, choose how one blends with the layers below it, and even create special Adjustment Layers that you can use to edit colors and add effects to other layers.

    I have only scratched the surface of what layers are capable of doing. Hopefully this gives you a basic understanding of what this powerful feature is all about. Do you have any tips or tricks for using layers that I missed? Please share them in the comments section below.

    googletag.cmd.push(function() {
    tablet_slots.push( googletag.defineSlot( “/1005424/_dPSv4_tab-all-article-bottom_(300×250)”, [300, 250], “pb-ad-78623” ).addService( googletag.pubads() ) ); } );

    googletag.cmd.push(function() {
    mobile_slots.push( googletag.defineSlot( “/1005424/_dPSv4_mob-all-article-bottom_(300×250)”, [300, 250], “pb-ad-78158” ).addService( googletag.pubads() ) ); } );

    The post An Introduction to Photoshop Layers Possibilities and Properties by Simon Ringsmuth appeared first on Digital Photography School.


    Digital Photography School

  • Remote Shutter Release Versus the Built-In Delayed Shutter

    It’s no secret that being a photographer, amateur or professional, can be quite expensive. We both travel and we want the latest and best equipment but we can’t always afford it all. Being selective with the equipment we choose to purchase can be wise as it’s better to spend a few dollars extra purchasing something of quality. A lot of the gear we have isn’t essential and can easily be done inside the camera itself. Let’s look at using a remote shutter release versus the delayed timer built into the camera.

    SelfieVoringsfossen

    A self portrait captured by using a remote shutter

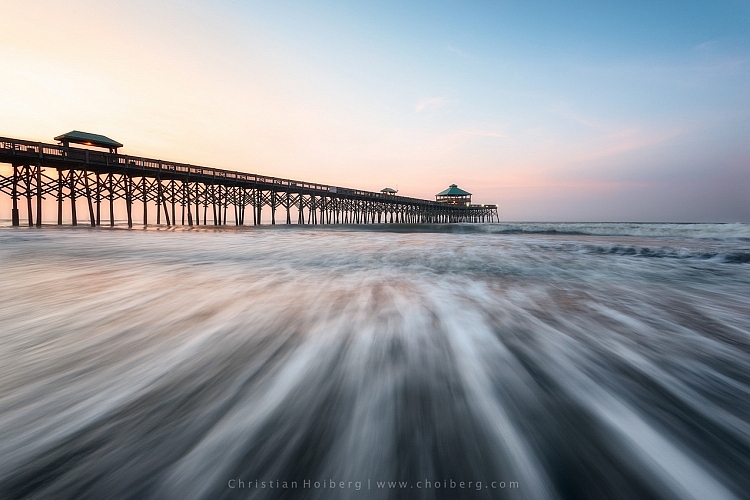
    A remote shutter is something you may have heard repeatedly that you need to purchase, especially if you’re into landscape photography. One of the main uses of a remote shutter is to minimize the vibration when taking a image to get a sharper result. What you also may know is that your camera has a delayed shutter function, typically of 2 and 10 seconds. So do you really need to purchase a remote shutter when you can do it in the camera? Let’s look at some pros and cons of using each – a remote shutter release and delayed shutter.

    Delayed Shutter

    Most digital cameras have a Delayed Shutter function. In fact, even smartphones have it.

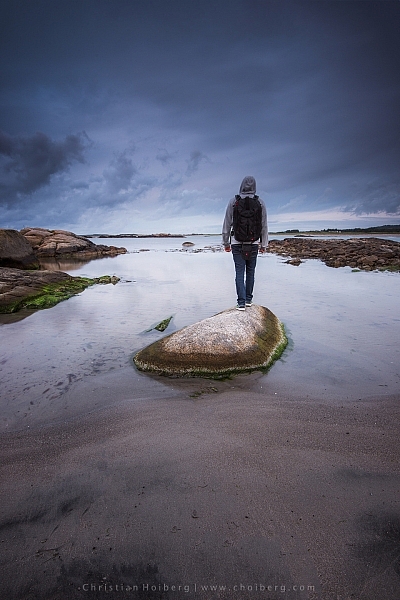
    Since I was close to the camera I could use a delayed shutter

    Since I was close to the camera I could use a delayed shutter

    A delayed shutter is, in simple words, a function that tells the camera to wait a few seconds after you push the shutter before it takes the picture. This allows you to either run in front of the camera and take a selfie or reduce the amount of vibration. This function is especially useful when you’re using a slow shutter speed and have your camera mounted on a tripod. If you use a shutter speed of 0.5 seconds and press the shutter you’ll see that the image will come out less sharp than if you use a delayed shutter.

    Pros of the Delayed Shutter:

    • It’s a standard function in most digital cameras and smartphones.
    • It’s free.
    • It reduces vibration and leads to a sharper image.
    • You can choose between a short delay or a longer delay.
    • You have the time to position yourself in the image after pressing the shutter.

    Cons of the Delayed Shutter:

    • It’s not flexible.
    • If you’re photographing something with motion it’s hard to time the shutter release perfectly and you might miss the shot.
    • In some cameras, the function is found deep in the menu.

    Remote Shutter Release

    Remote shutter release can vary in form, shape, and price. Some are tiny and inexpensive, while others are larger, with more options but also a less attractive price tag.

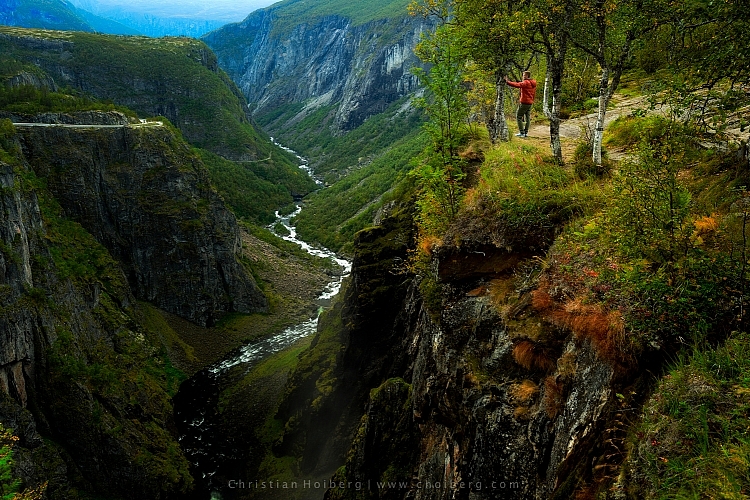
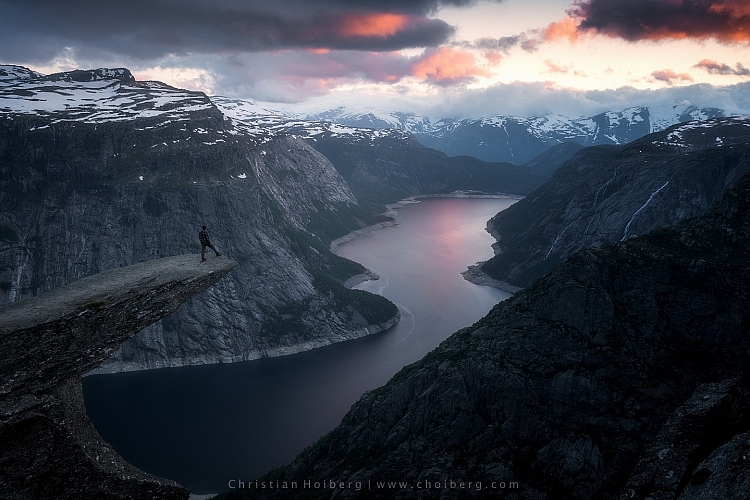
    I used a remote shutter and interval timer to photograph myself on the edge

    I used a remote shutter and interval timer to photograph myself on the edge.

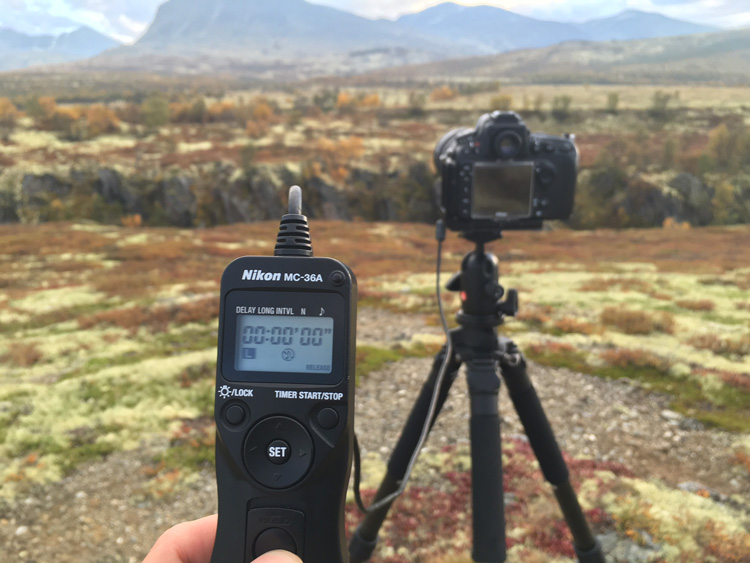
    Choosing the right remote shutter release can be a hassle sometimes as you may not know your needs. You may only need a simple one to avoid any motion when taking the image, or may need something more advanced that lets you do interval timing or perhaps something that has a “Bulb lockup”.

    Once your needs are established, you have to sort out if you want a cable release or wireless. I won’t get into the topic of which is better, but again you need to consider your needs for a remote.

    remote-timer-nikon

    Pros of remote shutter releases

    • Wireless remotes allow you to stand far away from the camera and take pictures.
    • Advanced models have many options such as interval timers.
    • You can use “Bulb Mode” without having to hold the camera’s release button and cause vibration.
    • Many models have LCD screens with a timer.
    • Take a picture at the exact moment you need.
    Freezing the exact moment with a cable release

    Freezing the exact moment with a cable release

    Cons of remote shutter releases

    • More advanced models can be very pricey.
    • It takes extra space in your bag.
    • It might be hard to choose the right model.
    • Cables break quickly on low-end cable releases.
    • Small, wireless remote shutters are easy to loose.

    What is best?

    To be honest with you, they both have their advantages. It would be wrong to say that one is better than the other in any case.

    That being said, as a landscape photographer, I am dependent on my remote shutter. A lot of the time I can’t wait the extra two or three seconds before the image is taken, as the moment is gone by then. When I’m photographing rushing waves I need to capture the image at the exact moment I want, ergo I need a remote shutter. If I’m in the woods and not photographing anything that might move, I don’t need the remote shutter (even though I use it by habit).

    Shutter speeds over 30 seconds requires a remote shutter

    Shutter speeds over 30 seconds require a remote shutter

    If you only photograph still landscapes and you don’t need a shutter speed of more than 30 seconds, I don’t see a reason to purchase a remote shutter. If you photograph anything with motion or need a shutter speed of more than 30 seconds I recommend you to purchase one.

    googletag.cmd.push(function() {
    tablet_slots.push( googletag.defineSlot( “/1005424/_dPSv4_tab-all-article-bottom_(300×250)”, [300, 250], “pb-ad-78623” ).addService( googletag.pubads() ) ); } );

    googletag.cmd.push(function() {
    mobile_slots.push( googletag.defineSlot( “/1005424/_dPSv4_mob-all-article-bottom_(300×250)”, [300, 250], “pb-ad-78158” ).addService( googletag.pubads() ) ); } );

    The post Remote Shutter Release Versus the Built-In Delayed Shutter by Christian Hoiberg appeared first on Digital Photography School.


    Digital Photography School

  • Entaniya 250 Micro Four Thirds fisheye lenses feature 250-degree FOV

    Tokyo-based maker of VR lens accessories Entapano is working on the Entaniya Fisheye 250 MFT lens, a model with a 250-degree field of view that it aims to make available in three varieties: 2.3mm F2.8, 3.0mm F2.8, and 3.6mm F4.0. All three lenses feature 18 elements in 12 groups with four extra-low dispersion lenses and a 1.6kg / 3.5lb weight without front or rear caps. The company cautions these specs are ‘subject to change,’ however, as the lens is still in development.

    Entaniya Fisheye 250 MFT 3.6 sample image taken with Olympus Pen F, provided by Entaniya

    The company details the Entaniya Fisheye as being suitable for producing different types of VR content depending on which lens version is used. The lenses are made in Japan, where the company estimates its price at ¥388,000 / $ 3,730 / €3400. Entapano has the released date scheduled for ‘end of 2016.’

    Articles: Digital Photography Review (dpreview.com)

  • Invisible Solar: Panels Camouflaged as Wood, Clay, Stone & Concrete

    [ By WebUrbanist in Design & Products & Packaging. ]

    solar-shingle-design

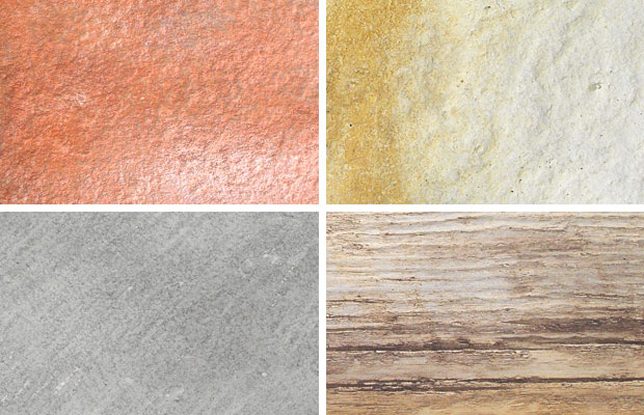
    Overcoming the awkward aesthetic factor typically faced by home solar technology, these disguised panels look like ordinary building materials you would expect to spot along the sides, steps or roof of a house.

    solar-camouflaged-disguised

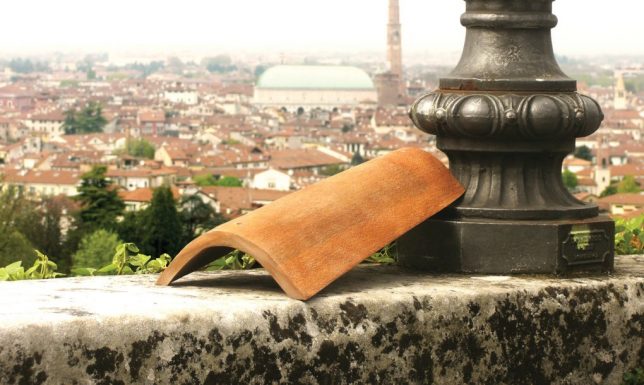
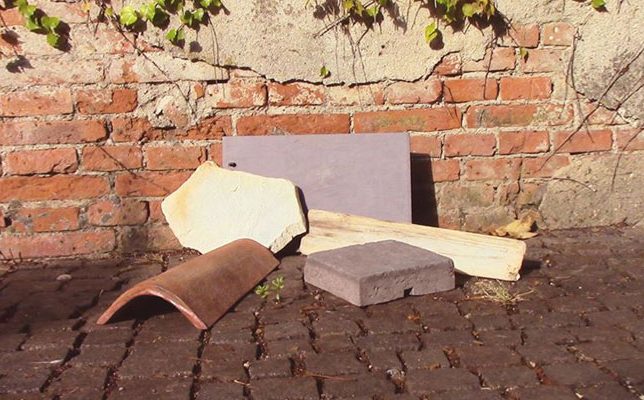
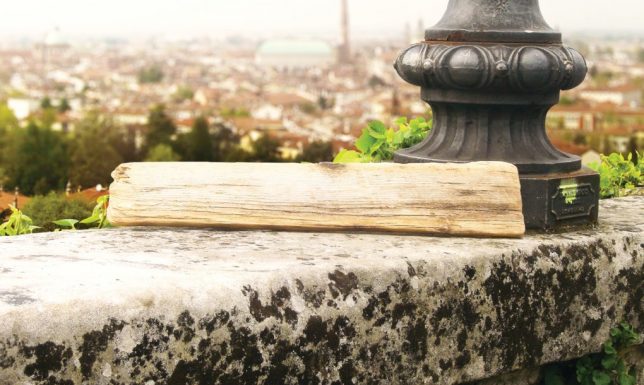
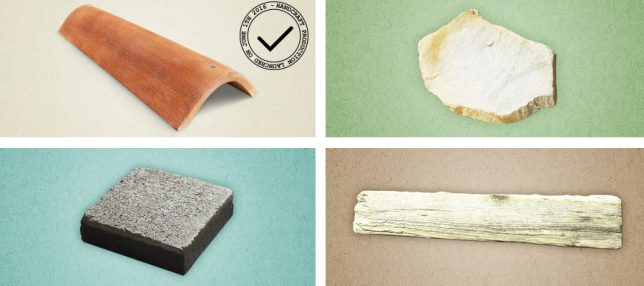
    Dyaqua, an Italian company, has developed their Invisible Solar series to look like concrete bricks, slate shingles and wooden boards, allowing them to blend into ordinary built environments. A thin top layer mimics desired materials while allowing the sun’s rays through to the photovoltaic cells beneath.

    solar-material-cover

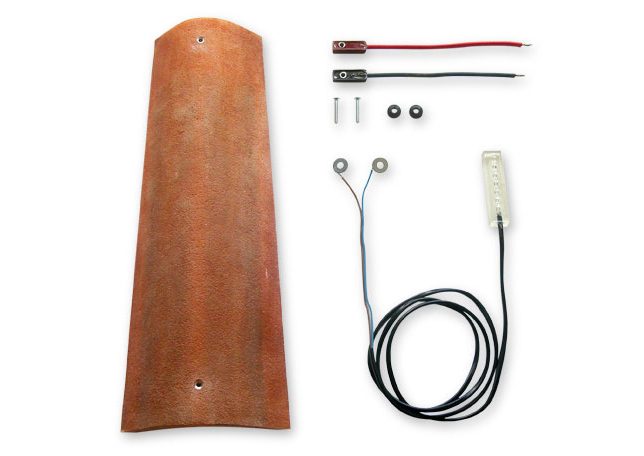
    From the company: “The Invisible Solar modules are composed of a non-toxic and recyclable polymeric compound, within which are incorporated the monocrystalline silicon cells. A special surface, opaque at the sight and transparent to the sun rays, covers the cells by hiding them without prevent their operation.”

    invisible-solar-panel

    Instead of adding semi-reflective, black-and-grey accents to a traditional wood or masonry structure, these fixtures are designed to fit any abode, historic or modern. The company has begun production with the Rooftile, which resembles a typical reddish-brown terracotta shingle.

    solar-wood-block

    secret-solar-panels

    From there, they aim to create blocks and boards that can be used on walls (cladding) or walkways (pavement) sure to please even the toughest community design standards boards. They are also built for strength and durability, able to “withstand high static load, tolerates chemical solvents and atmospheric agents.”

    Share on Facebook


    [ By WebUrbanist in Design & Products & Packaging. ]

    [ WebUrbanist | Archives | Galleries | Privacy | TOS ]


    WebUrbanist