Blog

  • NYC Dance Project: How two photographers capture the beauty in movement

    NYC Dance Project: The Art of Movement

    Charlotte Landreau, Soloist, Martha Graham Dance Company. © Ken Browar and Deborah Ory

    New York City-based photographers Deborah Ory and Ken Browar have spent the past two and a half years creating images of today’s most influential dancers in their home studio. A project that began in a quest to make photographs to decorate their daughter’s bedroom quickly became a long-term endeavor to capture the beauty of movement. This self-funded project, fueled by their passion for photography and dance, resulted in the team’s first book: The Art of Movement—a beautiful, award-winning 300 page compilation featuring photographs of more than 70 dancers from the world’s leading companies including American Ballet Theatre, New York City Ballet, Alvin Ailey American Dance Theatre, Royal Danish Ballet, among many others.

    Ory, who started dancing when she was 7, began her photography career photographing rehearsals when a dance injury prevented her from performing. She has shot editorial for magazines including Self, Martha Steward Living and Real Simple and served as photo editor for House and Garden and Mirabella.

    Fashion and beauty photographer Browar began his career in Paris, with work published in some of the leading fashion magazines in Europe and the U.S. including Vogue, Elle and Marie Claire. Browar’s interest in dance began when he photographed dancers for the Paris Opera Ballet.

    Together their NYC Dance Project has been featured in numerous magazines ranging from Harper’s Bazaar to Vogue Italia.

    For behind the scenes insight into the project, you can read our Q&A with this talented team. Be sure to scroll through the gallery to see some of the images from the project.

    The book can be purchased here. Follow NYC Dance Project on Facebook and Instagram And if you’re in New York City, check out these events celebrating the book:

    November 7 – ABT Jr Council Book Launch – A cocktail party and book signing; many of the ABT dancers will be there. More info and tickets

    November 10 – Barnes and Noble Book Signing – 7pm – 150 East 86th Street, New York City. A book signing and Q&A. Ory and Bowar will be joined by Martha Graham Principal dancers, Lloyd Knight and Masha Dashkina Maddux (the dancer on the cover). More info here

    ?November 30, 2016 – Martha Graham Dance Company Studio Series – 7pm. Ory and Browar will be having a discussion with Artistic Director, Janet Eilber. Members of the Martha Graham Company will be performing and there will be a chance to take photographs of the dancers. Reserve your tickets here

    December 8, 2016 – Rizzoli Bookstore – 6-8pm. 1133 Broadway, New York City. There will be drinks and a launch party to celebrate the book as well as a panel discussion with Ory, Browar and the dancers.??? rizzolibookstore.com

    NYC Dance Project: The Art of Movement

    Xin Ying, Principal, Martha Graham Dance Company. © Ken Browar and Deborah Ory

    How did the NYC Dance Project get started? What was your inspiration?

    The inspiration for the project came when our daughter Sarah, an aspiring ballerina, wanted to decorate her room with dance photographs. To our disappointment, we were not able to find images of the current dancers that Sarah admired in any contemporary books or photographs. There were beautiful images of famous dancers from past generations – such as Baryshnikov or Markova, taken more than 40 years ago – but nothing of the current stars.

    Ken decided we needed to photograph these dancers ourselves. We were great fans of Daniil Simkin, the American Ballet Theatre Principal Dancer, and sent him an email asking him to be our first subject. Daniil loves photography and agreed to be photographed and this was the beginning of NYC Dance Project. Daniil helped us in getting a lot of other dancers involved in the project. It was a time when dancers were starting to use social media to promote themselves and they were interested in having images taken.

    We originally thought it was going to be a blog, but after we had 4-5 shoots, we realized this had a longer life than we thought it would.

    NYC Dance Project: The Art of Movement

    Gillian Murphy, Principal, American Ballet Theatre. © Ken Browar and Deborah Ory

    You’re very active in social media. How has that benefited you and the project?

    Social media is a really important part of our project and we started with it right away. Daniil Simkin was very involved in social media and helped us learn how to promote our project through Facebook and Instagram. Our audience has been really active and it’s been a great way for us to reach even more people. Through social media, we have been able to reach an international market – we have dancers from around the world contacting us and asking about doing shoots with us when they are touring to NYC. It’s been a great way for us to connect worldwide with the dancers.

    Having a large social media following was also important to our publisher, as it’s a great way to promote the book.

    NYC Dance Project: The Art of Movement

    Michael Jackson Jr, Alvin Ailey American Dance Theater © Ken Browar and Deborah Ory

    Your studio is set up in your living room. How do you manage that arrangement?

    Ken and I mostly worked in rental studios or outdoors previous to this and the fact that we work from our home changes the mood for the shoot. There are usually no more than the two of us, the dancer and sometimes a hair and makeup artist. Because it’s a small crew, in our home, it’s a very warm and friendly environment. There is something about the casualness of being in our home that we really love. We also can do a shoot at the last minute. Often we leave our studio set up for a few days and shoot several dancers. We go in spurts where shoot a lot, then we put our home back together and spend a few days editing.

    The space we have is very large. We were able to do a shoot with 9 dancers here, although it was very tight. Ideally we would have an even larger studio, but as this is a self-funded project, we never would have been able to do it if we rented a studio.

    NYC Dance Project: The Art of Movement

    Michael Jackson Jr, Daniel Harder, Sean Aaron Carmon, Alvin Ailey American Dance Theater. © Ken Browar and Deborah Ory

    Tell us about how your studio space is set up, what gear you use and how you work together.

    Our home is a loft space with 16 foot high ceilings. Usually our background is about 15 feet high. We work with a Hasselblad on a tripod, using a standard 80mm lens. We now have the H6D. We like working with medium format, because we love the way it looks. Also, we like printing the images very large and the medium format lends itself well to this. We work very slowly, as we are using strobes and never have used a motor drive. When a dancer does a jump, we have to get the timing right, there is no room for mistakes!

    We tend to keep our lighting very simple, with just one or two lights – from the top and/or side, depending on where the subject is and how they are moving. We’ve been using Profoto’s D4’s. These are not as fast as other lights that would stop the action 100%, but we are not bothered by not having technically perfect images. It’s the emotion and movement that we are trying to capture.

    Our light is just to enhance the movement. We’ll start with the movement and think about how the light can work the best to complement it. Since the dancer is always moving throughout these shoots, we are constantly adjusting the light, bringing reflectors in and out and refining things. It’s all very fluid.

    NYC Dance Project: The Art of Movement

    Artem Ovcharenko, Principal, Bolshoi Ballet. © Ken Browar and Deborah Ory

    …(cont.) People write us all the time asking if we can send them a lighting diagram. We can’t do this as we are constantly adjusting the lights. It’s so helpful having two people making the images – one of us is watching the dancer and the other is moving a light or adjusting it.

    We use hand painted backgrounds that we’ve had an artist make. She is constantly refining it over and over for us. At one point she told us that she can’t add any more paint to it, it was getting too thick to roll up!

    We have wood floors but we put a Marley dance floor, which comes in rolls, on top of the floor and underneath the canvas. That helps dancers from slipping and helps keep the canvas in place as well.

    In the beginning we each worked with our own camera and had our own idea of what the image should be. The dancer would have to repeat the movement for each of us and we would compare who captured it better. Now we have become a team and work with one camera.

    NYC Dance Project: The Art of Movement

    James Whiteside, Principal, American Ballet Theatre. © Ken Browar and Deborah Ory

    When a dancer comes into the studio for a shoot, how much do you direct them? Where do you begin?

    Most of these dancers are well known dancers that we have seen perform before. If we haven’t seen them live—such as dancers from another country—then we’ll watch videos of them so we kind of know their strengths. Ken and I have an idea about what we would like to capture about each dancer, but once the dancer comes in, it’s a collaboration with them as well. We have them start moving with very little direction from us. We’ll look at a few images together and start to refine them. Usually we pick one or two ideas to work on and fine tune those until we get an image we all feel works well.

    NYC Dance Project: The Art of Movement

    Miriam Miller, New York City Ballet. © Ken Browar and Deborah Ory

    Who styles the dancers and where do you get the outfits for the shoots?

    I [Ory] do most of the styling for our shoots. Once we worked with a stylist and we felt it was too much about fashion and often the clothes did not move well. The clothing needs to be simple and beautiful, but most importantly, it needs to move well.

    Clothing is a really important element for us. We’ve gotten outfits from different designers, including Leanne Marshall, who has been a big contributor for us. Companies like ABT will sometimes give us old costumes. They’re tattered and hand stitched and I love that you can see little rips and tears.

    We also sometimes paint their pointe shoes so they match the clothing. In fashion you would never wear the same colored shoes with every outfit, so why would you wear pink pointe shoes with every dress?

    NYC Dance Project: The Art of Movement

    Fana Tesfagiorgis, Alvin Ailey American Dance Theater. © Ken Browar and Deborah Ory

    What software do you use and how much post-processing is involved?

    On set we shoot tethered with Hasselblad’s Phocus software. The images are brought into Lightroom to edit and the post-processing is done in Photoshop, after we have made our selects. Post-processing is pretty minimal in terms of what we do to the pictures. Most of our time is spent cleaning up spots and dust in the background. There is very little manipulation of the images themselves.

    Often we have to remove cats from the photos! Our cats are literally walking through the set and often they are in the photo or there is a tail in the picture. They will go lay down underneath the dancer, no matter what the dancer is doing!

    NYC Dance Project: The Art of Movement

    Misty Copeland, Principal, American Ballet Theatre, from our shoot for Harper’s Bazaar, Degas story. © Ken Browar and Deborah Ory

    You were commissioned by Harper’s Bazaar to do an editorial with American Ballet Theatre’s Principal dancer, Misty Copeland in conjunction with the Degas exhibit at MOMA. How did that come about?

    Harper’s Bazaar found us on Instagram and also through another principal dancer who recommended us for this job. Glenda Bailey, their Editor-in-Chief, wanted someone who was used to shooting dancers, rather than a fashion photographer. Also, we had worked with Misty before, so they had seen our images of her. While we were very fortunate that they picked us, we were not really looking for commercial assignments at that time. They asked us if we had a porfolio and we just suggested they look through our Instagram feed. It was interesting to us as we knew how difficult it can be to send your portfolio and try to get jobs with magazines like Harper’s Bazaar.

    It was a really difficult shoot. Bazaar wanted to make the pictures look exactly like Degas’ painting of dancers. We were stressing about how to make these images keep the perspective and painterly look of the Degas paintings. Degas sometimes just painted things in the background and we could not figure out what these things were. What are those blue streaks? Is he painting a set or was that just for effect? It was really a challenge re-creating these paintings!

    There were about 50 people on set, and it was the first time we had worked with a crew that large for a dance shoot. The space we used at Pier 59 photo studios in NYC was really large, but we had to create 5-6 sets and there was only room to put up 2 at a time. Luckily, there were a lot of people to help us create these sets and it all came together beautifully. There was a lot of press surrounding the story, so it really helped us to get better known.

    NYC Dance Project: The Art of Movement

    © Ken Browar and Deborah Ory

    Your first book, The Art of Movement, was released this October. What was it like to publish your first book?

    As photographers, both of us had always dreamed of making a book. We certainly did not just create the images for instagram! Meeting with publishers was a bit depressing, however; most said they only do a dance book every ten years or so. It took a lot of persistence, and also a great literary agent, to help us find the right publisher. Although it worked out in the end, we got our contract at the last minute. Our publisher, Black Dog & Leventhal, wanted to get the book out this year, so we had to work incredibly quickly to meet the deadline. We barely slept for a few months. Putting together a 300 page book in such a short amount of time was very ambitious and stressful, but looking back now, it definitley feels worth the struggle!

    NYC Dance Project: The Art of Movement

    Michael Jackson Jr and Sean Aaron Carmon, Alvin Ailey American Dance Theater. © Ken Browar and Deborah Ory

    What’s next for you?

    It’s likely that we will make another book. The next step is also working with galleries. We just started working with the Holden Luntz Gallery in Palm Beach and will be looking for a gallery in NYC as well.

    Articles: Digital Photography Review (dpreview.com)

  • Datascrapers: Infographic Skylines Overlay Income Inequality on City Grids

    [ By WebUrbanist in Art & Drawing & Digital. ]

    city-data-blocks

    Somewhere between data visualization and civic artwork, these info-driven diagrams reveal wealth disparities in the centers of America’s second and third largest cities. Herwig Scherabon‘s project, titled simply Income Inequality, uses a matrix of blocks (minimicking magnetized iron) to highlight rich and poor neighborhoods.

    urban-data-la-chicago

    The city grids form a recognizable backdrop for these axonometric representations, allowing viewers to read the baseline built enviroment against the overlaid information. In turn, the millions of stacked pixel blocks end up forming an alternative landscape of skyscraper-like structures in the urban environment.

    income-inequality-representations

    The net result is a map of the city’s invisible patterns and correlations shaped by power, money and time, revealing inequalities and mechanisms of segregation. Above: Chicago’s infamous low-income South Side (with Lake Michigan for reference). Below: poor areas of Los Angeles located directly next to the downtown core.

    cityscape-by-wealth-and-poverty

    The final presentation was mounted on a pair of wooden boards with the city names shown on the cites, exhibited at the Glasgow School of Art graduate show. Captions on the side give more details on the diagrams.

    city-captions-on-side

    From the artist/designer: “The two large prints (150x75cm) are visualizations of income inequality in Los Angeles and Chicago and are currently shortlisted for the Information is Beautiful Awards. They are printed on matte Somerset Velvet paper and mounted on thick wooden boards. The images are abstract diagrams of these cities that show a high resolution matrix of blocks. The height of these blocks corresponds to the income in the respective output area.”

    downtown-millions-of-blocks

    wall-mounted-artworks

    “It is part of the design idea to inspire the viewer to look for their own neighborhood or other areas that interest them. I want to trigger a train of thought for what the reasons behind inequality might be. I am always fascinated by the patterns and correlations in the urban fabric. The politics behind urban planning tell us a lot about the people who live in these places and the powers who shape them. I think that it is utterly important to try to unveil the inequalities and the segregating mechanism that we got used to live with.”

    Share on Facebook


    [ By WebUrbanist in Art & Drawing & Digital. ]

    [ WebUrbanist | Archives | Galleries | Privacy | TOS ]


    WebUrbanist

  • Power struggle: Hauntingly beautiful images of abandoned cooling towers

    A look inside active and abandoned cooling towers

    Belgian photographer Reginald Van de Velde has made a project of exploring the inner workings and mechanisms of some of Europe’s awe-inspiring, dormant giants: cooling towers. His images document both active and decommissioned cooling towers, as well as towers slated for demolition.

    The interiors of the towers yield astonishing vistas, and as they’re abandoned he’s able to enter explore them, document and admire them. In his imagery he searches for patterns, a sense of scale, repetition, and disruption, rendering landscapes within the massive structures.

    ‘One thing that fascinates me extremely is the fact that not a single cooling tower is the same,’ Van de Velde says. ‘Each and every one of them has a unique interior design and build! They all look the same from the exterior, but with each visit to a new cooling tower I’m always surprised by a different interior, time and time again.’

    To see more of Reginald’s work, visit his website or follow him on Facebook and Instagram.

    A look inside active and abandoned cooling towers

    Vegetation is slowly taking over the bottom area of this cooling tower slated for demolition, Belgium. Photo by Reginald Van de Velde

    A look inside active and abandoned cooling towers

    Inside the belly of an active cooling tower: billions of water drops fall down while releasing heat to the environment. Belgium. Photo by Reginald Van de Velde

    A look inside active and abandoned cooling towers

    The impressive interior view of a giant cooling tower scheduled for maintenance, France. Photo by Reginald Van de Velde

    A look inside active and abandoned cooling towers

    The spectacular view inside a decommissioned gasometer in Germany, looking upwards. The air vents at the top dome create natural ambient light. Gasometers can reach heights of 150 meters. Photo by Reginald Van de Velde

    Inside Active and Abandoned Cooling Towers

    Unreal scenery resembling the set of a sci-fi movie. This is the view inside a defunct cooling tower in Belgium. Photo by Reginald Van de Velde

    A look inside active and abandoned cooling towers

    Warm moist air rises from a central outlet inside an active cooling tower, Belgium. Photo by Reginald Van de Velde

    Inside Active and Abandoned Cooling Towers

    Snow particles cover the interior mechanism of an abandoned cooling tower in Belgium. Photo by Reginald Van de Velde

    A look inside active and abandoned cooling towers

    Covered in moss and algae, these beams support the inner structure of a defunct cooling tower, UK. Photo by Reginald Van de Velde

    A look inside active and abandoned cooling towers

    A structure that resembles the look and feel of a cooling tower: this is the view inside a gasometer, an industrial recipient used for the storage of natural gas. Belgium. Photo by Reginald Van de Velde

    To see more of Reginald’s work, visit his website or follow him on Facebook and Instagram.

    Articles: Digital Photography Review (dpreview.com)

  • Accessory review: MindShift Gear SidePath camera backpack

    The MindShift Gear SidePath
    $ 99.99 | MindShiftGear.com

    MindShift Gear makes a lot of cool bags; I’ve used several over the years and have been impressed with their durability. The most recent bag to join the MindShift Gear family is the SidePath. It caught my attention because it features a near identical design to one of my all time favorite camera backpacks, the Lowepro Hatchback. These ‘hatchback’ style bags consists of two main compartments: an upper area to store personal stuff and a lower area, accessible via the back of the bag, for storing one’s camera gear.

    I’ve found this style of bag to be exceptional for everyday use. I almost always have a camera on me (usually a Nikon D750 and 35mm F2), but often need additional room in my bag for carrying my hard drives, extra clothes and a snack. With the SidePath, I have plenty of room to do this. I was also able to keep my camera and hard drives separate from my cloths and food. Also convenient: the bag has a trapdoor to open up the two compartments into one. This makes it a good grocery-getter as well.

    The SidePath is available in one size only, and offers a total volume of 14 liters (by comparison, Lowepro has a 16L and 22L version of the Hatchback).

    Specifications:

    • Exterior Dimensions 10.6″ W x 19″ H x 5.9″ D (26 x 47 x 15 cm)
    • Camera Compartment: 9.1″ W x 6.7″ H x 5.5″ D (24 x 15 x 14 cm)
    • Tablet Slot: 8.3″ W x 9.8″ H x 0.6″ D (22 x 25 x 2 cm)
    • Weight: 1.6 lbs (0.7 kg) (includes rain cover)

    Design and Construction

    I live in Seattle and spend a lot of time walking and biking between my apartment, the office and concert venues. I had previously been using the Lowepro Hatchback before swapping it out for the SidePath and found I sacrificed very little in the switch (I have the 16L Hatchback, so I did lose some volume.) After three weeks using the SidePath, including a weekend trip to Santa Cruz California, and I have mostly positive things to say.

    What I like most about the design of this bag is how ordinary it looks; it doesn’t scream ‘I’m a camera bag!’ Moreover, I love how well-protected my camera gear is in the hidden lower compartment. Now, I’m not suggesting you sneak your camera somewhere it doesn’t belong, but the lower gear pocket makes doing just that VERY easy. And because the lower compartment is padded, it also doubles as a cooler-like area. Once again, I’m not suggesting you fill the compartment with brews, but it does perfectly fit a six pack of cold beverages.

    The exterior of the bag has a water repellent coating while the inside is coated in polyurethane. This helps to keep your stuff dry when not using the dedicated rain cover. More on that later.

    The side pockets are impressively stretchy. As you can see from the photo, I was easily able to stuff a water bottle in one and a Manfrotto BeFree tripod in the other. The two bungee cords located on the upper left and right of the bag can be used to further secure any oversized gear, like a tripod or flash stand.

    Comfort

    I’m 5’10” and have found the SidePath comfortable to wear, even for an extended period of time. It is also perfectly sized for every day out-and-about use (the next slide will give you a better idea of just how much you can lug). The back is well-padded, though the shoulder straps could benefit from some additional padding.

    Another benefit of the hatchback-style design is that most hefty items, like your camera and lenses, will be located in the lower portion of the bag, right up against your back. This makes hauling heavy equipment less painful. There is also a chest strap and buckle on the over-the-shoulder straps for added support.

    Capacity

    You can seriously fit a lot of stuff in this bag, including: a full frame DSLR body (Nikon D700), 2 lenses (Tokina 17-35mm F4, Nikon 85mm F1.8), two film cameras (a Polaroid 300 and Olympus Stylus Epic), a flash, card wallet, rain cover, 11-inch Macbook Air (you could probably squeeze a 13-inch in there instead), laptop charger, water bottle, tripod, US map, sunglasses, extra socks (it rains a lot in Seattle) and various personal items.

    Upper Storage

    The SidePath has only one interior zippered pocket, which I found disappointing. The more places I can organize and secure my stuff the better. It’s located up against the front inside of the bag. There is also a pocket against the back of the bag that MindShift is advertising can fit a 10” tablet or 1.5L hydration reservoir. I didn’t attempt to fit either of those in the pocket, but did find it a useful space for stowing my notebook, memory card wallet and extra Instax film. I only wish it had some way of securing itself closed, whether it be Velcro or a zipper.

    An 11″ laptop can easily slide down into the front portion of the bag. I also used that area to store my iPad while flying to Santa Cruz. There is also quite a lot of space in the open portion of the top area, which I was able to fill up with my flash, laptop charger and Polaroid camera.

    Lower Storage

    Whether you’re hauling sodas or camera gear, the lower area is well-padded and well-secured. The bag ships with three padded velcro pieces that can be reconfigured to your liking.

    One feature the Lowepro Hatchback offers that is missing on the SidePath is the ability to remove the lower gear portion of the bag completely. Still, it is nice that the divider between the upper and lower area can be dropped down to combine the two area into one.

    Side Pockets

    The ability to haul lightstands or a tripod securely is invaluable. The previously mentioned bungees chords located on either side of the bag are an excellent feature. And one not offered by the competition.

    Rain Cover

    The SidePath ships with a rain cover. Good thing because I tested the bag during the month of October, which just so happened to be the wettest October in Seattle history. Thankfully, never once did I find myself with wet gear. I’m also quite fond of the clips on the rain cover: they really help secure it to the bag and ensure no moisture is getting in.

    Areas for improvement

    There are aspects of the bag’s design I feel could be improved upon. The zipper track for the upper compartment allows the bag to open up dangerously wide. On several occasions over the course of this review, I unzipped the bag only to have it flop open and spill the contents of the upper compartment everywhere. If the zipper started and ended an inch or two higher than the bottom of the compartment, I think this would go a long way to rectify this issue. Or maybe I just need to get use to not opening the zippers all the way.

    I mentioned it before, but the back pocket could also really benefit from a zipper or velcro to secure itself closed. Because seriously, only one zipper pocket on a camera backpack is not enough, ever.

    The bottom line

    The MindShift SidePath is not a carbon copy of the Lowepro Hatchback, but the two are strikingly similar in design. There are aspects of each I like better, for instance I love the SidePath’s bungee cords for securing light stands or tripods, and I love the Hatchback’s removal lower compartment.

    On its own, the SidePath is an excellent day pack or travel pack. It can haul an impressive amount of gear, all in secure fashion and is well-versed to deal with inclement weather. At $ 100 MSRP it is pricier than the Lowepro Hatchback 16L (and a bit smaller), but it easily gives my favorite camera bag of all time a run for its money.

    What we like:

    • Lightweight
    • Spacious design with an impressive amount of room
    • Two compartments, one for personal items, one for gear
    • Camera gear compartment is secured against one’s back when wearing the bag
    • Trapdoor allows the two compartments to be one
    • Exterior of the bag is treated with a water repellent and it ships with a rain cover
    • Side pockets can easily fit a small tripod or light stand
    • Bungee cords allow for tripods or light stands to be easily secured to the bag

    What we don’t:

    • Only one interior zipper pocket
    • Camera compartment can not be removed
    • Upper compartment opens too wide, this sometimes lead to its contents spilling out
    • Shoulder straps could use a little more padding

    Score:

    Articles: Digital Photography Review (dpreview.com)

  • Apple cuts adapter and card reader prices to appease new MacBook Pro buyers

    When Apple announced its new MacBook Pro last week, Mac fans were up in arms about the removal of its HDMI port, SD card reader and MagSafe power connector (among other things.)  The new models have four Thunderbolt 3 ports (two on each side), and that’s it, thus requiring ‘dongles’ in order to use legacy connectors. SanDisk also produces an SD card reader (pictured) that plugs right into the side of the computer.

    To help placate those who aren’t excited about spending nearly $ 120 just to get their SD card reader and HDMI port back, the company has cut prices of many USB-C and Thunderbolt adapters for a limited time.

    • USB-C to USB adapter: $ 19 to $ 9
    • Thunderbolt 3 to 2 adapter: $ 49 to $ 29
    • USB-C to Lightning cables (1/2 meter): $ 25 to $ 19 / $ 35 to $ 29
    • Multiport adapter w/HDMI, USB and USB-C: $ 69 to $ 49
    • Multiport adapter w/VGA, USB and USB-C: $ 69 to $ 49
    • SanDisk USB-C SD card reader: $ 49 to $ 29

    Articles: Digital Photography Review (dpreview.com)

  • Leica D-LUX Typ 109 Explorer Kit bundle launches in November

    Leica has announced the new D-Lux Typ 109 ‘Explorer Kit’ bundle ahead of its launch in mid-November. This bundle includes the Leica D-Lux Typ 109 camera, an exclusive red cotton strap, and an auto lens cap that doesn’t need to be removed when powering the camera on, taking photos, or powering the camera off.

    The Explorer Kit’s D-Lux Typ 109 camera features the Leica DC Vario-Summilux 24-75mm equivalent F1.7–2.8 ASPH lens, and is ‘technically identical’ to the standard D-Lux camera ‘in every way,’ according to Leica (as well as the Panasonic LX100, probably). The D-Lux Typ 109 Explorer Kit is available to pre-order from Leica’s website for $ 1145. When purchased seperately, the camera and auto lens cap are priced at $ 1095 and $ 59 respectively.

    Source: Leica

    Articles: Digital Photography Review (dpreview.com)

  • Virtual Reality Nature: Helmet Lets Humans See the Forest Like Animals Do

    [ By SA Rogers in Conceptual & Futuristic & Technology. ]

    virtual-reality-forest-1

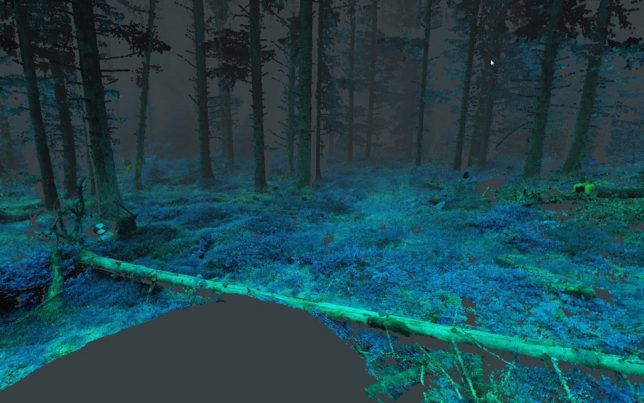
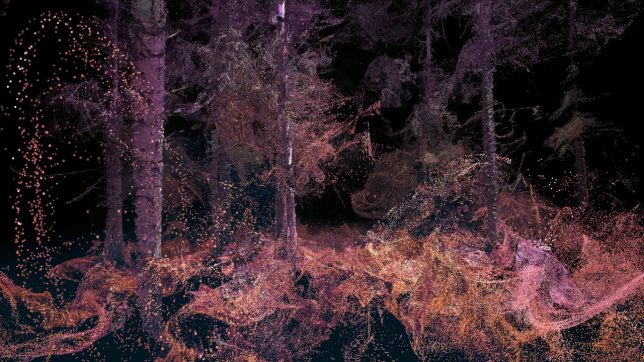
    Dragonflies experience their brief lives on this planet 10 times faster than humans, and in 12 color wavelengths as compared to our three, a viewpoint that’s been impossible to comprehend prior to the arrival of virtual reality tech. Thanks to a project called ‘In the Eyes of the Animal’ by the creative studio Marshmallow Laser Feast, we can see the world the way super-sighted creatures do in a feat that’s being called ‘sense hacking.’

    virtual-reality-forest-2

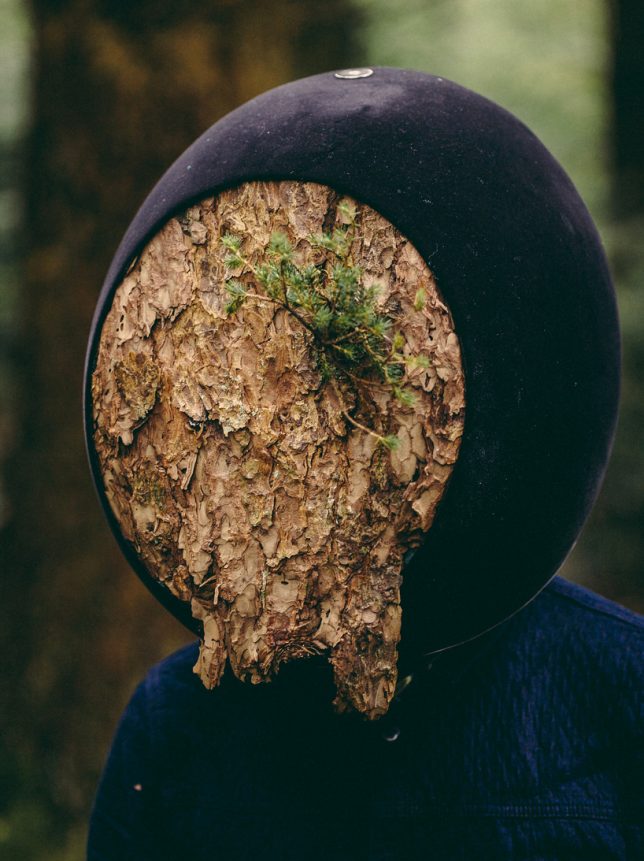
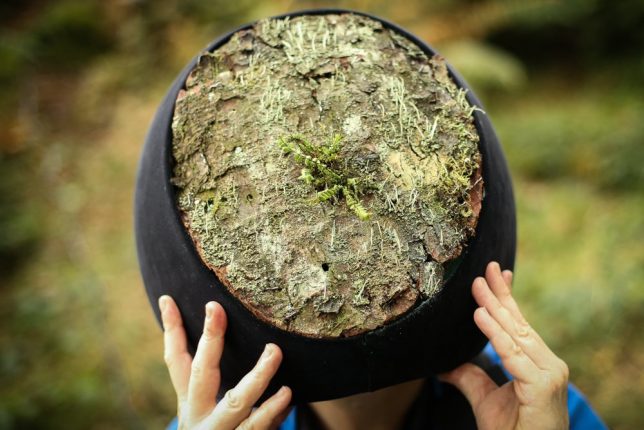
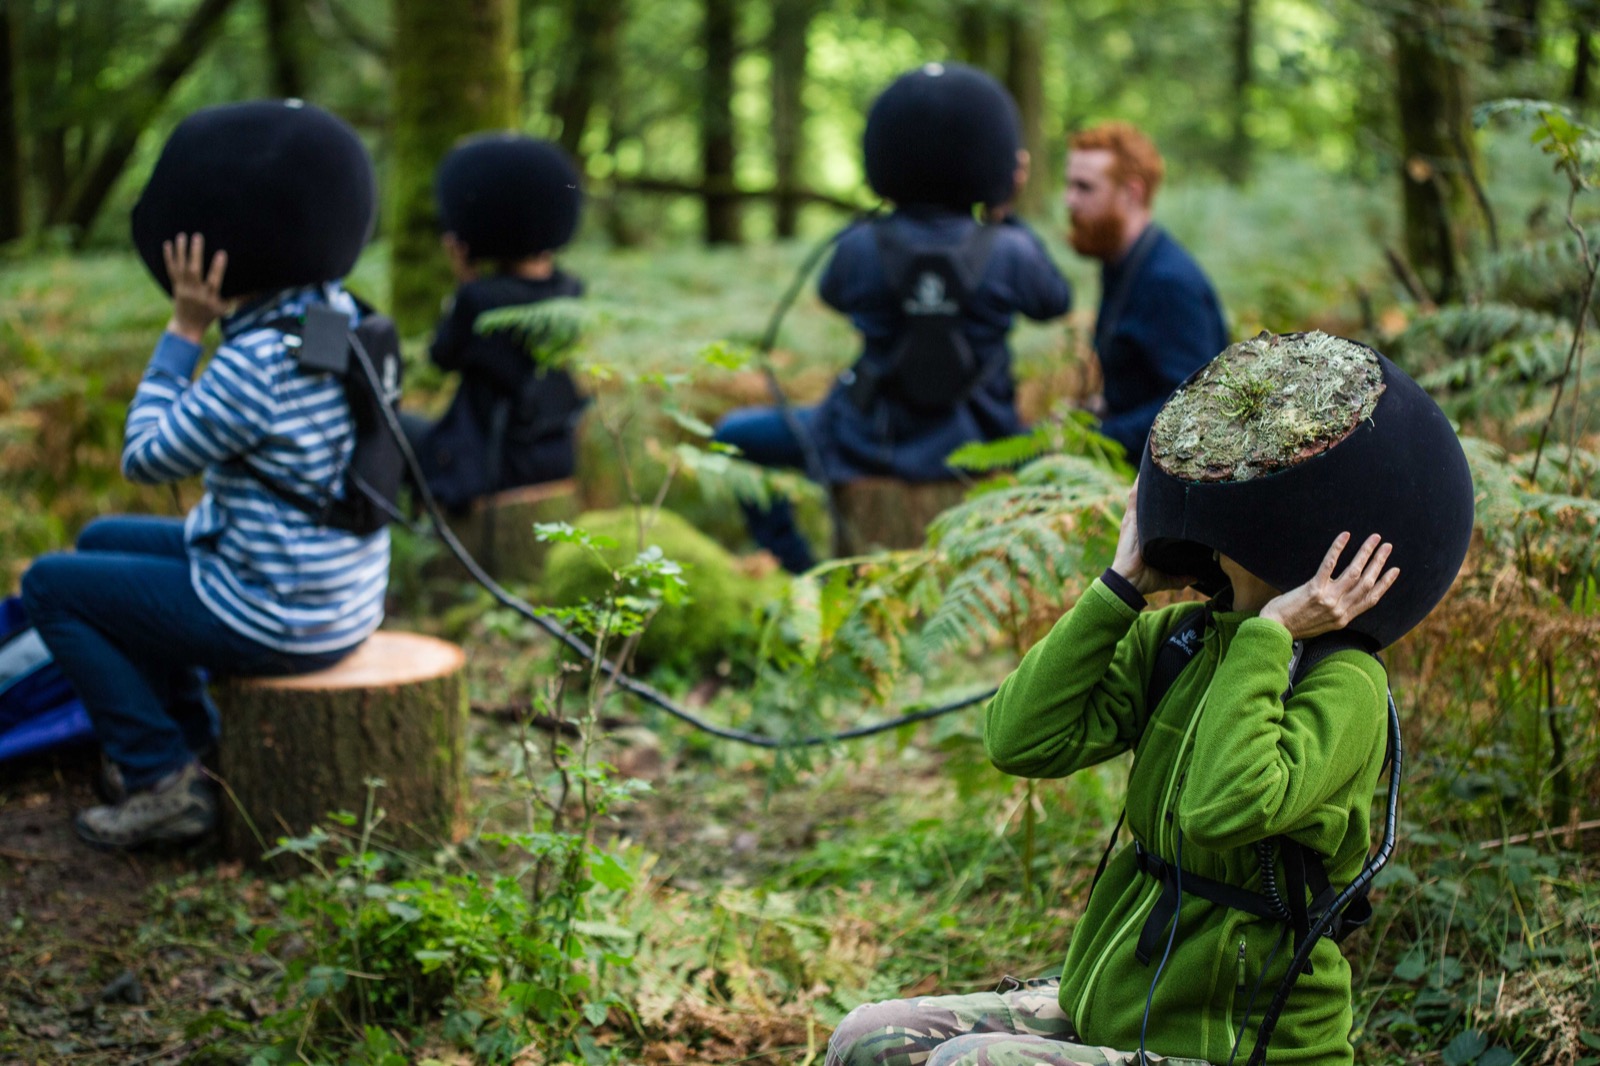
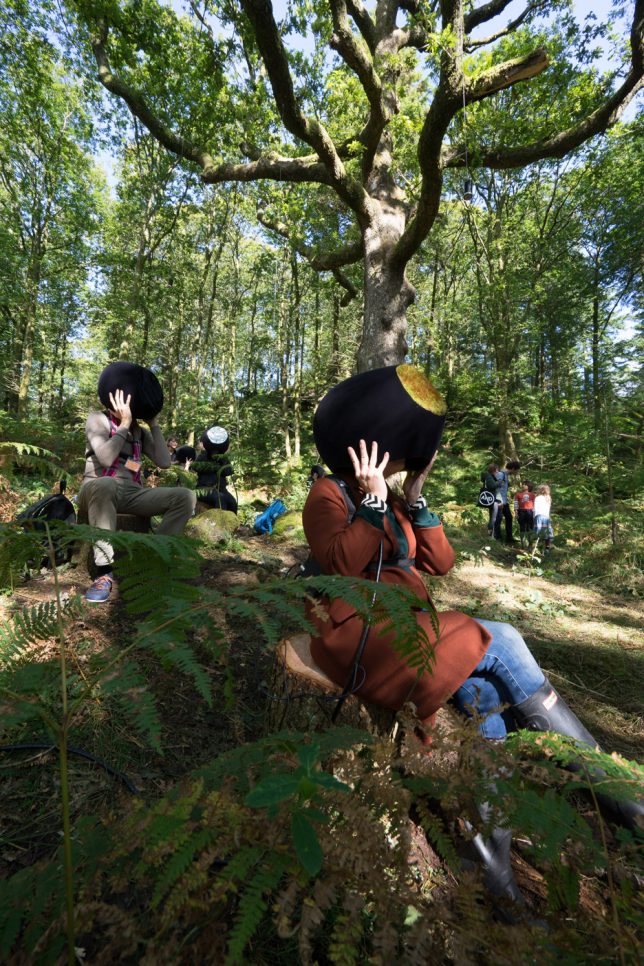
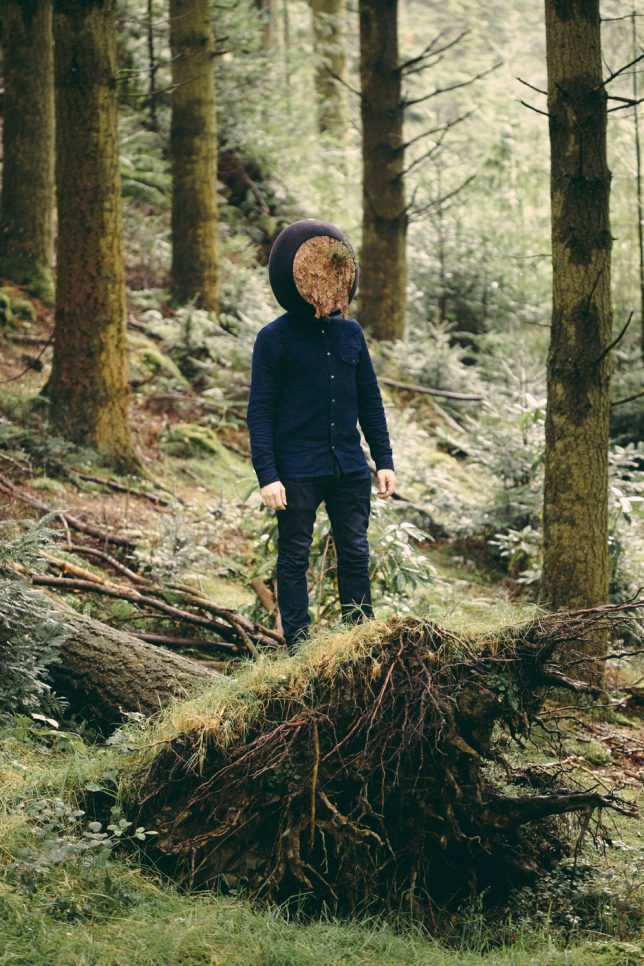
    Aerial drone footage, CT scans and LiDAR remote sensing technology taken from the Grizedale forest in the UK gives the team 800 million data points upon which to render a hyper-rich environment in tandem with a real-time visual and audio engine. Visitors to the real, actual forest put on virtual reality headsets obscured with moss to take it all in.

    virtual-reality-forest-3

    virtual-reality-forest-4

    virtual-reality-forest-5

    “Visual engine generates and renders whole environment in realtime with certain generative elements which makes each experience unique,” explains Creative Applications Network, . “Visual engine communicates with 3D Audio Engine via OSC [OpenSound Control] to provide positional data as well as head tracking data from the Inertial sensors of the VR headset. The sound uses Binaural audio, a technique mimicking the natural functioning of the ear by creating an illusion of 3D space and movement around the head of a listener as immersive as reality can be.”

    virtual-reality-forest-6

    virtual-reality-forest-7

    The result is an immersive experience at the intersection of science and digital art, and the images of the helmets in use in Grizedale Forest are pretty incredible, like something from a film. If you didn’t get a chance to see it yourself during the installation’s tour of festivals, you can watch the video to see an approximation of what it looks like.

    Share on Facebook


    [ By SA Rogers in Conceptual & Futuristic & Technology. ]

    [ WebUrbanist | Archives | Galleries | Privacy | TOS ]


    WebUrbanist

  • How to Find Your Photography Niche: You Don’t Have To Master It All

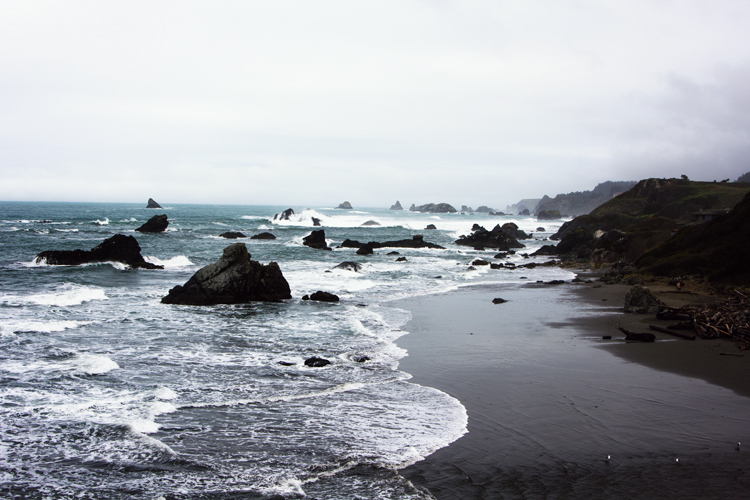
    When it comes to photography, there can sometimes be this strange assumption that we are (or should be) experts in all types of photography. Photography is essentially painting with light, so there’s no reason why we shouldn’t be able to do newborn photography, astrophotography, weddings, family portraits, landscape photography, and food photography, right? Light is light, whether it’s on a newborn or a spider, right? The simple answer is yes, and no. But, there’s good news, you don’t have to master it all. Let’s talk about how to find your photography niche.
    find-your-photography-niche

    Different strokes for different folks

    Much like a chef benefits from learning about cooking as a whole, photographers benefit from learning the fundamentals that apply across all types of photography: aperture, shutter speed, ISO, finding light, capturing movement and emotion, and focus. However, much like chefs often break off into different specialties, photographers also tend to break off into different niches. Some photographers find that they love newborns, but hate weddings (raises hand). Others love landscapes, but don’t enjoy photographing humans ever. Some photographers love to work in a studio, while others prefer to work only outdoors with natural light. Finally, some photographers prefer to shoot in digital, while others prefer film.

    niche-photography

    Do what you enjoy

    Whichever type of photography sparks your passion and fills you with joy? Do that. Whether that’s black and white portraits, lifestyle newborn images, macro photography of spiders, or architecture – do what you love.

    Then when it comes to post-processing, if there’s a method that transforms your image the way that you’ve always pictured it in your head, do that. If it’s a hipster vintage wash, do it. If it’s a quick curves adjustment and nothing else, do that too. Heck, if it’s black and white with selective coloring that makes you happy when it comes to post-processing, by all means, do that.

    Do it even if it isn’t cool, and no one else is doing it. Whether you consider photography to be a craft or an art, it is most certainly an opportunity to have a creative voice. And as corny as it may sound, your authentic voice, whether expressed in cooking or in photography, is important.

    find-your-niche-photography

    It’s okay not to do it all

    Just in case no one has ever told you before, it’s okay not to do it all. If you specialize in food photography and someone calls you up and asks if you’ll consider accepting a wedding booking, it’s okay to say, ‘Thank you so much for thinking of me, but no.” It’s okay to love photographing families and have absolutely zero interest in doing macro photography of insects.
    Whether you’re an amateur or a professional, it’s really hard sometimes to admit that a particular area of photography isn’t your preference or your strong suit. No one wants to feel incompetent. On the other hand, there’s no shame in telling someone that you are unable to accept a newborn booking because it isn’t your specialty and consequently you aren’t familiar enough with newborn posing safety to feel comfortable with accepting that job.

    Say it with me – I do not have to master it all.

    photography-specialty

    Finding your niche

    If you’re reading this article and thinking, “Okay great, so how do I find my niche?’ The answer is simply to try everything you can. Trying different types of photography is very different than feeling compelled to master every type of photography. Giving different genres of photography a try in low stakes (often unpaid) environments allows you to experiment, and to discover what it is that you really love.

    It also requires possibly humbling yourself a bit and allowing yourself to be taught by someone else. Even if you’re the best wedding photographer in your state or area, you may not know the first thing about being a wildlife photographer. So if you really want to learn, you have to be ready and willing to be taught.

    photography-you-love

    Benefits of trying things

    My personal niche in photography is newborns and families. It’s what really makes me excited, and what I really enjoy most. However, every time that I’ve stepped outside that comfort zone, with the goal of learning about another genre of photography, it’s been worth it.

    I’ve not been a master of every genre that I’ve tried, nor have I enjoyed them all, but I’ve learned something valuable in every case. When I buckled down and focused on landscape photography, it gave me an opportunity to review techniques of composition, metering, and shooting with a relatively small aperture in ways that I don’t typically use on a daily basis when it comes to people photography.

    finding-photography-passion

    When I made an attempt to learn about astrophotography (a genre of photography that had always greatly intimidated me) I had the opportunity to learn more about long exposures, and the technique of shooting with a wide open aperture in a different application than portraits. Are my astrophotography images perfect? Absolutely not! I’m not an astrophotography expert, and probably never will be. I have two kids, so staying up all night to photograph the stars is a special kind of sleep deprivation torture that I have no interest in repeating with any frequency.

    Yet, there’s also a certain importance in taking something that you have no idea how to do and learning the steps necessary to make it happen. When all the pieces finally fall into place, and you have an image that sort of resembles the gorgeous astrophotography images that you see in magazines, it’s a pretty amazing feeling. Like creating something out of thin air.

    photography-niche

    Conclusion

    The more types of photography you try, the more you’ll find yourself saying both “Yes!” and “Nope, I don’t need to do that ever again.” You may also find that there are several types of photography that you enjoy, which is fine. When I suggest finding your niche, I’m not suggesting that you choose one photography genre and one post-processing style and stick to those for the rest of your life and career.

    Your niche in the photography world should grow, shrink, and evolve over time. Give yourself the freedom to identify the types of photography that you really enjoy, and forget the rest of it. You do not have to master it all.

    What’s your photography niche? What types of photography do you love? Are there any types of photography that you hate? Chime in below!

    googletag.cmd.push(function() {
    tablet_slots.push( googletag.defineSlot( “/1005424/_dPSv4_tab-all-article-bottom_(300×250)”, [300, 250], “pb-ad-78623” ).addService( googletag.pubads() ) ); } );

    googletag.cmd.push(function() {
    mobile_slots.push( googletag.defineSlot( “/1005424/_dPSv4_mob-all-article-bottom_(300×250)”, [300, 250], “pb-ad-78158” ).addService( googletag.pubads() ) ); } );

    The post How to Find Your Photography Niche: You Don’t Have To Master It All by Meredith Clark appeared first on Digital Photography School.


    Digital Photography School

  • Lenovo pushing Moto Mod development through design contest and hackathon

    Lenovo’s Moto Z series, which was introduced earlier this year, is compatible with a range of accessory modules called Moto Mods. So far the Moto Mod line includes a speaker, a projector, a battery pack and the Hasselblad True Zoom camera module. When we tested the latter we found the Moto Mod concept to be the by far best modular smartphone system we have seen so far. The modules attach magnetically to the phone and work instantly, without a need to reboot the device, configure wireless connections or adjust any settings.

    Nevertheless, since the Hasselblad True Zoom we have not seen any new Moto Mods and in the long run the system can only be a commercial success if customers have a large Moto Mod ecosystem to choose from. Lenovo is aware of this and has launched several initiatives to encourage third party hardware and software developers to work on new Moto Mod modules. The Moto Mods Developer Kit (MDK) has been available since the launch of the first modules, but from now until the end of January 2017 hardware developers can design a Moto Mod and enter a competition to win a Moto Z smartphone. Additionally, Lenovo will be hosting a couple of Moto Mod hackathons, one in New York City in December and another in January in San Francisco.

    Winners of both the design contest and the hackathons will have the opportunity to meet the Moto Mod development team at Lenovo’s subdivision Motorola in Chicago and potentially receive investment to turn their idea into a product. Developers who design prototypes will also have the chance to launch a crowdfunding campaign on Indiegogo. Experts from Indiegogo will help run the campaign and Moto and Verizon will help promote the best projects with current Moto Z owners.

    We really liked the Moto Mod concept when we tested the Hasselblad True Zoom. However, with the latter targeted at a consumer audience, we would like to see somebody design an enthusiast or even pro level camera Moto Mod. What would your ideal camera mod look like? Let us know in the comments.

    Articles: Digital Photography Review (dpreview.com)

  • Mount a Canon 5D Mark III to a custom drone and capture the beauty of nature

    Polish photographer Miron Bogacki mounted a Canon EOS 5D Mark III to a custom-built octocopter and flew the drone over Northern Poland in the Valley of Drw?ca. We hope that you enjoy the gorgeous video footage he captured as much as we did! To see more of Miron’s work check out his website.

    Articles: Digital Photography Review (dpreview.com)