Blog

  • Overview and Hands-On Reviews of the New Fuji X-T2 Mirrorless Camera

    The newest Fuji camera on the market is the Fuji X-T2 mirrorless camera. It’s been available for a couple months now so there are a few reviews and tests out there already. I personally own and use the X-T1, so I am very interested to hear about its successor. Let’s see what a few sources have to say about the X-T2.

    the-new-fuji-x-t2-mirrorless-camera

    Check prices on the Fuji X-T2 on Amazon.com or B&H Photo. 

    Tony and Chelsea Northrup thoughts

    Tony and Chelsea tested out the X-T1 so they have a good comparison between it and the new Fuji X-T2 and talk about what’s new and improved in this video. They also mention a few things they would have liked to see added that weren’t.

    Photography Concentrate – Lauren’s thoughts

    Fuji loaned them an X-T2 to try out for a couple weeks. This is what Lauren thought of it overall. Some of the things she mentions as being “issues” I personally don’t have any problem with such as:

    • The aperture ring on the lens (I like it!)
    • That the camera gets quite warm on hot days. I have noticed that with the X-T1 also.
    • Play button in an odd place (no biggie you can program custom buttons)
    • Using the Smartphone app that you can’t see the RAW images. How I get around this with my X-T1 is that I process a few select images into JPG on the camera then pull them to my phone or iPad to play with in Snapseed. I haven’t found it an issue.

    But overall she gives it a pretty good thumbs up and says she’s considering switching from Canon to use this camera for all her profession work. So that’s a pretty good endorsement.

    The Camera Store guys

    In this next video, the guys from the Camera Store give the Fuji X-T2 a good field test in New York City. They test both still and video which some of the other reviews don’t cover. Also mentioned in this video is the new Fuji speedlight which can handle high-speed sync.

    The highly improve autofocus on the Fuji X-T2 is mentioned and that it’s a bit tricky to set up. There’s a link to the Fuji Guys channel where they’ll help you configure it if you decide to pick up this camera or already have.

    Things I’m excited about:

    Since I have the predecessor the X-T1, these are a few of the features that I’ve seen (and I’ve had a chance to handle the camera give it a really quick go) which I’m really excited about as improvements over the old design. They include:

    • YAY, you can open the battery compartment now without having to remove the tripod insert!! This is my biggest pet peeve of the X-T1.
    • The dial on top lock and unlock and they move a lot smoother now. Mine on the X-T1 stick and something both the top and bottom ones move together. I know I can send it back to get those fixed but I don’t want to be without the camera for several weeks so I put up with it.
    • Improved autofocus options and faster autofocus. From what I’ve seen the X-T2 is WAY better than the first generation X-T1. According to The Camera Store guys it actually rivals the Sony a6300 for fastest focus on the market currently. Impressive!!
    • Two memory card slots. I like the idea of shooting RAW on one and JPGS using the nice Fuji film profiles on the other.

    Check prices on the Fuji X-T2 on Amazon.com or B&H Photo. 

    Have you already ordered yours? Are you considering it? Have you had a chance to test drive one? I want to know. Tell me your thoughts in the comments below.

    googletag.cmd.push(function() {
    tablet_slots.push( googletag.defineSlot( “/1005424/_dPSv4_tab-all-article-bottom_(300×250)”, [300, 250], “pb-ad-78623” ).addService( googletag.pubads() ) ); } );

    googletag.cmd.push(function() {
    mobile_slots.push( googletag.defineSlot( “/1005424/_dPSv4_mob-all-article-bottom_(300×250)”, [300, 250], “pb-ad-78158” ).addService( googletag.pubads() ) ); } );

    The post Overview and Hands-On Reviews of the New Fuji X-T2 Mirrorless Camera by Darlene Hildebrandt appeared first on Digital Photography School.

    Digital Photography School

  • 5 Quick Tips to Help You Make a Fashion Photography Shoot Like a Pro

    It might be the fabulous pages of magazines or it might just be that urge to create something chic. Either way, we are now living in this digital era where fashionable shoots are just around the corner. Hashtag #OOTD (outfit of the day). But that’s where the similarity ends. Planning and executing a fashion photography shoot takes more than that.

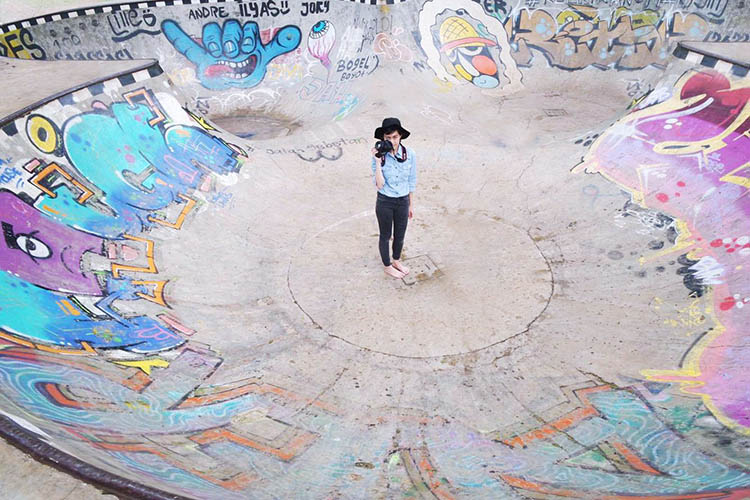
    Fashion shoot photography

    I hate to break it to you, but placing all your good looking friends in front of your camera, and purchasing the latest mirrorless technology probably won’t make you the next Guy Bourdin. From my personal story as a fashion photographer for over five years now, your biggest learning experience comes from learning through your own team, fellow creatives, photographers, stylists, models, and make-up artists. So, here are some tips I’ve learned through my years of trials and tribulations on how to produce a fashion shoot like a pro.

    1. Inspirations 101

    “Nothing of me is original. I am the combined effort of everyone I’ve ever known.” or so the saying goes. Nowadays, let’s challenge the concept of people stating there’s no such thing as originality anymore. Is that true? But truthfully, the best ideas may not be the first ones.

    Find Inspiration fashion shoot

    Creativity is a limitless concept. You can always start developing your ideas by sourcing inspirations from practically anywhere. When you start noticing the littlest things in your life, it will do wonders as your source of inspiration. This is fundamental because it is the ground work before every shoot. To develop a concept that is strong and authentically yours is the key to the next step of creating the perfect frame in a fashion photo shoot.

    Find Inspiration fashion shoot 2

    2. Team Work is Everything

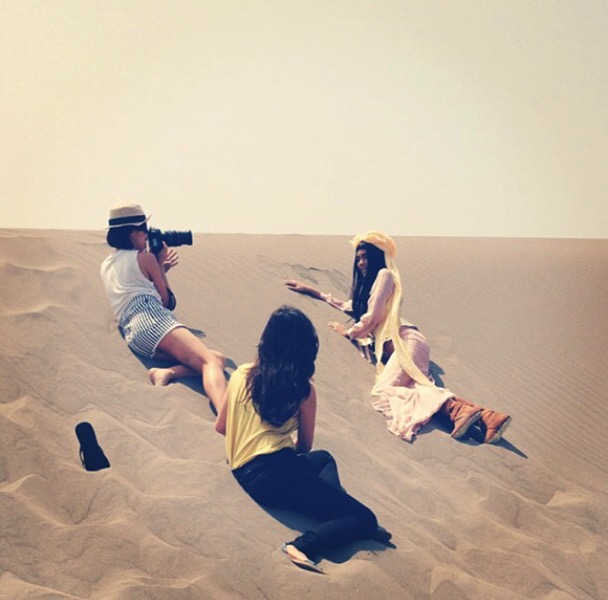
    Create your perfect squad. When you meet someone you are comfortable working with, continue to develop a great relationship with them. Because at the end of the day, the perfect frame is not just in the hands of the photographer. Everyone needs to be equally involved and the greater the chemistry ultimately leads to the perfect picture.

    Make sure you succeed in getting everyone on the team on the same page, from the vision for the shoot to work ethics. A solid team of creatives that gel well together is really ideal because in the end, it’s all about teamwork.

    Team Work fashion shoot 02

    Team Work fashion shooot

    3. The Look

    A fashion shoot is never complete without the right model. You need to find a model who has the right look for the concept. Whether it’s height, hair color, skin tone, eye shape, etc. Bonus points if you get to know the model first beforehand. Good chemistry between the photographer and model is also very important to create a comfortable shooting environment.

    When you are shooting, there’s only the photographer, the model, and a camera. Putting on a music that’s enjoyable to everyone can also help the model get into character.

    result-fashion-shoot

    4. Scouting Locations

    Outdoors or indoors, it’s crucial to prepare everything beforehand. You don’t want to be stressed out on the big day right? When it comes to studios, the physical environment has to be a positive working environment. Think about how much space you need, equipment, facilities, etc. An outdoor fashion shoot are tad trickier. Always double check if you need to have permission beforehand if it is a private area, and always, always check the weather! The sun can be your best friend or your enemy in this case.

    Location Scout fashion shoot

    Locations Locations fashion photography

    5. Hair, Makeup and Wardrobe

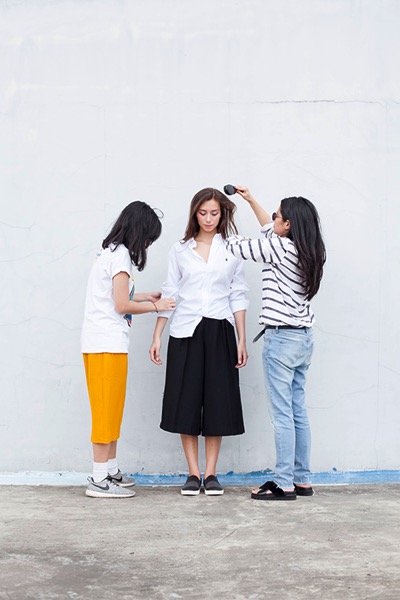
    This is where the good team work really shows. I personally think it is important to get everyone on the same page for the vision and mood of the shoot. Also, don’t be afraid to voice your opinion if something can be altered. Such as the hair is too big, the model needs more mascara, the button’s falling off, etc. Don’t be afraid to speak up, it’s team work after all.

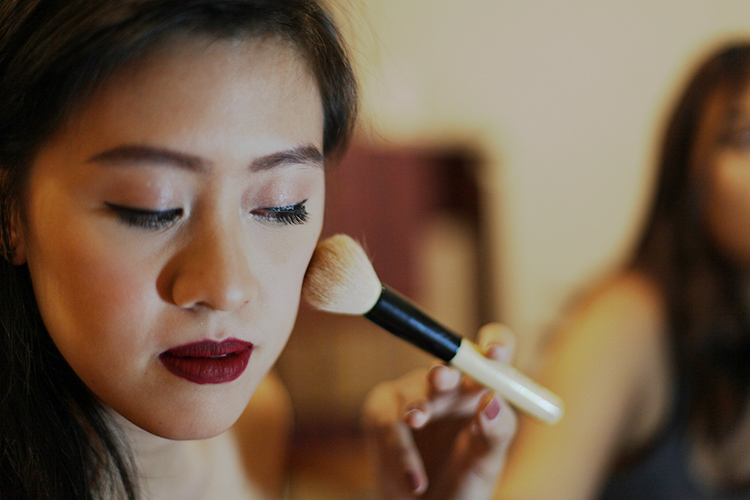
    Make Up fashion photos

    Hair Make Up fashion shoot

    Lastly, never forget to have fun! It’s always a blessing to be able to work passionately. Enjoy your ride along the way, stay curious, and bring positive vibes. Good luck.

    Please share your fashion photography tips and photos in the comments below.

    googletag.cmd.push(function() {
    tablet_slots.push( googletag.defineSlot( “/1005424/_dPSv4_tab-all-article-bottom_(300×250)”, [300, 250], “pb-ad-78623” ).addService( googletag.pubads() ) ); } );

    googletag.cmd.push(function() {
    mobile_slots.push( googletag.defineSlot( “/1005424/_dPSv4_mob-all-article-bottom_(300×250)”, [300, 250], “pb-ad-78158” ).addService( googletag.pubads() ) ); } );

    The post 5 Quick Tips to Help You Make a Fashion Photography Shoot Like a Pro by Sally Ann and Emily May appeared first on Digital Photography School.


    Digital Photography School

  • 7 Tips for Doing Crystal Ball Refraction Photography

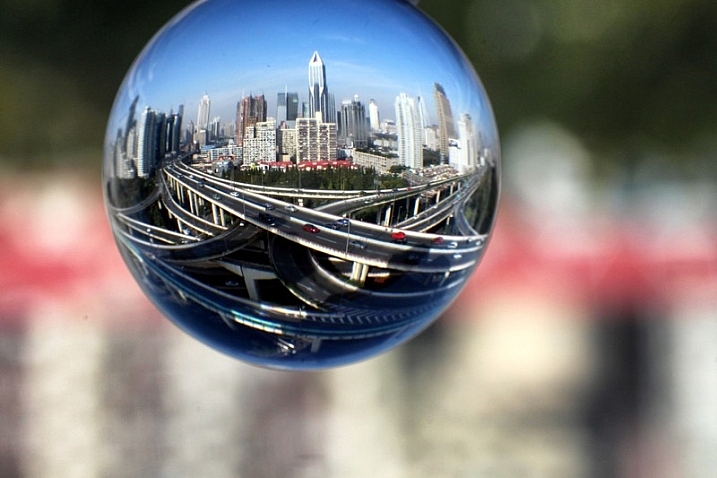
    You’ve have heard of reflections in photography, but have you have tried refraction? When used well, refraction creates compelling images that will leave your audience both wowed and curious. I’ve been approached many times by strangers who are curious about how I photograph with a glass ball. Once you’ve mastered this type of photograph you’ll likely get the same audience. Here are some tips to help you do crystal ball refraction photography.

    Doing Crystal Ball Refraction Photography - house inside glass ball

    The subject shows prominently in the ball, and around the ball is bokeh.

    So what is refraction?

    Refraction happens when light passes through an object of denser mass, such as water or glass. When this occurs, light is bent, and there is a distortion. When refraction occurs with a transparent spherical object something magical happens. An inverted image of the scene behind the ball is seen. The lens elements in your camera actually work this way as well. You can use a glass ball as an extra lens element, one you can move around your scene.

    Doing Crystal Ball Refraction Photography

    How to do refraction photography

    Now you know what refraction is, it’s time to learn how to apply it to your photography. If you follow the guide below you won’t go far wrong with this type of photography.

    #1 – Dealing with the upside down image

    There are instances where it works to have an upside down image in the background or inside the ball. If you want to avoid this, the best way to deal with an upside down background is to blur it out using bokeh. An alternative to blurring out the background is to use reflection since the reflected image will be the right way up inside the ball.

    Doing Crystal Ball Refraction Photography - The image inside the ball will be upside down.

    The image inside the ball will be upside down.

    #2 – Get above your subject

    You should get the ball off the ground so it’s level with the subject you’re photographing. A centered subject in the ball will have less distortion and more impact in the frame. There are always exceptions, of course, as leaf beds or puddles work well when the ball is placed right in them.

    #3 – Fill the glass ball with your subject

    You have to get close to your subject, or it (they) will appear very small inside the ball. The best advice I can give here is to see if your scene would fill a wide angle lens. If so you’re gold.

    Doing Crystal Ball Refraction Photography

    In this photo, the cityscape is captured inside the ball, and a closer framing was employed.

    #4 – Choose the correct lens

    The best option here is to use a macro lens or a telephoto lens with macro capability. The macro lens will allow you to get close to the ball, making it easier to create bokeh around the ball. Using a wider angle lens can also work if your scene allows it.

    #5 – Choose the correct aperture

    You need to get the correct aperture for your scene. An aperture that’s too small won’t blur out the background. One that’s too large will make it hard to get a sharp image inside the ball. I would choose an aperture of around f/4, it depends on the scene you are photographing, though.

    Doing Crystal Ball Refraction Photography

    One of the best ways of dealing with the upside down image is to use reflection in the photo.

    #6 – Find a safe place to position the ball

    This is very important, especially if you are photographing from a high vantage point. The ball needs to sit on a flat surface, finding a crevice to sit the ball on is better. Once you have placed the ball ensure it isn’t going to fall and keep your hands near it during this time.

    If there is no place to rest the ball you can ask a friend if they’ll hold the ball for you. You need to be especially careful on a windy day, a strong gust of wind can move the ball if it’s not in a secure position.

    In this photo of the Taj Mahal there is reflection in the background, and this reflected image is in fact upside down.

    In this photo of the Taj Mahal, there is a reflection in the background, and this reflected image is in fact upside down.

    #7 – Lighting the subject in front of the ball

    You should have a well-lit subject in any kind of photo, but it’s even more important with refraction photographs. A strongly lit subject will shine through the ball with less reflection appearing on the ball. Look to photograph when the sun is behind you or during blue hour shooting towards lit buildings.

    Refraction photography versus a standard landscape

    A lot of locations that suit refraction photography with a glass ball will also be good for regular landscapes. The question is why photograph a refraction photo when you could take a wide-angle shot of the same scene? Let’s take a look at some of the pros and cons of crystal ball refraction photography.

    Pros of refraction

    • A glass ball is cheaper than a lens and allows you to create a fish-eye like effect.
    • You can move the ball to different positions in your scene.
    • Using a large aperture in conjunction with the ball to create bokeh, is great for minimalism.
    • Scenes created with a crystal ball often have a more artistic feel.
    • The ball creates a natural frame for your photo.
    Images that work well as a wide angle photo also work well inside a crystal ball.

    Scenes that are well suited for a wide-angle photo also often work well inside a crystal ball.

    Cons of refraction

    • The larger glass balls are heavy to carry, in an already heavy camera bag.
    • You need a macro lens, something a landscape photographer may not normally carry.
    • Distortion on the edge of the ball.
    • It’s difficult to get a sharp image inside the ball.
    • The image in the ball is upside down.
    This is a wide angle photo of a famous road junction in Shanghai.

    This is a wide angle photo of a famous road junction in Shanghai.

    The choice of taking a glass ball is yours to make, I highly recommend experimenting with it, though.  The pros really outweigh the cons, and following the tips in this article will help. You may also find weight an issue, so I recommend scouting a location before shooting with the ball. Then return for a second visit with just the equipment you need to take the photo, this will reduce the weight somewhat.

    Experiment with the ball

    The first thing you’ll need of course is a crystal ball, you can buy them easily through amazon for 27$ . While you wait you can try filling a wine glass with water, you’ll get the refraction effect this way too.

    Now you’re ready to get started, so head to a local landmark and start experimenting. The list of subjects is really endless; you can start with a lone tree, a church, or a cityscape scene. If you have any photos that show refraction please add them to the comments below, it would be great to see them.

    Natural landscape look great inside the ball. This is a volcanic lake found in Indonesia.

    Natural landscapes look great inside the ball. This is a volcanic lake found in Indonesia.

    googletag.cmd.push(function() {
    tablet_slots.push( googletag.defineSlot( “/1005424/_dPSv4_tab-all-article-bottom_(300×250)”, [300, 250], “pb-ad-78623” ).addService( googletag.pubads() ) ); } );

    googletag.cmd.push(function() {
    mobile_slots.push( googletag.defineSlot( “/1005424/_dPSv4_mob-all-article-bottom_(300×250)”, [300, 250], “pb-ad-78158” ).addService( googletag.pubads() ) ); } );

    The post 7 Tips for Doing Crystal Ball Refraction Photography by Simon Bond appeared first on Digital Photography School.


    Digital Photography School

  • OWC’s Thunderbolt 3 Dock adds 13 ports to your MacBook

    When Apple introduced the 2016 generation of its MacBooks the new machines were criticized for the lack of an SD-card reader and a generally reduced number of ports. OWC’s Thunderbolt 3 Dock looks like an interesting solution for anyone who owns a new MacBook or any other computer with a limited number of ports and connectors. 

    The Thunderbolt 3 Dock makes full use of Thunderbolt 3 technology and offers a 40Gb/s throughput which allows for the inclusion of 13 ports. Through a single Thunderbolt 3 cable, the Dock allows you to charge mobile devices, connect multiple 4K displays, add external storage, transfer images and data from SD cards, connect to wired networks via Gigabit Ethernet, plug in audio accessories and power the 2016 MacBook Pro. Here is a list of all available connections:

    • 2 x Thunderbolt 3
      • Two USB-C ports
      • Daisy chain and power up to 5 Thunderbolt 3 devices
    • 5x USB 3.1 Gen 1
      • Including two high-power USB Type-A ports for fast mobile device charging
    • FireWire 800
    • Gigabit Ethernet
    • mini DisplayPort
    • SD Card reader
      • Easily transfer photos and video from an SD card
    • Audio combo port
      • For headphones or microphones
    • S/PDIF digital audio

    The OWC Thunderbolt 3 Dock can now be pre-ordered at a number of authorized resellers and shipping is scheduled for February 2017. When preordered the OWC Thunderbolt 3 Dock is priced at $ 279 and comes with a free 0.5 meter Thunderbolt 3 40Gb/s USB-C cable. The regular retail price will be $ 300.

    Press Release:

    OWC INTRODUCES THUNDERBOLT 3 DOCK WITH 13 PORTS – THE MOST POWERFUL OWC CONNECTIVITY SOLUTION EVER – AVAILABLE FOR PRE-ORDER TODAY 

    FEATURING THUNDERBOLT 3, USB 3.1 GEN 1, FIREWIRE 800, ETHERNET, MINI DISPLAYPORT, SD CARD READER, COMBO MIC & HEADPHONE PORT, AND DIGITAL AUDIO 

    WOODSTOCK, IL – November 3, 2016 – OWC®, a leading zero emissions Mac and PC technology company, today introduced the all-new Thunderbolt 3 Dock – the latest in its award-winning lineup of connectivity expansion solutions.

    Now available for pre-order, the Thunderbolt 3 Dock offers exceptional flexibility and connectivity with 13 ports, up to 40Gb/s of bandwidth, and the capability to power the new 2016 MacBook Pro, all in an elegant, industrial design. For anyone concerned with the limited port options on new Thunderbolt 3-equipped Macs or PCs, the Thunderbolt 3 Dock is the ideal solution for connecting a wide variety of existing and future devices including external hard drives, webcams, audio interfaces, Ultra HD displays, wired networks, and more.

    “With our critically-acclaimed Thunderbolt 2 Dock and USB-C Dock, OWC defined a new standard in providing more connectivity at a time when new computers were shipping with fewer ports,” said Larry O’Connor, Founder and CEO, OWC. “The all-new Thunderbolt 3 Dock is the best expansion solution we’ve ever made, offering the incredible speed of Thunderbolt 3 technology coupled with 13 ports of connectivity, perfect for getting the most out of the new 2016 MacBook Pro.” 

    ALL YOUR DEVICES. INCREDIBLE PERFORMANCE. ONE CABLE. 

    At twice the bandwidth of Thunderbolt 2, the Thunderbolt 3 Dock takes full advantage of the cutting-edge performance of Thunderbolt 3 technology with throughput up to 40Gb/s. As a result, the new Thunderbolt 3 Dock offers more ports than ever, including 13 ports of connectivity and the capability to charge mobile devices, connect multiple 4K displays, add external storage (including legacy devices like FireWire drives), import photos and videos from SD cards, access wired networks via Gigabit Ethernet, connect audio accessories, and even power the new 2016 MacBook Pro – all through a single Thunderbolt 3 cable. 

    EXTREME CONNECTIVITY WITH 13 PORTS 

    • (2) Thunderbolt 3
      • Two USB-C ports
      • Daisy chain and power up to 5 Thunderbolt 3 devices
    • (5) USB 3.1 Gen 1
      • Including two high-power USB Type-A ports for fast mobile device charging
    • FireWire 800
    • Gigabit Ethernet
    • mini DisplayPort
    • SD Card reader
      • Easily transfer photos and video from an SD card
    • Audio combo port
      • For headphones or microphones
    • S/PDIF digital audio 

    PRICING & AVAILABILITY 

    The OWC Thunderbolt 3 Dock is currently available for pre-order at MacSales.com and other authorized resellers. Deliveries of the dock will begin in February 2017.

    The OWC Thunderbolt 3 Dock is priced at $ 279.00 during the pre-order event. Plus, it ships with a free .5 meter Thunderbolt 3 40Gb/s USB-C cable–valued at $ 24.95. 

    THE LEADER IN THUNDERBOLT AND USB CONNECTIVITY EXPANSION 

    OWC has a history of creating full-featured connectivity solutions for Mac users around the world. In addition to the upcoming Thunderbolt 3 Dock, OWC offers the award-winning Thunderbolt 2 and USB-C Docks. The OWC Thunderbolt 2 Dock provides 12 ports of connectivity all united with just a single Thunderbolt 2 cable, while the OWC USB-C Dock provides a complete connectivity solution for computers that utilize USB-C ports. 

    NEED IMMEDIATE CONNECTIVITY FOR YOUR 2016 MACBOOK PRO? 

    If you need an immediate connectivity solution, the OWC USB-C Dock and OWC Thunderbolt 2 Dock are currently shipping and fully compatible with the new 2016 MacBook Pro. Simply connect the OWC Thunderbolt 2 Dock via a Thunderbolt 3-to-Thunderbolt 2 adapter (sold separately) or directly connect the OWC USB-C Dock to your 2016 MacBook Pro, or MacBook, and bring a new world of connectivity to your workflow.

    Articles: Digital Photography Review (dpreview.com)

  • 10 Tips for Doing Your First Family Portrait Session

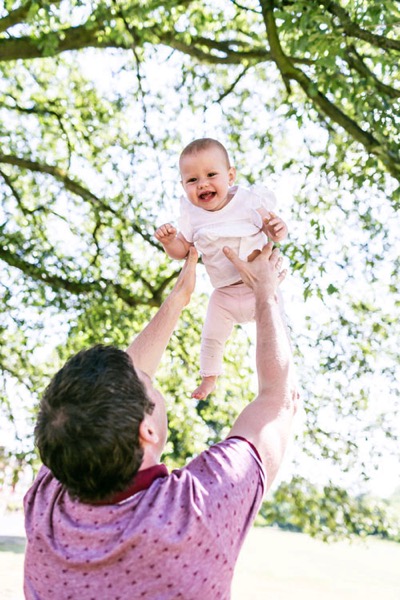
    Photographs from a good family portrait session will be treasured for many years to come. It’s an incredibly rewarding area of photography, but it can also be a little daunting for new photographers. You need to build a rapport with the family fast, keep the children on board, and meet the parents’ expectations with gorgeous photographs.

    Family portrait FAMILY GROUP

    So where do you start? Which camera settings should you choose?

    Here are some important pointers to make your first session go smoothly, and to help you take great family portraits.

    1. Get down to their level

    Get down to a child’s eye level. This will lead to far more engaging photographs, as well as helping you to interact better with the child.

    Family portrait INDIV GIRL flowers

    2. Use Centre point focus

    Different focus settings suit different photographers, but center point focusing tends to be the most useful for family portraits. As you take more and more family portraits, you’ll get a feeling for whether this suits you, But it’s a great starting point for your first session.

    3. Choose an appropriate aperture

    Your aperture settings will be influenced by the style you prefer. As a starting point, many lifestyle family photographers choose to shoot wide open for individual portraits (f/2.2 works really well), and around f/5.6 for group shots to ensure everyone is in focus.

    Family portrait DAD AND SON opt

    This was taken at f/5.6.

    Family portrait INDIV GIRL park

    This was shot at f/2.2.

    4. Starting shutter speed

    You will probably find yourself needing a slightly faster shutter speed for family portraits than you’d need for many other kinds of portraits. Children move fast, and sometimes unpredictably! A good setting to start with is 1/250th, which will give you flexibility for children rolling over or waving. If you have a situation where someone is moving very fast, such as a child jumping or racing off into the distance, choose a much faster shutter speed like 1/800th.

    Family portrait BABY opt

    This was taken at 1/800th]

    5. Use Auto ISO

    While you’re familiarizing yourself with the apertures and shutter speeds that work for you on family portrait sessions, consider setting your ISO to auto. The results are usually satisfactory, and it’s one less thing to think about on the day. As you gain experience and confidence, you can start to select the ISO as you go along.

    6. Metering mode

    Certain metering options seem to suit some photographers better than others. As you take more family portraits, you’ll soon see which works best for you. To start with, try using spot metering for individual portraits, and evaluative metering for a group shot.

    Family portrait MUM AND BABY

    This was taken with the evaluative metering mode.

    7. Shoot in RAW format

    The editing options open significantly in Lightroom, and you’ll have a far greater range of colors and detail recorded if you shoot in the RAW format.

    8. Auto White Balance

    Set your white balance to auto if you’re doing a location shoot. You’ll be working in a variety of locations with different lighting, and you won’t have much time for setting white balance as you go. Correcting white balance is an easy edit in Lightroom, so you’d be better off spending the time engaging with the family you’re photographing.

    9. Choose your lenses

    Consider which lenses to take with you to the family portrait session. If your budget doesn’t stretch to having several lenses, consider renting some. It can be surprisingly economical, and it gives you the opportunity to try out different focal lengths to see which suit you best.


    Family portrait BABY

    This was taken with an 85mm lens.

    Using several lenses throughout a family portrait session will give you lots of variety in the images, as well as meaning you can cope with most locations. A zoom lens like a 24-70mm will give you lots of flexibility, or a popular prime lens for family portraits is an 85mm lens, which is very flattering for portraits. A wide lens like a 35mm will help you to set the scene.

    As you gain experience photographing families, you’ll develop a sense for which lenses suit you best. That’s a good time to invest in the best quality lenses you can afford.

    Family portrait SIBLINGS INSIDE

    This was taken with a 35mm lens.

    10. Set limits

    Limit yourself to taking five versions of each scene. This will train your eye to look for the details and expressions you want to capture and to make sure you ultimately combine them all in one photograph.

    Conclusion

    So there you have it – family portraits in a nutshell. Practice makes perfect, though, so be prepared to work hard and hone your camera skills. Above all, a friendly and professional attitude combined with careful preparation for each family portrait shoot should make for happy clients and repeat business.

    Please share your family portrait tips and photos in the comments section below.

    googletag.cmd.push(function() {
    tablet_slots.push( googletag.defineSlot( “/1005424/_dPSv4_tab-all-article-bottom_(300×250)”, [300, 250], “pb-ad-78623” ).addService( googletag.pubads() ) ); } );

    googletag.cmd.push(function() {
    mobile_slots.push( googletag.defineSlot( “/1005424/_dPSv4_mob-all-article-bottom_(300×250)”, [300, 250], “pb-ad-78158” ).addService( googletag.pubads() ) ); } );

    The post 10 Tips for Doing Your First Family Portrait Session by Louise Downham appeared first on Digital Photography School.


    Digital Photography School

  • Olympus to give away OM-D E-M1 ll and 1M Yen in global competition

    An Olympus OM-D E-M1 ll with a 12-40mm F2.8 Pro lens and ¥1M is up for grabs for the winner of the 2016-2017 Olympus Global Open Photo Contest. The competition is open to amateur and professional photographers alike, and the company has placed no restriction on the equipment used to take entered images saying ‘Any photographic device from a DSLR to smartphone may be used.’

    There are four categories with these themes:

    • Power of life
    • Connections to Cherish
    • Places that Inspire
    • Perspectives Often Missed

    There will be three prizes for each category with first place images winning an OM-D E-M5 ll with the 12-40mm F2.8 Pro lens, second placed winners getting an OM-D E-M10 ll with 14-42mm F3.5-5.6 EZ and those coming in third receiving a Pen E-PL8 with 12-42mm F3.5-5.6 EZ. The overall winner will get the OM-D E-M1 ll with the 12-40mm F2.8 Pro lens and the cash.

    Entry is free and entrants may submit up to five pictures for each category until the closing date on January 10th 2017. Winners will be announced in April 2017. At current exchange rates 1,000,000 Japanese Yen is worth about $ 9200/£7400/€8600.

    For more information visit the Olympus Global Open Photo Contest website.

    Articles: Digital Photography Review (dpreview.com)

  • Mountainsmith debuts Chris Burkard T.A.N Camera Series bags for adventurers

    $ (document).ready(function() { SampleGalleryV2({“containerId”:”embeddedSampleGallery_0234113324″,”galleryId”:”0234113324″,”isEmbeddedWidget”:true,”standalone”:false,”selectedImageIndex”:0,”startInCommentsView”:false,”isMobile”:false}) });

    Mountainsmith has launched a new camera bag series called T.A.N. (Tough as Nails) in collaboration with photographer Chris Burkard, whose name is featured on the bags. Burkard helped design the five new bags, according to Mountainsmith; the series is comprised of the Tanuck 40L backpack, Tanack 10L lumbar pack, and the TAN Kit Cube in small, medium and large sizes.

    The Tanuck 40L backpack ($ 230) is the largest and most expensive of the bunch, offering a ‘tough and versatile’ design with space for a 17-inch laptop, camera, lenses, batteries, tripod, hydration bladder, and other accessories. The backpack is compatible with the smaller Tanack 10L lumbar pack ($ 100), which offers additional space for more gear. The TAN Kit Cube bags ($ 50, $ 60, and $ 70), meanwhile, are designed to carry a camera, lenses and accessories like SD cards.

    All five bags are made from 610d Cordura HP fabric with a 210d nylon liner and EVA high-density PE foam. The backpack also features 630d nylon carbonate, while the backpack and lumbar pack both include YKK zippers. All five bags are water-resistant and described as durable.

    Via: ThePhoblographer

    Articles: Digital Photography Review (dpreview.com)

  • The internet figured out a genius way to make sure you see the supermoon tonight

    Tonight’s supermoon will be the largest in decades, appearing 7% larger than your typical full moon. While photographers around the world are making a game plan to capture the drama, Twitter user Alex Duggan has found another, simpler solution. Step one: secure a tortilla. Step two: apply it to the nearest window for instant supermoon.

    Since we’re guessing that a tortilla won’t do the trick for you, here are a few actual supermoon photos to help you get inspired.

    Embed from Getty Images

    Are you planning on photographing the supermoon? Do you find the whole thing underwhelming? Let us know in the comments.

    Articles: Digital Photography Review (dpreview.com)

  • Navigating the Future: 12 Forward-Thinking Urban Transit Systems

    [ By SA Rogers in Conceptual & Futuristic & Technology. ]

    Integrating fairly seamlessly into existing city infrastructure, making use of renewable energy and solving the ‘last mile’ problem plaguing most public transit systems, these designs make some major advancements from the buses and trains already in use today. With some already in development around the world and others representing ideas that could provide inspiration for real-life solutions, these futuristic urban transit systems aim to get around traffic congestion and provide safer, more efficient rides.

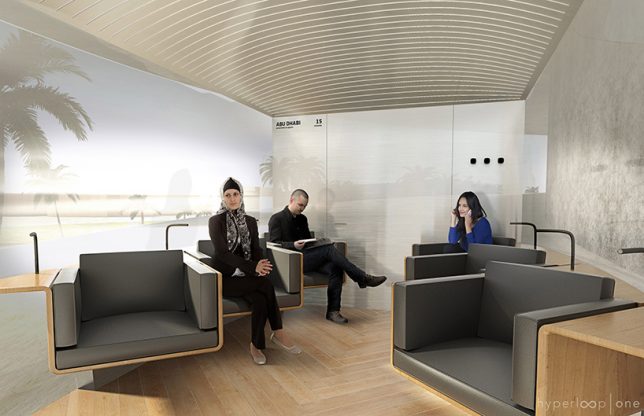
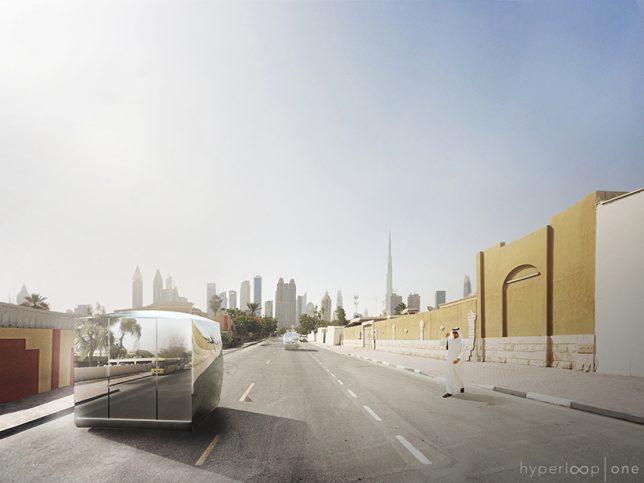
    Hyperloop for Dubai by Bjarke Ingels Group

    hyperloop-dubai-1

    hyperloop-dubai-2

    hyperloop-dubai-3

    Residents of the United Arab Emirates could get from the cities of Dubai to Abu Dhabi in just twelve minutes with the hyperloop transportation system recently announced as a deal between Hyperloop One and Dubai Roads and Transport Authority. Designed by Bjarke Ingels Group (BIG), the system will carry passengers in 6-person pods contained within a pressure vessel ‘transporter’; the units are small to allow for on-demand travel and reduce wait times.

    Self-Driving Bus by Mercedes-Benz

    Weltpremiere: Mercedes-Benz Future Bus mit CityPilot – Meilenstein auf dem Weg zum autonom fahrenden Stadtbus

    mercedes-bus-1

    Already tested on a 12-mile route in Amsterdam, Mercedes-Benz’ new line of self-driving buses avoids human error while performing their usual duties, with a driver only present to take over when the route isn’t suitable for automated driving. Short-range radar, satellite-controlled GPS navigation, sensors and cameras help it on its way, and it communicates with the route infrastructure via wi-fi to take advantage of rolling green lights.

    Skytran for Tel Aviv

    skytran

    skytran-2

    skytran-3

    skytran-4

    The world’s first magnetically levitating skytTran system is set for development in Tel Aviv to reduce congestion, making routes faster, less expensive, more comfortable and more earth-friendly. Individual two-seater pods feature point-to-point service so travelers can reach specific destinations, and you can request one via a mobile app. Following completion in Tel Aviv, commercial skytrain systems will be rolled out worldwide.

    Next Future Modular Transportation System

    nextfuture-1

    nextfuture-2

    nextfuture-3

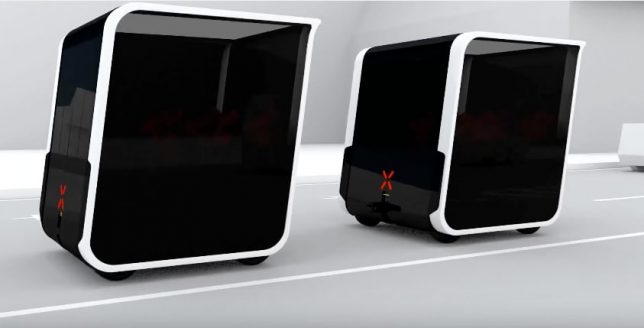
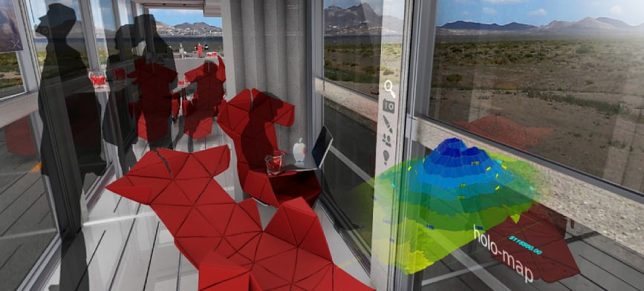
    The self-driving modules envisioned by Next Future can link up like a typical transit system or go their own way on existing roadways, with users ordering them through a mobile app. Like the skyTran, this system takes care of that ‘last mile’ problem, automatically calculating routes. The 8×8’ modules, which hold ten passengers each, can link together in a ‘swarm’ or split up. When they’re linked, you can move from one module to the next to find the one that’s headed in the direction of your destination.

    Next Page – Click Below to Read More:
    Navigating The Future 12 Forward Thinking Urban Transit Systems

    Share on Facebook


    [ By SA Rogers in Conceptual & Futuristic & Technology. ]

    [ WebUrbanist | Archives | Galleries | Privacy | TOS ]


    WebUrbanist

  • PanoMoments cleverly adds the element of time to 360-degree images

    PanoMoments’ ‘360-degree living photos’ are a kind of mashup between 360-degree images and Apple’s Live Photos. It’s not quite video, and it’s not a static image: PanoMoments can be created using any robotic panorama head (though the company is producing a specialized one), uploaded to their website for conversion and viewed on the web, with a VR headset or on a mobile device. Varying the time it takes for the device to complete a full rotation gives the resulting product a ‘live photos’ feel or a more time-lapse effect. 

    Click to view this PanoMoment. Note that you will need to be running Google Chrome version > 52.x or viewing on a modern Android/iOS smartphone.

    The process for creating a PanoMoment begins with the camera of your choice (ideally a larger sensor ILC) and a circular fisheye lens. Using PanoMoments’ PanoCatcher Loop or any panorama head, the camera is rotated 360-degrees while capturing at least 120 images. Convert your images to equirectangular format, upload them to PanoMoments.com and voila – you’ve got a PanoMoment. You can upload up to 20GB worth of images for free, while a ‘Pro’ membership will get you 500GB.

    At the moment, PanoMoments’ creators are looking for funding through Kickstarter to help with building costs. Currently, a $ 270 pledge will get you a PanoCatcher Loop along with a 1 year Pro membership.

    Head over to their Kickstarter page to learn more and see additional PanoMoments.

    Articles: Digital Photography Review (dpreview.com)