Blog

  • Against All Odd (Shapes): 12 Homes Tailored to Tiny & Difficult Plots

    [ By SA Rogers in Architecture & Houses & Residential. ]

    odd-shaped-house-mineral-3

    Plots of land long considered too small and strangely shaped to build upon prove to be more valuable when they seem thanks to some creative thinking. Across the world (put particularly in cramped Tokyo), architects are rising to the challenge to expand available living spaces in heavily populated cities, designing structures that fit these ‘odd lots’ without sacrificing privacy, comfort and outdoor spaces.

    Wedge-Shaped Home by Oof! Architecture

    odd-shaped-house-wedge-1

    odd-shaped-house-wedge-2

    odd-shaped-house-wedge-4

    odd-shaped-house-wedge-5

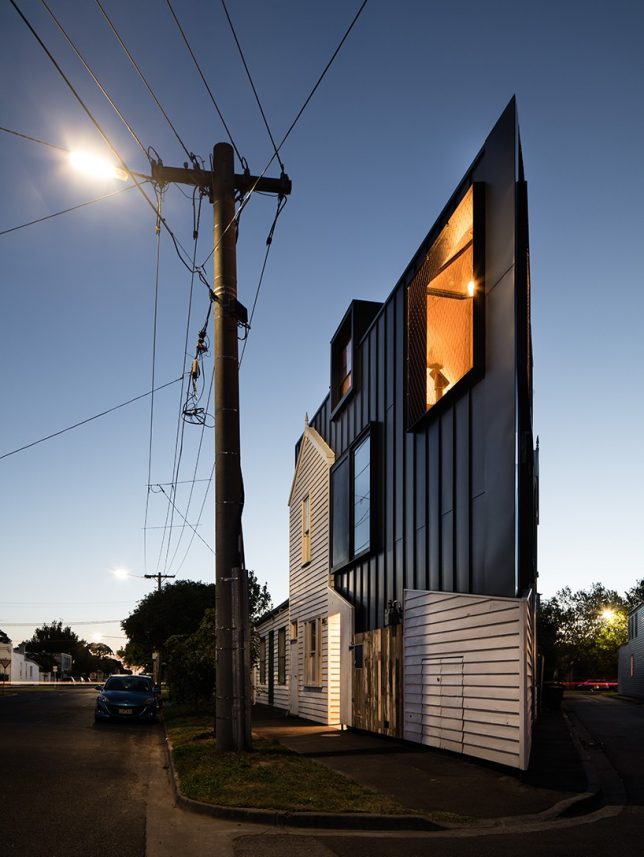
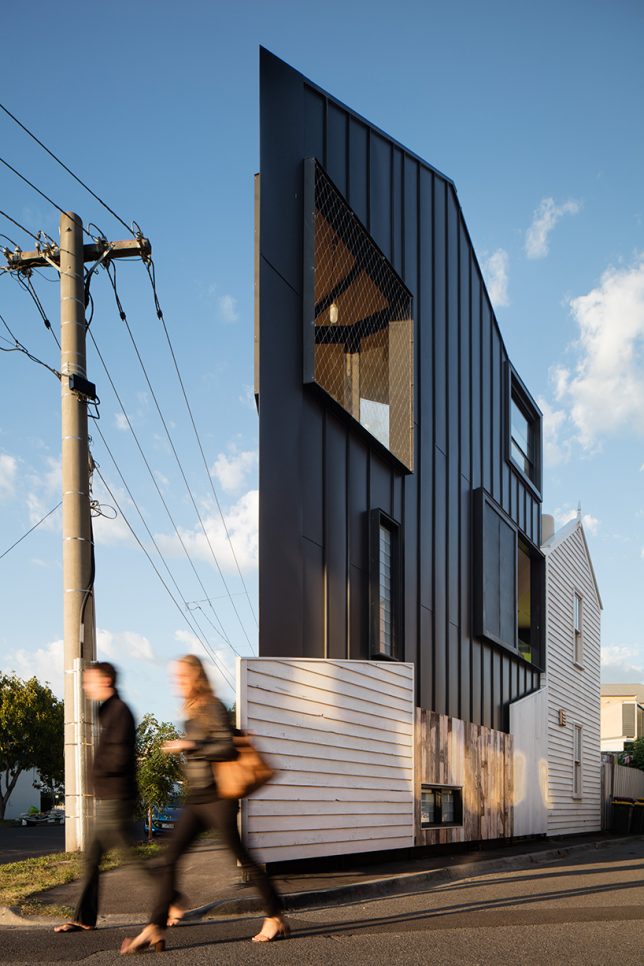
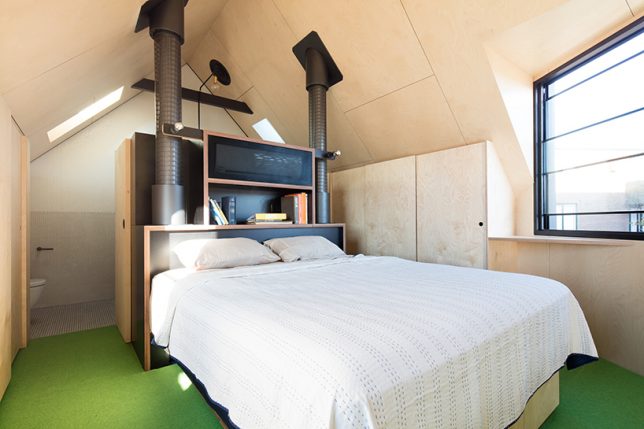
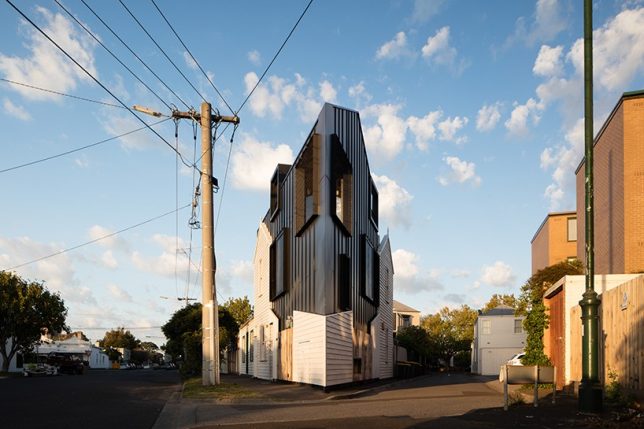
    The geometry of this triangular site in a residential neighborhood in Melbourne presented a major challenge for OOF! Architecture, especially due to strict building rules. The architects created a three-story structure full of split-level living areas to avoid wasting space on internal walls, doors and hallways.

    House in Horinouchi by Mizuishi Architect

    odd-shaped-houses-horin-1

    odd-shaped-houses-horin-2

    odd-shaped-houses-horin-3

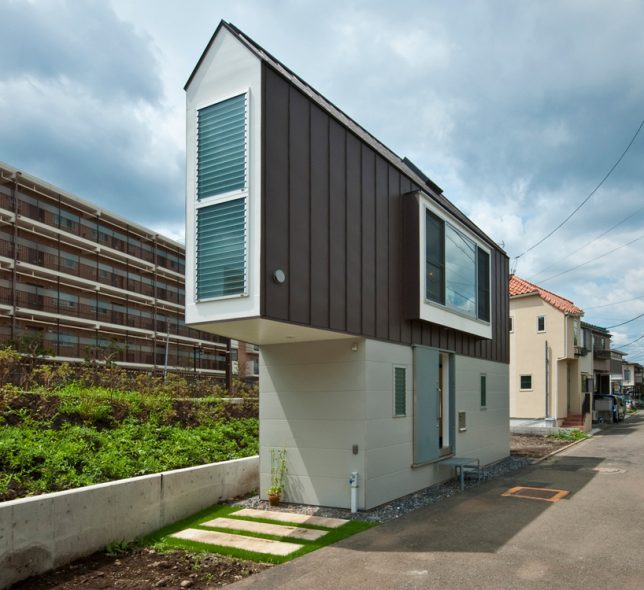
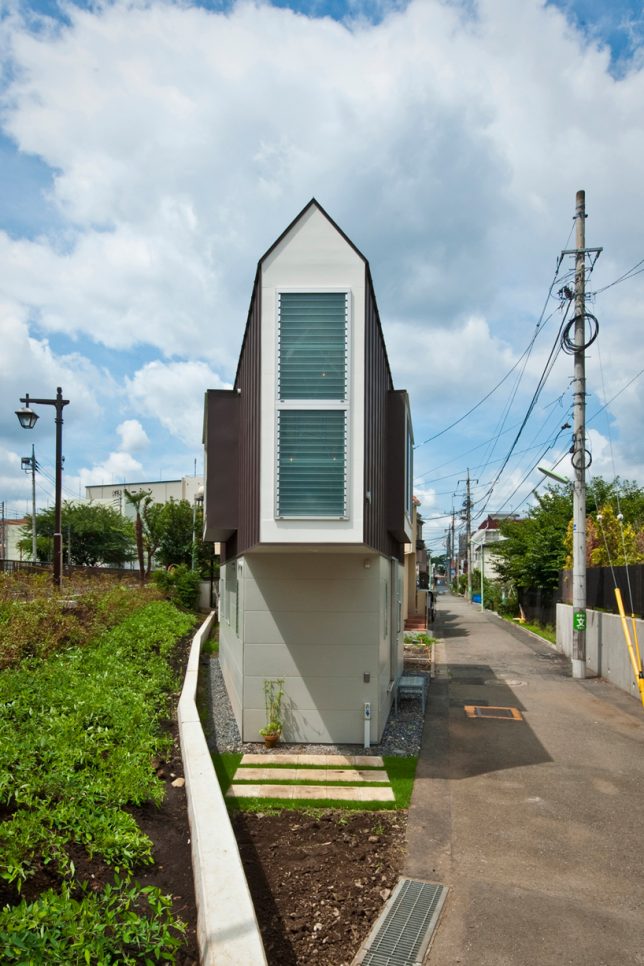
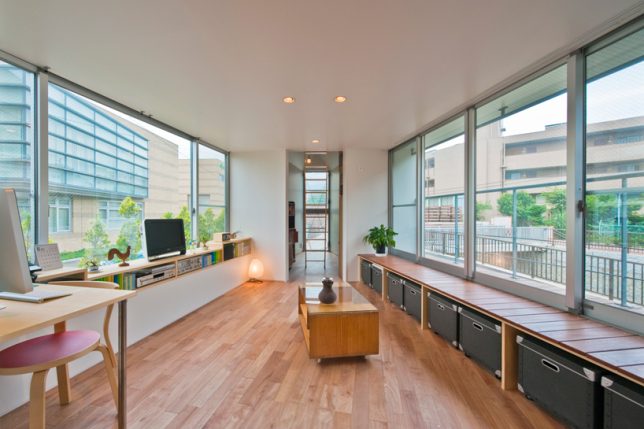
    One of Tokyo’s most distinctive odd-shaped houses, ‘House in Horinouchi’ by Mizuishi Architect Atelier had to fit within a strip of land roughly the size of a parking spot while still having a place to store bikes outside. The ultra-narrow result features a tapered cantilevered end, a slightly wider area containing the living spaces, and a play loft for the owner’s children.

    Grass Cave House by Makiko Tsukada

    odd-shaped-house-grass-cave-1

    odd-shaped-house-grass-cave-2

    odd-shaped-house-grass-cave-3

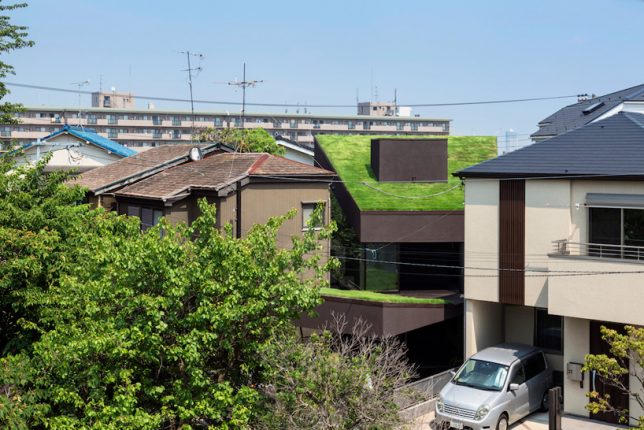
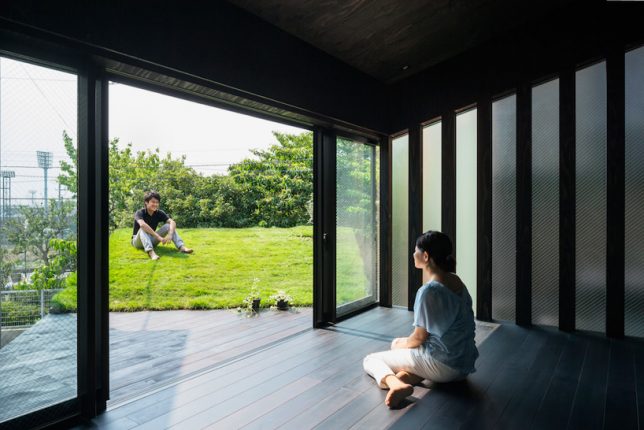
    This plot is squished between several existing houses in the suburbs at an odd angle, which could easily have resulted in a dark structure with very little privacy and no outdoor spaces. Instead, Makiko Tsukada Architects built a step-shaped structure consisting of three grass-covered volumes, including a carport roof and the home itself. Large windows face these elevated lawns to bring sunlight inside.

    Mountain House by Hiroki + Tomoko Sekiguchi

    odd-shaped-house-mountain-1

    odd-shaped-house-mountain-2

    odd-shaped-house-mountain-4

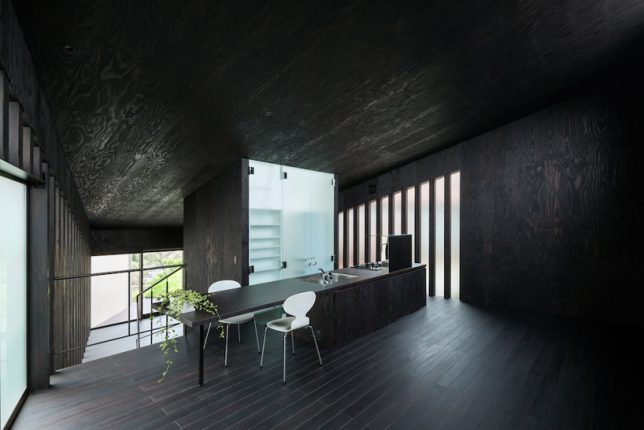
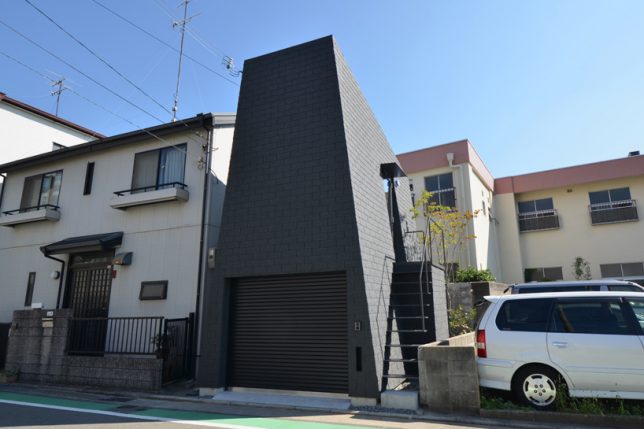
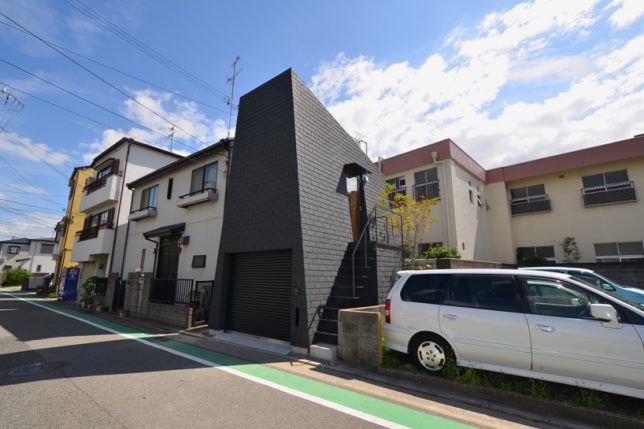
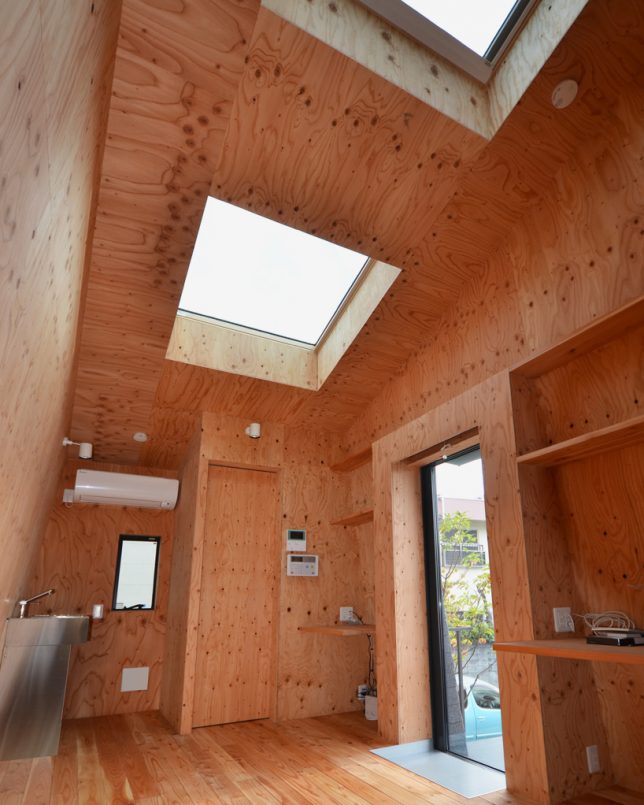
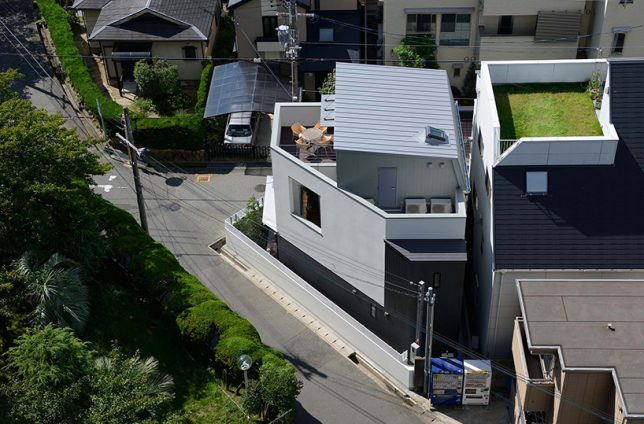
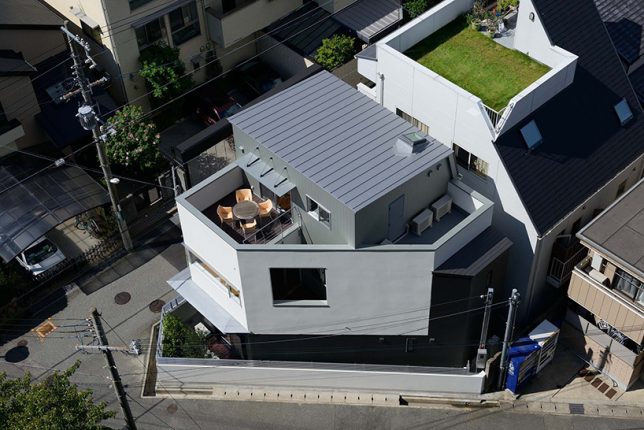
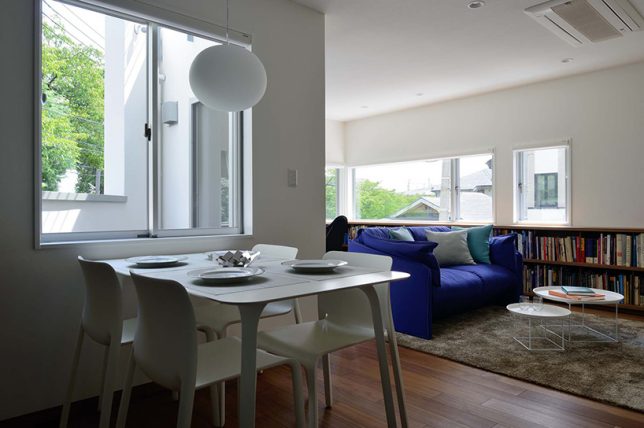
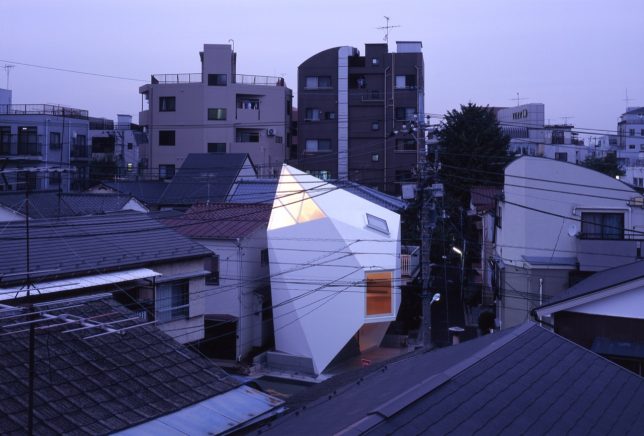
    Monolithic and windowless from outside, ‘Mountain House’ by Hiroki and Tomoko Sekiguchi Architects has to accommodate a large four-wheel-drive car on its lowest level and contend with the prying eyes of neighbors. The result frames views of the sky and accesses daylight via skylights.

    Triangular House by H.ARCHITECTS

    odd-shaped-houses-triangular

    odd-shaped-houses-triangular-2

    odd-shaped-houses-triangular-3

    Strict Japanese setback requirements prevent architects from building right up to the edge of the plot, including roof overhangs, yet the typical Japanese plot is incredibly small. This one was considered too awkward to build on and used as a parking lot for many years, but H.ARCHITECTS found a solution that makes the most of the adjacent park. A z-shaped interior layout allows for the creation of a few outdoor spaces, like the third floor balcony.

    Next Page – Click Below to Read More:
    Against All Odd Shapes 12 Homes Tailored To Tiny Difficult Plots

    Share on Facebook


    [ By SA Rogers in Architecture & Houses & Residential. ]

    [ WebUrbanist | Archives | Galleries | Privacy | TOS ]


    WebUrbanist

  • Ultimate OM-D: Olympus E-M1 Mark II Review

    Olympus’ OM-D EM-1 has been one of our favorite mirrorless cameras since its introduction in 2013. It impressed us with its build quality, image quality, ridiculous amount of manual control (that’s a compliment) and boatload of features. Three years later, it’s still very competitive.

    To say that Olympus has topped itself with the E-M1 Mark II is an understatement. The company told us that this camera was overdeveloped, and it shows. Its blazing dual quad-core processors allow for 60 fps burst shooting (18 fps w/continuous autofocus) and ridiculously fast image playback. Combine that with one of the most advanced autofocus systems we’ve seen and 5-axis in-body image stabilization – along with what made the original so impressive – and the Mark II is a force to be reckoned with.

    One thing about the Mark II that makes us pause is its price. Its MSRP of $ 2000 is higher than that of Nikon’s D500 and full-frame D750 (both are $ 1800), and the Mark II’s Four Thirds is small in comparison to the D500 and other APS-C cameras and tiny versus full-framers. 

    Key Specifications

    • 20MP Live MOS sensor
    • 5-axis in-body image stabilization system
    • 121-pt hybrid AF system
    • 60 fps burst shooting (18 fps with continuous AF)
    • Fully articulating 3″ LCD display
    • High-res electronic viewfinder
    • Cinema (DCI) and UHD 4K video
    • 50MP High-Res Shot mode
    • Weather-sealed body
    • USB 3 (Type-C)

    Compared to Olympus E-M1 and Nikon D500

    We are including the D500 here since it’s target audience is in the same vein: those who want high-speed shooting and an advanced AF system. As mentioned above, they both have a similar MSRP.

      Olympus E-M1 II Olympus E-M1 Nikon D500
    Sensor 20MP Four Thirds 16MP Four Thirds 21MP APS-C
    ISO range (expanded) 64-25,600 100-25,600 50-1,640,000
    Image stabilization In-body (up to 5.5 stops*) In-body (up to 4 stops) Lens only
    Autofocus system 121-point hybrid 81-point hybrid 153-pt phase-detect
    Burst mode (electronic) 60 fps (AF-S)
    18 fps (AF-C)
    11 fps (AF-S) N/A
    Burst mode (mechanical) 15 fps (AF-S)
    10 fps (AF-C)
    10 fps (AF-S, no IS)
    6.5 fps (AF-C, no IS)
    10 fps
    LCD 3″ fully articulating touchscreen 3″ tilting touchscreen 3.2″ tilting touchscreen
    Viewfinder 2.36M-dot EVF (0.74x equiv. mag) Optical
    (0.67x equiv. mag)
    Flash GN 9.1 external GN 7 external None
    Video capture DCI/UHD 4K (237Mbps) 1080/30p (24Mbps) UHD 4K (144Mbps)
    Video output 4:2:2 over HDMI N/A 4:2:2 over HDMI
    I/O ports Headphone, mic, remote, flash sync, USB 3, HDMI Mic, remote, USB, HDMI Headphone, mic, remote, flash sync, USB 3, HDMI
    Storage Dual SD (UHS-II/UHS-I) SD (UHS-I) SD + XQD
    Wireless Yes Yes Yes, with Bluetooth and NFC
    Weather-sealed Yes Yes Yes
    Battery life (CIPA) 440 shots 350 shots 1,240 shots
    Dimensions 134 x 91 x 69mm 130 x 94 x 63mm 147 x 115 x 81mm
    Weight (CIPA) 574g 497g 760g

    * 6.5 stops with Olympus 12-100mm lens

    Accessories

    $ (document).ready(function() { SampleGalleryV2({“containerId”:”embeddedSampleGallery_5394800926″,”galleryId”:”5394800926″,”isEmbeddedWidget”:true,”standalone”:false,”selectedImageIndex”:0,”startInCommentsView”:false,”isMobile”:false}) });

    At the time of its launch Olympus also debuted a number of accessories to go along with the E-M1 Mark II. The one most people will likely purchase is the HLD-9 battery grip ($ 249), which doubles battery life and offers two control dials and two custom buttons. It also features a DC-in jack, so the battery can be charged right inside the grip via an outrageously priced AC adapter.

    Also available is the powerful FL-900R external flash ($ 299), which has a guide number of 58m, built-in video lamp, wireless control and the ability to fire at 10 fps. The STF-8 Macro Flash Set ($ 479) has fully adjustable (and removable) left and right flashes, manual control down to 1/128 power and support for focus stacking. Both of these flashes are weather-sealed.

    For those who want to take the camera underwater there’s the PT-EP14 housing ($ 1299). It works down to 65m/196ft and numerous brackets, weights and arms are available. Naturally, you’ll need a housing for whatever lens you attach.

    Articles: Digital Photography Review (dpreview.com)

  • 8 Advanced Street Photography Tips to Get You to the Next Level

    In photography, teaching and learning can only get you so far. At some point, you will get to a skill level where it’s up to you to put in the time and effort to continue improving. However, dedication and self-learning aside, here are some advanced street photography tips that I think can help you significantly improve your skill level in this area.

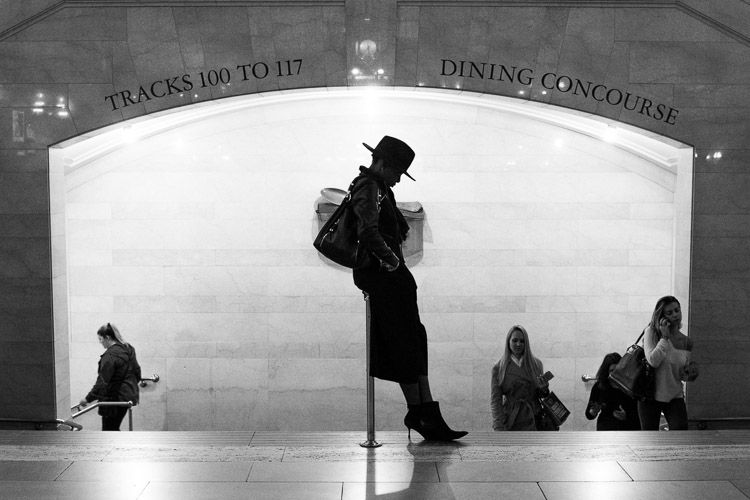
    Grand Central Woman, NYC

    1. Use your eyes instead of the viewfinder

    When photographing, it is very common for people to look straight into the viewfinder and forget about the world around them, but this can make street photography tougher. Your vision through the viewfinder is hindered significantly, and that can hurt your ability to capture spontaneous moments. You need to see everything that is happening around you. This will help you to anticipate the special moments that are about to occur in front of your camera.

    Your eyes are the real viewfinder, and you will be able to notice much more if you use them. Scan the area and look for subjects that are both near and far. Wait until you notice something with your eyes, then put your viewfinder to your eye to capture the moment. If you start with your head in the viewfinder, by the time the moment happens, your ability to notice it will be a half-second too slow.

    2. Embrace spontaneity

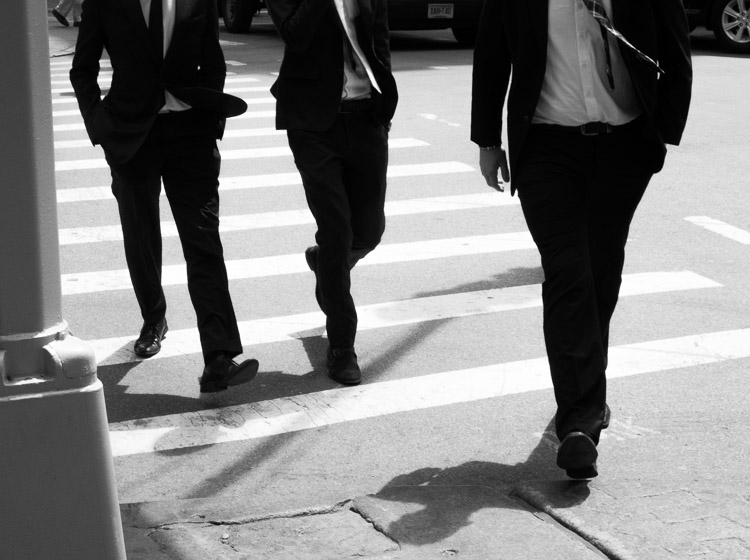
    Suits, SoHo, NYC

    This was one of the early tips that Garry Winogrand received in his photography education that set him on a path to become one of the most renowned photographers of all time. You should certainly spend a lot of time thinking about your work and what you like to shoot, but when you are out there going through the motions, embrace your gut feelings. Instead of worrying about every little detail and thinking about if you are doing a good job or not, put that all aside and have fun.

    There is no need to worry about what other people will think. If you feel like there might be a chance for a good photograph, then go for it, no matter how weird the image may be. Don’t let your brain talk you out of it. That gut feeling exists for a reason, so use it to your advantage. If you use your instincts and shoot confidently, that will show in your photographs. They will feel more real and more you. Of course, you will probably take more bad photographs as well, but the good ones will be that much better. Trust your gut.

    Keep in mind that some people may take this suggestion too far and machine-gun fire their camera every time they have an inkling that there’s a good photograph. That’s taking this tip too far. Turn off continuous shooting and make sure that you are able to recognize and capture tha moment with a shot or two.

    3. Think about how your photos are going to age

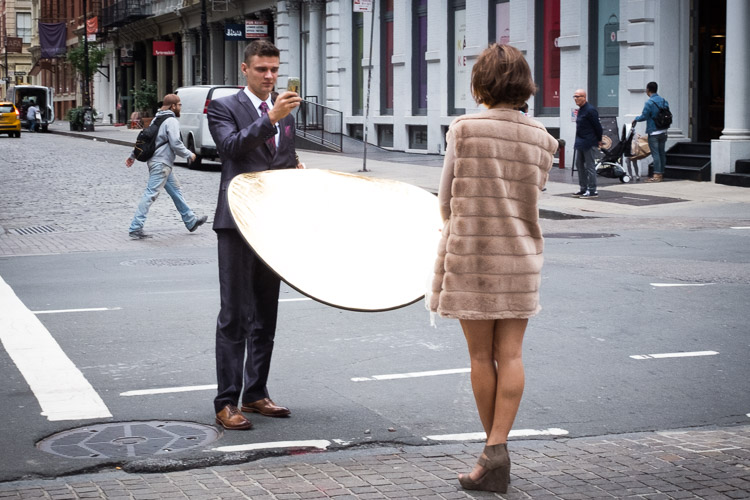
    Cellphone Fashion Shoot, Soho, NYC.

    It is important to think about your work in a historical context. Think about classic photographs and what makes them special. Simple old photographs of window displays and fashions look incredible, but those photographs might have seemed very ordinary back then. If you could go back in time to photograph, what you might see as interesting then would probably be much different than what most photographers were shooting at that time.

    What about your life and area is going to be interesting in the future? What is going to change? Are people still going to be staring at their cell phones every second with huge headphones on and completely disconnected from reality? Who knows, maybe?

    Try not to take anything for granted, and if you notice yourself disregarding something, then think about why you feel that way. Occasionally, these situations can make the best photographs.

    4. Create themes and consistency in your photography

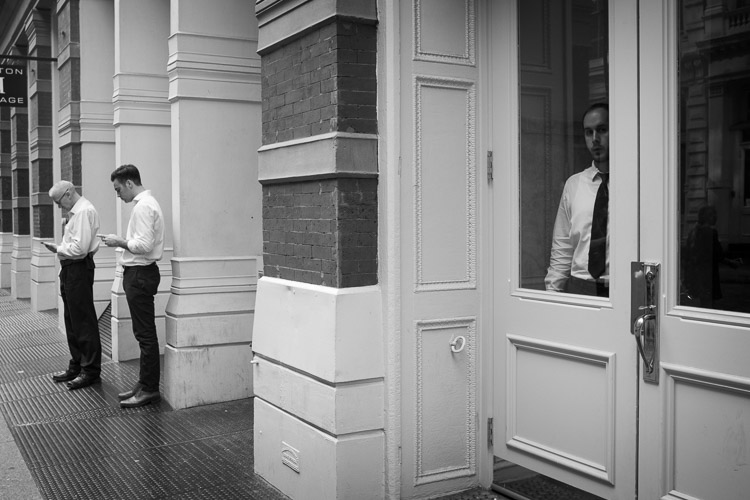
    Cellphones, Greene Street, SoHo, New York

    The more you shoot, the more you will notice that you are attracted to certain types of photographs. Find these consistencies when you are editing and embrace them. Over time, these ideas can blossom into full-fledged projects and books.

    Group these images together into collections, and think about the type of photographs that you would like to add to them. Then the next time you come across a moment that fits into that category, you will be quick to notice and capture it. Each individual photograph is a piece of art, but a collection of photographs is its own work of art. Play with the order of your photographs and the meaning that comes out with different sequences of them.

    Consistency does not mean that you can’t photograph different types of subject matter or in both color and black and white. You can be very diverse in how you shoot, and you can change and evolve as you go along, but you can still group these consistencies into projects that fit well together.

    5. Repetition

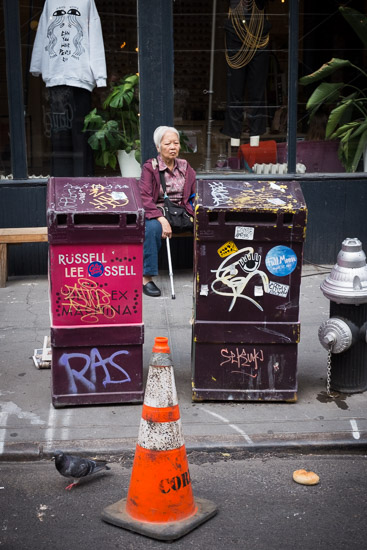
    Lower East Side, New York.

    The real key to improving your photography is through repetition. It is necessary to photograph frequently to keep your eyes sharp and your hand-eye coordination ready. Your instincts will improve. The more often you do it, the better you will be. Keep the rust away. Even the best photographers need to continually photograph to keep their skills up.

    The more you learn to enjoy the act of photographing, the easier it will be to walk out the door to shoot more. Photography shouldn’t be about feeling inspired or uninspired. You do not need to feel inspired to photograph if you enjoy the act of walking. Create a plan for how often you will photograph, just like the gym, and stick to it. Over time, it will become routine and your enjoyment for it will continue to grow.

    There is no need to worry about coming back with good photographs. That is going to happen, and you shouldn’t feel sad if you didn’t get anything good in a session. The good photographs will come, but if you feel frustrated too often, then that will affect how you photograph. Just enjoy the process of being out in the world doing something you love. The more you enjoy that, the better you will be.

    6. Photograph where you live

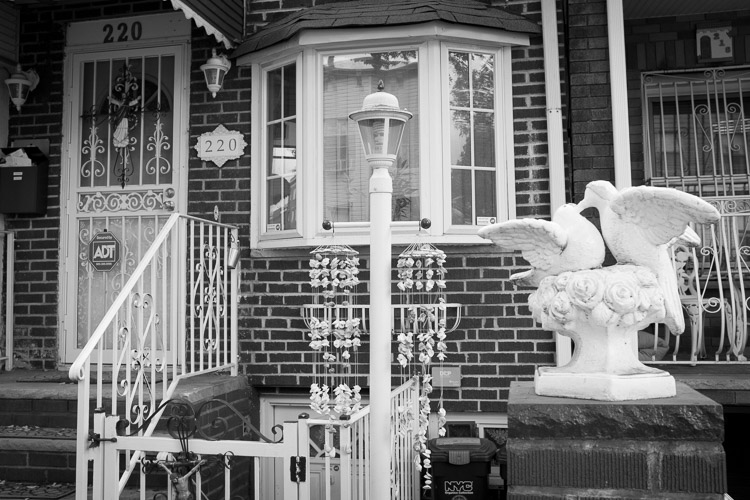
    Brooklyn Home, NYC.

    No matter where you live, whether it’s in the middle of a big city or in a small suburb, use that as a backdrop for a project. That is the area that you frequent the most, and know the best. Go to places that you think would be incredibly boring for photographs and figure out how to get a good photograph there. Don’t take things for granted. Absolutely anything can make a good and beautiful photograph. All it takes is dedication.

    7. Emotion and gesture

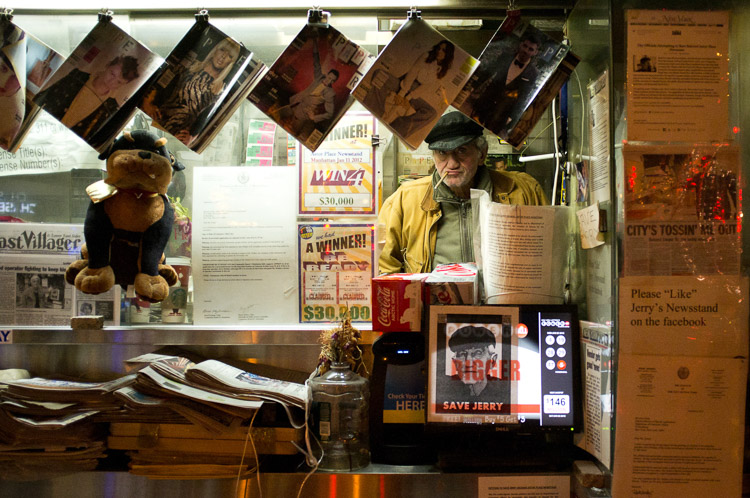
    Jerry Delakas, Astor Place Newsman.

    As photographers, our job is to pass on an idea or an emotion to the viewers of our work. How you do that is something for you to figure out. Search for feeling and emotion when you are shooting. Aim to create evocative photographs.

    If you are photographing people, it is important to capture them when they are portraying an emotion. This can be shown in a facial expression, what they are doing, or the gesture of their body. Sometimes, you will capture a unique looking person with no emotion or gesture and that will ruin the photograph. Other times, you will capture someone that you did not think would be a good subject, but the emotion shown on their face make the entire photograph. When you photograph people, this emotion is vital to focus on.

    8. Zone focusing

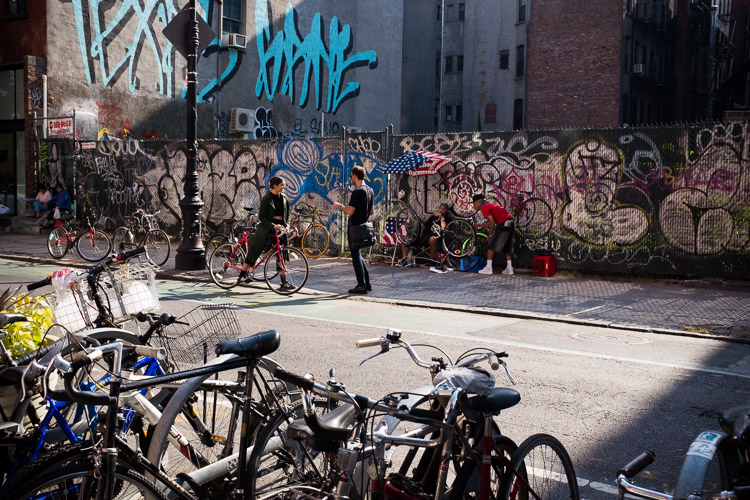
    Lower East Side, New York City

    Zone focusing is the toughest technical skill to learn in street photography, but it is very important to learn. At first, you will screw up a lot of photographs, but over time it becomes a more accurate way of obtaining sharp photographs.

    Zone focusing works particularly well in busy areas, but it can be used any time once you get good at it. I tend to zone focus 60% of the time and autofocus the rest. If your subject isn’t moving and you have time to autofocus, it is always good to do that as it will guarantee perfect focus. But the rest of the time zone focusing can be the way to go.

    What is zone focusing and how is it done?

    This strategy of zone focusing is basically just using manual focus your camera and guessing the distance to subjects. Because of this, you will need a distance meter on either your lens or in your camera. You then want to turn your camera (or lens) to manual focus. Set the focus at a certain distance away from the camera. I prefer 8-10 feet, although I will do a smaller distance if I’m in a really busy area where people are closer together. Next, figure out how far that distance is away from your camera, and now you know that everything at that distance away from you will be sharp.

    Zone focusing can be done well at very large apertures, even f/2, but it becomes much more difficult to do well. This focusing strategy works much better with apertures of f/16, f/11, and f/8 and a wide-angle lens such as 35mm. That will ensure there is a large depth of field in your image (make sure to also raise your ISO to achieve this and still keep an adequately fast shutter speed). Thus, there will be a significant area both in front and behind of the spot that you are focused on that will all be in sharp focus. This helps for situations where you miscalculate the distance when the perfect moment happens and it’s not exactly where are focused, and when you have multiple subjects at different distances that you want to be relatively sharp.

    This is why it is always good to start off zone focusing in bright sunlight with a wide-angle lens. This will allow you to shoot at f/11 or f/16 so that a lot of your image will be sharp and you will barely have to worry. Set your focus to 8 or 10 feet away and pay attention to your subjects more than your focusing. It is a very freeing feeling, and the extra time you save not having to focus will aid you in catching those spontaneous and instantaneous moments that appear before you.

    Conclusion

    If you want even more street photography tips, check out: The Ultimate Guide to Street Photography (you can even download it as a PDF).

    What things to you practice to up your street photography game? Please share your comments and images in the section below.


    If you’d like to learn more about Street Photography, then please check out my ebook The Essentials of Street Photography.

    googletag.cmd.push(function() {
    tablet_slots.push( googletag.defineSlot( “/1005424/_dPSv4_tab-all-article-bottom_(300×250)”, [300, 250], “pb-ad-78623” ).addService( googletag.pubads() ) ); } );

    googletag.cmd.push(function() {
    mobile_slots.push( googletag.defineSlot( “/1005424/_dPSv4_mob-all-article-bottom_(300×250)”, [300, 250], “pb-ad-78158” ).addService( googletag.pubads() ) ); } );

    The post 8 Advanced Street Photography Tips to Get You to the Next Level by James Maher appeared first on Digital Photography School.


    Digital Photography School

  • How to Make a Pinhole Camera with a DSLR Body Cap

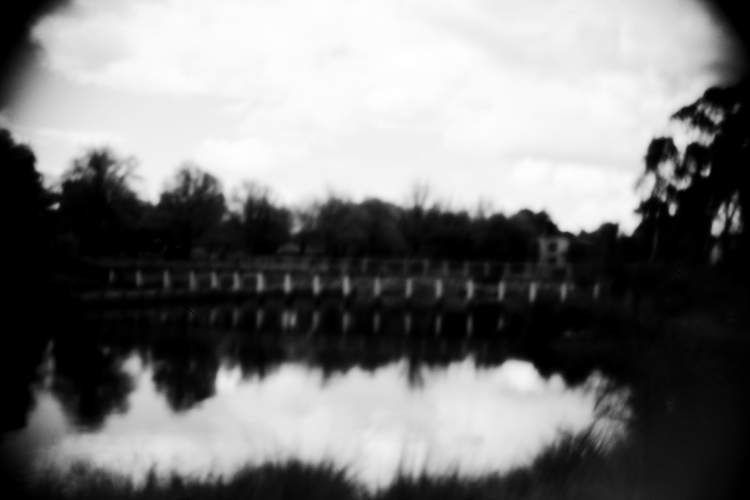
    Pinhole photography is a lensless form of photography. Essentially, the pinhole camera is a lightproof box with a tiny aperture and a photosensitive material positioned inside. Light passes through the aperture and projects an inverted image onto the interior of the box where the photosensitive material is fixed. You can make a pinhole camera out of practically anything, and the results are unique and often surprising.

    digital-pinhole-13

    Analog ideas in a digital world

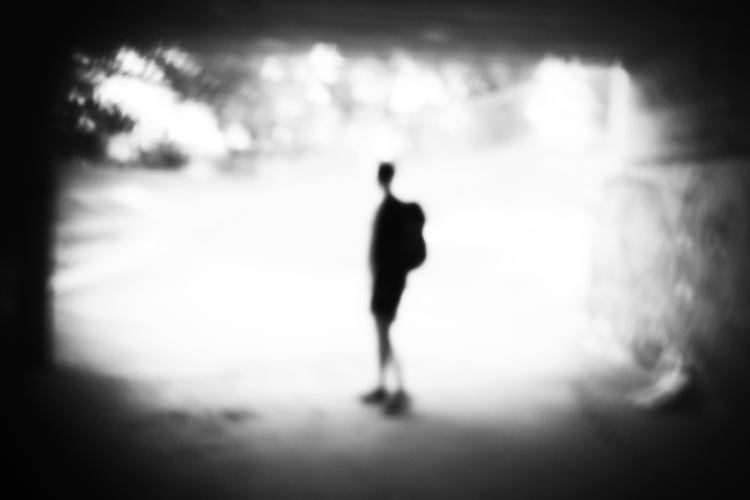
    Modifying your DSLR camera’s body cap to create a pinhole effect is a simple project that allows for real-time adjustments that the analog process doesn’t. As long as you can spare a body cap you can do this. The lens emulates the distinctive vignette and softness of a pinhole photograph in a fraction of the time and is great for adding an abstract or surreal quality to an image. While the digital technique isn’t the same as a classic biscuit-tin camera, your home-made lens makes for a dynamic approach to a nostalgic analog process. Plus, the unpredictability of the results adds an interesting twist to your digital practice.

    digital-pinhole-15

    You will need:

    • A DSLR camera
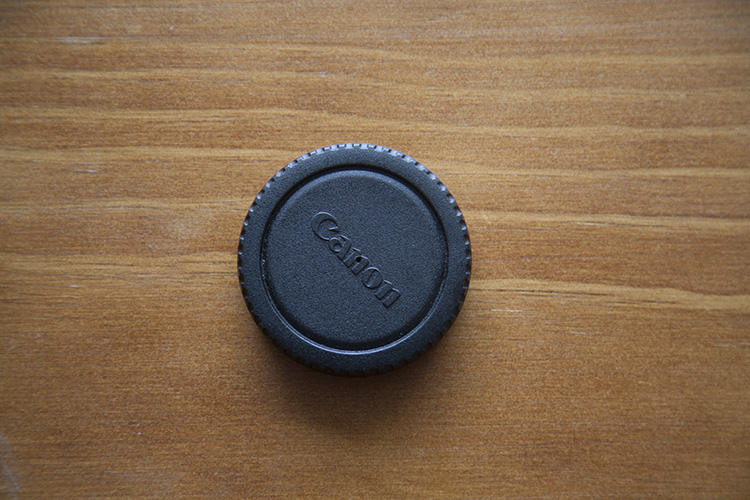
    • One body cap that fits the body of the camera you are going to use
    • One drill and a drill bit
    • A needle
    • Aluminum foil
    • Sticky tape
    • Blu-Tack

    Method

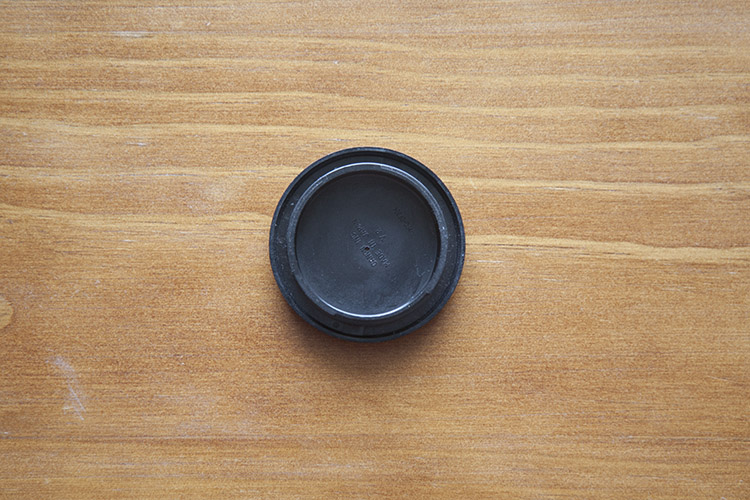
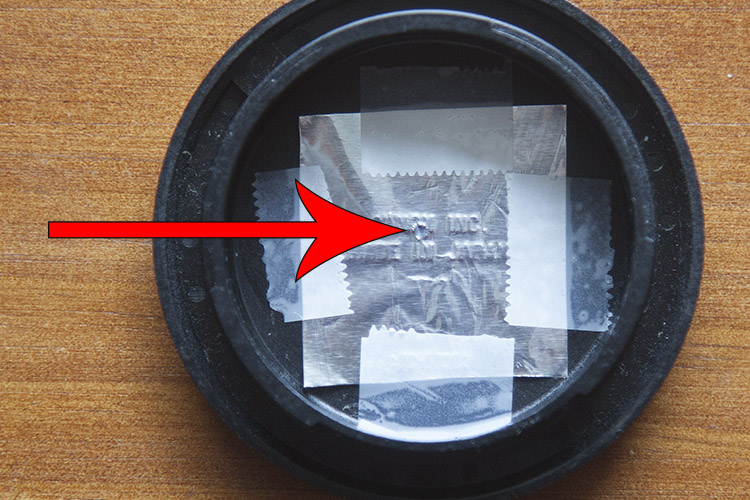
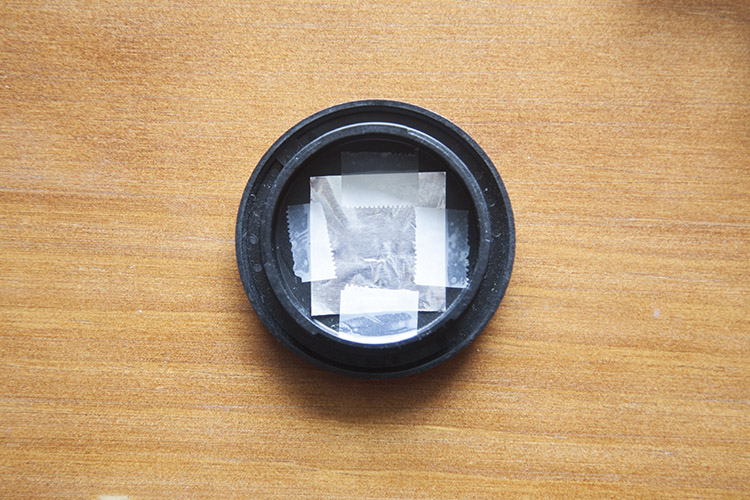
    Mark out the center of the body cap and make an indent by pressing the tip of the drill bit into the center mark. It’s important to make a hole in the center of the body cap or you won’t get the full effect. Drill a 1/4″ or 6.35mm hole in the center of the cap. Make sure the hole is clear of any swarf (chips) or sharp ridges left behind by the drill.

    digital-pinhole-06

    digital-pinhole-07

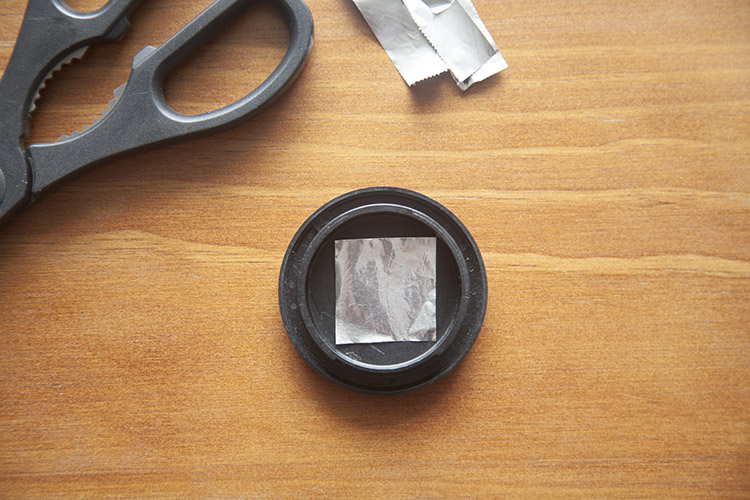
    Cut a small piece of aluminum foil to fit inside the edges of the cap.

    digital-pinhole-08

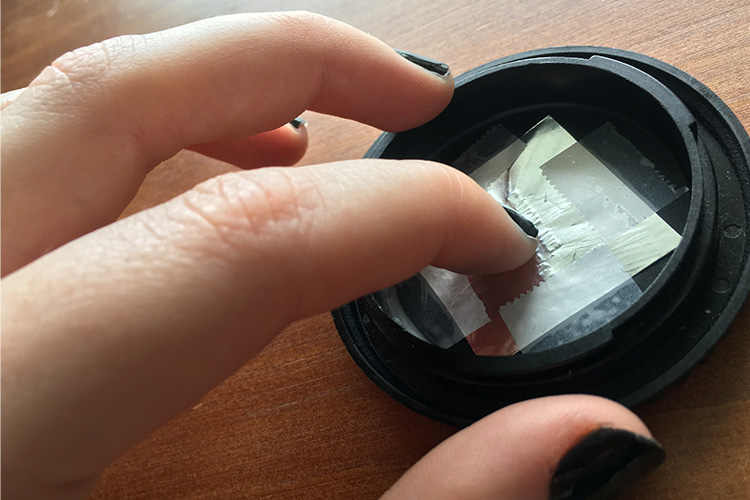
    Tape the foil onto the inside of the cap, keeping the sheet taut.

    digital-pinhole-10

    To create an outline of the drilled hole, gently press the foil into the body cap with your finger,

    digital-pinhole-11

    digital-pinhole-09

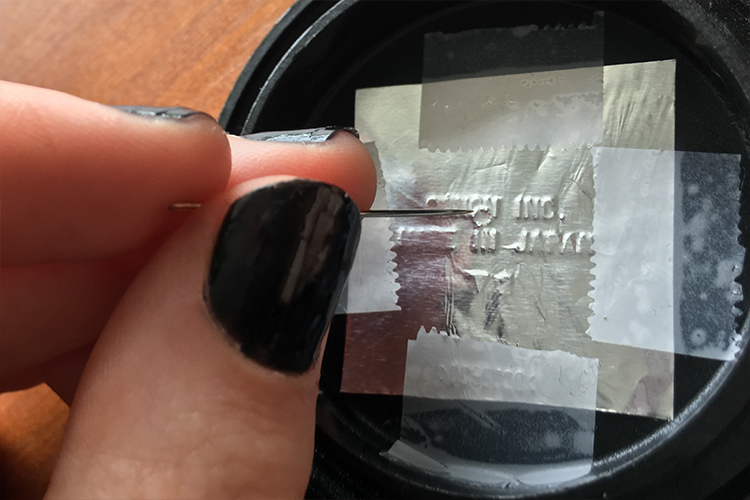
    Now, have a look at the outline of the drilled hole. With a small sewing needle, prick a tiny hole in the center of the outline.

    digital-pinhole-12

    The smaller the aperture, the sharper the photograph, so use the very tip of the needle to make a hole. Make sure no foil hangs over the newly pricked hole as this could compromise image quality.

    Shooting with your pinhole camera

    Before attaching the cap onto the camera body, be sure to thoroughly clean the body cap of dust and residue. Keep a bit of Blu-Tack with you to cover the hole when the camera isn’t in use.

    The tiny aperture in our pinhole lens allows significantly less light to hit the sensor than a conventional lens, so exposures must be longer to compensate. When I’m out in the field, I set my ISO to 500 so the sensor will be more sensitive to the light that does reach it, without too much digital noise in the image. I also set my camera to aperture priority (A on Nikon and Sony, and Av for Canon and Pentax) so that I can adjust the exposure easily, and the shutter speed will adjust automatically.

    In dark, indoor conditions, my shutter speed settings can go as low as 8 seconds. On bright days outdoors I photograph at 1/30 of a second but shutter speeds of up to 1/8000th of a second can be used to photograph bright subjects like the sun. At first, it will feel a bit trial-and-error, but half the fun is in the experimentation and you will quickly get a feel for it. Tripods are handy, but in-camera movement can have some neat results too, so don’t be afraid to experiment.

    digital-pinhole-01

    digital-pinhole-02

    Also due to the small aperture of the pinhole lens, dust specks are more visible than images taken with a conventional lens. Don’t panic, it’s not the sign of a dirty sensor! Use Photoshop or a similar program to remove spots via the Spot Healing Tool. While you’re at it, give the colors in your image a bit of a boost with the Curves tool to make your images really pop, or convert an image to black and white for a traditional analog feel.

    Conclusion

    This project is quick, easy and fun, but it also yields fascinating and unexpected results. Much like its analog counterpart, I found that this method requires the user to relax and enjoy the experimental process and hone in on their photographic senses, rather than pouring over the details.

    I found that my best images were the ones I took spontaneously, often having to quickly guess the appropriate exposure and shoot from the hip. Also, I was compelled by the new perspective that the combination of camera movement, long exposure, the limited field of view, and minimal technical adjustment delivered. 

    Have fun and share your results in the comments below.

    digital-pinhole-04

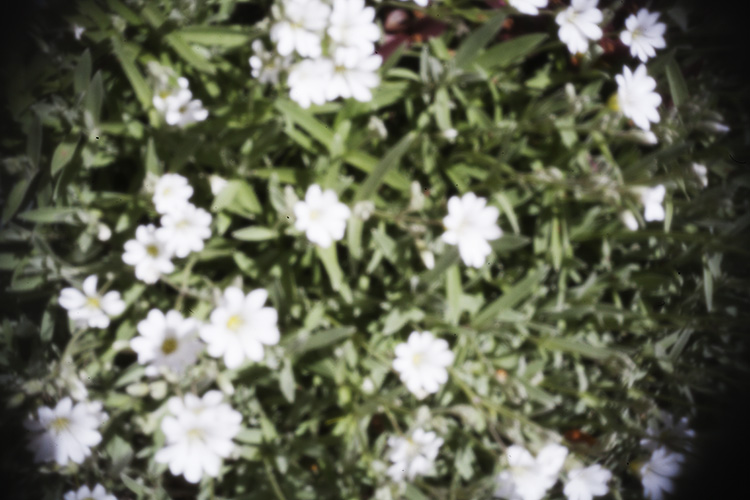
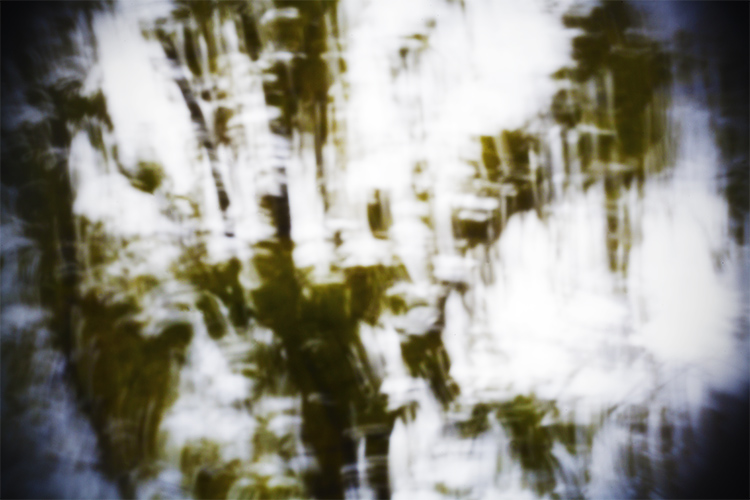
    This photograph of leafy branches was taken with a 2 second exposure on an overcast day. The soft focus of our modified lens and the moment of the branches lends a painterly quality to the image.

    digital-pinhole-14


    digital-pinhole-16

    digital-pinhole-03

    digital-pinhole-05

    googletag.cmd.push(function() {
    tablet_slots.push( googletag.defineSlot( “/1005424/_dPSv4_tab-all-article-bottom_(300×250)”, [300, 250], “pb-ad-78623” ).addService( googletag.pubads() ) ); } );

    googletag.cmd.push(function() {
    mobile_slots.push( googletag.defineSlot( “/1005424/_dPSv4_mob-all-article-bottom_(300×250)”, [300, 250], “pb-ad-78158” ).addService( googletag.pubads() ) ); } );

    The post How to Make a Pinhole Camera with a DSLR Body Cap by Megan Kennedy appeared first on Digital Photography School.


    Digital Photography School

  • 4 Tips to Supercharge your Lightroom Workflow

    In this article, we’re going to look at four tips to help you supercharge your Lightroom workflow and post-processing. Then you can spend more time doing what you love, photography!

    The issue

    Going through several hundred pictures after a photo session can seem so daunting and time-consuming that it becomes more of a chore than an enjoyable and creative part of the photography process. It’s those late nights staring at a collection of pictures on your computer monitor, sipping the last drops from your cold mochaccino long after the whipped cream has melted away, that can suck all the fun out of photography. It can make you want to up-end your workstation, chuck your gear in the trash, and look up the price of desert island real estate so you never have to edit another picture again.

    Fortunately, most image editing programs have some type of photo management built-in to help streamline your editing. Lightroom has a set of tools that have been honed over many years of iterative development to really assist you when it comes to trimming precious time from your post-processing workflow. There are four specific techniques that can help you, and those just getting started in the field. Together they can save you time and maybe bring back the artistic spark that may have been lost over the years.

    You can help me save time in Lightroom? Tell me more!

    Can you help me save time post-processing in Lightroom? Tell me more!

    #1 – Create your own presets

    Most people know that Lightroom has a fairly extensive offering of built-in presets, and you can even buy additional sets like the ones we offer here at dPS. But as useful as those are, they might not meet your specific needs as a photographer. If you’re like me you, tend to use presets as a starting point and then tweak your images ad nauseam, but sometimes even getting to that starting point can be tricky.

    Enter the wonderful world of user-created presets! Lightroom lets you save any combination of adjustments in the Develop module as a Preset that you can apply to any photo at any time. I find this really handy when doing my initial photo imports. I like the RAW files from my Nikon D750 to have a little bit of added vim and vigor right off the bat. So upon import, I usually apply a preset I made called “Nikon RAW Import” that adjusts black, white, and shadow levels along with a few other parameters. It gives me a nice starting point for almost any image and is a great way to save time when editing.
    supercharge-lightroom-workflow-custom-presets

    How to save your own presets

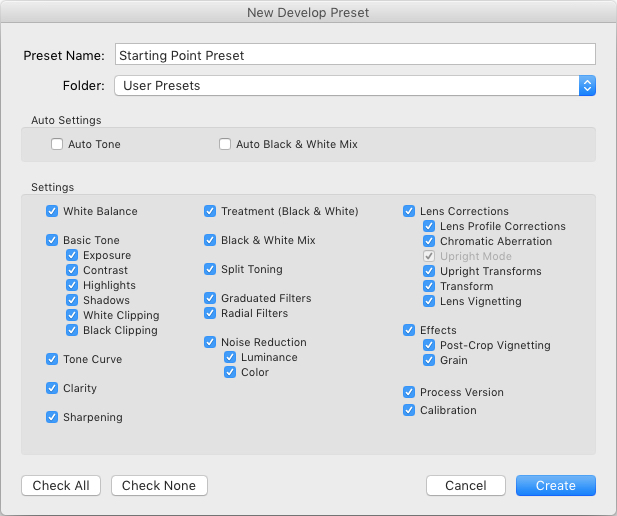
    To create your own presets go to the Develop module and change the value of your sliders, adjust your tone curve, dial in your preferred level of sharpening and noise reduction, and you’re 90% finished. After you have an initial set of edits created go to the Develop menu and choose “New Preset.” Select the parameters you would like to include in the Preset and then click “Create.”

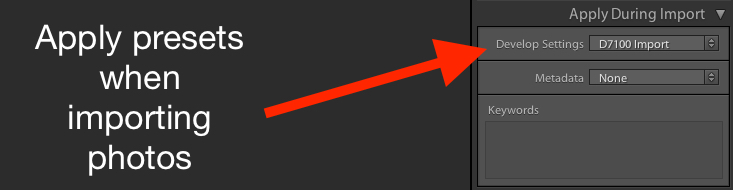
    Your Preset is now ready to go and you can apply it with one click to any image, or to a batch of images. Do so by selecting them (from the thumbnails) in the Develop module, right-click on them, and choosing “Develop Settings > User Presets > [Your Preset name].” You can also apply it to all your photos on import by going to the right-hand side of the Import screen under the “Apply During Import” option. Where is says “Develop Settings” pull that menu down and find your preset from the list.
    supercharge-lightroom-workflow-preset-import

    As a bonus, you can even share your Presets with others by navigating to the folder on your hard drive in which they are stored (“Preferences” menu > Presets > Show Lightroom Presets Folder), copying the file with your Preset data, and sharing it with anyone you choose.

    Read more here: How to Create Your Own Lightroom Presets

    #2 – Sync edits across multiple photos

    Photographers are going crazy over this! You can save all sorts of time in your Lightroom workflow by using this one weird trick! I know that sounds like a cheesy click-bait title from a sidebar you might see on a used car website, but in this case, it’s really true.

    On many photo sessions you will end up with dozens of images that are relatively similar and thus can often benefit from the same types of adjustments. Let’s say you shoot a wedding and have 20 really nice images of the groomsmen getting ready and adjusting their superhero-themed vests in the church office. You could easily spend 5 or 10 minutes adjusting the white balance, black levels, highlights, color saturation, and noise reduction. You finally get one of the photos looking, as Goldilocks might say, “Juuuuust right,” and then realize you still have nine more to go. At which point you start looking up how much your 70-200mm lens might sell for on Craigslist because you know this is going to be another one of those editing sessions that involves way more late nights and cups of coffee than you had initially planned.
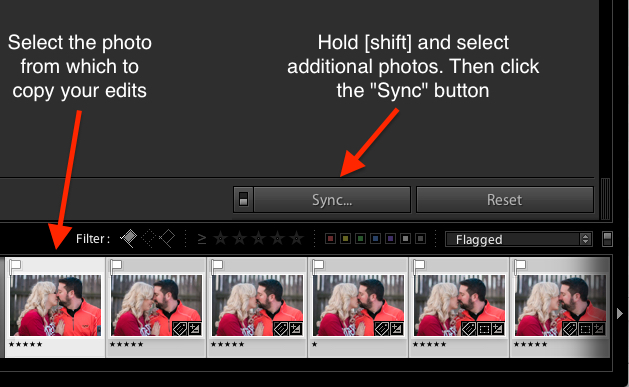
    supercharge-lightroom-workflow-sync-button

    How to sync your processing settings

    But wait, there’s hope! To instantly sync the edits from the first photo to all the rest which are similar, select the initial image in the filmstrip view at the bottom of the Develop panel. Then hold down the [shift] key while selecting all the rest and click the “Sync…” button in the lower-right corner of your screen.

    You can pick and choose which edits you want to sync, and with the click of a button, all the other images are instantly edited just like the first one. BAM! Time saved: infinite. You’re welcome.

    Alternatively, you could use the Copy/Paste function to copy edits from one picture to the next, but that only works with a single photo at a time. I have found the Sync option to be far more useful, you may as well.

    Using the Sync option saved my bacon on this photo shoot. I had so many pictures to edit that synchronizing the changes made things go much faster.

    Using the Sync option saved my bacon on this photo shoot. I had so many pictures to edit that synchronizing the changes made things go much faster.

    #3 – Use the White Balance Eyedropper

    When I first started out with digital photography I was the kind of person who wanted to do everything myself. Auto mode? No thank you camera, I’ll set the exposure myself. Autofocus? I don’t think so. Automobile? Not me, I prefer to walk!

    Over time, I learned to let go of some of these tendencies with one glaring exception. Setting the white balance on my RAW files in post-production, stuck with me far too long.

    Setting the proper white balance is the foundation for almost any photo editing. If you fiddle with the Temp and Tint sliders long enough you can usually get a good result. The trouble is that takes a long time, especially when working with hundreds of images. It can take a lot of trial and error, and guesswork to dial in just the right white balance. Unless you let Lightroom do most of the heavy lifting for you.
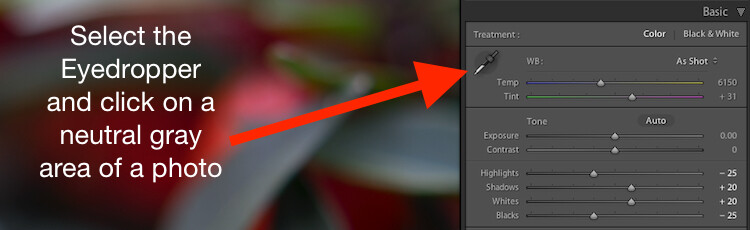
    White Balance got you down? The Eyedropper is here to help.

    White Balance got you down? The Eyedropper is here to help.

    Using the eyedropper

    Nestled quietly on the left-hand side of the Basic panel in the Develop module is a strange icon. It looks like a medieval dagger or possibly a light saber that can’t decide whether it’s meant for a Jedi or a Sith. It’s actually an eyedropper. Using on it can help you out immensely when it comes to finding the proper white balance for a RAW file.

    Click the icon and find a spot on your photo that is slightly gray (neutral). Not totally pure white mind you, but a little off-white to give Lightroom a reference point as it calculates the value of how the rest of the colors in the image should look. What it does is neutralizes any color cast or shift in that area. A half second later and voilà! Your picture is now properly white balanced, but if it doesn’t look quite right you can tweak it with the sliders. Using the eyedropper isn’t a surefire guaranteed method, but it almost always gets you right on the mark or very close to it.
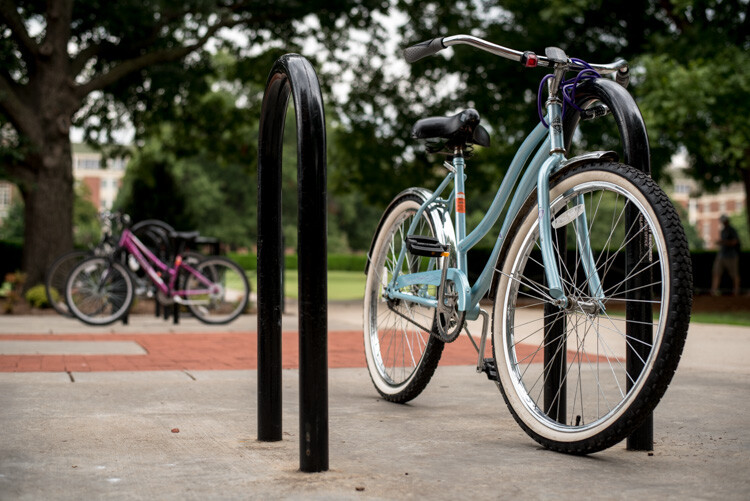
    One click and...bam! Instant white balance.

    One click and…bam! Instant white balance.

    #4 – Flag/Reject when culling images

    I was just talking with a friend recently who takes a lot of pictures of his kids with his DSLR. He told me that one of the hardest things for him to do is go through his images and remove the bad ones. His solution was to simply not delete any at all.

    If this sounds like you, whether you’re professional or amateur, and you just can’t quite bring yourself to tap the [Delete] key when browsing through your photo library – Lightroom is here to help.

    You might do a family portrait session and get 20 pictures with just mom and dad, 50 that you took in burst mode with the kids sitting on their lap. Then a couple hundred from when the family invited their pet ferret to join the shoot. Some of your images would be easy to discard due to being out of focus, poorly composed, or overly pernicious polecats deciding to climb atop dad’s carefully crafted coiffure. But what about the rest? The ones that are all pretty good while also being quite similar?
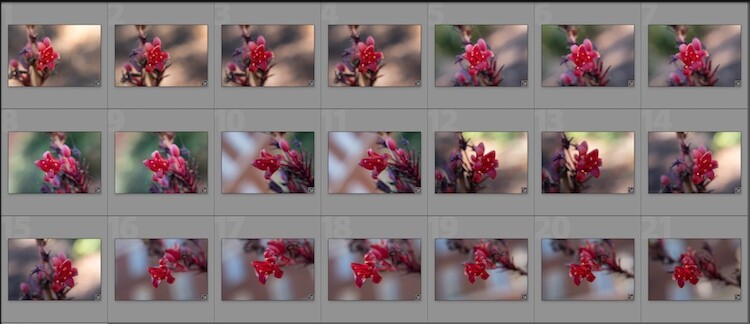
    So many photos, so little time...

    So many photos, so little time…

    How to flag images in Lightroom

    As you scan through your library in Lightroom, you can use the arrow keys to move from one image to the next, and the P and X keys to mark images as keepers or rejects. Tap P (pick) on a picture to adorn it with a  white flag, and tap X to mark it with the Tiny Black Flag of Shame denoting a rejected image.

    A Flagged picture is one that you have highlighted as particularly good, while a Rejected picture is not worth your consideration. Marking an image as Rejected does not delete it so you can always go back and look at it later. But it serves as a signal to you as you are culling, that you don’t need to consider it. You can also use the filter bar at the bottom of the screen to show only those images that are Flagged, Unflagged, or Rejected by clicking on their respective icons. If you accidentally mark an image incorrectly, press the U key to remove the Flag/Rejected status.

    Filter them

    You can also use the filter bar at the bottom of the screen to show only those images that are Flagged, Unflagged, or Rejected by clicking on their respective icons. If you accidentally mark an image incorrectly, press the U (unflag) key to remove the Flag/Rejected status.
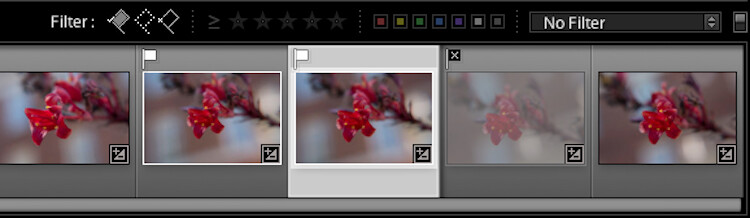
    Once you mark your images as Flagged or Rejected, use the filter icons to choose which photos to display.

    Once you mark your images as Flagged or Rejected, use the filter icons to choose which photos to display.

    Using the Flag/Rejected markings has significantly decreased my editing time, and will likely dramatically lower yours as well. In a similar fashion you can use the number keys 1-5 to mark images with one to five stars, and numbers 6-9 to label images with different colors. I find these less handy than simply using the Flag/Rejected method when doing the initial culling, but far more useful when deciding, for instance, which images are the Best of the Best and worth printing, sharing, or showing to clients.

    Over to you

    I hope these tips have been helpful. Certainly, there are many more options for helping your Lightroom workflow go a little smoother that we simply don’t have the space to cover in one article. What are your favorite tips? Please share your ideas, tricks, and shortcuts in the comments below!

    googletag.cmd.push(function() {
    tablet_slots.push( googletag.defineSlot( “/1005424/_dPSv4_tab-all-article-bottom_(300×250)”, [300, 250], “pb-ad-78623” ).addService( googletag.pubads() ) ); } );

    googletag.cmd.push(function() {
    mobile_slots.push( googletag.defineSlot( “/1005424/_dPSv4_mob-all-article-bottom_(300×250)”, [300, 250], “pb-ad-78158” ).addService( googletag.pubads() ) ); } );

    The post 4 Tips to Supercharge your Lightroom Workflow by Simon Ringsmuth appeared first on Digital Photography School.


    Digital Photography School
  • 2016 Roundup: Best Camera Drones Under $1500

    The past few years have seen an explosion in the popularity of drones, and they’re being used for everything from video production to aerial panoramas. It’s an exciting time to dive into this technology.

    Drones can be expensive, but there are good values to be had, even under $ 1500. In fact, some of the models in this round-up have been used for prize-winning photography as well as for major feature films.

    Before buying a drone, think about how you intend to use it. Some are better for video, while others may be better for pictures. Some still photographers prefer to shoot with 4K video and ‘frame grab.’ As with any tool it’s about picking what’s right for you.

    One thing to remember is that specifications are designed to catch your eye. But remember, as with any camera, it’s not all about a single specification; it’s about combining the features and specifications that matter most to you and meet your needs.

    In addition to core specs, many drones have features such as ‘follow-me’ or subject tracking modes that can be used to make operation easier, or even automate shots. For instance, if you want to shoot video but have a difficult time orbiting, spiraling, or doing a fly-by pan while keeping your subject in frame, these features can be an immense help (if they work properly). Also, consider how easy a drone is to fly. The guidance system and stability of the drone will help determine this.

    It’s a crowded market and there are a lot of drones available for under $ 1500, but we’ll take a look at some of the most common models you’re likely to run into:

    • Parrot Bebop 2
    • DJI Phantom 3 Series
    • 3D Robotics Solo
    • Yuneec Q500 Typhoon 4K
    • Yuneec Typhoon H 4K
    • DJI Mavic Pro
    • DJI Phantom 4 and Phantom 4 Pro

    Finally, we’ll try to help answer the question “Which drone should I buy?”

    Articles: Digital Photography Review (dpreview.com)

  • Announcing the PDN Gift Guide 2016

    Our friends at Photo District News just published their annual Gift Guide, including gift ideas from the reviews team here at DPReview. Alongside our personal recommendations, you’ll find contributions from the team at PDN, and Rangefinder Magazine.

    So whether you’re shopping for a special photographer in your life, or just as an end of year treat to yourself (we won’t tell anyone), this guide is a great place to get some inspiration.

    Articles: Digital Photography Review (dpreview.com)

  • Review and Field Test of the New SpiderLight Holster

    Since 2010, Spider Holster has produce camera carrying systems which are intended to create a more innovative method for carrying your camera with you while working. Their carry systems are designed to offer a convenient and comfortable way to access your camera quickly while still managing to store it securely within easy reach when not in use.

    SpiderLight Holster Close Up

    Recently, Spider Holsters has launched a brand new Kickstarter campaign for the latest addition to their line of quick-draw type camera carry systems; the SpiderLight Holster. The SpiderLight is intended specifically for those shooters who carry a mirrorless or smaller SLR camera setup. Being a recent convert to a mirrorless camera system myself, I was excited to try out this newest offering from Spider and see if I would truly “Ditch the strap” in favor of this inventive way of carrying my camera while in the field.

    First Impressions of the SpiderLight Holster

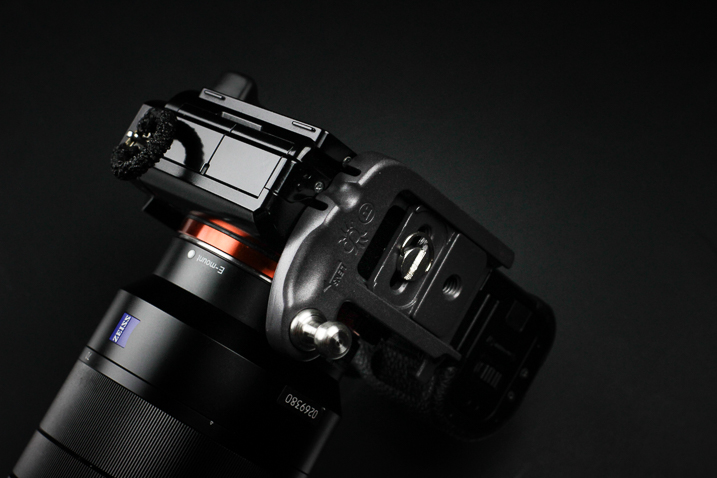
    My cameras are more like extensions of myself than just pieces of metal and plastic. I love my cameras. So naturally I was, shall we say, somewhat hesitant to place their welfare in the hands of a new type of carry system instead of my heavy-duty leather camera strap. All those fears were genuinely soothed as soon as I handled the SpiderLight Holster for the first time. The product is solid, beefy, and extremely substantial. More so than I expected it to be based on the product photos from Spider Holster’s website.

    SpiderLight Holster_Plate_2.jpg


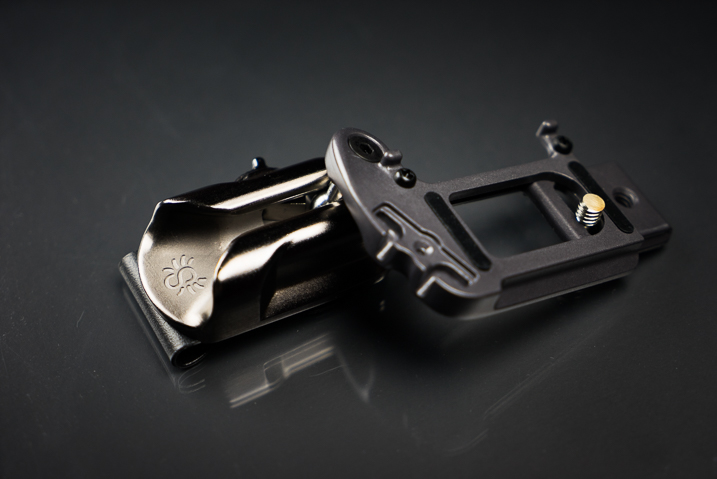
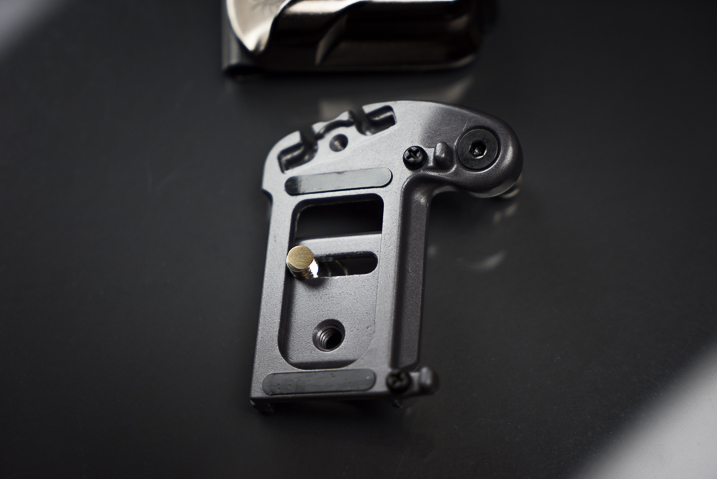
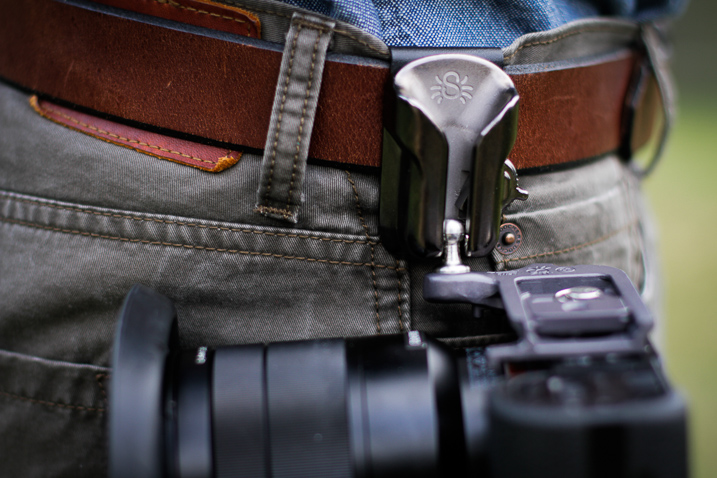
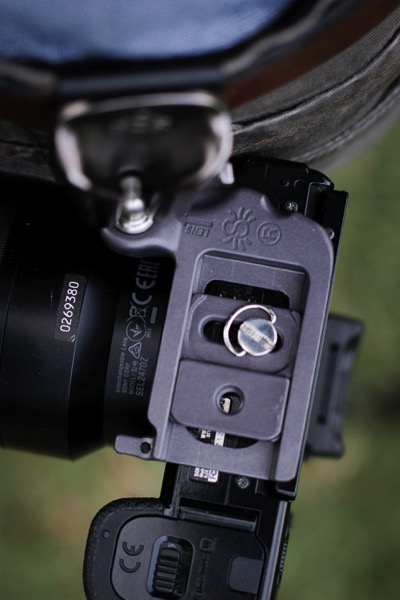
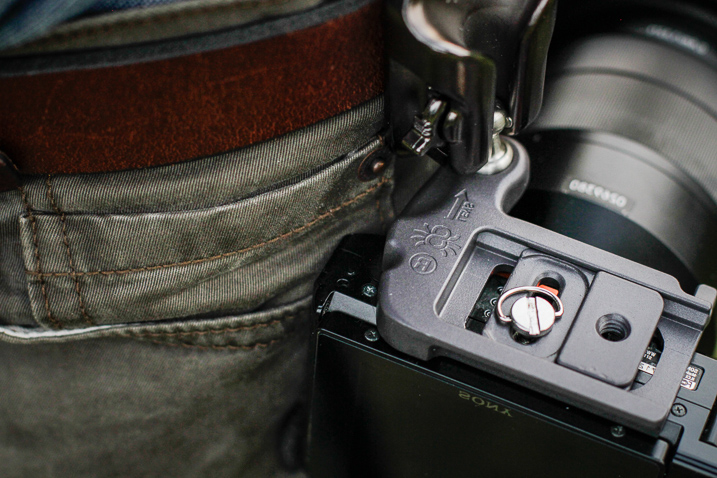
    The construction of the SpiderLight is all stainless steel and aluminum, subdued in a professional-looking matte finish. The holster itself is constructed of aluminum with a stainless steel insert to prevent wear with the belt clip on the back, being made from spring steel. The camera plate is crafted from heavy aluminum as well, while the Spider pin (the part that slides into the holster) is CNC machined stainless steel.

    SpiderLight Holster Plate

    SpiderLight Holster Release

    All the screws were tight and the entire mechanism moved smoothly with no burrs or imperfections appearing to be found. Even the markings on the product are etched into the metal instead of being painted onto the surface. The belt clip itself is substantial and provides a heartily robust grip to a wide range of belt widths.

    Real World Use

    The majority of my work focuses on wilderness and adventure photography with a little bit of everything else thrown into the mix. I spend lots of time in the outdoors chasing light so I was extremely curious to see how well the SpiderLight would perform during hiking and fast movements. I tested the mechanism using my main camera body, the Sony A7r Mk1 fitted with Zeiss Vario-Tessar 24-70mm F4.

    SpiderLight Holster 3

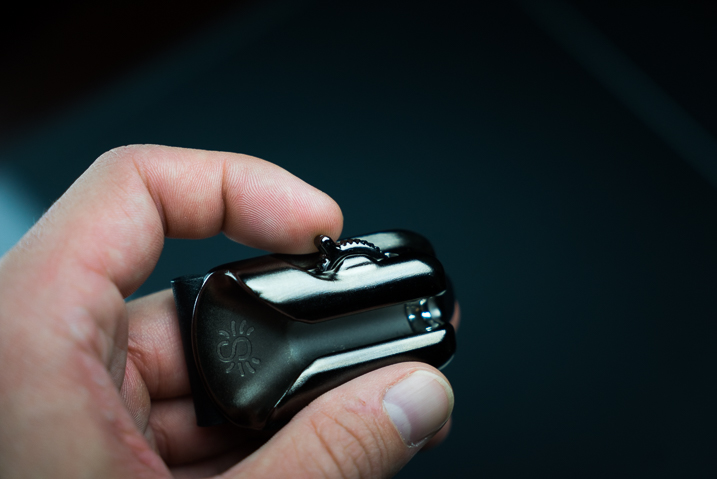
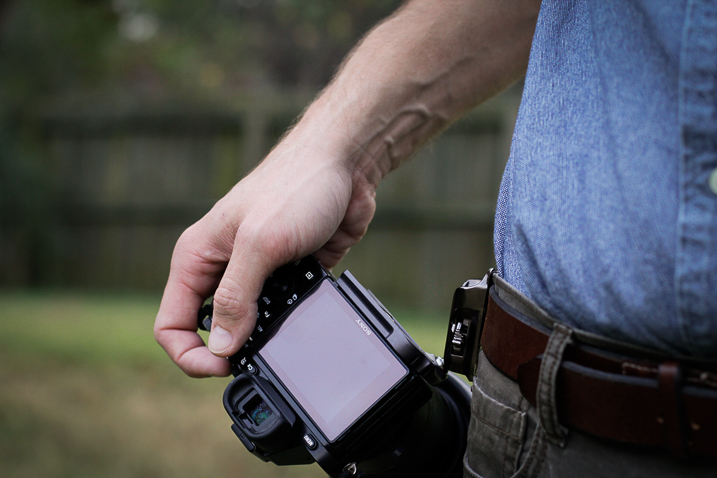
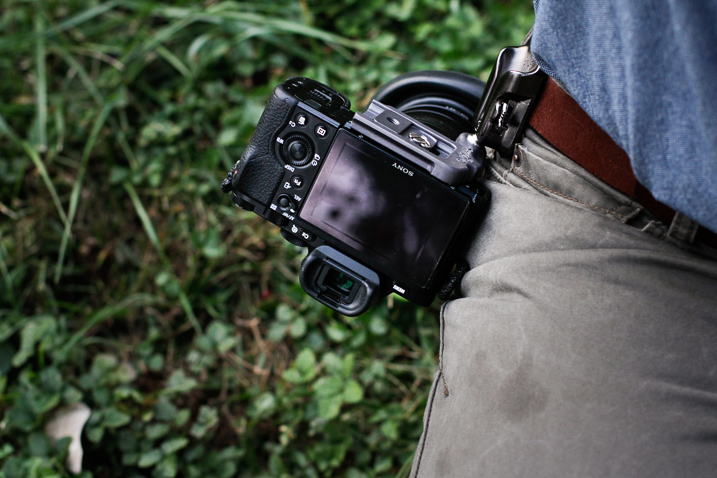
    Functionally, the SpiderLight is deceptively simple. There is a steel peg that slides into a groove on the holster in such a way that the camera hangs inverted from the holster. However, looking more closely reveals evidence of some fairly impressive engineering at work.

    A well placed two-stage locking switch secures the camera in one of two ways depending on your needs. This switch is invaluable. It locks the camera in place until the user disengages it with a subtle flick. More importantly, it can be completely disengaged to facilitate quick retrieval of your camera.

    SpiderLight Holster 4

    SpiderLight Holster 5

    I was extremely surprised at just how versatile the SpiderLight could be in practice. I walked, jogged, bent down, and did all the epic things photographers do without any real encumbrance caused by the device. The only adversity I encountered was to remember the camera was by my hip when passing through doorways. After a little practice, I completely forgot that I carried the camera at my side. It worked, for lack of a better word, beautifully.

    SpiderLight Holster 2

    SpiderLight Holster 1

    Using a tripod with the SpiderLight Holster

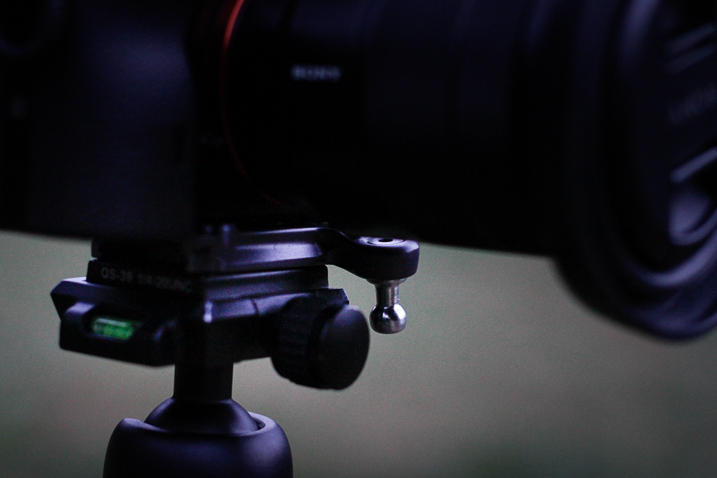
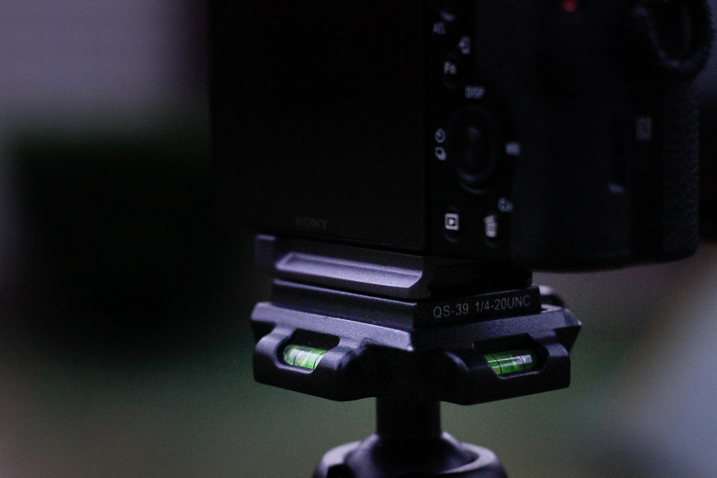
    The SpiderLight still allows for the attachment of your own tripod’s quick-release plate, so it does not interfere with your normal workflow if you find yourself shooting with a tripod. It’s not guaranteed that the holster will work with your specific tripod, though. Notice I have to mount mine backward. Still, the function was not hindered in any way by the Spider.

    SpiderLight Holster Tripod 1

    SpiderLight Holster Tripod 2

    One caveat

    The only possible reservation I have with the SpiderLight is that even with a lightweight camera kit (Sony A7r and 24-70mm Zeiss) the one-sided weight distribution sometimes sags the pants. I wouldn’t consider wearing the system without a sturdy belt. This wasn’t something that deterred me from using the holster but it is definitely a point of consideration. If you carry a heavier camera I would highly recommend the Spider Holster Pro.

    Final Thoughts

    The SpiderLight Holster works great for use with a lightweight kit such as mirrorless cameras and smaller DSLRs. From the perspective of a first time user, the SpiderLight performed admirably, in spite of my reservations. The overall build is sturdy enough for heavy-duty use and the complete concept works well. If you are considering the idea of trying the SpiderLight or any other of the products in Spider Holster line you won’t be disappointed.

    That being said, give yourself enough time to get to know the holster. Some will love it, some not so much. One of the biggest obstacles I faced was learning to actually trust the holster to securely carry my camera. In my case, breaking 10 years of absolute camera strap reliance takes some time. Still, you never know until you try it and it very well could become your favorite method of carrying your camera.

    googletag.cmd.push(function() {
    tablet_slots.push( googletag.defineSlot( “/1005424/_dPSv4_tab-all-article-bottom_(300×250)”, [300, 250], “pb-ad-78623” ).addService( googletag.pubads() ) ); } );

    googletag.cmd.push(function() {
    mobile_slots.push( googletag.defineSlot( “/1005424/_dPSv4_mob-all-article-bottom_(300×250)”, [300, 250], “pb-ad-78158” ).addService( googletag.pubads() ) ); } );

    The post Review and Field Test of the New SpiderLight Holster by Adam Welch appeared first on Digital Photography School.


    Digital Photography School
  • Sony a7 II firmware version 3.30 now available

    Sony has released firmware version 3.30 for the Sony a7 II camera. The update is a very small one, improving the amount of light at the edge of images taken when using the flash.

    The features and improvements added by the previous update, version 3.20, remain:

    • Adds support for the Radio-controlled Lighting System
    • New lenses are supported.
    • Phase-detection AF is supported
    • The lens name will be correctly recorded in the EXIF
    • The AF can be used in movie recording mode with the SEL85F14GM
    • Adds the 14-bit uncompressed RAW format option
    • Adds Phase-detection AF support for A-mount Lens Adaptor LA-EA3 (LA-EA1)
    • Adds a MOVIE button custom key settings that can be assigned for the movie recording function
    • Improves camera function and provides picture improvement for the new lenses (SEL35F14Z, SEL24240, SEL28F20, SEL90M28G)
    • Provides enhanced image stabilization system in half-pressing the shutter, in Focus Magnifier, in movie recording, and other functions

    The Sony a7 II version 3.30 firmware can be downloaded now from Sony’s website.

    Articles: Digital Photography Review (dpreview.com)

  • Godox launches mini radio flash unit for Sony mirrorless cameras

    Flash and accessory manufacturer Godox has announced a new small flash unit that it says is designed to go with the Sony mirrorless range of cameras. The Godox TT350S features 2.4GHz radio control and TTL exposure metering, and offers a guide number of 36m@ISO 100. The company says that the unit is compatible with the Sony a7R II, a7R, as well as the a58 and a77ll SLT cameras. Some RX models are also able to pair with the unit.
    The radio controlled system allows the TT350S to work alongside other Godox radio flash units and studio heads, and the flash can operate as a master or slave in multiple-head set-ups. Three groups are programmed into the control system along with 16 channels, while the maximum working range is said to be 30m. High speed sync is provided via an HSS mode that can work with shutter speeds of up to 1/8000 sec, and the unit can be switched from TTL to manual operation to make use of 22 output levels from 1/128th power. An automatically zooming head covers focal lengths of 24-105mm, and a hinge allows the head to tilt but not to swivel.

    The TT350S is powered by two AA batteries which the company claims should be good for 210 full power bursts. There is no official pricing yet, but one UK ebay seller is offering pre-orders for £73 and says delivery is expected early January.

    For more information about the TT350S visit the Godox website.

    Articles: Digital Photography Review (dpreview.com)