Blog

  • Slik Lite tripods feature built-in LED lights

    Intro 2020 has launched its Slik Lite series, a line of tripods that feature a built-in removable LED light. The series is comprised of five models, three made of aluminum and two made of 8-layer carbon fiber. According to Intro 2020, all five models can be compactly stored and transported thanks to Rapid Flip Mechanism locks for inverting the tripod’s legs 180-degrees. 

    The Slik Lite series tripods all feature rubber feet and a ball and socket head. The aluminum models, which include the AL-420, AL-420M, and AL-20S, feature lever-locking four-section legs. The CR-422 carbon fiber model, meanwhile, has four-section twist-locking legs, while the CF-522 carbon fiber model has five-section twist-locking legs.

    The series’ most notable, feature, however, is the removable LED light powered by two AAA batteries built into the bottom of the center column. The LED light aids in viewing camera bag gear in low light and dark settings, and can also double as a flashlight when needed. 

    All five models are available now from Intro 2020 in the UK and SlikUSA for the following prices:

    • Slik Lite AL-420S tripod: £121.99 inc VAT / $ 89.95 USD
    • Slik Lite AL-420M tripod: £131.99 inc VAT / $ 104.95 USD
    • Slik Lite AL-420 tripod: £142.99 inc VAT / $ 119.95 USD
    • Slik Lite CF-422 carbon fibre tripod: £439.99 inc VAT / $ 304.95 USD
    • Slik Lite CF-522 carbon fibre tripod: £415.99 inc VAT / $ 274.95 USD

    Articles: Digital Photography Review (dpreview.com)

  • An Overview of 8 Adobe Creative Cloud Mobile Apps

    If you currently have an Adobe Creative Cloud subscription, did you know that you have access to a variety of mobile apps developed by Adobe? Even their least expensive subscription plan (the Photography plan, which includes access to Photoshop and Lightroom for $ 9.99 per month) includes access to eight different mobile apps that have so much to offer! In this article, I’ll take you through an overview of all the Creative Cloud Mobile apps included in the Photography Plan, and explain some different ways that you can use them.

    adobe-mobile-apps

    1. Adobe Photoshop Fix

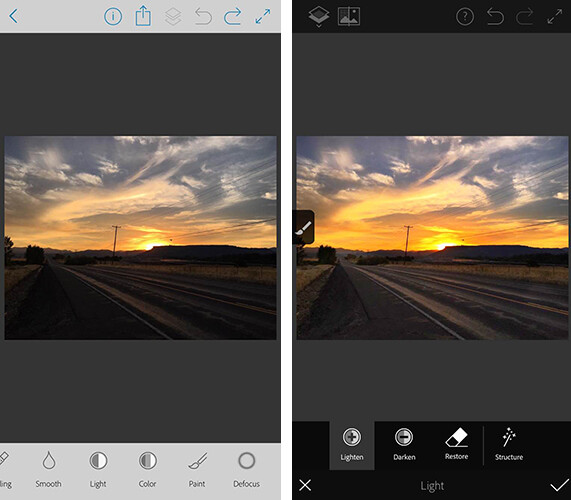
    The first app is a mobile version of Photoshop (called Photoshop Fix) that includes simple retouching with the ability to liquify, heal, patch, smooth, lighten, and darken images. You can also do some basic image adjustments such as controlling exposure, adjusting contrast, and saturation. You also have the capability to send your image directly to the Photoshop CC desktop program with layers intact, to continue editing there if you’d like.

    The mobile app is certainly a scaled-down version of the desktop program. But it does offer lots of options for simple retouching and adjustments of images you’ve taken with your cell phone, and is a fantastic (FREE) resource!

    adobe-photoshop-fix-app

    Screenshots of Adobe Photoshop Fix for iPhone.

    2. Adobe Lightroom for Mobile

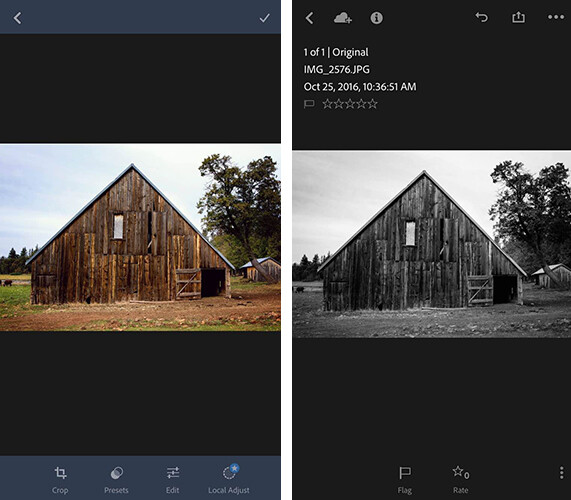
    Once again, the Lightroom Mobile app is a scaled-down version of the desktop program which allows you to make basic adjustments to your images via your smartphone or tablet. Easily make adjustments to temperature, tint, exposure, contrast, highlights, shadows, whites, blacks, clarity, saturation, sharpness, noise, moire, color hue, and more. The real gem of the Lightroom mobile app is the access to 40

    The real gem of the mobile app is access to 40 Lightroom presets that can help elevate your images in one touch. I especially enjoy the 11 black and white presets, which are significantly better (in my opinion) than other apps that offer one-touch editing. They also offer everything from low contrast to film versions.

    adobe-lightroom-mobile-app

    Screenshots of Adobe Lightroom app for iPhone

    3. Adobe Photoshop Mix

    Adobe Photoshop Mix allows for more creative editing than the original Photoshop Fix app. It specializes in cutting out portions of different images and merging them together into one image. I haven’t found this app to be particularly useful for the type of photography I prefer, but if you ever find yourself in the position of needing a photo of Santa on the beach, with no time to make a photo session happen, this app would be your go-to.

    I found this app much more difficult to use with my finger than any of the other Adobe apps, but it may be easier to manage with a stylus. Like the other Adobe apps, it runs seamlessly with the desktop programs, so you can fine-tune your images on the computer later if you wish.

    4. Adobe Spark Post (formerly Adobe Post)

    Adobe Spark Post allows you to quickly create graphics combining photos and text for social media. You can begin using a number of different templates, import your own photo, or search from Adobe’s free photo library. Next, enter your text, choose your font, spacing preferences, and color palate. With one touch, you can select whether you’ll be posting to Facebook, Instagram, on a blog post, or a number of other options, and the app will automatically size the image for you.

    I have found this app to be so useful in so many different ways. Need a quick graphic advertising mini-sessions? Check. Want to combine a photo with a quote you love? Check. Need a pinable image for a blog post or article? Check. All of these examples are things that I could certainly do from scratch in Photoshop, but the ease and speed with which I can create very similar graphics with Spark Post has completely won me over. It’s the app you didn’t know you were missing!

    adobe-spark-post-mobile-app

    Sample graphic created with Adobe Spark Post on iPhone.

    5. Adobe Spark Page (formerly Adobe Slate)

    Adobe Spark Page is a quick and easy way to create easy photo journals and web stories that are shareable on social media. It is suggested to use Spark Page to easily create newsletters, presentations, and travel journals. Once again, you can begin with a number of different layouts from Adobe that take all the guesswork (and time) out of the project. Spark pages automatically adjust to a plethora of different devices, and you can preview the way that your particular page will look on each. I haven’t implemented Adobe Spark Page into my process as of yet, but am currently contemplating using it as an avenue to share collections of images on social media.

    6. Adobe Spark Video (formerly Adobe Voice)

    All of the Adobe Spark apps are similar in that they are designed to elevate what you’re sharing on social media, while simultaneously streamlining the process. In this instance, Spark Video allows you to create simple and easy videos with lots of different options and layouts.

    When you first begin creating a project with Spark Video, it asks whether you’re promoting an idea, sharing something that happened to you, telling a story about someone overcoming something difficult, telling about something important to you and attempting to engage your audience to participate, or sharing an experience that changed your view on the world. Depending on which option you select, Spark Video moves into a template that prompts you with what to include on each 2-second clip of your video. You also have the option to start from scratch and build your video from the ground up.

    You can also record yourself narrating the video, or chose from a stock music library. There are so many different ways that you could think about utilizing Spark Video–whether making a video of a particular session, easily explaining what to wear for a family session, or creating a quick ad to use on social media. The possibilities are endless.

    7. Adobe Portfolio

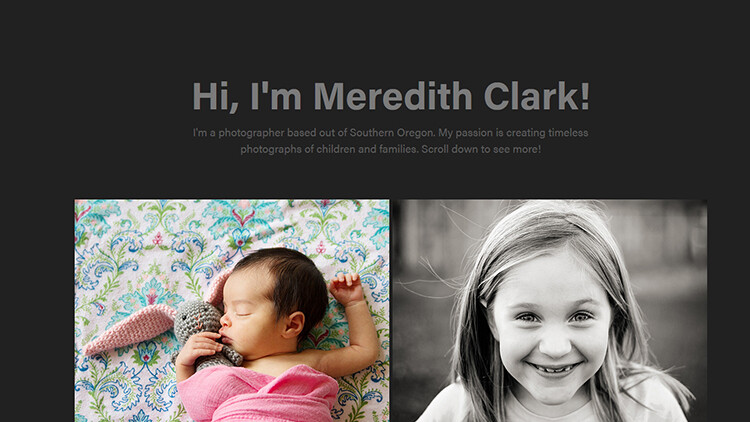
    With Adobe Portfolio, you can build a website in just a few minutes. Again, there are many different templates available, including several designed especially for photographers. You can select images to act as feature images to link to albums, include some brief information about yourself, and gives you the ability to enable or disable right-clicking to save images. The process to build and edit your site is simple and requires no knowledge of HTML or CSS. You can even use your own domain name in conjunction with the portfolio you create. You can also achieve a similar but even more streamlined effect, by using Adobe Spark Page to create a portfolio of your work.

    adobe-portfolio-app

    An example of a basic portfolio created with Adobe Portfolio. More galleries could be included as you continue to scroll down past the header.

    8. Adobe Premiere Clip

    With Adobe Premiere Clip, you have access to some amazing video editing capability right from your phone. Drag and drop videos, trim them and arrange into a video. The app is smart enough that you can add music and set it to auto-fade during any dialogue. If you have an iPhone, you can also import an entire collection from Lightroom for mobile to Premiere Clip to easily create a video of your images.

    Accessibility

    In order to use these apps, simply search for them individually in the app store (or use the links provided for you above), and download them. Once you open the app, you’ll be prompted to sign in with your Adobe ID. Simply sign in using the same ID you used to purchase your Creative Cloud subscription, and you’ll have access to the app! Additionally, it’s worth mentioning that many of these apps (Spark Page, Spark Post, Spark Video, and Adobe Portfolio) are also available via web browser, so you aren’t necessarily limited exclusively to your mobile device.

    In all, these apps pack a big punch and are a huge bonus to the desktop access to Photoshop and Lightroom! If you have a Creative Cloud subscription and are not already using the Adobe Creative Cloud Mobile Apps, I’d absolutely encourage you to check them out. Whether you’re a professional photographer or just someone who enjoys taking photos in their own backyard, there’s likely at least one app that you’ll find useful!

    googletag.cmd.push(function() {
    tablet_slots.push( googletag.defineSlot( “/1005424/_dPSv4_tab-all-article-bottom_(300×250)”, [300, 250], “pb-ad-78623” ).addService( googletag.pubads() ) ); } );

    googletag.cmd.push(function() {
    mobile_slots.push( googletag.defineSlot( “/1005424/_dPSv4_mob-all-article-bottom_(300×250)”, [300, 250], “pb-ad-78158” ).addService( googletag.pubads() ) ); } );

    The post An Overview of 8 Adobe Creative Cloud Mobile Apps by Meredith Clark appeared first on Digital Photography School.


    Digital Photography School

  • Product Review: Polaroid Carbon-Fiber Travel Tripod and Varipod

    First a little background: I’m a wilderness photographer. I spend time, a lot of time, every year on multi-day river, backpacking, and winter trips in Alaska. This past summer, between June and mid-September, I spent more than 60 days in the backcountry. On every one of these trips, to one degree or another, weight was an issue, and I’m always on the lookout for good, light equipment that might suit my travels. With that in mind, on to the review of two new support products from Polaroid, the Polaroid Pro Series Carbon Fiber Travel Tripod, and the Varipod.

    ak-homer-109256-sunset-48

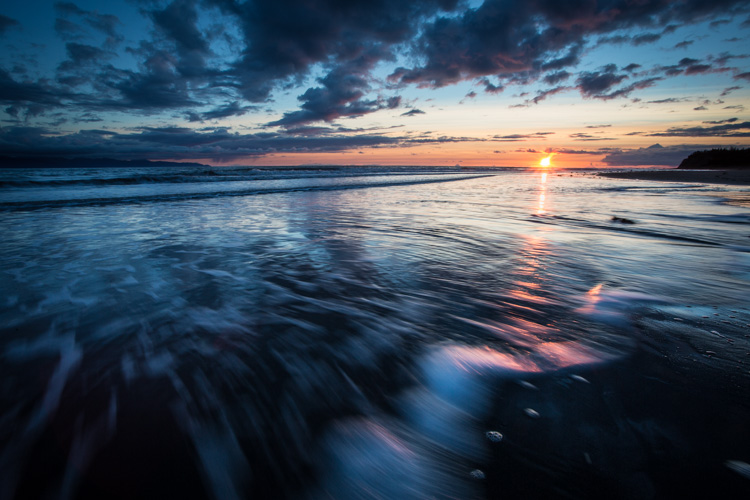
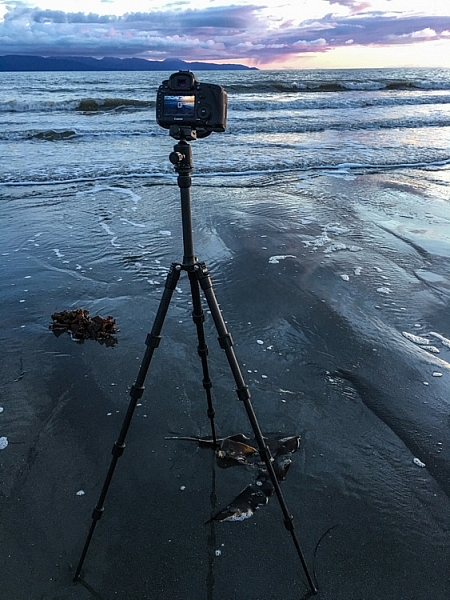
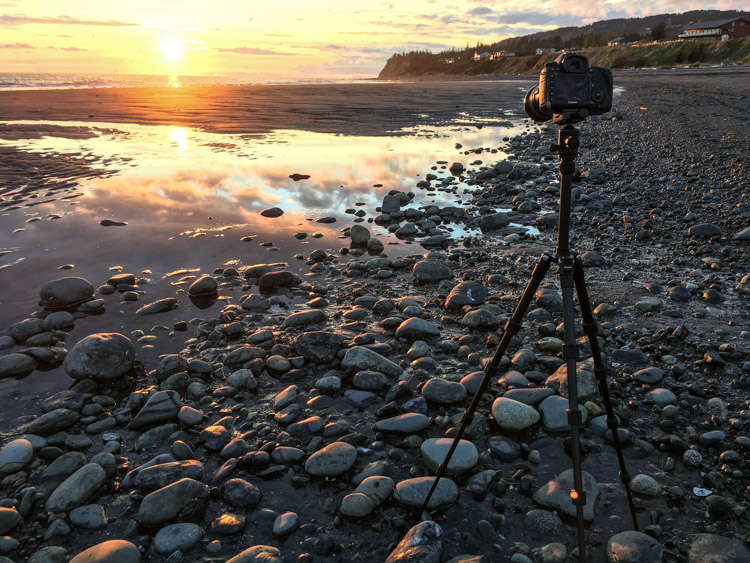
    Image made using the Polaroid Pro Series Carbon Fiber Travel Tripod (ISO100, 1/5th sec @ f22)

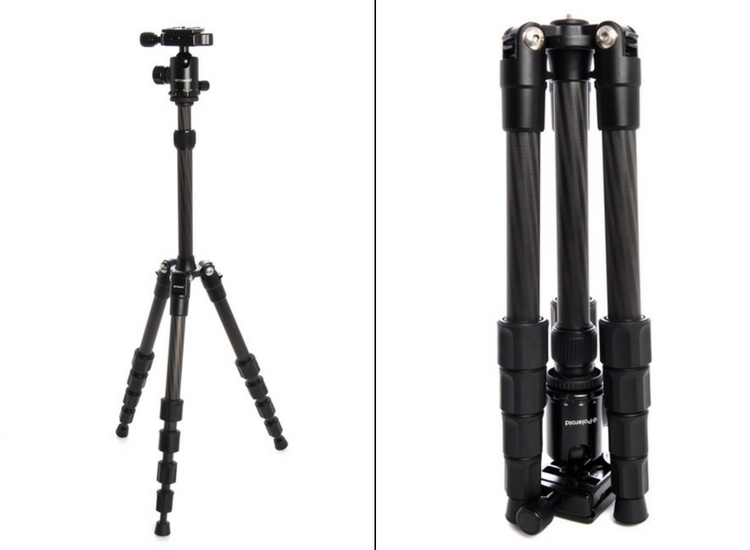
    Polaroid Pro Series 55″ Carbon Fiber Travel Tripod With Removable Ball head

    polaroid-tripod-review

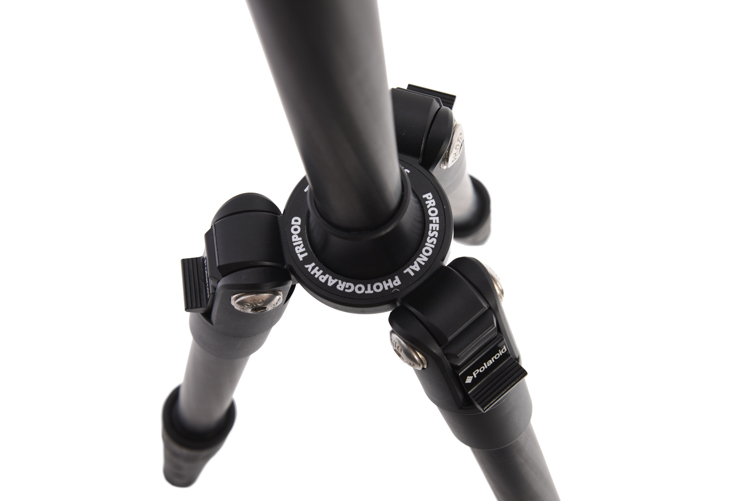
    I was excited to open up the box containing Polaroid’s new carbon travel tripod. Upon first inspection, I was impressed. There are five leg segments, each about eight inches in length making the tripod very compact. Additionally, it is designed so the legs fold back over the center post and included ball head, making the fully collapsed tripod very small indeed.

    Build

    The leg segments are of the twist-lock variety, ergonomic, and very effectively hold the sections in or out with a simple, quick twist. The numerous legs section means that the lowest sections are thin, giving the impression of flimsiness. However, after several days of use, they did not strike me as fragile.

    img_3264

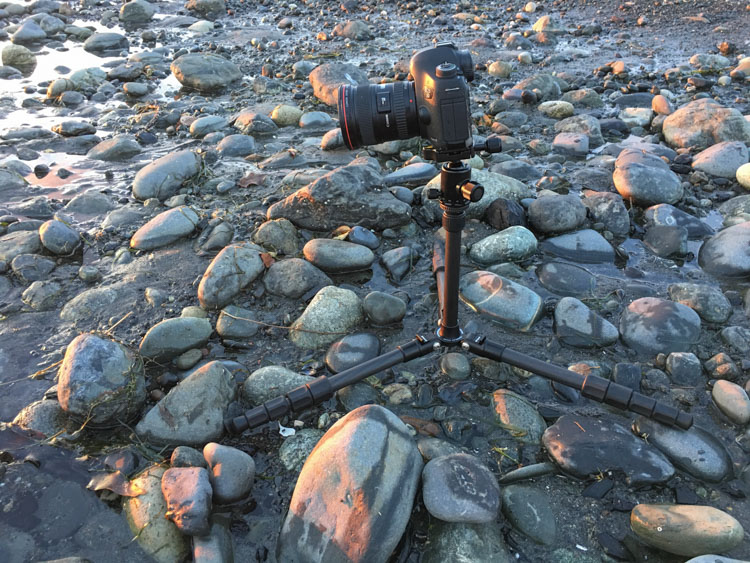
    The legs of the tripod, even when fully extended are not very long. Polaroid has made up for this shortcoming by having a fixed center post that extends up another foot or so from the top of the tripod, adding substantially to the height. The post itself is expandable, allowing the very compact tripod to stretch almost to my eye level (I’m six foot). Though using this extendable system reduces stability.

    polaroid-tripod-review-01

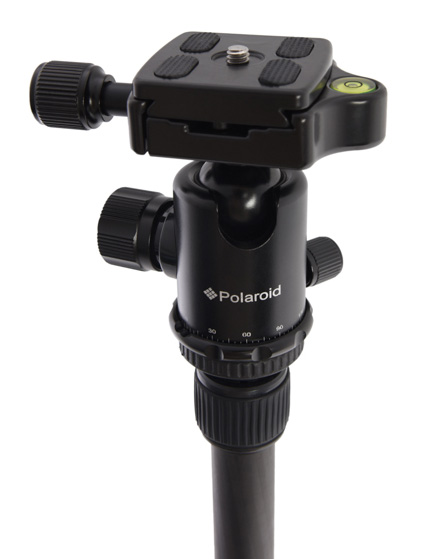
    The included ball head is the highlight of this tripod. Made of machined aluminum, it’s designed much like the large Kirk Industries head on my full-size tripod. Polaroid’s version uses three knobs, one to lock the quick release (similar to Arca-style plates), one to control the rotation, and one to lock and unlock the ball itself. One side cut allows for vertical compositions. Simply, it’s a great little ball head that held my big Canon SLR easily. In fact, it was so good, I wish I could purchase it separately to replace the flimsy head atop my current compact tripod. As the head is the point where many light and entry-level tripods fall short, I was impressed and surprised by this one.
    img_3248

    Usability of the tripod

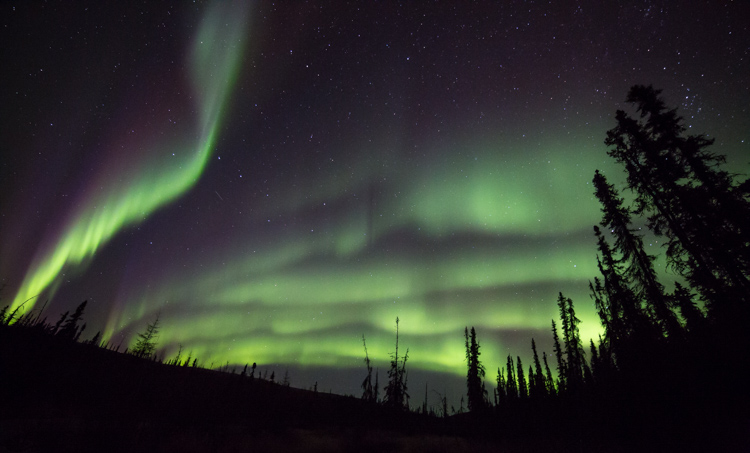
    I put this tripod to use a number of times over a couple of weeks, including a couple of sunset photo shoots on a beach, and two evenings photographing the aurora borealis. In bright conditions and relatively fast shutter speeds, the tripod worked well. The height adjusts easily and quickly, though the center post system does limit how low the camera can go. (At its lowest, the camera is still 12-15 inches off the ground, see photo below.)

    img_3255

    During my sunset photo shoots, the system worked fine at a variety of heights, and I was able to use shutter speeds down to about 1/5th of a second, and still maintain sharp images (see top image in this article).

    pltric-90-final

    Image showing the design of the non-retractable center post on the Polaroid Carbon Travel Tripod.

    It was when I tried to shoot the northern lights that the tripod showed its one flaw – instability with a heavy camera. The non-retractable, non-removable center post, make the tripod a bit jiggly when used with a full-size DSLR. A point and shoot, or mirrorless system would not likely have the same trouble. However, even with the heavy camera, I was able to attain sharp images when I used a remote shutter release and the mirror lock-up function of the camera.

    To maintain sharpness, I was forced to use the camera's timer and mirror lock-up functions.

    To maintain sharpness at extended shutter speeds, I used the camera’s timer and mirror lock-up functions.

    Conclusion

    If it weren’t for that wobbly center post, I would give this small, light tripod, with an awesome ball-head, a glowing review. I’d like to see Polaroid include a system to retract the center post to add stability when I drag the shutter. If the next version of this tripod includes such a feature, I’ll strongly consider adding it to my quiver. In the mean time, I can easily recommend this tripod to anyone shooting with a light-weight camera system. If you are working with a point and shoot, or mirrorless, the simplicity, flexibility, and the particularly impressive ball head make the Polaroid Pro Series Carbon Fiber Travel Tripod a contender.

    Rating 3.5 out of 5 stars.

    Polaroid 65″ VariPod

    2-in-1 Telescoping Camera Monopod with Removable Tripod Balance Stand Base

    varipod-polaroid

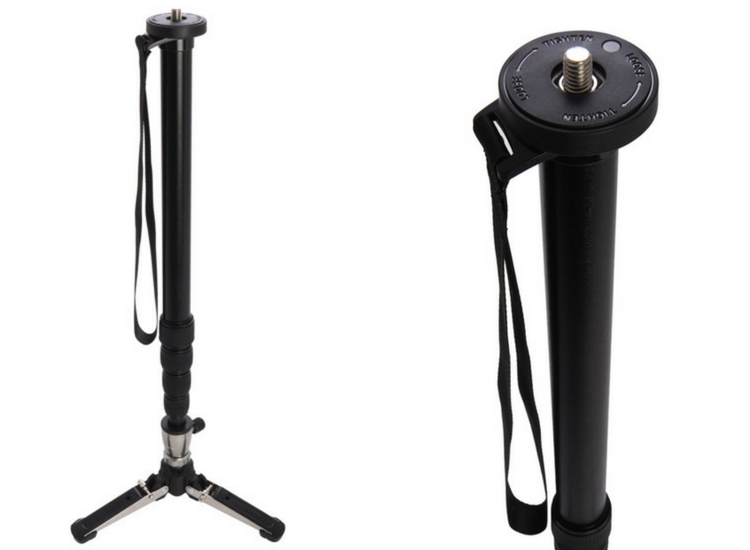
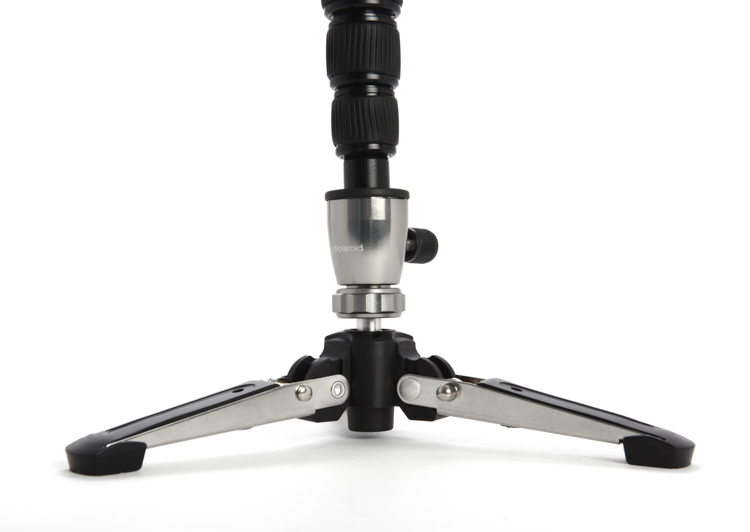
    Out of the box, Polaroid’s rendition of this classic long-lens tool, the monopod, looked more or less like a standard version of the product, with one exception. The foot of the monopod incorporates a removable, articulated, three-legged base. At first, I didn’t understand the purpose of this feature, but later, as I used the Varipod outdoors, I figured it out (more on that in a moment). The expandable leg, like the tripod reviewed above, uses a twist-lock system that holds the aluminum tubes firmly extended. I had no issues with segments collapsing, even with a heavy lens and SLR.

    In the field, the monopod worked well. The removable foot is articulated so it doesn’t interfere when you tip the monopod forward or back. Though at first confused by this seemingly unnecessary add-on, as I shot with a 500mm f/4 on a sandy beach, the usefulness of the stand was obvious; the monopod foot didn’t sink into the muck. This could be useful to anyone shooting in soft terrain, whether the sidelines of a sports field or a muddy wetland.plmonstand-66-final

    The foot system did seem overly complex. It is made of aluminum with various hinges and springs. Though effective at providing support in soft terrain, it also got dirty and was very difficult to clean. The foot had to be blown out, rinsed, and shaken before I eventually managed to remove all the grains of sand.

    The support provided by the monopod allowed me to achieve sharp images with my 500mm f/4 at shutter speeds as low as 1/30th, opening up creative composition possibilities with moving subjects. The monopod is also far lighter and maneuverable, though of course less stable, than a full-size tripod.

    Conclusion

    The Polaroid Varipod works. The articulated foot provides support in soft terrain, and the legs are sturdy and easy to adjust. My main complaint is the complexity of the foot and difficulty in cleaning. I’d like to see this made simpler, with fewer parts that can jam with sand and dirt. Otherwise, it’s a solid contribution to the market.

    Rating 4.5 out of 5 stars.

    googletag.cmd.push(function() {
    tablet_slots.push( googletag.defineSlot( “/1005424/_dPSv4_tab-all-article-bottom_(300×250)”, [300, 250], “pb-ad-78623” ).addService( googletag.pubads() ) ); } );

    googletag.cmd.push(function() {
    mobile_slots.push( googletag.defineSlot( “/1005424/_dPSv4_mob-all-article-bottom_(300×250)”, [300, 250], “pb-ad-78158” ).addService( googletag.pubads() ) ); } );

    The post Product Review: Polaroid Carbon-Fiber Travel Tripod and Varipod by David Shaw appeared first on Digital Photography School.


    Digital Photography School

  • Fujifilm launches X-A10 as entry-level X-series model

    $ (document).ready(function() { SampleGalleryV2({“containerId”:”embeddedSampleGallery_5348208065″,”galleryId”:”5348208065″,”isEmbeddedWidget”:true,”standalone”:false,”selectedImageIndex”:0,”startInCommentsView”:false,”isMobile”:false}) });

    Fujifilm has added a new entry-level model to its X-series of mirrorless interchangeable lens compact system cameras in the shape of the X-A10. The camera will use a 16 Megapixel APS-C sensor (with a Bayer color filter, rather than X-Trans) and will come equipped with a flip-over rear screen designed to make taking selfies easier.

    The company says that it has designed the grip so that it will be comfortable to hold with the camera facing towards as well as away from the photographer’s face, and that when shooting self-portraits the rear command dial can be used to focus and trigger the shutter. Flipping the rear screen to the 180° position also activates eye-detection AF so that the camera will prioritise focusing for faces. It has six film simulation modes are on offer along with a collection of filters and effects, including Portrait Enhancer for better skin reproduction.

    The X-A10 is claimed to deliver 410 shots per charge due to ‘energy efficient design,’ can  shoot Full HD video at 30p, 25p or 24p for up to 17 minutes. The camera’s top shutter speed in electronic shutter mode is 1/32000 sec.

    The X-A10 will come bundled with a XC16-50mm f/3.5-5.6 OIS II lens, and will cost $ 499/£499 when it goes on sale in January 2017.

    For more information see the Fujifilm website.

    UK Press Release:

    Introducing the FUJIFILM X-A10 – the compact, lightweight and stylish mirrorless digital camera.

    The X-A10 delivers the X Series’ premium image quality in any shooting conditions with ease, making it the ideal choice for a first interchangeable lens camera.

    FUJIFILM Corporation (President: Kenji Sukeno) has announced that it will launch the mirrorless digital camera, the FUJIFILM X-A10; a new addition to the X Series range of cameras that deliver outstanding picture quality.

    Despite its compact and lightweight design, the X-A10 combines a 16.3 megapixel sensor with the company’s colour-reproduction technology, refined over more than 80 years, to deliver the premium image quality synonymous to the X Series with ease. This makes the X-A10 an ideal first interchangeable lens camera.

    Combining a 16.3 megapixel sensor and Fujifilm’s colour-reproduction technology, refined over more than 80 years, to deliver premium picture quality

    The X-A10 combines a 16.3 megapixel APS-C sensor with the image processing engine that achieves Fujifilm’s excellent photo quality. Sharp FUJINON lenses that boast ultimate image resolution, and the proprietary colour-reproduction technology, refined over more than 80 years, allows users to capture premium quality images in any shooting conditions. Fujifilm is particularly renowned for accurately reproducing skin tones, and the X-A10 is built with this advanced skin tone reproduction capability, allowing you to produce high-quality portraiture.

    180-degree slide-and-tilt LCD with 100% visibility for facilitating “self-portraits”

    The rear LCD employs the slide-and-tilt mechanism so that even when it is tilted by 180 degrees, the LCD is not blocked by the camera, allowing for 100% visibility. The grip is shaped to accommodate both normal shooting and self-portraits. When taking a self-portrait, you can focus and release the shutter by pressing the vertical command dial found directly below your index finger to minimise camera shake. Rotating the tilting LCD upward by 180 degrees activates the Eye Detection AF to automatically adjust the focus on the subject’s eyes. The X-A10 also features the Portrait Enhancer mode for natural and beautiful skin-tone reproduction.

    Compact and lightweight camera body with retro design and intuitive operability

    The compact and lightweight X-A10 sports a retro design. The use of two Command Dials means you only need a thumb to quickly adjust aperture, shutter speed and exposure settings. Frequently used functions such as white balance, continuous shooting and the self-timer can be assigned to standalone function buttons, eliminating the need to go through the Menu screens to change settings.

    Inheriting FUJIFILM X-A2’s popular performance features

    Its energy-efficient design means the X-A10 is capable of shooting approx. 410 frames on a single battery charge. When fitted with the standard zoom kit lens “XC16-50mmF3.5-5.6 OIS II,” the camera offers the class-leading minimum working distance of approx. 7cm from the front edge of the lens, allowing close-up macro photography.

    Product features

    • Outstanding image quality, made possible by the newly-developed 16.3 megapixel image sensor
    • Fujifilm’s colour reproduction technology, nurtured through the development of photographic film, captures accurate, warm skin tones, clear blue skies and lush green foliage in tones exactly as you remember them.
    • The APS-C sensor delivers beautifully smooth bokeh effects for portraiture and macro shots when using a shallow depth of field.
    • The X-A10 offers a total of six Film Simulation modes, namely the true-to-life colours of PROVIA (standard), the vibrant tones and saturated colours of Velvia (vivid), the soft tones of ASTIA (soft), the documentary-style deep colours and soft shades of CLASSIC CHROME, as well as Monochrome and Sepia.
    • The normal sensitivity range covers ISO200 to ISO6400, while extended sensitivity settings of ISO12800 and even ISO25600 can be selected when you want to minimise camera shake. The X-A10 produces clear images with astonishingly low noise, even on low-light nightscapes and indoor shots where high ISOs are essential.
    • Advanced Filters help you easily produce creative effects. A total of ten Advanced Filters are available, including the new “Fisheye” and “Cross Screen” as well as Toy Camera, Miniature, Dynamic Tone, Pop Colour, Soft Focus, High Key, Low Key and Partial Colour.

    Designed for perfect self-portraits

    Perfect composition
    The screen has a slide-and-tilt mechanism so when it is tilted 180 degrees into “selfie-mode”, it can slide out further to ensure the camera body doesn’t block the view. 

    Ergonomic Grip
    The grip is shaped to accommodate both normal shooting and self-portraits alike. The final shape, based on ergonomic design, was decided through prototype testing involving hundreds of photographers

    Automatic shooting modes
    When taking a self-portrait, you can take photos by pressing the vertical command dial found directly below your index finger to minimise camera shake. The Self Timer function offers Smile Detection, that take photos automatically when the subject smiles, Buddy Timer which shoots when two people come close together, and Group Timer mode that automatically shoots when a specified number of people come into the frame.

    Intelligent focusing
    Rotating the tilting LCD upward by 180 degrees activates the Eye Detection AF to automatically adjust the focus on the subject’s eyes.

    Beautiful skin
    The X-A10 features a Portrait Enhancer mode, which makes the human skin look smoother and brighter. Enjoy the beautiful skin tonality that only the X Series offers also when shooting selfies.

    Extended battery life of approx. 410 frames per charge
    The energy-efficient design has extended the battery life to a class-leading level, allowing you to concentrate on shooting pictures without having to worry about remaining battery power.

    The camera also supports charging via USB for maximum convenience, especially while travelling.

    Class-leading minimum working distance
    When fitted with the standard lens “XC16-50mmF3.5-5.6 OIS II,” the X-A10 can focus on subjects as close as approximately 7cm from the front of the lens allowing you to explore the fantastic world of close-up macro photography.

    Super Intelligent Flash
    The built-in pop-up flash supports the Super Intelligent Flash system that accurately controls light output according to individual scenes. When shooting indoor portraits in low-light, small items or food, the flash system reduces highlight clipping to produce images exactly as your eyes see them. Natural colours and brightness are also achieved when shooting backlit scenes or photographing a person under intense sunlight that casts strong shadows on the face.

    Full HD video recording
    Press the dedicated Video Recording button on the rear to easily start recording full HD (1080/30p, 25p, 24p) video.

    The Film Simulation function, popularly used for still images, can also be applied to video recording for a diverse range of creative effects, which can be combined with smooth bokeh, made possible with the APS-C sensor and FUJINON lenses to produce professional-looking, creative movies.

    Turning on the electronic image stabilisation function delivers the five-axis image stabilisation that combines optical and electronic stabilisation, significantly reducing a variety of camera shakes that could occur during video recording. This function allows you to record high quality video with reduced camera shake while walking around with the camera in your hand.

    Versatile shooting functions including the electronic shutter with the maximum speed of 1/32000 sec

    When using the ultra-fast electronic shutter, even under clear skies or other bright conditions, you can use large aperture to achieve a shallow depth of field without over-exposing the image. You can capture a scene exactly as intended without having to use an ND filter.

    As a result of answering the requests from many users, the X-A10 now features the Panorama and Time Lapse functions.

    Other new functions include the interlocking of Metering and AF areas, support for the Adobe RGB colour space, and choice of different colours in Focus Peaking for assisting MF.

    Wireless communication functionality enables remote shooting from smartphones and tablet devices

    Install the free FUJIFILM Camera Remote app on your smartphone or tablet and use the Wireless Communication function to transfer photos and videos to your device with a simple one-touch operation. You can view and select photos and videos in your camera or on your smartphone and then easily import them to your device. You can even attach GPS location information, obtained by your smart device, to your images.

    The Remote Shoot function lets you adjust exposure and other settings, focus and take photos from your smartphone or tablet device. With Remote Shooting, the app not only offers basic operations such as Touch AF and shutter speed adjustment, but also lets you adjust a variety of shooting settings or initiate video recording. It’s great for group photos, self-portraits and even wildlife photography where you might want to compose your shot from a distance.

    Images can also be sent directly from the camera to the Instax SHARE smartphone printer for instant printing.

    AVAILABILITY AND PRICING:

    FUJIFILM X-A10 with XC16-50mmF3.5-5.6 OIS II kit will be available from January 2017 with a Suggested Retail Price of $ 499/£499.00

    Articles: Digital Photography Review (dpreview.com)

  • How to Choose the Right Camera Mode to Get the Shot You Want

    When starting out in photography, one of the scariest and most confusing things for a beginner is deciding which camera mode to use. While the automatic modes provide a bit of a safety net for those just starting out, there will come a time when you either want to or have to, take greater control of your camera to get the results you desire. But how do you know what camera mode to use?

    Aperture Priority Mode

    Aperture Priority mode is a perfect choice for a scene like this where you know you’ll want deep depth of field to keep the entire scene in focus.

    First off, I won’t discuss any of the automatic modes here. A full discussion of what those do can be found here: Camera Modes Explained for Newbies. What I’d like to do here is discuss specific situations and the appropriate mode for each. Before we dive into that, I’ll explain the basics before we move forward.

    Aperture

    The aperture is the opening of the lens, which determines exactly how much light enters the camera and strikes the imaging sensor. The aperture also affects the field of focus from foreground to background, otherwise known as depth of field. A shallow depth of field is one that has a sharp focus on the subject, while objects in front of or behind the subject are out of focus. Deep depth of field is when the entire image is in sharp focus from foreground to background. And of course, you can have a depth of field that is somewhere in between those two.

    Aperture is shown as a number on your lens, usually as a ratio. For instance, lenses with a maximum (widest) aperture of f/1.8 will have a very shallow depth of field. That same lens set to f/16 will have a deeper depth of field. An easy way to remember this is smaller numbers give you less and higher numbers give you greater depth of field.

    Aperture Priority

    When you know you want the background blurred, setting a wide aperture to create a shallow depth of field is key. Aperture Priority mode can be used in cases like this (keep reading to learn more on that a bit later).

    Shutter Speed

    Shutter speed determines the amount of time light strikes the sensor when it enters the camera. The faster the shutter speed, the less light strikes the sensor. In addition, shutter speed is directly responsible for how movement is rendered in an image. Shutter speeds are referred to in fractions of a second, such as 1/125th, 1/60th, or 1/1000th. Faster shutter speeds, such as 1/500th, freeze motion, while slower shutter speeds, such as ½, 1 second, or even 30 seconds,  will show motion as more of a blur. The longer the shutter speed, the more blur motion will create.

    ISO

    Your camera’s ISO determines how sensitive it is to light. Lower numbers such as ISO 100 or 200 mean your camera is less sensitive to light and are used in bright situations, such as in direct sunlight. When there is less light, such as in shade, or indoors, you might use a higher ISO such as 800, 1600, or 3200 to make your camera more sensitive to light. ISO plays an important part in the various situations I will discuss going forward, so always keep in mind that you can change this setting, and don’t be afraid to raise your ISO if needed.

    Camera Modes

    Before going any further, I want to clarify that there are multiple ways to get a specific desired result with your camera, using any of these modes. Once you understand the relationship between shutter speed, aperture, and ISO, you’ll be able to do whatever you like in any of these modes.

    But which mode is best for which situation? You’ll have to visualize your image to decide.

    Program Mode

    "<yoastmark

    Program Mode resides on the advanced side of the camera mode dial, usually denoted by a P. In this mode, the camera will set the aperture, ISO, and shutter speed for you. So when should you use Program Mode?

    Program Mode is good when you’re not looking for any effect in particular. Your camera, when set to Program Mode, will attempt to give you a proper exposure that can be handheld, meaning you won’t be required to use a tripod to steady your camera. This is a good mode for when you’re just casually photographing and just want to be sure your exposures are right.

    It is a lot like Automatic Mode in that regard, except that you have the ability to override, or shift, the exposure the camera sets, as well as many other settings such as white balance and picture style. In addition, while in Auto mode, the camera will pop your flash up when it thinks it needs more light. But in Program Mode the flash will not pop up unless you tell it to.

    Aperture Priority

    On some cameras, this mode is simply denoted by an A on the mode dial, while on Canon cameras it is denoted as Av, meaning Aperture Value. In any case, in this mode, you set the aperture and ISO you want and the camera will set the appropriate shutter speed for you. So when should you use Aperture Priority mode?

    Aperture Priority

    When you want a shallower depth of field, such as in a portrait, using Aperture Priority and setting a wide aperture is an excellent choice.

    To determine the answer, visualize your finished image in your mind’s eye. What do you want it to look like? Generally speaking, if you’ve decided that the most important factor in your image is a specific depth of field, you’ll want to use Aperture Priority Mode so that you can force your camera to give you the depth of field that you want. For instance, if you’re making a portrait, you probably want your subject in sharp focus, but you may also want the background to be a little blurred, to keep your viewer’s focus on the subject. An out of focus background can create a setting without distractions for the viewer. So you might decide you want to use a fairly wide aperture such as f/4, to create enough depth of field to keep your subject sharp, but let the background blur nicely.

    But watch your shutter speed too

    It’s important to note, however, that you also need to keep an eye on the shutter speed setting. While the camera will set this for you, unlike in Program Mode, the camera is not going to try and give you a fast enough shutter speed to handhold. If there isn’t enough light, this will result in a slower shutter speed that may not be fast enough to freeze any subject movement. This could result in a slight blur due to unsteady hands or slight movement by your subject. If the shutter speed chosen by the camera (based on the aperture you’ve set) isn’t fast enough to freeze motion in this situation, you’ll need to raise your ISO. Raising your ISO will effectively increase the shutter speed given for the aperture you’ve set.

    Aperture Priority Landscape

    Aperture Priority is a great choice when photographing a landscape where you want a deep depth of field, and the shutter speed doesn’t need to be set at anything specific to capture motion a certain way.

    For landscape photography

    Another situation for Aperture Priority would be a landscape photo, where you may want greater depth of field to keep the entire scene in focus. In this situation, your primary goal is to get lots of depth of field to keep the entire scene in focus, so you’d set an aperture of f/11 or even f/16 to capture a greater amount of the scene sharply. In this situation, if you’re using a tripod, the shutter speed may not be as big of a factor for you.

    But if you’re handholding the camera,  you will want to pay attention to the shutter speed the camera sets to ensure it’s fast enough to avoid camera shake. In addition, if there is moving water or clouds, or the wind is blowing the trees or grass, you’ll want to ensure that the shutter speed the camera sets is appropriately stopping that movement to your liking. If not, you’ll want to adjust your ISO so the camera sets a more appropriate shutter speed.

    Shutter Priority

    Panning using Shutter Priority

    When you know you need a specific shutter speed, such as this image where a panning technique was used, Shutter Priority is often the best choice.

    Shutter Priority is usually denoted using an S on most cameras, while Canon uses Tv, representing Time Value to denote Shutter Priority mode. Shutter Priority Mode is just the opposite of Aperture Priority. In this mode, you set the shutter speed you want, as well as the ISO, and let the camera choose the appropriate aperture.  This mode is an excellent choice when you’ve decided that rendering motion in a certain way is the key component of your image.

    Shooting sports

    For example, suppose you are photographing a sporting event. Most likely, you’ll want to freeze the action of the athletes on the field. To do so, you need a fast shutter speed, such as 1/500th or even 1/1000th. In shutter priority, you’ll need to again keep an eye on your ISO to ensure that the camera is giving you a proper exposure. Usually, the exposure indicator in your viewfinder will flash to show that at the current settings, proper exposure cannot be achieved. In this case, raise the ISO to achieve the correct exposure for the shutter speed you want.

    Shutter Priority for Fast Action

    You might want to use Shutter Priority Mode when you know you need a fast shutter speed to stop action, such as when photographing sports.

    As another example, let’s say you want a slower shutter speed to create a panning effect. Again you would set the correct shutter speed to create the effect, and let the camera adjust the aperture. Any time the primary concern is the appearance of motion in an image, Shutter Priority is a good choice for shooting or camera mode.

    Panning in Shutter Priority mode

    Another example of using a slow shutter speed to create a panning effect in Shutter Priority Mode.

    Manual Mode

    Once you’re comfortable with changing settings and you really want to take control of your camera, Manual mode is the way to do that. You will set all of your settings according to how you want your final image to look. There is one caveat, however. Your settings will also be dependent on the available light in the scene. So if you want a fast shutter speed, and deep depth of field, you’ll probably need to raise your ISO a bit. Or compromise on one of the other settings as well.

    Watch the meter

    Just keep an eye on your camera’s meter and it will help you find the right combination of shutter speed, ISO, and aperture. The other modes do a nice job of taking some of the load off your brain by allowing you to choose one setting to have priority, but sometimes you just need to take full control.

    Silhouette in Manual Mode

    Manual Mode is the best choice when you want to create an effect that the camera’s normal exposure modes just don’t normally do, such as this silhouette.

    Exposures long than 30 seconds

    One instance where you’ll need to do this is when creating an exposure longer than 30 seconds. Today’s cameras don’t have shutter speeds for longer than that, so you would need to calculate in your head how long to keep the shutter open, and then use the Bulb setting to do so. Any time the camera can’t properly calculate exposure is a good time to use Manual Mode.

    manual-mode-long-exposure

    When creating images using a long exposure, such as this one with an exposure time of two minutes, Manual Mode is the best (or possibly only) choice.

    Another time to use Manual Mode is when the lighting in a scene is especially challenging, such as when there are a lot of dark shadows. Your camera will try to expose for the deep shadows, causing the highlights to overexpose. Using a manual setting to override the camera’s choices will work well in achieving a satisfactory exposure.

    Summary

    As I mentioned, there are many ways to capture an image and arrive at similar settings. But each time I’m out photographing, I go through the following checklist in my head:

    1. Do I want deep or shallow depth of field?
    2. Do I want to stop action or is some motion blur okay?
    3. Which of the above two choices is more important for this image?
    4. Is one of the priority modes suitable for the available light of the scene?

    The answer to those four questions should lead you to the correct mode for the shot you want.

    Shutter Priority for fast action

    Shutter Priority can be used when photographing sports to set a fast shutter speed to stop action.

    googletag.cmd.push(function() {
    tablet_slots.push( googletag.defineSlot( “/1005424/_dPSv4_tab-all-article-bottom_(300×250)”, [300, 250], “pb-ad-78623” ).addService( googletag.pubads() ) ); } );

    googletag.cmd.push(function() {
    mobile_slots.push( googletag.defineSlot( “/1005424/_dPSv4_mob-all-article-bottom_(300×250)”, [300, 250], “pb-ad-78158” ).addService( googletag.pubads() ) ); } );

    The post How to Choose the Right Camera Mode to Get the Shot You Want by Rick Berk appeared first on Digital Photography School.


    Digital Photography School

  • Drawing Sculptures: 3D Architectural Art Styled After 2D Sketches

    [ By WebUrbanist in Art & Sculpture & Craft. ]

    stick-frame-drawing-sculpture

    This ongoing series of sculptural floating cities and suspended towns could be mistaken for pencil drawings when glanced on a wall or seen in a two-dimensional medium like photography.

    wall-drawing-art

    white-on-dark

    Spanish artist David Moreno sees it that was as well: at attempt to draw sculptures, but using steel rods lashed together with piano wire rather than a pen on a pad. Background depth, shadows and other slight dimensional clues cue viewers into what they are really seeing.

    sticks-on-stilts

    These stick-figure structures correspondingly look deceptively simple: what would normally be a single stroke is instead a meticulous assembly process, the rods tied together by hand and piano wire wrapped and clipped to support them.

    chair-art

    chair-sculpture

    The Barcelona-based artist has also toyed with 3D-printing extrusion devices to shape similar works in more colorful formats, combining, for instance, a series of stylized chairs into a mass of interconnected hanging sculptures.

    wall-art-process

    stick-house-detail

    In other cases, strings and wires are looped and stretched to form complex shapes or interact with other objects – stories and figures emerging from a combination of materials and forms.

    wire-artwork

    staircase-wall

    While the specifics of his work shifts from one installation to the next, a common theme is clear: taking traditions of line art into the third dimension and seeing what can come of the process (via Colossal).

    Share on Facebook


    [ By WebUrbanist in Art & Sculpture & Craft. ]

    [ WebUrbanist | Archives | Galleries | Privacy | TOS ]


    WebUrbanist

  • The whole nine yards: Canon 35mm F1.4L II USM review

    Canon is on a roll with its updated Mark II lenses and scoring bullseyes with pretty much every shot. New versions of key focal lengths are being rolled out across the range, with fully revised optics and mechanical construction. Most are class leading, often setting new standards in one area or another, and the Canon EF 35mm F1.4L USM MkII is no exception – it is sharp, very, very sharp!

    The MkII model launched last year replaces the elderly MkI of 1998. That lens was originally designed for film SLRs, but it won many digital hearts, including some on the DPReview team and several articles have already been published, looking back at the old lens and forward to the MkII with sample galleries, user reports and comparisons.

    One thing missing from those articles though, is the close scrutiny of DxO Mark’s lab tests, with full analysis of MTF (Modulation Transfer Function) sharpness performance, and other important aspects of image quality that can only be properly assessed under controlled conditions. So now we’re putting that right, and the resolution of this lens on a 51 megapixel Canon 5DS R is something to behold. The new Canon 35mm F1.4 MkII shares headline specifications with the MkI, and most key features are the same or similar. It’s all-change under the skin though, with more of everything in the quest for quality, including a significant increase in size, weight and cost.

    Key specifications

    • New optical design with 14 elements in 11 groups (MkI version has 11 in 9)
    • One UD glass element added, and two aspherical surfaces (MkI has one aspherical)
    • New BR Optics layer reduces CA
    • Nine rounded aperture blades (MkI has eight)
    • Weight goes up 31% and length 23% (compared to MkI)
    • Military-grade weather resistant build (MkI is not weather resistant)
    • Manufacturer’s Suggested Retail Price $ 1799USD (MkI $ 1479)

    Canon has paid close attention to the optical redesign and the mechanical construction, and both raise the bar. No stone has been left unturned, and just about the only thing that stays the same as the MkI is the 72mm filter size, and the minimum focusing distance is also very similar at 28cm (11in).

    There is no image stabilization, with that option already very effectively covered by the Canon 35mm F2 IS USM. Purists will welcome the decision to concentrate on sheer optical quality, and it helps to keep complexity and the burgeoning weight in check.

    Angle of view

    35mm focal length delivers a 63° field of view on full frame cameras, measured conventionally across the diagonal, from corner to corner. Image corrected for lateral CA, distortion and vignetting in Lightroom, at default sharpening. Canon 5DS R (51mp), 1/2500 sec, F4, ISO 100, mirror lock-up.
    On APS-C format, the 35mm focal length’s field of view is narrowed to 42° (56mm equivalent). This is a digital simulation, cropped 1.6x (20mp) from the full frame image above. Shire Hall, Cambridge, UK.

    Articles: Digital Photography Review (dpreview.com)

  • The dPS Ultimate Guide to Landscape Photography


    Download “The Ultimate Guide to Landscape Photography”

    We respect your email privacy

    Introduction

    Landscape photography is one of the most challenging and most rewarding hobbies a person can have. One of the things I like most about it is that there is always more to learn. It keeps our brains active! Between learning about what type of gear you need, how to use it, understanding light and composition, and learning to process your photos, you will quickly come to the realization that making a striking landscape photograph involves a number of essential ingredients.

    Note: this is one of the most comprehensive articles we’ve written – get a free downloadable copy to print and/or refer to later above.
    DPS ultimate landscape photography guide 12

    The goal of this guide is to touch on each of these essential ingredients because you need to know a little about each one before you’ll start making the quality of images you are after.

    My journey in landscape photography began 25 years ago, and since then I’ve constantly thought about what makes a truly great landscape image. I hope that you will take what I have learned over the past 25 years and use it to jump start your own journey in photography and start making striking images you are proud of.

    Gear Essentials

    I want to emphasize that gear is not the most important factor in landscape photography. The other chapters outlined in this guide are all more important when it comes to making striking images. However, you do need some gear, and it can be hard to make the right choices when you are just getting started. This chapter will help you understand the most important things to look for when buying your gear.
    DPS ultimate landscape photography guide 14

    Your Camera

    There are three basic categories of digital cameras: point-and-shoot; digital single lens reflex (DSLR); and mirrorless.

    Point and shoot cameras are the small digital cameras that most people start with. These cameras do not have interchangeable lenses, and they have tiny sensors that have limited image quality. Point-and-shoots are used for making snapshots. If you are getting serious about your photography, you’ll want a camera that has a bigger sensor for better image quality, manual functions, and one that accepts a variety of different lenses.

    DSLRs are the most popular type of camera for landscape photography for a number of reasons. They allow you to shoot in RAW format for maximum data capture (more about that later). They have a variety of shooting modes including fully manual. DSLRs have large sensors and you can use a huge variety of lenses with them.

    DPS ultimate landscape photography guide 08 DPS ultimate landscape photography guide 09

    Mirrorless cameras are relatively new technology. They have all the same features as a DSLR, but they don’t have the internal mechanism that includes the mirror, which is why the camera bodies are smaller and lighter. However, they are not cheaper! But if weight and size are important factors to you, you may want to check out a mirrorless system.

    Sensor size

    When it comes to image quality, the only thing you should concern yourself with is sensor size. Megapixels are not nearly as important as sensor size.

    The largest sensor is known as a Full frame because it is the same size as a 35mm film negative. You’ll pay the highest price for a system with a full frame sensor, whether it is a DSLR or mirrorless system.

    Sensor sizes smaller than full frame are known as Cropped (or Crop) Sensors. The largest cropped sensor is an APS size. You’ll find a wide variety of cameras with these types of sensors at a more affordable price.
    DPS ultimate landscape photography guide 10

    The next smaller size is the four-thirds sensor. There are actually quite a number of sensor sizes in between the three I have mentioned, but these are the most common. Sensors smaller than these three are what you find in point-and-shoots and mobile phone cameras.

    Personally, I use a mirrorless camera with an APS sensor for my landscape photography because the weight of the kit makes a huge difference for me when carrying my gear on long hikes.

    I recommend that when you are choosing a camera, you pick the sensor size you can afford, then choose the camera that feels good in your hands and has a menu system that makes sense to you. These days, all of the DSLR and mirrorless cameras available are capable of making great images so don’t worry about whether Canon, Nikon, Sony or another brand is better. They are all good.

    Lenses

    DPS ultimate landscape photography guide 11 DPS ultimate landscape photography guide 17

    Once you have your camera picked out, you’ll want to pick a few quality lenses that give you good focal range from wide-angle, which puts everything in your field of view into the frame, to telephoto, which will allow you to zoom in to something in the distance.

    Lens choice is important because your photograph is influenced much more by your lens than by your camera. Sharpness, contrast, depth of focus, clarity, and detail are all determined almost exclusively by the glass (lens). It forms the image, while the camera simply captures it.

    While it may seem absurd to spend more on a lens than on the camera itself, most photographers agree that they would always prefer to have a less expensive camera with a quality lens, rather than the other way around. And because lenses don’t depreciate in price as quickly, the investment is far more worthwhile.
    DPS ultimate landscape photography guide 13

    Prime versus zoom lenses

    Lenses come in two forms; prime and zoom. A prime lens has one fixed focal length, such as 35mm. A zoom lens has a focal range, such as 18-55mm. Prime lenses are often slightly sharper than zoom lenses. However, zoom lenses are much more versatile and allow you to carry fewer lenses in your bag.

    I recommend that you start out with three zoom lenses that cover a focal range from 10mm to 200mm for maximum versatility. These are the three that I use for my landscape photography:

    • Wide Angle Zoom 10-18mm
    • Regular Zoom 18-55mm
    • Telephoto 55-210mm

    DPS ultimate landscape photography guide 15

    Tripod

    For landscape photography, a tripod is an essential piece of gear. When you have lots of light, you might get away with hand holding your camera. But if you want to make images in low light situations such as sunrise or twilight, you’ll need a tripod so that you can use longer shutter speeds.

    This is the purchase where everyone seems to make the same mistake. Buy cheap, buy twice. Most landscape techniques require long shutter speeds – sometimes very long. A bargain bin tripod is not strong enough to hold your camera steady with a telephoto lens on it. It’s not strong enough if there is any wind. It’s a waste of money. On the other hand, if you purchase a sturdy, well-built tripod from a reputable brand it can last you a lifetime.

    Make sure you check the load capacity of your tripod and ensure it can handle your camera with its longest (heaviest) lens attached. Expect to spend as much money on your tripod as you did on your camera.

    Filters

    Many landscape photographers also carry filters, which can help you enhance your images. The two most commonly used are a Polarizing Filter and a Neutral Density (ND) filter. Graduated ND filters can be helpful as well, but become tricky to use if you do not have a clean, straight horizon.

    • Circular polarizing filter – This is an essential piece of equipment when photographing water to allow you to remove reflections and glare from the water’s surface and allow you to see through the water to any interesting rocks underneath.  It can also help enhance the richness of a clear blue sky, or remove reflections from windows and other shiny surfaces in urban settings.
    • Neutral density (ND) filter – If you decide to shoot a long exposure and it happens to be the middle of the day when there is a lot of light, you will need this gray-tinted piece of glass placed in front of your lens. It blocks some of the light from hitting your sensor, allowing you to use a slower shutter speed. These are sold in varying strengths, and can be stacked for different levels of light absorption.

    Make sure to get the right filter size for your lenses. Better yet buy one for your biggest lens (look inside your lens cap for the filter size) and step down rings to your smaller ones.

    Recommended Camera Settings
    DPS ultimate landscape photography guide 19

    Shooting in RAW

    Most people are used to shooting pictures that come out as JPG (jay-peg) files since this is the default setting on most cameras. JPG is a compressed format meaning that some of the data the camera captures is discarded to make a smaller file size. Raw format, on the other hand, is completely uncompressed with no information thrown away.

    What results from this is a digital negative – a large file that can only be accessed through Adobe Camera Raw, Lightroom, Photoshop and other compatible image editing software products. We’ll talk more about processing your photos later, but start off by capturing a RAW file so you have more information to work with when you process your photos.

    Shooting Mode

    Your camera will likely have a mode dial on the top where you can choose your shooting mode from one of the following; auto; aperture priority; shutter priority; program; or manual. For landscape photography, I highly recommend shooting in aperture priority mode, likely marked on your camera’s mode dial as “A” or “Av”.
    DPS ultimate landscape photography guide 30

    The reason for using aperture priority is because aperture controls the depth of field in your image – the amount of the scene (in your image) that will be in focus. Generally, for grand landscapes, you will want everything from the foreground to the background sharp, so you’ll pick an aperture like f/11 or f/18. But sometimes, you might want only your subject to be sharp and everything else to be blurred and out of focus. For this, you might pick f/4 or f/5.6.

    More information about how aperture affects depth of field is coming up in the chapter on exposure below.

    Using aperture priority shooting mode allows you to make this choice based on your artistic vision and the camera will choose the corresponding shutter speed to give you a good exposure.

    Metering Mode
    DPS ultimate landscape photography guide 27

    Evaluative or Average metering is the most common metering mode to use in landscape photography because the camera reads the light information from the entire frame. This is your best bet most of the time when the highlights and shadows are spread relatively evenly throughout the scene.

    However, if there are very dark blacks or very bright whites, this can throw your camera’s meter off. In this case, you might want to switch to Spot Metering. Using Spot Metering, your camera will take its reading based on one single spot in the frame, which you choose. Choose the most important part of the image, likely the main subject, and let the rest of the scene fall where it may.

    Note: Just a word of caution. Make sure you are familiar with how your camera meter works and how to do Spot Metering before you attempt this. Remember, your camera meter will always try to measure for medium or 18% gray. Therefore, if you meter off something that is black or really light in tone, your camera will compensate and try and make it gray. So you will need to adjust accordingly by using Exposure Compensation. 
    DPS ultimate landscape photography guide 22

    Focus Mode

    Your camera likely has at least four focus modes, they are; single shot autofocus; automatic autofocus; continuous autofocus; and full manual focus. If you have good eyes and focusing comes easy to you, use manual focus. For the rest of us, one of the autofocus modes is better.

    For landscape photography, single shot autofocus is the best option because it will focus the camera once (and lock on) when the shutter button is pressed halfway down. The other focus modes are good when you have something moving in the frame that you want to lock on to, as you would with wildlife photography.

    Location Scouting

    Now that you have your equipment sorted out, you’re ready to do some shooting! But how do you find those specific spots where you can make images with impact?
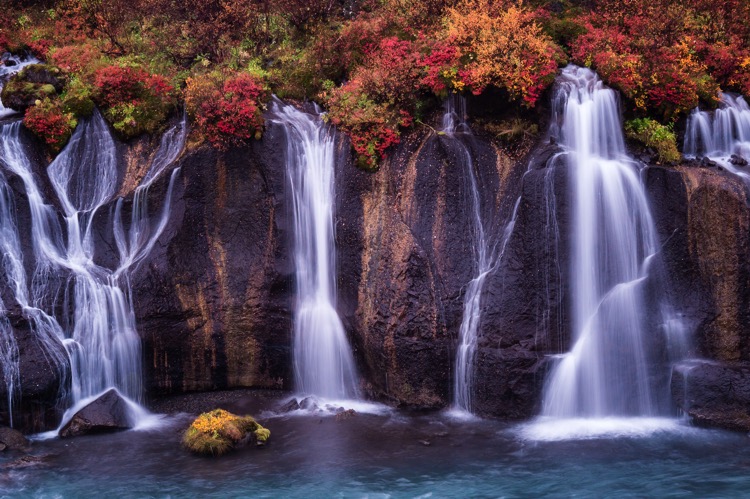
    DPS ultimate landscape photography guide 26

    The first step is to research the location to get a good overview of the place and see what kinds of scenes are on the menu. These days, my favorite tool for doing this type of research is Pinterest. Keyword searches on Pinterest will bring up loads of photos of any given location. You can create a Pinterest board, which is like a virtual scrapbook, where you can collect these images in one place for future reference.

    The next step is to map out the specific locations you have chosen so you know how to get there on the ground. You can look on Google Maps or pick up a hard copy map at a visitor center.

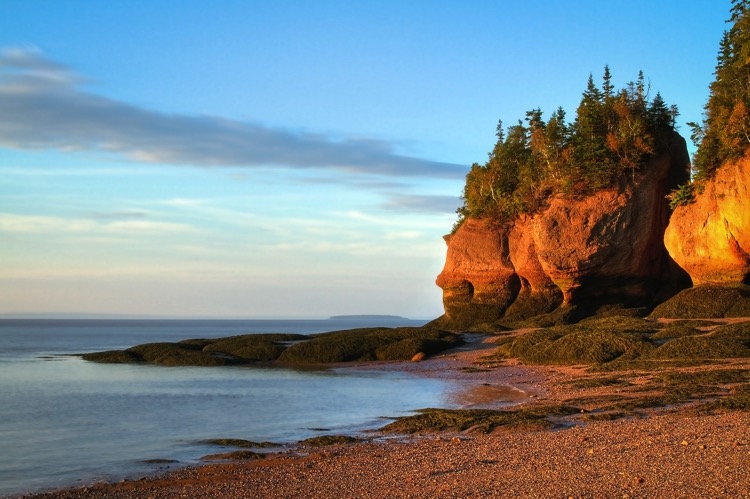
    Next, visit the location in person and have a walk around looking for good compositions. I like to do this during midday when I’m not likely to be photographing due to the bright, harsh, light. Finding your spot during the day means you will know exactly where to go and you’ll be ready during the limited hours on the edges of the day when the light is just right.
    DPS ultimate landscape photography guide 28

    Helpful apps

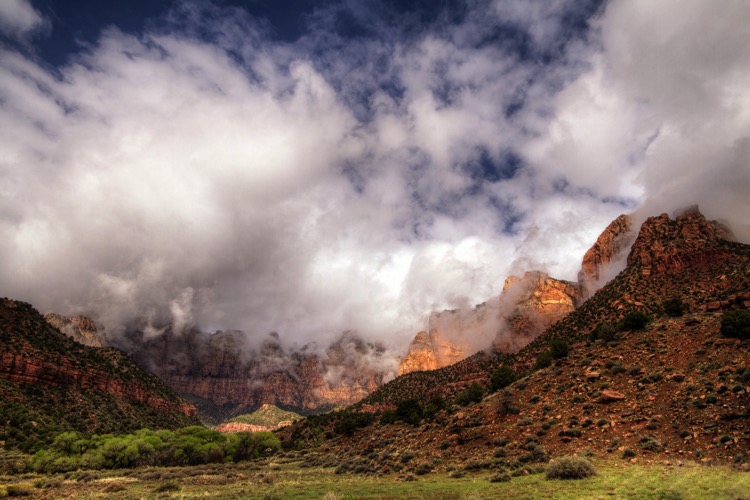
    Speaking of good light, the final tool you can use in your location scouting is something that will tell you sunrise and sunset times, when moonrise and moonset occur, and the direction that those things will take place. This will help you immensely when thinking about the direction the light will be coming from on the edges of the day.

    My favorite tool for this part of my research is an app called The Photographer’s Ephemeris. You can use it on your desktop or mobile device. It will tell you exactly what is happening in the celestial sky at a particular time. So if you want to get a photo of the full moon rising behind a bridge, you can find out when the full moon is, exactly when it will rise, its position in the sky and then it will calculate where you have to be to get the point of view you want.
    DPS ultimate landscape photography guide 36

    Making the Most of Natural Light

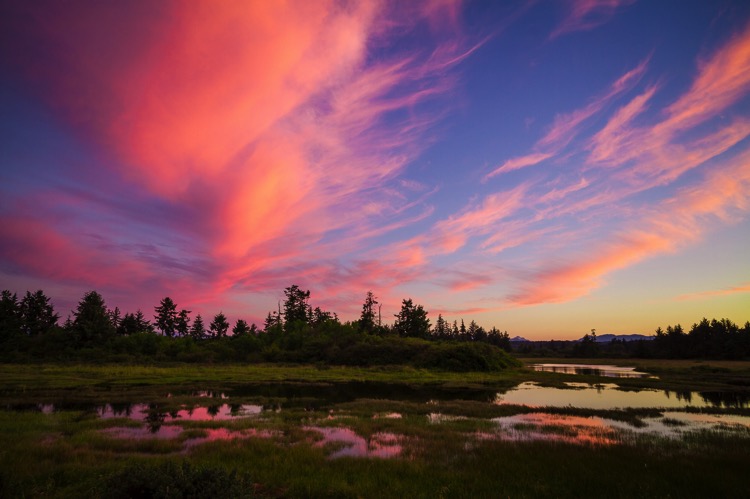
    Understanding natural light is a critical aspect of landscape photography. Even when you’ve done everything else right, if the light isn’t right for your scene, your photos are not going to look their best. That is not to say there is such a thing as “good light” and “bad light”. You just have to know what to do with various types of lighting situations.

    Remember, you can change the direction of light simply by moving around your subject. Or, you can photograph subjects that are in the shade.
    DPS ultimate landscape photography guide 20

    Sidelight

    Sidelighting occurs when light hits your subject on one side casting a shadow on the other. It is often thought to be the most pleasing type of light for landscape photography because the contrast between light and dark emphasizes texture and shape.

    If you have a round object with light hitting it on the side, it will have a shadow on the other, and the gradation of light will emphasize the round shape. Similarly, subjects with textures will have shadows that serve to emphasize the texture. Without the shadows, the texture will be more difficult to convey in an image.
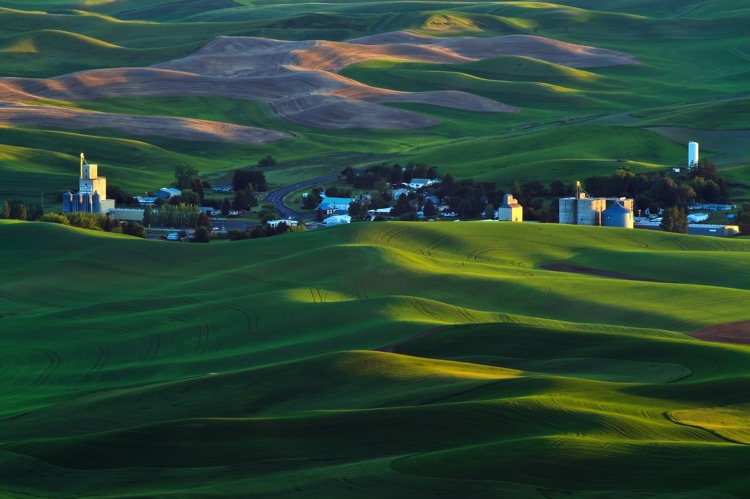
    Ultimate landscape photography guide 01

    In this photograph from the Palouse region in Washington, sidelight emphasizes the curves in the hillside.

    Backlight

    Backlight occurs when the light source is directly in front of you, hitting your subject from behind. It is a bit more difficult to create a good exposure in these kinds of high contrast situations, though.

    Backlighting is wonderful when your subject is somewhat transparent, like the petals of a flower for instance, because it will make your subject appear to have an inner glow (image below left). This is especially effective when you have a dark background. In this situation, make sure you meter on your subject and allow the rest of the image to fall into shadow.

    Ultimate landscape photography guide 02 Ultimate landscape photography guide 03

    Backlighting is also useful when you have a subject with a great shape that you can make into a silhouette (image above right). To do this, meter on the sky portion of your frame so the sky will have a proper exposure and your subject will go completely black.

    When you have backlight and you want to meter on a specific portion of the frame, this is a good time to use spot metering instead of evaluative metering mode. It’s a little bit more difficult but well worth the effort for the dramatic images you can create using this method.

    Front Light

    Front light occurs when the sun is behind you hitting your subject directly in front of you. This is my least favorite type of light because it is often intense and unforgiving causing a scene with a lack of texture and depth.

    However, used at the right time it can be the best kind of light! When the sun is low in the sky, such as at sunrise and sunset, the light is not so harsh and it can cast a golden glow on your subject, especially when your subject is tall such as a mountain or a cityscape. The golden light will fall on the tallest part of the scene, casting its golden glow, while the rest of the scene remains in shadow creating a dramatic shot.
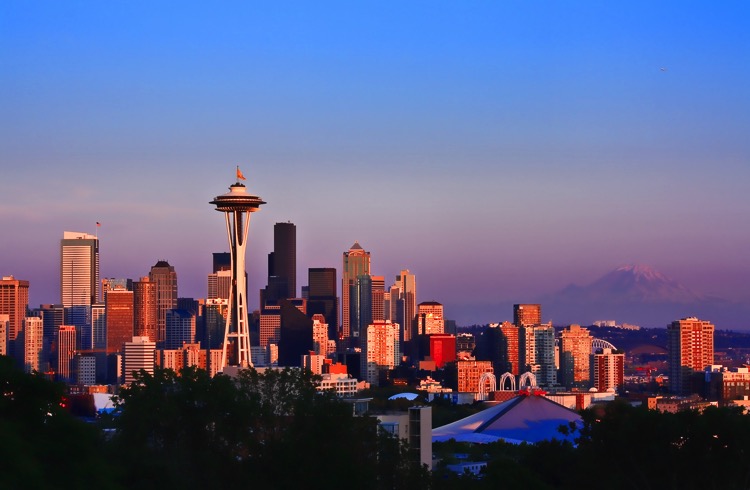
    Ultimate landscape photography guide 04

    Diffused Light

    Diffused light happens on an overcast day or when your subject is in the shade. Under this type of light, your subject will have soft pastel colors and soft or no shadows. You will not get the same sense of shape and texture that you would under different types of lighting situations. As well, your scene will have very low contrast.

    However, this is the best type of light for creating soft, gentle images. For example, flowers and colorful scenes work especially well under diffused light.
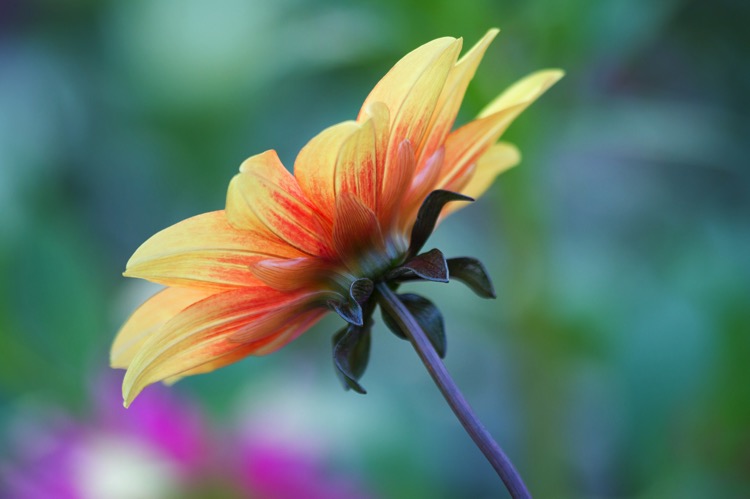
    Ultimate landscape photography guide 05

    But remember, when you have a bright overcast sky, it is best to exclude it from the frame and get in closer to your subject.

    Getting a Good Exposure

    Getting a good exposure means using a balanced aperture, shutter speed, and ISO so that you don’t have any areas of the frame that are too bright (known as blown out highlights). The problem is that if you have blown out highlights, there is nothing you can do in post processing to fix it. It will forever be a white spot. You may also want to make sure that you don’t have any areas that are too dark unless solid blacks are what you are after as in the example of creating a silhouette.

    When you make an image, you can see the areas of light and dark using your camera’s histogram. Using a histogram is easy! It is simply a graph with the darks on the left and the brights or white on the right.
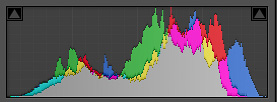
    Ultimate landscape photography guide histogram good

    All you really need to do is make sure there is not a spike on the right edge of the graph. If it spikes before the edge, that’s okay. You only need to be concerned if the spike touches the right edge. If your image is too bright, you can use your camera’s exposure compensation to reduce the brightness.

    The Aperture is Key in Landscape Photography

    So, how do you get the right exposure balance? For landscape photography, we are usually most interested in aperture because it affects the depth of field of the photo, so let’s start with selecting the correct aperture for the scene.

    Aperture is the variable opening through which light travels to your camera’s sensor and its size is expressed in f-stops.

    The smaller the f-stop number, the larger the opening. That’s kind of confusing, isn’t it? It’s because the f-stop number is actually a ratio. But I don’t want to get into too much mathematics here, just remember it’s like a fraction and 1/2 is bigger than 1/8 so f/2 is bigger than f/8.
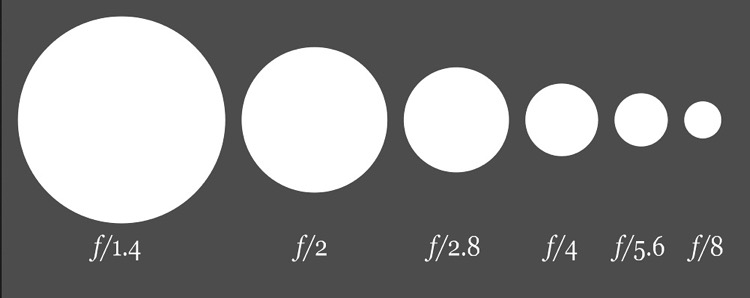
    Ultimate landscape photography guide aperture

    The larger the opening the more shallow the depth of field. In other words, the amount of your scene that will be sharp, measuring from the object you focused on, is smaller.

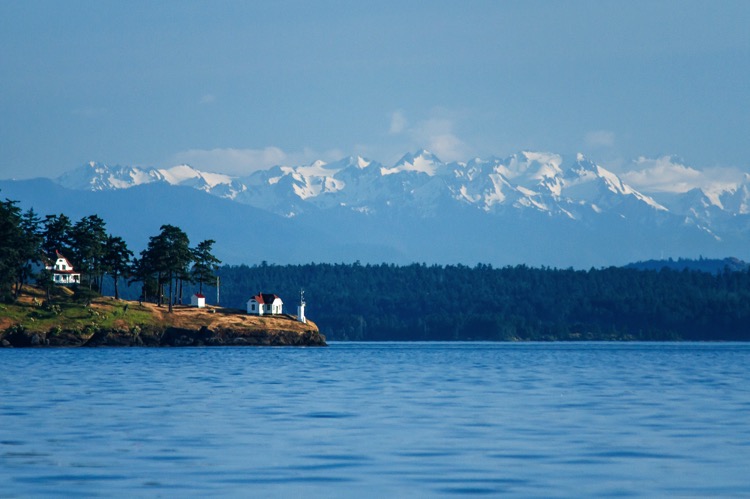
    Here are three images that illustrate the effect of aperture on the depth of field.
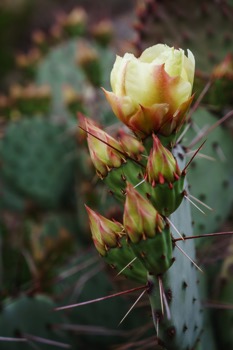
    Ultimate landscape photography guide aperture f4point5Aperture: f/4.5 Ultimate landscape photography guide aperture f11Aperture: f/11 Ultimate landscape photography guide aperture f29Aperture: f/29

    Once you have the aperture selected, the other two factors in exposure are ISO and shutter speed. ISO is the sensitivity of your sensor to light. A low ISO is good when you have lots of light. A high ISO might be necessary if you are shooting hand-held in low light situations. However, increasing the ISO causes noise in your image, so for landscape photography, we usually use the lowest ISO and if we need more light we reduce the shutter speed and use a tripod.

    When you are in the field, set your ISO to 100. This is usually the lowest setting on most cameras. Then set your camera to aperture priority shooting mode and set the aperture you want for the depth of field you desire in the image. Then, the camera will calculate the appropriate shutter speed to create a balanced exposure. Remember to keep your eye on what that shutter is, because if it is any slower than about 1/100th of a second, you’ll need to use your tripod.

    Composition Tips
    DPS ultimate landscape photography guide 33

    When you are just getting started in landscape photography, it can be hard to know what to include the frame to make a compelling composition. In this chapter, I’ll show a few different types of compositions to help get you started so you know what to look for in the field.

    Of course, there are many more composition options than these to explore, and some that you’ll discover on your own through experimentation. But this will give you a starting place on which to base your own vision in photography.

    Rule of Thirds

    The rule of thirds is probably the most well-known “rule” in photography. I like to think of it as more of a guideline. As you grow in your photography, you’ll probably start to break these rules and come up with your own unique ways of composing images. But you have to understand the rule before you can break it.

    Using the rule of thirds, the frame is divided into three vertical and three horizontal sections, like a tic-tac-toe game. The idea is that your main subject should fall on one of the lines in order to create a dynamic and interesting composition. Locating your subject on the intersection of two lines is ideal.
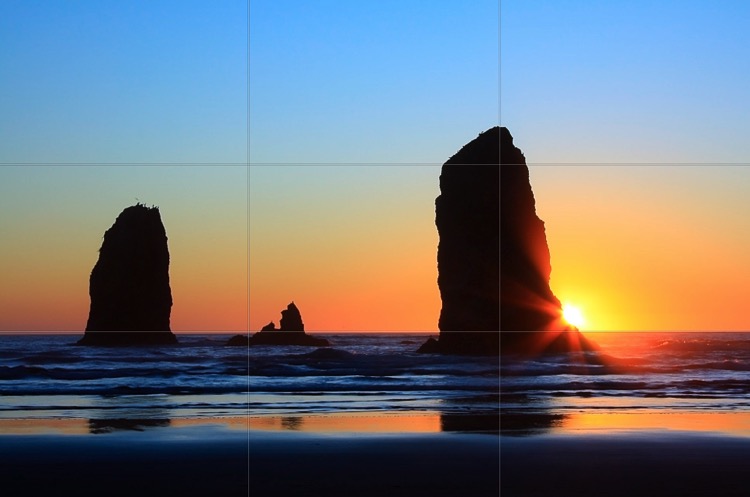
    Ultimate landscape photography guide rule of thirds

    A centered horizon gives equal importance (visual weight) to both the sky and land portions of your image, and the viewer is left with no direction where to look. For example, by placing the horizon along the bottom third line, you will give more visual weight to the sky area and direct the viewer’s eye to that area. A higher horizon placement will have the viewer’s eye going to the bottom of the image where there is more emphasis.

    Symmetry

    Symmetry is the exact opposite of the rule of thirds. A symmetrical composition has the center of the subject exactly in the middle of the frame with equal weight on either side. The two sides of the image are often a mirror image of each other. This works especially well with subjects that are naturally symmetrical like plants or architecture.

    Another way to use symmetry is to put a shoreline in the center of the frame, especially when you have a reflection to balance out the image.
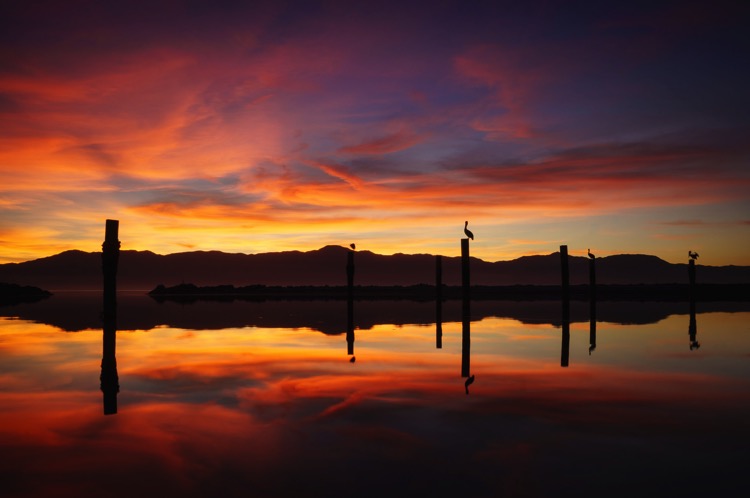
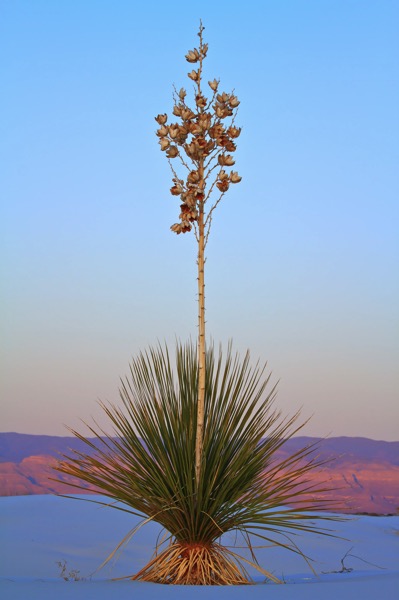
    Ultimate landscape photography guide 06

    DPS ultimate landscape photography guide 29

    Leading Lines

    Another effective type of composition uses leading lines to draw the viewer’s eye to the main subject. The lines can be man-made such as roads, fences, or bridges, or they can be natural elements such as rivers, shorelines or rocks.

    Usually, the lines start from the bottom of the frame and move upward and inward to draw the eye into the image, connecting the foreground and background, and often leading to the main subject.

    In the field, when you find a subject you want to work with, take a look around and see what lines you can use in your composition that would lead up to the subject creating depth and perspective in your image.
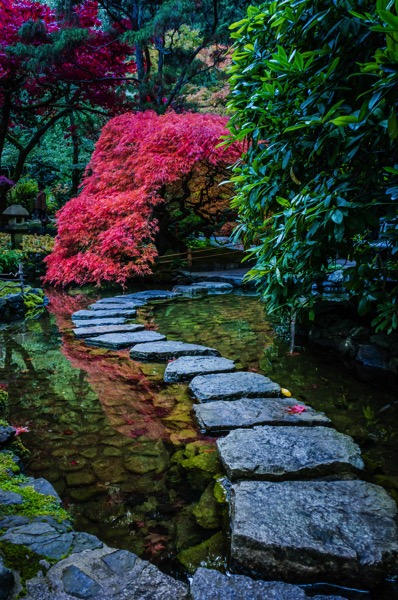
    Ultimate landscape photography guide 07

    Processing Your Photos

    Processing your photos is an important part of digital photography. In the old film days, the lab technicians who processed the negatives and printed made a lot of decisions about color and contrast that affected the final outcome. These days, that job has become yours. If you find that your photos look gray and dull, it’s probably because you haven’t processed them.

    When you shoot in RAW format, as mentioned earlier, you have collected the highest amount of data you can which will help you when it comes to processing. You’ll need to use Adobe Camera Raw, either on its own or within Lightroom, Photoshop or other Raw compatible software.

    I recommend that you go with Lightroom. Not only does Lightroom include Adobe Camera Raw for processing your photos, but it also provides an excellent way to keep your photos organized and accessible. I do all of my basic processing in Lightroom and only use Photoshop if I want to do something unusual with my image.

    Note: check out the dPS course Lightroom Mastery here.
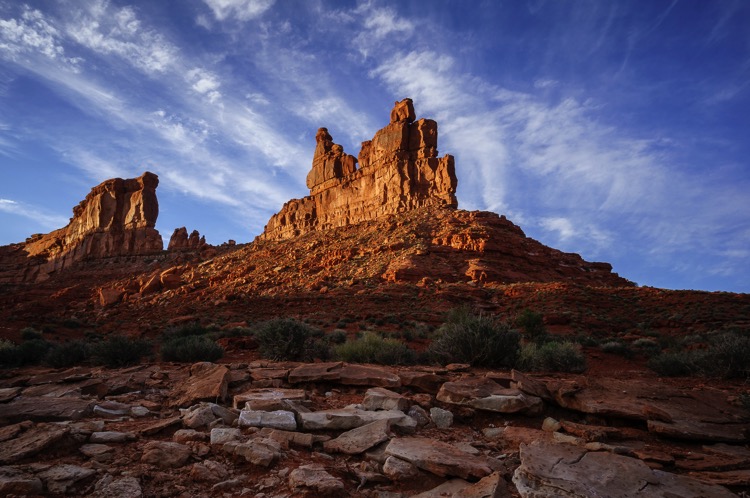
    DPS ultimate landscape photography guide 37

    Using the sliders in Adobe Camera Raw, you can make subtle adjustments that will have a huge impact on the end product. For most of my images, I make adjustments to the following settings:

    • White Balance
    • Contrast
    • Vibrance and Saturation
    • Sharpening
    • Noise Reduction
    • Cropping

    A little processing can go a long way. With solid ingredients like good composition and effective use of light, a little processing can turn a good image into a great one.

    Taking it to the Next Level

    If you want to take your landscape photography to the next level, beyond just snapshots and postcard-like images here are a few places to start, and links to articles on this topic in more depth.

    Add a Foreground Element

    One of the biggest hurdles in photography is the fact that our majestic three-dimensional scene is rendered into a mere two-dimensional image, and the physical depth that we experience in real life is lost. To resurrect this spacious feeling, we can create the illusion of depth where there is none, by using strong elements in the foreground.

    Read more about how to add a foreground element to your images here: How to Use Foreground to Create Depth in Your Images.
    Ultimate landscape guidebook foreground

    Use Shadows to add Depth to Your Images

    In music, they say the spaces between the notes are just as important as the notes themselves. Similarly, in photography, it is the spaces that are not in the light that can add impact to an image. Shadows help tell a story and enhance the mood and visual power of a photograph. In fact, they can be so interesting, that they “overshadow” the subject itself!

    By focusing your attention on the shadows, you can create beautiful compositions full of contrast, form, and minimalist simplicity. An object and its shadow will strengthen each other. Sometimes you might even want to cut the object out entirely, and play with capturing only the interesting shadows that are cast by it.

    Read more about how to use shadows in your images here: Add Impact to Your Photos by Including Shadows.

    Summary

    DPS ultimate landscape photography guide 32 DPS ultimate landscape photography guide 25

    Landscape photography can be a fun and rewarding endeavor. Use these tips as a starting point for your journey and continue exploring this wonderful world and all it has to offer and share your images with others to enjoy as well.

    Remember, photography is a journey, so continue to learn and grow as a photographer. Look back on your work from a year ago and see how far you’ve come. Then think about what you can learn and master next. Have fun, and enjoy the ride.


    Download “The Ultimate Guide to Landscape Photography”

    We respect your email privacy

    googletag.cmd.push(function() {
    tablet_slots.push( googletag.defineSlot( “/1005424/_dPSv4_tab-all-article-bottom_(300×250)”, [300, 250], “pb-ad-78623” ).addService( googletag.pubads() ) ); } );

    googletag.cmd.push(function() {
    mobile_slots.push( googletag.defineSlot( “/1005424/_dPSv4_mob-all-article-bottom_(300×250)”, [300, 250], “pb-ad-78158” ).addService( googletag.pubads() ) ); } );

    The post The dPS Ultimate Guide to Landscape Photography by Anne McKinnell appeared first on Digital Photography School.


    Digital Photography School

  • 10 of the Biggest Business and Marketing Mistakes Photographers Make

    James ebook Creative Freelance Marketing is on sale now at 50% OFF over at Snapndeals (only until December 13th, 2016)

    Photographers can be some of the best business people around or some of the worst. But realistically, if you’re building a photography business, you probably didn’t get into it because you enjoyed business and marketing. This is why some photographers struggle at being successful. They got into it for the passion, and then wake up one day to the reality that it is a business like any other.

    The 10 Biggest Business and Marketing Mistakes That Photographers Make

    Dancer Portrait

    However, fear not. The business and marketing aspect of photography can actually be rewarding and interesting. It’s necessary to learn it to be able to succeed, but once you start to see it work, it becomes empowering. It’s a way to guarantee your success as a photographer so you can continue to do what you love.

    But you can’t do that if you make too many mistakes. Here are the biggest mistakes that I see photographers make (and which I have also made myself).

    Mistake #1 – Not charging enough

    Business Portrait Photography - The 10 Biggest Business and Marketing Mistakes That Photographers Make

    Business portrait photography

    How much you charge is going to be the backbone of your entire business. You cannot let clients lowball you over and over again. By doing that you are lowering the perceived value of the work for the entire industry, and you are not even giving yourself a chance to succeed. By not charging enough, you will inevitably go out of business. Even if you feel desperate for a job, know that it will take up time that would be better spent on marketing yourself to get jobs that pay what you need to survive and thrive.

    Many young photographers are afraid of losing jobs, but that’s a regular part of the business. You should not feel bad about it if the client cannot afford you. If they can’t afford you, then it was never a real job in the first place. How can you do good work or create a portfolio worthy piece if you’re not being paid enough to have your heart in it? In addition, these cheap jobs always end up to be the biggest headaches anyway. Every photographer has a story from when they were starting out about that client who just wouldn’t go away.

    Commercial Photography

    Commercial Photography

    Even worse than a client lowballing you, are situations when you do not charge enough! Sometimes you will have no idea that a client has budgeted much more than you quoted them. A simple and fantastic question to ask to help you handle confusing pricing situations is, “What is your budget?” This question is sometimes not appropriate, but there are many ways to say it, such as telling them that you offer multiple levels of service based on the cost and asking what their budget is for the project. Or if they say they are tight on budget, you can offer to help them and simultaneously ask what they can pay. When introduced in the right way, this can get your client to lay all their cards on the table.

    Mistake #2 – Not responding to inquiries quickly enough

    Musician Photography - The 10 Biggest Business and Marketing Mistakes That Photographers Make

    Musician photography

    Every ounce of business development and every second of time spend on the tedious aspects of building a business serves the specific purpose of getting someone to contact you with a job. Well then answer them! I get nervous if it takes me 24 hours to respond to an inquiry, and the clients usually come back thanking me for responding so quickly. If you answer your emails and calls efficiently, then you immediately put yourself ahead of the majority of photographers. I can’t tell you how many times I’ve been told that we were able to have a whole back and forth and book a job before a competitor even replied.

    In addition, responding regularly and efficiently will add to their comfort in working with you. Showing that you are responsible enough to do this also shows them that you are probably responsible in all aspects of your business. It is a great way to set the tone for what working with you will be like and can be excellent for gaining referrals in the future.

    Mistake #3 – Not having a focused business plan

    Business Photography - The 10 Biggest Business and Marketing Mistakes That Photographers Make

    Business or corporate photography

    You need to know how you are going to make money. Having a focused plan with an income target, price per job needed to reach that target, and a strategy to reach clients will become the basis for your entire business. The more focused that plan is, the more focused you will be. Figure out the strategy with the most potential to help you make a living and start with that. Focus on that before you waist your time on anything else. You do not want to fragment yourself too early in the building process.

    Mistake #4 – Not setting aside enough time for personal work

    Fine Art Photography - The 10 Biggest Business and Marketing Mistakes That Photographers Make

    Fine art photography

    Personal work is what you do to renew your passion for photography. Without that, it will be very difficult to succeed in the photography business. However, it is also the way that you get jobs and build your portfolio. It’s where you test out new strategies and ways of photographing, and it is a way to improve overall at your craft. If there is a type of job that you want to start booking, then build a portfolio of work that will help sell you as a photographer to those clients. They don’t have to know that this portfolio wasn’t made of paid jobs, and in many cases they will enjoy knowing how passionate you are in pursuing your personal work.

    Mistake #5 – Not researching colleagues/competitors

    As a business owner, you need to know what’s out there. Learning from your competition and even your friends is incredibly important. Go through their work and figure out what you like and what you dislike. Try to figure out the different ways that they market themselves and where their jobs come from. See how they use social media and where they get press from. Learn their pricing and test out their website.

    All of this information is so important to helping you find your way. Take the best aspects of everyone you research, and put them together into your own plan. All of the information is out there for you to be successful, it’s just up to you to find it.

    Family Photography - The 10 Biggest Business and Marketing Mistakes That Photographers Make

    Family photography

    Mistake #6 – Not having a plan for editing and delivering

    One of the biggest problems that I see newer photographers have is that they take way too much time editing. They end up missing deadlines, wasting their time, and worrying too much. This is not a good situation for anybody and is one of the quickest ways to hold your entire business back. Learn to cull your images from a job quickly. Right away, knock 800 images into the top 200 or 150 as fast as possible and work from there. Organizing and attacking a job’s editing in an efficient matter will make your life so much better, and it will make your clients very happy.

    Always tell a client that you will deliver a job to them a couple days after you plan to (under promise over deliver). That way you will look very good when you deliver the work early, and if you have some unfortunate setback or issue in your life, you will still have extra time to complete the job.

    Mistake #7 –  Not doing enough local networking

    Writer Portrait Photography - The 10 Biggest Business and Marketing Mistakes That Photographers Make

    Writer environment portrait

    Friends, family, and colleagues are your first line of people who can help you gain work. The second line is your local area. Figure out the businesses and people in your community that might need your services, and figure about the best way to reach them. Find business meet-up groups, local meet-ups, and trade shows that occur in your community and become a part of them. And this tip doesn’t mean that you should only show up once and never again. Become a regular part of them. Spend more time socializing within your community and that will come back to you business-wise.

    Mistake #8 – Not using a mailing list

    Business Portrait Photography- The 10 Biggest Business and Marketing Mistakes That Photographers Make

    Business portrait photography

    Social networks come and go. They all change constantly and hold you at their whim. While they are necessary to be a part of, social networks are in it for themselves, not for you. Diversify your marketing and build up a mailing list of all your contacts, clients, and friends. This way there is nothing between you and reaching them with important news. Mailing lists have a significantly higher open and click-through rate than social networks, and won’t charge you (per email) to reach your list.

    Mistake #9 – Trying to do too much all at once

    Event Photography - The 10 Biggest Business and Marketing Mistakes That Photographers Make

    Event photography

    There are so many strategies to market yourself in photography. Every situation is unique, and every marketing plan should be different. It is important to learn as much as you can about marketing, but at the same time you need to prioritize. Five strategies done with a small amount of your attention on each will be much less effective than one strategy with all of your attention focused on it. Spend some time to figure out which strategies will have the most potential for your situation and rank them. Then start with the first one and over time move down the list.

    Mistake #10 – Not putting yourself out there

    Artist / Writer Portrait Photography focused

    Artist / Writer Portrait Photography

    Nobody is going to give you an opportunity if you don’t ask. The biggest difference between the people who make it and the people who fail is that the ones who succeed will wake up tomorrow and take these steps. None of this is rocket science – it just takes dedication, organization, and follow-through.

    Many people won’t give you an opportunity the first time you ask. Learn to take rejection because rejection isn’t that bad. It means you’re pushing yourself and it’s inevitable along the way. Keep a thick skin and pride yourself on trying. Marketing is a grind at first. The photographers who can dive right in despite every frightened feeling their brain gives them will be the most successful.

    James ebook Creative Freelance Marketing is on sale now at 50% OFF over at Snapndeals (only until December 13th, 2016)

    googletag.cmd.push(function() {
    tablet_slots.push( googletag.defineSlot( “/1005424/_dPSv4_tab-all-article-bottom_(300×250)”, [300, 250], “pb-ad-78623” ).addService( googletag.pubads() ) ); } );

    googletag.cmd.push(function() {
    mobile_slots.push( googletag.defineSlot( “/1005424/_dPSv4_mob-all-article-bottom_(300×250)”, [300, 250], “pb-ad-78158” ).addService( googletag.pubads() ) ); } );

    The post 10 of the Biggest Business and Marketing Mistakes Photographers Make by James Maher appeared first on Digital Photography School.


    Digital Photography School

  • Bike on the River: Cycle-Powered Gym Boat Glides Through Paris

    [ By SA Rogers in Conceptual & Futuristic & Technology. ]

    paris-navigating-gym-1

    Well, here’s one way to get some exercise and simultaneously enjoy views of a beautiful city without getting rained on or dealing with traffic.  Gliding along the surface of the Seine in Paris, past such landmarks as the Notre Dame Cathedral, ‘The Paris Navigating Gym’ gets most of its power from the humans operating the stationary bicycles inside. Supplemented by rooftop solar panels, the boat is a mobile exercise facility and relaxing tour of the city all at once, separated from the noise and chaos of the streets.

    paris-navigating-gym-2

    Architect Carlo Ratti collaborated with fitness manufacturing company Technogym, non-profit Terreform ONE and urban generation institute URBEM to develop the project. Director of the MIT Senseable City Lab, which describes itself as ‘urban imagination and social innovation through design & science,’ Ratti aims to explore the potential of power generation through the movement of human bodies.

    paris-navigating-gym-3

    The boat itself is pretty cool, accommodating up to 45 people on the bikes and other fitness equipment made by Technogym. As they work out, they can keep track of how much energy they’re producing as well as their fitness progress. An inverter convert the pedal power into utility grade electricity, powering the electronic elements of the equipment and propelling the boat. Excess energy is fed into the grid.

    paris-gym-boat

    The design of the boat is based on that of Bateaux Mouches, ferry boats for tourists that have dotted the Seine for nearly a century. The panoramic glass facades looking out onto the water sure beat the views of parking lots and televisions at most local gyms.

    Share on Facebook


    [ By SA Rogers in Conceptual & Futuristic & Technology. ]

    [ WebUrbanist | Archives | Galleries | Privacy | TOS ]


    WebUrbanist