Blog

  • How to Convert a Camera to Infrared for Black and White Landscape Photography

    Get Andrew’s The Black and White Landscape eBook bundle at 30% off now over at Snapndeals, only until December 20th (AUS time).

    Do you have an old digital camera that you don’t use much anymore? If you do, one way to make it useful again is to convert it to infrared for black and white landscape photography.
    How to Convert a Camera to Infrared for Black and White Landscape Photography

    Why would you want to do this? For me, the main reason is that it gives me a new way of working in black and white. Yes, infrared converted cameras can give you color images as well as black and white ones, but for me, the strange colors are more of a gimmick than a useful tool. With black and white, it’s different. In infrared photography, the tonality of the photo changes, giving you new and interesting ways to capture the landscape.

    What is infrared photography?

    The simple (non-technical) explanation is that infrared light is a kind of invisible light, formed of electro-magnetic waves that are undetectable to the human eye.

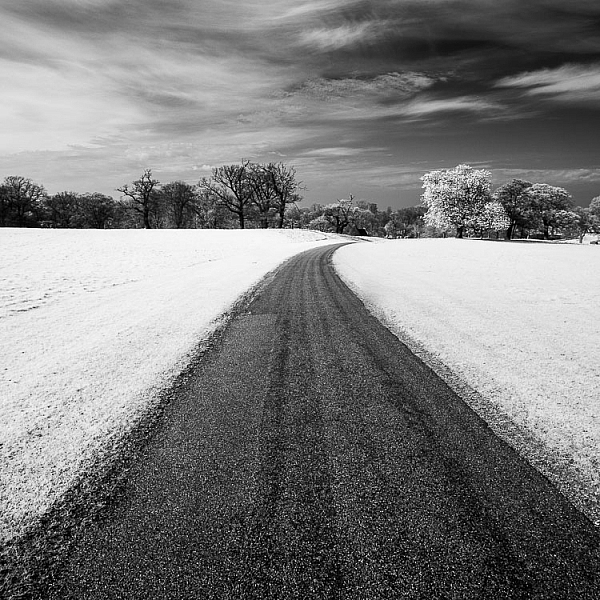
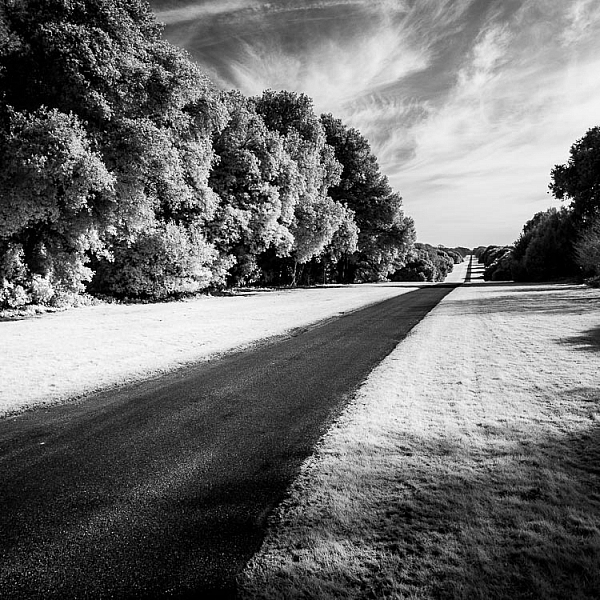
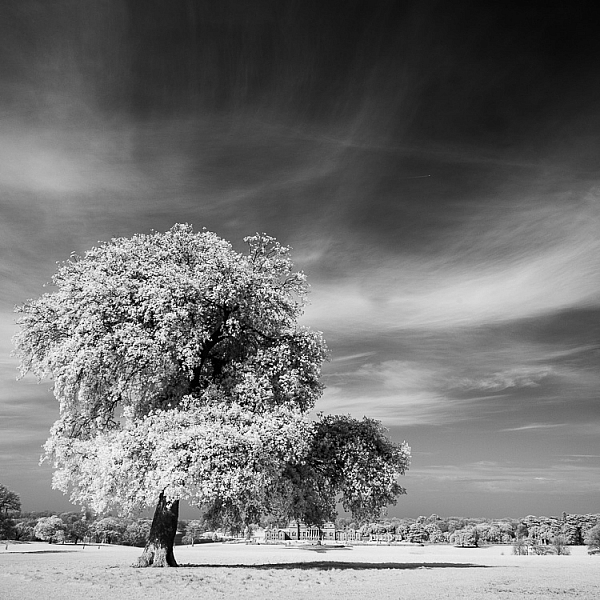
    Human skin reflects a lot of infrared light, so does vegetation. These these things appear very bright in black and white infrared photos. Inanimate objects, such as roads, stones, and buildings, don’t reflect as much infrared light and can look remarkably similar to regular black and white photos when photographed in infrared.
    How to Convert a Camera to Infrared for Black and White Landscape Photography

    What is an infrared conversion?

    Digital camera sensors are sensitive to ultraviolet (UV) light and infrared light as well as the visible wavelengths of light. Because of this, digital cameras have filters to block both ultraviolet and infrared light. The infrared filters on most cameras do let some infrared light through, but not enough to affect the image.

    During an infrared conversion the technician removes the infrared filter so that the sensor can now see infrared light, and replaces it with a filter that blocks visible light, so the sensor can only see and record infrared. The process isn’t complex, and because of that isn’t particularly expensive. If you are technically minded you could even try it yourself. There are videos on YouTube that explain how. You just need the right tools and parts.

    The usual caveats apply. If your camera is still under warranty that will be voided, and bear in mind that you can damage your camera if you don’t know how to do it properly. You should only attempt it if you know what you are doing!How to Convert a Camera to Infrared for Black and White Landscape Photography
    The infrared conversion on my camera was done by Protech Photographic in the UK (they also handle orders from mainland Europe). LifePixel and Kolarivision are US based companies that also do infrared conversions. If you know of any other reliable companies, please let us know in the comments section below.

    Types of infrared conversion

    There are several types of infrared conversion. These are some of the most common.

    Full spectrum conversion

    The UV and infrared filters are removed. Your camera’s sensor can now see UV and infrared light as well as visible light. You control the effect by using filters (on the lens) to block different amounts of visible and/or infrared light. This may be interesting if you like to experiment, but the disadvantage is that you need to buy filters, adding to the cost. Filters also block light, so you need to use slower shutter speeds or higher ISOs to compensate.
    infrared-camera-conversions-6

    720nm conversion

    The technician places a filterin front of the sensor that blocks all wavelengths under 720nm (nm = nano-meter and is a unit of measurement equivalent to 1/1,000,000,000 meter used for measuring wavelengths of light). In other words, it only lets infrared light through. It’s the type of conversion best suited for landscape photography, giving you a color image that’s easy to convert to black and white. This is probably the most common type of infrared conversion and the one you should go for unless you have a specific need for one of the other types.

    830nm conversion

    The sensor is fitted with a filter that blocks all wavelengths under 830nm. This gives a more intense type of infrared effect, with very little color. It’s ideal for dramatic black and white landscape photography.

    Some companies offer different types of conversion in addition to these, so check their websites for details.
    How to Convert a Camera to Infrared for Black and White Landscape Photography

    Camera types and infrared conversions

    When it comes to converting digital SLRs to infrared there is something you need to bear in mind. Infrared light focuses at a different point to regular light. Your camera is calibrated to focus visible light, which means that if you try to focus on something using a wide aperture (which gives less depth of field) then your focus may not be accurate. It is possible to calibrate a lens to focus accurately with infrared, so check with the company that is going to handle your infrared conversion for details.

    But for landscape photography, where most photographers use wide-angle lenses and stop down the aperture for sharp focus, it is not so important. If your camera offers some sort of contrast detect autofocus in Live View (where the camera focuses by taking a reading from the sensor rather than using the camera’s phase detection autofocus system) then you will have accurate focusing in Live View (just not when using the viewfinder).
    infrared-camera-conversions-5

    Mirrorless advantage

    Mirrorless cameras have an advantage over digital SLRs for infrared because they are able to focus from the camera’s sensor. That means that if you plan to hand-hold the camera and look through the viewfinder to take photos (rather than put the camera on tripod and use Live View) then a mirrorless camera is an excellent choice as you won’t get any focusing errors.

    Another advantage of cameras with electronic viewfinders is that when you set the camera to its black and white mode the camera displays the scene in black and white in the viewfinder. This makes it easy to visualize how the photo will come out in black and white with the infrared effect applied.
    infrared-camera-conversions-7

    Lenses and infrared photography

    Another consideration is that not all camera lenses are suitable for infrared photography. Older lenses in particular tend to show a hot spot at the center of the frame, especially at wide aperture settings. Before converting your camera you should check and see if there are any reported problems with the lenses you intend to use with it. Kolarivison have a comprehensive list of infrared compatible lenses.

    Infrared filters

    Another option, if you don’t want to convert a camera to infrared, is to buy an infrared filter that blocks out visible light and just lets infrared light reach the camera’s sensor. The Hoya R72 filter is a great option and not very expensive, especially if you have smaller lenses. It blocks wavelengths below 720nm, just like a 720nm infrared conversion.

    Note: shop for the Hoya R72 Filter on Amazon.com or on B&H Photo’s site. 
    infrared-camera-conversions-8

    You may remember that digital cameras have a filter that blocks most infrared light. An infrared filter is opaque, so the result is that not much light reaches the sensor. In effect, an infrared filter is a strong neutral density filter as well as an infrared filter.

    The strength varies according to the camera used, but don’t be surprised if you lose 16 stops of light. A tripod is essential. Luckily, this is not necessarily a bad thing for landscape photographers. If you are prepared to work within this limitation then an infrared filter could be for you.
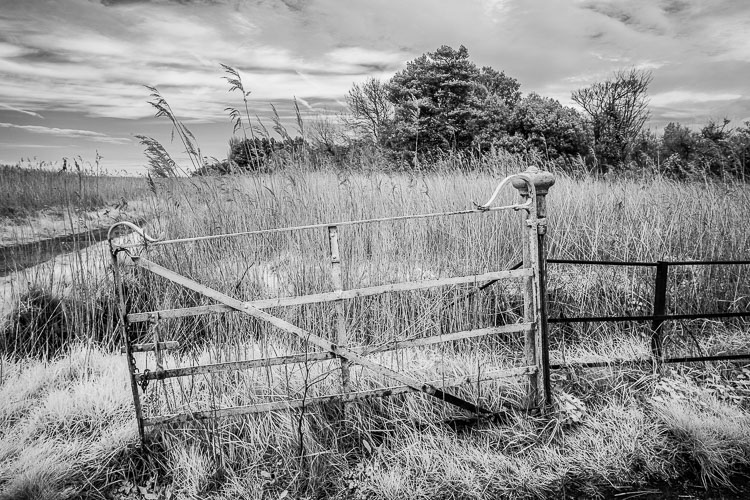
    infrared-camera-conversions-11

    Test first

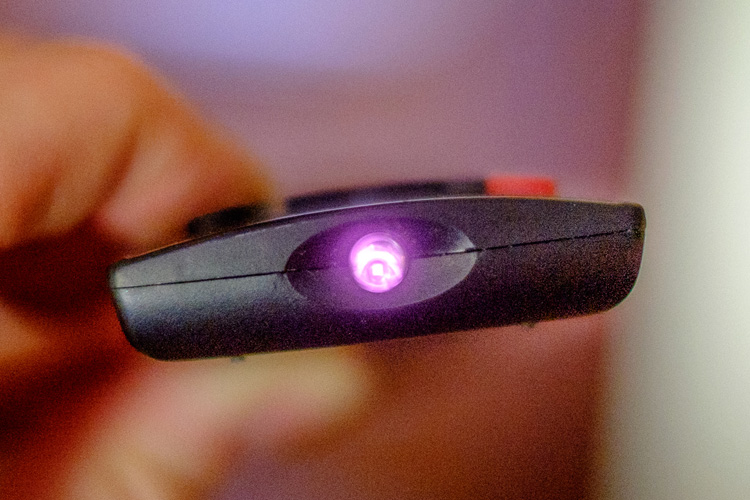
    The infrared filter on some cameras is so strong that no light reaches the sensor at all. This makes using an infrared filter impossible. There’s a simple way to check to see if your camera’s sensor can detect infrared light. Do this test first before buying an infrared filter.

    Set your camera to Live View and focus on the end of a television remote control while pushing down one of the buttons. If you can see a light (the infrared communication in action) then it is sensitive enough to infrared light to use with a filter. It’s probably easiest if you ask somebody to hold the remote control for you.
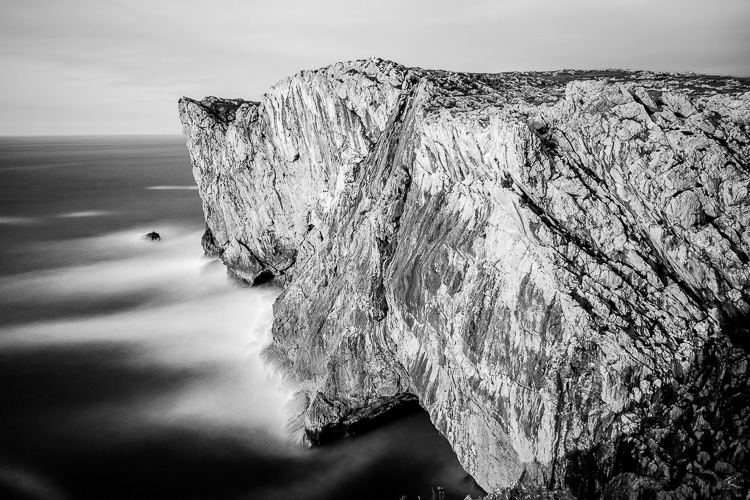
    Black & white infrared landscape photograph

    This photo (below) was taken with a Hoya 72 filter. It required a shutter speed of 180 seconds, even though the cliffs were lit by the light from the setting sun.
    Black & white infrared landscape photograph

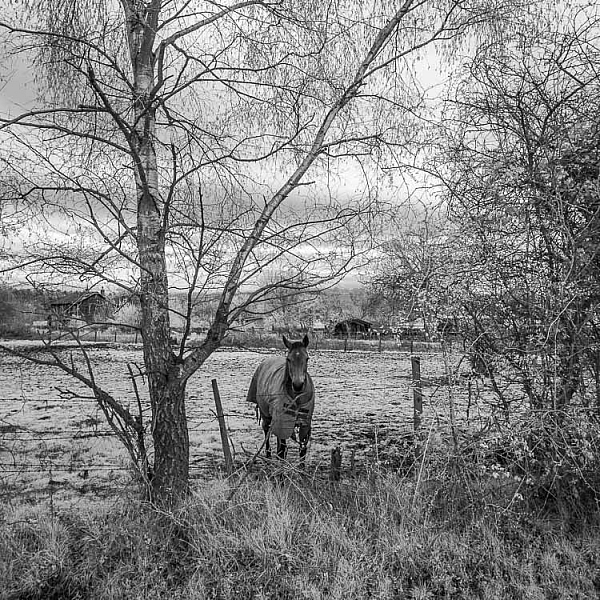
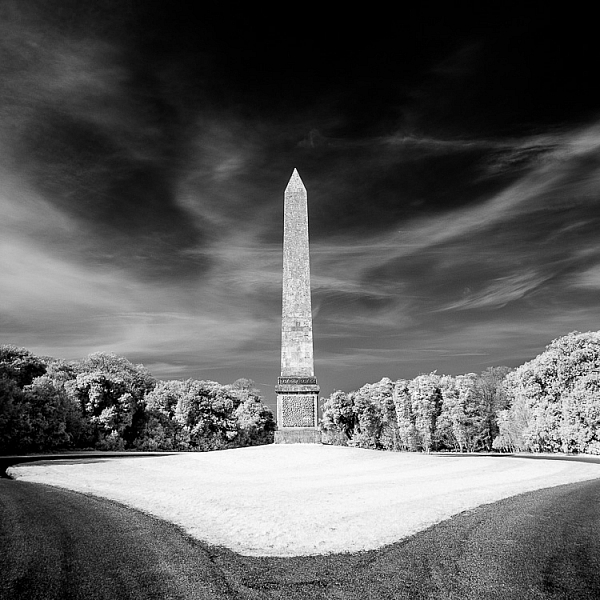
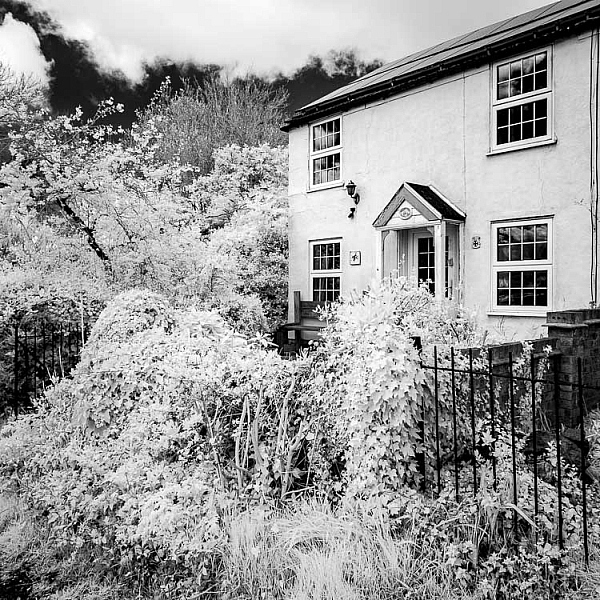
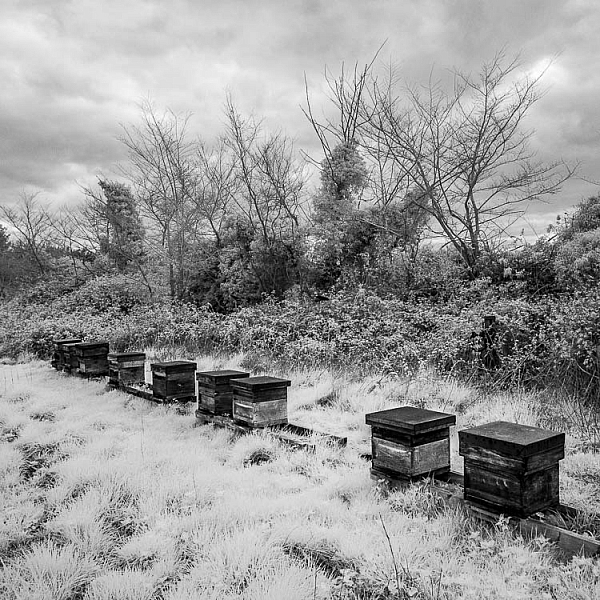
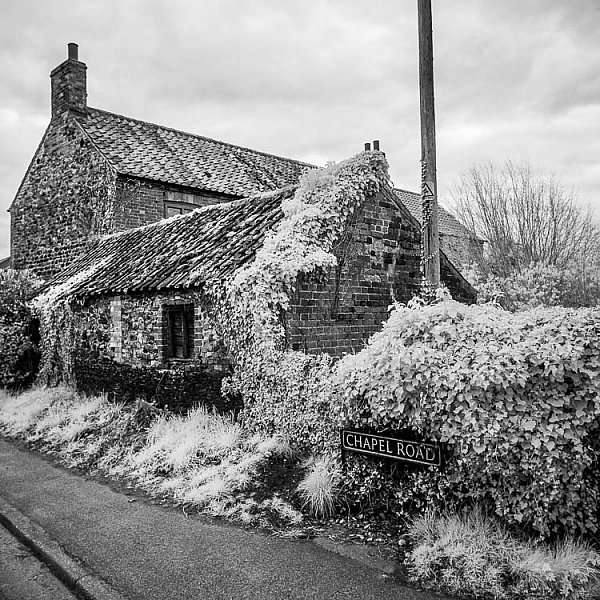
    All the other photos in the article were taken with a Fujifilm X-Pro 1 converted to infrared.

    Conclusion

    That concludes our overview of converting cameras to infrared for black and white landscape photography. Have you tried this yourself? What camera did you have converted and how did it work out? Please let us know in the comments.

    Get Andrew’s The Black & White Landscape eBook bundle at 30% off now over at Snapndeals, only until December 20th (AUS time).

    googletag.cmd.push(function() {
    tablet_slots.push( googletag.defineSlot( “/1005424/_dPSv4_tab-all-article-bottom_(300×250)”, [300, 250], “pb-ad-78623” ).addService( googletag.pubads() ) ); } );

    googletag.cmd.push(function() {
    mobile_slots.push( googletag.defineSlot( “/1005424/_dPSv4_mob-all-article-bottom_(300×250)”, [300, 250], “pb-ad-78158” ).addService( googletag.pubads() ) ); } );

    The post How to Convert a Camera to Infrared for Black and White Landscape Photography by Andrew S. Gibson appeared first on Digital Photography School.

    Digital Photography School

  • Benjamin Von Wong’s latest project spotlights conservation with mermaid photo series

    $ (document).ready(function() { SampleGalleryV2({“containerId”:”embeddedSampleGallery_6050913312″,”galleryId”:”6050913312″,”isEmbeddedWidget”:true,”standalone”:false,”selectedImageIndex”:0,”startInCommentsView”:false,”isMobile”:false}) });

    A single plastic bottle doesn’t make for a terribly compelling photo. But what about 10,000 plastic bottles and an brightly costumed model? That’s a different story.

    Benjamin Von Wong’s latest project seeks to call attention to the problem of plastic pollution. Von Wong quotes research that says 50% of plastic is used just once before it’s thrown away, and by 2050 the world’s oceans will contain more plastic than fish. 

    Von Wong wanted to call attention to the problem, and came up with a concept that would help represent his subject beautifully – colorful mermaids lost in a sea of plastic. To do so required a massive number of plastic bottles and an equally large space to stage the scenes. You can read more about the logistics on Von Wong’s blog.

    Using a Sony a7R II and a 16-35mm F4 ZA OSS, Von Wong captured the scale of his creations by rigging the camera to a system of plywood and pulleys, suspending it high above his model. He controlled it remotely from an iPad, and previewed images on a borrowed 52″ TV. See how it came together in the behind-the-scenes video below. If you want to take action, you can sign a petition to pledge to reduce your use of plastic. 

    Articles: Digital Photography Review (dpreview.com)

  • Tokina FiRIN 20mm F2 FE MF lens to begin shipping January 27

    Tokina launched the FíRIN 20mm F2 FE MF lens for Sony E mount just prior to Photokina this year, and has announced that the lens will go on sale at the end of January. The wide-angle lens features three super-low dispersion elements alongside a pair of aspherical elements, an F2 to F22 aperture range, and a nine-blade diaphragm. In addition to full-frame Sony E mount cameras, this lens can also be used with APS-C models.

    $ (document).ready(function() { SampleGalleryV2({“containerId”:”embeddedSampleGallery_2569809841″,”galleryId”:”2569809841″,”isEmbeddedWidget”:true,”standalone”:false,”selectedImageIndex”:0,”startInCommentsView”:false,”isMobile”:false}) });

    According to Tokina, its new FiRIN lens supports in-camera assist functions, and includes both manual focus up to a minimum 11-inch distance and aperture control. The lens sports a multi-layer coating for minimizing ghosting and lens flare, as well as printed distance and depth of field scales on the lens barrel.

    The lens is slated for release on January 27 with a retail price of ¥108,000. Pre-orders are available through B&H Photo for $ 799.

    Via: Tokina

    Articles: Digital Photography Review (dpreview.com)

  • How to See and Photograph Light – 6 Tips to Help you Take Better Photos

    I was teaching a class recently and someone asked me how they could have made a particular set of landscape images better. Should they have used a different aperture, shutter speed, etc.? “You couldn’t have made those photos any better because the light was terrible.” I explained. You must learn to see and photograph light to take better photos.

    How to See and Photograph Light - 6 Tips to Help you Take Better Photos

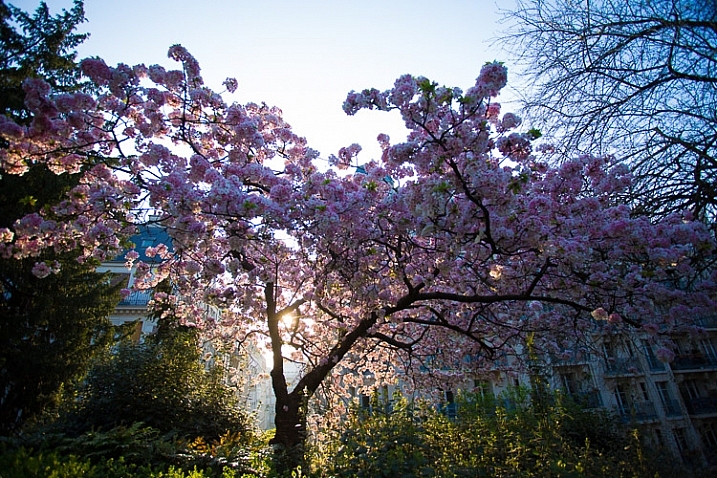
    Blossoms at dawn, Paris.

    There are times when interesting photos can be made in bad light. But I will unequivocally say that in most cases (as there are always exceptions to the rules, right?) when you have boring light you will have boring photos.

    Interesting light transforms any subject. It reveals and enhances the subject’s natural qualities. In many ways, it brings your subject to life. If you follow only one piece of advice in photography it should be this:

    “Light makes photography. Embrace light. Admire it. Love it. But above all, know light. Know it for all you are worth, and you will know the key to photography.” George Eastman.

    How to See and Photograph Light - 6 Tips to Help you Take Better Photos

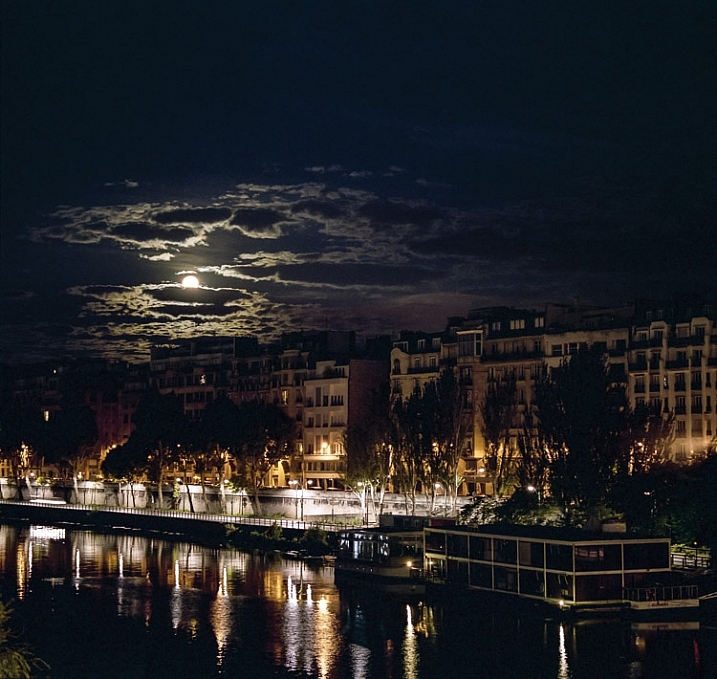
    Moonset on the Seine.

    In this article, I am going to explore light in many forms, but it’s not a technical article. This is about the how you compose with light, how its different forms affect your subject, the emotions that light communicates, and how when you really chase light you’ll learn to create more compelling and memorable images.

    In every single one of these photos, I will say that the subject is the light. The light might be subtle, or very obvious, but what compelled me to snap that shutter was what the light was doing. Here are some tips to get you more involved with capturing the mesmerizing qualities of light.

    1) Notice light

    “It’s not what you look at that matters, it’s what you see.” Henry David Thoreau

    How to See and Photograph Light - 6 Tips to Help you Take Better Photos

    This first step seems like a stupidly simple piece of advice right? I mean who doesn’t notice light? Most people notice the obvious aspects of light – it’s a sunny day, it’s stormy, it’s twilight. There is so much more to light, though. It’s a rich, varied and complex entity. Light is creating hundreds of different effects all around us all the time.

    The first piece of advice I always give to all my students is – look for what the light is doing and look for light sources. You’re out and you see a beautiful shaft of light on a wall. Ask yourself – where is it coming from? Is it direct or is it being reflected off of something? Is it bouncing off the wall and doing something else?

    As you move around light alters – as you enter a square, go under a tree, move behind a building – it’s bouncing and reflecting off so many things. Light is being filtered through leaves, through different urban and natural materials. It’s this constantly changing aspect that you need to become very familiar and intimate with. Light is always changing – as clouds drift across the sun, as the hours pass, as weather systems move.

    How to See and Photograph Light - 6 Tips to Help you Take Better Photos

    See the shadows on the clouds?

    Become a light detective

    There are, of course, many times when the light is super flat. We have many days in London where cloud cover is very dense and the light is very flat and gray. Or back in California, where I grew up, in the height of summer at midday the light is hard and almost flat in its piercing white intensity. Then you have to work harder to look for alterations in light. But like life itself, change is something we can consistently rely on.

    You’ll also start to notice that when the light outside changes, it also changes the light inside. A drop in the vibrancy of the light outside will make the light inside seem warmer and stronger.

    Becoming a good photographer is like becoming a light detective. What is light doing to your subject? What is it revealing about your subject?

    How to See and Photograph Light - 6 Tips to Help you Take Better Photos

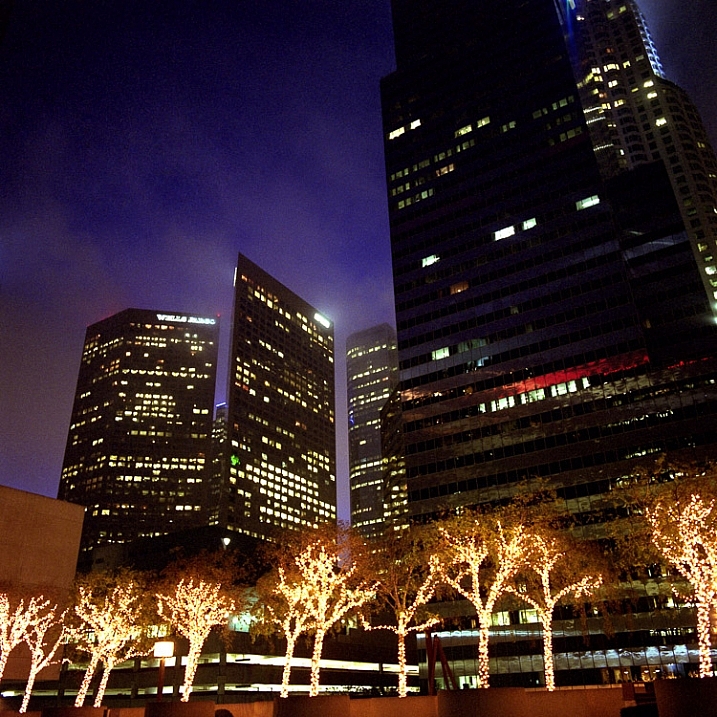
    Los Angeles downtown at dawn.

    2) Use light to create emotion in your images

    “A great photograph is a full expression of what one feels about what is being photographed in the deepest sense and is thereby a true expression of what one feels about life in its entirety.” Ansel Adams

    For me, light always creates an emotion, a feeling, or a sense of mood. It doesn’t have to be a strong feeling or even a positive one, but it does have to create an impact with me that goes beyond the initial pleasingness to the eye. I am constantly searching to capture a feeling in my images. Light is a very powerful way to communicate emotions.

    So I want you to look at the light in the following photos and ask yourself – how do they make me feel? Light can be a powerful and dramatic element in your photos, creating a deep feeling of awe, about the grand beauty of the world.

    How to See and Photograph Light - 6 Tips to Help you Take Better Photos

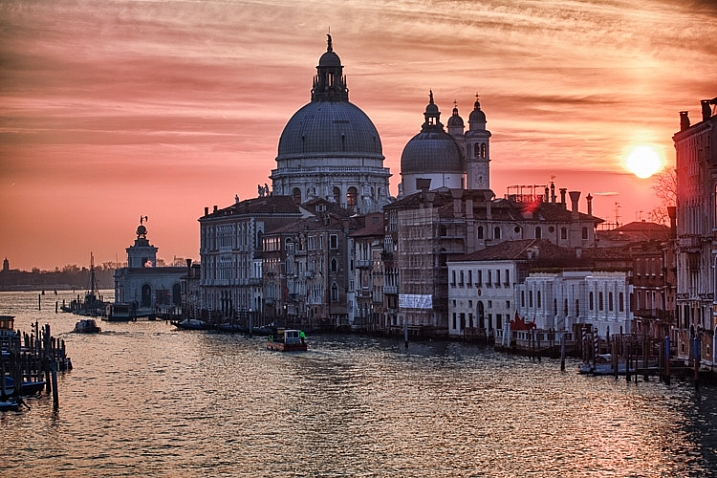
    Dawn over the Grand Canal Venice, Italy.

    Light enhances the subject

    Of course, the photo above would have been interesting without the dramatic sunrise, after all, it is Venice and the subject is incredible. What the beautiful light adds, though, is a big pop of color, adding a layer of depth and enhancing the awe-inspiring feeling of these amazing buildings. The dramatic color and light matches and enhances the dramatic subject.

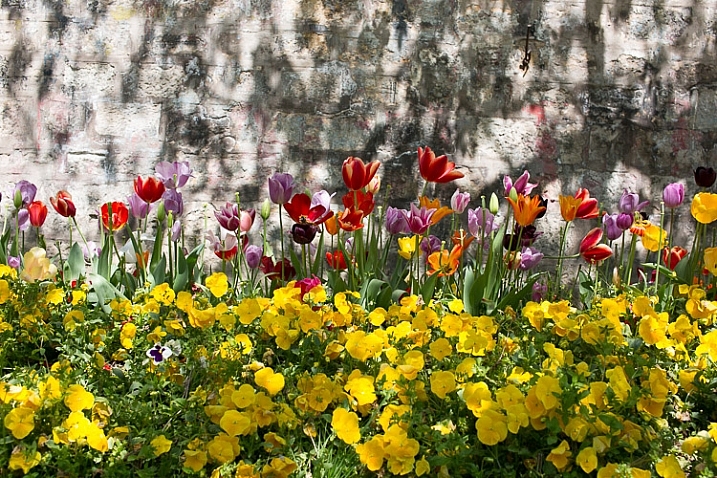
    It doesn’t have to be big subjects, though. This simple shot of pretty flowers would be quite boring if it didn’t have this lovely dappled light on it. It’s simple but very evocative. If you are starting out, or trying to refresh your basic skills, focusing on detailed shots like this, and what light is doing to the elements in the world around you, is a fantastic way to start playing with, and capturing the magic of light.

    How to See and Photograph Light - 6 Tips to Help you Take Better Photos

    Tulips in bloom Istanbul Gulhane park

    I have mentioned interesting and beautiful light. So what is interesting light? Well, to me it’s any light that communicates an emotion, a feeling, or a mood. It’s light that makes you feel something. Even if that’s melancholy.

    How to See and Photograph Light

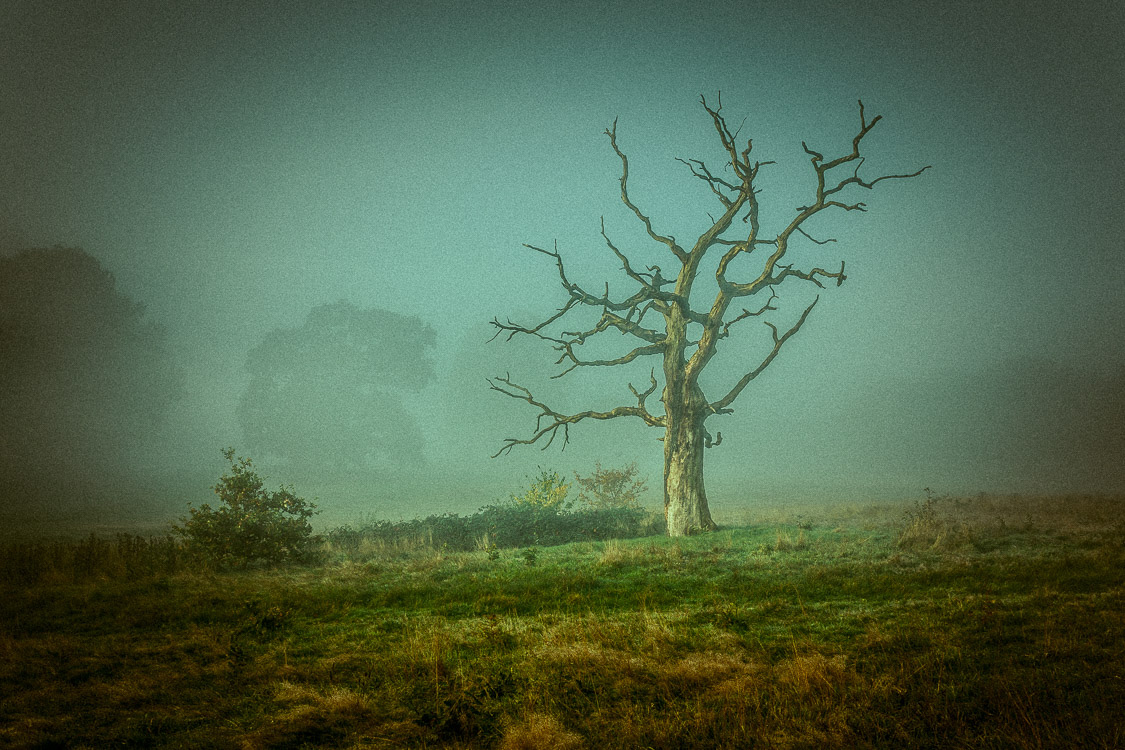
    Lone tree on a foggy morning on Hampstead Heath London, at dawn.

    I shot the photo above on a cloudy autumnal morning. The light was very diffuse, very subtle, but it was still pretty and interesting to me. It matched the location I was in – the wild heathers and grass along with the stark leafless tree standing alone.

    Can you see how the light emphasizes the natural qualities of the tree? How the amazing wild branches, stripped bare, almost like someone’s mind going crazy, are enhanced by the soft light?

    In the photo below, to me, the light is offering an amazing feelingof foreboding.

    How to See and Photograph Light - 6 Tips to Help you Take Better Photos

    Dark days ahead, London.

    3) What is the color of light?

    “Light, that first phenomenon of the world, reveals to us the spirit and living soul of this world through color.” Johannes Itten

    Color from light is produced when white light is split by a prism into the colors of the rainbow. You also get artificial effects created by the myriad of things that light reflects onto and bounces off.

    For me, color is the second most powerful force in my photography, and getting a sense of the color of light is a great way to start using light and color in your compositions.

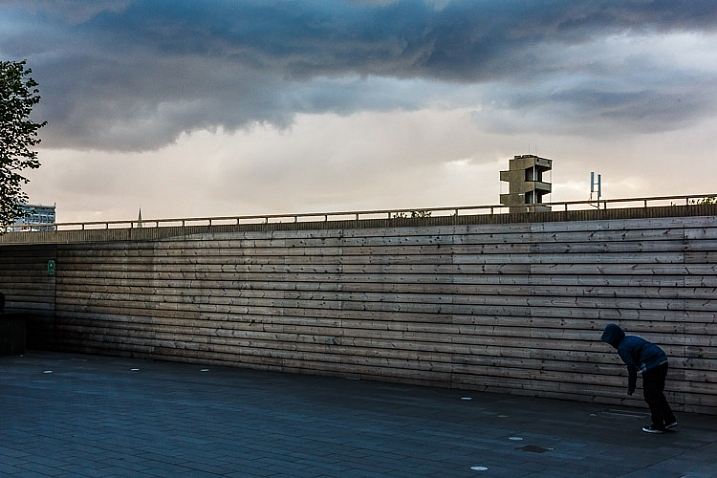
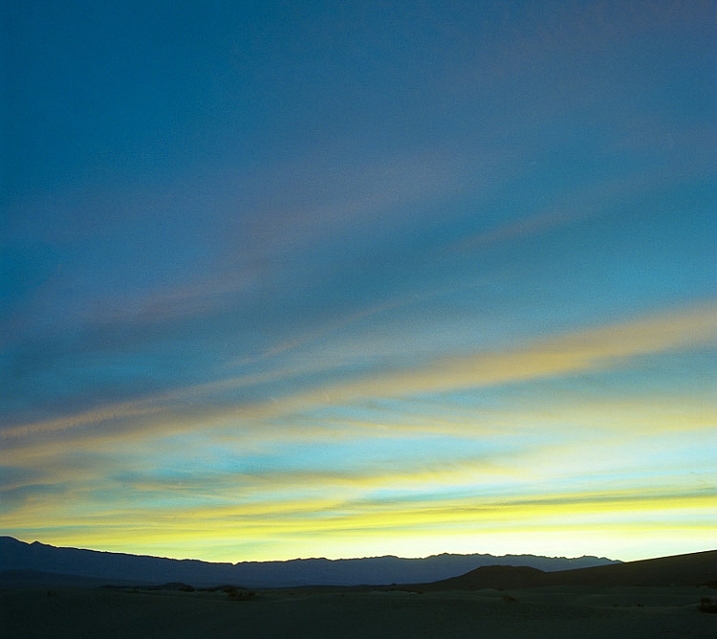
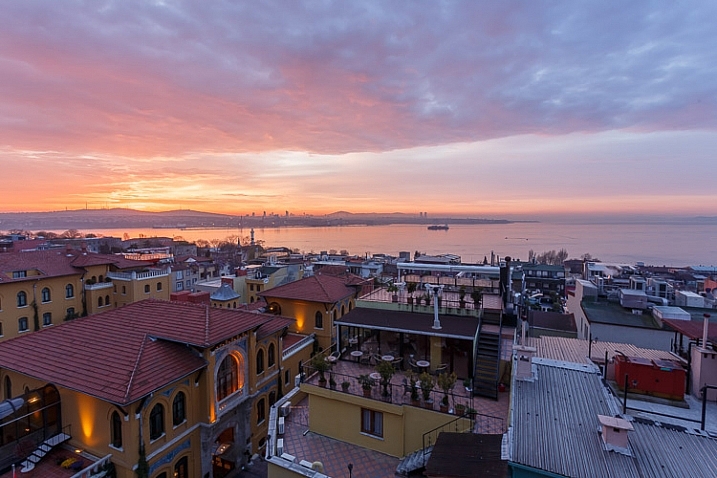
    Compare the color of the light in the following three images.

    How to See and Photograph Light - 6 Tips to Help you Take Better Photos

    Dawn over Death Valley, California

    How to See and Photograph Light - 6 Tips to Help you Take Better Photos

    Sunrise over the Bosphorus, Istanbul Turkey at dawn.

    How to See and Photograph Light - 6 Tips to Help you Take Better Photos

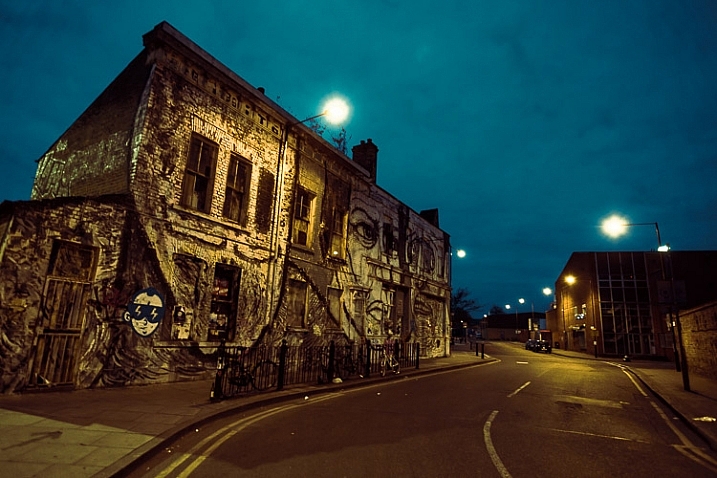
    Near Hackney Wick station London at dawn.

    Light is always full of color – even if it’s piercing white. And it’s doing something to the color of your subject.

    4) Light can make even dull and boring subjects interesting

    “In the right light, at the right time, everything is extraordinary.” – Aaron Rose

    Interesting light doesn’t have to just be natural, or even beautiful. Light of all kinds creates mood and feeling within a photo. Your aim is to ensure that the light helps to create a story of some kind for your image, that it tells you something about what it’s like to stand right there, where you were.

    How to See and Photograph Light

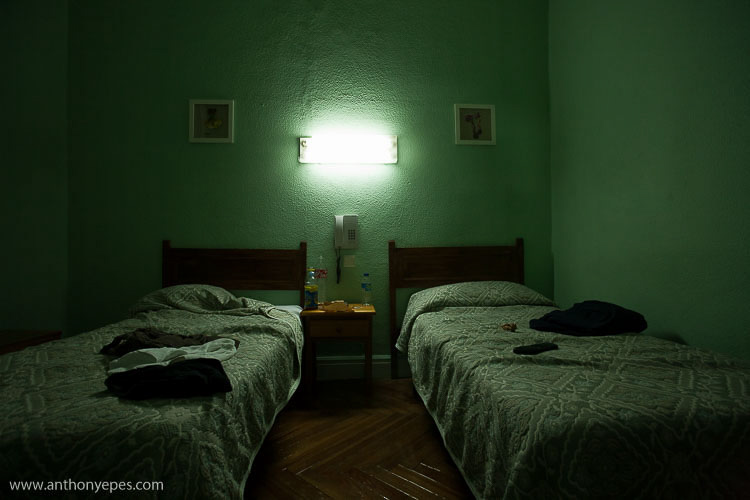
    Hotel room, Madrid, Spain.

    Above is a great example of harsh light that usually I wouldn’t go near – but it works in this photo because it works well for the subject. I rarely take photos using such unflattering hard lighting. But in a grim hotel room in Madrid, it enhances the feeling of loneliness that the twin (disconnected) beds give off, with the bleak looking paint color. That burst of light wraps up the photo into a nice melancholy package. See, even horrible light can be interesting (in the right circumstances)!

    Then you also have the issue of beautiful, gorgeous light making rather dull subjects suddenly quite interesting.

    How to See and Photograph Light - 6 Tips to Help you Take Better Photos

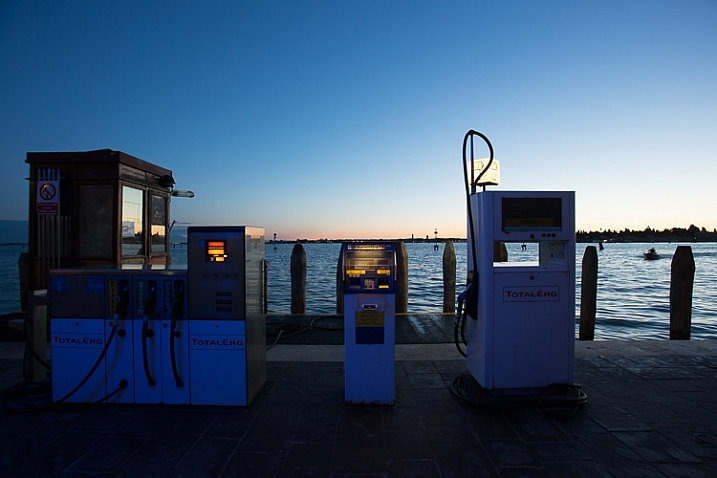
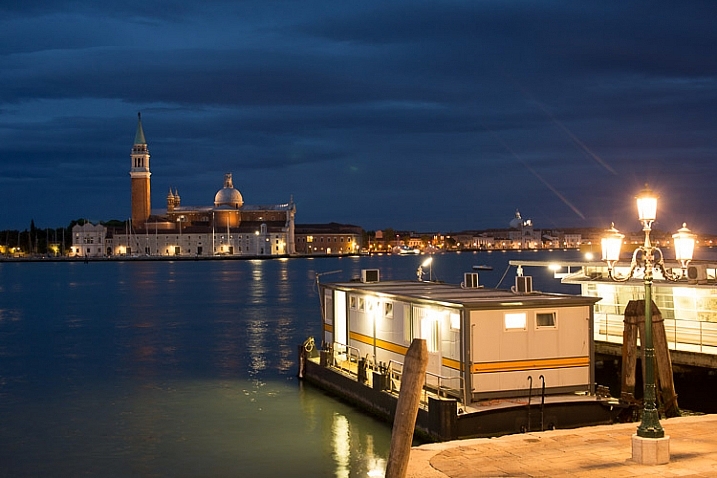
    Gas pumps for boats in Venice, at dawn.

    Without the rich blue light, this would not be an interesting photo. Plus what gives it another layer of interest are the pops of artificial light.

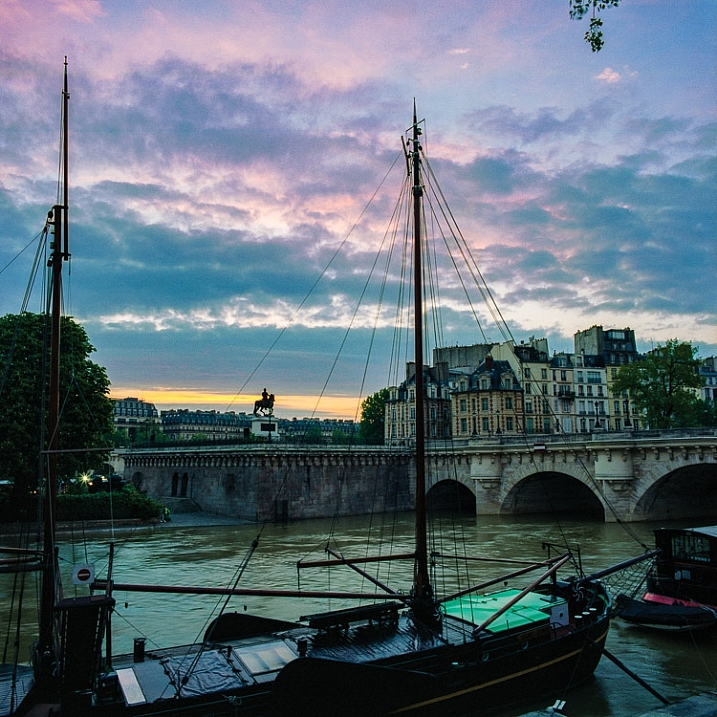
    This following photo has a fascinating subject. But imagine this scene on a gray, drab Parisian morning, when all you want to do is dive into a cafe and eat several pains au chocolat?

    How to See and Photograph Light - 6 Tips to Help you Take Better Photos

    A dawn Idyll on the Seine, Paris.

    The light is bringing everything to life – the gray stone buildings, the grayish-green water, the black and browns of the boats. This would be a totally boring photo without that magical light and sky.

    5) Use light to tell a story

    “There is only you and your camera. The limitations in your photography are in yourself, for what we see is what we are.” – Ernst Haas

    I think photographs are at their strongest when they enhance the inherent qualities of the subject you are photographing when they add another layer of story to the photo.

    What story do you want to tell?

    I photograph a lot of cities at dawn; it’s my main subject at the moment. Dawn, though, becomes very repetitive to photograph. It’s often so pretty, but just how many epic sunrises can you photograph? So one of my favorite things to do is to juxtapose that beautiful, ethereal light of dawn with the broken, used or decaying elements of our cities.

    How to See and Photograph Light - 6 Tips to Help you Take Better Photos

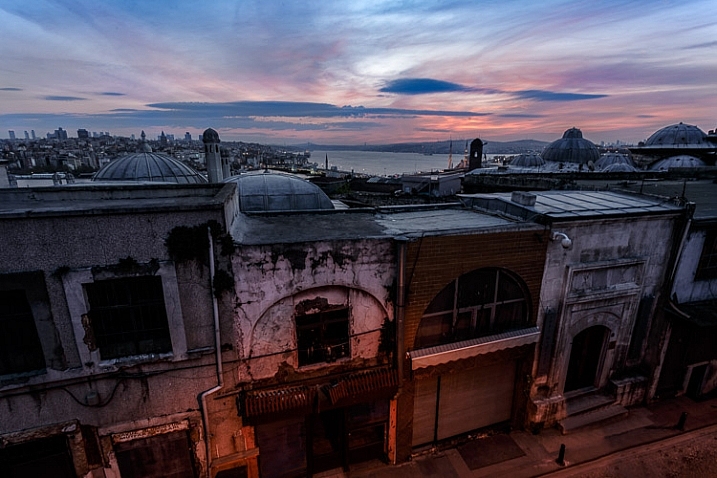
    Ancient vista, Istanbul at dawn.

    I think it says so much. The hopeful light of dawn, with the heavy feeling you get from the urban scene, and feeling of human impact.

    I also love to photograph dawn when the street lights are still on. That mix of the best light nature produces, with that hard functional light we humans create for our cities, is a very interesting thing to play with. The light is telling you more about what it’s like to be exactly where you are – it’s helping to tell the story of your subject.

    How to See and Photograph Light - 6 Tips to Help you Take Better Photos

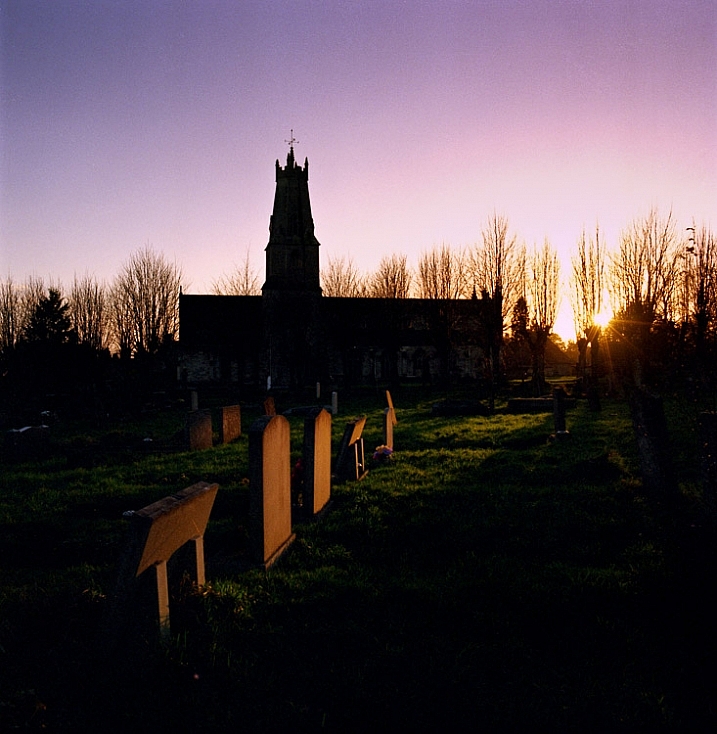
    Last light on gravestones, Stroud, England.

    In the photo above I was in this graveyard on a winter’s afternoon. I noticed that the sun was starting to set and realized that if I waited, the sun would fall perfectly between the trees, lighting up the gravestones. This stream of light through the trees only lasted a minute or two, but it shows that when you really pay attention to light you can start to anticipate what it’s going to do, and how it will affect your photos. Without that stream of beautiful light the scene would have been really boring.

    6) Chasing light is an adventure

    “Photography is a love affair with life.” – Burk Uzzle

    Photography is such an amazing creative pursuit. I love how it connects me so much more to the world around me. Learning to pay attention to light and how to capture it is one of the best ways to elevate your photography. Becoming intimate and familiar with light will help you become really present with the beauty and wildness of this amazing world.

    How to See and Photograph Light - 6 Tips to Help you Take Better Photos

    I would encourage you to photograph light – just for the sake of it. It’s a wonderful, thrilling adventure to always be chasing the light.

    I’d love to know if you how you go about capturing light and use it in your photos. Please comment below, I love hearing your ideas.

    googletag.cmd.push(function() {
    tablet_slots.push( googletag.defineSlot( “/1005424/_dPSv4_tab-all-article-bottom_(300×250)”, [300, 250], “pb-ad-78623” ).addService( googletag.pubads() ) ); } );

    googletag.cmd.push(function() {
    mobile_slots.push( googletag.defineSlot( “/1005424/_dPSv4_mob-all-article-bottom_(300×250)”, [300, 250], “pb-ad-78158” ).addService( googletag.pubads() ) ); } );

    The post How to See and Photograph Light – 6 Tips to Help you Take Better Photos by Anthony Epes appeared first on Digital Photography School.

    Digital Photography School

  • Urban Camouflage: Nude Body-Painted Models Blend Into Built Environments

    [ By SA Rogers in Art & Photography & Video. ]

    body-painting-san-francisco-2

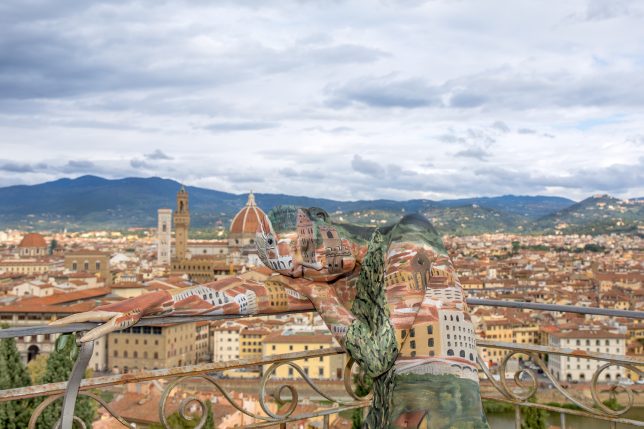
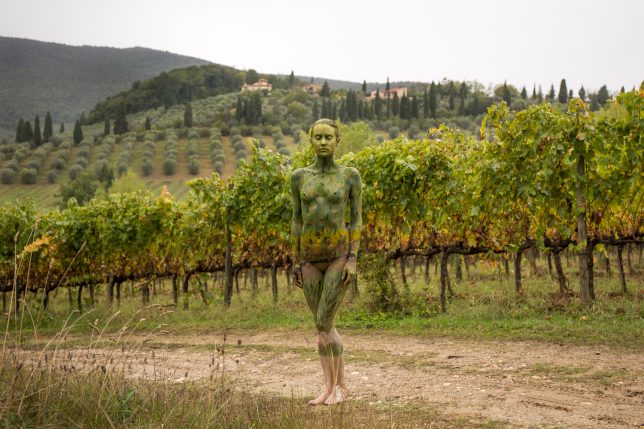
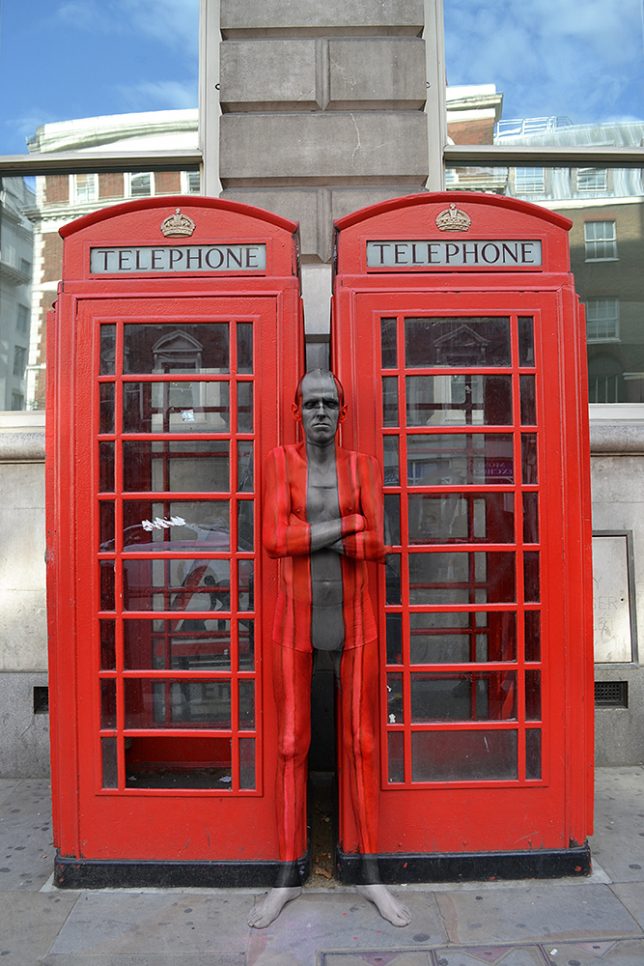
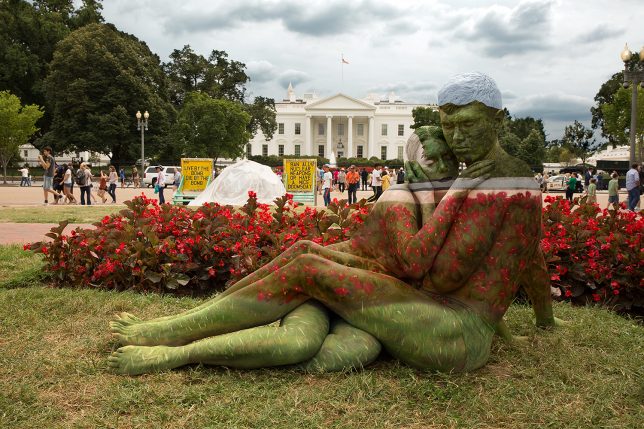
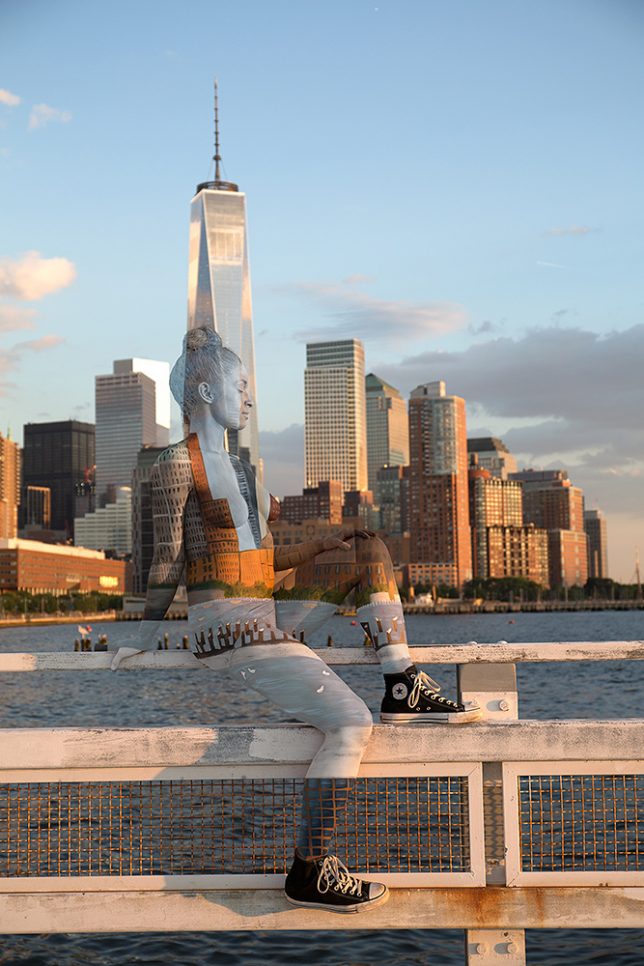
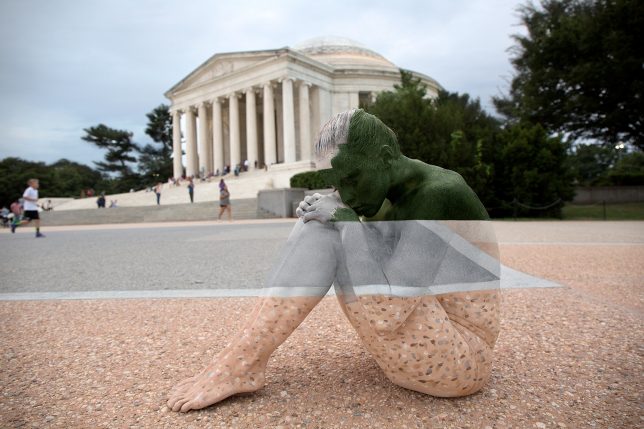
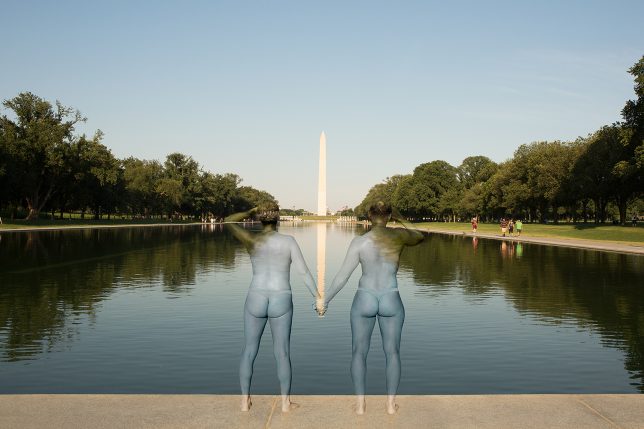
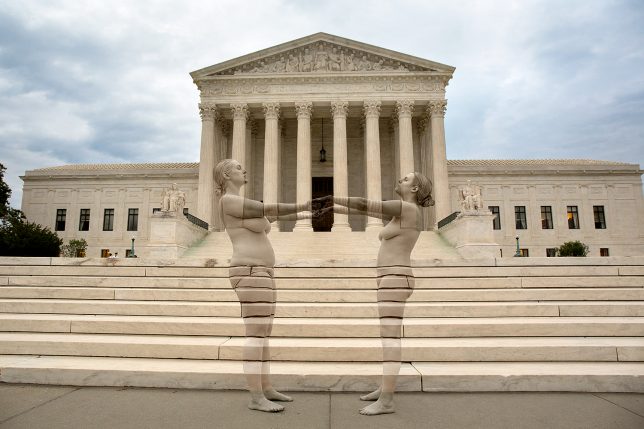
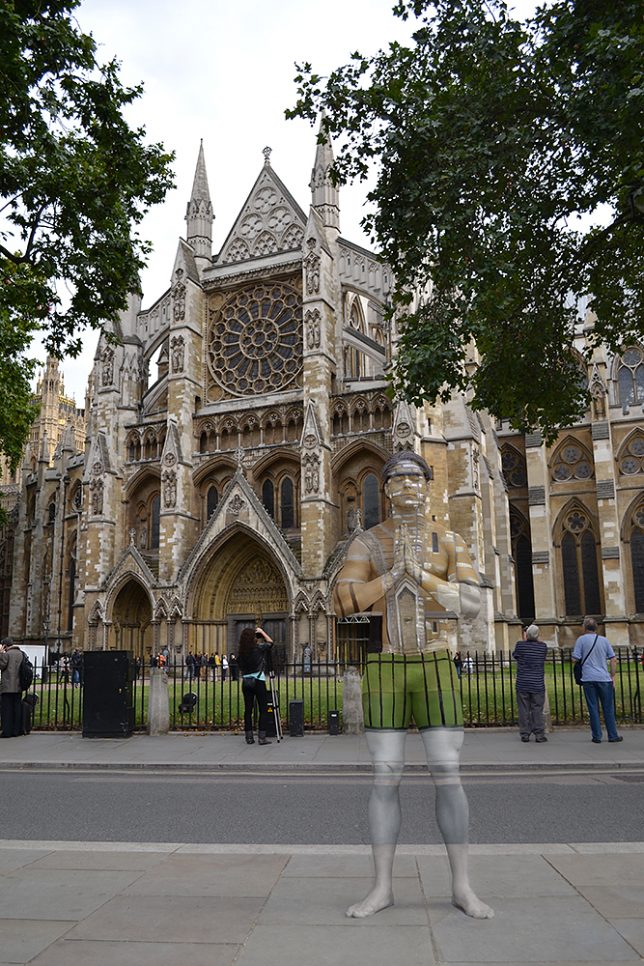
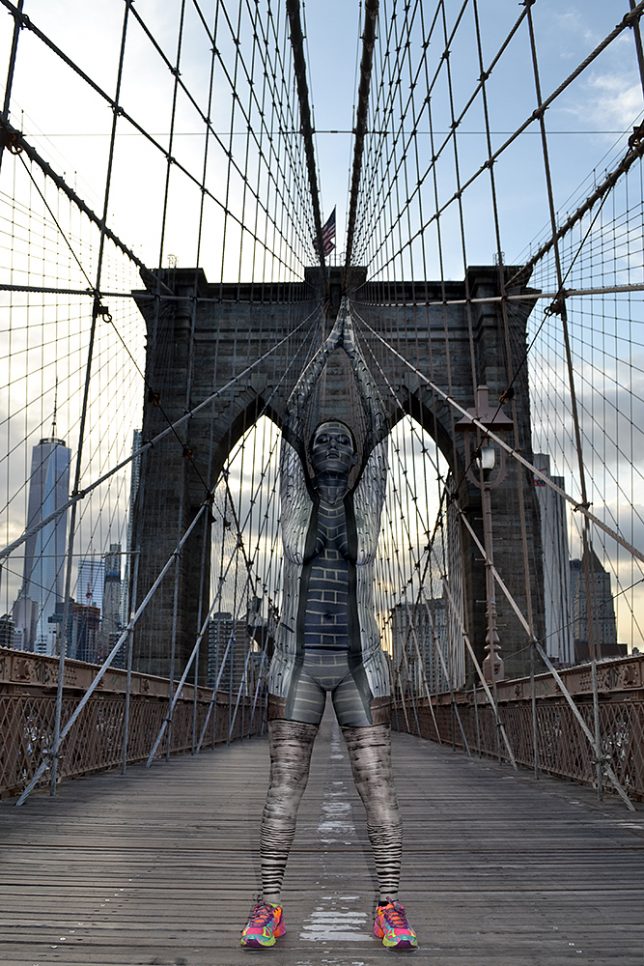
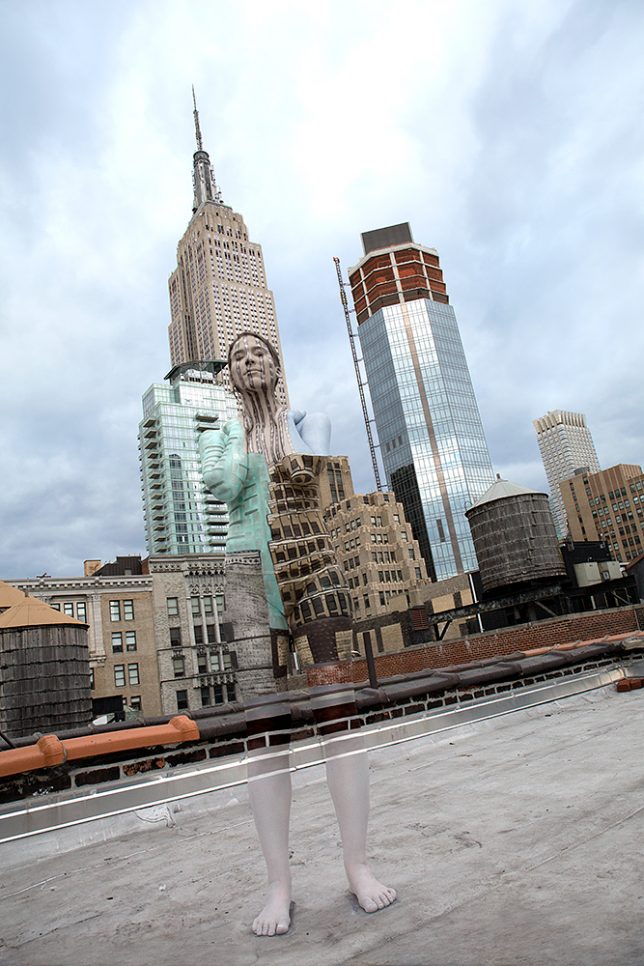
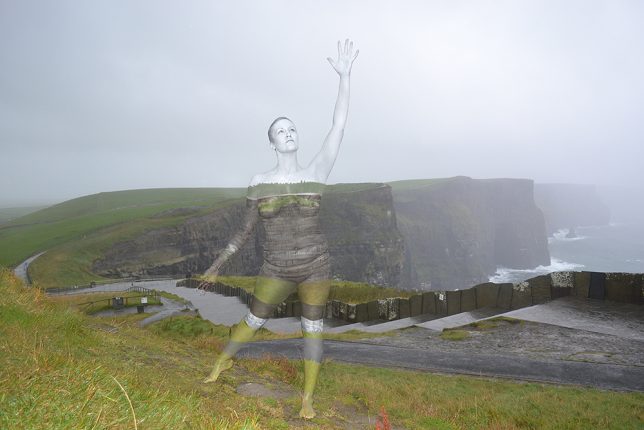
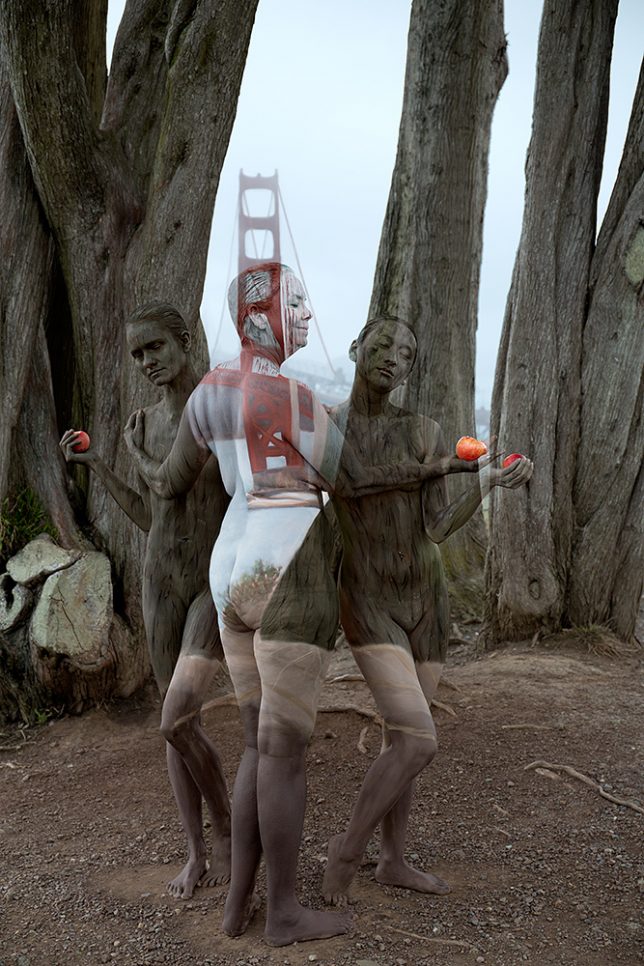
    Nude human bodies seem to melt into their surroundings, expertly hand-painted to match their environments in an artistic form of urban camouflage. Artist Trina Merry dodges traffic, police, pedestrians and inclement weather to capture photographs of her subjects against such backdrops as the Florence skyline, the Washington Monument, the Brooklyn Bridge and Westminster Abbey.

    body-painting-florence

    Artist: Trina Merry - Model: Vitalia Abramova

    body-painting-car

    body-painting-london

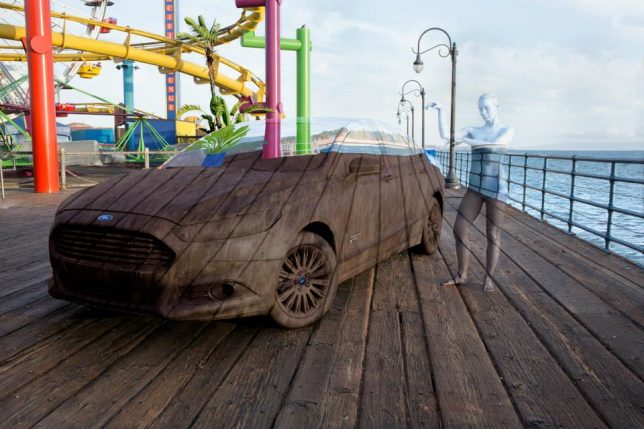
    Typically working guerrilla-style without the permission of authorities in most cases, Merry selects locations that can make a big visual impact and then paints her models in place. Getting all those angles right is no small challenge – the human body is three-dimensional, after all, and nobody can stand perfectly still for very long. But somehow, it all comes together in the final images of Merry’s work.

    sweet-land-of-liberty-body-painting-series-1

    sweet-land-of-liberty-2

    sweet-land-of-liberty-3

    sweet-land-of-liberty-4

    sweet-land-of-liberty-7

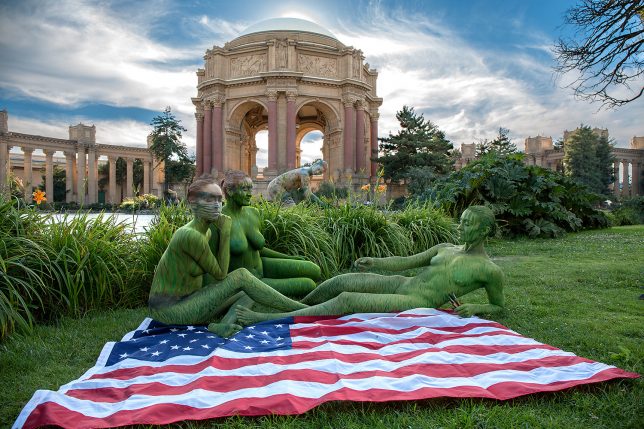
    For her latest series, ‘Sweet Land of Liberty,’ Merry poses subjects in front of iconic patriotic landmarks like the White House and the Lincoln Memorial, asking her audience to think about what we have to be grateful for. Previous projects have been set in cities around the world, along with natural cliffs and meadows of Ireland and studio shoots. Many scenes are made even more complicated by the use of several models, contorted to create specific shapes. Some incorporate larger objects, like entire cars, as in a commission for Ford.

    body-painting-london-2

    body-painting-new-york

    body-painting-new-york-2

    body-painting-ireland

    body-painting-san-fracisco

    “Body paint is an ancient art form and the use of ochre on the skin dates back 425,000 years and has a deeper part in all of our cultures than people tend to realize,” says Merry. “Painting on the body is a distinctly human experience; it creates a special connection to a person that other visual art forms have trouble accomplishing. This work has a heartbeat and a breath – it is dynamically alive. The ephemeral nature of body paint forces focus and reflects on the reality of existence, which is an incredible thought that I find myself reflecting on frequently while working.”

    Share on Facebook


    [ By SA Rogers in Art & Photography & Video. ]

    [ WebUrbanist | Archives | Galleries | Privacy | TOS ]


    WebUrbanist

  • Syrp introduces Super Dark 5-10 stop variable ND filter

    Accessories brand Syrp has announced a new variable neutral density filter that will appeal to those who like to create very long exposures. The Syrp Super Dark Variable ND Filter operates between five and ten stops (ND32 to ND1024) and provides stop-markings on the rings so photographers can measure exactly how much light they are cutting out.

    The company says it has reduced the range of densities the filters create to avoid the ‘X’ interference effect that is common with one to ten-stop filters. The filter can only be rotated within ‘safe’ limits, and Syrp has used ‘hard stops’ to prevent the forward ring being turned too far.

    The filters come in 67mm and 82mm sizes, and each is packed with a pair of step-up rings to allow them to fit to smaller lenses. The forward ring of each is also threaded so further screw-in filters can be stacked in front of them, and the bezel is moulded to allow a regular lens cap to be fitted.

    The filters cost $ 169 for the 67mm version and $ 209 for the 82mm version, and both come with a protective leather zip-up holder. For more information see the Syrp website.

    Manufacturer information

    Introducing the New Super Dark Variable ND Filter!

    With 5-10 stops of adjustable exposure control, the Syrp Super Dark Variable ND Filter is a must-have tool for any photographer’s gear bag and is available for pre-order from today, with a planned shipping date of the 15th of December. The Super Dark is available in two sizes and includes hard stops at the minimum and maximum ends for reducing X-pattern.

    Long exposures are fundamental to landscape photography as they capture the effect of time passing, giving your images an expressive and often surreal look. They also add a creative element to your time lapses making them more fluid and giving them a dreamy effect. Silky smooth waterfalls or glassy lakes can be captured in full day light with just a simple twist of the filter to allow you to slow your shutter speed and record long exposures.

    Both the Small and Large Filter Kits come with a genuine leather carry case to house the filter and ensure it stays protected from dust and scratches. Our Super Dark Variable ND Filter provides exposure reduction of 5 (ND32) to 10 (ND1024) stops using a smooth, adjustable front ring. The filter also has a front thread so you can easily stack filters if needed and will fit your regular lens cap.

    Included in each Filter Kit are two step up rings for maximum compatibility with the range of lenses in your kit. The Large Kit (82mm) has 77-82mm and 72-82mm rings and the Small Kit has 58-67mm and 52-67mm rings. An invaluable tool for time-lapse, the Super Dark creates a more natural and fluid transition between frames, reducing the appearance of moving elements’ flickering and stuttering.

    Articles: Digital Photography Review (dpreview.com)

  • Zeiss ExoLens PRO lens lineup updated with support for iPhone 7 phones

    $ (document).ready(function() { SampleGalleryV2({“containerId”:”embeddedSampleGallery_6073214240″,”galleryId”:”6073214240″,”isEmbeddedWidget”:true,”standalone”:false,”selectedImageIndex”:0,”startInCommentsView”:false,”isMobile”:false}) });

    Zeiss has announced a new ‘Edge’ bracket that brings iPhone 7 family support to the maker’s ExoLens PRO with Optics by Zeiss smartphone lenses. The bracket features half a dozen device inlays that support both the iPhone 7 and the iPhone 6 phones, as well as a cold shoe mount for attaching secondary accessories such as lighting instruments.

    According to Zeiss, a bracket specifically for the iPhone 7 and the ExoLens optics is available now from camera stores, as well as a wide-angle ‘accessory lens.’ The Edge bracket, meanwhile, will be available at camera stores starting in the end of January. The company recommends that iPhone 7 Plus owners use either the ExoLens PRO Macro-Zoom or Wide-Angle lenses since the device already offers a 2x telephoto camera, however, all of the lenses are said to be ‘generally compatible.’

    The iPhone 7 bracket is available now for $ 59.95 / €64.95, and the Edge bracket will be available starting next month for $ 49.95 / €59.95. The Wide-Angle lens recommended for the iPhone 7 Plus is $ 149.95 / €179.95, and the Macro-Zoom lens is $ 149.95 / €179.95.

    Via: Zeiss

    Articles: Digital Photography Review (dpreview.com)

  • Future Cities: 13 Fresh New Visions for Residential Towers

    [ By SA Rogers in Architecture & Houses & Residential. ]

    spire-london-main

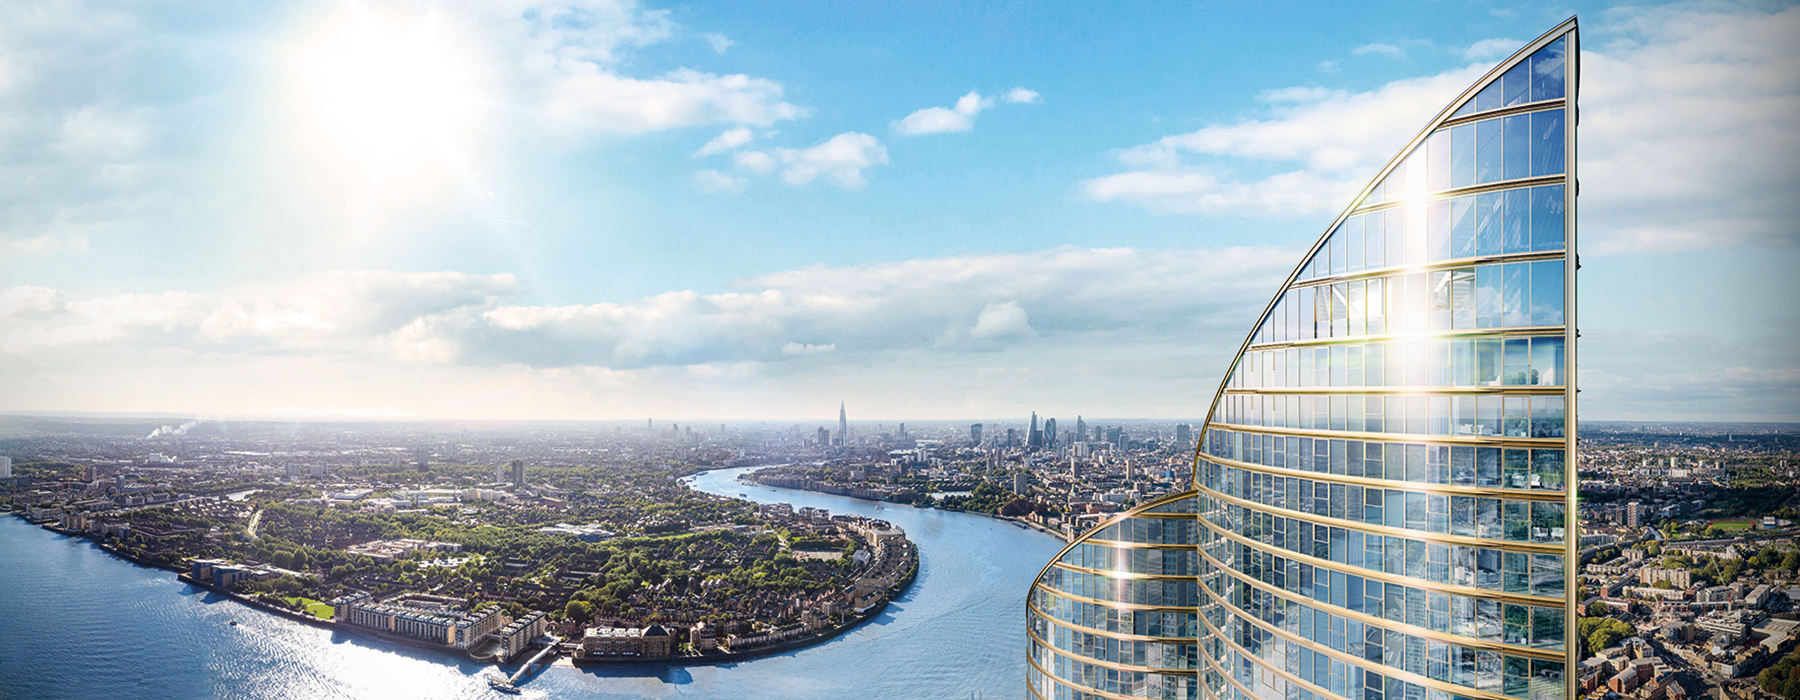
    The future of urban living (at least for the wealthy) is looking pretty lush, with residential towers finding new and creative ways to incorporate greenery, maximize views and give residents the feel of a spacious suburban backyard hundreds of feet in the air. As unrealistic as some of the renderings have looked, these towers are becoming a reality, with many set to be completed in 2017.

    Fake Hills by MAD Architects, Beihai, China

    residential-towers-fake-hills

    residential-towers-fake-hills

    residential-towers-fake-hills-3

    residential-towers-fake-hills-4

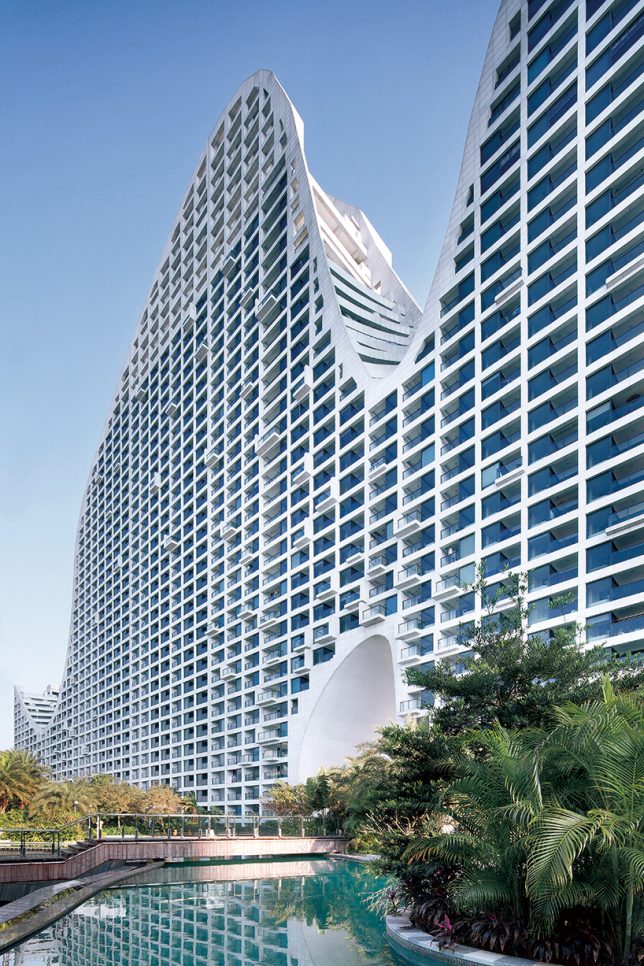
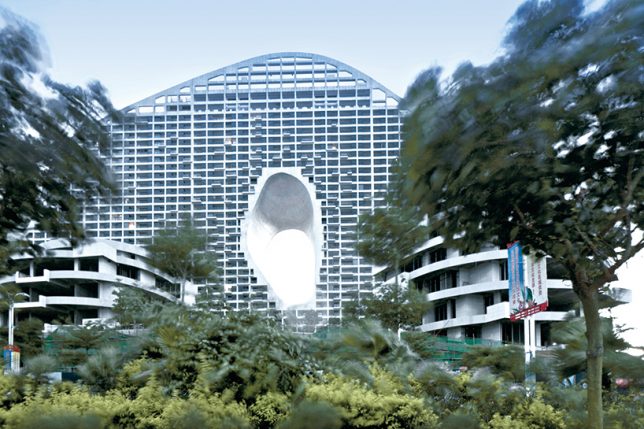
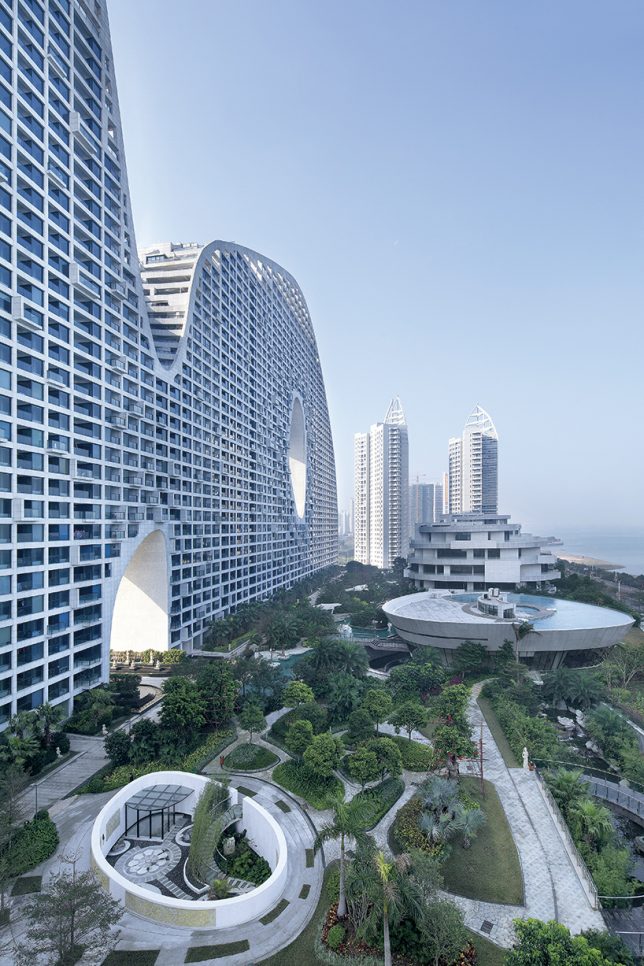
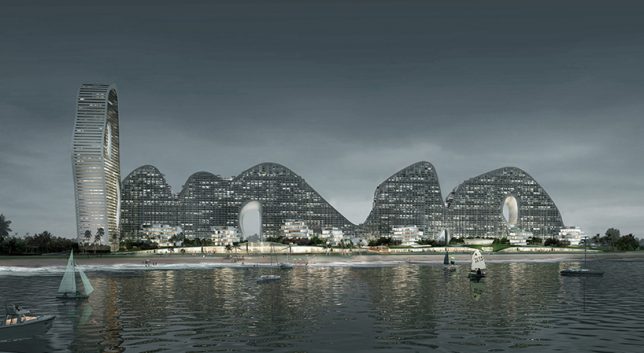
    One of those renderings that looked too fantastical to be real, ‘Fake Hills’ by MAD Architects is almost fully complete in the coastal Chinese city of Beihai. The development is part of a planned, built-from-scratch city featuring dense housing in architecturally innovative form along with a lush green landscape. The continuous roof platform running along the top will eventually be planted with gardens, too, and feature tennis courts and swimming pools.

    Grove at Grand Bay by BIG, Miami

    residential-towers-big-1

    residential-towers-big-2

    residential-towers-big-3

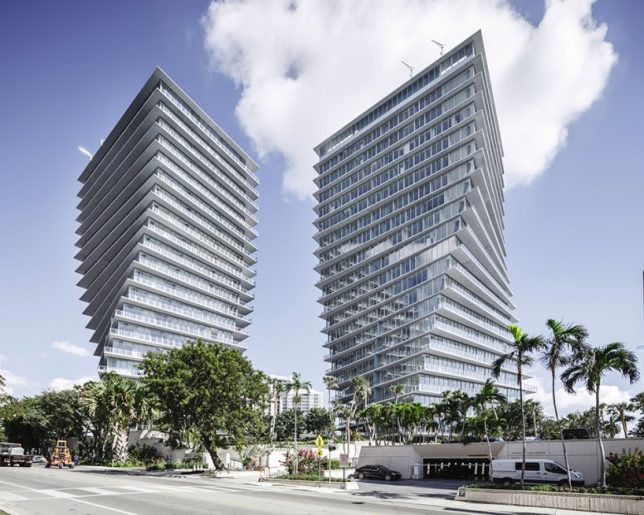
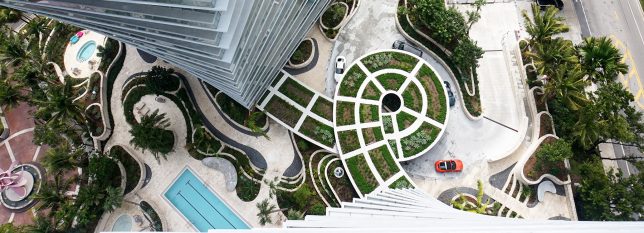
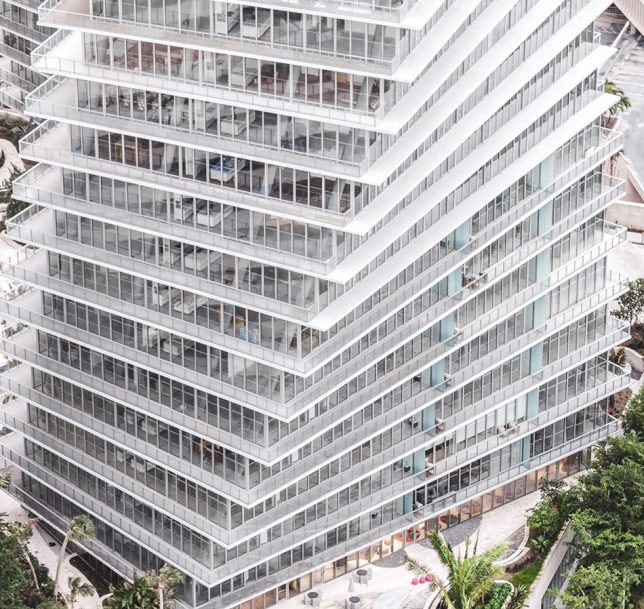
    BIG’s recently completed ‘Grove at Grand Bay’ in Miami is true to its renderings, down to the undulating planted areas at the base. The pair of twisting towers is actually a luxury ‘low density’ project featuring 98 units topped with dual level penthouses and containing seven swimming pools, a spa and fitness center, and an on-site art gallery in what could be perceived as stacked mansions for a dense urban setting.

    Gridded Residential Tower by C.F. Møller and Brut, Antwerp

    residential-tower-gridded-1

    residential-tower-gridded-2

    residential-tower-gridded-3

    residential-tower-gridded-4

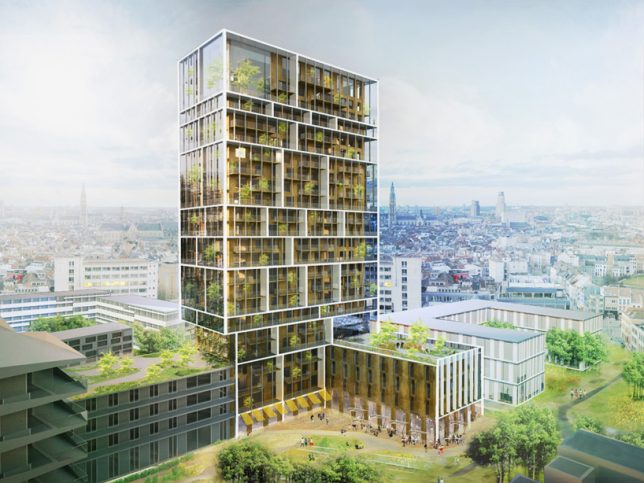
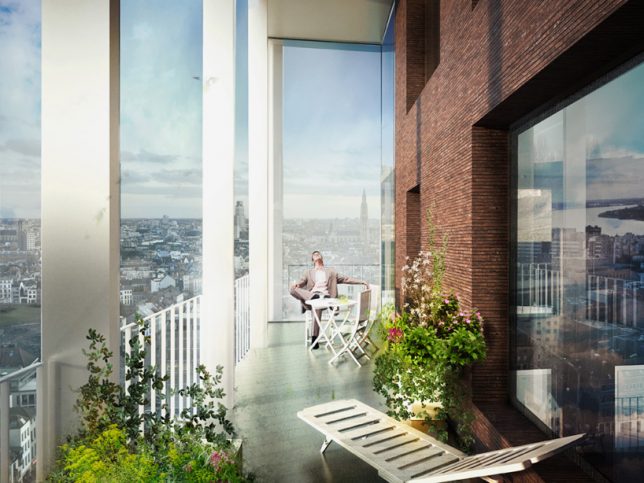
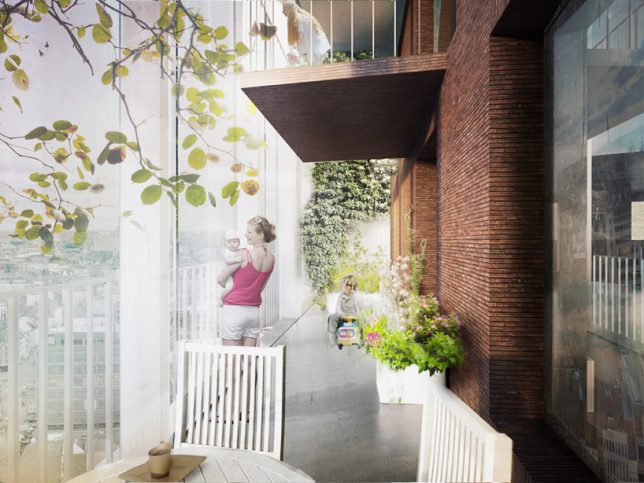
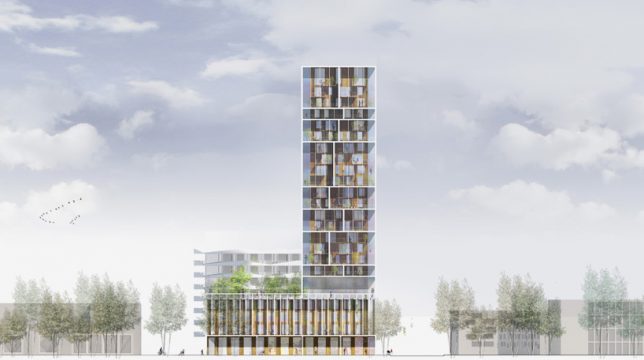
    This ‘vertical community’ by C.F. Møller is a residential and mixed-use tower that was “developed from the inside out,” placing an emphasis on social qualities, aiming for a suburban quality of life. The 24-story complex contains 116 homes, retail outlets, offices and communal areas, including enclosed winter gardens at each end of the tower and a shared 5th floor facility with a landscaped roof terrace. The envelope of the structure contains balconies enclosed within glass, spacious enough for kids to play.

    Farmanieh Residential Tower by ZAAD Studio and Marz Design, Tehran

    residential-tower-zaad-1

    residential-tower-zaad-2

    residential-tower-zaad-3

    residential-tower-zaad-4

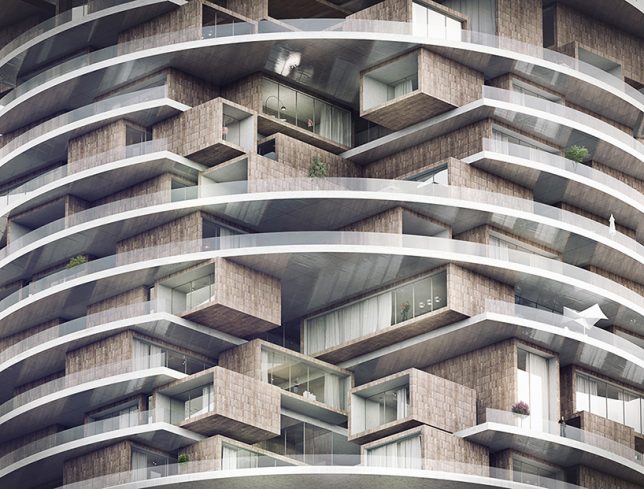
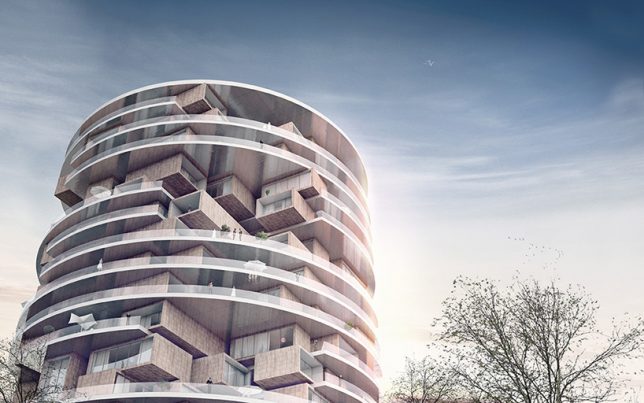
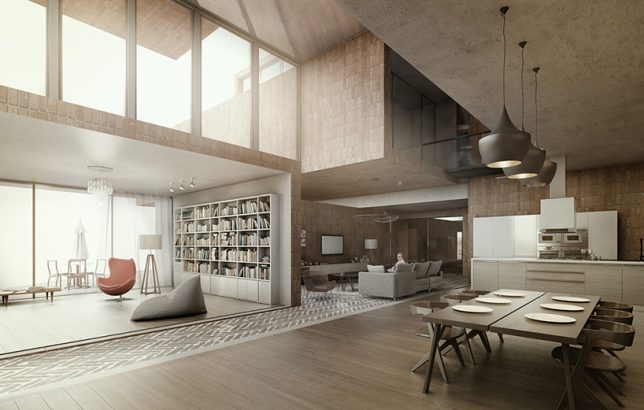
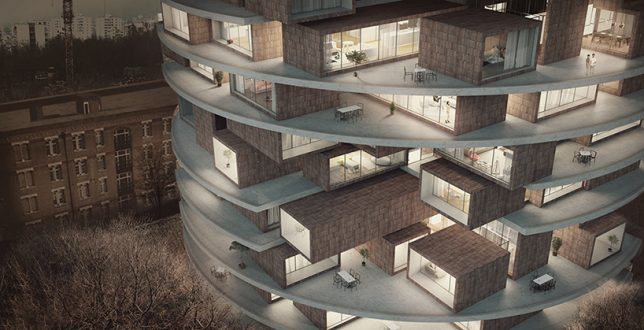
    The form of this residential tower by ZAAD is pretty unusual, featuring a series of modular units wedged between stacked circular platforms to create a patchwork of indoor and outdoor areas. Also set to the scale of a suburban home, the units offer a comfortable living environment and highly varied views of the city intermixed with spacious terraces.

    Vertical Forest Tower by Stefano Boeri, Lausanne

    residential-tower-vertical-forest

    residential-tower-vertical-forest-2

    residential-tower-vertical-forest-3

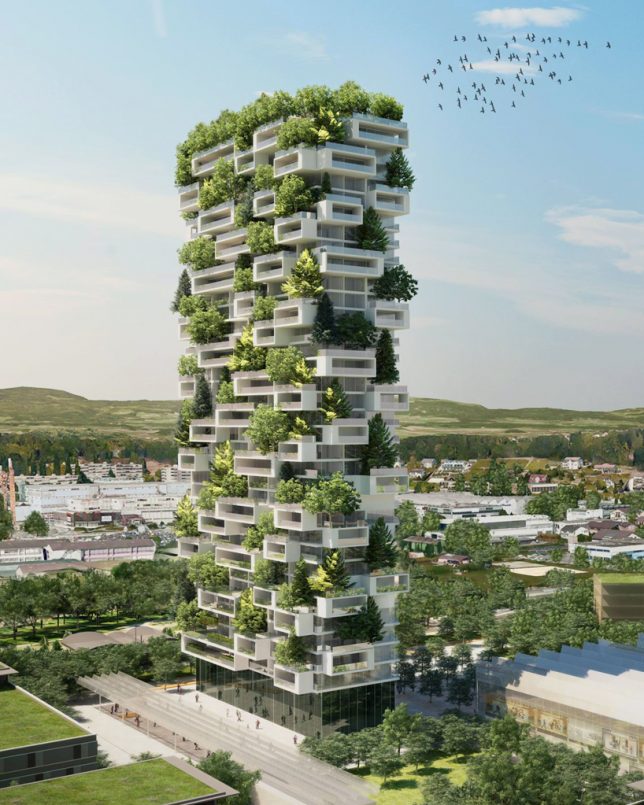
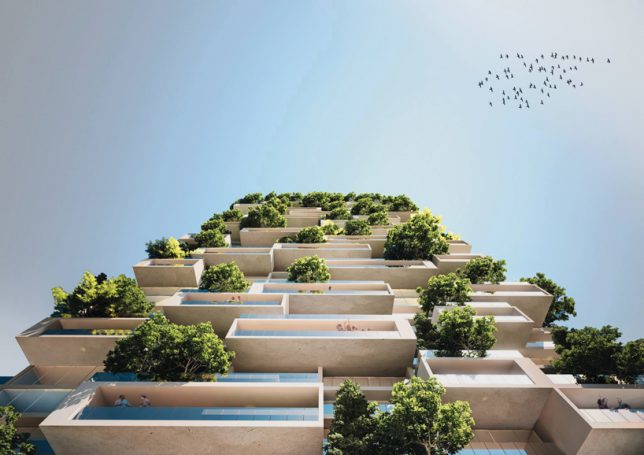
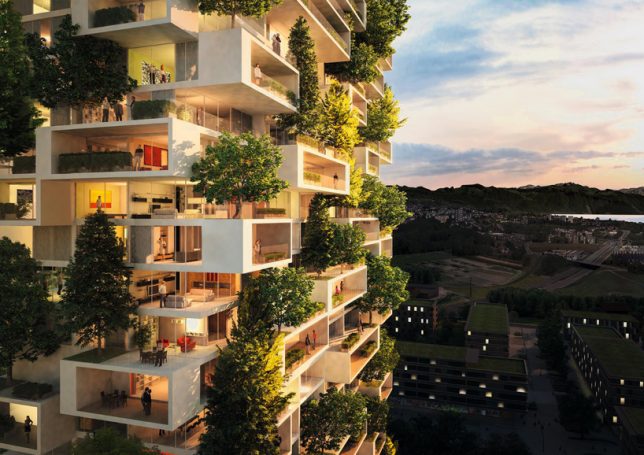
    Critics have questioned whether this ‘vertical forest tower’ by Stefano Boeri is an ‘Alice in Renderland’ kind of concept, especially considering that the trees pictured along the peripheral areas of the structure would need a much deeper root system and lots more soil than the design allows. The vision of such large-scale greenery seems pretty unrealistic, especially given the high demand for water and the inevitable strain on the supporting structures. But we’ve been surprised before, and the tower is under construction with a completion date set for 2017, so we’ll soon find out.

    Next Page – Click Below to Read More:
    Future Cities 313 Fresh New Visions For Residential Towers

    Share on Facebook


    [ By SA Rogers in Architecture & Houses & Residential. ]

    [ WebUrbanist | Archives | Galleries | Privacy | TOS ]


    WebUrbanist

  • Medium-format meets the modern age: Hasselblad X1D-50c shooting experience

    Hasselblad’s X1D-50c caused quite a stir when it was announced over the summer, as its mirrorless design and relatively tiny size defied what we thought we understood about the relationship between sensor size and body bulk in digital cameras. All previous digital medium-format models, other than the Leica S series, have been DSLRs with spacious mirror box housings and forward projecting architecture, but the X1D-50c breaks that mold and harks back to the Mamiya 7/Bronica RF compact rangefinder style. More exciting perhaps is the adoption of the features that we associate with mirrorless compact system cameras, such as touch focusing and an electronic viewfinder, that bring this usually lumbering format into the modern age.

    Although the price of the system is higher than those centered around 35mm-style DSLRs, it is also a good deal less than we have come to associate with the 6×4.5cm digital format. The combination of the X1D’s design, features and price made the camera popular immediately. Hasselblad has said that it took more orders in the first ten days than it had expected to take for the year – but now, of course, it has to actually deliver the product to those who pre-ordered it. My understanding is that it is almost ready and I’ve been able to shoot for a short while with the latest pre-production X1D with a 45mm F3.5 lens.

    The camera itself is finished but the firmware is still being added to and refined. As such, this article should give you a good general idea of what the camera will be like when it is all done and a pretty clear idea of the image quality we can expect from the finished product.

    Body and handling

    The Hasselblad X1D-50c isn’t all that much bigger than a Panasonic Lumix GH4 and it will displace less water than the Nikon D810 (don’t try that at home). Size-wise, then, it feels very much like a standard DSLR. The grip is well pronounced which makes the camera very comfortable to hold and to carry, and which makes it feel secure in the hand. The controls feel quite chunky, deliberate and designed to reduce the chances of pressing something by accident. Although the dials are in slightly different places it seems as though they and the shutter release button came out of the same parts bin as those used on the H6D body. These exaggerated features lend the X1D-50c the feel of a big camera but without the size.

    I’m pleased Hasselblad has adopted new buttons for the top plate instead of the slightly spongy ones used around the info panel LCD of the H6D, and it has changed the feel of those running down the side of the rear screen. The exterior of the body houses only nine control buttons plus a depth of field preview and the on/off button, so the space feels un-cluttered and simple to navigate.

    The menu system is very much the same as that used in the backs for H6D, with bold icons and a large shouting print that will require reading glasses less often than the GUIs of most DSLRs. All the features are activated by touch and options can be scrolled through using the touch screen or the traditional control wheels.

    Those used to traditional DSLR and CSC menus might find that of the X1D-50c sparsely populated when it comes to features and options – and it is. The menu will be gradually fleshed out as Hasselblad develops the camera, but don’t expect it to have the same number of options as a regular DSLR.

    The 3″ rear LCD is clear and bright, and its 920k-dot resolution makes the display useful when focusing manually. The EVF is also very clear and its 2.36 million-dot display feels very detailed. The firmware version I was using didn’t allow playback in the viewfinder so I couldn’t check to see what that would look like, but Hasselblad tells me that will be coming soon in a further update.

    Articles: Digital Photography Review (dpreview.com)

  • Time Machines: Langdon Clay’s Gritty Cars Of New York City

    [ By Steve in Art & Photography & Video. ]

    langdon-clay-cars-10

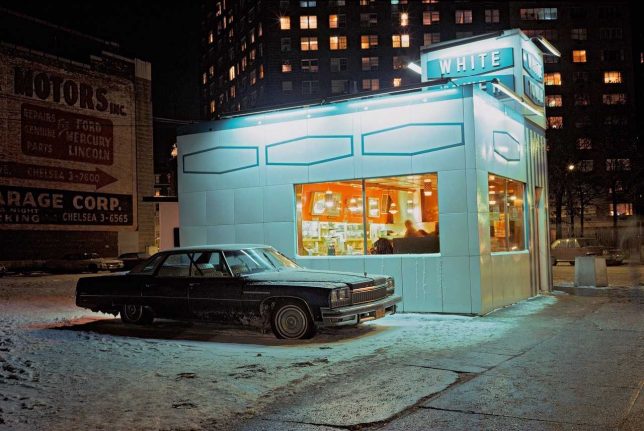
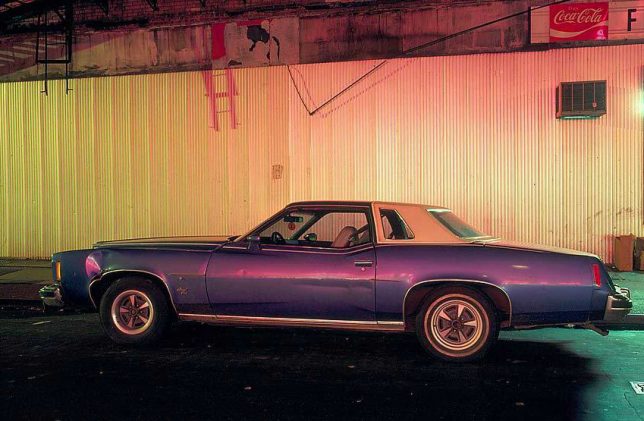
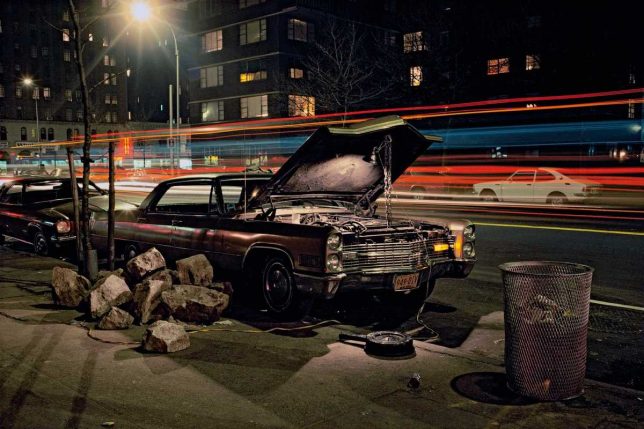
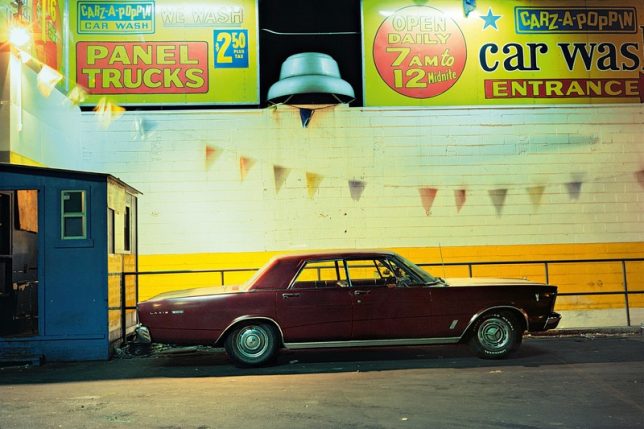
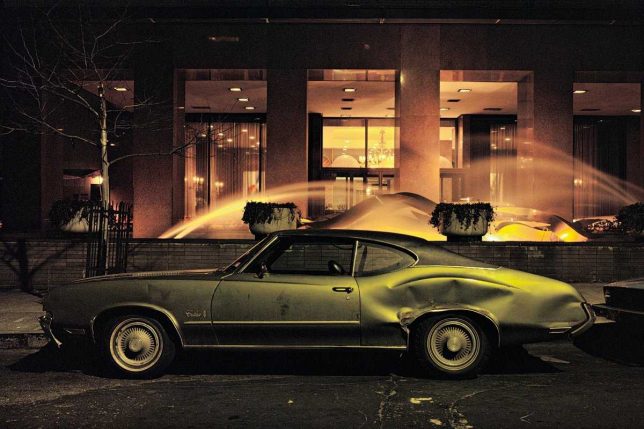
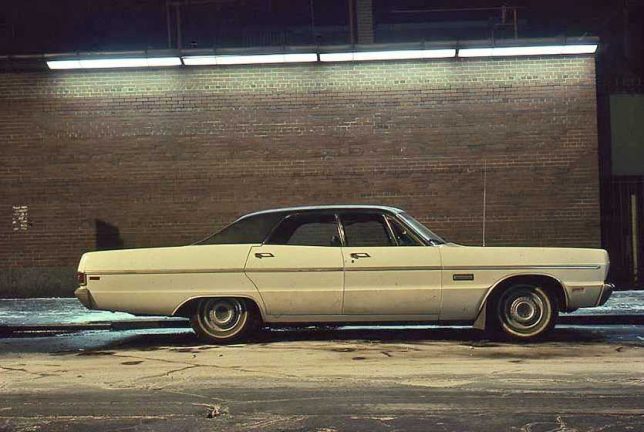
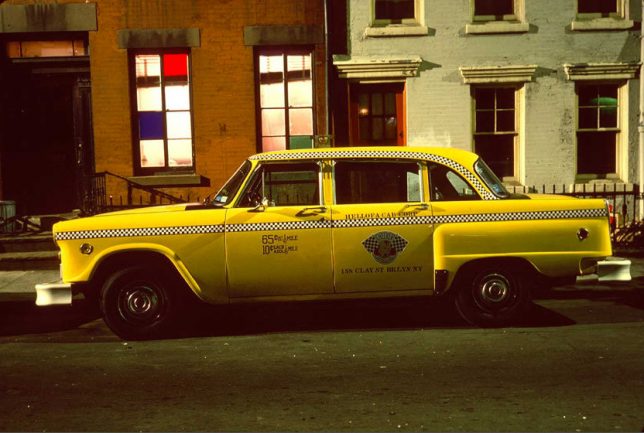
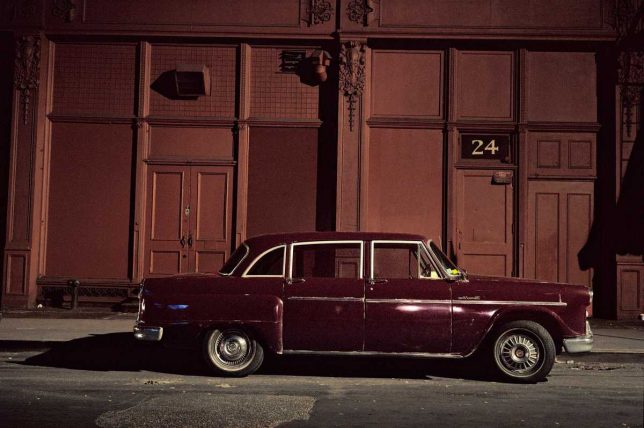
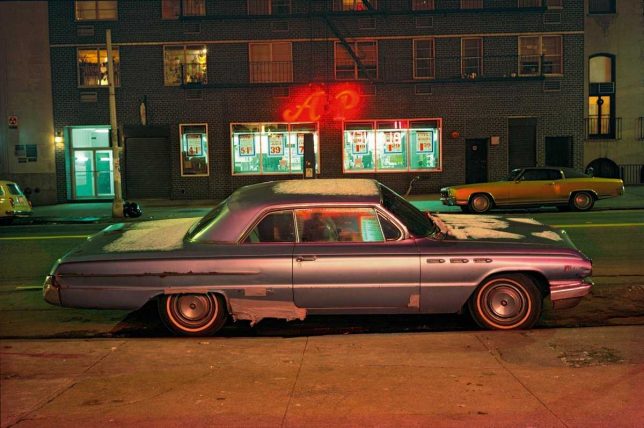
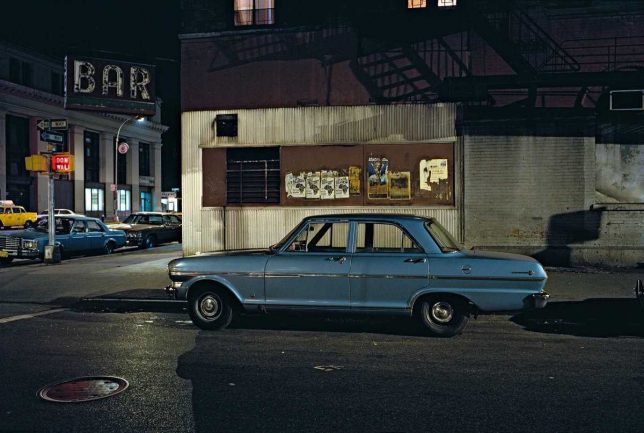
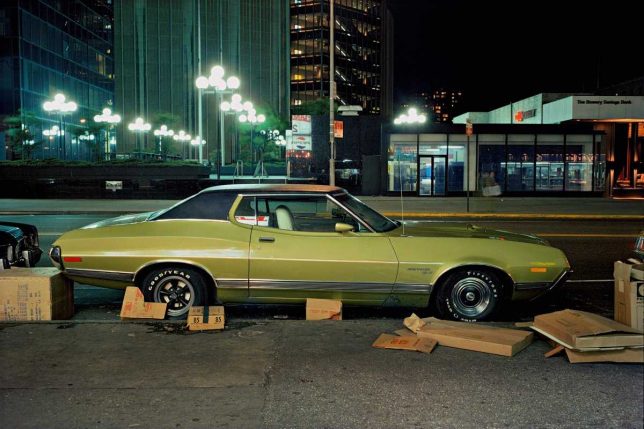
    Photographer Langdon Clay captured New York‘s bruised & battered road warriors at rest, evoking a dirtier and more dangerous era of the city that never sleeps.

    langdon-clay-cars-18

    langdon-clay-cars-11

    New York City in the 1970s was a city on the slippery slope to disaster; a major metropolis whose decline into bankruptcy, pervasive corruption and rampant crime portended a grim dystopian future fit for the likes of Snake Plissken. Armed with only his trusty Leica camera and rolls of Kodachrome film, Langdon Clay ventured into the Big Apple’s littered streetscapes, finding a fitting iconography for troubled times amongst the oft-filthy and snow-encrusted parked cars sheltering under the unforgiving glare of sodium-vapor streetlights.

    langdon-clay-cars-13

    langdon-clay-cars-3

    langdon-clay-cars-7

    Langdon Clay, a native of NYC born in 1949, grew up in New Jersey and Vermont before moving back to the city of his birth in 1971. Like many photographers of the era, Clay cut his teeth on black and white composition but once immersed in New York’s unique urban milieu, inspiration struck. “I experienced a conversion of sorts in making a switch from the ‘decisive moment’ of black and white to the marvel of color,” relates Clay, “a world I was waking up to every day. At the time it seemed like an obvious and natural transition. What was less obvious was how to reflect my world of New York City in color… I discovered that night was its own color and I fell for it.”

    Checkered Past

    langdon-clay-cars-9b

    langdon-clay-cars-9

    From 1974 through 1976, often in winter and always after dark, Clay roamed the streets of New York and nearby Hoboken, New Jersey seeking out likely land-barge subjects. Most – though not all – of his photos depict used and abused Detroit iron of the Malaise Era with a few stubborn survivors of the Space Age tossed in for good measure. Of course, no expose of New York’s cars would be complete without a Checker or two: the pair above includes one once-ubiquitous New York cab and a rarer, privately-owned Checker Marathon.

    Apple Spread

    langdon-clay-cars-6

    langdon-clay-cars-8

    langdon-clay-cars-5

    We’re not sure why it took Clay forty-odd years to publish his collection of mid-seventies car photos… perhaps, like fine wine, a significant passage of time was required to imbue his subjects (and their surroundings) with the flavor of their long-passed era. In the event, “Cars – New York City 1974 – 1976”, published by Steidl, features 96 photographs spread over 132 pages.

    Next Page – Click Below to Read More:
    Time Machines Langdon Clays Gritty Cars Of New York City

    Share on Facebook


    [ By Steve in Art & Photography & Video. ]

    [ WebUrbanist | Archives | Galleries | Privacy | TOS ]


    WebUrbanist