Blog

  • Photojournalists and documentary filmmakers ask camera manufacturers for encryption

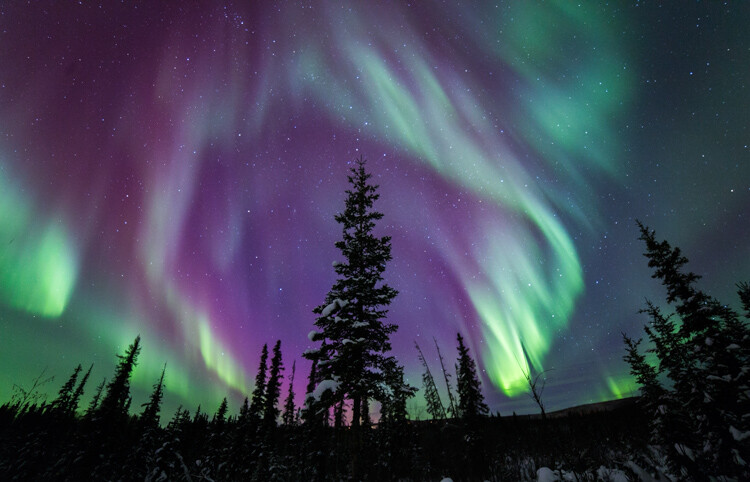
    Photo via UNclimatechange on Flickr. Used under Creative Commons license

    Over 150 photojournalists, filmmakers and media professionals have signed an open letter addressed to major camera manufacturers, asking them to add encryption to their products. While many of the storage devices and computers photographers use to store files offer encryption, the cameras themselves do not. 

    The letter points out that when a photojournalist’s camera or memory card is stolen or confiscated, which happens regularly, their footage and images are left exposed and vulnerable, potentially putting the photographer and their sources in real danger. Encryption is commonplace in smartphones, messaging apps and many operating systems, but not in image capture devices or memory cards.

    The letter is addressed to Canon, but the Freedom of the Press Foundation says they’ve sent similar copies to Nikon, Fujifilm, Sony and Olympus. You can see the body of the letter below; head to Freedom of the Press Foundation’s website to see the full list of signees. 

    Dear Canon,

    We, the undersigned documentary filmmakers and photojournalists, are writing to urge your company to build encryption features into your still photo and video camera products. These features, which are currently missing from all commercial cameras on the market, are needed to protect our safety and security, as well as that of our sources and subjects worldwide.

    Without encryption capabilities, photographs and footage that we take can be examined and searched by the police, military, and border agents in countries where we operate and travel, and the consequences can be dire.

    We work in some of the most dangerous parts of the world, often attempting to uncover wrongdoing in the interests of justice. On countless occasions, filmmakers and photojournalists have seen their footage seized by authoritarian governments or criminals all over the world. Because the contents of their cameras are not and cannot be encrypted, there is no way to protect any of the footage once it has been taken. This puts ourselves, our sources, and our work at risk.

    Many technology companies have in recent years embraced encryption technology, often including it in their products and enabling it by default. Indeed, encryption has, in some sectors, become an industry-best practice. Apple’s iPhones encrypt all data stored on them by default, as do many phones running Google’s Android operating system; text messages and voice calls made with WhatsApp, iMessage, FaceTime, and Signal are all protected using end-to-end encryption technology; and laptops and desktop computers running modern versions of Microsoft Windows and macOS encrypt all data stored by default too.

    However, we face a critical gap between the moment we shoot our footage and the first opportunity to get that footage onto more secure devices.

    As filmmakers and photojournalists who value our own safety and the safety of our sources and subjects, we would seek out and buy cameras that come with built-in encryption. Adding these data security features to your product line would give your company a significant competitive advantage over other camera manufacturers, none of whom currently offer this feature.

    Beyond the commercial motivation for adding encryption features, we know your company has commendably committed to corporate social responsibility. Building encryption into your products is not just about helping the filmmakers and photojournalists who buy them, but about making the world a better place. As filmmakers and photojournalists, we use our lenses to hold powerful people to account — and ultimately to change society for the better. Encryption features will allow us to continue to tell the most important stories, from some of the most dangerous places in the world.

    You can help us reach that goal by starting to work towards building encryption into your camera products.

    Thank you for your consideration.

    Signed,

    Over 150 Filmmakers, Photographers, and Media Workers Around the World

    Articles: Digital Photography Review (dpreview.com)

  • Architecture for the People: 10 Subversive and Imaginative Designs for China

    [ By SA Rogers in Architecture & Cities & Urbanism. ]

    pao-shipping-container-pavilion

    Putting architecture into the hands of the people in a country where home ownership is typically out of reach, this studio has some incredibly innovative ideas, from modular units that ‘plug in’ to the envelopes of historic buildings to unexpected uses for cheap and plentiful materials. These 10 projects by People’s Architecture Office explore the convenience of prefabrication, multipurpose objects and the brilliance of simplicity while still offering structures that are bright, fresh, airy and comfortable.

    Courtyard House

    pao-courtyard-house-1

    pao-courtyard-house-2

    pao-courtyard-house-3

    courtyard-house-4

    courtyard-house-5

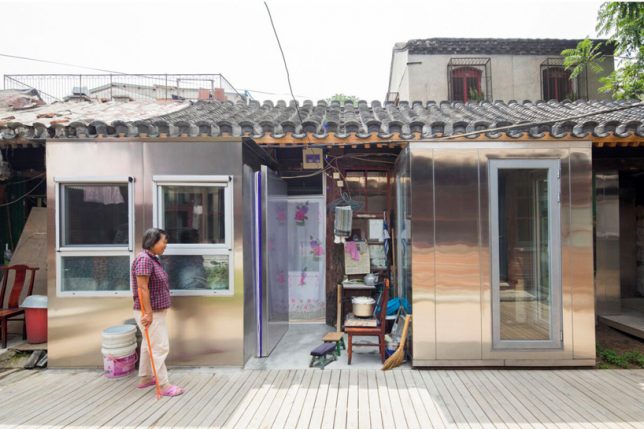
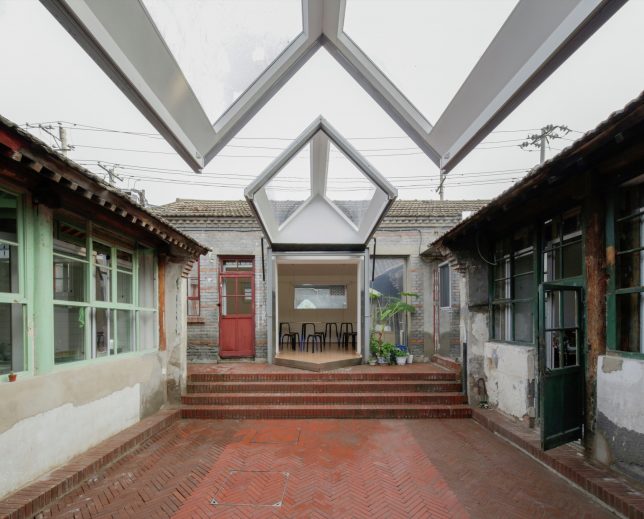
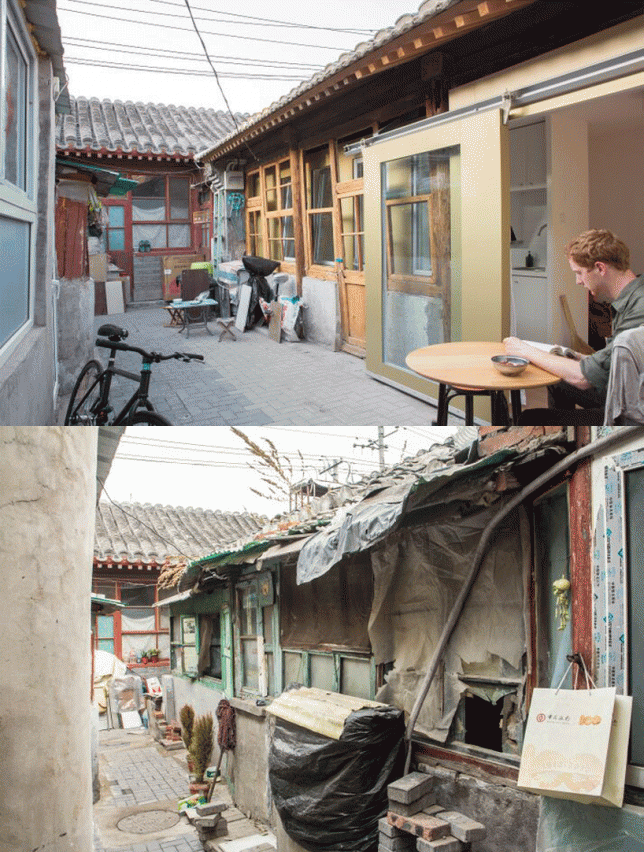
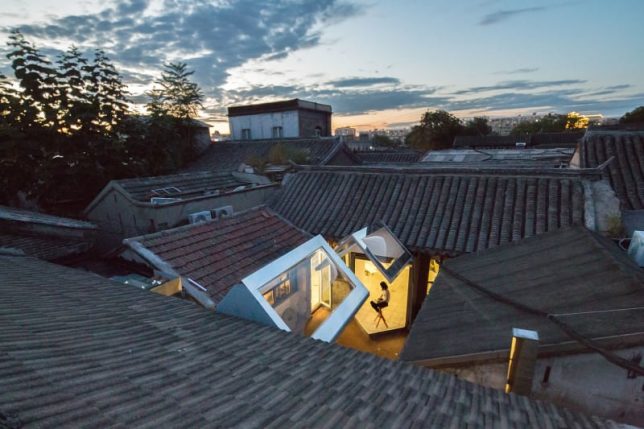
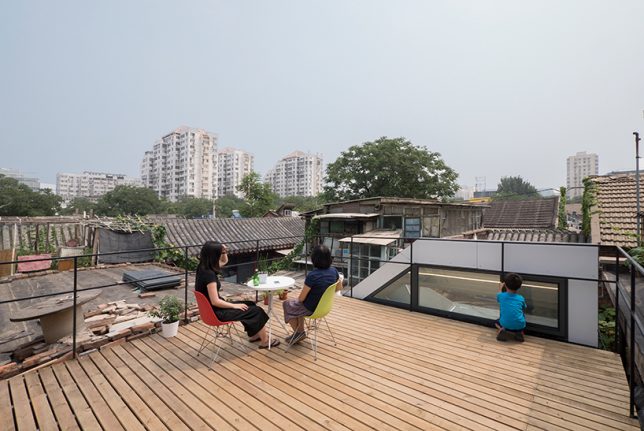
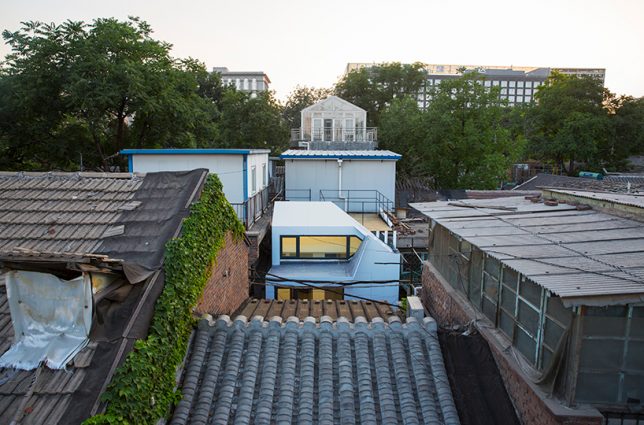
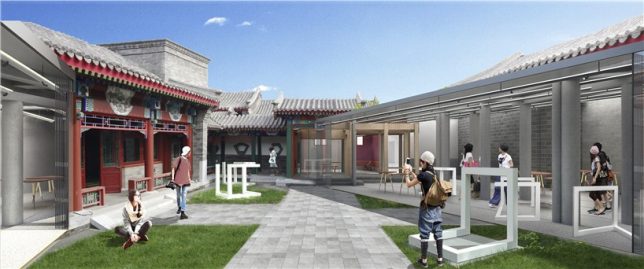
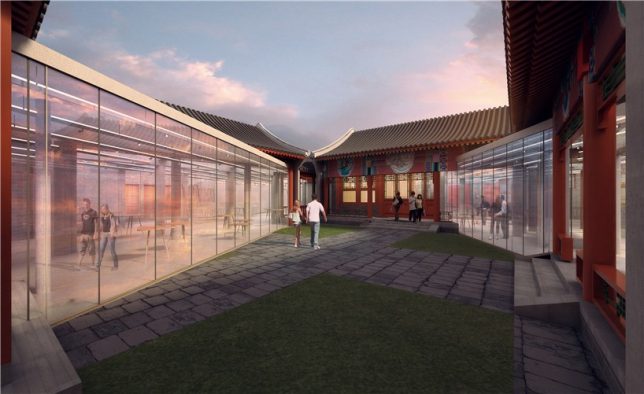
    In Beijing, a whole lot of historic architecture has simply been cast aside in favor of newer, cleaner, more spacious suburban housing. Once-vibrant neighborhoods lacking in simple infrastructure like sewer systems are being left behind and neglected, growing more and more dilapidated. PAO has one solution: modern modular units that simply ‘plug in’ to the existing architecture to make it more livable. In the case of ‘Courtyard House,’ the original buildings are used like an envelope for newer structures that can be quickly, cheaply and easy assembled on-site.

    Plugin House

    pao-plugin-house

    pao-plugin-house-2

    pao-plugin-house-3

    pao-plugin-house-4

    pao-plugin-house-5

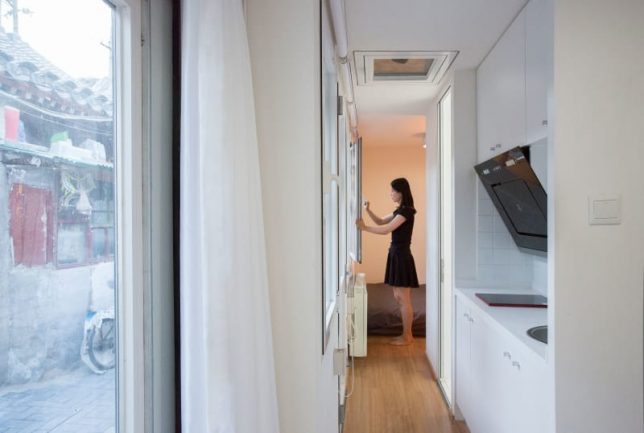
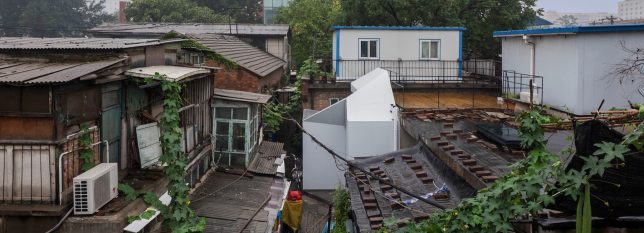
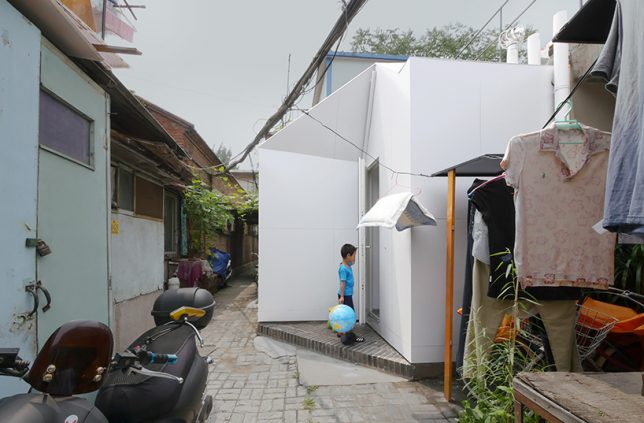
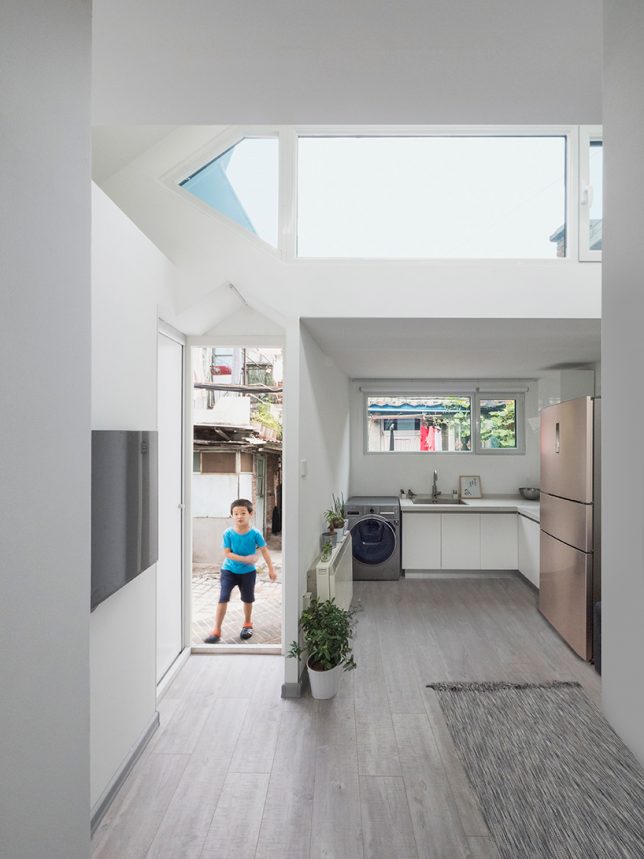
    The firm carried the same concept over to ‘Plugin House,’ which slots onto a tiny, awkwardly shaped plot in a traditional ‘hutong’ alleyway. The prefabricated panels used to create these structures already have insulation, plumbing, windows, doors, wiring, interior and exterior finishes built in, and they snap and lock together with no more than a single hex wrench. People who no prior construction experience can put one of these houses together in 24 hours, and it costs less than $ 10,000.

    Plugin Tower

    pao-plugin-tower

    pao-plugin-tower-2

    pao-plugin-tower-3

    pao-plugin-tower-4

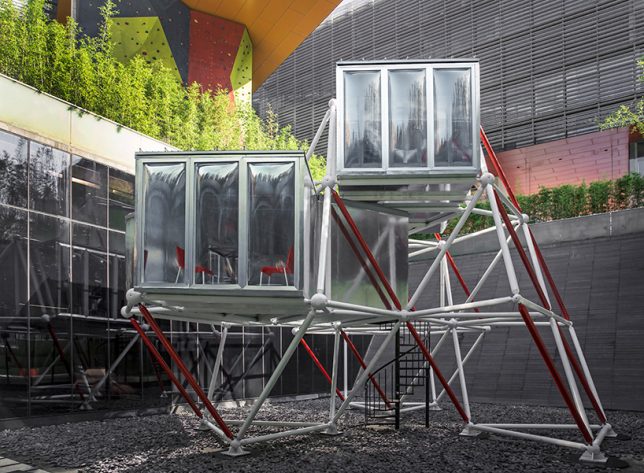
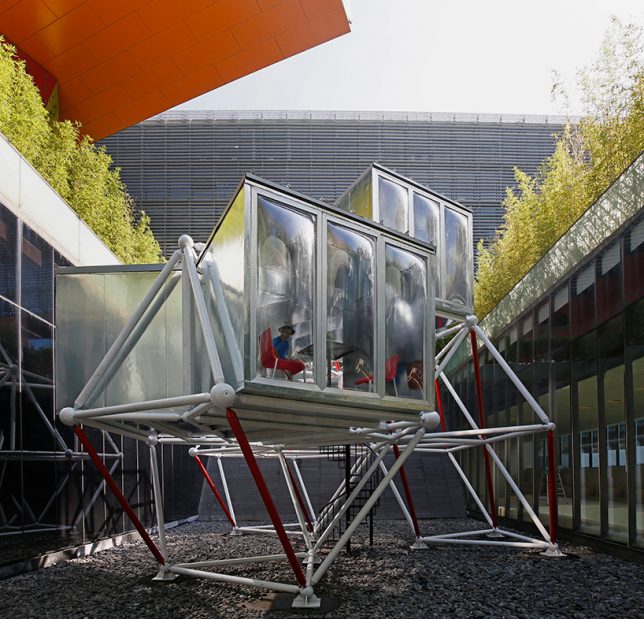
    Plugin Tower is another PAO project that easily fits into existing urban environments, and gets around the difficulty of stable housing in China, where land is held exclusively by the government and building private homes is only affordable to the wealthy. This structure requires no foundation, so it doesn’t need planning approval, and it can be picked up and moved to a new location. The prefabricated steel frame comes in a kit of parts, and the modular living units just plug right in. You can rearrange it however you like and expand it when necessary.

    Container Pavilion

    pao-pavilion-2

    pao-pavilion-3

    pao-pavilion-4

    pao-pavilion-5

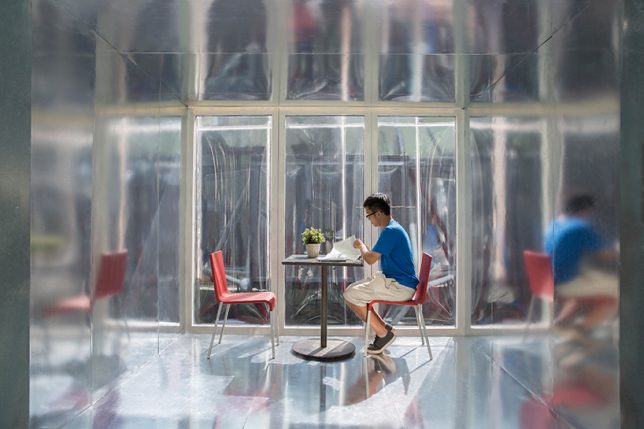
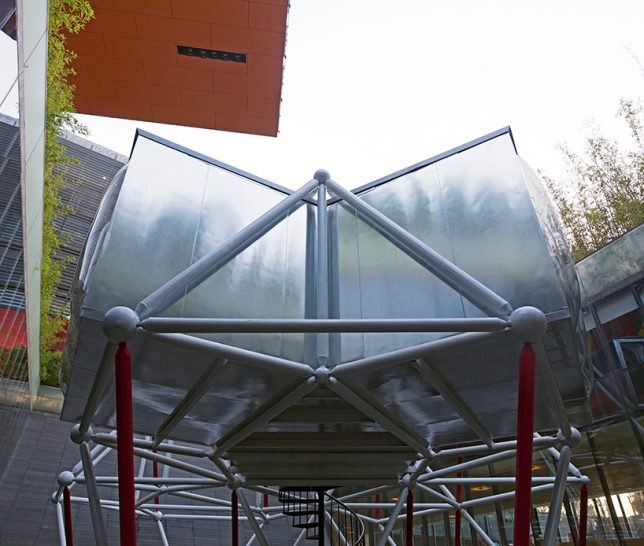
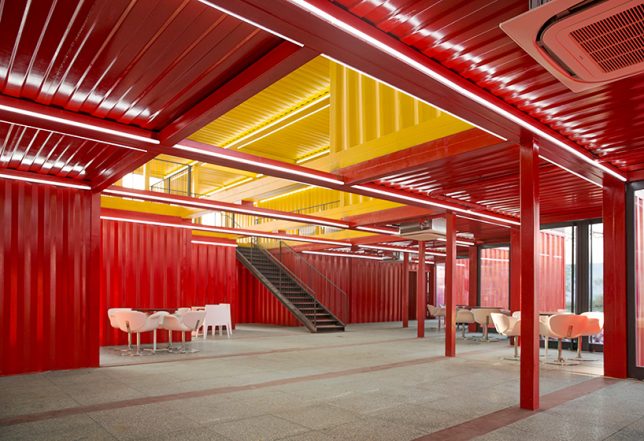
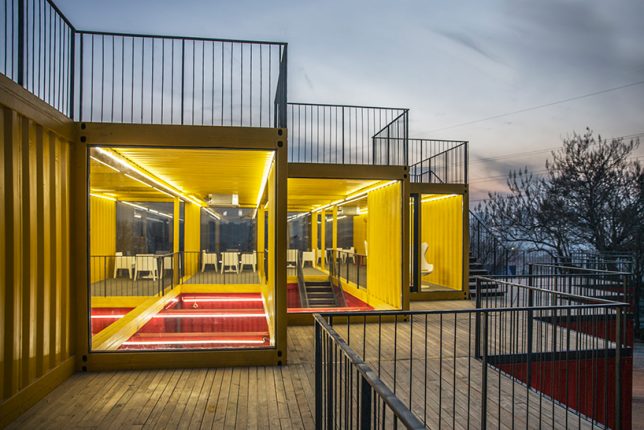
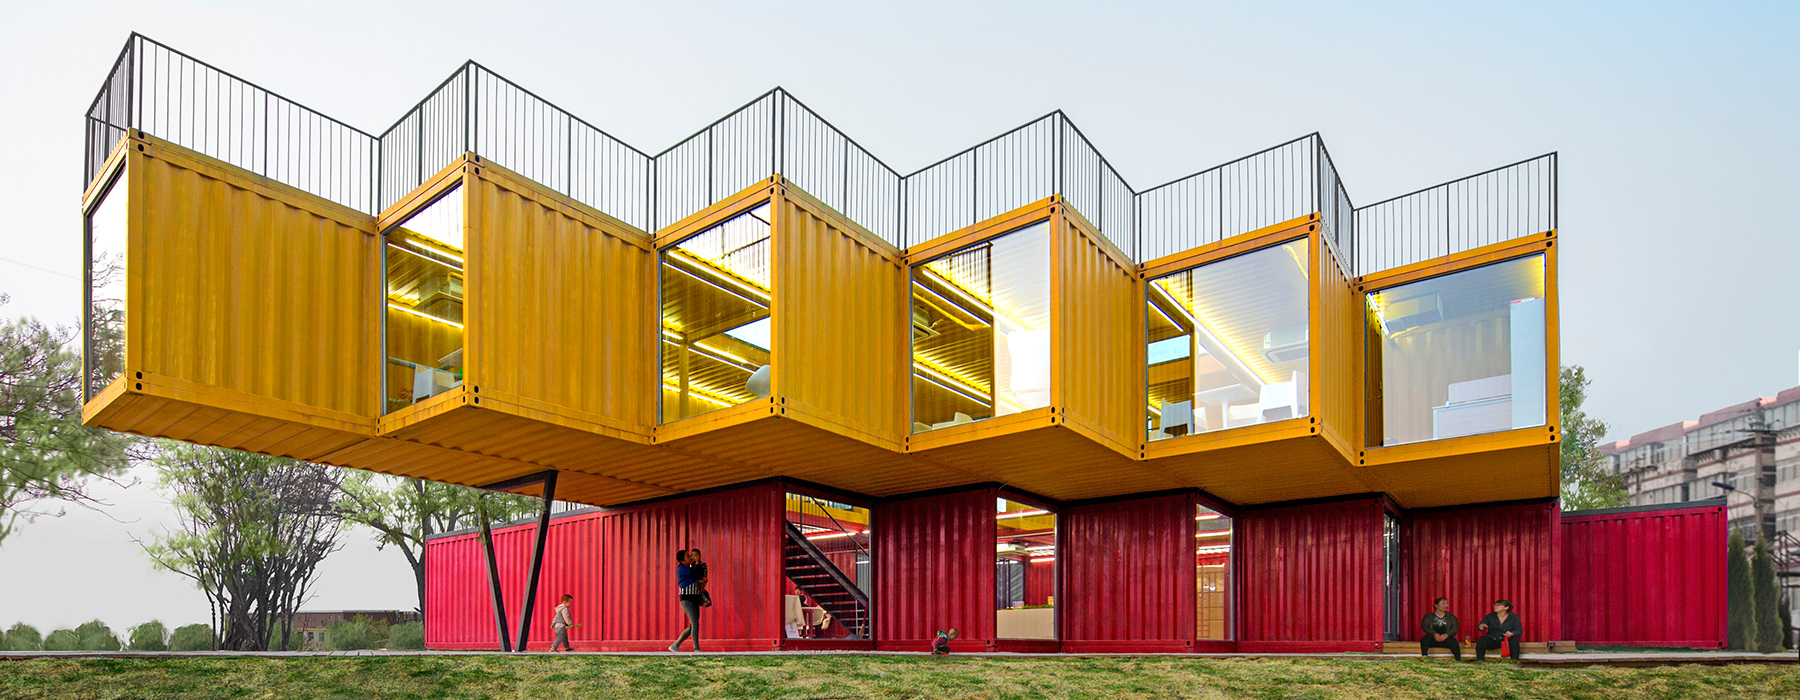
    Shipping containers are cheap, easy to procure, highly stackable, customizable and a breeze to transport, so it’s no surprise that PAO has made use of them. This cantilevered pavilion consists of six yellow units overlapping six red units in a perpendicular arrangement, creating shaded areas on the ground and a series of rooftop recreation spaces. The ends of each unit are glazed for views of the city and sightless through the entire building.

    Hutong Insert: Beijing Culture and Art Center

    pao-beijing-cultural-center

    pao-beijing-cultural-center-2

    pao-beijing-cultural-center-3

    pao-beijing-cultural-center-4

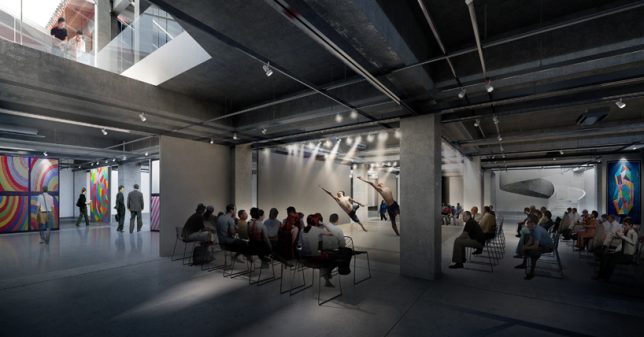
    PAO uses its skills in inserting modular units into historic structures in their proposal for the Beijing Culture and Art Center, set within a traditional hutong house. A competition to design the project called for a solution that would renovate the building while retaining as much of its original character as possible; PAO’s proposal makes it easy to add lots of interior space without disturbing much of the outer structure at all.

    Next Page – Click Below to Read More:
    Architecture For The People 10 Subversive And Imaginative Designs For China

    Share on Facebook


    [ By SA Rogers in Architecture & Cities & Urbanism. ]

    [ WebUrbanist | Archives | Galleries | Privacy | TOS ]


    WebUrbanist

  • Hitch Hiker balanced-motion tripod head boasts smooth, uniform rotations

    A new Kickstarter project is seeking funding for Hitch Hiker, a tripod head said to offer smooth and precise uniform rotations thanks to its ‘balanced-motion’ design. Unlike conventional tripod heads, Hitch Hiker is said to be capable of simultaneous vertical and horizontal motions without the need for clamping or locking to hold a specific position.

    Hitch Hiker is made from CNC-machined aircraft-grade metal with an anodized finish and preloaded roller bearings. Levers are used to ‘fine-tune’ the way movements on each axis feel, while motion is accomplished via a knurled-grip guide handle. The tripod head has an overall weight of 2.5lbs / 1.1kg and can handle cameras or other items (including a smartphone or GPS unit) weighing up to 7lbs / 3.2kg. The model attaches to a tripod via a 3/8-16 screw.

    The team behind the Hitch Hiker is seeking funding for production on Kickstarter, where a single unit in a clear/black finish is promised in exchange for a $ 499 or greater pledge, and a model in all-black finish for pledges of $ 529 or more.

    Via: Kickstarter

    Articles: Digital Photography Review (dpreview.com)

  • Sigma releases price and availability for sd Quattro H

    Lens and camera manufacturer Sigma has announced UK pricing for its forthcoming sd Quattro H APS-H interchangeable lens mirrorless camera: it will cost £1500, and will be available for sale in January 2017. We’ve reached out to Sigma to confirm US pricing and will update this story when we have that information.

    The camera was first introduced almost a year ago in February 2016 at the CP+ show in Japan. It uses a 26.6×17.9mm Foveon sensor that the company says offers resolution on a par with a 51MP sensor of traditional design. The sensor actually uses 25.5 million pixels, but due to the unique layout of the sensor Sigma claims it can record twice the detail of standard models.

    The camera shoots DNG Raw files, uses both phase and contrast detection AF systems, a 2.36-million-dot EVF and Sigma’s SA mount lenses.

    For more information see the Sigma website.

    Press release

    SIGMA sd Quattro H

    The SIGMA Corporation is pleased to announce the SIGMA sd Quattro H, the new high-image-quality digital camera that incorporates the Foveon X3 direct image sensor (generation name: “Quattro”).

    The RRP of the SIGMA sd Quattro H is £1,499.99 and they will be available in January 2017.

    The SIGMA sd Quattro H is the first camera to feature the newly developed APS-H size Foveon X3 Quattro direct image sensor with incredible 51-megapixel-equivalent resolution. Featuring the SIGMA SA mount, the new camera is compatible with all of the SIGMA GLOBAL VISION lenses in the Contemporary, Art and Sports lines, and it is designed to take full advantage of these lenses’ superb optical performance. In addition, it is compatible with DNG format, and imaging software from other companies is also available for higher versatility. The DC Crop Mode, which is automatically activated when DC lenses are attached, makes it possible to take full advantage of your lens assets.

    [Key features]

    Foveon X3 Quattro direct image sensor
    Leveraging the light absorption characteristics of silicon, the Foveon X3 Quattro direct image sensor comprises three layers of photodiodes, each at a different depth within the silicon and each corresponding to a different RGB color. Since it is the only sensor to use this superior vertical color separation technology, it is also the world’s only direct image sensor. Requiring no low-pass filter needed to correct the interference caused by a color filter array, the Foveon X3 Quattro direct image sensor is able to take full advantage of the information carried by light, including color information. The sensor features a pixel ratio of 1:1:4 in the bottom, middle, and top layers and applies the brightness data captured by the top layer to the middle and bottom layers. This unique structure makes possible fast resolution and high-speed data processing.

    51 megapixel-equivalent ultra-high image quality
    Other camera typically uses a single-layer photo sensor covered by a Bayer filter mosaic, which comprises 50% green, 25% blue, and 25% red squares. In contrast, the Foveon X3 Quattro direct image sensor uses no low-pass filter and is able to capture 100% of the data for blue, green, and red in each of its three layers. Due to this unique structure, the Foveon X3 Quattro direct image sensor can generate up to twice the resolution data of sensors using a Bayer filter. The SIGMA sd Quattro H features a newly developed APS-H size sensor (26.7 x 17.9mm) with 25.5 megapixels in its top layer for an equivalent total of approximately 51 megapixels. This larger sensor takes Foveon image quality to the next level, delivering more detailed images than ever before.

    Dual TRUE III for high-speed processing of high-volume data
    TRUE (Three-layer Responsive Ultimate Engine) III is the dedicated image processing engine for the Foveon X3 Quattro direct image sensor. SIGMA’s original algorithm processes data without loss of color detail or other image degeneration to deliver extremely detailed image expression with a noticeable 3D pop. In addition, by using two separate TRUE III engines, the camera is able to process data from the Foveon X3 Quattro direct image sensor at extremely high speed.

    14-bit RAW data
    RAW data records the light information captured by the Foveon X3 Quattro direct image sensor. Using 14-bit (16,384 gradations) signal processing to convert the analog output signal to digital results in photographic data with fine gradations that effectively represent the smooth, natural gradations of the original subject. RAW data uses lossless compression that prevents image degradation. Moreover, processing RAW data with SIGMA Photo Pro results in images with incomparable natural balance.

    DNG format
    In addition to SIGMA’s original RAW format (X3F), DNG (Digital Negative) format is available. DNG is the RAW image data that is developed by Adobe Systems Incorporated. DNG file makes it possible to develop images on other softwares, which gives more choices of expression.
    *It is not possible to record the image data in DNG and JPEG simultaneously. In addition, the number of pixels to be recorded will change depending on the aspect ratio of shooting images.

    New Super-Fine Detail exposure mode
    The new Super-Fine Detail (SFD) exposure mode brings out the full performance of the Foveon X3 Quattro direct image sensor. One push of the shutter generates seven different exposures, creating RAW data in the X3I file format. Using this data with the SIGMA Photo Pro software package, the photographer can create noiseless images with an extensive dynamic range. With this new mode, the more detailed imaging potential of the Foveon X3 Quattro direct image sensor is fully leveraged. From each X3I file, individual X3F files may also be generated. The value of SFD exposure mode is especially apparent in studio photography.
    Note: To prevent camera shake, SIGMA recommends the use of a tripod.

    DC Crop Mode
    The Sigma sd Quattro H incorporates an APS-H sized image sensor, and it automatically switches to DC Crop Mode, when DC lenses are attached. Also, it is possible to select On/Off of the DC Crop Mode manually. When a DG lens is mounted and the DC Crop Mode [On] is selected, the coverage of the LCD monitor and the view finder automatically becomes within APS-C size, which makes it easy determining the composition.
    *If [On] is selected, the angle of view will be equivalent to 1.5 times longer than the focal length of the lens and the number of pixels to be recorded will be smaller.

    Exclusive SIGMA Photo Pro software
    SIGMA Photo Pro makes possible intuitive processing of RAW data, leveraging the full power of the information captured by the Foveon X3 Quattro direct image sensor. Operation is easy: the user simply adjusts horizontal sliders while viewing the photographs to create images that perfectly match his or her vision. In addition, the software turns X3I files created using the camera’s Super-Fine Detail function into high-resolution, noiseless images with outstanding dynamic range. Various modes allow the user to take full advantage of the image sensor’s fine tones and gradations and create monochrome images of impressive depth.

    SIGMA Capture Pro software
    SIGMA Capture Pro allows the user to control and capture photographs with the camera via a personal computer. After connecting the camera to the computer with a USB cable, the user can take photos and adjust the aperture value, shutter speed, and other settings. The photographs taken using the software may be downloaded to the camera’s SD card, to the computer, or both at the same time. The software also allows the user to continuously shoot a set number of photographs. While connected to the computer, the camera may still be operated and used to take photographs manually.

    RAW onboard data processing
    The camera can process RAW data (X3F files) into JPEGs without the need for a personal computer. The user can adjust the exposure correction, white balance, color mode, and aspect ratio while viewing the photographs on the LCD monitor.

    Combination of two AF detection methods
    Phase detection AF is superior for speed performance, while contract detection AF is superior for focusing accuracy. Combining these two methods in a single system delivers AF that is fast and precise at the same time. In addition, this approach to autofocus takes full advantage of the characteristics of high-performance lenses. The Single AF mode is optimal for everyday photography, while the Continuous AF mode is optimal for focusing on a moving object. In the latter mode, pressing the shutter button halfway causes autofocus to operate continuously, while Movement Prediction AF operates at the same time for more accurate autofocusing. A variety of other AF modes are also available. 9-Point Selection AF mode allows the user to select among nine focus frames. Free Movement AF mode allows the user to select the focus frame with high precision. Face Detection AF mode detects human faces and prioritizes focusing on them. The AF assist light incorporated in the camera body makes possible the use of AF even in low-light conditions.

    Focus peaking function
    This function puts a colored outline (white, black, red, or yellow) around the subject in the viewfinder for instant confirmation of the person or object currently in focus.

    Continuous shooting of up to 8 images in RAW format
    The DDR III high-speed, high-volume memory is approximately twice the capacity of that of the SIGMA dp Quattro. This allows the SIGMA sd Quattro H to capture up to 8 RAW images (X3F files) in High size during continuous shooting. Leveraging high-speed data transfer and processing, the SIGMA sd Quattro H offers a continuous shooting speed of up to 4.4 frames per second. (4.8 frames per second when it is set as DC crop Mode.?As a further option, when Low size is used, the SIGMA sd Quattro H offers a continuous shooting speed of up to 6.2 frames per second and continuous shooting of up to 16 images. (6.8 frames per second when it is set as DC crop Mode.

    Aspect ratio selection
    To accommodate various photographic needs, six different aspect ratios are available, including 3:2 (standard), 1:1 (square), 21:9 (similar to cinema widescreen), and 7:6 (similar to 6×7 camera format). When using an aspect ratio other than 3:2, the user may select a black or semi-transparent frame. The semi-transparent frame can serve as a sports finder, allowing the user to monitor activity outside the frame. The aspect ratio of images recorded as RAW data can also be changed in SIGMA Photo Pro.
    *It is not possible to change the aspect ratio of DNG files after shooting.

    High-resolution electronic viewfinder
    The high-resolution 2.36 mega-pixel electronic viewfinder features near-100% viewfinder coverage and a 1.09 magnification ratio. The viewfinder incorporates three lenses with the outermost lens specially coated to ensure a clear field of view. Using a switch next to the viewfinder, the user can toggle between displaying the image in the viewfinder and the monitor. In AUTO mode, the camera automatically switches to the viewfinder display when the user is looking through it and to the monitor when he or she is not. This mode allows seamless use of the viewfinder to take photographs and use of the monitor to access settings and confirm results. For extra convenience, many functions of the monitor are available via the electronic viewfinder itself, such as setting values, grid lines, electronic level, zoom, focus peaking and more.

    Dual monitors
    In addition to the 1.62 mega-pixel 3.0 inch TFT LCD main monitor, the rear of the camera features a sub-monitor that displays the number of remaining shots on the SD card, shutter speed, aperture value, ISO level, and more. This extra monitor makes it easy to watch the live view and confirm key information at the same time. A sheet of special material lies between the two LCDs and the protective glass that covers them. This sheet prevents air pockets from forming and minimizes reflections, ensuring excellent display visibility in sunlight.

    Electronic level
    Allowing the user to view the camera’s horizontal and vertical position while shooting, this function is useful in precisely establishing composition.

    Tough magnesium alloy body
    The exterior and main frame of the camera body features a tough magnesium alloy. The rigidity and strength of this alloy significantly contribute to the reliability and quality of the camera as a whole.

    Dust- and splash-proof design
    O-rings and sealing material effectively seal buttons and seams to prevent the intrusion of dust and water, making the camera an excellent choice for pros working under tough conditions.

    Dust protector on lens mount
    To prevent the intrusion of dust and debris into the camera body, the lens mount features a dust protector sealed with optical glass. Additional sealing around the mount further lessens the chance of dust entering the camera body.

    Intuitive user interface helps user focus attention on creative work
    Building on the success of previous SIGMA user interfaces, the new UI is more intuitive than ever. Located next to the shutter button, the Quick Set button provides instant access to the Quick Set Menu, which allows the user to quickly adjust commonly used settings while continuing to look through the viewfinder. Located on the top of the body, the LOCK switch prevents the accidental pressing of buttons, helping keep the user’s attention on the creative work. The buttons that are locked with this switch may also be customized by the user. Located on the rear of the camera near the selector are several controls for commonly used functions. Easily accessed with the thumb of the right hand, they include the menu button, focus frame button, and AEL/AF button with lever.

    Quick Set Menu
    Located next to the shutter button, the Quick Set button provides instant access to eight commonly used functions, including aspect ratio, ISO, white balance, and color mode. The user can quickly adjust settings using the selector and front and rear dials. Users can also customize the functions included in the Quick Set Menu and the order in which they appear.

    System camera compatible with all SIGMA GLOBAL VISION lenses
    Featuring the SIGMA SA mount, the new camera is compatible with all of the SIGMA GLOBAL VISION lenses in the Contemporary, Art and Sports lines, and it is designed to take full advantage of these lenses’ superior optical performance.

    High-resolution Super-High size images
    A variety of file sizes is available to accommodate a wide range of user needs. Using High-size files brings out the best performance from the image sensor, while using Low-size files increases the number of shots that can be stored in memory. In both of these file sizes, the camera can simultaneously create RAW and JPEG data. In addition, the camera can create JPEG files in S-HI size, appropriate for large prints, as well as in S-LO size, which is ideal for online sharing.

    Higher-precision white balance
    A new algorithm enhances the precision of auto white balance, even optimizing white balance in images with multiple light sources. The Auto (Lighting Source Priority) mode leaves the color of light sources intact for extra atmosphere, while the Auto (Default) mode allows the camera to automatically make white balance adjustments. In total, twelve white balance modes are available, including three custom modes. It is also possible to adjust white balance based on the specific image and to set the color temperature in Kelvin. Moreover, each white balance mode can be fine-tuned for detailed correction of white balance and creative filter effects.

    Full range of Color Modes
    Color Modes can adjust color tones and contrast to best suit each photographic scene. The range of color modes includes Cinema, which reduces saturation and emphasizes shadows for a film-like effect; and Sunset Red, which emphasizes red for more impressive sunset shots. Color Modes make artistic expression easier than ever.
    * It is not possible to select some of the Color Modes when it is set as DNG.

    Custom bracketing display
    This function allows the user to take a single shot but save several versions of the photograph with customized white balance, Color Mode, and other settings. This function can be combined with auto bracketing to help increase the chance of getting the perfect shot.

    Monochrome options
    The Filtering Effect allows contrast to be changed as if the images had been taken using a color filter for black and white photography. The Toning Effect allows warm, cold, sepia, and other color tones to be added to monochrome photos to emphasize the subject in creative ways. SIGMA Photo Pro makes possible optimal monochrome processing of RAW data without any color processing, producing high-resolution monochrome images with exceptional dynamic range and outstanding reproduction of the tones of highlights and shadows.

    SD card
    The camera is compatible with compact and portable SD, SDHC, and SDXC cards. The camera features the UHS-I standard, allowing large volumes of data to be recorded at high speed. The camera is also compatible with Eye-Fi, allowing wireless transfer of images to personal computers, smartphones, and more when an Eye-Fi card is inserted (sold separately).

    Dedicated high-capacity rechargeable lithium-ion battery
    The camera includes the high-capacity BP-61 lithium-ion battery and BC-61 charger. The optional SAC-7 AC adapter allows the camera to run AC power from a wall outlet.

    Dedicated cable release
    By connecting the dedicated CABLE RELEASE CR-31 (sold separately) to the camera’s USB port, the user can release the shutter without touching the camera. This function is useful when the user wishes to release the shutter from a distance, avoid camera shake, or shoot with a low shutter speed.

    USB 3.0 port
    The USB 3.0 Micro B port allows the user to connect the camera to a personal computer to download high-volume image files at high speed.

    HDMI port
    The MINI HDMI Type C port allows the user to connect the camera to an HD television with an HDMI cable (sold separately) and view photographs, camera menus, and even the viewfinder image in high definition on a big screen.

    Articles: Digital Photography Review (dpreview.com)

  • Gear of the Year: Richard’s choice – Fujifilm X-T2

    If 2016 has made one thing very clear it’s that not everyone agrees with one another about what is logically sound. Indeed there’s been a considerable trend towards questioning the very value of expertise and facts. So perhaps it’s fitting that my camera of the year wasn’t chosen with the logical, dispassionate approach that is often necessary for my job.

    I just chose the one I enjoyed the most.

    If technical capability alone were my primary consideration, the Nikon D500 makes a strong case. Its autofocus is jaw-dropping, even compared with top-end sports cameras and its ergonomics are amongst the best I’ve encountered. The Sony a6300 is technically impressive, too, and I loved the video footage I got out of it (though it helped that I shot a series of short clips, so never encountered the temperature limitations that have got parts of the Internet so hot and bothered).

    But my product of the year is, without question, the Fujifilm X-T2. Not because it’s unquestionably better (it isn’t), but because it’s the camera the most made me want to get out and shoot, this year.

    Completing the picture

    Maybe it’s a question of delayed gratification. I loved a lot about the X-Pro2 when I reviewed it at the beginning of the year, not least the image quality. I also really enjoyed shooting on a system with a good range of prime lenses for the APS-C format, rather than one that, through omission, tries to push me into buying a different format.

    But that experience didn’t prepare me for just how good the X-T2 was going to be. Looking back, the X-Pro2 gave hints at the video and autofocus improvements Fujifilm had made, but the full impact didn’t really hit me until I got to spend some time shooting with the X-T2, which gives a little more control and flexibility to both.

    With the X-T2 it feels like all the pieces have come together: a camera that captures beautiful color with ergonomics I enjoy that can shoot pretty much anything I point it at, without me ever feeling I’m working around its shortcomings. And, as a bonus, that will produce excellent footage when I come up with an idea for a short film, rather than a series of stills. Having something like that sitting in your desk is tremendous encouragement to go out and shoot.

    Projects like this video, for instance, shot by some friends and I using the X-T2, battery grip and BlackMagic Video Assist:

    Parts of the video were shot in F-Log and graded with the help of the color correction profile (LUT) that the company provides, which gives a hint about how much thought has gone into the T2’s video capabilities. The battery grip improves the battery/heat management for video shooting, though in near 0°C (32°F) conditions, overheating was the least of our problems. I’ll admit that I like the camera less if I have to operate it with gloves on.

    A question of style

    And, before you think I’ve just been bewitched by the X-T2’s retro looks and handling, I should make clear that, while I think it’s an attractive camera, my reason for enjoying the X-T2 isn’t that I believe camera ergonomics reached their zenith in 1987. For instance I don’t, personally, find the dedicated shutter speed dial especially useful: locking it to ‘A’ for most stills shooting and having to set to 1/60th then spin the rear dial one notch to shoot video at 1/50th of a second.

    “I find it as quick and easy to use as the most polished contemporary DSLR”

    However, between the AF point joystick, large, well-placed exposure comp dial, lenses with aperture rings and enough custom buttons to give me access to the settings I change most often, I find the X-T2 as quick and easy to use as the most polished contemporary DSLR. Not inherently better, but similarly good, for the way I shoot. And yes, this is all about me.

    It’s such a truism that I’m sure I’ve said it before: having a camera you know will give you the results you want can be an inspiration. The X-T2 is not cheap, by any means. Even as an occasional video shooter, I’d also need to shell-out for the battery grip, so the costs would add up pretty quickly. But, if I had to put my hand in my pocket and buy one camera tomorrow, this would be it.

    And, as we enter the last week of our loan period, the X-T2 is the camera I’m least looking forward to shipping back. I’ll miss it, and I’ll miss the encouragement that it’s given me. Merry bloody Christmas.

    Articles: Digital Photography Review (dpreview.com)

  • DxO ONE app update adds support for Facebook Live

    DxO has announced an update for the iOS app that supports its ONE camera. Version 2.5 of the app will make it possible to use the camera for Facebook Live streaming. When used remotely via Wi-Fi, the app’s Facebook Live integration allows for switching between the ONE’s camera as well as the iPhone’s built-in front and rear facing cameras. Users can also switch between the ONE and the iPhone’s audio feeds, or set the app to switch automatically when the camera is switched. 

    DxO estimates that the app update will be available in early 2017.

    Press release

    The DxO ONE camera to offer the most accessible and flexible pro-quality solution for Facebook Live

    Free DxO ONE camera iOS app update revolutionizes Facebook Live broadcasting with a powerful and professional multi-camera mode

    PARIS and SAN FRANCISCO—December 14, 2016—DxO, pioneer in digital imaging technologies, announces a major free update to its award-winning DxO ONE pro-quality miniaturized and connected camera for iPhone that will take Facebook Live broadcasting to new heights. The DxO ONE camera iOS app version 2.5 will introduce the world’s first pro-level multi-camera solution for Facebook Live, enabling users to take full advantage of the DxO ONE’s remarkably compact design, outstanding image quality, and integrated internet connectivity while broadcasting to their followers. Available to all DxO ONE users free of charge, the update is expected to be available in early 2017 via the iTunes App Store.

    With the update, the DxO ONE app will embrace Facebook Live, providing the ability to quickly and easily create a live stream with only a few taps of the app. When combined with full Wi-Fi remote control, the DxO ONE will operate as a remote broadcast camera, giving users the ability to experiment with camera compositions and placements that are impossible to achieve with the iPhone’s built-in cameras alone. The DxO ONE’s large image sensor and fast lens combine to provide a shallow depth-of-field and natural looking bokeh that lets users live stream with a level of quality that is breathtakingly cinematic.

    The DxO ONE Facebook Live solution provides a sophisticated set of controls, including an elegant multi-camera source panel, that lets you preview all three camera views at once—DxO ONE, iPhone front and back—so you can recompose the shot, adjust the lighting, or prepare your subject before going live with any camera view. You become the technical director, as you seamlessly cut between each of the three cameras on-the-fly with a quick tap. Your audio feed can be sourced from the DxO ONE’s internal microphone, the iPhone’s microphone, or set to automatically switch between the two as you cut between cameras. And of course, the DxO ONE app will allow you to name your Live stream and let you connect with the people who care most, whether it’s a select group of personal friends, or your fans worldwide.

    “Because it’s so incredibly compact, the DxO ONE has been my go-to camera for pro-quality video whenever and wherever I need it most,” said Nathan Yamniak, Film Director. “Now with the addition of a multi-camera broadcast control panel, and deep support for Facebook Live, it has become for me and my clients the ultimate pro-quality live broadcasting solution.”

    Articles: Digital Photography Review (dpreview.com)

  • How to do Tilt-Shift Portraits

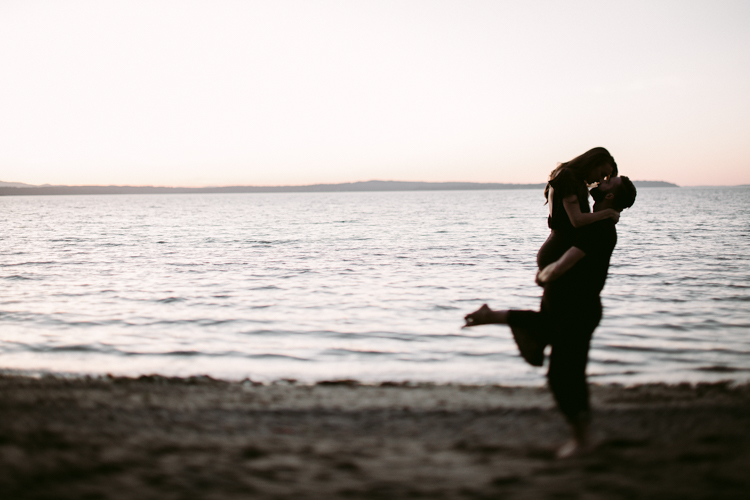
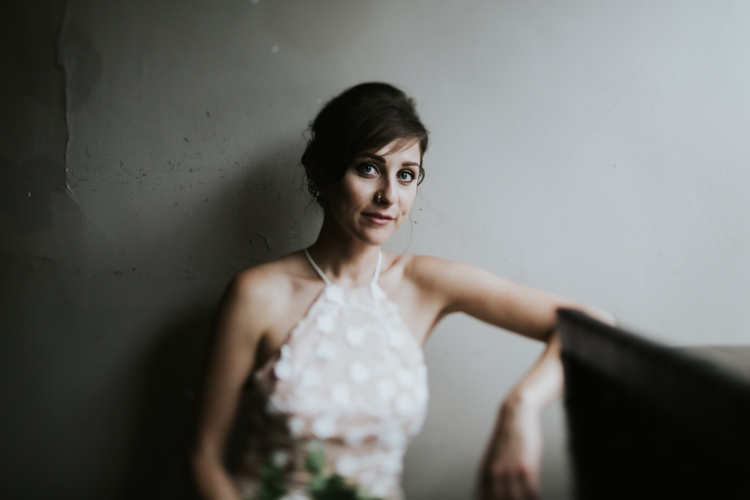
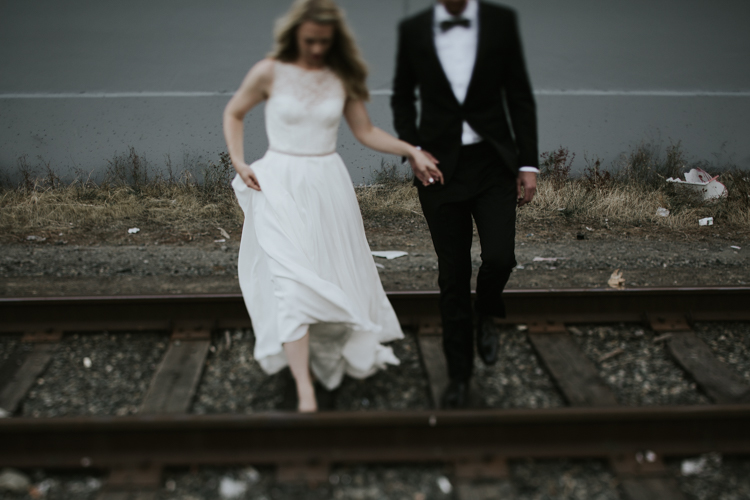
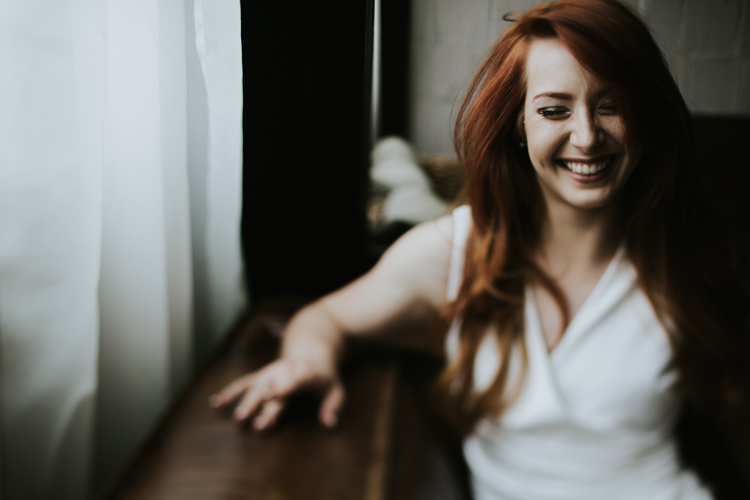
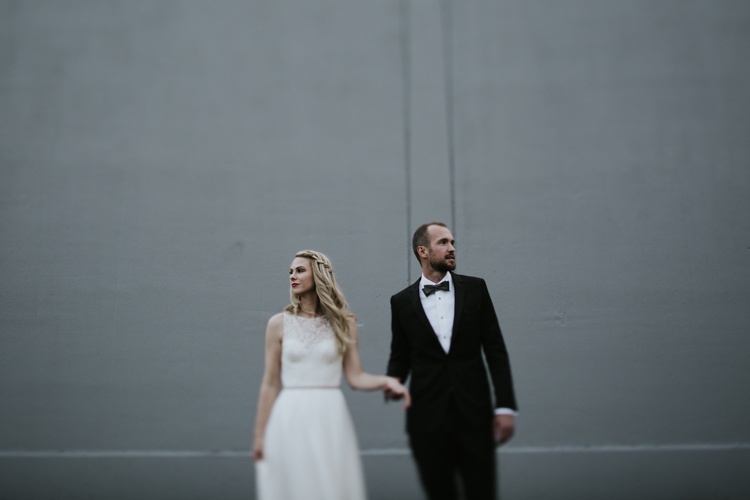
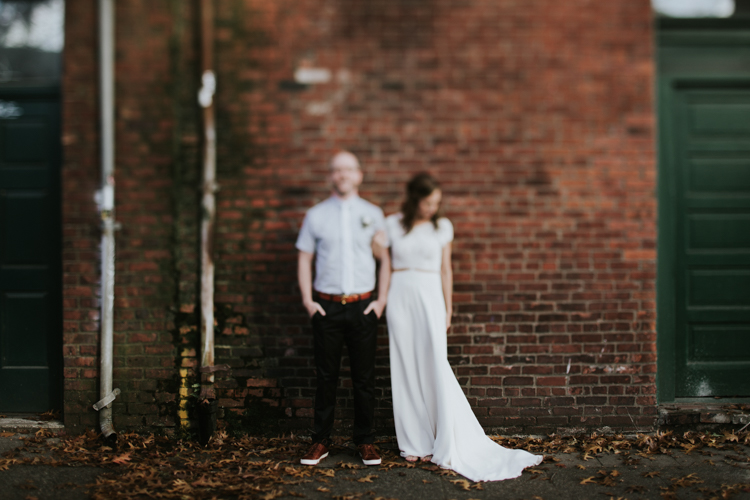
    Photography gives you an awesome opportunity to present to the world your vision of it rather than its absolute reality. At their best, photos can evoke the feel of a moment without being an exact representation of it. Think of the last time you fell in love. Most likely, your memories aren’t clear, linear progressions, but rather a series of moments, blurred together by a high-dose cocktail of dopamine and romance. Life can be a blur and feel so good. For me, that’s where tilt-shift portraits come in.

    tilt-shift-photography-8-of-1-13

    tilt-shift-photography-8-of-1-6

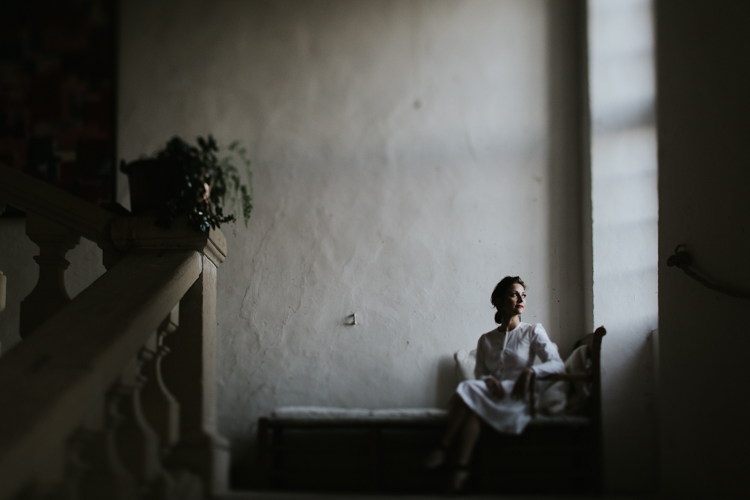
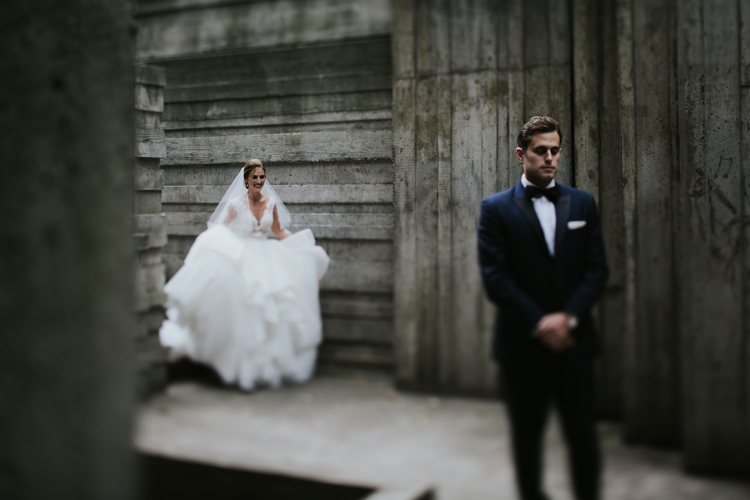
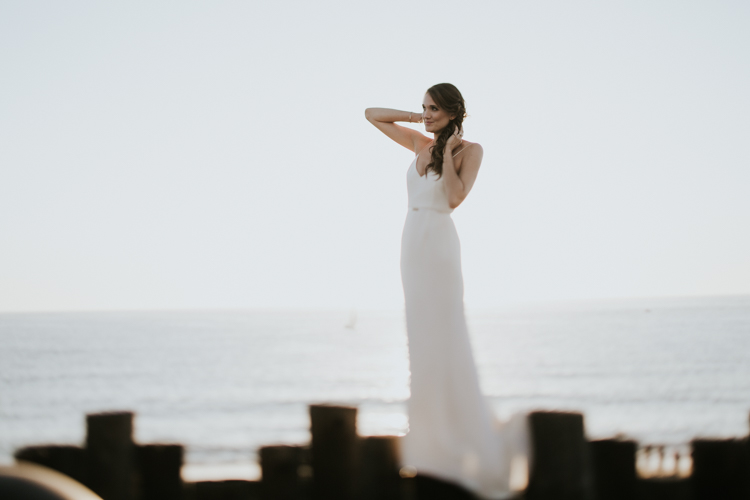
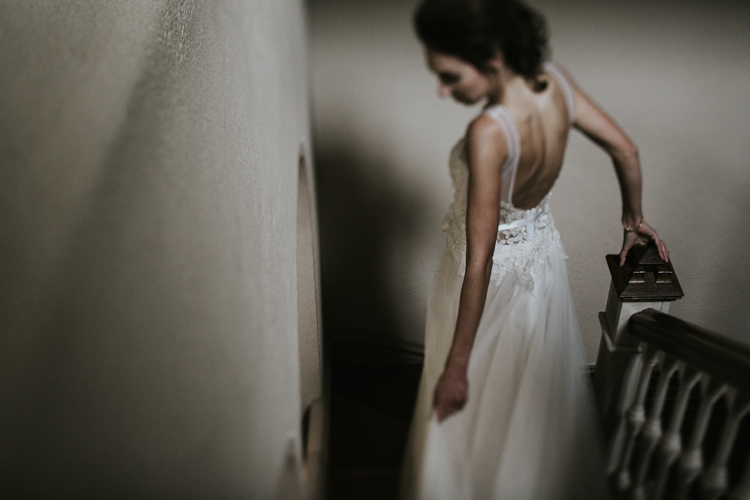
    Tilt-shift lenses are most commonly used for architectural purposes, meant to fix converging verticals when shooting tall buildings in order to reduce distortion in the final photo. You’ve also probably seen the miniaturized versions of city streets shot from above where even a city as grand as New York can seem positively dainty. Tilt-shift portraiture however, involves carefully selecting focus and letting anything that isn’t the subject of your photo fade into obscurity. This allows the viewer to be swept into your alternative realty. In my view, it’s a portrait that can be a truer representation to how a moment actually felt.

    Tilt-shift portraiture however, involves carefully selecting focus and letting anything that isn’t the subject of your photo fade into obscurity. This allows the viewer to be swept into your alternative realty. In my view, it’s a portrait that can be a truer representation to how a moment actually felt.

    Tilt-shift portraits = high risk, high reward

    tilt-shift-photography-4-of-1

    Most of my tilt-shift portraits are taken wide-open (using the largest aperture setting) with the lenses shifted as far as possible. This means that my focus point is tiny and the chances of me missing it are huge. This means that if I want the eyes in focus, I have to slow down, concentrate, play with my focus ring and maybe take a few shots just in case.

    When the focus is even just a little bit off, you lose the ability to the guide the viewer. That said, when you do nail the focus, the subject jumps out of the frame surrounded by bokeh.

    Note: if you do not own a tilt-shift lens, look into renting one from a local camera store.

    Wait, what’s a tilt-shift lens?

    tilt-shift-photography-8-of-1-10

    The tilt-shift is a specialty lens that allows the photographer to bend and distort light by tilting and/or shifting the lens itself.

    Shifting implies that the lens actually shifts its position (and the view through it) either up or down, left or right. This can minimize distortion especially with wider focal lengths. Tilting is when the front lens elements literally tilt (again, up or down, left or right) to get selective focus in a given plane.

    tilt-shift-photography-8-of-1-12

    So how do you use this lens to take an interesting portrait? Here is a step by step guide:

    Step #1 – Visualize it

    tilt-shift-photography-8-of-1-11

    Because of the precision and manual focus, you need to visualize your shot before you take it. You need to know exactly what story you want to tell. Do you want the viewer to zoom in to the subject’s eyes or perhaps your shot is about the flow of her dress or how he’s placed his hand. Most of the time, with tilt-shift, you gotta pick one thing to tell your story. What do you want that to be?

    Step #2 – Shift it

    tilt-shift-photography-8-of-1-8

    Tilt-shift lenses can become rather mundane without a shift. Sure, you can use your tilt-shift to take shots straight on with neither tilt, nor shift, but where’s the fun in that? I recommend shifting your lenses before framing your shot as your sweet spot on your lens will help determine your framing. With that, I should mention…

    Step #3 – Know your lens’s sweet spot

    tilt-shift-photography-8-of-1

    Every tilt-shift has parts of the lens that it captures better when tilted or shifted. Know where to place the subject in your frame to get it in focus.

    Step #4 – Manual focus

    tilt-shift-photography-8-of-1-5

    If you’re used to relying on autofocus, switching to manual focus can feel like jumping into the driver’s seat of a stick shift car after years of only using automatic. You’ll be a rusty at first and are sure to stall out once or twice, but soon enough, you’ll get the hang of it.

    On most dSLRs you have two options to view your focus. The first is right through the viewfinder, just make sure that the dial (the diopter) next to the viewfinder is set to match whatever your eye needs or you will have a hard time getting focus pinned down. The second is through Live View Mode on the back of your LCD.

    At times, Live View is a better option as it provides a larger screen but also it allows you to zoom in to your precise focus point and make sure you’re right on.

    Step #5 – Take a deep breath

    tilt-shift-photography-8-of-1-9

    Tilt-shifts are not quick and easy lenses to use. You need to spend time to set up your shot. Relish in its slowness. Just before taking the shot, take a deep breath. Not only will it help steady your shot, but you’ll feel darn good after clicking that shutter.

    Step #6 – There’s more to life than just faces

    tilt-shift-photography-8-of-1-2

    Portrait artists can get overly fixated on eyes. Yes, eyes are incredibly satisfying and captivating things to focus on, but so are fabrics, texture, movement, etc. In life, all of these things at times can be the sole focus of our attention and that story needs to be told too.

    tilt-shift-photography-3-of-1

    Conclusion

    Tilt-shift lenses make it so we can’t get anxious about precision but rather let the feel of photograph take center stage. They can open up a whole new way of viewing not only the world but your photographic style. Now go forth and play!

    googletag.cmd.push(function() {
    tablet_slots.push( googletag.defineSlot( “/1005424/_dPSv4_tab-all-article-bottom_(300×250)”, [300, 250], “pb-ad-78623” ).addService( googletag.pubads() ) ); } );

    googletag.cmd.push(function() {
    mobile_slots.push( googletag.defineSlot( “/1005424/_dPSv4_mob-all-article-bottom_(300×250)”, [300, 250], “pb-ad-78158” ).addService( googletag.pubads() ) ); } );

    The post How to do Tilt-Shift Portraits by Laura Sullivan appeared first on Digital Photography School.


    Digital Photography School

  • 20 Airborne Images of Objects in Flight

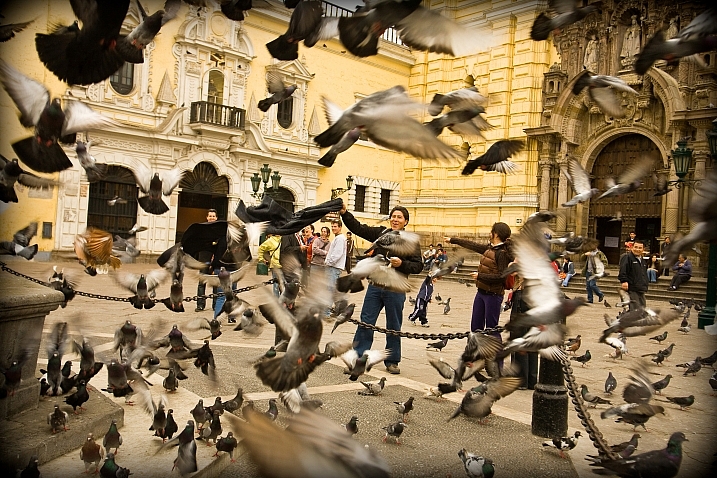
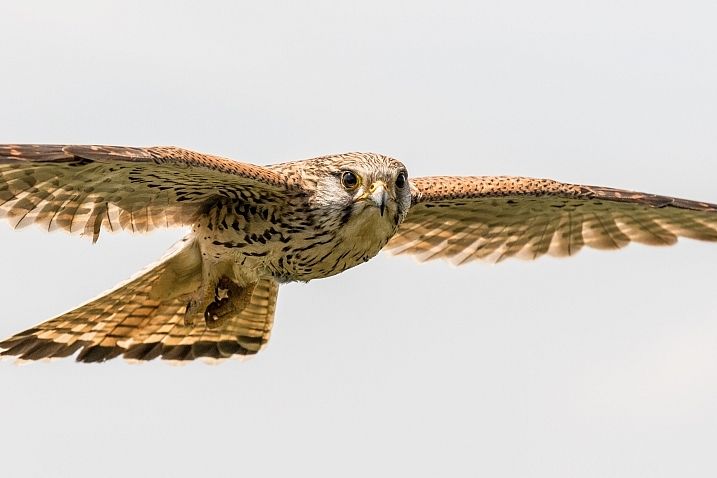
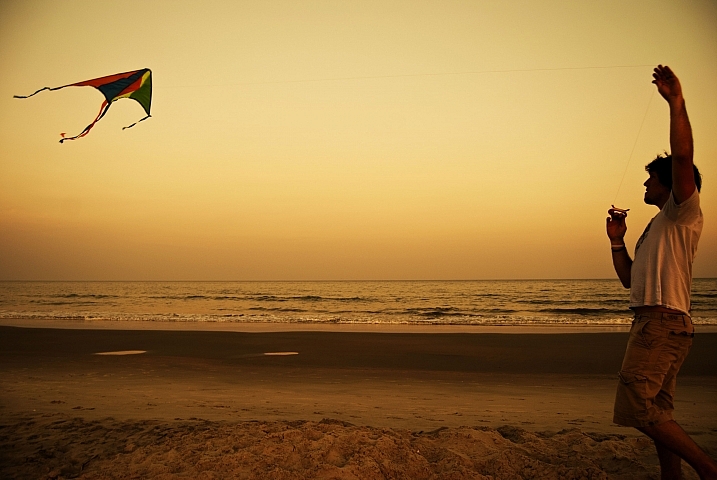
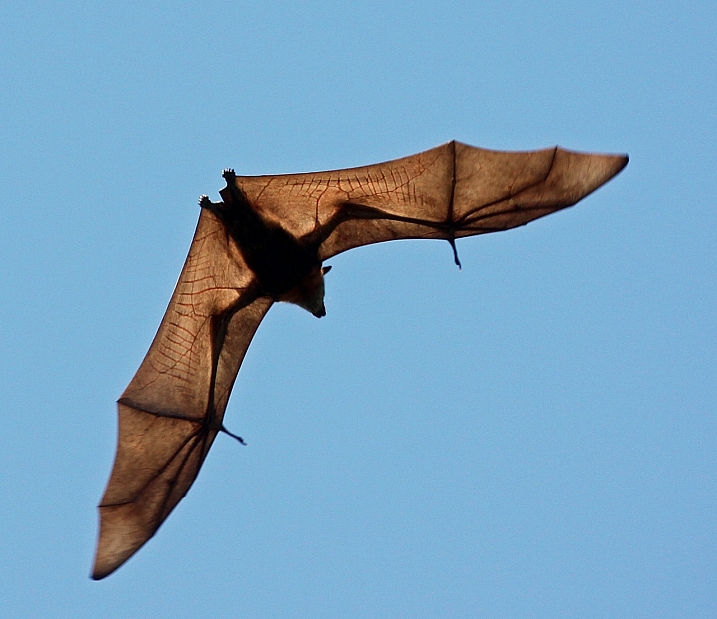
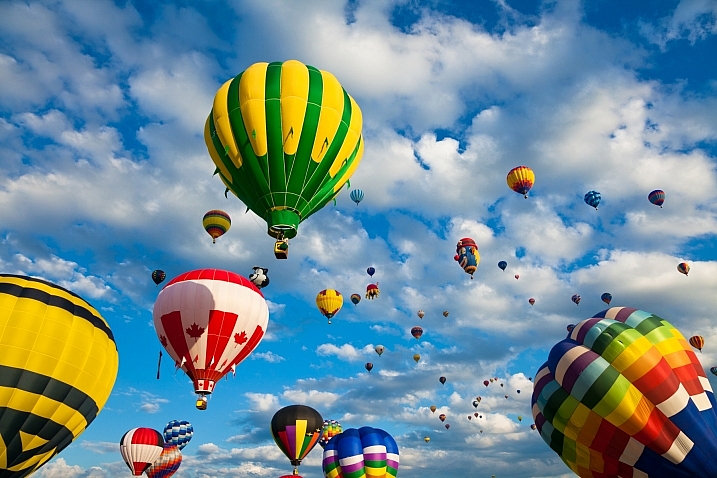
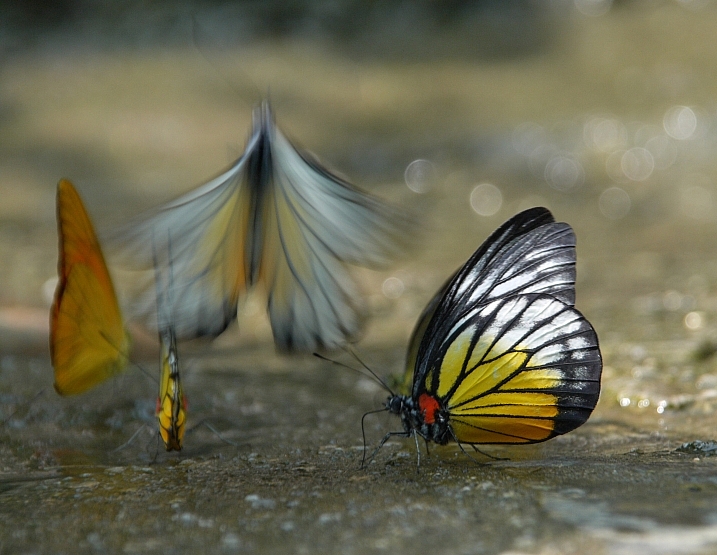
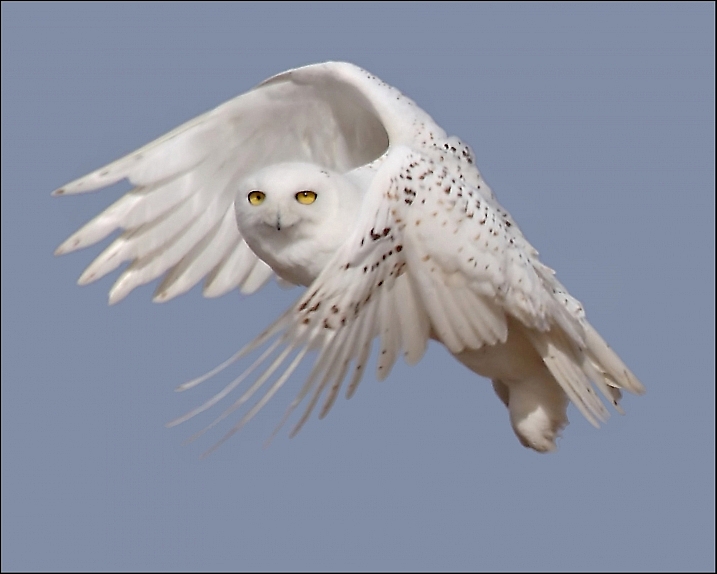
    There are many things that take to the air in flight. Humans need a device like a plane or glider, whereas other creatures take off on their own steam.

    Flying things can be hard to photograph. Photographers have to make choices to freeze their motion or create a blur. Let’s see how these 20 photographers decided to photograph these flying objects.

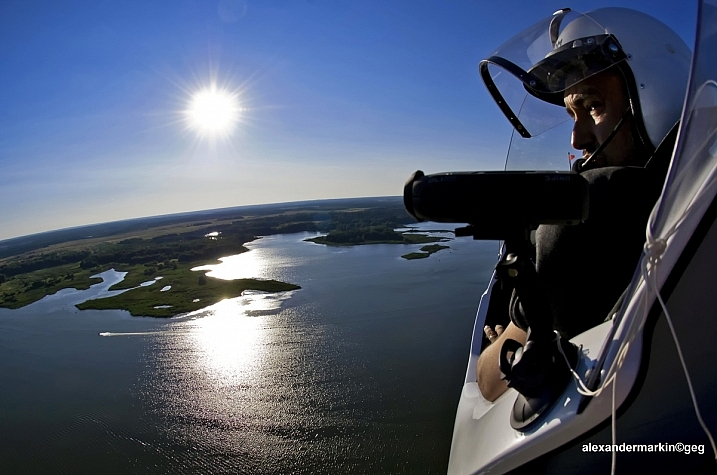
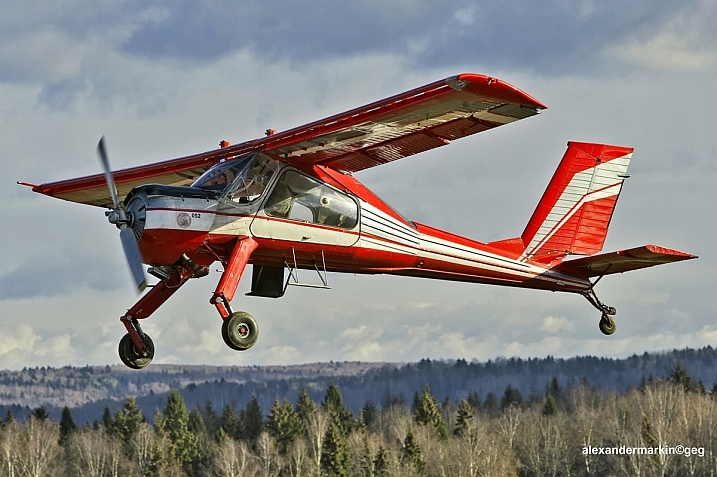
    Aleksander Markin. ????????? ??????

    By Aleksander Markin. ????????? ??????

    Jim McCulloch

    By Jim McCulloch

    Gianluca Micheletti

    By Gianluca Micheletti

    Steve Corey

    By Steve Corey

    Victoria Nevland

    By Victoria Nevland

    Howard Ignatius

    By Howard Ignatius

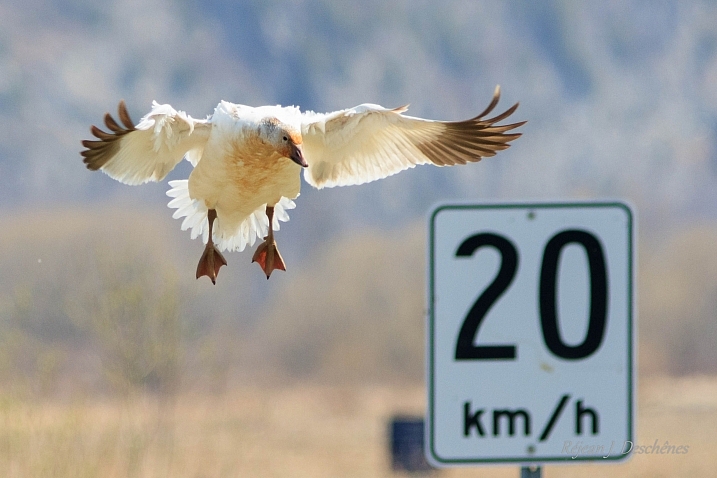
    RejeanJ Deschenes

    By RejeanJ Deschenes

    Steve Corey

    By Steve Corey

    Aleksander Markin. ????????? ??????

    By Aleksander Markin. ????????? ??????

    Darlene Hildebrandt

    By Darlene Hildebrandt

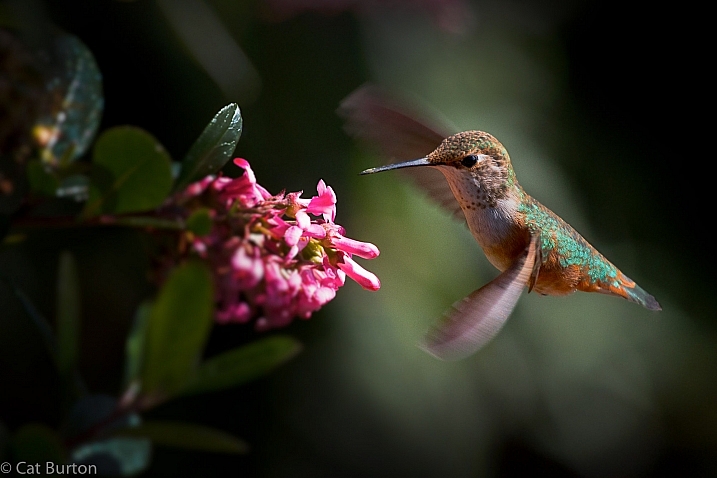
    Cat Burton

    By Cat Burton

    Stan Lupo

    By Stan Lupo

    Andy Morffew

    By Andy Morffew

    Jblaha

    By jblaha

    Michael Jefferies

    By Michael Jefferies

    Nicolas Raymond

    By Nicolas Raymond

    Farrukh

    By Farrukh

    Pat Gaines

    By Pat Gaines

    ERIC SALARD

    By ERIC SALARD

    Darkday

    By darkday

    googletag.cmd.push(function() {
    tablet_slots.push( googletag.defineSlot( “/1005424/_dPSv4_tab-all-article-bottom_(300×250)”, [300, 250], “pb-ad-78623” ).addService( googletag.pubads() ) ); } );

    googletag.cmd.push(function() {
    mobile_slots.push( googletag.defineSlot( “/1005424/_dPSv4_mob-all-article-bottom_(300×250)”, [300, 250], “pb-ad-78158” ).addService( googletag.pubads() ) ); } );

    The post 20 Airborne Images of Objects in Flight by Darlene Hildebrandt appeared first on Digital Photography School.


    Digital Photography School

  • Weekly Photography Challenge – Flight

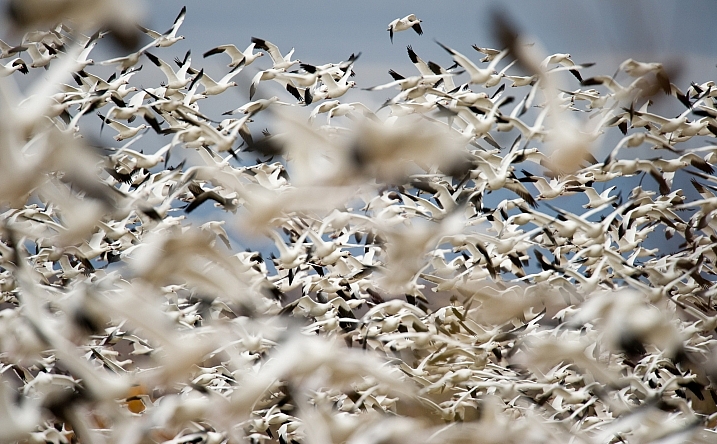
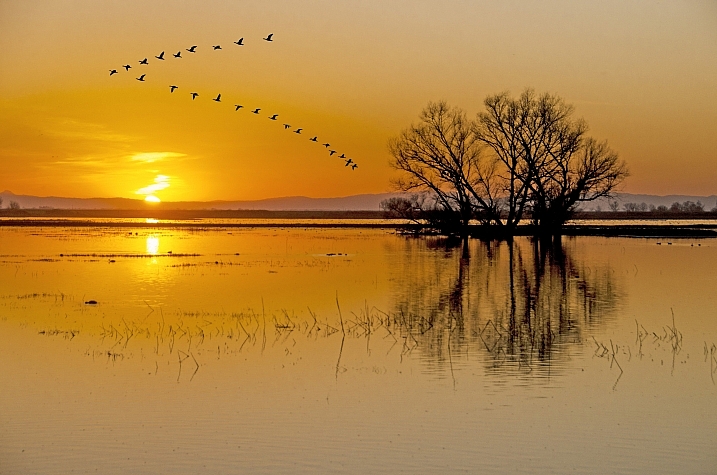
    Things that fly or defy gravity have always fascinated humans. These 20 images of airborne objects capture flight perfectly.

    Susanne Nilsson

    By Susanne Nilsson

    Weekly Photography Challenge – Flight

    What sorts of subjects can you think of that take flight, or glide through the air? How about these:

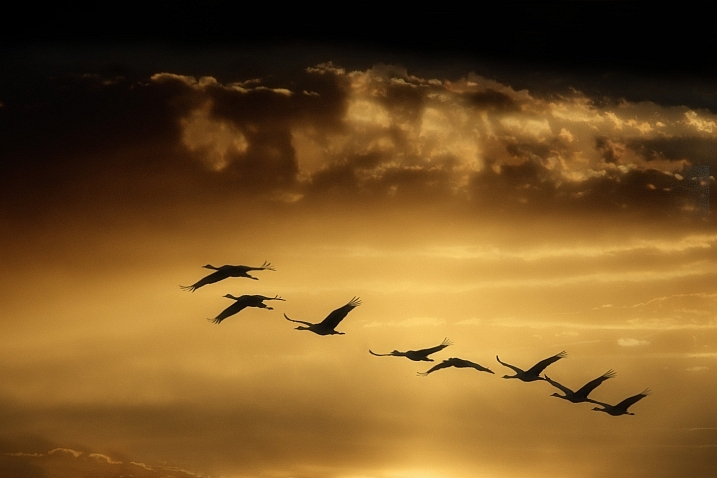
    • Birds
    • Planes
    • Kites
    • Gliders
    • Flying squirrels
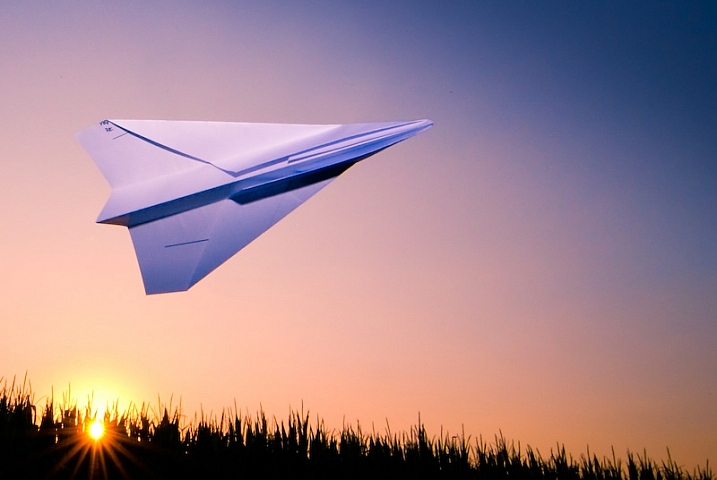
    • Paper airplanes
    • Bugs, butterflies, dragonflies, etc.
    • Balloons
    • Hot air balloons
    • Ski jumpers?
    • Skate boarders?

    Can you think of any others?

    Simon Plestenjak

    By Simon Plestenjak

    William Warby

    By William Warby

    Chris Harrelson

    By Chris Harrelson

    Heather

    By Heather

    Share your images below:

    Simply upload your shot into the comment field (look for the little camera icon in the Disqus comments section) and they’ll get embedded for us all to see or if you’d prefer, upload them to your favorite photo-sharing site and leave the link to them. Show me your best images in this week’s challenge. Sometimes it takes a while for an image to appear so be patient and try not to post the same image twice.

    Share in the dPS Facebook Group

    You can also share your images on the dPS Facebook group as the challenge is posted there each week as well.

    googletag.cmd.push(function() {
    tablet_slots.push( googletag.defineSlot( “/1005424/_dPSv4_tab-all-article-bottom_(300×250)”, [300, 250], “pb-ad-78623” ).addService( googletag.pubads() ) ); } );

    googletag.cmd.push(function() {
    mobile_slots.push( googletag.defineSlot( “/1005424/_dPSv4_mob-all-article-bottom_(300×250)”, [300, 250], “pb-ad-78158” ).addService( googletag.pubads() ) ); } );

    The post Weekly Photography Challenge – Flight by Darlene Hildebrandt appeared first on Digital Photography School.


    Digital Photography School

  • The Five Most Essential Camera Settings and How to Use Them

    Modern cameras, from phones to high-end DSLRs, are designed to make decisions for us. And for the most part, they do a pretty darn good job of it. Slap your SLR into AUTO mode and more often than not you’ll get images that are sharp with decent exposure. If you are just looking to document your world, then go for it, snap away. The drawback is that images taken in AUTO tend to look similar to one another, with a uniform depth of field and exposure. If you want to move beyond the automatic camera settings, you need to understand your camera, how to use it, and most importantly, what impact changing those settings will have on your final image. Here are five of the most essential camera settings, what they mean, and how they impact the photograph.

    Five Most Essential Camera Settings

    ISO

    Five Most Essential Camera Settings

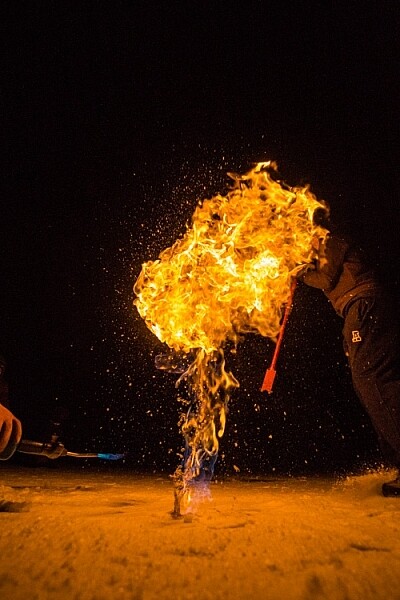
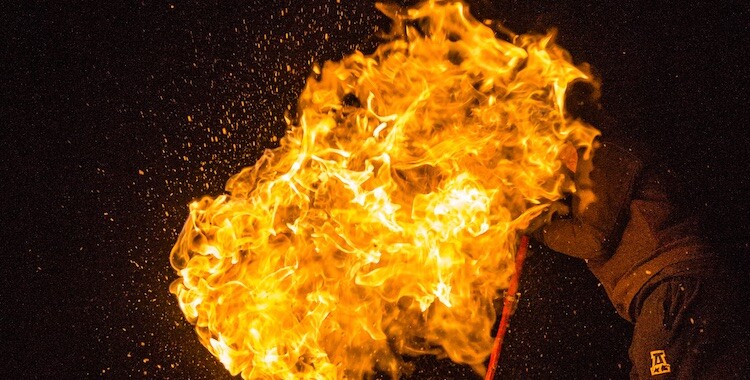
    This night image required I use a fast shutter speed to retain detail in the flame, so I had to use a high ISO (3200). In the next detail shot, you can see the noise, in the original RAW file. (By the way, this image shows what happens when you free methane from a bubble in the ice of a frozen pond in the boreal forest, and then set it alight.)

    First, the acronym ISO is terrible, because it’s basically meaningless in terms of photography. It stands for “International Standards Organization” a European non-governmental organization that makes sure industries apply the same standards. In the case of photography, they want to make sure that an 800 ISO on a Canon is the same as on a Nikon, Sony or Fuji. If that standard didn’t exist, then settings wouldn’t be applicable across camera brands. So if I set my Canon to make an image at 1/100th sec at f/2.8 and ISO 400, and you set your Nikon to the same setting, we wouldn’t get the same exposure. Thankfully all the major manufacturers do subscribe to the ISO standards.

    Yeah, yeah, but what is ISO? It is the measure of the sensitivity of your camera’s digital sensor to light. The lower the number the lower the sensitivity, the higher the number the more sensitive the sensor becomes. If you are shooting in a low light situation, say a poorly lit room or a dusky evening, an ISO setting of 100 will require that more light reaches the sensor than if you were to use a setting of 400, 800, or 1600.

    Five Most Essential Camera Settings ISO

    Note the noise in the detail of the person’s clothing and in other shadowed areas.

    Drawbacks of high ISO

    So why not shoot at high ISOs all the time? Two reasons: 1. High ISOs often create digital noise on the image, (though camera sensors are getting better and better) and 2. Sometimes you may want to force a slow shutter speed, in which case you want low sensitivity to light. This may be the case when you are trying to capture blurred motion such as water, wind or to create pleasing blurs in sports photography.

    1. High ISOs often create digital noise in the image, (though camera sensors are getting better and better)
    2. Sometimes you may want to force a slow shutter speed, in which case you want low sensitivity to light. This may be the case when you are trying to capture blurred motion such as water, wind, or to create pleasing blurs in sports photography.

    In short, ISO is one of the three tools you have at your disposal to manipulate your exposure.

    Shutter Speed

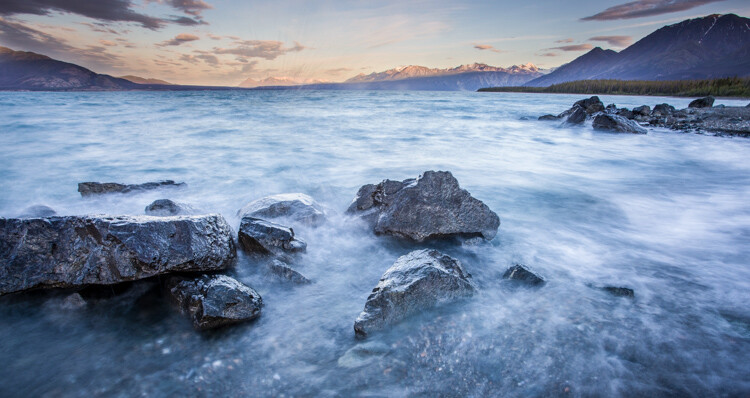
    The length of time your camera’s sensor is exposed to light is the shutter speed. Many cameras have a mechanical shutter that snaps open and closed allowing light to reach the sensor, others use a digital shutter that simply turns on the sensor for the set period of time before switching it off again. Shutter speed has a huge impact on the final image. A long shutter speed will create blur in moving subjects. As a landscape photographer, I use long shutter speeds often to blur water, expose starlight, or capture wind motion.

    Five Most Essential Camera Settings

    For this image, I used a 0.5 sec shutter speed to blur the waves somewhat, but retain detail.

    Five Most Essential Camera Settings shutter speed

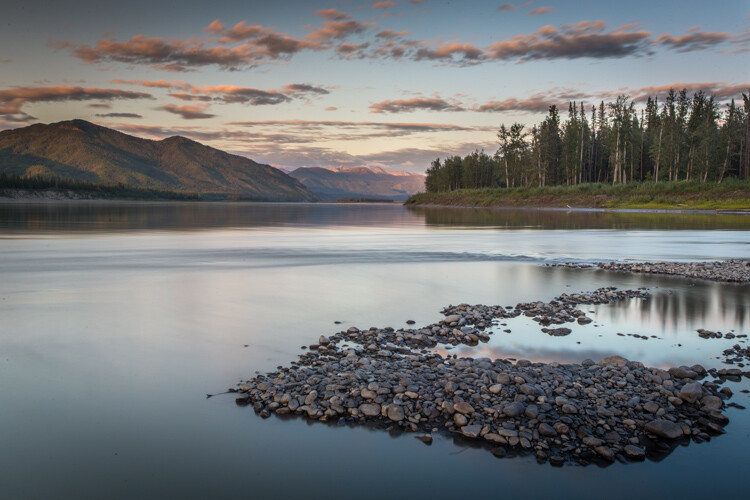
    A 30-second shutter speed blurred the Yukon River in this image, into a mirror-like surface.

    Short or fast shutter speeds have the effect of stopping motion. Use a shutter speed of 1/2000th of a second and the motion of a runner or a cyclist will be stopped dead.

    Five Most Essential Camera Settings shutter speed

    This image of a bike passing used a shutter speed of 1/500th of a second. It was just enough to be sharp overall while retaining some sense of motion in the spinning tire.

    Your use of the shutter has to be thoughtful to create a good image. Think about the final image you want to create. Does it have blurred components or is it all sharp? Do you want to stop, or convey the sense of motion? Consider, experiment, then decide on your shutter speed.

    Aperture

    Five Most Essential Camera Settings aperture

    An f-stop of f/11 at 17mm was sufficient to make the entire image, from inches in front of the lens to the cliffs in the distance, sharp.

    The aperture, or f-stop, may be the most confusing aspect of photography for many photographers because it affects images in unexpected ways. Essentially, the aperture is how big the hole in the lens is. The smaller the hole, the less light is allowed in, the larger it is, the more light gets through. What often confuses people is the numbering system: the smaller the number, the larger the hole. So f/2.8 is a larger opening than f/4, f/5.6, f/8, f/11 and so on. Lenses with a wide maximum aperture (a small number like f/2) are considered “fast” meaning they are capable of allowing in more light.

    But it’s not just about light, and how wide a lens can open. The aperture also affects image sharpness. Most lenses (dare I say all?) are sharper, a few stops down (called the sweet spot). A lens with a maximum aperture of f/2.8 will create a sharper image at f/8, then at f/2.8. The higher quality the lens, the less this matters, but it is noticeable on most lenses.

    Five Most Essential Camera Settings aperture

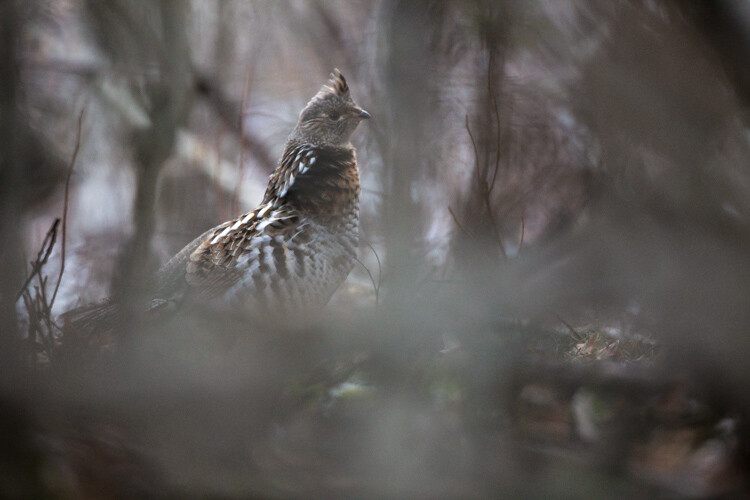
    A very shallow depth of field in this image brings the grouse hiding in the brush into focus while the surrounding chaos of branches blurs into a haze.

    Depth of Field and application

    Next, the aperture also controls the Depth of Field. The DoF is the amount of the image from close to far that is in focus. A lens, when set wide open, say f/2.8, will have less DoF than when the same lens is set to f/11.

    Like shutter speed, your use of aperture should be purposeful. Have a landscape image that you want in focus from front to back? You better select a high f-stop (like f/11). How about a portrait where you want a clean, soft background but a tack-sharp eye? Then use a small f-stop (like f/2.8 or f/4) and watch that focus point.

    The aperture has a direct impact on shutter speed. A large f-stop will require you to use a longer shutter speed to attain proper exposure. Just as lower f-stop, will allow you to use a fast shutter speed. These two are completely interrelated, there is no escaping it, so you NEED a strong understanding of both.

    White Balance

    White balance, like ISO, relates to the sensor, but in this case, it has to do with the color of the light, rather than its brightness.

    Different light sources have different color tones. Our eyes often don’t detect these differences, but you can bet your camera will. Have you ever seen a photo of a home interior lit by soft-white bulbs, but including a window? Usually, the interior of the room looks natural while the light outdoors looks artificially blue. That’s white balance. The camera (or photographer) decided to use the interior light (the warm-toned bulbs) as the natural color, but then the natural light

    The camera (or photographer) decided to use the interior light (the warm-toned bulbs) as the neutral color, but then the natural light outdoors appears blue. When the white balance is set wrong, the colors are off. They look too yellow, blue, or orange. When it’s correct, everything looks natural, or as our eyes detect it.

    Five Most Essential Camera Settings white balance

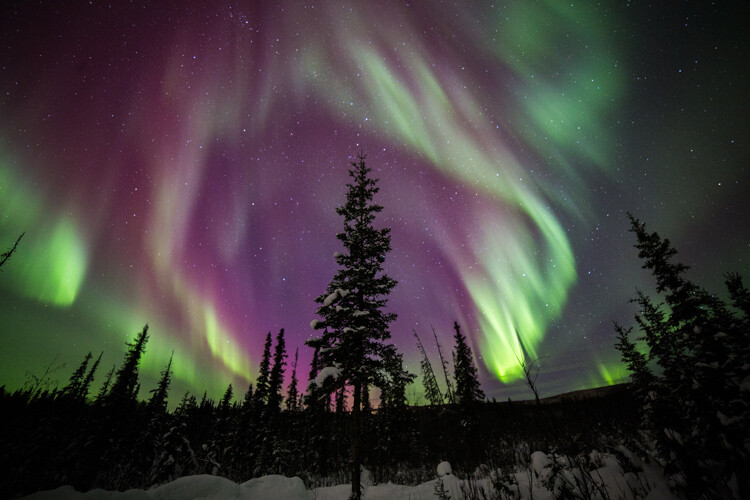
    Here is the camera’s AUTO selection for the White Balance. The colors of the aurora borealis appear too purple and yellow.

    Five Most Essential Camera Settings white balance

    In this version, using the same post-processing for exposure, I adjusted the white balance further into the blue range, making the colors of the lights appear more natural and pleasing.

    What about Auto White Balance?

    I’ve got a confession to make here. I almost always use the AUTO white balance setting on my cameras. Cameras are pretty darn good at assessing color tones and deciding on the appropriate white balance. When it does get it wrong, I can check the image on the LCD and make the correction for the next shot. Second, I shoot exclusively in RAW format which means that I can make adjustments to the white balance in the computer. I trust the image on my computer screen more than I trust the tiny LCD on the back of my camera.

    That said, there are times to adjust the camera’s white balance settings. The first is if you are shooting JPEGs. That image format will not allow you to effectively adjust white balance later, so it’s got to be right in the camera. The second is when stacking images either for high contrast scenes or for panoramas. When stacking images, slight changes in color tones will make combining them into HDR or panoramas much more difficult or impossible. You can also use White Balance if you purposefully want to make an image look cool or warm, or if you are using artificial lights. (Now THAT subject warrants an article of its own…)

    Be mindful of your White Balance, know what it does and how it will impact your image, then decide how, or whether to use it.

    Exposure Compensation

    ak-homer-109266-sunset-139

    Here I used Exposure Compensation to make sure that the image was bright enough to show details in the foreground while assuring that the bright sunset in the background was not blown out.

    These two images show how useful Exposure compensation can be. The image below was made in bright sunlight, but a purposeful underexposure of three stops reduced the mountains to black but retained detail in the sky, making a surreal image.

    Know your camera well

    Exposure Compensation is a tool you should know how to adjust without even lowering the camera from your eye. Exposure compensation allows you to very quickly, add or subtract light from an image. Too dark? Use Exposure Compensation to add a stop of light. Too bright? Exposure Compensation can quickly reduce the exposure. How it is set depends on your camera settings.

    I use Aperture Priority mode most often on my camera. That means I select the aperture, and the camera decides the shutter speed. If I adjust my Exposure Compensation, the camera will retain my chosen aperture and simply adjust shutter speed up or down to get the desired exposure. If I were to use Shutter Priority, as I sometimes do, the camera will adjust the aperture. In AUTO the camera will make that decision for me.

    I use Exposure compensation constantly. It is my go-to method for fine-tuning my exposure in the field. On my Canon DSLR, I can adjust it with a simple twitch of my thumb on the rear wheel of the camera. Other cameras have their Exposure Compensation controls on the front, a wheel near the shutter button, or some other system of buttons on the back. Know how your camera works, and learn to adjust this quickly and efficiently. Understanding this important tool will mean you don’t miss your chance to get the shot right when you are working in the field or studio.

    Conclusion

    These five camera settings are the most important things to understand on your camera. Experiment with them so you know how they affect your final image, and know how to change each quickly and without fuss. Once you do, you’ll have taken charge of your photography, and be on your way to creating purposeful images.

    If you have comments or questions please share post them below.

    googletag.cmd.push(function() {
    tablet_slots.push( googletag.defineSlot( “/1005424/_dPSv4_tab-all-article-bottom_(300×250)”, [300, 250], “pb-ad-78623” ).addService( googletag.pubads() ) ); } );

    googletag.cmd.push(function() {
    mobile_slots.push( googletag.defineSlot( “/1005424/_dPSv4_mob-all-article-bottom_(300×250)”, [300, 250], “pb-ad-78158” ).addService( googletag.pubads() ) ); } );

    The post The Five Most Essential Camera Settings and How to Use Them by David Shaw appeared first on Digital Photography School.


    Digital Photography School