Blog

  • This image is why the world needs professional photographers

    A gunman assassinated Russia’s ambassador to Turkey yesterday at the opening of a photography exhibit in Ankara. Associated Press photographer, Burhan Ozbilici was covering the event and witnessed the assassination first hand, which occurred while the ambassador was addressing the room of attendees.

    In the face of an active gunman meters away, Ozbilici kept on making pictures. And because of his bravery, the world can witness and better contextualize this horrific event. But before you go on calling Ozbilici a hero for being brave, consider for a moment that he did exactly what he is trained to do. He did what any good photojournalist should have done. 

    In an interview with the Los Angeles Times today, Ozbilici had this to say about the incident:

    “I was, of course, fearful and knew of the danger if the gunman turned toward me. But I advanced a little and photographed the man as he hectored his desperate, captive audience,” Ozbilici tells the LA newspaper. “I was thinking: ‘I’m here. Even if I get hit and injured, or killed, I’m a journalist. I have to do my work. I could run away without making any photos… But I wouldn’t have a proper answer if people later ask me: ‘Why didn’t you take pictures?’”

    It’s a stark reminder that the world needs well-trained photojournalist now more than ever. Unfortunately the trend in the newsroom, both in the United States and World-wide has been a constant cycle of slashing staff photography positions. 

    There are a lot of reasons why photojournalism jobs are disappearing, the decline of print/classified ads is surely one, but the increase in smartphone image quality is another. Smartphones have come a long way and for many media companies, a multi-talented journalist who can shoot some photos and video with their iPhone is often considered good enough.

    So what if instead of a proper photojournalist, the Associated Press has sent just a reporter with a smartphone to cover the event? After all, it’s just a gallery opening right? A quick snap of the ambassador behind the podium and a few shots of the gallery walls to accompany the text should do the trick. 

    The point is, there really is no substitute for a professional photojournalist with years of training and field time. In an era when news is increasingly catered toward one’s specific taste, the facts can be elusive. But a good photojournalist can get us closer to the truth. It’s their job.

    Articles: Digital Photography Review (dpreview.com)

  • DEAL: 2 Amazing Courses to Improve Your Landscape Photography

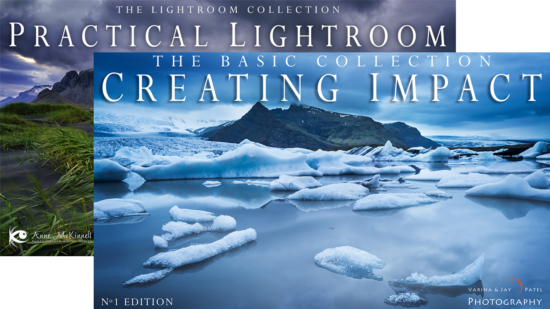
    Our 6th deal of our 12 Days of Christmas Sale brings you two amazing online video courses that will improve your Landscape Photography – at 60% off the regular price.

    NewImage

    Today only you can pick up these two courses for just $ 54 (normally $ 188).

    This value packed Landscape Photography bundle includes:

    Creating Impact Course by Varina Patel
    Go beyond the basic rules to build stronger compositions with visual impact. The Creating Impact course will help you to establish your creative vision, develop a solid workflow that will make that vision a reality and help you take beautiful landscape photos.

    This course normally sells for $ 134.

    Practical Lightroom Tutorials by popular dPS writer and renowned Landscape Photographer Anne McKinnell.

    Anne will teach you how to stop being overwhelmed by Lightroom and to start using it to transform the Landscape (and other) images that you take. Anne authored our popular ultimate guide to Landscape Photography article, and we’re sure you’ll enjoy these lightroom tutorials just as much!

    This course normally sells for $ 49.

    This Deal Won’t Last

    You are going to love these courses – they have been developed by two of our favourite landscape photographers and contain so much practical information that will help you to take some beautiful photos.

    Grab both of these courses today – with hours of video training and 40 online videos – for just $ 54. A Saving of $ 129!

    This offer won’t last because tomorrow’s is just 24 hours away – so avoid disappointment and pick it up today here.

    googletag.cmd.push(function() {
    tablet_slots.push( googletag.defineSlot( “/1005424/_dPSv4_tab-all-article-bottom_(300×250)”, [300, 250], “pb-ad-78623” ).addService( googletag.pubads() ) ); } );

    googletag.cmd.push(function() {
    mobile_slots.push( googletag.defineSlot( “/1005424/_dPSv4_mob-all-article-bottom_(300×250)”, [300, 250], “pb-ad-78158” ).addService( googletag.pubads() ) ); } );

    The post DEAL: 2 Amazing Courses to Improve Your Landscape Photography by Darren Rowse appeared first on Digital Photography School.


    Digital Photography School

  • Google Sheep View: Creature-Mounted Cameras Map Rugged Faroe Islands

    [ By WebUrbanist in Destinations & Sights & Travel. ]

    mapping

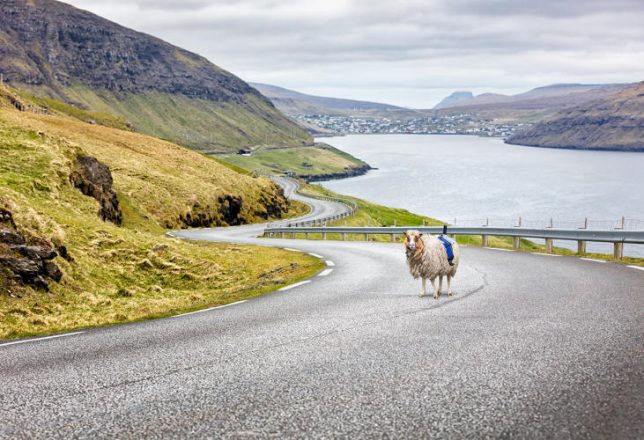
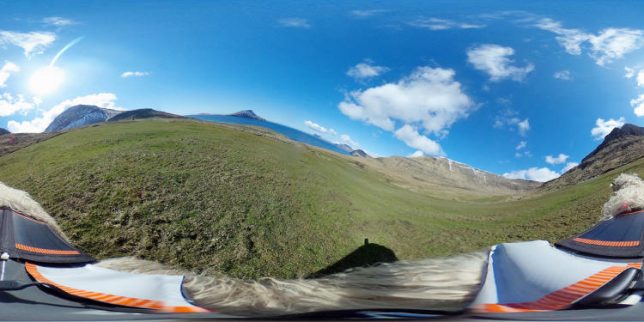
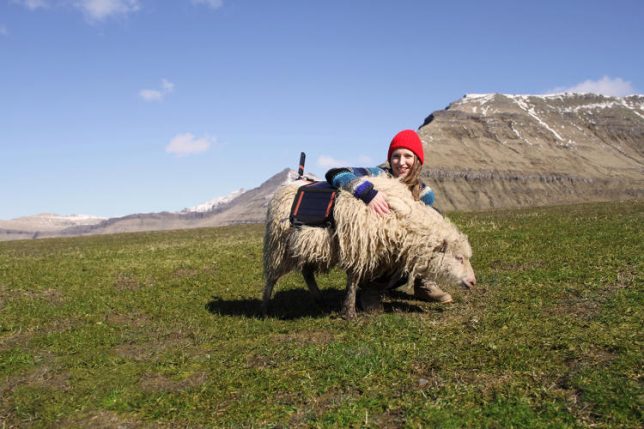
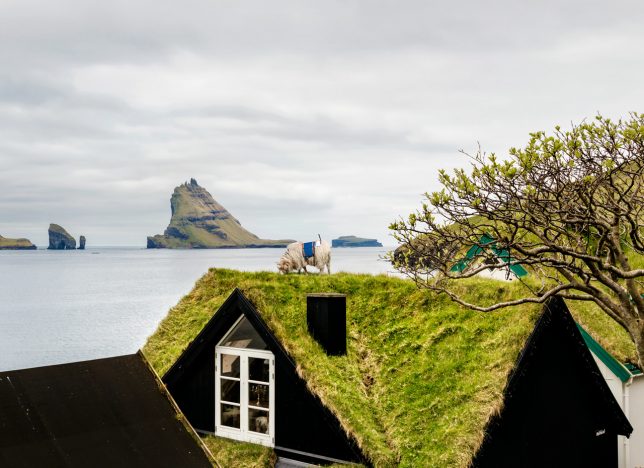
    Powered by solar energy and mounted to the backs of sheep, 360-degree cameras are mapping out the Faroe Islands for Google Street View. Since Google was initially reluctant to send cars to the archipelago, locals took it upon themselves to get their own interactive images out into the world, raising awareness of the region’s uniquely beautiful landscapes. In the end, they not only attracted Google’s interest but managed to spawn a creative DIY approach to mapping rugged environments.

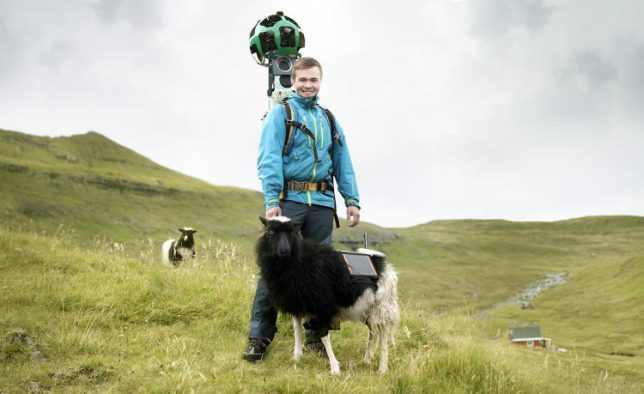
    Sheep View 360 got its start when resident Durita Dahl Andreassen first strapped a camera to a sheep, let the animal roam free around the island then uploading the results to Google. “I gently placed a 360-degree camera powered by a solar panel on the back of a sheep that would take photographs as the animal freely grazed the open hillsides,” explains Andreassen.

    google-sheep-view

    “Photos are then transmitted back to my mobile phone so that I can upload them to Google Street View myself, finally putting the Faroes on the map in a very unique way!” Indeed, some of the shots and perspectives would be unlikely or impossible for vehicles or even humans, taken as they are from the tops of roofs and sides of mountains.

    sheep-view-mounted

    This endeavor and an associated petition eventually did get Google’s attention, but by the time they showed up with vehicles the self-mapping system was well underway with sheep, bikers, backpackers, ships and even a wheelbarrow playing parts.

    sheep-view-panoramic

    Ultimately, folks from the Faroe Islands have made it a bit of an interactive game — anyone who wants to can come borrow a camera and start mapping the parts not yet uploaded to Google. This presents an interesting challenge for those who want to take it on: can you as a tourist cameraman visit the places most people and cars don’t go to or can’t reach?

    sheep-view-hug

    “The Faroe Islands have some of the most beautiful roads in the world. It is impossible to describe what it feels like driving through the green valleys and up the mountains, or alongside the ocean, surrounded by steep drops and tall cliffs. It’s an experience like no other.”

    Share on Facebook


    [ By WebUrbanist in Destinations & Sights & Travel. ]

    [ WebUrbanist | Archives | Galleries | Privacy | TOS ]


    WebUrbanist

  • 4 Beginner Tips for Doing Architecture Photography

    The first thought you will want to steer clear of is that architecture means buildings, as it actually encompasses most man-made structures. Architectural photography involves capturing an image of a physical structure in an aesthetically pleasing way for your viewers. Here are a few tips to consider if you are just getting into this category of photography.

    architecture photography tips

    1. Gear Up

    In any genre of photography, the right gear makes the difference and this also holds true for architectural photography.
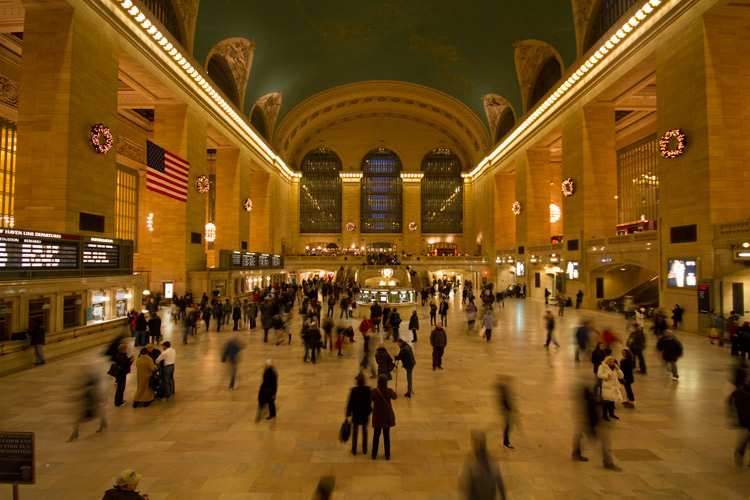
    If you want to get an entire structure or room into your frame or opt for a dramatic composition, pack a wide-angle lens in your bag.

    architecture photography tips

    Keep in mind that there will be times when even a wide angle lens may not be adequate to capture an enormous structure or a sense of place – here the knowledge of shooting panoramic images can come in handy.

    architecture photography tips

    On the flip side, you may not want to show everything and just focus on some interesting details. Pack a zoom lens to capture those details which help to convey the more ornate and interesting characteristics of architecture.

    arnos-vale-entrance-architecture

    architecture photography tips

    Also, a telephoto lens allows shooting your subject from further away and can help a building’s walls and lines appear straighter (with less distortion).

    2. Compose Yourself

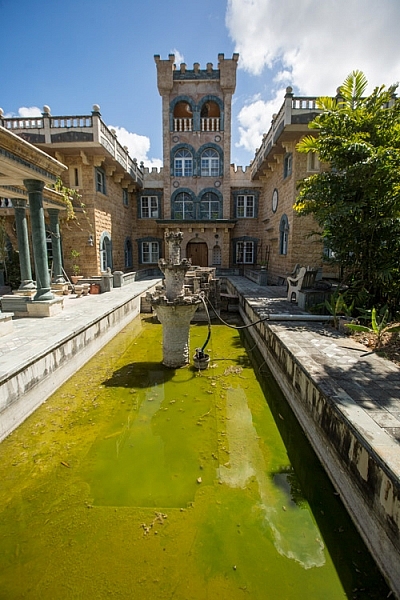
    Interesting architectural photography benefits from good composition. While distortion can add drama and lend to that artistic feel, buildings leaning backwards or looking too distorted can be less appealing. Always consider your angles and how you want to convey your subject.

    architecture photography tips

    Photographers who specialize in architectural photography find themselves correcting skews in the post-processing phase or invest in a tilt-shift lens to avoid distortion in the first place.

    If you are starting out and want to play around with the dramatic feel, you can shoot from lower or higher angles to maximize the disfigurement. Remember while doing this can be interesting, it is recommended to reduce the effect so that it is not too distracting.

    architecture photography tips
    Move around and try different angles – shoot straight up, get closer or further away, go low to the ground or higher than the building if possible and see what enhances your architecture.

    3. Lighting

    A major challenge with architectural photography is that you have no control over the position and orientation of the subject (especially when it comes to buildings), so most times you have to make the most the available light.

    architecture photography tips
    One of the most interesting (and recommended) lighting options for buildings is when light falls on its side and front (side-front lighting). This angle of lighting provides a decent amount of illumination and can cast interesting shadows across the face of a building, which gives it a more three-dimensional look. So scout out your location at different times and see how the light and shadows change the look and feel of your image.

    architecture photography tips
    Be wary with strong back lighting when shooting buildings since it can create uniform dark surfaces, unless you are going for that silhouetted look. Again the time of day comes into play and if the structure itself has lights, it adds to the photo.

    architecture photography tips
    Alternatively, you can shoot at night. Many buildings and cities are designed with night time in mind. Even bridges, sculptures, and windmills can be interesting pieces to photograph after dark. Look for color and the way the buildings are lit and use a tripod!

    4. Time Investments

    As noted there is little control over large-scale lighting on existing grand architecture, so work with the light that is already there. You can do this effectively by investing time to determine what light is most flattering.

    architecture photography tips nighttime

    Does the building look better in the morning sun or at sunset? How about at night – is it lit or does it make a great silhouette? Are there interesting reflections in the daytime or a lot of texture to capture? Remember that different times of the day and varying weather conditions can change the mood of your architecture.

    architecture photography tips light

    Conclusion

    Architectural photography is interesting and can be quite exciting. Give yourself time to see architecture from alternate angles, at different times of the day and study it long enough to know what you want your end result to be. Invest the time – it can be worth it.

    What is your favorite type of architecture to shoot? Please share some of your shots and techniques with us in the comments below..

    googletag.cmd.push(function() {
    tablet_slots.push( googletag.defineSlot( “/1005424/_dPSv4_tab-all-article-bottom_(300×250)”, [300, 250], “pb-ad-78623” ).addService( googletag.pubads() ) ); } );

    googletag.cmd.push(function() {
    mobile_slots.push( googletag.defineSlot( “/1005424/_dPSv4_mob-all-article-bottom_(300×250)”, [300, 250], “pb-ad-78158” ).addService( googletag.pubads() ) ); } );

    The post 4 Beginner Tips for Doing Architecture Photography by Nisha Ramroop appeared first on Digital Photography School.


    Digital Photography School

  • GoPro HERO cameras undergo torture test: a dip in liquid nitrogen

    Industrious YouTube user Grant Thompson recently subjected the GoPro HERO5 Session and HERO5 Black cameras to a chilly torture test: dunks in liquid nitrogen. He first tested the experiment with an older Session camera, hoping to avoid the destruction of two perfectly good new cameras if death proved swift. However, the older Session held up surprisingly well, and so he put the two new cameras to the test, literally freezing them solid. See the results in the video above.

    Via: PetaPixel

    Articles: Digital Photography Review (dpreview.com)

  • Tips and Resources for Doing Android Phone Photography

    Everywhere you go in the world today you will find someone, or many people, with their phones in the air capturing what they see. They all have a camera with them because they have their phones and can photograph everything they see. Phones have had cameras in them for quite a few years now, but slowly over the years they have improved and today many phones are amazing.

    However, when you look around at phone photography there does seem to be an emphasis on iPhones and their cameras. While this article isn’t about which is better, it is important to remember that when it comes to phones Android has a much larger market share and therefore more people are using Android phones and their cameras.
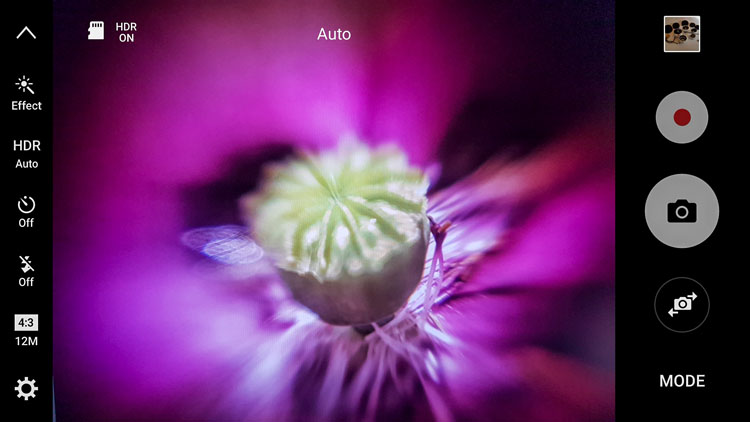
    Android phone photography tips

    The camera user-interface for the Samsung Galaxy S7 Edge.

    For this reason, this article is going to concentrate on Android photography, as there are many who seem to think that everything is made for the iPhone and if they don’t have one they are missing out. That really isn’t the case and since beginning research for this article so many things have come to light.

    Phone

    Not all phones are the same, nor are the cameras in them. If you are serious about using it for photography, then it would be good to do your research and get one that has a good camera.

    While Samsung has had some bad press lately over the debacle with the release of the Note 7, it has to be remembered they are still good phones and the camera in the Galaxy S7 Edge is said to be the best still camera (inside a mobile phone) on the market. It is very clear and the photos have an amazing quality. This is the one I use.

    Get one that matches your needs

    The camera, as with most, has lots of different settings and modes so you can find one that will be suitable for the type of photography that you are shooting.

    If your intention is to use your phone a lot for photography then be sure to select on that has what you need. Also, make sure that it is easy to get the photos from the phone to your computer. In today’s phone market, though, that is easier than ever.
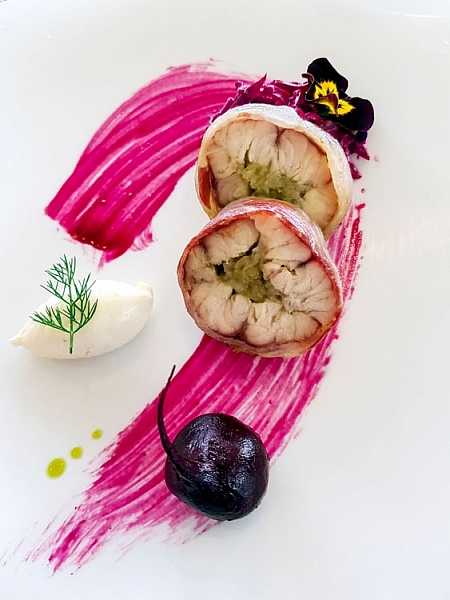
    Android phone photography tips

    Some food photography with the Samsung Galaxy S7 camera.

    Apps for photography

    We live in a world of apps. There seem to be apps for everything. Whether they are good or not is another story.

    If you go to the Google Play Store and search for cameras you will be given an overwhelming choice. You can get apps for image sharing, doing effects, making selfies, collages, and so on. The list seems endless. Just the popular results give you over 200 choices.
    Android phone photography tips

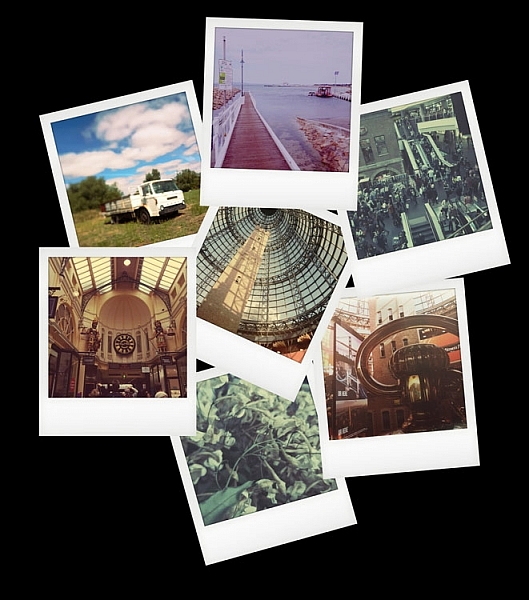
    Photos taken with the Instant Camera App.

    Most of them are free, so if you are unsure which ones to use you can install them, try them out, and if you don’t like one then just uninstall it. The reviews and number of stars can be a good indicator, especially for ones that you have to pay for. If you have to spend money, then you want to make sure it is a good purchase. Having said, though, many of them don’t cost a lot.

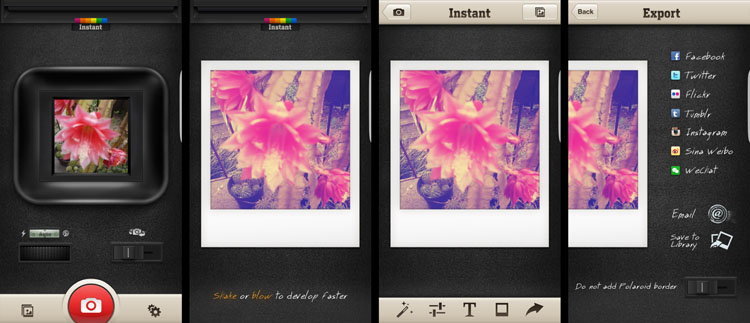
    I purchased Instant, which imitates the type of image you would get with a Polaroid camera. After playing around with it for a bit I discovered that there are lots of filters in the app to create many different effects. It is set up for you to shake or blow the image for it to be revealed, like the original Polaroids. Even though you know you don’t need to do it, it almost seems irresistible to not shake or blow on it.
    Android phone photography tips Instant app Polaroid.

    Taking photos with the Instant Camera App.

    Retro camera app

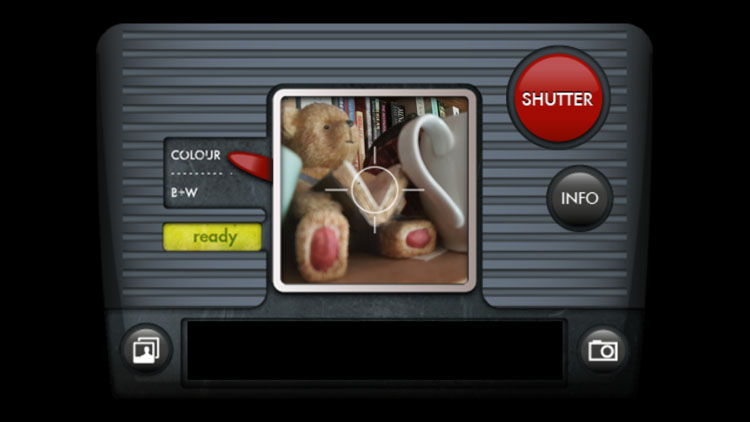
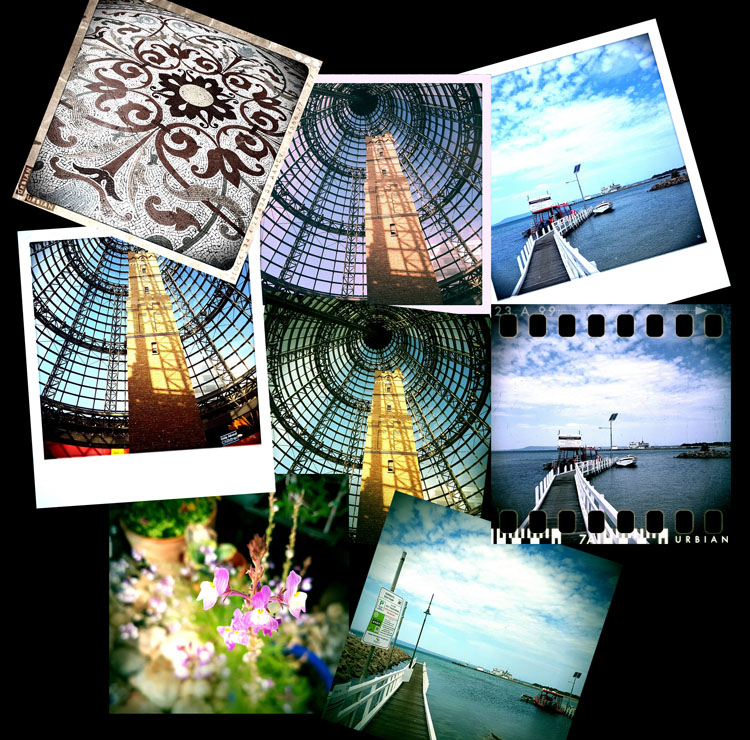
    Another one that you can try out is the Retro camera. It’s free and comes with several different cameras. If you press the camera icon in the app you can scroll through and find different ones. I quite like the Xoloroid one and the Fudgecan.  This app does not seem to have the filters, but you can choose to either take colour or black and white images with it.
    Android phone photography tips retro camera

    The Retro Camera app as it is taking an image.

    They are great fun to play around with and I do suggest you try many apps. You might even fall in love with one.
    Android phone photography tips retro app

    Using the cameras within the Retro Camera app you can get a variety of results with each of the different options.

    Lenses to attach to your phone

    Lenses for mobile phones have been around for a while, but there does seem to be the impression that they are only for iPhones. I thought the same thing too. But, there are many lenses available for you to attach to your Android phone.

    Lensbaby has lenses for the iPhone. When asked why didn’t they do them for Android the answer was simple. They did, but people didn’t seem interested and they didn’t sell. Perhaps the reason they didn’t sell well, was because people didn’t know about them. Well, now you do.

    It is unknown how many lenses there are for Android, but apparently, a lot of the ones for iPhones can also be used on Androids. They use a magnetic ring that sticks over the top of the camera on the back of your phone. Some rings are better than others, and some don’t work very well.

    Lensbaby

    There are three phone lenses from Lensbaby and they all do different things. Along with them is an app for your phone that helps you take photos.

    • The Lensbaby LM-10 is a two-way lens, meaning you can turn it around and use the opposite end as well. The sweet spot is in the center for both ends, but one end will let you get closer than the other. It is a bit like reversing the lens on your camera.
    • LM-20 has a bigger sweet center spot and lets you take more normal images.
    • LM-30m this is very sharp in the middle and gives a crazy effect around it. Some say the photos are mind-bending, and can too strange. You do have to think about where you would use this lens. It isn’t suitable for everything.
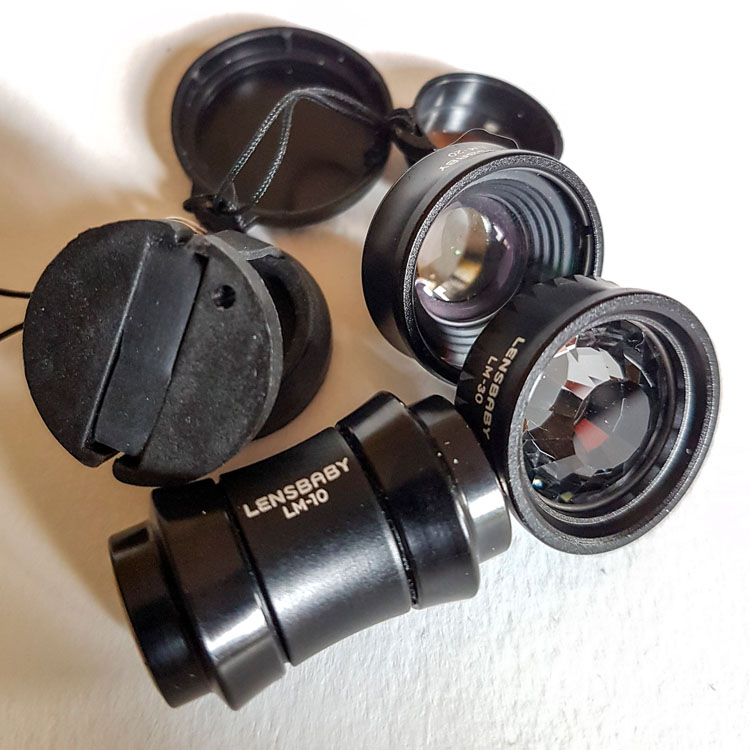
    Android phone photography tips Lensbaby LM-10

    Lensbaby Lenses

    The magnetic ring that sticks to the camera is great and doesn’t come off when you take the lenses off. However, it can be hard to focus using it and if you leave it on, the camera can move so it may need readjusting next time.

    One thing that is quite good is that you can take it on and off a bit. I’ve done it up to four times and often leave it stuck to the back of the phone until I need it, and then move it over the camera when I’m ready to shoot.
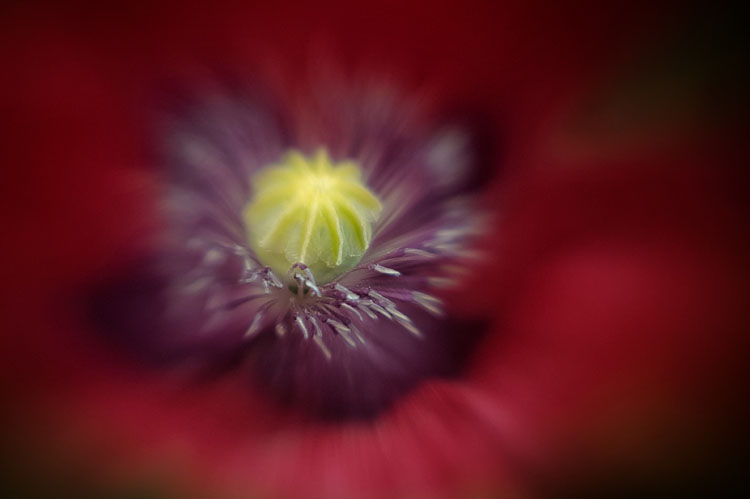
    Android phone photography tips lenses

    Macro photo taken using the Lensbaby LM-10

    Lensbaby app

    As previously stated, Lensbaby also has a free app that you can download that lets you have a lot more control over the images. You can move the sweet spot around, or lock it to one position. Be aware that the LM-10 does reverse the image when you are taking it, so you need the app so you can reverse the view so it appears right way around.

    Overall the lenses are great and are small enough to carry around in your pocket or bag when you’re out. I use them a lot for macro photography.
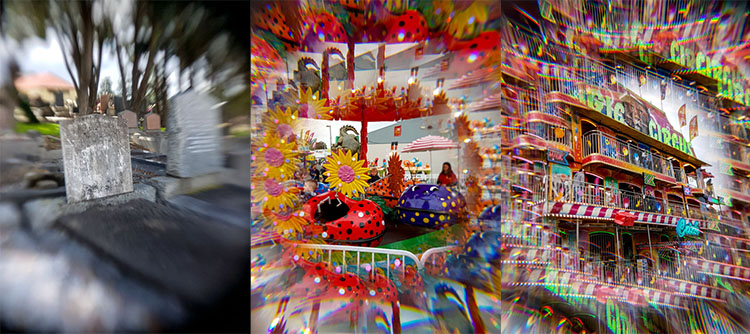
    Android phone photography tips Lensbaby

    Three images, the first taken with the Lensbaby LM-20, the second two taken using the LM-30 lens.

    Photojojo

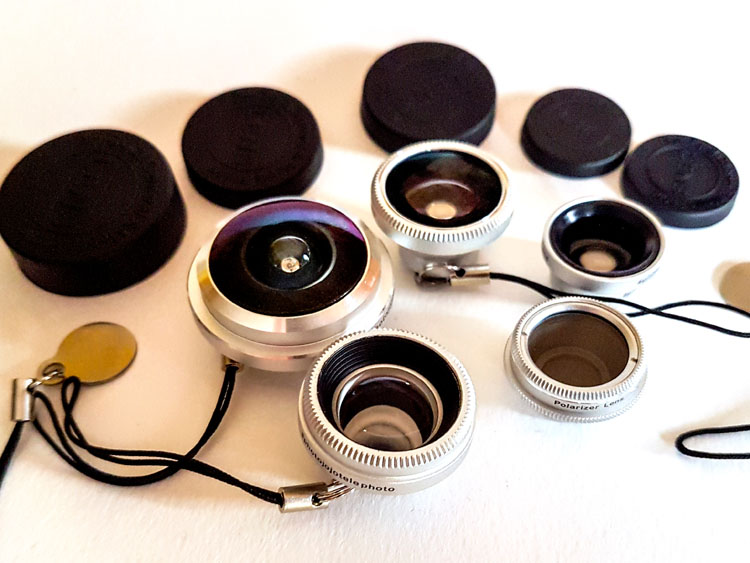
    Another company that has produced lenses is Photojojo. You can buy all five or just a couple of them. They have standard lenses, but they also have some special effects ones as well. They are the only company that I saw with a polarizer, which could be very handy for some situations.

    Here is a list of what they have:

    • Fisheye
    • Superfisheye
    • Polarizer
    • Wide/macro
    • Telephoto lens
    Android phone photography tips Photojojo

    Photojojo lenses

    They are all good but the super fisheye is probably the one I’ve played with the most. It is very wide and distorted. You will get your hand holding the camera in the shots you take with this lens. The other lenses are much what you would expect.

    The Photojojo lenses come with the magnetic rings to attach to your camera, but they don’t stick very well and when you remove the lens, the ring often comes off as well. If the lens is a bit heavy, like the super fisheye, when you angle the phone down it will just come off, along with the ring.
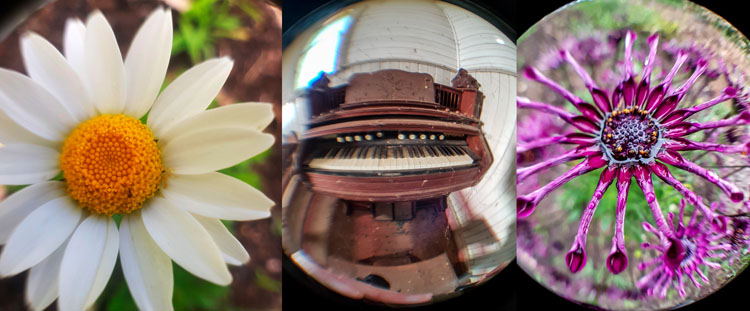
    Android phone photography tips Photojojo lenses

    Photos taken with the Photojojo lenses, the super fisheye.

    I’ve been using the Lensbaby rings with the Photojojo lenses. Sometimes you have to move the lens or the ring around, but you can get them to work together if you are patient.

    Photo editing apps

    When you start taking photos with your phone the next progression is to start sharing them with the world on social media places like Facebook or Instagram. You could just post them straight up, use the filters that come with Instagram, or you can do some fine tuning of the images photo editor apps.

    If you do a search for photo editors in the Play Store you will be given many choices. As it was for the cameras, you need to go through and see which ones you think will work for you and your purposes. We are going to look at two here.

    Snapseed

    Snapseed is a photo editor app that has been around for a while. It is free and fairly easy to use. While it does have some filters that you can just add to your image, it also has quite a few adjustments as well. Often, that is all you need to do, just do a few tweaks and the photo is ready to be saved.

    As with any software that allows you to make changes to your images you always have to save it. On your phone, Snapseed will make a new gallery for your new saved edited images. You will end up with two of every image, the original and the edited version. When you are sharing, make sure to choose the one from the Snapseed gallery.
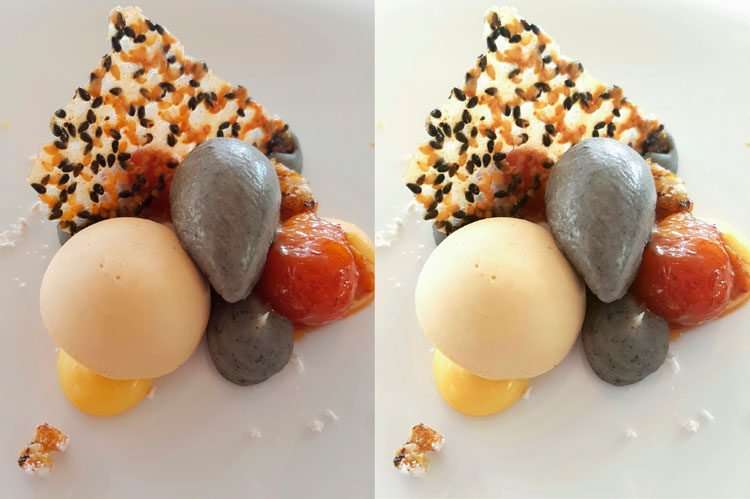
    leannecole-androidphone-snapseed

    The photo on the left was taken with my phone and then processed in Snapseed on the right.

    Lightroom Mobile

    To get Lightroom Mobile for your phone you have to be a subscriber to Adobe for Photoshop CC and Lightroom CC. It comes as part of the package. Once you are a subscriber you can download the app and sign in.

    Get a 20% discount on Photography Plan using this link for dPS readers only! 

    It doesn’t work like Lightroom CC on your computer, rather is very similar to other photo editing apps like Snapseed. It is easy to navigate around and figure out. Again, save everything you do and it will export it into a Lightroom gallery for you on your phone.

    If you don’t subscribe, then don’t do it just to get this app. Snapseed is probably just as good, and if you don’t like it there are lots of other editing apps. Ask around and I am sure you will get a list for a lot of them. One thing that is great is the ability to install them, and if you don’t like, just uninstall.

    Android photography round-up

    Taking photos with your phone can very enjoyable and just because you have an Android that doesn’t mean you can’t take photos just as well as those with iPhones. Don’t let Apple users tell you your phone isn’t as good. Now you know that you can take good photos just as good, maybe even better.

    In the end, it comes down to the person holding the camera (you) and how good you are. Have faith and share your photos. I would love to see them in the comments section below.

    googletag.cmd.push(function() {
    tablet_slots.push( googletag.defineSlot( “/1005424/_dPSv4_tab-all-article-bottom_(300×250)”, [300, 250], “pb-ad-78623” ).addService( googletag.pubads() ) ); } );

    googletag.cmd.push(function() {
    mobile_slots.push( googletag.defineSlot( “/1005424/_dPSv4_mob-all-article-bottom_(300×250)”, [300, 250], “pb-ad-78158” ).addService( googletag.pubads() ) ); } );

    The post Tips and Resources for Doing Android Phone Photography by Leanne Cole appeared first on Digital Photography School.


    Digital Photography School
  • DEAL: How to Create Captivating Photo Collages in Seconds

    Welcome to Day 7 of the dPS 12 Days of Christmas Sale.

    Today’s exclusive offer will help you make beautifully designed collages within Lightroom, in seconds.

    Cole from Cole’s Classroom has an exclusive offering for dPS subscribers.

    LR collage header

    Normally $ 158, today it’s only $ 29. That’s 85% Off.

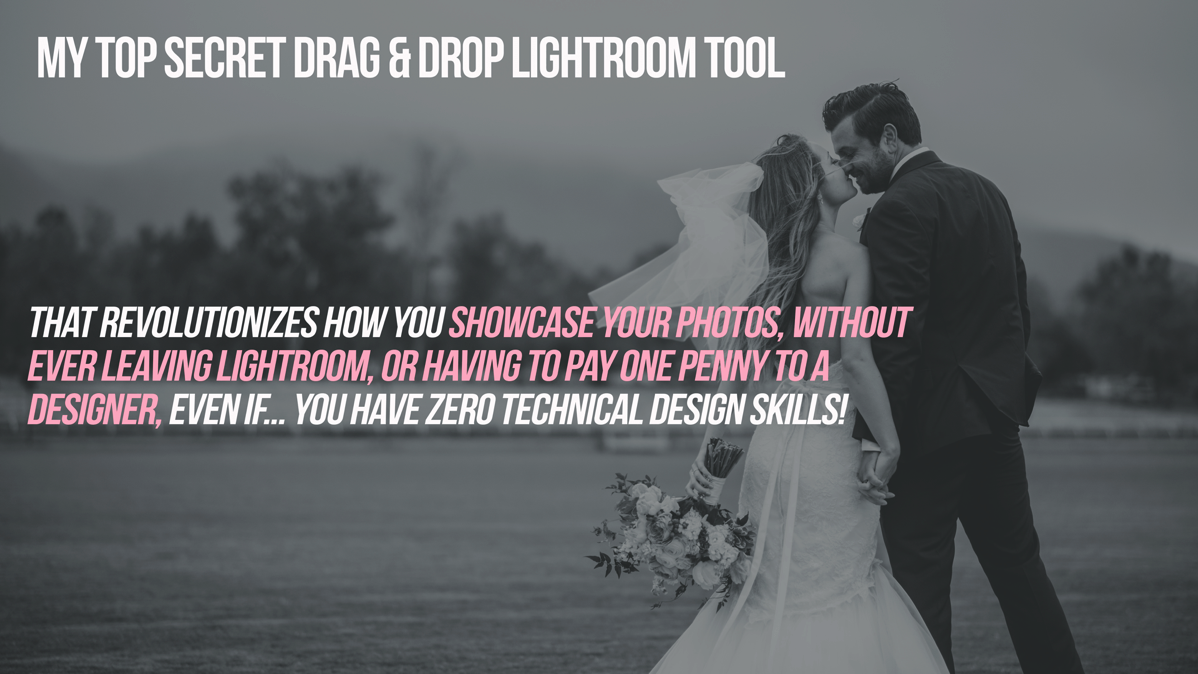
    Creating photo collages has never been so simple, and without ever having to leave Lightroom, you save massive amount of time! These Drag & Drop Collage Templates are Perfect for…

    Your Blog, Instagram, Facebook, Prints for Your House & More!

    Cole has set up templates for all the popular formats, so you can create collages using:

    • 16 Instagram Unique Design Templates
    • 18 Blog or Website Collage Templates
    • 19 Facebook Cover Design Templates
    • 7 Facebook Ad Templates
    • 16 Print Design Layout Templates

    That’s a total of 76 unique design layouts & collages!

    Cole has also thrown in a bonus if you buy today so you can export your collages to your blog or Facebook in one click!

    So don’t miss out, save $ 129 today.

    Note: There’s a 100% no-questions asked money back guarantee on these templates so no risk to you. Buy it, try it and if isn’t what you expect Cole will be more than happy to provide you with a refund.

    googletag.cmd.push(function() {
    tablet_slots.push( googletag.defineSlot( “/1005424/_dPSv4_tab-all-article-bottom_(300×250)”, [300, 250], “pb-ad-78623” ).addService( googletag.pubads() ) ); } );

    googletag.cmd.push(function() {
    mobile_slots.push( googletag.defineSlot( “/1005424/_dPSv4_mob-all-article-bottom_(300×250)”, [300, 250], “pb-ad-78158” ).addService( googletag.pubads() ) ); } );

    The post DEAL: How to Create Captivating Photo Collages in Seconds by Darren Rowse appeared first on Digital Photography School.


    Digital Photography School
  • Rangefinder magazine announces 30 rising stars of wedding photography for 2016

    30 Rising Stars of Wedding Photography

    Rangefinder magazine has announced selections for its fifth annual 30 Rising Stars of Wedding Photography for 2016, based on submissions by photographers from over 200 countries. Rangefinder is the official publication of the annual Wedding and Portrait Photographers International (WPPI) conference, and honorees will be featured in the December issue of Rangefinder, as well as on display at the WPPI Conference+Expo from Feb. 5-9 in Las Vegas, Nevada. 

    We’ve highlighted a few of our favorite photos from this year’s selections, and you can find a complete online gallery here.

    Above: Lato Photography/Laura&Tommy (Italy) “One of our favorite weddings of the last season. We were dealing with very difficult and shiny light, and we had to get the best from that situation so we captured this moment using a 45mm tilt-shift lens to create a softer background. The strength of this image comes from their hand positions creating a harmonious line, the delicate colors of their clothing matching with the background and, of course, the bride’s look.”

    Lukas Piatek (Germany)

    During a wedding day, I often try to take photos of small children. They are not disturbed by the camera at all and just do whatever they would do if I was not around. This little boy was basically running around the dance floor the entire evening, and at one point, I literally waited for him to do something special. I did not expect, however, that he would jump so perfectly, raising his arms in the air, looking into the light and being perfectly centered and framed on the dance floor. The shot was made two years ago and it was my favorite photo from that year.”

    Jacob Loafman (USA)

    “So, this couple’s ceremony and reception were held at their church. However, their church had recently built a brand new building, but they informed me they still had access to the old church. They wanted to know if I would like to do the main wedding party and bride/groom portraits there. I excitedly agreed and we headed that way. As soon as we walked in, I almost fell over from how amazing the building was inside. It was vacant. Completely vacant. This vacant space still featured the remnants of where the previously used cross hung on the wall. It was just beautiful.”

    “I noticed there was still access to the balcony and wanted to do a full wedding party portrait from up there. My idea was to just have them arrange themselves randomly. I provided very little direction, as that’s what I wanted. My desire was to create a group portrait that felt more like an album cover, where the entire group was the focal point, but the vacancy and tattered old floors added an element of interest to the shot. After I released the shutter button a few times, I knew I had accomplished what I was going for.”

    People Truelove Tellers (Spain)

    “This was a very lucky one. We didn’t actually want to shoot it because we were running out of time and were on our way to another spot for portrait pictures. We were driving in a tiny, narrow and lonely road in the middle of nowhere outside of Madrid, and suddenly a full flock of sheep crossed the road. That was perfect because they ran away to the hill in the perfect direction of the sunset. I asked for the couple to follow them and the photo came!”

    Tim and Laura Sullivan (USA)

    “Chip and Karyn had a lot they wanted to do for their wedding (ranging from Prince impersonators to multiple live bands), but in the end, they chose an in-town elopement with just their two kiddos and us. Tim officiated, Laura took the ceremony photos, and we spent the day gallivanting around some of the most gorgeous spots in Seattle (we even organized a private chef in an industrial loft for them, because going above and beyond for our clients is our favorite thing). This shot is from the deck of their unfinished condo during their ceremony. Our florist came in and covered the construction dust with the most gorgeous arrangements, almost like their own little Wonderland. Their daughters were crying, we were crying—oh man, was it all memorable.”

    Marko Marinkovic (Croatia)

    “My editing process aims to resemble the colors of the visual artists from the 16th and 17th century as they, among others, struck a foundation for all of us. Each of the paintings I visit for inspiration gives me insight on the thought process a painter must go through in order to recreate 3D light on a two-dimensional surface. From framing the scene on the square canvas to choosing the color palette, it stays pretty much the same in photography today. Spoiled by the digital era we often overshoot and undermine the thought process behind the images we create.”

    The Hendrys (Scotland)

    “This was one of the most heartfelt weddings we’ve captured to date. The sun was out—when it was forecasted to rain heavily—emotions were running high and the couple and their guests exuded happiness throughout the whole day. At that moment, we thought to ourselves, is this really our job?! And from then on, we knew it was what we wanted to continue doing for as long as we possibly could.”

    Lucy Spartalis (Australia)

    “Working with Paul and his groomsmen was like spending a day on the set of Monty Python. LOOK at those mustaches; socks; sexual poses. My partner Alastair and I were wiping tears away between every shot. At one point, someone did a handstand and someone else started posing provocatively on the floor. I could’ve just shot them as they already were, but with a little zhuzhing (I checked that spelling, by the way—what a word)—positioning Paul between the spread legs of the groomsman behind him, asking another gent to kneel on one knee to create a mid-level point of interest, etc—we created a more balanced and dynamic composition. I don’t like to pose people too heavily in most cases, but when you’re onto a good thing, a little directorial tweaking can really take things to the next level.”

    Heather Liddell (New Zealand)

    “Spring weddings are something special. Julia was greeted by an ecstatic Graham and a sun shower when she reached the top of the aisle. The beads of water caught the light and created the most amazing effect. I crouched low so I could create an angle to get in a little sun flare and to make sure that the rain drops would be highlighted against the dark hedge.”

    Pablo Beglez (Spain)

    “A few minutes after Paula got out of her room to go directly to the altar, she had a problem with the dress. The designer was there with us and had to take a needle and thread and sew the dress right there. Those were some minutes of stress, but it finally was great.”

    Jacob Murphy (USA)

    “It was toward the end of the night and the dance party was reaching a crescendo, but I couldn’t help but notice this perfect vignette of everyone’s shoes. I love when details can tell a strong story too. I used an indirect tunnel flash technique to make this photo more interesting.”

    Articles: Digital Photography Review (dpreview.com)

  • Have Your Say: Best Gear of 2016

    Have Your Say: Best Gear of 2016

    For the past few weeks we’ve been running a series of polls to find out what you – our readers – think of the major product releases of 2016. For the first round of voting we made initial five polls covering lenses, compact cameras and interchangeable lens cameras (ILCs). Now that those polls have closed, we’re pleased to announce the winners.

    In this slideshow we’re announcing the winners and runners-up in each category, and kicking off a final poll, to determine which of the ten individual poll winners from the first round should be crowned as your choice for overall best gear of 2016.

    Best Prime lens – Runner-up: Sigma 85mm F1.4 Art

    We’ve been waiting and hoping for Sigma to create an 85mm lens in its highly-regarded ‘Art’ lineup for some time, and 2016 saw that dream come true. Like all of the Art primes, the 85mm F1.4 is a stunning performer. We’ve heard Sigma representatives say that the Art series is the company’s ‘no compromise’ line, and the company certainly didn’t compromise with the new 85mm – it’s as big as a flower pot.

    It might be a bit of a lump, but it’s beautifully constructed, and optical quality really is gorgeous. We love this 85mm for its sharpness, and the quality of its bokeh. Clearly it has impressed you, too. You voted this lens runner-up in our poll for best prime lens of 2016.

    Best prime lens – winner: Nikon AF-S NIKKOR 105mm F1.4E

    Winner of our readers’ poll for best prime lens of 2016 is another fast portrait lens, the Nikon AF-S Nikkor 105mm F1.4E. Like Sigma’s 85mm F1.4 Art, the Nikon 105mm F1.4 is a big, heavy lens, and it comes with a big, heavy pricetag. Optically though, we think it’s worth every penny. While armchair engineers, xenophobes, and those ignorant of modern lens design might balk at the polycarbonate exterior and ‘made in china’ label, as our friend Roger Cicala has proved, the 105mm F1.4 is a tough, well-built lens.

    As far as its optics are concerned, the 105mm F1.4 represents the state of the art for fast short telephoto lens design. There’s no doubt that this lens is a relatively niche product, but with such stunning central sharpness between F2-4 and such beautiful bokeh, it’s among the best portrait lenses on the market. You voted the Nikon AF-S Nikkor 105mm F1.4E best prime lens of 2016.

    Best zoom lens – runner-up: Sigma 50-100mm F1.8 Art

    Sigma’s 50-100mm F1.8 DC HSM Art provides a 75-150mm focal length range on the APS-C format DSLRs for which it’s designed, and – crucially – replicates the classic F2.8 (equivalent) continuous aperture that has been a traditional feature of high-end full-frame zooms.

    Offering a fast maximum aperture and standard ‘Art’-series construction quality the 50-100mm is solid, heavy and luxuriously engineered. An ideal companion to high-end DSLRs like Canon’s EOS 7D Mark II and Nikon D500, you voted the Sigma 50-100mm F1.8 Art runner-up in our poll for best zoom lens of 2016.

    Best zoom lens – winner: Olympus M.Zuiko 12?100mm F4 PRO

    Olympus is ending 2016 with a bang, thanks to two major new releases. The OM-D E-M1 Mark II is an extraordinarily powerful, pro-grade mirrorless camera, and a new kit lens, the 12-100mm F4 has also impressed us – and you – greatly.

    The M.Zuiko Digital ED 12-100mm F4 IS Pro is a powerful carry-everywhere zoom lens. Combined with Olympus’ 5-axis IBIS in the new OM-D E-M1 II, it can offer up to 6.5 stops of image stabilization, which greatly expands the camera’s usefulness in marginal light, for both stills and video. As we’d expect for a lens in Olympus’s ‘PRO’ lineup, the 12-100mm is also splash-proof, dust-proof, and freeze-proof. We’ve been impressed by its versatility since we got our hands on a sample after Photokina, and clearly you agree.

    Best high-end compact camera – Runner-up: Sony Cyber-shot RX10 III

    The Sony Cyber-shot RX10 III is an expensive camera, no doubt about it, and one of the largest ‘compact’ cameras on the market. But it’s also one of the best performers. Despite boasting a fast 24-600mm (equivalent) zoom lens and a 1 inch sensor, the RX10 III produces images that beat or rival its competitors even at the very furthest ends of its zoom reach. Within a few days of shooting with it, DPReview’s staff were already talking about the RX10 III’s lens as ‘magic’, and however they managed it, Sony’s engineers should be congratulated on a significant optical achievement.

    Of course it’s not all about the lens. The RX10 III also offers class-leading image quality in terms of resolution and high ISO image quality, and an impressive 4K video specification, plus the option to capture HD-quality high frame-rate footage. The RX10 might rival some DSLRs for size, but it beats them when it comes to a lot of other things.

    Best high-end compact camera – Winner: Sony Cyber-shot RX100 V

    As we’ve come to expect, Sony released a lot of cameras this year, and the Cyber-shot RX100 V clearly caught your attention. Although it’s not a major upgrade to the RX100 Mark IV, the new Mark V improves on its predecessor with a revamped autofocus system, which features 315 phase-detection AF points covering 65% of the frame. The other major addition is a significantly increased buffer, allowing for full-resolution 20MP capture at 24fps, with full AE and AF. This is effectively equal to shooting 5K 24p video footage, made up of up to 150 JPEGs, or ~60 Raw + JPEGs in a burst. Impressive stuff.

    This kind of performance, plus an impressive 4K video specification make the RX100 V a real powerhouse. It’s one of our favorite compact cameras of 2016, and clearly a hit among our readers, too. You voted it your high-end compact camera of the year. 

    Best midrange ILC – Runner-up: Panasonic Lumix DMC-G85

    The Panasonic G85 (G80 outside the US) has proven to be something of a sleeper hit, this year. Although not as flashy as Olympus’s 2016 M43 offerings, the G85 is one of the most powerful and capable cameras of its type on the market. The G85 uses the same sensor as its predecessor the G7, but without an AA filter. The 2.36M dot OLED electronic viewfinder is all new, and boasts increased magnification compared to the G7.

    The camera also gains in-body 5-axis image stabilization and Dual I.S. 2 as well as weather and dust-sealing. It now uses an electromagnetic shutter and features a new in-camera focus-stacking mode. Like its predecessor it is 4K-capable, has built-in Wi-Fi and utilizes Panasonic’s Depth from Defocus AF.

    The G85 has become one of our go-to cameras for tradeshows and press events thanks to its small size, reliably focus and high-quality 4K video mode. Clearly it has impressed you, too, taking the runner up spot in our readers’ poll for best midrange ILC.

    Best midrange ILC – Winner: Sony a6300

    The G85 had tough competition this year in the shape of the Sony a6300. With an APS-C sensor and compact form factor, the a6300 is one of the most powerful cameras of its type on the market. As far as image quality is concerned the a6300 (literally) punches above its weight, offering class-leading resolution and high ISO noise performance and superb 4K video footage. Fast continuous shooting performance and an advanced hybrid AF system round out an impressive feature set.

    Since it was released, we’ve reached for the a6300 more and more, for ‘run and gun’ video, especially. And the a6300 impressed you enough to beat stiff competition and win our poll for best midrange ILC. 

    Best high-end / professional ILC – Runner-up: Fujifilm X-T2

    The Fujifilm X-T2 is one of the most likable ILCs on the market. While the X-T1 was a lot of fun to use, it was in some respects (resolution, video and autofocus being the most obvious) a little behind its competition. The X-T2 fixes all that, without messing with the formula that made its predecessor such a great camera. 

    Fujifilm’s current 24MP APS-C sensor is capable of excellent still image quality, and while not class-leading, a revamped AF system makes the X-T2 more versatile than its predecessor. The X-T2 is Fujifilm’s first camera to offer 4K video capture, and footage compares very well to other 4K-enabled competitors, not to mention older X-series models, which were notoriously weak when it came to video. We weren’t surprised to see that you think highly of the X-T2, voting it runner-up in our readers’ poll for best high-end / professional ILC. 

    Best high-end / professional ILC – Winner: Nikon D500

    It was a tight race in the high-end / professional ILC poll this year, but the Nikon D500 just pipped the X-T2 to the top position, by a whisker. The long-awaited successor to the D300S, the D500 is a stunning camera, and easily the most advanced APS-C DSLR that we’ve ever reviewed. Essentially the best bits of the flagship Nikon D5 but in a smaller, APS-C format body, the D500 is a powerhouse.

    Capable of 10fps capture with an almost infinite buffer (when using an XQD card) the D500 is a superbly capable tool for wildlife and action photography, but is equally useful for travel, landscape work and portraiture. The D500’s 153-point autofocus system is almost uncanny in its ability to accurately track moving subjects, and the camera’s tough and weather-sealed body is designed to stand up to hard professional use. 

    Aside from its somewhat half-baked 4K video mode, the D500 is practically peerless in the APS market, and also compares very favorably against the best of its full-frame competitors. It topped your list of 2016’s high-end / professional ILCs, and a very worthy winner it is, too. 

    Have Your Say

    You’ve seen the results from our five polls, so now’s the time to pick an overall winner. You can vote for up to three of the products in this poll, and voting closes at midnight (PT) on December 31st. We’ll announce the overall winner, and runner-up early in the new year.

    Thanks for voting, and for contributing to DPReview over the past year. We couldn’t do any of this without you.

    .


    Have your say

    $ (document).ready(function() { Poll({“pollId”:”5121852146″,”openForVoting”:true,”mainElementId”:”poll0″,”slot”:null,”isSingleChoicePoll”:false,”minNumberOfChoices”:1,”maxNumberOfChoices”:3}); })

    Have Your Say: Best Product of 2016
    Your answers
    1. Required
    2. Optional
    3. Optional
    You need to login to vote

    Fujifilm X-T2

    Nikon D500

    Nikon AF-S 105mm F1.4E

    Olympus M.Zuiko 12-100mm F4

    Panasonic Lumix DMC-G85

    Sigma 85mm F1.4 Art

    Sigma 50-100mm F1.8 Art

    Sony a6300

    Sony Cyber-shot RX10 III

    Sony Cyber-shot RX100 V

    Voting is easy – you pick your favorite products by dragging and dropping. You can pick up to three, and rank them in order of priority.

    Articles: Digital Photography Review (dpreview.com)

  • 4 Tips For Doing Eye-Catching Landscape Photography

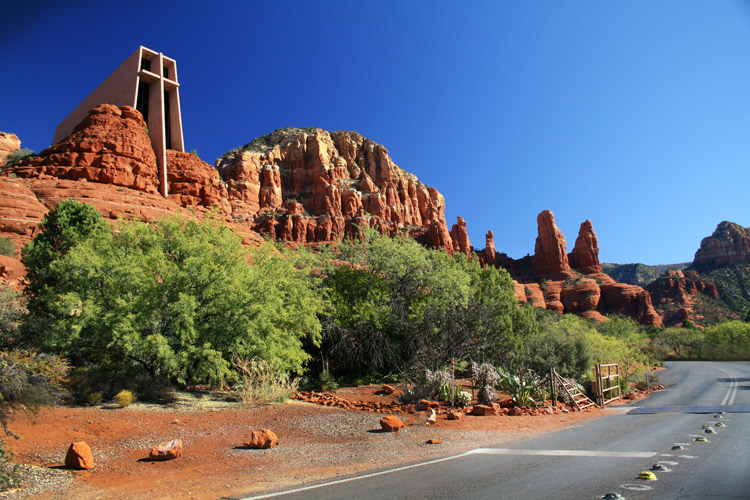
    Landscape photography is everywhere today and for good reason – the world is beautiful! However, because landscape photography is so popular, it can be difficult for your photographs to grab the eyes of your desired viewers. While there’s no way to predict exactly what image will stand out in the crowd, you can use these four techniques to give your photography the edge when it comes time to grab some eyes.

    Landscape Photography

    #1. Define your vision

    As a photographer you are not only taking a photograph, you are sharing a vision – your vision. It’s important to remember this concept every time you’re capturing an image. This is important because if you are aware of why you’re attracted to a scene, and why you want to share it with others, the easier it will be for your viewers to connect with what you saw.

    This does not mean that you have to stick with the same definition of vision through every photograph you take. Instead, you should try to adapt and evolve your vision each time you go out to take photographs. Letting your experiences influence the choices you make in your photography will allow your photography to express your individuality as a person.

    #2. Perspective

    Landscape Photography

    It’s easy to see a beautiful landscape and take a photograph of what you see, but that is often not enough to grab the eye of your viewer. After you’ve defined your vision for a specific photograph it’s time to answer some questions about the perspective you wish to convey.

    Do you want to photograph from a low angle or from above the scene? Are you thinking of using a super wide-angle lens or would your scene be better suited for the compressed look of a telephoto? You can even begin to think about what type of post-production techniques you will use. Will it be HDR, black and white, vibrant and saturated, or muted?

    Each photograph you take is going to be unique in its answers to these questions. There’s no one-answer-fits-all solution here, it’s just a matter of finding out what works and learning from experiences over time.

    #3. Be purposeful in the choices you make

    Landscape Photography

    If you’re going to overexpose a photograph, have a reason why. If you’re going to post-process an image using the HDR technique be sure do it because it makes sense, not because you want it to be HDR. Making purposeful decisions in your photography will make every photograph you take better.

    In regards to post-production in general, be sure to use it as a tool to elevate your great photographs to the next level, and not to save your misfires from the trashcan. Post-production is not what makes a photograph great, it can only enhance an already great photograph allowing it to stand out, above the crowd.

    #4. Subject matter, light, and the basics

    Landscape Photography

    Finally, a boring landscape, shot in bad light, with the wrong techniques is not going to win any love from the peanut gallery so brush up on the basics first. Learning how to photograph in the right lighting conditions, how to properly use a tripod, and how to achieve the perfect exposure of your scene will allow you to create more eye-catching photographs.

    What else?

    Do you have some other tips for achieving eye-catching landscape photographs? Share them with us in the comments below!

    googletag.cmd.push(function() {
    tablet_slots.push( googletag.defineSlot( “/1005424/_dPSv4_tab-all-article-bottom_(300×250)”, [300, 250], “pb-ad-78623” ).addService( googletag.pubads() ) ); } );

    googletag.cmd.push(function() {
    mobile_slots.push( googletag.defineSlot( “/1005424/_dPSv4_mob-all-article-bottom_(300×250)”, [300, 250], “pb-ad-78158” ).addService( googletag.pubads() ) ); } );

    The post 4 Tips For Doing Eye-Catching Landscape Photography by John Davenport appeared first on Digital Photography School.


    Digital Photography School