Blog

  • 2017 Oskar Barnack award offers €80,000 prize fund

    The Unbearable, the Sadness and the Rest
    Clémentine Schneidermann
    Winner of the Leica Oskar Barnack Award Newcomer 2016

    Leica has announced that entries for its 2017 Oskar Barnack award will be accepted from 1st March and that the winner will receive €25,000 in cash and €10,000 worth of M-system equipment comprising a body and lenses. The theme for this year is ‘the interaction between people and their environment’ and entrants are expected to submit a series of between ten and twelve images that were all or mostly shot during 2016-17.

    In addition to the main prize, there will be a Newcomer Award for 25s and under that will consist of €10,000 of cash and €10,000’s worth of M-system camera and lenses. Ten other photographers will receive a prize of €2,500 for being in the shortlist.

    The competition is open to professional and, in the case of the Newcomer Award, prospective professional photographers and there is only one entry per person. Images do not have to have been shot on Leica equipment.

    Entry closes on April 10th and the winners will be awarded their prizes at a ceremony in Berlin. For more information and to see the winners from previous years visit the Leica Oskar Barnack Award website.

    Press release

    Leica announces Oskar Barnack Award 2017

    Dates confirmed for prestigious annual Leica Camera AG photographic competition

    Now in its 37th year, Leica has announced the opening dates for the Leica Oskar Barnack Award 2017. Those wishing to enter the renowned international competition for professional photographers, in addition to the ‘Leica Oskar Barnack Newcomer Award’ (for up-and coming photographers under the age of 25), can submit their entries between 1 March and 10 April 2017.

    The competition calls for the submission of a self-contained series of between ten and twelve images, in which the photographer perceives and documents the interaction between people and their environment in a creative and ground-breaking style. Eligible for submission are portfolios of photographs captured in 2016 and 2017, or work from long-term projects including at least some images taken within this period. From 1 March 2017, entry forms and the terms and conditions of entry, will be available on the competition website at www.leica-oskar-barnack-award.com.

    As in the previous year, the presentation of the awards to the winners in both categories will take place at a gala ceremony in Berlin. Oskar Barnack, the inventor of the revolutionary and iconic ‘Ur-Leica’ 35mm camera, began his career in the German capital. Indeed, in 1959, close to the Giesensdorfer Schule in Berlin – attended by Barnack as a child, and where children are still taught today – a street was named ‘Barnackufer’ to commemorate the school’s most famous pupil.

    With prizes amounting to a total cash value of 80,000 euros, the ‘Leica Oskar Barnack Award’ is one of the industry’s most prestigious photographic competitions. The winner in the main category will be honoured with a cash prize of 25,000 euros and Leica M-System equipment (a camera and lens) valued at an additional 10,000 euros. The winner of the Newcomer Award will receive a cash prize of 10,000 euros and will also receive a Leica rangefinder camera and lens. In addition to the two main categories, a further ten submissions to the competition will each be honoured with prizes of 2,500 euros. The portfolios entered by all finalists will be published on the www.leica-oskar-barnack-award.com website and in a magazine published specially for the competition.

    Further details will be announced during the year.

    Articles: Digital Photography Review (dpreview.com)

  • How to Create a Dynamic Zoom Burst Photograph

    Who doesn’t love warp speed? In this article, you’ll go hurtling into the future at warp speed nine, and you don’t need any federation star fleet spaceships to do it! A DSLR camera with a zoom lens and a tripod is the only equipment you’re going to need for this exciting technique. There are similarities to light painting by camera rotation, and the zoom burst is indeed another form of kinetic light painting. Let’s take a look at this technique, what it will give to your photos, and how to do it.

    zoom burst photo cityscape

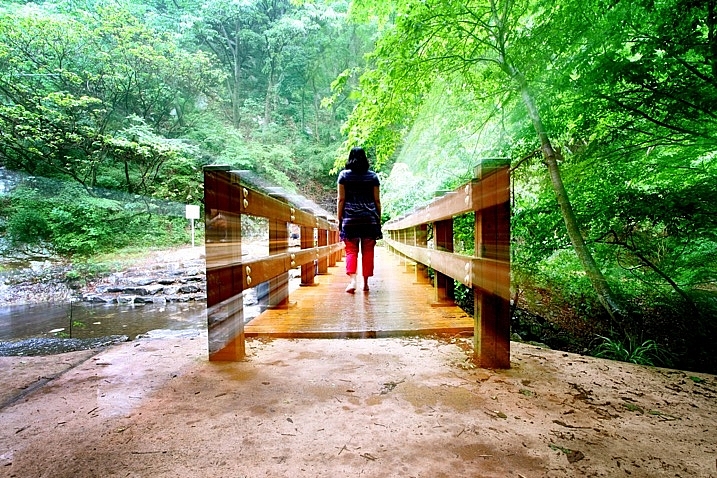
    In this photo, a friend stood still in front of Marine iCty in Busan.

    What does this technique add to your photograph?

    Put simply, this gives a still frame a much more dynamic edge. This article will look at how you can apply zoom bursting to architectural photos and is best used in an urban environment. The nature of still frames is of course that they’re a single moment, by changing the focal length during long exposure you can add movement and urgency to your frame. The zoom also produces leading lines within your frame that all lead up to your main subject within the frame.

    How to take zoom burst photographs

    Taking a zoom burst photo is a simple technique, in fact, you can even do this handheld. The effect is achieved by changing the focal length of your camera lens during a long exposure. Follow these steps:

    1. Choose a scene that has mixed areas of light. You can use a forest with mottled light, or an apartment building where some lights are on and some are off.
    2. The exposure should be between half a second and 2 seconds long.
    3. You can take this photo handheld but it’s better to use a tripod.
    4. Change the focal length of the lens during the exposure. Zooming out tends to work better during the night for longer exposures, and zooming in works better during the day.
    zoom burst lights

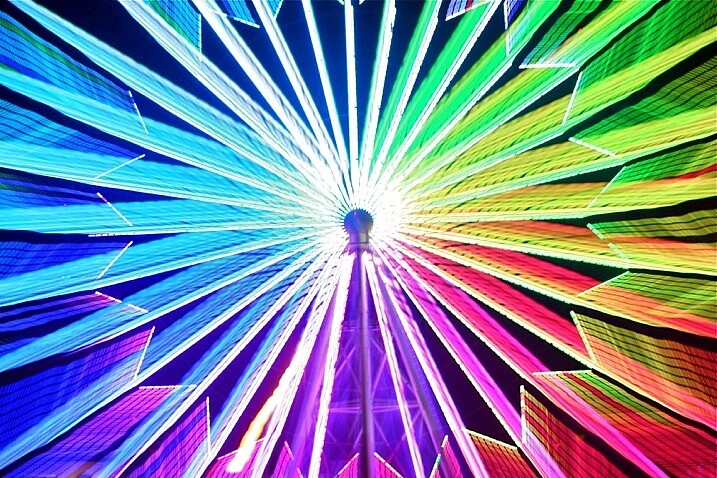
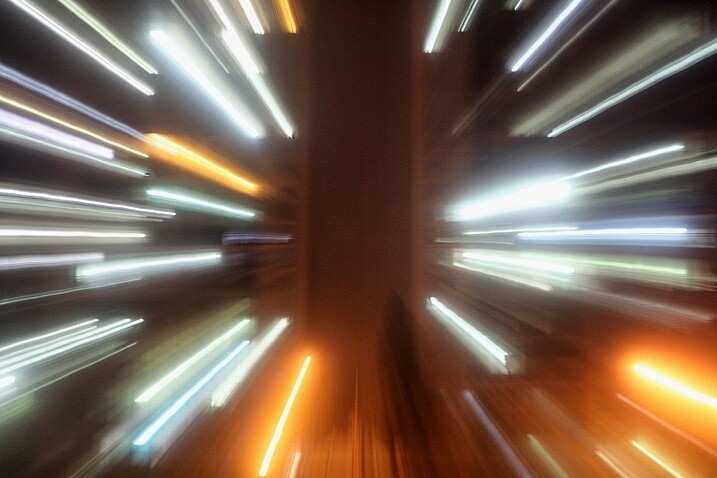
    A photo that uses zoom with no stationary phase. This photo is colorful and abstract.

    How to take zoom burst photos that show structures

    Now that you know how to make a simple zoom burst, which looks abstract in nature, it’s time to move a step further. Now you are going to see how you can introduce architectural structures into this frame.

    1 – Choose the correct location

    Not all locations work well for zoom bursts, especially if they’re too cluttered. You need to choose a building that’s well lit and not surrounded by others. There are other options you can look at as well such as Ferris wheels or sculptures. Any location you choose should allow you to zoom into the structure, and then zoom out on the lights that surround it.

    zoom burst too many buildings

    When there are too many building in the frame, the zoom burst shot can get busy.

    2 – Set the camera on a tripod

    If this is going to be a long exposure of 25 or 30 seconds, you will have to use a tripod. You need to secure the tripod in position, making sure it doesn’t move about. A lot of tripods let you hook your camera bag to the extendable center, doing so will steady the tripod. Apply the same logic you would use to attain a sharp image. The focal length movement of the lens will prevent you getting maximum sharpness, though.

    3 – Select the right lens

    The best lens for this type of photo is a super zoom, one that goes from 18mm-300mm. A super-zoom gives you maximum flexibility over composition and allows for more creative photographs. If you don’t have a zoom with this kind of range, you can use a kit lens. The 18-55mm lens works very well for the zoom burst.

    4 – Focus the camera using Live View

    Now compose your photograph in the position you intend to finish your zoom burst. The final composition will be at the wider or widest end of your lenses focal length. Turn the camera’s Live View function on, and zoom into the central structure you wish to focus on. Use the lens’s manual focus so that the image on the Live View screen is sharp. Keep the camera lens in manual focus to prevent loss of focus during the exposure. Keep a mental note of the focal length where you focused, especially if that isn’t the widest part of the lens.

    castle zoom burst photo

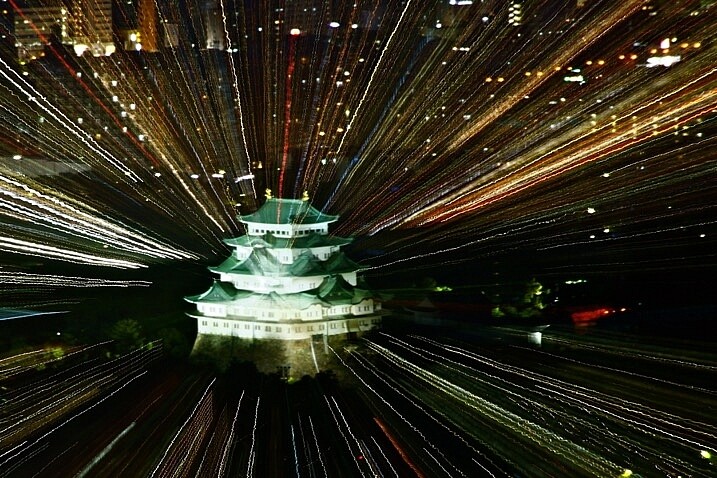
    In this photo, Nagoya castle was focused on using a zoom. I zoomed into the castle.

    5 – Zoom into the target area

    Select the area of the scene you want to have as the center of your zoom, this should have been decided already during initial scene composition. Ensure that all your settings remain the same, as this is the final step before you begin the exposure. Set the camera to expose for 25-30 seconds, at f/8 or f/11. You can use a smaller aperture if you need to in order to get a longer exposure.

    6 – Carry out the zoom burst

    Set the camera to the 2-second timer (or 10 seconds if you want to prepare yourself for the zoom). Hit the shutter button to begin the countdown to the exposure. At the point when the shutter is about to open begin slowly zooming out. As the camera is exposing, continue to zoom out keeping it as smooth as possible to avoid camera shake.

    You should be zooming out for between two and five seconds, the longer the zoom is the more pronounced the light trails will be in the image. As you zoom keep an eye on the focal length of the lens so you finish at your composed position.

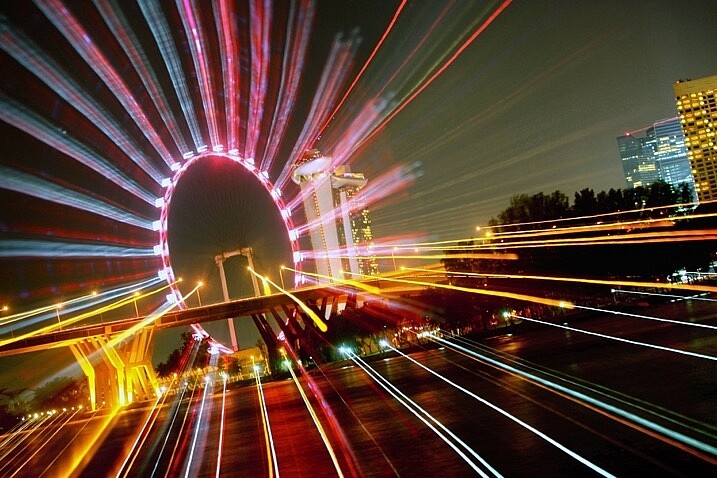
    The ferris wheel is a great subject for zoom bursts. The middle is empty, and there is a ring of light to zoom out.

    The Ferris wheel is a great subject for zoom bursts. The middle is empty, and there is a ring of light to zoom out.

    7 – Allow the camera to finish the exposure

    Once you have finished the zoom remove your hand from the lens, without moving the camera. The camera will continue to expose for 20-25 seconds depending on the exposure time you used. The image will now show zoom burst lights and architectural structures in the same exposure.

    8 – Carry out post-processing work on the photo

    The result in-camera will look nice, but adding contrast in post-processing is important. The image has “lost” five seconds of exposure time, so adjusting the contrast helps. You can use NIK color efex, which has a filter called pro-contrast and is an excellent choice for this type of photo. The centered position of the zoom can’t be adjusted in camera, though cropping the photo in post-processing allows you to move the zoom to an off-center position.

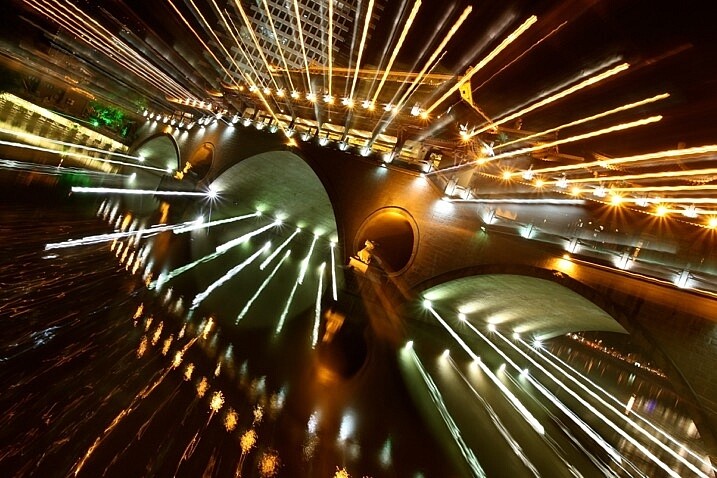
    The bridge lit with many lights is a good subject for a zoom burst.

    The bridge lit with many lights is a good subject for a zoom burst.

    Where should I go to take zoom bursts?

    The best place to take this type of photograph is in a city, one that’s well lit, and has interesting architecture. A Ferris wheel is a great structure to use as it’s circular, which helps with the centered nature of the zoom burst. Other architecture can also work as long as it’s alone and not surrounded by other structures. A cityscape with many buildings can look too busy with too many light streaks in one frame.

    You can even take zoom burst photos during the day, but you will need an ND filter to do this. An ND filter that allows you to shoot for 30 seconds will allow you to create a zoom burst using the steps listed above, though the zoom should last longer.

    img_2957

    I look forward to seeing your photos using this zoom burst technique, please post any images you have in the comments section below.

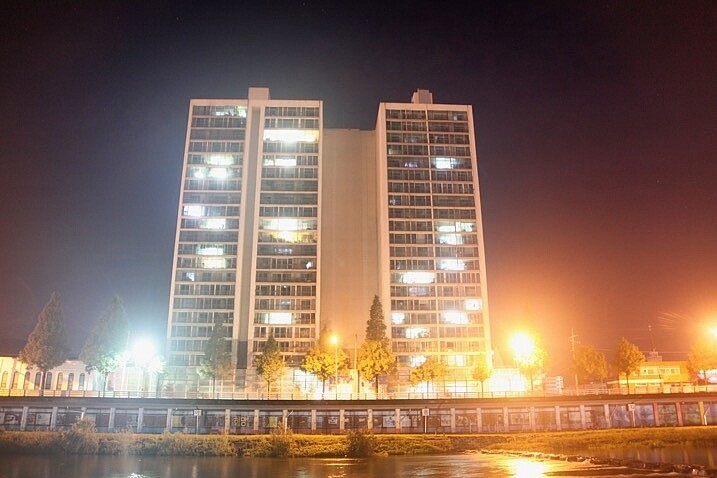
    This is a good example of a lone building with lights on.

    This is a good example of a lone building with lights on.

    In this photo only zoom is used, there is no stationary phase.

    In this photo only zoom was used, there was no stationary phase.

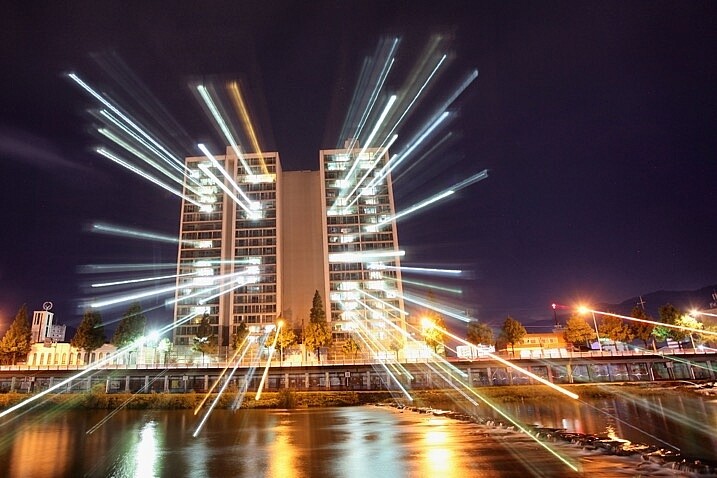
    This photo shows how a zoom burst and static phase produces an image.

    This photo shows how a zoom burst and static phase produces an image combining light streaks and architecture.

    googletag.cmd.push(function() {
    tablet_slots.push( googletag.defineSlot( “/1005424/_dPSv4_tab-all-article-bottom_(300×250)”, [300, 250], “pb-ad-78623” ).addService( googletag.pubads() ) ); } );

    googletag.cmd.push(function() {
    mobile_slots.push( googletag.defineSlot( “/1005424/_dPSv4_mob-all-article-bottom_(300×250)”, [300, 250], “pb-ad-78158” ).addService( googletag.pubads() ) ); } );

    The post How to Create a Dynamic Zoom Burst Photograph by Simon Bond appeared first on Digital Photography School.


    Digital Photography School

  • Kodak CMO says the company is ‘looking into’ reviving Kodachrome

    Photo by pittaya via Flickr. Used under CC license

    During CES 2017, Kodak announced it would revive the film stock it discontinued in 2012, Ektachrome. The announcement was well received, and was itself the result of an uptick in professional film sales, something that has also spurred Kodak toward another possible revival: Kodachrome. Eastman Kodak’s President of Consumer Film division and Chief Marketing Office Steve Overman confirmed as much during a recent The Kodakery podcast.

    The Kodakery team spoke with Overman from the Kodak booth during CES, and near the end of the discussion they mentioned the Ektachrome revival. That topic snowballed into a confirmation from Overman that Kodak is likewise looking into bringing Kodachrome back, but plans to do so haven’t been finalized at this time.

    Overman works for US-based Eastman Kodak but it seems likely the company would follow the pattern seen with its recent Ektachrome announcement, and work with UK-based company Kodak Alaris to release a stills version of the film to photographic markets.

    It took less effort and time to bring Ektachrome film back, Overman explained, which is why it was given precedence. He went on to say, though, that ‘people love Kodak’s heritage products and I feel, personally, that we have a responsibility to deliver on that love.’ 

    Via: PetaPixel

    Articles: Digital Photography Review (dpreview.com)

  • 19 New Beginning Images for a Fresh Start to the Year

    Well, a new year is yet again upon us. It’s a time for a new start, fresh beginnings.

    That can make many things to different people. Let’s see what new or beginning means to these 19 photographers with their fresh “new” images.

    Smilla4

    By smilla4

    Robert Voors

    By robert voors

    Darlene Hildebrandt

    By Darlene Hildebrandt

    Nico Cavallotto

    By Nico Cavallotto

    Mark Gunn

    By Mark Gunn

    Christian Siedler

    By Christian Siedler

    Zeitfaenger.at

    By zeitfaenger.at

    Incase

    By Incase

    Oregon Ducatisti

    By oregon ducatisti

    ?eagan

    By ?eagan

    Brookhaven National Laboratory

    By Brookhaven National Laboratory

    Margus Kulden

    By Margus Kulden

    U.S. Geological Survey

    By U.S. Geological Survey

    Kala Bernier

    By Kala Bernier

    Mikael T

    By Mikael T

    MFer Photography

    By MFer Photography

    Kylie_Jaxxon

    By Kylie_Jaxxon

    Samuel John

    By Samuel John

    Johan Neven

    By Johan Neven

    googletag.cmd.push(function() {
    tablet_slots.push( googletag.defineSlot( “/1005424/_dPSv4_tab-all-article-bottom_(300×250)”, [300, 250], “pb-ad-78623” ).addService( googletag.pubads() ) ); } );

    googletag.cmd.push(function() {
    mobile_slots.push( googletag.defineSlot( “/1005424/_dPSv4_mob-all-article-bottom_(300×250)”, [300, 250], “pb-ad-78158” ).addService( googletag.pubads() ) ); } );

    The post 19 New Beginning Images for a Fresh Start to the Year by Darlene Hildebrandt appeared first on Digital Photography School.


    Digital Photography School

  • Weekly Photography Challenge – New Beginning

    As the first photography challenge of 2017, I thought it would be fitting if we go with a theme for new beginnings. Like these 19 images show – there are many ways to interpret that theme.

    Francisca Ulloa

    By Francisca Ulloa

    Shellie

    By Shellie

    Weekly Photography Challenge – New Beginning

    So, however you want to run with this idea is up to you. It could be about babies, kittens, or eggs. Or it could be around a new beginning you want for yourself this year. Maybe even a goal or resolution you want to achieve.

    Share your images below:

    Simply upload your shot into the comment field (look for the little camera icon in the Disqus comments section) and they’ll get embedded for us all to see or if you’d prefer, upload them to your favorite photo-sharing site and leave the link to them. Show me your best images in this week’s challenge. Sometimes it takes a while for an image to appear so be patient and try not to post the same image twice.

    Micolo J

    By Micolo J

    Andy Reago

    By Andy Reago & Chrissy McClarren

    Craig Sunter

    By Craig Sunter

    Elycefeliz

    By elycefeliz

    Share in the dPS Facebook Group

    You can also share your images on the dPS Facebook group as the challenge is posted there each week as well.

    googletag.cmd.push(function() {
    tablet_slots.push( googletag.defineSlot( “/1005424/_dPSv4_tab-all-article-bottom_(300×250)”, [300, 250], “pb-ad-78623” ).addService( googletag.pubads() ) ); } );

    googletag.cmd.push(function() {
    mobile_slots.push( googletag.defineSlot( “/1005424/_dPSv4_mob-all-article-bottom_(300×250)”, [300, 250], “pb-ad-78158” ).addService( googletag.pubads() ) ); } );

    The post Weekly Photography Challenge – New Beginning by Darlene Hildebrandt appeared first on Digital Photography School.


    Digital Photography School

  • How to Create and Use Smart Collections in Lightroom

    Collections are one of Lightroom’s most powerful features, giving you a way to bring images from many folders together. Generally speaking, they’re just like boxes you sort your physical stuff into. Nothing goes in unless you put it there, and nothing comes out unless you take it out. What if I told you there was another far more powerful type of collection that can sift through all your photo information and build a collection automatically based on a subset of that information? Well, there is, it’s called a Smart Collection.

    Using Smart Collections

    You’ll find the easiest way to get to grips with Smart Collections is to begin with a few simple ones and then expand to more complex ones. Let’s start with a couple simple ones.

    Creating a Smart Collection

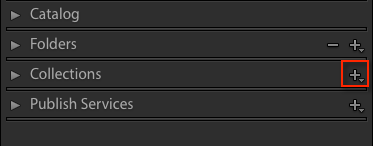
    You can create a Smart Collection in a number of ways. First, you can click on the little ‘+’ in the Collections panel header, situated in the Left Panel of the Library Module.
    Creating and using smart collections in lightroom

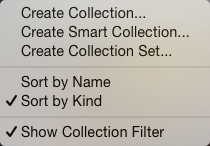
    From the flyout menu, choose Create Smart Collection.
    Creating and using smart collections in lightroom png 2

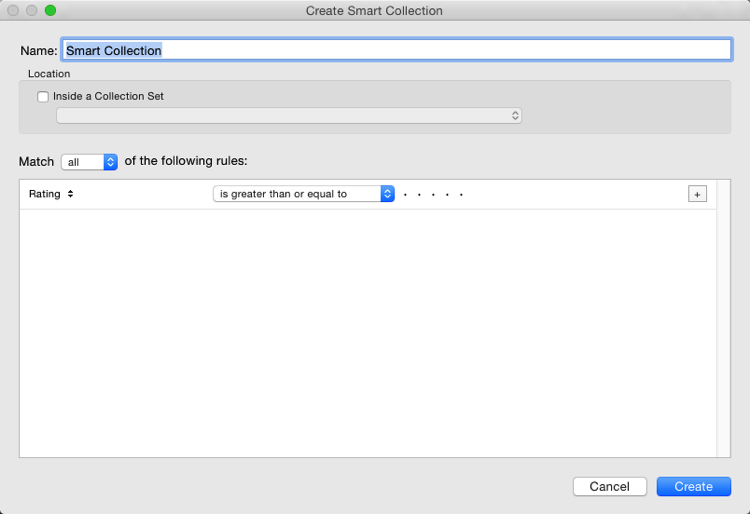
    This brings up the default Smart Collection panel (below).
    Creating and using smart collections in lightroom 3

    Begin by giving the Smart Collection a name. If you don’t, you’ll end up with a list with Smart Collection, Smart Collection 1, Smart Collection 2, and so forth. Use a name that describes what the collection will contain. For example, you could call this one “3 Stars or Above”. Below this you can choose to add the Smart Collection to a Collection Set (which needs to be created in advance). You could add it to the Smart Collections set, which is a default set created by Lightroom.

    Adding the rules

    The next part is the key to creating the Smart Collection. It’s the rules section that defines what will be in the collection. In the Match flyout, you’ve three options:

    1. All: Every rule must match for a photo to be included.
    2. Any: As long as a photo matches one of the rules, it’s included in the collection.
    3. None: As long as a photo doesn’t match a rule, it’s included.

    If you’re trying to narrow down to a limited set of photos, you’ll most likely be using the All option. As your first Smart Collection is a simple one, set the Rating to 3 stars, with “is greater than or equal to” applied in the pull-down menu. There are other options in the list including; is, is not, is greater than, is less than, is less than or equal to, is in the range. These all allow you to refine what appears in the collection. Click Create to make the collection.
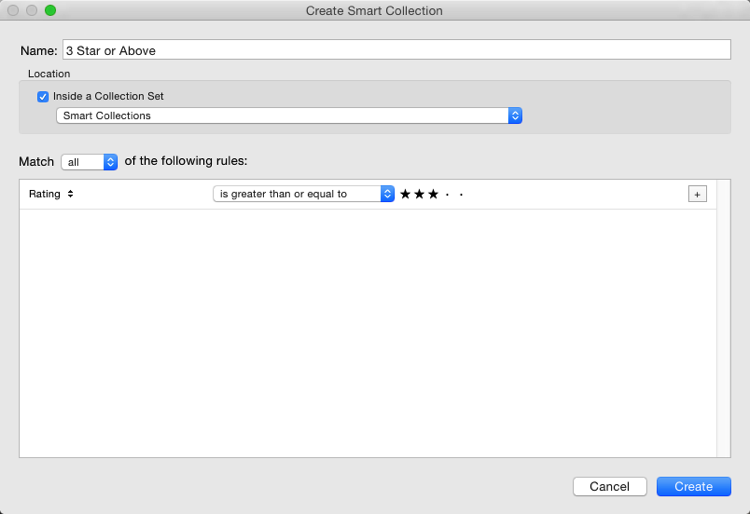
    Creating and using smart collections in lightroom 4

    The newly created collection will appear in the Smart Collections set, already selected, and the Grid View will show all matching photos. If you change the rating of one of the images visible to be a 2-star photo, it would automatically drop out of the collection. Why? Because it no longer matches the collection rules (3 or more stars).
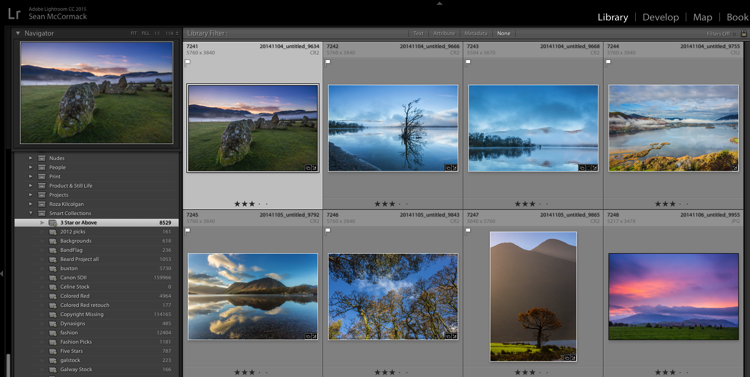
    Creating and using smart collections in lightroom 5

    Adding more criteria

    Let’s start to narrow down the images you’re seeing. You can either double click on the collection to edit it or create a new one. I’ve double clicked for this example to edit. At the end of the Rating line is a + icon (outlined in red below) which you can click to add another rule. As soon as you do, a minus (-) icon appears, allowing you to remove this rule at any stage. There must always be at least one rule, though.

    Creating and using smart collections in lightroom 6

    Let’s narrow down the collection to show only more recent 3-star images.

    The new rule has Rating selected by default. You can change this by clicking Rating and choosing from the possible rule options in the pull-down menu. To get recent images, you need to choose Capture Date from the Date menu.

    You’ll notice there’s a different set of options for dates in the figure below. As you want recent dates, choose “in the last” from the list. Next, you enter a number, then choose from days, weeks, months and years. For speed, enter 30 with the default “days” option. See below:

    Creating and using smart collections in lightroom 7

    Next, change the name to reflect the new options and click Save. The collection will now display only the most recent photos (taken in the last 30 days) with 3 stars.
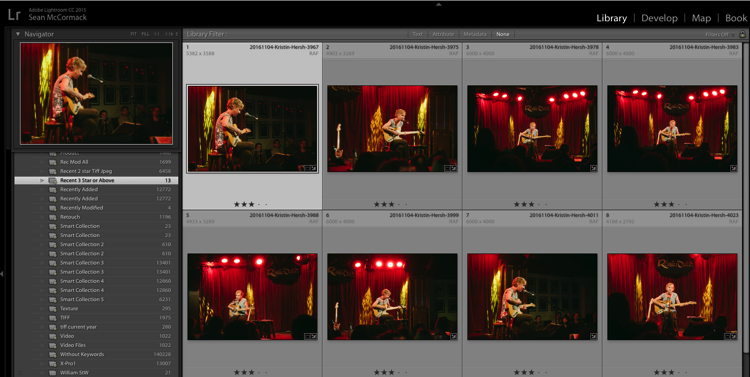
    Creating and using smart collections in lightroom 8

    Smart Collection uses

    Right now, what you’ve just created could be done using the Filter Bar, so what use is a Smart Collection? Well, they’re great for helping you complete workflow tasks such as:

    • Add Copyright:  Create a Smart Collection with the rule “Copyright Status”, the option “is” and the choice ‘”unknown”. If you use Metadata Presets, generally you’ll have one that sets the copyright information and sets the Copyright Status to “copyrighted”. Add this preset to the files in the Smart Collection to add that information.
    • Add Keywords:  To sort images not keyworded. From the Other Metadata menu, choose Keywords, then set the option to “are empty”. Use this to add keywords to an image. Just remember that as soon as you hit enter in the keywords panel, the image will drop out of the Smart Collection.
    • Event work:  For event work, you’re generally delivering most of the image, except blinks or out of focus shots. Usually, this work is edited quickly. Create a Smart Collection with the rules; Capture Date, is in the last, 1 days, and Pick Flag, is, unflagged. Now run through and reject the duds using the shortcut key X. Export the rest for your client.
    • Labels for workflow stages:  Labels can be used to imply a status with your photos. For example, you could use red to mean “selected, but needs editing”, yellow to mean “processing” and green for “final image”. By creating smart collections for each stage, you can see what needs to be done with each image. Combined with setting a date, you can keep on top on what needs doing!
    • Adding Captions:  Coupled with a recent date range, you can create a Smart Collection with “Other Metadata>Caption” and “is empty”. This shows recent images in need of a caption. Couple with ratings, etc., to narrow down which images need to be worked on.

    Advanced Rules

    The Any, All and None route does allow a great selection of options, but it’s missing a trick. What if you need 4-5 rules for sure (All), but also need one or two rules that are more like an Any set? That can’t be done using the method you’ve seen so far.

    Rejoice . . . There is a way! It’s a little bit hidden, but if you hold down the Alt/Option key, the + icon turns into a number (#) sign. You can click the # to create a subset of new rules. These allow; Any of the Following, All of the Following and None of the Following – so you can mix in options as well.

    Creating and using smart collections in lightroom 9

    For example, you could specify an “Any of the following” are true and have two options for File Type, one for JPEG, and one for TIFF. This means all the other rules must apply, but either JPEG or TIFF will also apply. (note I’ve changed to 60 days here for a better set of photos to match for the example).
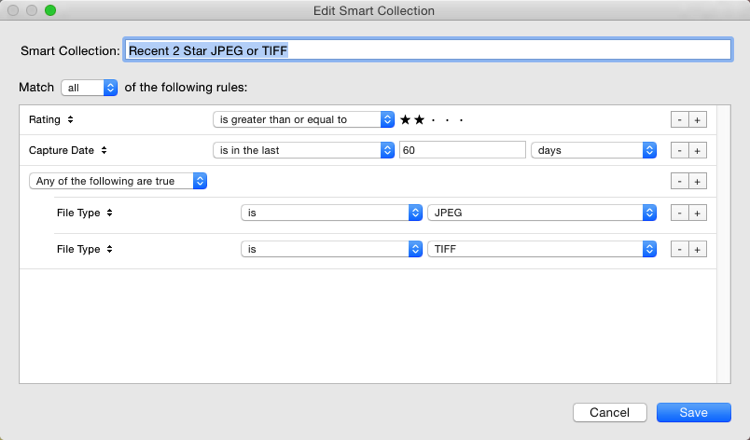
    Creating and using smart collections in lightroom 10

    The Smart Collection now shows both TIFF and JPEG images with 2-star or higher ratings, taken in the last 60 days.
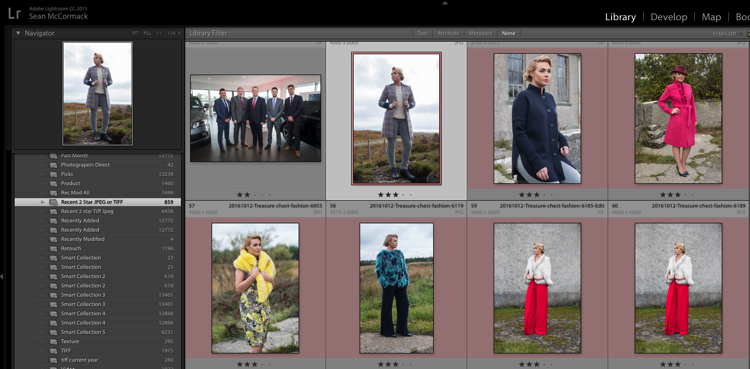
    Creating and using smart collections in lightroom 11

    Other options you could use are red or yellow labels, or even non-continuous date ranges. Alternatively you could use the option to exclude information. For instance, you could have a date range of “in the last 1 year” and using “None of the following” could have “in the last 1 month” to exclude the most recent month. Combined with ratings/flags or stars, this could help locate older material still in need of editing.

    Finally

    As you can see, Smart Collections are a great tool in your file management arsenal, helping you drill down to specific sets of photos easily.

    googletag.cmd.push(function() {
    tablet_slots.push( googletag.defineSlot( “/1005424/_dPSv4_tab-all-article-bottom_(300×250)”, [300, 250], “pb-ad-78623” ).addService( googletag.pubads() ) ); } );

    googletag.cmd.push(function() {
    mobile_slots.push( googletag.defineSlot( “/1005424/_dPSv4_mob-all-article-bottom_(300×250)”, [300, 250], “pb-ad-78158” ).addService( googletag.pubads() ) ); } );

    The post How to Create and Use Smart Collections in Lightroom by Sean McCormack appeared first on Digital Photography School.


    Digital Photography School

  • KitSplit acquires CameraLends, becomes largest peer-to-peer camera rental platform

    Peer-to-peer camera equipment rental platform KitSplit has acquired its rival CameraLends to form the world’s largest peer-to-peer gear rental community. The combined entity will be managed under the KitSplit brand from headquarters in New York and CameraLends founder Adam Derewecki will join KitSplit as an advisor. 

    “There are more content creators today than ever before and they all need access to top quality, affordable gear. Since launching a little over a year ago, KitSplit has made huge improvements in gear rentals, making creative work and connecting with creators even easier and more affordable. The CameraLends acquisition will further our goals of democratizing access to great gear and empowering creators,” says KitSplit cofounder and CEO Lisbeth Kaufman.

    CameraLends user accounts including gear information have already been integrated into the Kitsplit web platform to smooth the transition for existing CameraLends users. In addition to individuals, KitSplit also works with rental houses and production companies to expand its gear pool. More information is available on the KitSplit website.  

    Articles: Digital Photography Review (dpreview.com)

  • 4 Reasons Why You Should Photograph Concrete

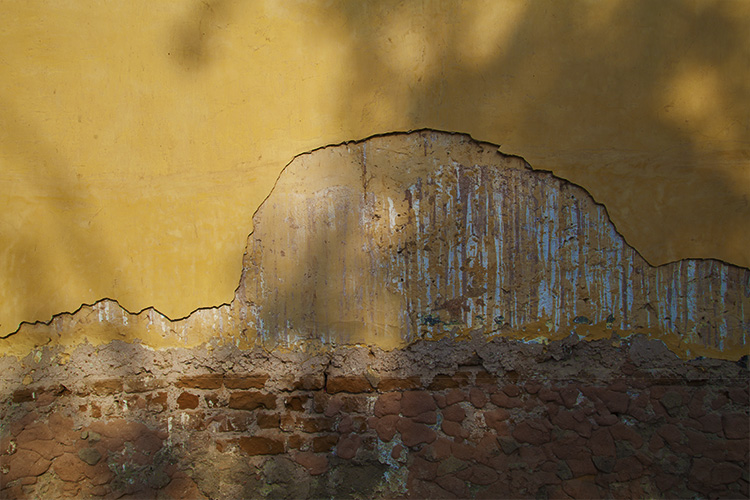
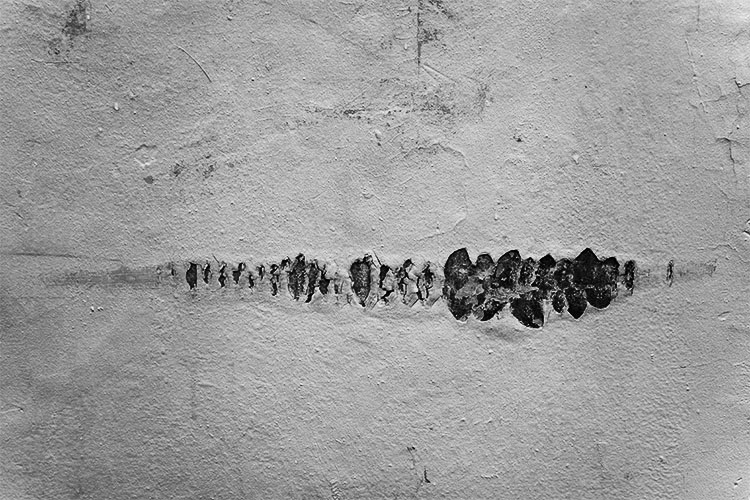
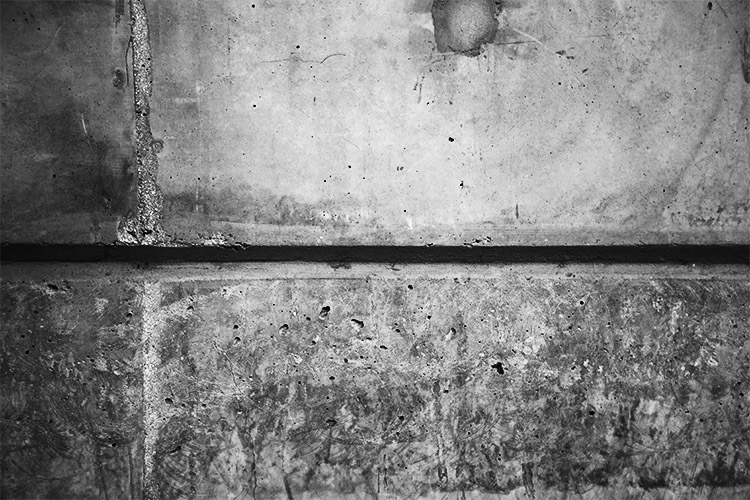
    When people ask me if I have a favorite subject to photograph, they are often surprised by my response. See, I really enjoy photographing abstract urban environments, and most of all, I love photographing concrete. Yep, that’s right! Plain old concrete.

    As the most common urban material, concrete shapes buildings, lines pathways, forms pipes, columns, bridges, and driveways. Anywhere you look you’ll see concrete, it’s as endless in variety as the reasons I love photographing it. You could say that car parks are a wonderland for me.

    concrete-photography-03

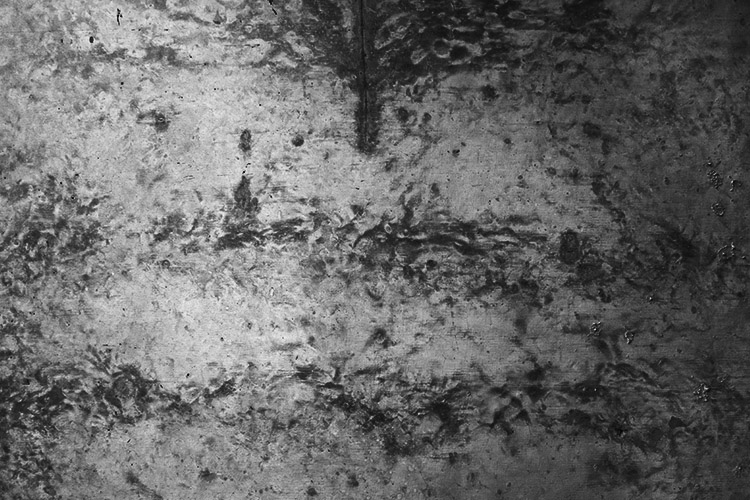
    This slab of concrete takes on the appearance of a Rorschach test.

    However, concrete is often overlooked for more obvious or eye-catching subjects. If you google “urban photography” there are thousands of beautiful photographs of skyscrapers and streets, urban patterns, and underground train lines. But rarely do you see photographs of just concrete itself.

    And why would you bother? A photograph of a concrete bollard sounds pretty boring, right? Wrong! Here are a few reasons why concrete can be a photographic wonderland if you simply take the time to look.

    concrete-photography-14

    The strikingly bold mark on this slab of concrete is the remnant of a red car that got a bit too close.

    concrete-photography-01

    1 – Concrete is a time capsule

    Concrete is popular in construction because it builds durable, long-lasting structures that will not rust, rot or burn. In short, it stands the test of time. This means that concrete construction will invariably wear the markings of the surrounding environment and the people who consciously or unconsciously interact with it.

    It is a time capsule and photographing it means documenting the story of what makes up an urban environment. From the freshly laid feature wall, to the roughly poured foundations of an underground car park, or names etched into pathways and paint scratches from cars, it all tells a story.

    concrete-photography-13

    concrete-photography-15

    concrete-photography-11

    concrete-photography-16

    concrete-photography-17

    2 – Abstract expressionism

    If  photography is like painting with light, then concrete is a sturdy urban canvas. Another reason I enjoy photographing concrete so much is it has parallels to abstract expressionism. Abstract art, mostly characterized by painting, focuses on the process, the medium, the shape and the color within the frame of the canvas. Through their paintings, abstract expressionists create a visual arena documenting an artist’s movements, thinking and process without relying on the depiction of figurative imagery. Like abstract art, concrete lays bare the visual results of spontaneity, time and the limitations of physics. The lack of figurative references also allows the viewer to explore the image in greater depth, lending their own meaning to the work – which creates a deeper connection with the audience.

    Like abstract art, concrete lays bare the visual results of spontaneity, time and the limitations of physics. The lack of figurative references also allows the viewer to explore the image in greater depth, lending their own meaning to the work – which creates a deeper connection with the audience.

    concrete-photography-08

    concrete-photography-05

    concrete-photography-18

    The lack of figurative references creates the appearance of an almost alien landscape

    3 – Minimalist beauty

    Concrete itself is like an abstract expressionist’s canvas, but the act of photographing such a bold subject is actually very minimalist. Photography, when you drill down to the basics, is about light, shade, surface, tone and line. Photographing concrete surfaces doesn’t seek to depart from this, but rather, emphasize it.

    Photographing a seemingly menial subject like concrete not only draws attention to its beauty but hearkens back to the simple elegance of photography by documenting the incidental and intentional brushstrokes of the urban environment.

    concrete-photography-09

    concrete-photography-02

    4 – Variety!

    No two panels of concrete are the same. Concrete acts as a canvas for a myriad of air bubbles, paint, scratches, graffiti, wear, watermarks, leftover adhesive, etc. Concrete itself forms waves and arches as it is poured. Finishing effects vary too, depending on the type of concrete and the pouring technique. Any portion of concrete maps out the history of that particular time and place with hypnotizing whorls and abrasive texture.

    The familiarity of the subject is no deterrent either. Often, as I’m photographing a wall or pathway, passers-by do a double-take, trying to see what it is that I’m photographing. It’s something they may never have considered photograph-worthy before, and it interests them. The beauty is already there, waiting for someone to draw attention to it. Viewers often remark that they never knew concrete could be so beautiful until now!

    concrete-photography-10

    concrete-photography-12

    Conclusion

    Concrete is an incredibly variable and dynamic subject, and whats more, it keeps still! As an almost constant presence in history, the use of concrete has evolved with humans to shape our environment. Concrete is a time capsule of intricate details and hidden stories that illustrate the way we interact with the world.

    It’s an often overlooked, but delightfully accessible subject, always ready for a photographer to take notice. Next time you are out and about with a camera, take time to look at what concrete has to offer. You may surprise yourself with how fascinating the canvas of the urban landscape can be!

    concrete-photography-04

    googletag.cmd.push(function() {
    tablet_slots.push( googletag.defineSlot( “/1005424/_dPSv4_tab-all-article-bottom_(300×250)”, [300, 250], “pb-ad-78623” ).addService( googletag.pubads() ) ); } );

    googletag.cmd.push(function() {
    mobile_slots.push( googletag.defineSlot( “/1005424/_dPSv4_mob-all-article-bottom_(300×250)”, [300, 250], “pb-ad-78158” ).addService( googletag.pubads() ) ); } );

    The post 4 Reasons Why You Should Photograph Concrete by Megan Kennedy appeared first on Digital Photography School.


    Digital Photography School
  • Nikon’s 100 year anniversary video is both amazing and ridiculous

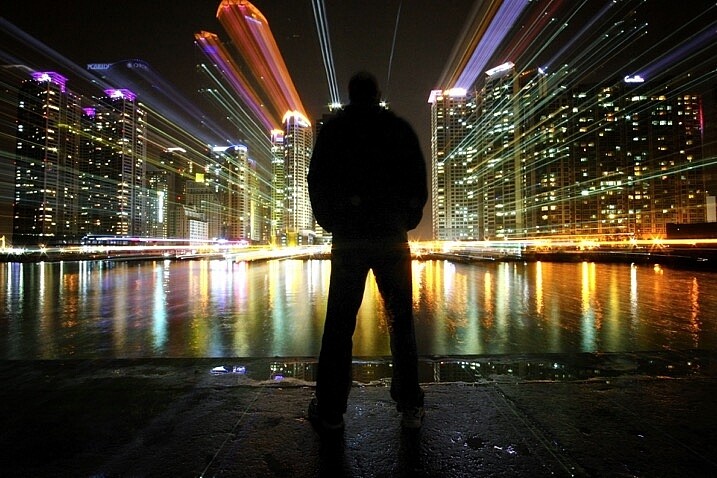
    Nikon has been around for 100 years, which is pretty cool, and to celebrate the anniversary it has launched a dedicated anniversary site alongside a pretty amazing movie that traces Nikon’s history.

    The video features an epic intro from outer space and a catchy song with the lyrics ‘I can see the light, oh yes I can see the light,’ repeated. It’s the kind of song where if I lived in say, Berlin and enjoyed underground dance parties, I wouldn’t bat an eyelash if it came on in the club. There’s also cameos by famous photographers, recreations of historic moments, famous magazine and newspaper covers and a narrator with a Hollywood blockbuster-style voice.

    In all seriousness it’s a very cool, albeit over the top, video. And Nikon is certainly a company with a rich and important history worth celebrating. The anniversary site also features a really cool timeline of the company’s achievements. Here’s hoping they’ll be around for another 100 years.
    Articles: Digital Photography Review (dpreview.com)

  • Electroads: Wireless Vehicle-Charging Roads Rolling Out in Tel Aviv

    [ By WebUrbanist in Conceptual & Futuristic & Technology. ]

    electroads

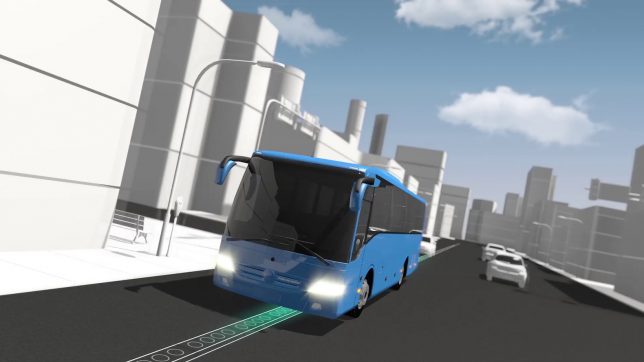
    A series of roads and public buses in Israel are being retrofitted to test an electromagnetic induction system designed to recharge vehicles on the go, eliminating the cost, time, emissions and waste associated with conventional fuel and refueling stops.

    smart-inverter

    Electroad, an Israeli startup, boasts a relatively straightforward and fast-deploying system compared to competitors. Their copper and rubber chargers can be rolled out at a rate of a close to a half a mile per day into shallow trenches just a few inches deep. The ease of retrofitting is one of the striking advantages of the system — more involved variants can require ripping up substantial sections of pavement, taking longer and costing more to implement.

    air-gap

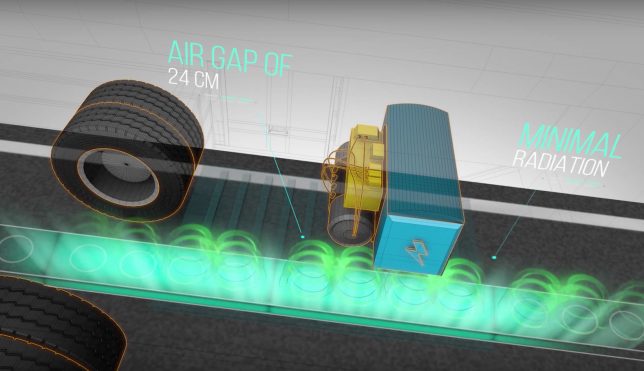
    Their technology has already been tested in controlled settings (small sections of test track outside Electroad’s lab) but will now be demonstrated at scale under real-world conditions along public transit routes. Like other induction technologies, no connection is needed between the vehicle and the road — a radiation-shielded coil simply picks up energy from the lines below, tied into the grid at intervals along the way.

    eletric-bus-wireless-charging

    To deploy the system, an asphalt scraper digs a trench while a second vehicle unrolls the the rubber-and-plastic strips. Electric buses following the revamped route will be able to store a charge for any jumps off the invisible grid. That may not sound like much, but the reduced storage capacity means the bus can travel lighter, using less energy and requiring a cheaper battery. Ultimately, the cost and power saved upfront will help pay back for the system installation more rapidly.

    Share on Facebook


    [ By WebUrbanist in Conceptual & Futuristic & Technology. ]

    [ WebUrbanist | Archives | Galleries | Privacy | TOS ]


    WebUrbanist