Blog

  • How to Prepare a Photography Exhibit of Your Work

    There is nothing like having your work displayed up on a wall for everyone to see. Even better, is seeing little round red stickers underneath to indicate that the work has been sold. For most artists, that is their driving force and anyone who makes images that are intended for walls and display. However, where and how to go about having a photography exhibition can be harder than you think. It can also be a very expensive exercise.

    This article will help answer a lot of the questions that you may have when it comes to exhibiting your work.
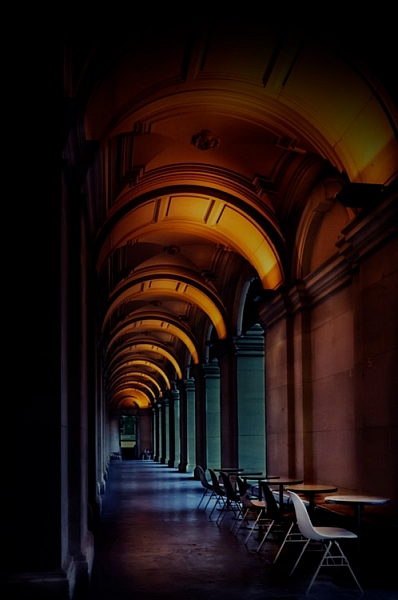
    photography exhibit tips

    If I were to have an exhibition now this image would be in it.

    Why do a photography exhibit?

    Artists have been exhibiting their work for centuries, now is no different. The reasons for doing an exhibit can vary from artist to artist. Before the internet, it was one of the best ways to showcase your work to everyone. However, artists used them to make money. They would invite special clients or benefactors to the openings in the hope they would buy one or a few pieces.

    Selling artwork is harder these days, so if your sole reason for exhibiting is to sell some, then you may be very disappointed. However, if your goal is to put your work up on a wall to show people what you are capable of, then it can be very rewarding. Having all your best work up for everyone to look at can feel like quite an achievement.

    Another reason many artists exhibit is to be able to put the exhibitions down on their artists CV. The CV or Curriculum Vitae is a list of all their exhibitions, plus education and a few other things, similar to a resume. It is what galleries look at when seeing if they will have a show with an artist.
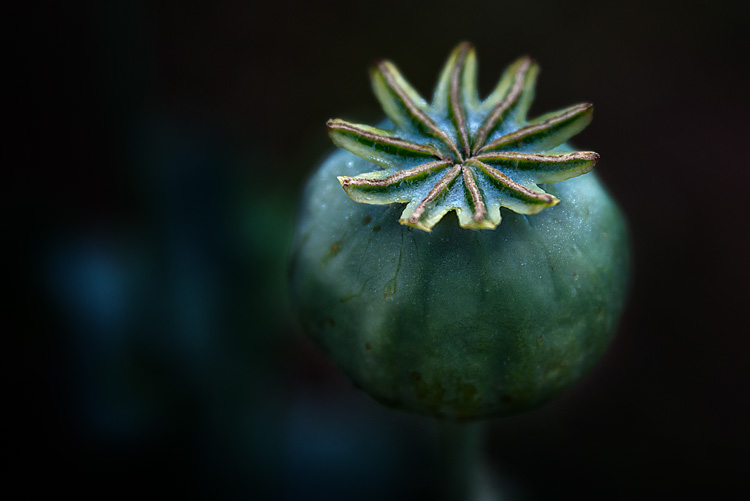
    leannecole-exhibiting-your-artwork-31

    This image would be ideal if I decided to have an exhibition of just my macro work.

    Costs and Budgeting

    Exhibitions are not cheap and before you decide to have one there are many things you need to take into consideration. What sort of space will you exhibit in and how much will it cost? What other expenses will there be? How many images will you prepare for the exhibit and what will the reproduction outlays cost? Should you have a solo exhibition or start with group shows? These are all questions you need to think about.

    Group or Solo

    Solo shows are fantastic and ultimately what every artist wants, to have their own show. But they are also very expensive and you have no one to share the expenses with. Having said that, most artists build up to solo shows and often have had some success in group shows first.

    For most photographers, group shows are a good way to get your feet wet and start building your artist’s CV. Find some friends who are also interested in exhibiting. Apply together to galleries to see if you can get an exhibition. Many galleries advertise for artists to participate in group shows they are holding, so look out for them and apply.
    leannecole-exhibiting-your-artwork-39

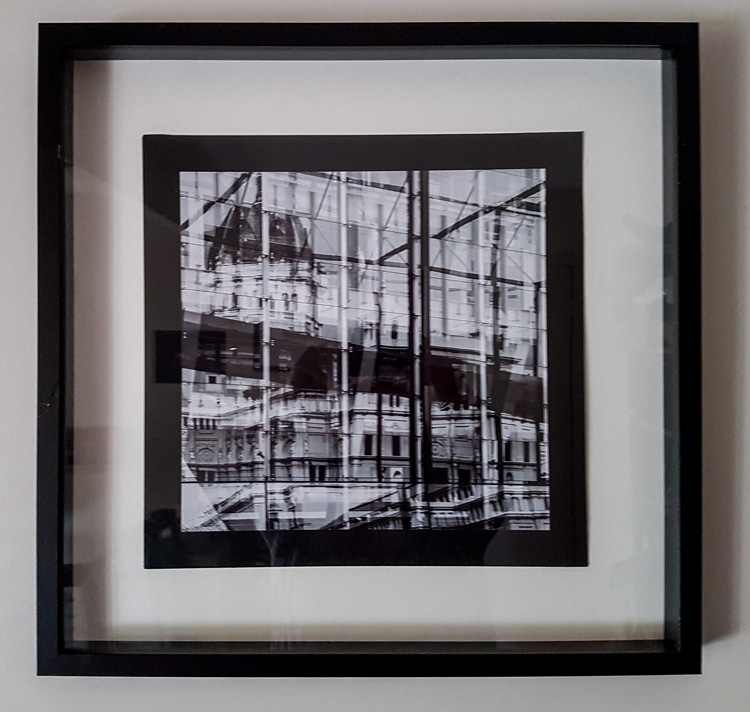
    This framed image was in a group show for street photography.

    Where to exhibit

    This could be an endless list, but the most common places are galleries that specialize in the work that you want to show. However, there are other places, like cafes or restaurants, that like to have exhibitions which feature different artwork on their walls. There are benefits and disadvantages to each.

    Cafes, Restaurants, and Foyers

    These are often free for holding an exhibition. They don’t always have schedules so you could possibly have your work up for longer than you could in a gallery. These types of venues may not want a commission from the sale of work, though they may want you to handle all the sales, so you would need to leave contact information. They usually won’t take any responsibility for your art pieces, so be aware of that (loss or damage is not covered).
    leannecole-exhibiting-your-artwork-35

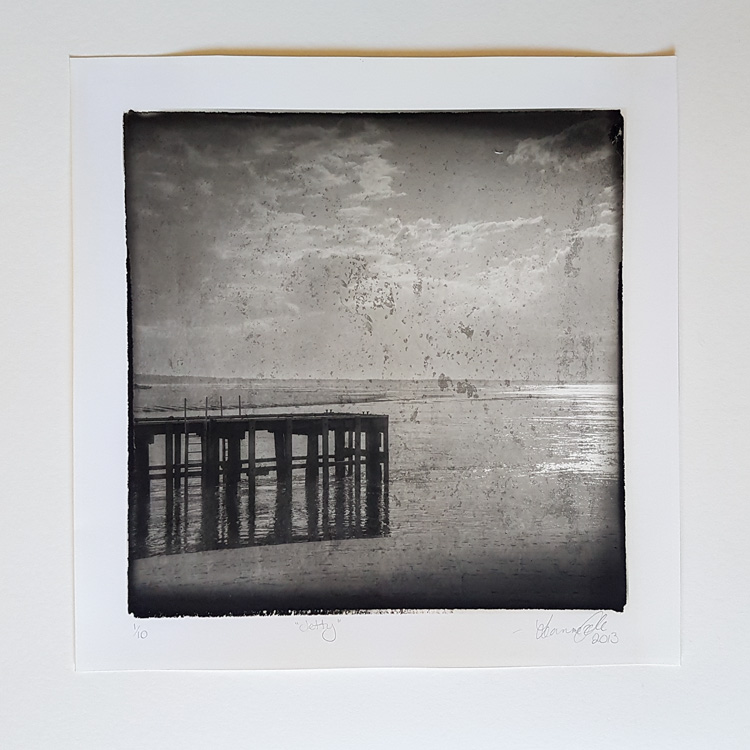
    This is one of two images that were exhibited in a cafe down near the coast.

    With a place like this, you won’t have access to a mailing list and will have to do all the advertising yourself. People can’t generally just wander in to look at the work. All the customers will see your images, but they are there for different reasons, such as to eat, and buying images isn’t one of them. While it isn’t impossible to sell a piece from a cafe exhibit, your audience isn’t there to necessarily buy what you are selling.

    Your work will most likely need to be framed for hanging, and you will probably have to install it yourself at the exhibit space.
    leannecole-exhibiting-your-artwork-34

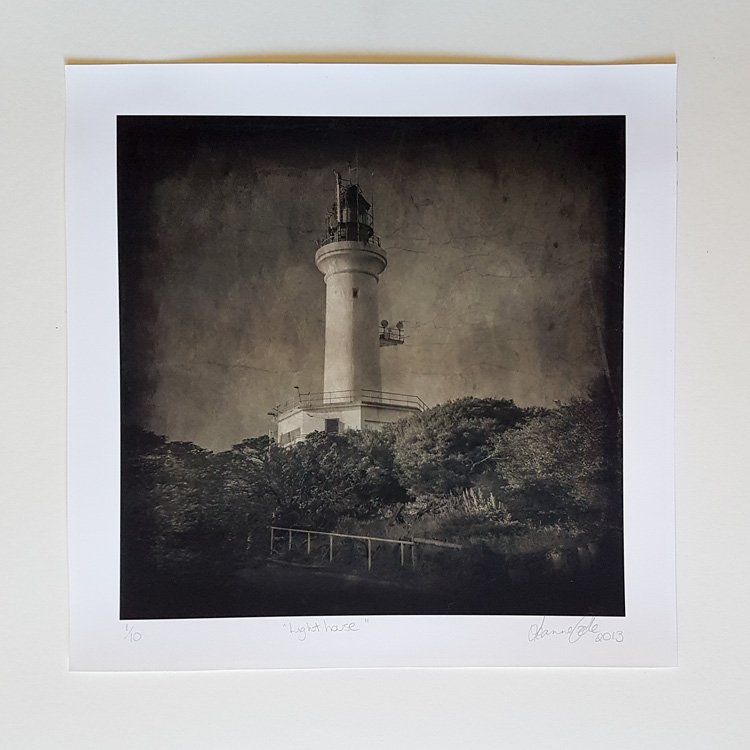
    This is the other image that was exhibited in the cafe.

    Galleries

    There are many different types of galleries, and it is up to you to decide which one you think will work for you. They usually start with artist-run spaces, then come staffed galleries which are either non-commercial or commercial.

    Artist-Run Spaces

    Possibly the cheapest spaces to get are those which are artist-run. You pay less to use the space, but you are expected to do what they call, “sit the exhibition”. That means that when the gallery is open you have to be there to watch your work and manage any sales yourself.

    Having to be there the entire time the gallery is open can be time-consuming. Many artists will get together for a group show, split the costs of renting the space, and draw up a roster to sit the exhibition. For artists starting out this can be a much better option. If you want to do this, but don’t know anyone to exhibit with perhaps you can contact the gallery as they may know some artists who are looking for someone to share.

    You need to take on most of the expenses in this environment. The cost of the opening is covered and organized by you. You must pay for most of the advertising as well, though some galleries will have a mailing list for you to use.
    leannecole-exhibiting-your-artwork-38

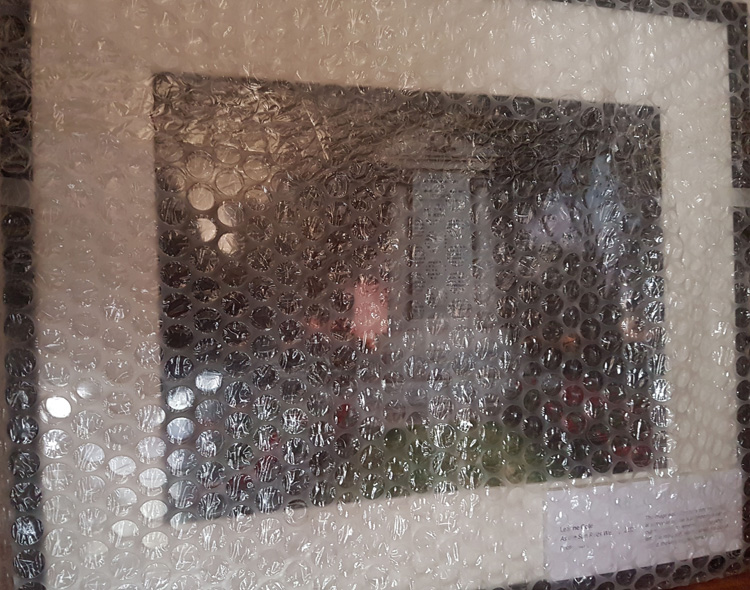
    Still packed up from when it returned from an exhibition last year.

    Staffed Galleries

    Staffed galleries are the next level. They cost more, but you are relieved of the burden of having to sit the exhibition. There are two different sorts of galleries, the commercial and non-commercial kind, and they often have different directions.

    Non-commercial galleries

    These are often smaller galleries that will charge you for renting the space and for their service to sit the photography exhibit for you. They are often the most expensive galleries to hire. Non-commercial galleries will help advertise the opening, but they are generally not interested in helping to promote you and your work further beyond the exhibition and the relationship is short term.

    They make their money from you hiring the space, and taking a commission from any work you sell, usually around 30%. It is a good way to start getting work on your CV or finding galleries that do a lot of group shows. See if you can put work into them.

    Non-commercial galleries aren’t typically picky about who they choose, as long as the quality of work is good. They are not going to mind if one exhibition is all abstract paintings and the next one is more landscape photographs. It can be a lot easier to get a show with them than the commercial galleries.
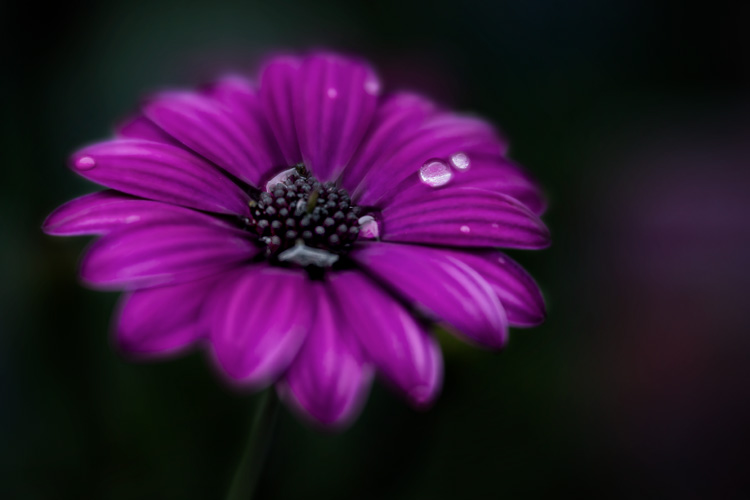
    leannecole-exhibiting-your-artwork-28

    This image was also popular on social media so it would definitely be in the macro exhibition.

    Commercial Galleries

    These types of galleries are a lot harder to get exhibitions with as they have so many artists to choose from and usually have a particular type of artist in mind that they show. They are more interested in helping you establish yourself as one of their artists, in other words represent you. Commercial galleries will keep some of your work in a stockroom and advertise what you do. They try to get collectors to view what you have done so they can begin collecting and supporting you as well.

    Commercial galleries usually have a niche market they represent. If you are a photographer and you send your work to a gallery that only deals with Indigenous art, then they are not going to be interested in your work.

    When approaching these galleries you need to do your research and make sure you work fits in with the other artists they represent. At the same time, if they have another who does work that is almost the same as yours, then they are not going to be interested either.

    The commercial galleries often cost a lot less for an exhibition, however they are harder to get shows in and they will take a higher commission. Here in Australia that rate is usually around 40%, compared to the 30% that other galleries take.
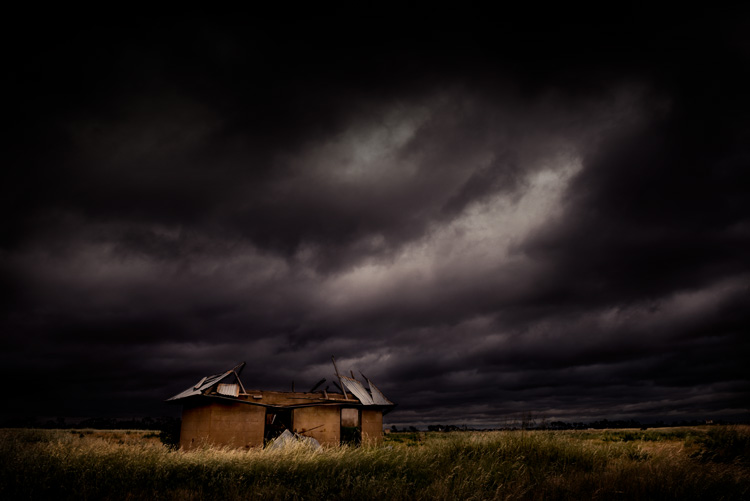
    leannecole-exhibiting-your-artwork-30

    Another image that would be used if I were to have an exhibition now.

    Submitting your work to galleries

    All galleries tend to advertise when it is a good time to submit proposals. While you can send in inquiries at other times, it is best to look for submission dates, times when they are asking people to send in exhibition proposals.

    Commissions and pricing your work

    All galleries charge a commission and some cafes may as well. You need to consider how much the commission is when you are pricing your work. Make sure you find out how much the commission is when first inquiring about exhibiting in the space.

    When it comes to pricing you should be realistic. If you are new to the art world, charging thousands of dollars for your work would be unrealistic. Only established artists can command prices like that. To get an idea look at the space that you will be exhibiting in and see how much previous artists have charged for similar work. If you are happy with the prices you could try charging the same, or similar.

    As your reputation grows and more people start buying your work then you can look at charging more.
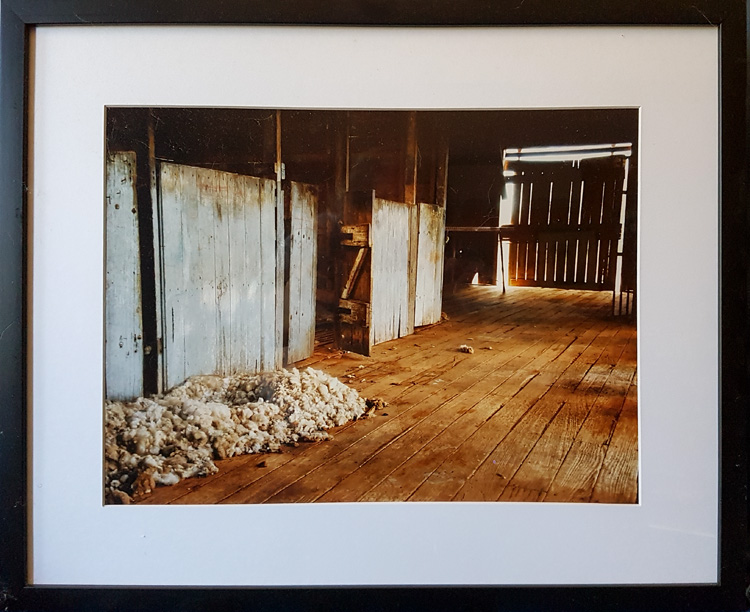
    leannecole-exhibiting-your-artwork-36

    This is from an solo show I had in the foyer of a theater company.

    Loss due to damage or theft

    When you hire a space to show your work you also take on the responsibilities of it as well. The gallery or space is unlikey to cover any damage to your artwork or the theft of it. It is often in the contract or terms of conditions. Make sure you are aware of it, and if you are worried then insurance could be an option.

    Insurance

    As previously stated most places will not cover your work for damage or being stolen, so insurance is  something that you need to consider when putting your art up anywhere. Do you need to take out insurance on it? Most artists don’t worry about it, but that doesn’t mean you should do the same. Look into it and see how much it will cost and if it is worth it for you

    If the work has cost you a lot of money to produce, then you may want to consider getting insurance. Talk to the gallery and see if they have had problems in the past, especially with theft. If the work is going into a high traffic zone, like a walkway, where it can be damaged or someone could walk off with it, then it is worth considering.

    It should be done according to the place where you are showing. If it is a café then the staff may not have the time to watch the work at all, especially during busy periods. However, a gallery is going to be in a better position to watch if they have the staff. If you have to man the space yourself, can you watch everything?

    To frame or not to frame
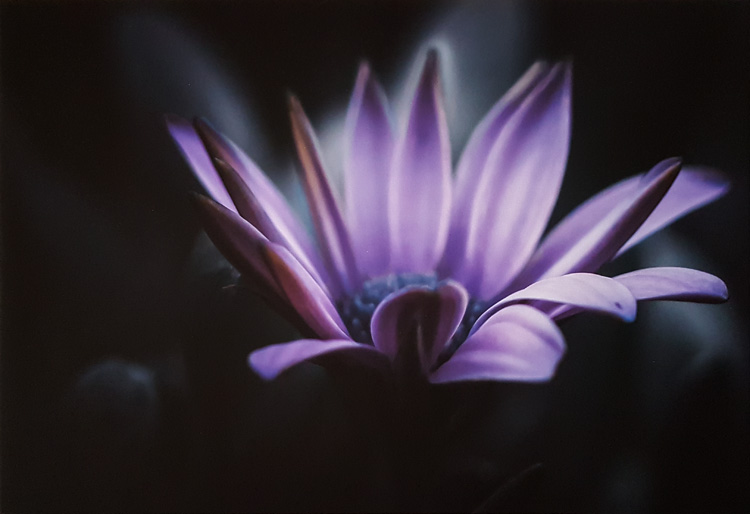
    leannecole-exhibiting-your-artwork-37

    Testing out a framer and had this macro printed on canvas.

    Many places will answer the question of framing for you. tThey will either say the work has to be framed or it can be pinned to the wall.

    If the work has to be framed then you must decide if that is something you can afford. Getting work custom framed can be very expensive. But what a lot of artists do is make all their work the same size (or use the same size frames and just alter the mat sizes according to the images), then go to somewhere like Ikea and buy cheaper frames. If you do the framing yourself then you can reuse the frames every time you want to do a show.

    If you don’t have to frame and can pin the images on the wall, that doesn’t mean you can’t get the work framed. Again, your budget is going to determine that. However, if you choose to pin them on the wall you need to find out what is going to be the best way and if the purpose is to sell your work then pinholes in your photos might not be desirable to potential buyers (it also isn’t as professional looking or finished for the buyer, they can’t just take it home and hang it up).

    What size and how many images to exhibit
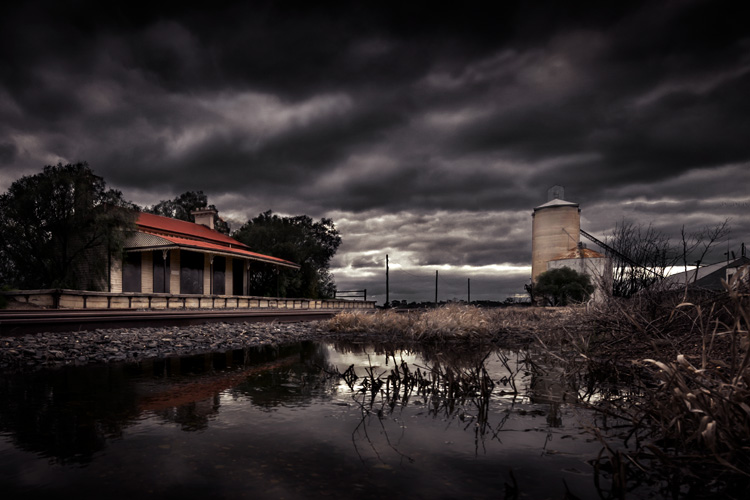
    leannecole-exhibiting-your-artwork-25

    If I were to have an exhibition now this would be in it along with the others.

    This decision comes down to price and space. How much money you have for the exhibition can only be determined by you. But how many pieces you can make, and the size you can get your work reproduced is going to be determined by your budget.

    It is also important to know how much space you have available for the exhibit. If the space is only three meters (10 feet) of wall space, then putting up three images that are one meter (39 inches) across will make it crowded and not allow enough space in between each one. However, if you have 10 meters (33′) of space, and you put up four images that are only 50cm (20 inches) across, that will give you too much space between them.

    Consider the space carefully. If you think your work looks great when it is enlarged, then perhaps having fewer large pieces is better. The larger they are the more they will cost.

    The same goes for the number of images. You don’t want to completely fill the space you have, as giving each image room will allow them to be shown better. Just because you have paid for the space doesn’t mean you have to fill it up. Consider the size of the frames as well, if you choose to frame.

    Editioning
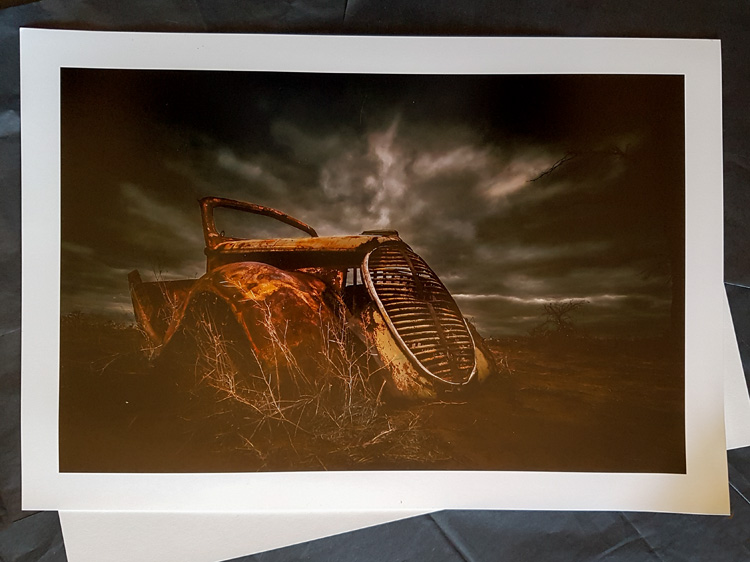
    leannecole-exhibiting-your-artwork-33

    Trying out different papers to see which one will work best for this image.

    Editioning is also referred to Limited Editions and is something to consider with photography. Printmakers have been doing it for centuries. It basically means that you are promising your clients or potential ones that only a certain number of those images (prints) will be available for sale.

    Editions can be a good way to make your work more valuable. If you have an image and do an edition of 20, then you need to make sure that the buyer knows what number in the edition they are receiving, for example, 8/20. You need to keep records of it, so you know how many of the image you have sold. Once you have sold the 20 you can’t sell anymore. You made a promise to those that bought the first 20 that you would only sell 20 of them. Be sure of how many you think you might sell from the start, and be realistic.

    Another thing you need to be careful about with editioning is to make sure they are all printed exactly the same. They all have to be consistent. If you put up a piece in a show and sell it a few times, people won’t be happy if the image they receive is not the same as the one they saw in the exhibition. You don’t have to get them all printed at the same time, but make sure you use the same printer for all of them and that the printer knows how to replicate them identically.

    Medium for printing

    What medium you choose for printing is again going to be determined by your budget, but also consider how your work will look the best. Do you want prints in frames? Perhaps canvas will work better for the type of image you are getting printed. Getting work printed on metal is becoming popular now as well, though it is also very expensive and perhaps might only suit some styles of photography.

    Whatever you choose, you need to be careful that it shows off your work in the best way possible. Consider getting some images printed in different ways and then deciding which you like the best, and which one will fit into your budget.
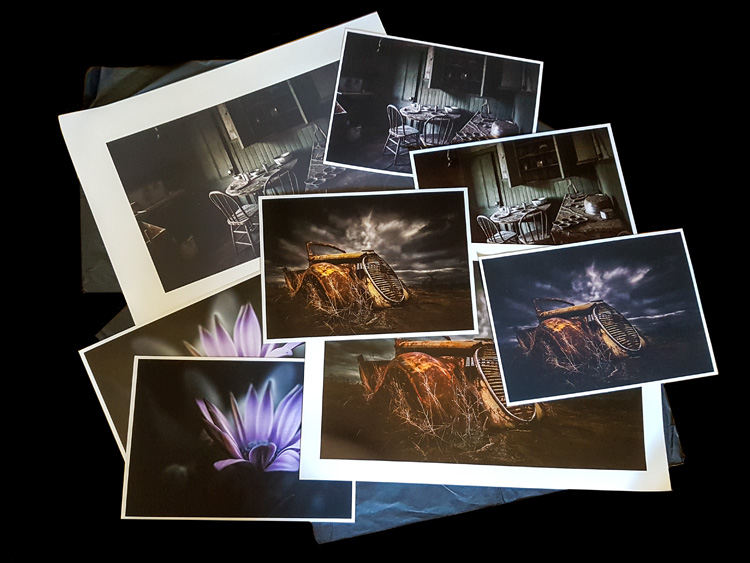
    leannecole-exhibiting-your-artwork-32

    My new printer did lots of tests for me to see which would work the best on what medium.

    Curating and choosing which images to exhibit

    Choosing which images to put in the exhibit is the hardest part for most people How do you know what images will be the best to show? There is no real way to tell. If you are working with a gallery that has a curator you can likely get a lot of help from them using their experience with the gallery and what sells. If a curator isn’t available you might have to enlist the help of friends, find out what are their favorite pieces. Perhaps your social media sites will help you see which images were popular online.

    When it comes to curating the show, there should be a cohesiveness to the work and to the final exhibition. Make sure all the work fits together and flows. Be clear on what your vision for it is. The better it looks on the walls, the more you could sell.
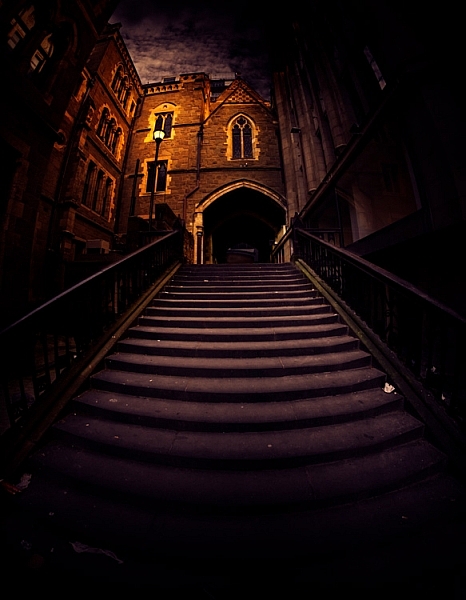
    leannecole-exhibiting-your-artwork-29

    If I were to have an exhibition now this is another image that would be in it.

    Start planning your exhibition

    Hopefully this has answered many of the questions you had and explained some of the ways that galleries work. There are many decisions that need to be made and before you start it is good to have a plan of what you want to do, why, and how you will pay for it.

    Have you done a photography exhibit before? Please share your experience or post your questions in the comments below.

    googletag.cmd.push(function() {
    tablet_slots.push( googletag.defineSlot( “/1005424/_dPSv4_tab-all-article-bottom_(300×250)”, [300, 250], “pb-ad-78623” ).addService( googletag.pubads() ) ); } );

    googletag.cmd.push(function() {
    mobile_slots.push( googletag.defineSlot( “/1005424/_dPSv4_mob-all-article-bottom_(300×250)”, [300, 250], “pb-ad-78158” ).addService( googletag.pubads() ) ); } );

    The post How to Prepare a Photography Exhibit of Your Work by Leanne Cole appeared first on Digital Photography School.
    Digital Photography School

  • 10 More Photography Tips to Help Take Your Images to the Next Level

    A while back I wrote an article that was quite popular: 10 photography tips to take your photography up a level. In this article, I bring you 10 extra tips from all aspects of photography. Enjoy!

    10 More Photography Tips to Help Take Your Images to the Next Level

    #1 – What’s more than meets the eye?

    Let me ask you something, what would you do? You meet someone attractive, you are head over heels, and then you start actually talking to them. You then uncover the most superficial person you have ever met. That person is all looks and not much else. You would lose interest, right? Because looks by themselves are good enough to make you interested, but if there is nothing sustaining that interest, you’re gone. This is the same thing in Photography,

    This is the same thing in photography. A beautiful composition is nice, but what is in your image that is designed to keep the viewer’s attention? What is it about your image that is more than meets the eye? Is it saying something deeper? Is it making a point? Showing a concept? Add meaning to your images to keep the viewer engaged.

    #2 – Know your opportunity

    I believe there are only four times when you control the image. The first is at the moment of exposure (when you shoot), the second is in post-processing, the third is in sequencing and editing, and the fourth is while printing. So, when shooting, have these things in mind in order to shoot with clarity.

    Example, you shoot an image and it is overexposed (because of the camera’s limitation). But it doesn’t end there as you know that you have another opportunity in the post-processing phase to recover details. Or you shoot something with a nice texture but it doesn’t have the effect you want. It doesn’t end there, you know that you can print and blow it up real big to have the effect you seek. Or you shoot an image that can’t stand by itself. Once again it doesn’t end there, you know you have another similar image that can make a diptych.

    The point is that making an image is only the first step. There’s a whole process that comes afterward when you can get the effect you desire. So it’s important to know that what you have in the camera is the starting point and not the end.

    #3 – Pay attention to this detail (after your background)

    10 More Photography Tips to Help Take Your Images to the Next Level

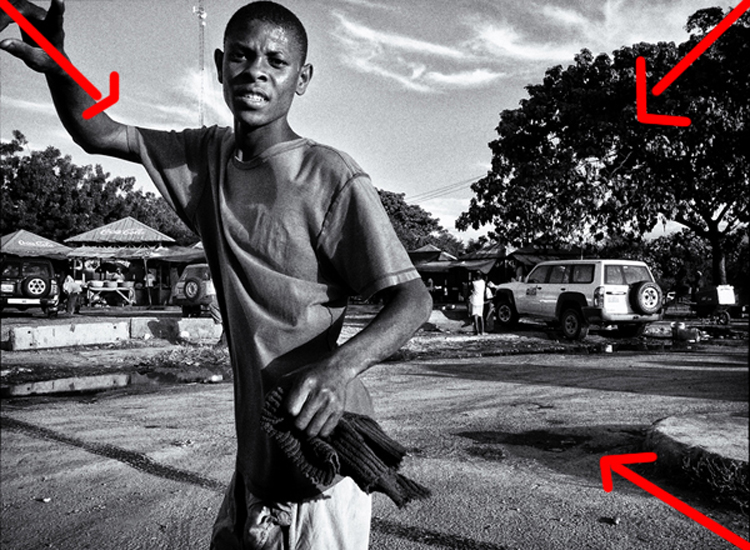
    In the first 10 tips article, I suggested that you pay attention to the background first. Now I would like to add another thing to pay attention to before your subject – the corners. You see there is a strong dynamic with the corners, they draw you into the frame, towards the dead center and if you can align some lines there, it’s like surfing a big wave, it just draws your eye even more!

    In the image above we have the guy’s hands, the shape of the tree and the shadow on the bottom right corner just pulling you into the image. So, pay attention to your background, watch your corners, and then look at your subject.

    #4 – Dennis Rodman-ize it

    10 More Photography Tips to Help Take Your Images to the Next Level

    Let’s face it, it’s hard to get attention in this ever increasing attention deficit world. Dennis Rodman had been in the NBA for years, but he was receiving few endorsement contracts. He was a good player but didn’t shine enough. Then came the Rodman with the crazy hair and style, even as a kid I knew his name because he simply looked different.

    That brings us to photography, you are probably doing something a certain way, so can you Dennis Rodman-ize it? Shoot in a different way that makes your work pop above and beyond what you normally do? For example, landscapes are usually shot with a wide angle, what if you shot landscape abstracts with a telephoto? Or used a special processing technique on your images that gave them a certain look?

    #5 – Work on your name

    You probably know the wine experiment, where they gave people wine to drink, one was expensive and the other was cheap. Everyone, of course, preferred the expensive wine over the cheap one, even if it was the same wine. Here’s the REAL KICKER, when they scanned the brains of the people who drank the wine, their brain actually made them believe they were drinking expensive wine, and it literally tasted better. Their perception altered their reality.

    10 More Photography Tips to Help Take Your Images to the Next Level

    With that in mind, work on your images but also on your name or brand. Try to get as much recognition as you can, it will alter people’s perception of your work. I remember a photographer who had decent work, and then that person got famous literally overnight. Let me tell you, even I, knowing all that I know about psychology, now see his work in a better light.

    It’s crazy, and probably a bit sad, but that’s just the way it is. The story of Joshua Bell also illustrates this point well. This guy makes $ 1000 per minute playing on a million dollar violin, yet he got a meager $ 32 and a few cents when they had him play anonymously in a metro. Same guy, same skill – different context, different result.

    #6 – Get luckier

    Let’s not mince words here, luck plays a big role in photography. That Cartier-Bresson shot of the man jumping? That was 100% luck because he couldn’t even see what he was shooting through a hole.

    Why is luck such a big deal? Because you DO have to be there at the right moment, and so does your subject, the light, etc. Truth be told, you need the skill and the eye to seize the moment, but if you are not there, the shot won’t be yours.

    10 More Photography Tips to Help Take Your Images to the Next Level

    So taking into account the luck factor, shoot more often. You’ll get luckier and luckier every time you do. By making more photo opportunities, you’ll be making more images. So if you used to go out once, go out twice, etc.

    I mean, who do you think will have a better chance at getting a job? The one that applies for one job, or the one that applies for 10? Skill and creativity are multiplying forces, but it doesn’t matter how skillful you are if you are a couch potato. Sharpen your skills and get out there to get lucky.

    #7 – Scramble everything

    There was this cool experiment where they gave this guy upside down glasses, so everything was inverted. They wanted to pour him a drink, and he turned the cup upside down (because he believed it was upside down). Imagine the world upside down and how hard it would be to live like that. The kicker? After 10 days he adapted to the upside down vision, and could even ride a bike!

    10 More Photography Tips to Help Take Your Images to the Next Level

    Sometimes we just get used to how we shoot, we get complacent, that’s normal. So scramble things up. If you normally shoot color, try b/w, if you like portraits try street photography, if you are a film shooter, try digital, etc. It’s like the “Dennis Rodman-ize” tip, but this is more designed to shake you out of complacency rather than to bring attention to your work.

    #8 – Revisit your images
    10 More Photography Tips to Help Take Your Images to the Next Level

    Two photographers can look at the same scene, and yet see two different things. The difference is their knowledge about photography. You probably have some hidden gems in your images that you’ll probably never uncover if you do not revisit your images. You made them, but when you revisit them you do so with new eyes, and you will see them differently.

    You will be amazed at what you find. Images that you believed were boring and/or ruined will be seen in a new light. You may ask yourself, “How did I miss that?!? There are quite a few images that I have overlooked, that’s why I have a no-delete policy. Maybe I can’t see what my future self will see or what my future self will be into.

    #9 – Let go of preconceptions

    10 More Photography Tips to Help Take Your Images to the Next Level

    I receive emails daily from photographers around the world. The one thing many seem to struggle with is that they don’t live in a big city. It is understandable, but just because you can’t find the images you have in your mind doesn’t mean they are not there. You just need to let go of your preconceived ideas and be more open to what is in front of you.

    Some people tell me they wish they had more money to travel. Evidently, the image in their mind is of travel, but an image doesn’t need to be travel photography to be good, does it? It’s good to have a general idea of what you want, but also to be open to the possibilities.

    Some people get hung up on relationship breakups, passing by great, if not better opportunities in front of them. Likewise, seeing what is possible right in front of us allows us to maximize our opportunities as photographers.

    #10 – Remember it’s all plastic

    10 More Photography Tips to Help Take Your Images to the Next Level

    It’s a hard concept to grasp, especially as a beginner, but remember that photography is plastic. Exposure? Plastic. Colors? Plastic. White Balance? Plastic. Sharpness. Who said every image needed to be averagely exposed, with white balance set perfectly by grey card, and super sharp? The first thing I do as a photographer in Lightroom is to clip my blacks. I LOVE clipping my blacks. I never set my white balance with a grey card, I just look at the image and hear what it creatively calls for, then do that.

    Photo of a bride and groom? Probably needs to be on the warmer side so that the viewer can get some emotional cues from that. Shot these plastic surgeons? I’ll put my white balance on the cool side to reinforce the surgical cleanliness. Whatever you are doing right now, remember all of it is plastic. Who said images needed to be in a square or rectangle? Who said portraits have to contain faces? Who said colors had to be realistic (see above)? Who said paper and canvas was the only printing options…..you get the gist!

    Conclusion

    There you have it, 10 more photography tips to help you in your photography journey. I hope you resonate with some of them. Be yourself, stay focused and keep on shooting.

    10 More Photography Tips to Help Take Your Images to the Next Level

    googletag.cmd.push(function() {
    tablet_slots.push( googletag.defineSlot( “/1005424/_dPSv4_tab-all-article-bottom_(300×250)”, [300, 250], “pb-ad-78623” ).addService( googletag.pubads() ) ); } );

    googletag.cmd.push(function() {
    mobile_slots.push( googletag.defineSlot( “/1005424/_dPSv4_mob-all-article-bottom_(300×250)”, [300, 250], “pb-ad-78158” ).addService( googletag.pubads() ) ); } );

    The post 10 More Photography Tips to Help Take Your Images to the Next Level by Olivier Duong appeared first on Digital Photography School.

    Digital Photography School

  • Astropad launches Astropad Studio for the Apple iPad Pro

    The team behind Astropad, an iOS app that turns your iPad into a graphics tablet for the Mac, has today released Astropad Studio, a premium version of the original Astropad. The new release was specifically designed to work with the iPad Pro and offers better performance and an expanded feature set. 

    Astropad Studio can communicate with an Apple Mac computer via a Wi-Fi or USB connection and uses Liquid Extreme, an improved and 5 times faster version of the standard app’s Liquid technology which allows for smooth operation of the tablet and image quality that is free of compression artifacts. 

    In addition, Astropad Studio supports both Bluetooth and wired keyboards and comes with the new Magic Gestures feature that allows for the creation of gesture shortcuts using touch-Pencil combinations. Sidebar shortcuts automatically adapt to the Mac app you are working with and Stroke Lab lets you adjust the characteristics of your pencil stroke in a variety of ways. 

    Astropad Studio will be available as a subscription service for either $ 64.99 per year or $ 7.99 per month. This includes syncing of settings across devices and priority support. A 7-day free trial is available for those who are interested in trying the app. More information is available in the video below and on the Astropad Studio website.

    Articles: Digital Photography Review (dpreview.com)

  • Voice-controlled photo editing: coming soon to Photoshop?

    Adobe Research is experimenting with a voice-controlled photo editing virtual assistant. A demo video uploaded to Adobe’s YouTube account shows how the tool might function, performing and undoing basic edits to an image, and exporting the final product to Facebook – all achieved through spoken commands. 

    The demo shows this feature being used for extremely basic editing functions (cropping, flipping an image), which Adobe calls ‘a first step towards a robust multimodal voice-based interface’ for its mobile applications. 

    Given that voice control is popping up in just about every gadget you can think of, it seems logical for Adobe to be considering adding voice control to its apps. The Internet of Things is rapidly turning out to be the Internet of Shouting at Things, so voice-controlled photo editing seems inevitable. 

    Do you think Adobe could make voice control sophisticated enough for the complex needs of serious photo editing? Let us know in the comments.

    Articles: Digital Photography Review (dpreview.com)

  • Mobility Vision: Hyundai Concept Connects Smart Home to Driverless Car

    [ By SA Rogers in Technology & Vehicles & Mods. ]

    mobility-vision-1

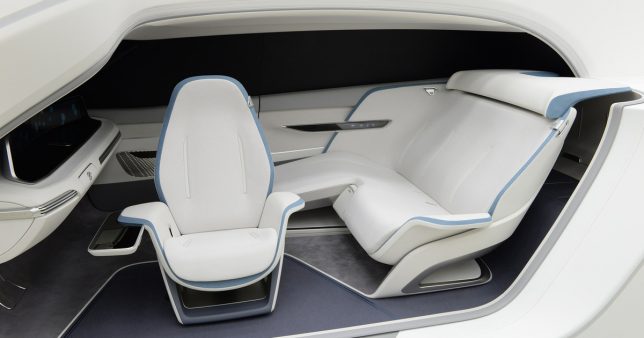
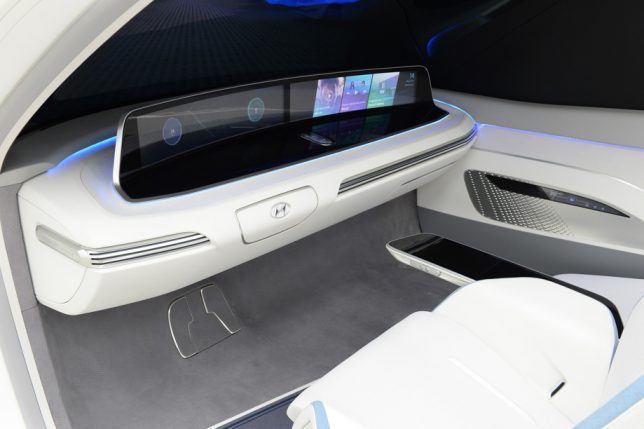
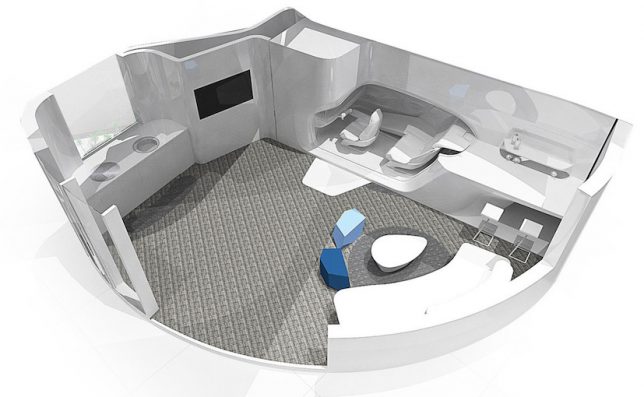
    Who needs a garage when your autonomous vehicle could simply pull up into a port inside your home and seamlessly integrate itself with the interior? Hyundai wants to give us all another reason to spend hours inside our cars by effectively turning them into furniture when they’re not in use. Its ‘Mobility Vision’ concept, unveiled at this year’s CES (Consumer Electronics Show) in Las Vegas, blurs the lines between architecture and automobiles more than ever.

    mobility-vision-2


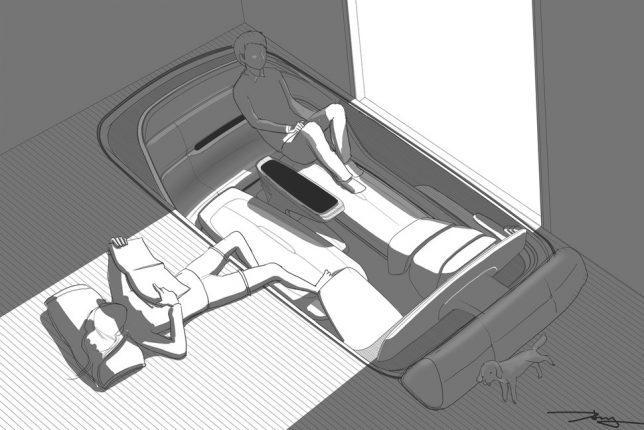
    The driverless car essentially plugs into the house when you’re done with a trip, and then the driver’s seat, which is mounted on a pivoting arm, can slide right into the living space for use as a chair. The idea is never having to stop what you’re doing and metaphorically shift gears between travel time and home time; stuff you leave in the car is easily accessible, babies can continue sleeping in their carseats, and there’s no fumbling for keys.


    mobility-vision-4

    A single door, almost the height and width of the entire car, opens upward to delineate the space between the car’s interior and the living room. You can even run the car’s heat or air conditioning to adjust the temperature of your house, and use the car stereo to play music at home. Perhaps the most important detail: the car is powered by a hydrogen fuel cell, so it’s quiet, and there’s no danger of breathing unhealthy fumes.

    mobility-vision-7

    mobility-vision-6

    It’s just a concept, and not likely to become a reality anytime soon – but could it be a glimpse into what mobility will look like in the not-so-distant future? It seems entirely possible, but it’s not clear how many people want to just sit around in their cars for no reason when there’s probably a perfectly good couch just a few feet away.

    Share on Facebook


    [ By SA Rogers in Technology & Vehicles & Mods. ]

    [ WebUrbanist | Archives | Galleries | Privacy | TOS ]


    WebUrbanist

  • DxOMark gives RED Helium 8K sensor a record-breaking 108 score

    DxOMark has given RED’s 35.4MP Helium 8K sensor its highest overall score ever: 108. This makes the prototype sensor the second ever to exceed the 100 point milestone, joined only by the RED Epic Dragon prototype, which scored 101. DxOMark says the Helium is a ‘solid upgrade’ over the Epic Dragon, offering better color depth, less noise, improved low-light ISO and a greater dynamic range.

    DxOMark explains that while both the Dragon and Helium sensors are ‘physically similar,’ the Helium ultimately offers more densely packed pixels at approximately 3.65 microns each. Less impressive is the organization’s assessment of the dynamic range, which measured at 15.2 stops versus RED’s advertised 16.5+ stops. That is still greater than the Epic Dragon’s DxOMark dynamic range rating of 14.8 stops, however. 

    Because both the Helium 8K and Epic Dragon tests were performed with prototype devices, neither model will be officially added to DxOMark’s device ranking list. The company does present a ‘simulation’ ranking that shows where the two models would fall if they were included, however: above the Sony a7R II, Nikon D810, Sony Cyber-shot DSC-RX1R II, and the Pentax K-1.

    Via: DxOMark

    Articles: Digital Photography Review (dpreview.com)

  • Not Your Grandma’s Kitchen: 17 Modern Designs for the Discerning Cook

    [ By SA Rogers in Design & Fixtures & Interiors. ]

    futuristic-kitchen-ora-1

    If these designs are any indication, the kitchen of the future is modular, minimalist, mobile and so unobtrusive that it can practically blend into the furniture in your living room. Whether you love a more rustic handcrafted aesthetic or want your house to look like the interior of a spaceship, these modern kitchen designs radically depart from contemporary interiors for the sake of both looks and functionality.


    Invisible Kitchen by i29 Architects

    invisible-kitchen-2

    invisible-kitchen-3

    invisible-kitchen-4

    When it’s not needed, the kitchen in this historic Parisian apartment disappears altogether, blending into the wall. The top surface of the center island measures just about an inch thick to add to the sense of lightness, making the room’s classic woodwork its focal point. Dutch firm i29 Architects developed the ‘Invisible Kitchen’ system to be adaptable, so the front facade always mimics another wall in the room.

    Aquarium Kitchen Island by Robert Kolenik

    aquarium-kitchen

    aquarium-kitchen-2

    The ‘Ocean’ kitchen island by Robert Kolenik not only places an island countertop on an oversized aquarium, but also includes a mechanism that lifts the top vertically to provide access to the tank for feeding and maintenance.

    Transparent Cookspace by Tokujin Yoshioka

    transparent-kitchen

    transparent-kitchen-2

    transparent-kitchen-3

    transparent-kitchen-4

    Cooking implements, tableware and other small objects are partially visible yet still obscured in a translucent cook space by Tokujin Yoshioka, developed for Toyo Kitchen Style.

    Sculptural ICE Kitchen by Tom Dixon

    ice-kitchen

    ice-kitchen-2

    ice-kitchen-3

    Departing radically from the look of a typical contemporary kitchen, ICE by Tom Dixon consists of monolithic triangular prisms in various shapes and sizes that form the base of a luxurious kitchen made of ‘caesarstone’ premium quartz surfaces.

    Next Page – Click Below to Read More:
    Not Your Grandmas Kitchen 17 Modern Designs For The Discerning Cook

    Share on Facebook


    [ By SA Rogers in Design & Fixtures & Interiors. ]

    [ WebUrbanist | Archives | Galleries | Privacy | TOS ]


    WebUrbanist

  • Fotodiox LED100WB-56 quick review

    The LED100WB-56 is a wall-powered, dimmable LED light source with that should be a little bit different. Fotodiox has done quite a bit, not just to negate the issued of using LEDs for continuous lighting but also to address some inherent issues of using continuous lighting in general. This is enough to warrant a closer look, as it could make these more useful for a wide number of users.

    Included with the 3-light kit that we tested are three lights, reflectors, slip-on diffusion covers, ballasts/power adapters with XLR cables (not pictured), and a set of remotes. The kit also includes a set of light stands as well (not the short one pictured above), making the 3-light kit an entirely complete set for those getting started, as you are given more flexibility with three lights for a key, fill, and hair light, than you are with two.

    One inherent issue with LED lights is the source itself. Bright LEDs are never a single diode: they’re often an array of diodes arranged closely together. At first we saw LED panels grow in popularity, which spread single individual diodes in a grid to create a big and bright source. The issue is the individual diodes when spread out act like a series of point light sources, with each diode creating its own set of shadows. These complex shadows get distracting very quickly, and the bare bulbs are tough on the eyes.

    As time has moved on, the diodes have shrunk down to a tight grid on a wafer, much like the chips in our cameras, just not quite as dense. Fotodiox has taken a panel like this and then put it back behind a glass lens with a frosted back. The back of this lens becomes the single light source instead of the hundreds of individual LED spots, creating an even light source with a single shadow, much like a classic tungsten source. 

    Speaking of ‘classic’ tungsten sources, one of the biggest advantages of LED lights over these sources is heat production. Anyone who has used even a120-watt modeling light knows these things get extremely hot. So hot, in fact, that any skin contact with the bulb will leave behind oil residue that creates a hotspot – eventually resulting in the bulb’s failure. While the Fotodiox does produce some heat, a small quiet fan keeps inside temperatures steady. During use, no outside part of the light becomes hot to the touch.

    Another historic issue with the LEDs as a photographic light source is color – or lack thereof. This handy YouTube video dives a bit more in to the issue:

    The Fotodiox is rated at 95+ CRI, which is quite a high rating for the price. This is also a drastic improvement over Fotodiox’s own LED100WA, which is only rated at 85 CRI. CRI isn’t a perfect way to assess color output but the spectrum Fotodiox shows for the lamps shows a fairly consistent output across most colors, with the only significant spike being in the blue region, meaning there shouldn’t be any nasty surprises.

    So these lights promise to take care of the light source and color issues, what else? How about flicker? All lamps flicker to some degree if they’re powered by the alternating current of mains electricity but different lighting technologies have different dimming characteristics during the ‘off’ half of the power cycle. Tungsten bulbs stay fairly hot (and hence bright) throughout the cycle while poorly-designed LEDs abruptly switch on and off as the power cycles. You won’t always notice this with the naked eye but set your shutter speed faster than the frequency of the lights and the difference can become apparent.

    This effect can be seen with the Sony a7R II in ‘low light’ mode with ‘electronic shutter’ and maximum ISO in our studio scene – the line-by-line readout of the sensor happens at different parts of the light’s power cycle, resulting in exposure differences that render as bands across the frame, despite the use of a tungsten bulb.

    Fotodiox claims its LED100WB lights are flicker free, so we tried it out for ourselves by shooting some super slow-motion with two of the lights and a Sony RX10 III.

    In these clips, the lights were at full power with their intensity controlled by their distance from the subject. When the lights are partially dimmed banding does begin to happen at 960fps/1000sec shutter speeds, but at full power there was no banding to be seen.

    So, these lights are looking pretty good so far right? They also work quite well for portraits, especially when diffused or modified. The mount is the classic Balcar type, better known as the Paul C. Buff mount. This mount not only has a lot of affordable modifiers from Paul C. Buff, but also has adapters made for mounts like Bowens (which is what we own).

    In use:

    You’ll find this shot on the back of Dan’s debut bestseller novel (if he ever writes one). Olympus E-M1 Mark II, 75mm F1.8 lens, 1/200 sec, F2.2, ISO 200

    This portrait of Dan was lit with just one LED100WB shot through an adapted Bowens mount beauty dish and two sheets of foam core: black for the background, and a white ‘fill card’ to the left of the camera. The light was at full power, and wasn’t placed very far from Dan’s head. That short distance meant the light was intense enough for a short shutter speed and soft enough to be flattering and smooth. However, the requirement for the short distance means that a lot of the light’s output was being lost in the beauty dish, so those hoping to use existing light modifiers may find the LED100WB lacking in power in certain scenarios.

    Using the lights outdoors on a dim day can also be an interesting experience, especially when a camera is left in any sort of priority mode where it can control either shutter speed or aperture automatically. Here’s why: It essentially makes the ‘B’ button on the light’s remote an overall exposure control. Let’s look at this shot of Carey to explain further:

    The lights can easily balance with lower light conditions, and the 5600K temperature balances relatively well with daylight and overcast conditions. Sony a6500, 50mm F2.8, ISO 100 1/60sec F4

    What I wanted to achieve with this shot was to combine an F4 portrait (where this particular lens is very sharp) while also bringing attention to the shape of ‘bokeh’ balls in the background. After putting one of the LED100WB’s with its diffusion sock where I wanted it relative to Carey (just over my head and a little to the left), I let the camera control shutter speed as I adjusted the light with the remote and watched the exposure change through the viewfinder.

    When the lights were dimmed the camera’s evaluative metering was mostly reading the brightness of Carey’s face, and as the light was turned down the background got brighter. As the lights were brightened, the background got darker as the camera shortened the exposure time to keep Carey’s face from over exposing. I ended up somewhere in the 25-50% power area to brighten up the ‘bokeh balls’ in the background.

    While these lights can be used in limited cases for stills, the best application for the 3-light kit is for video. A 3-light kit gives photographers or videographers a key, fill, and hair light ready to go. Plus, their extremely quiet operation means they don’t get in the way of a simple sound setup. We ended up using them when shooting our Game Boy Camera video a few months back:

    One frustration we encountered was with the remotes. Having them was extremely handy but the implementation is a little clunky: each light has its own dedicated remote, which can make using multiple lights at once a bit fussy to use. Also, the buttons are just labeled alphabetically, with no indication of their function. The ‘A’ button works as on/off. The ‘B’ button cycles through 25%, 50%, 75%, and 100% power levels. The ‘C’ and ‘D’ buttons act as an incremental adjustment up and down, with ‘C’ being brighter and ‘D’ being dimmer. That said, they’re better than nothing, and came in handy several times while using the lights.

    Conclusion

    At the end of the day these lights are some of the easiest to use continuous lights we’ve encountered. Their nearly flicker-free output allows use of extremely high shutter speeds. Their lack of heat output means they can be used with any Balcar mount light modifier, not just special expensive ones made to withstand the heat of a tungsten bulb. Plus, the remotes make it easy to adjust power level, even when the lights have been placed out of reach.

    For beginners, continuous light is a great option for mastering studio work, as you get to see the light as you shape it, and with mirrorless cameras you get to preview the results constantly. For photographers that need to match or even overpower bright ambient light, these lights aren’t always powerful enough, so strobes would be a better choice. However, in the studio where ambient light can be controlled, these LED lights find many uses quite quickly, and for photographers looking for a set of lights to accompany them on a foray in to the video world, this 3-light kit is a great place to start.

    Articles: Digital Photography Review (dpreview.com)

  • HMD Global releases Nokia 6 Android smartphone

    HMD Global, the Finnish company that acquired the exclusive Nokia brand licensing rights for mobile phones in late 2016, has released its first model under the legendary Nokia moniker. The Nokia 6 is best described as an upper mid-range device with an unibody that is machined from a solid block of 6000 series aluminum and would not look out of place on a top-end smartphone. 

    Images can be viewed and displayed on the 5.5” Full-HD IPS LCD display with 2.5D Gorilla Glass and the Android 7 Nougat OS is powered by a Qualcomm Snapdragon chipset and 4GB of RAM.  The device also features 64GB of expandable storage and dual amplifiers in combination with Dolby’s Atmos surround technology should be capable of delivering excellent sound.

    Juho Sarvikas, Chief Product Officer, HMD Global said: “We have set ourselves a mission to deliver the best possible smartphone experience, with a beautiful premium design touch, to everyone, at every price point. By building on true Nokia phone hallmarks of leading design and materials, an obsessive focus on the latest technology and solving real-life issues, we believe we have a unique proposition for consumers. The Nokia 6 marks the first step on our journey, with more to come in 2017.”

    In the camera department the Nokia 6 packs a 16MP camera with 1.0 µm pixel size, F2.0 aperture and phase detection AF. The 8MP unit at the front also has an F2.0 aperture and at 1.12 µm slightly larger pixels. Both cameras can record 1080p video at 30 frames per second.

    The Nokia 6 will, at least to start with, be exclusively available through JD.com in China and set you back approximately $ 245. On paper at least, the Nokia 6 looks like a very solid device at an attractive price point and a good first step for re-establishing the Nokia brand in the marketplace. That said, we are still hoping to see Nokia’s rumored camera super-phone revealed at MWC at the end of February. 

    Press Release:

    HMD Global launches first smartphone, the Nokia 6 in China

    • Nokia 6 will be available exclusively in China through JD.com. Available in early 2017, Nokia 6 is 1699 CNY
    • New design philosophy embraces much-loved Nokia phone hallmarks of quality, superior craftsmanship and relentless focus on the consumer experience
    • Nokia 6 marks the first step for the Nokia brand into Android smartphones with more to come in H1 2017

    Espoo, Finland – 8 January 2017: After securing the exclusive Nokia brand licensing rights in mobile phones in late 2016, HMD Global Oy (“HMD”) is proud to announce the launch of its Nokia 6 smartphone in China. The Nokia 6 marks the first step in HMD’s ambition to set a new standard in design, material quality and manufacturing innovation across every tier of its products by building on the hallmarks of a true Nokia phone experience. The device, which is designed explicitly with the needs of users in mind, combines quality and in-built durability to deliver a real-life premium smartphone experience at a price point for the highly aspirational Chinese consumer.

    The decision by HMD to launch its first Android smartphone into China is a reflection of the desire to meet the real world needs of consumers in different markets around the world. With over 552 million smartphone users in China in 2016, a figure that is predicted to grow to more than 593 million users by 20171, it is a strategically important market where premium design and quality is highly valued by consumers.

    With the arrival of Nokia 6, consumers will see superior craftsmanship and design quality in action. It takes 55 minutes to machine a single Nokia 6 from a solid block of 6000 series aluminium. It then receives two separate anodising processes, taking over ten hours to complete, with each phone being polished no less than five times. The end result is an aluminium unibody with the highest level of visual and structural quality.

    Delivering quality to the core, the Nokia 6 display has a bright hybrid in-cell 5.5” screen with full HD resolution and incredible colour reproduction wrapped in 2.5D Gorilla Glass. The display stack is laminated together with a polarizer layer enabling excellent sunlight readability and slim form. The build is completed with the latest generation Qualcomm Snapdragon™ 430 processor with X6 LTE modem designed for excellent battery life and superior graphics performance.

    The Nokia 6 has 4GB RAM and 64GB storage with which to run the latest version of Android Nougat and is packed with entertainment to bring to life the latest that Android has to offer. The dual amplifiers deliver a 6dB louder sound than a regular amp, giving higher voice, deeper bass and unmatched clarity. Dolby Atmos creates powerful, moving audio that seems to flow all around users. The Nokia 6 packs a 16MP phase detection auto focus rear camera for sharp detailed pictures, and an 8MP front camera. The f/2.0 aperture lenses and exclusive camera UI with automatic scene detection make it easy to take great shots every time.

    Arto Nummela, CEO, HMD Global said: “Just a short while ago we announced the launch of HMD Global. From the outset we have stated that we intend to move with speed to establish a position as a player in the smartphone category and create products that truly meet consumer needs. The Nokia 6 is a result of listening to our consumers who desire a beautifully crafted handset with exceptional durability, entertainment and display features.

    Our ambition is to deliver a premium product, which meets consumer needs at every price point, in every market. We start today, with our premium, high quality Nokia 6; built to deliver a fantastic core user experience for Chinese consumers. We look forward to unveiling further products in the first half of this year.”

    Nestor Xu, Vice President Greater China, HMD Global said: “China is the largest and most competitive smartphone market in the world. It is no coincidence that we have chosen to bring our first Android device to China with a long-term partner. JD.com is known for its upwardly mobile customer base and it has for many years believed in the Nokia brand and sold millions of our products to Chinese customers. Launching our first smartphone device, in such a strategically important market, with JD.com a trusted online retailer marks a signal of intent.”

    Juho Sarvikas, Chief Product Officer, HMD Global said: “We have set ourselves a mission to deliver the best possible smartphone experience, with a beautiful premium design touch, to everyone, at every price point. By building on true Nokia phone hallmarks of leading design and materials, an obsessive focus on the latest technology and solving real-life issues, we believe we have a unique proposition for consumers. The Nokia 6 marks the first step on our journey, with more to come in 2017.”

    Shengli Hu, President of 3C Business Unit, JD.com, said: “The Nokia 6 marks a new milestone for the iconic brand, and JD.com is proud to work with HMD on this exclusive launch in China. Our 200 million active consumers come to JD.com to shop for guaranteed high-quality products from the world’s leading brands, and we are proud to provide a trusted outlet for them to reconnect with Nokia phones.”

    Nokia 6 will debut exclusively through JD.com in early 2017 in China. Competitively priced for the aspirational smartphone user, the Nokia 6 is 1699 CNY at JD.com.

    Articles: Digital Photography Review (dpreview.com)

  • Is this drone-toting concept car the future of photojournalism?

    $ (document).ready(function() { SampleGalleryV2({“containerId”:”embeddedSampleGallery_3973428980″,”galleryId”:”3973428980″,”isEmbeddedWidget”:true,”standalone”:false,”selectedImageIndex”:0,”startInCommentsView”:false,”isMobile”:false}) });

    Photojournalists, especially those embedded or covering remote and/or dangerous regions of the world would likely benefit from a vehicle specifically designed to help them overcome the daily challenges they face. Dillon Kane, an automotive design student at Lawrence Technological University, seemed to think so too. He recently won Magna International’s ‘Main Event’ design competition for his concept called ’30 degrees West,’ a futuristic car that we can only describe as an Inspector Gadgetmobile for visual journalists.

    The competition is held annually prior to the North American International Auto Show, and this year, judges asked young automotive designers to dream up a new vehicle that might debut in the year 2030.

    Sure, the vehicle rendering looks a bit like a riding lawnmower, but it would actually be packed with intelligent technology and design. Kane’s design features compartments for gear located on all sides of the vehicle (that apparently open and close in near silence) and a ladder pops out from the back of the vehicle to allow journalists a higher vantage point. Of course, if standing on the roof still isn’t high enough, the vehicle has a built in drone, also located on the roof, that can be launched for aerial coverage. Because duh, it’s the future and drones.

    Additionally, the vehicle would be covered with smart sensors and cameras to record information about one’s environment, and a built-in ‘gentle light’ is also included in the design to create some flattering light for portraits on the fly. While some aspects of its design may seem like they need more hashing out (like the fact that it is not autonomous and must be piloted), it’s pretty cool to see a vision for a car designed specifically with photographers in mind.

    So what do you think of Kane’s design, is it something you’d drive? Or better yet, how would you improve upon it to make it truly meet the needs of traveling photographers? Let us know in the comments!

    Articles: Digital Photography Review (dpreview.com)