Blog

  • How to Turn Your Kids into Star Wars Characters Using Photoshop

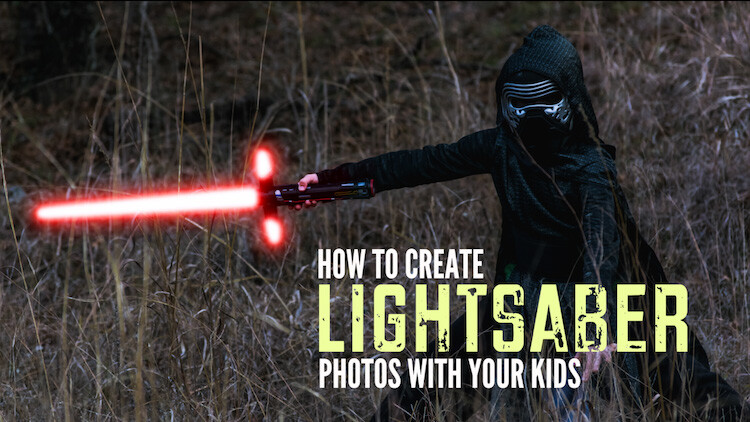
    Do your kids love Star Wars? Do you love photography? If so, here’s a great opportunity to join forces and turn your kids into Star Wars heroes or villains by giving them the ultimate Star Wars weapon, the lightsaber.
    How to Turn Your Kids into Star Wars Characters Using Adobe Photoshop

    All you need to awaken the force are these three steps:

    1. The setup
    2. Capturing the shot
    3. Light up your sabers using Photoshop

    BONUS tip – The Jumping Jedi

    Step #1 – The Setup

    For the setup, you will want to make sure that the photographs of your kids look as close to a Star Wars scene as possible. Don’t just take a picture of your kids wearing a t-shirt standing in the kitchen. Luke Skywalker doesn’t light up his lightsaber in a kitchen. Your kids will have a lot of fun getting into character, so spend some time on the setup.

    Costumes

    You can buy costumes for your kids on Amazon. Here are the costumes used in this tutorial.

    • Luke Skywalker
    • Rey
    • Kylo Ren
    • Lightsabers
    • Total customs cost ~ $ 40-70

    Location

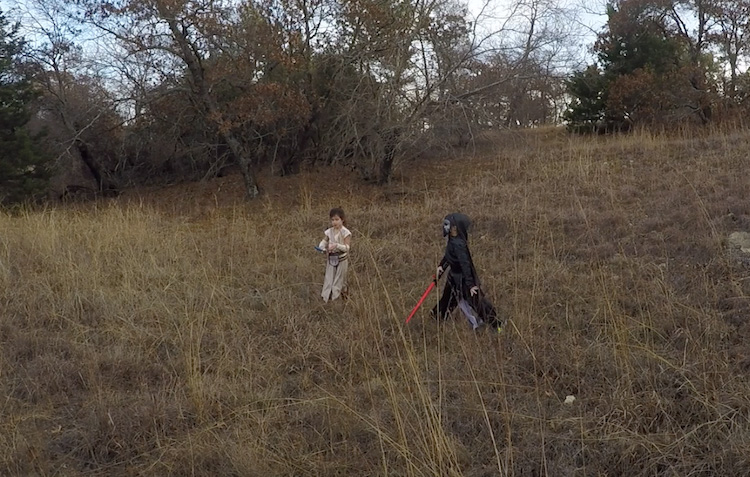
    For the location, you will want to find a place that looks like it could be a scene in any of the Star Wars movies. The easiest location to use would be a park with trees, and no noticeable man-made objects in sight.
    2 Location - How to Turn Your Kids into Star Wars Characters Using Adobe Photoshop

    Step #2 – Capturing the Shot

    Action shots

    For action shots of a lightsaber battle, you will want to use a fast shutter speed of at least 1/500th of a second, and set your camera to continuous (burst) shooting mode. This will allow you to freeze the action of the battle and take multiple shots in sequence to ensure you capture the best of the action.
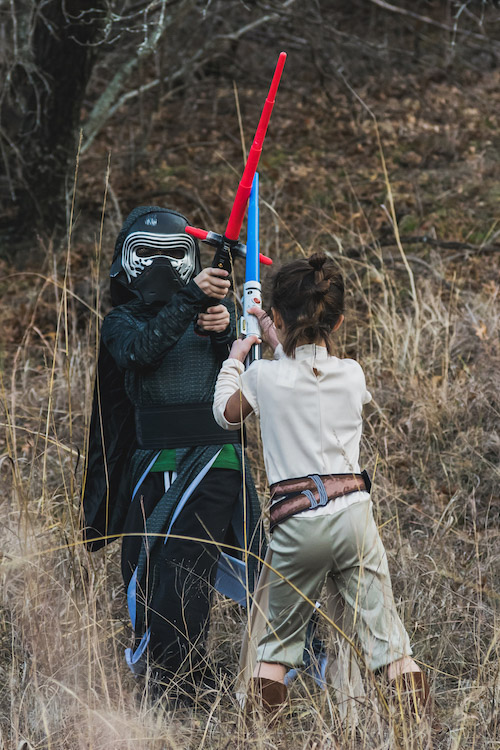
    4 Action shot - How to Turn Your Kids into Star Wars Characters Using Adobe Photoshop

    Shutter speed was 1/800th of a second.

    Portraits

    For the portraits, give your kids some epic poses to follow. To give you ideas for creative poses, do a Google images search for the Star Wars character of your choice. This will also help your child get more into the character. For example here are some for Rey.
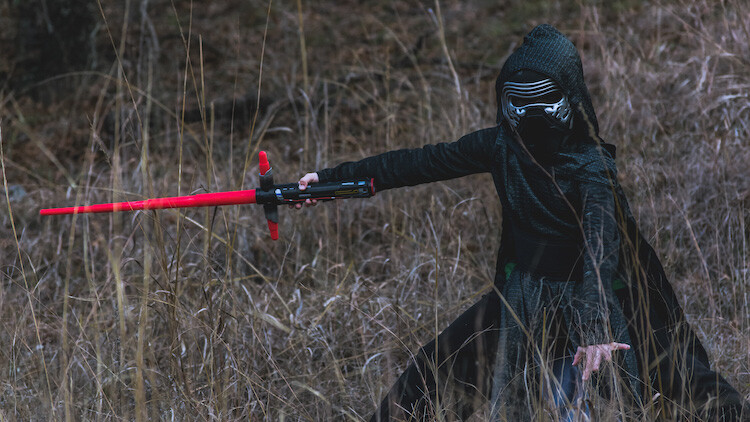
    5 Portrait pose - How to Turn Your Kids into Star Wars Characters Using Adobe Photoshop

    Do basic edits to the image

    After you capture the image, you will need to make a few adjustments to the image to make it stand out. This can be done in Adobe Lightroom and is the final step before your photo is ready to go into Photoshop for the lightsaber effect.

    For the look of Star Wars, a few basic edits, such as increasing the contrast and the clarity will help give it a rough and grungy look that Star Wars is known for.
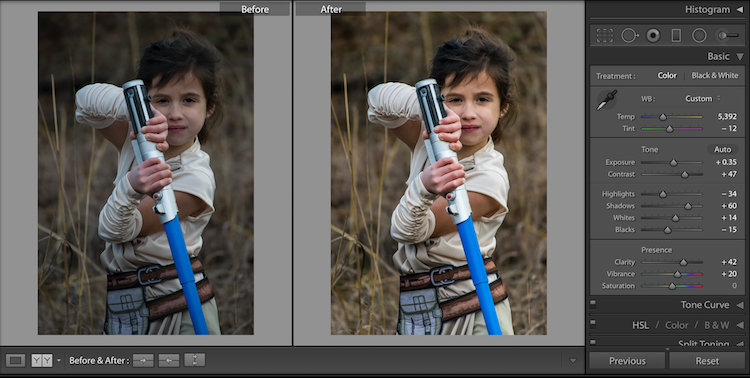
    6 Before After Lightroom Edit Star Wars

    Notice the differences between the before and after of this image by making a few basic edits in Adobe Lightroom.

    Step #3 – Light your sabers up in Photoshop

    Adding the lightsaber effect is the last and final step in making turning your kid into the Star Wars character of their dreams. This process should take about five minutes per photo once you have done it a few times.

    Part 1: Prepare the layer

    Start by creating a duplicate layer by pressing CTRL/CMD + J.
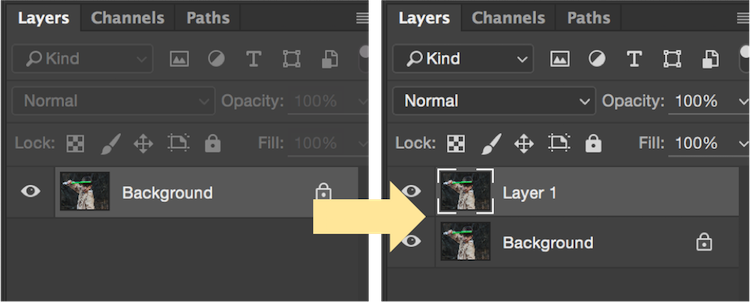
    8 Duplicate layer - Star Wars character in Photoshop

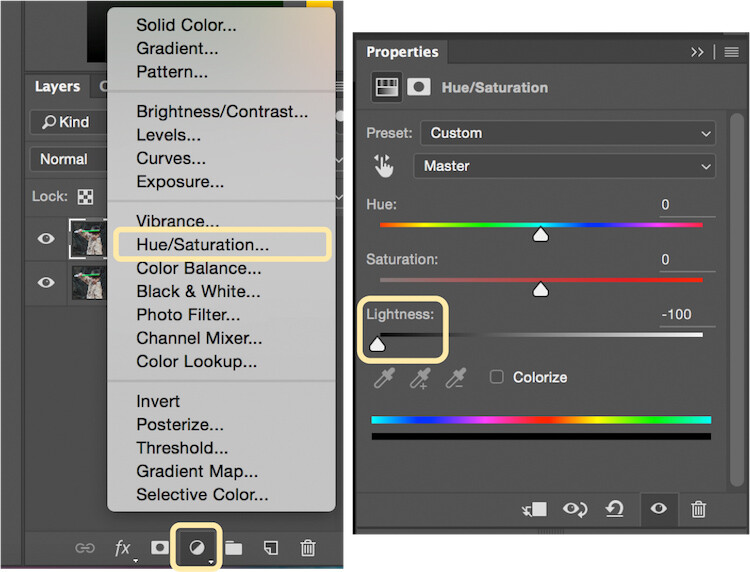
    Select the icon to create a new fill or adjustment layer, and from that menu select Hue/Saturation. Then, move the lightness slider to -100 to make it black.
    9 Hue Saturation

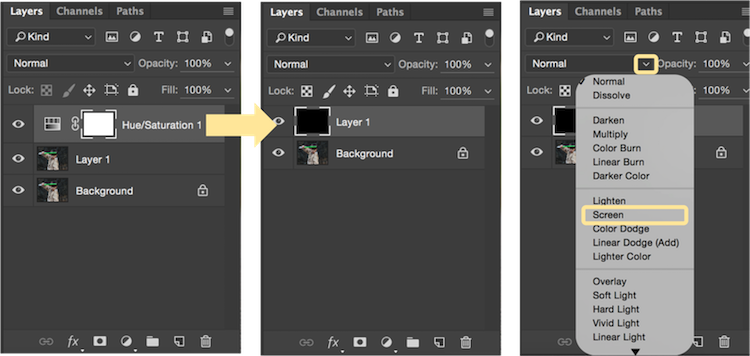
    Select CTRL/CMD + E to merge the adjustment layer and duplicate layer. Next, set the blending mode drop down to Screen.
    10 merge and screen Star Wars

    At this point, your layers are prepped and ready to add the lightsaber.

    Part 2: Add the lightsaber by using the brush tool

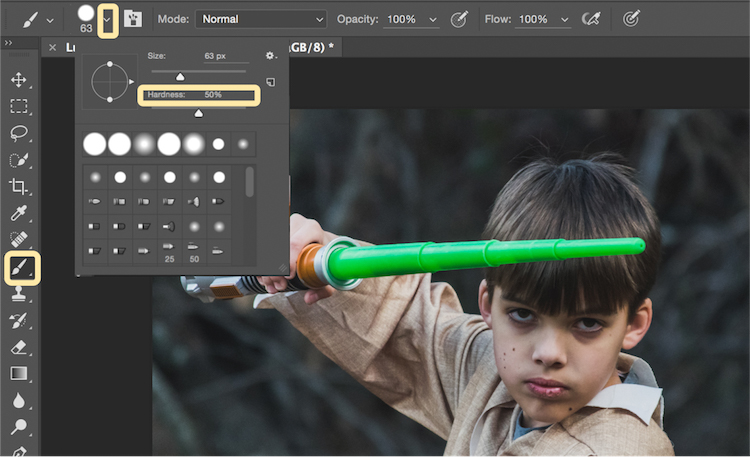
    Select the brush tool, and adjust the size and hardness of the brush. The size of your brush will vary based on the size of the lightsaber and your image. Set the hardness of the brush to approximately 50%.
    11 brush selection

    Begin to add your lightsaber using brush strokes. Select the end point of the lightsaber, then hold down shift, and click the other end of the lightsaber to draw a straight line. Repeat these lines multiple times to fill in the lightsaber with brush strokes. You will likely need to add free-form brush strokes around the base of the lightsaber to fill it in.

    12 draw the saber

    Illuminate the lightsaber

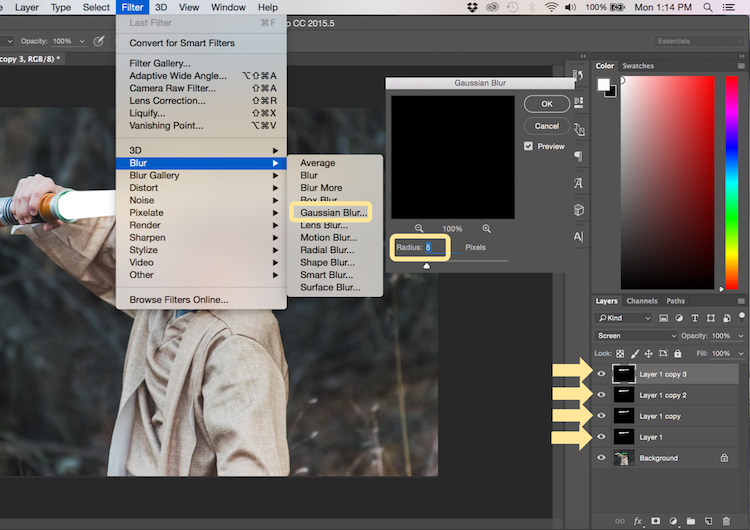
    The next step allows you to illuminate the lightsaber. Create three duplicate layers of the lightsaber by selecting CTRL/CMD + J three times. For each layer, you will then select Filter > Blur > Gaussian Blur. But, each layer will be set to a different radius setting. For this image, we used 5, 15, 35, 75 for each respective layer. Note, that the amount of Gaussian Blur needed may vary based on the size of your image. Adjust these numbers as needed to ensure you have a nice glow from the lightsaber.
    13 Gausian Blur

    Select all of the duplicate layers (do not select the background), and merge them into one layer by pressing CTRL/CMD + E. Then set the blending mode to Screen.
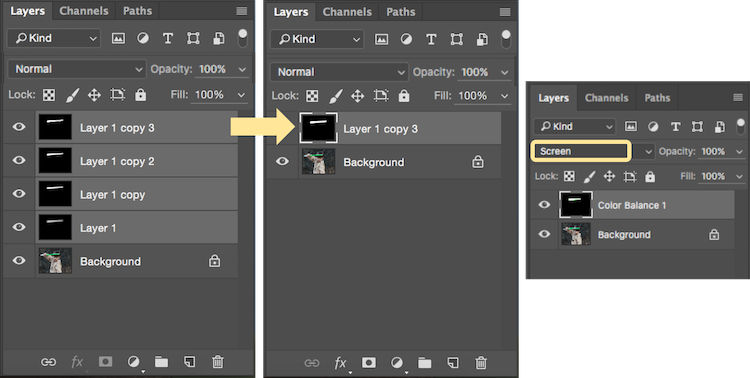
    14 Merge and Screen

    Add color to the lightsaber

    It’s now time to add color to your lightsaber. Select the icon to create a new fill or adjustment layer, and choose the option for Color Balance. Activate the clipping mask so that you only add color to the lightsaber, not the entire image. You can choose any color of your choice, but in this example, we are working with green.

    You will want to add the color selection to each option for Shadows, Midtones, and Highlights. Adjust the color slider up or down based on the color preferences for your lightsaber. For this photo, we set shadows, midtones, and highlights to green at around +65.
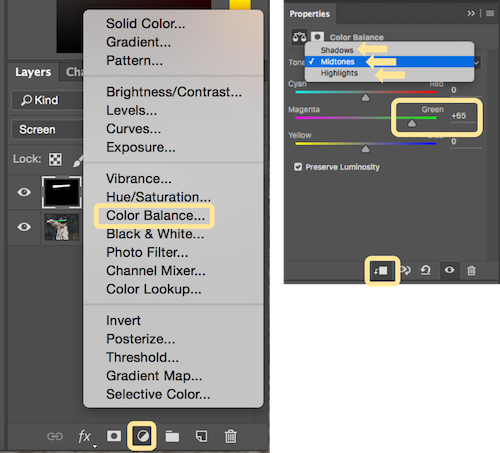
    15 Color Lightsaber

    Your lightsaber is now complete, but there is still one more important step to get a realistic photo. You need to add some glow to the subject from the illumination coming off of the lightsaber.

    Part 3: Add the reflective glow from the lightsaber

    Select the background or base layer. Click the icon to create a new fill or adjustment layer, and choose the option for Color Balance. Choose the same color as you used for your lightsaber, but this time as you adjust the color for Shadows, Midtones, and Highlights, it will work best if you emphasize the color around the highlights more than the shadows or Midtones. For this photo, we used Shadows +32, Midtones +38, and Highlights +70
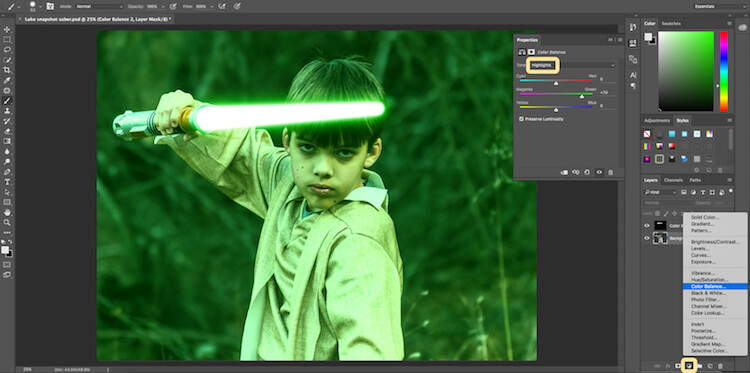
    16 Color for Glow

    Add a vector mask and then select CTRL/CMD + I to hide all of the color balance. Select the brush tool, and make it a soft edge brush with an opacity around +18. This will allow you to brush in a soft reflection of glow to parts of the image that make it look realistic.
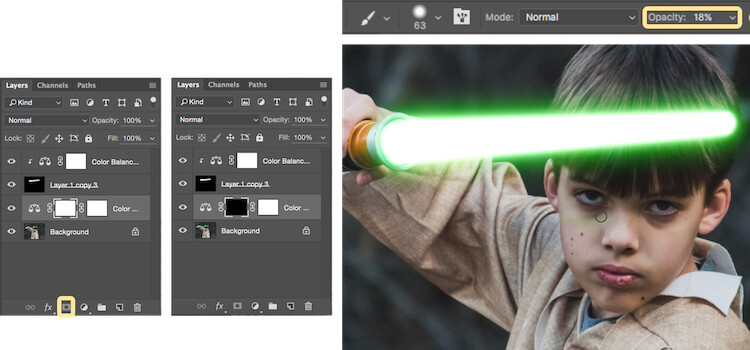
    17 Brush in glow reflection

    Bonus – Jumping Jedi

    A bonus tip that you may want to use in your Star Wars photo shoot is a jumping Jedi. With a few simple tricks, you can give the illusion of your Jedi jumping high into the air over a swinging lightsaber.

    First, make sure you use a tripod as you will need the camera to be completely stationary for two different shots. You can have your Jedi jump off a chair at the same time that his enemy swings his lightsaber. Then remove the chair and capture a shot of the exact same scene, but this time without the chair or characters in the shot (tripod use is important for image alignment later).

    The second shot should be empty with the exception of the background because it will allow you to take the chair out of the original picture to create the illusion of a jumping Jedi.
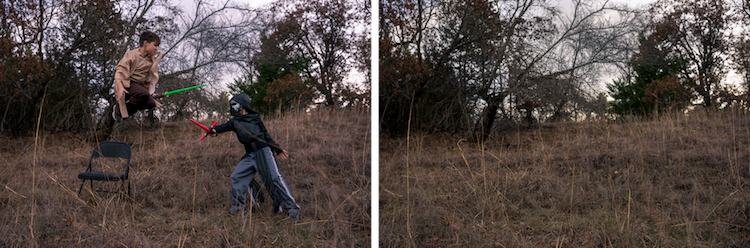
    19 Jumping jedi tripod shots

    Here’s how it’s done in Photoshop.

    Start by opening both photos as layers. You will want the empty background shot to be set as the base layer and the action shot as the top one. Select the top layer of the action shot, and click Layer > Layer Mask > Reveal all.
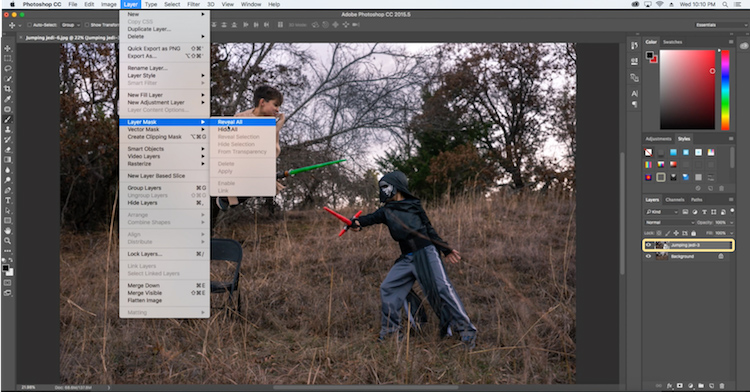
    20 Jumping Jedi mask

    Select the brush tool, and make sure that your foreground color is set to black, which will allow you to brush away the top layer to reveal some of the base layer. If your foreground color is set to white as opposed to black you can switch it to black by clicking X. Simply brush over the chair (make sure you are painting on the mask NOT the layer) to make it disappear.
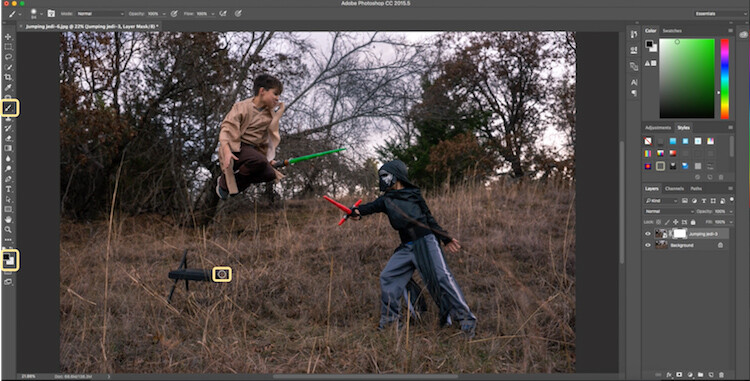
    21 Jumping Jedi brush away

    Add the lightsaber effect from above, and you have the illusion of a jumping Jedi.
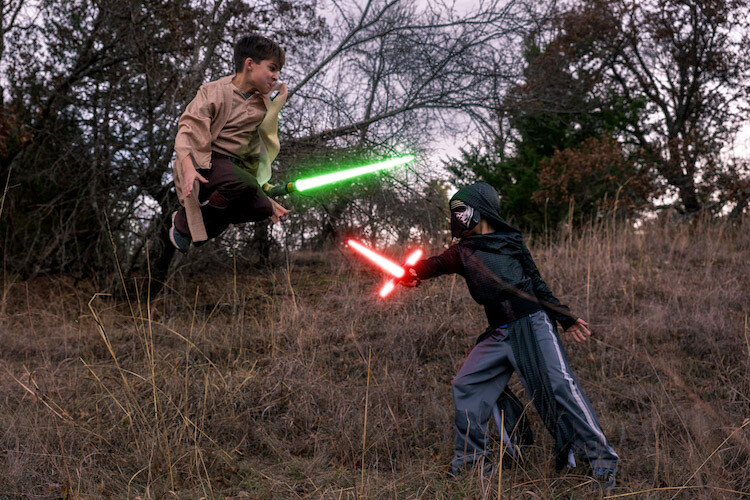
    22 Final photo Jumping Jedi

    Below are some additional examples of the final images from this Star Wars project to give you additional ideas for action shots and portraits to bring your characters to life.
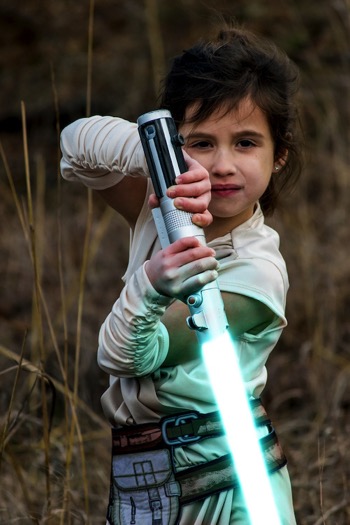
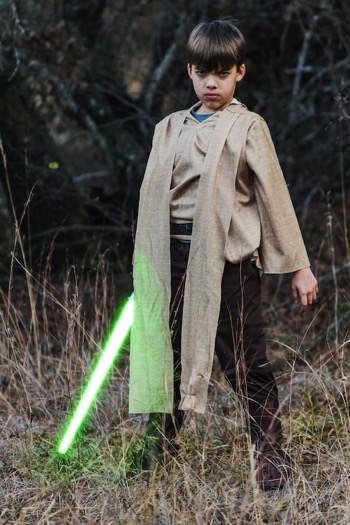
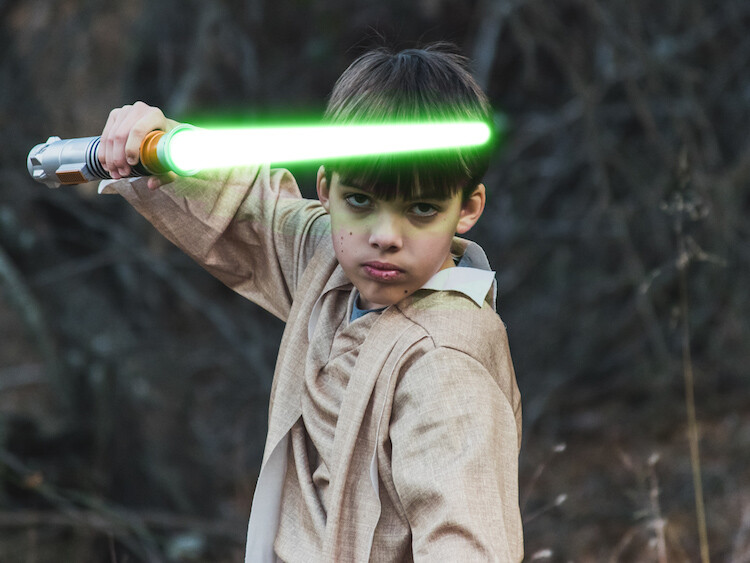
    28 Final photo Rey portrait 29 Final Photo Luke portrait

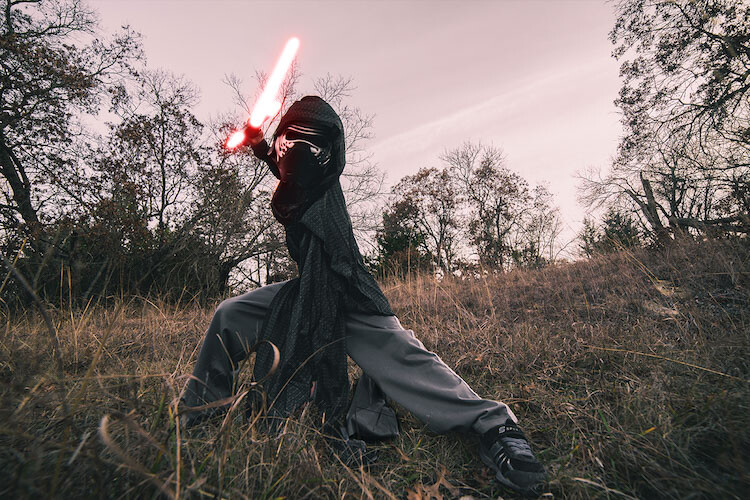
    30 Kylo Ren Red

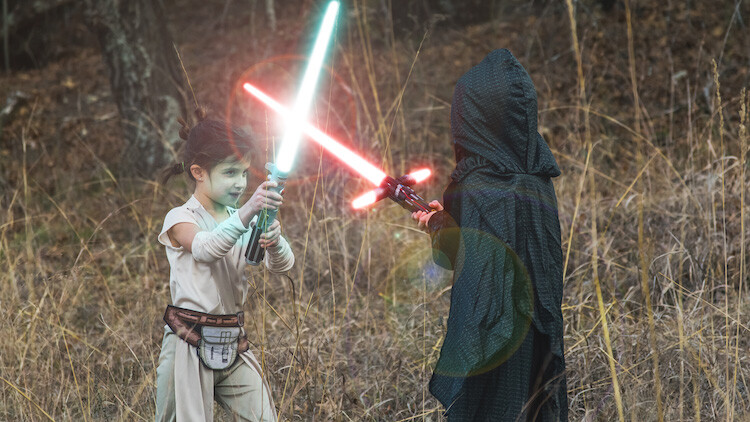
    27 Final photo saber battle

    Finally

    You can watch this whole process in the follow short video as well:

    Note: thanks to my co-author on this article, David Kahl.

    Try to awaken the force in your family by giving them a lightsaber and following this tutorial. In addition, leave a comment with any other fun photography projects that you have captured with your kids or family. Share your images if you give this a go, we’d love to see them!

    googletag.cmd.push(function() {
    tablet_slots.push( googletag.defineSlot( “/1005424/_dPSv4_tab-all-article-bottom_(300×250)”, [300, 250], “pb-ad-78623” ).addService( googletag.pubads() ) ); } );

    googletag.cmd.push(function() {
    mobile_slots.push( googletag.defineSlot( “/1005424/_dPSv4_mob-all-article-bottom_(300×250)”, [300, 250], “pb-ad-78158” ).addService( googletag.pubads() ) ); } );

    The post How to Turn Your Kids into Star Wars Characters Using Photoshop by Paul Fontanelli appeared first on Digital Photography School.

    Digital Photography School

  • Google AI adds detail to low-resolution images

    It seems intelligent enhancement of image detail is currently high on the agenda at Google. Recently the company brought its RAISR smart image upsampling to Android devices. Now, the Google Brain team has developed a system that uses neural networking to enhance detail in low-resolution images.

    The system uses a two-step approach, with a conditioning network first attempting to map 8×8 source images against similar images with a higher resolution and creating an approximation of what the enhanced image might look like. In a second step, the prior network adds realistic detail to the final output image. It does so by learning what each pixel in a low-resolution image generally corresponds to in higher-res files.

    As you can see, the system already works pretty well. In the series of samples above, the images on the left show the 64 pixel source images, while the ones in the middle show the output image that the Google Brain algorithm has produced from them. The images on the right show higher-resolution versions of the low-res source images for comparison. While the results are not perfect yet, they are certainly close enough to provide value in a variety of scenarios. Eventually we might even be able to extract high-resolution images from low-quality security-cam footage a la CSI.

    Articles: Digital Photography Review (dpreview.com)

  • 8 Tips For Doing Stunning Urban Landscape Photography

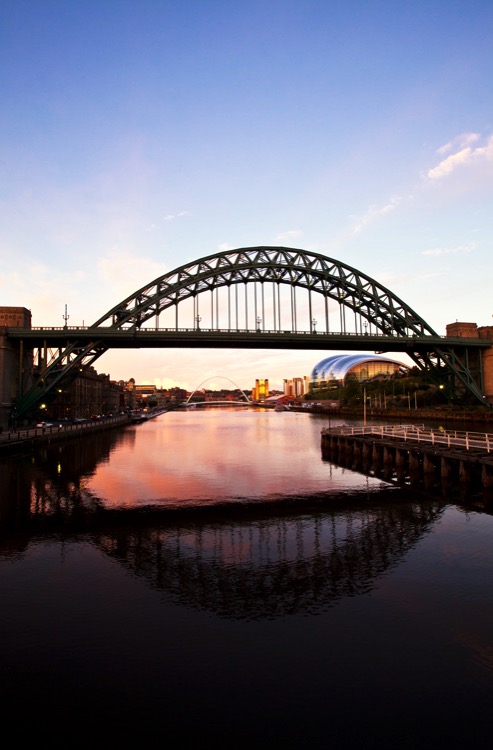
    As a photographer, when you hear the word landscape your mind will most likely conjure up images of lush valleys, looming mountains, and majestic, sweeping vistas. With good reason, as the natural world can be a place of staggering beauty. But done well, a different type of landscape photography, the urban landscape, can produce shots that are equally as compelling as anything Mother Nature can throw your way.

    The energy of a major city lends images a vitality that can’t be found anywhere else. There’s so much movement and life in the urban environment, and the best city shots capture that buzzing vibrancy.

    Urban landscape 02

    Shooting urban landscapes also has plenty of practical advantages too. Every type of photography is all about the light, and that is one thing cities never run out of. You can shoot in the artificial glow of the metropolis long after you’d have been forced to pack up your kit and make your way home from a day in the countryside.

    Couple that with the fact that, for the most part, cities are a lot more accessible for the majority of us, and shooting urban landscapes is the ideal activity for photographers during those long winter months.

    So here are our top 8 tips for getting the most out of your time pounding the sidewalks.

    #1. Research

    You wouldn’t embark on a traditional landscape photography outing by jumping in the car, heading for the hills and hoping for the best. Likewise, the success of an urban landscape shoot depends largely on how well you plan.

    Your home town

    Even if you’re off to capture the town or city you grew up in, putting in the effort to do a little research up front usually pays dividends.

    Urban landscape 01

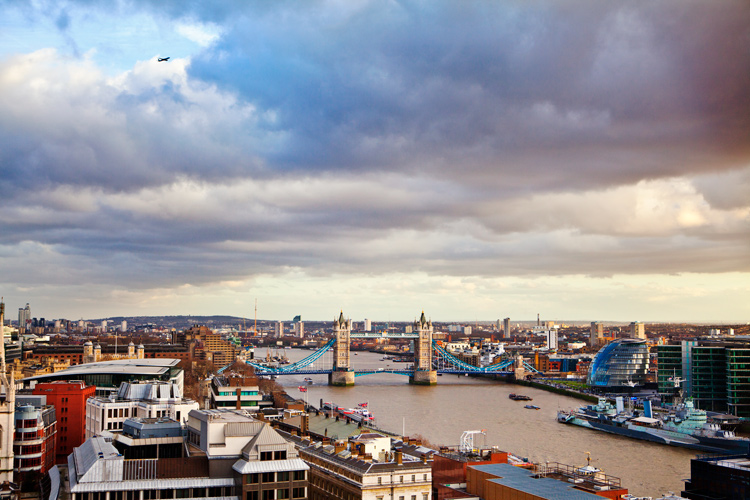
    For example, when I wanted to get a shot from high up, overlooking my hometown of London, I didn’t foresee any problems in finding a suitable viewpoint. However, after a little digging, I learned that while London isn’t lacking in tall buildings offering amazing views, the number you can actually gain access to, that are also well suited for photography, can be counted on the fingers of one hand.

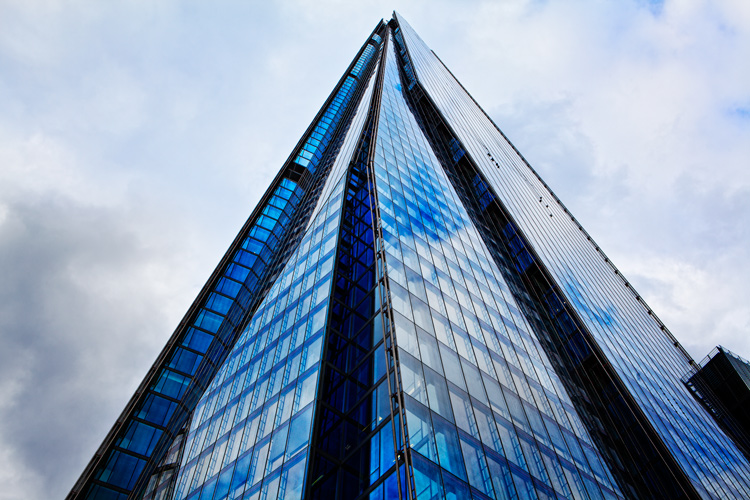
    The vast majority are either restricted entry or in the case of The Shard (seen at the top of this article), cursed with a viewing gallery shrouded with ultra-reflective windows.A few minutes Googling directed me to a lesser-known church tower on the banks of the Thames with unrestricted views downriver, saving me hours of fruitless searching.

    Visiting another city

    If you’re visiting a city for the first time, it’s a good idea to spend a little longer familiarizing yourself with the place before you go. Drawing up a shot list of the locations you want to photograph is a good idea as well.

    But all that being said, don’t make yourself a slave to it. Few things are more exciting or rewarding in photography than allowing yourself the freedom to meander through a new landscape, get a little lost, and allow whatever happens to happen.
    One word of warning: depending on your location, be sure you know where you can and cannot shoot. Many places these days are understandably sensitive about strangers waving cameras around. If in doubt, ask.

    #2. Light

    The quality, color, and angle of the light can make or break any shot, and this is especially true for urban landscape photography. A subject that looks dull and uninspiring at one time of day can transform into a truly spellbinding image just with the passing of a few hours.

    Urban landscape 03

    As with any landscape photography, dragging yourself out of bed before the sun puts in an appearance can reward you with the kind of light show that almost makes up for all that missed sleep. The golden hour, that brief a period right after sunrise and before sunset, can present you with views of a city that you may never have seen before.

    Plus, you can carry on shooting long after the sun’s gone down. Cities come alive at night. They never get truly dark, and some of the most interesting shots can be taken with the only illumination coming from artificial light.

    Just remember to bring your tripod!

    Urban landscape 04

    #3. Hustle and Bustle

    Major cities are fast and frenetic places. Everyone seems to be moving a million miles an hour and there’s always something going on. It’s the perfect environment for photographers.

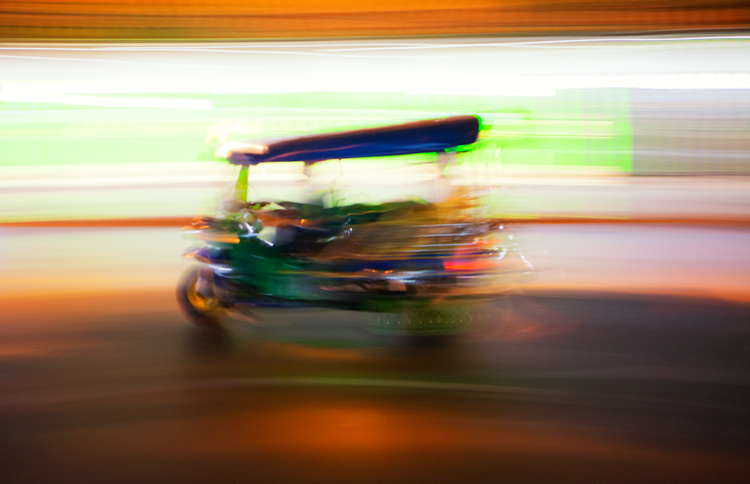
    If you can manage to avoid getting swept along in the tidal wave and stop to look around, you can capture images that convey all that chaotic frenzy. Using a slower shutter speed will help you pick up a real sense of movement, either tripod-mounted or handheld if you’re feeling brave.

    Urban landscape 05

    #4. Details

    There are countless small and fascinating details in cities. Always be on the lookout for the tiny intricacies, the patterns, and shapes that otherwise go unnoticed.

    They won’t all be right in front of you. Keep your eyes moving and your head on a swivel, some of the most rewarding shots are going to be found way above your head or close to the ground.

    Urban landscape 06

    Whether it’s an advertising billboard, some rugged brickwork, or a set of windows, get in close, fill the frame, and isolate your subject.

    This is another time when the quality of the light can make all the difference to the success of a shot. A strong, high contrast light can give interesting areas of highlights and shadow, turning an everyday scene into a beautiful abstract. If you have time, it’s worth revisiting potential subjects at different points throughout the day.

    Urban landscape 07

    #5. Composition

    Moving from the countryside to the urban environment doesn’t mean all the old landscape composition rules go out the window. Much of what applies standing on top of El Capitan in Yosemite Park, is still relevant looking down on New York from the Empire State.

    Keep the basics of composition in your mind, things like the rule of thirds, leading lines, and natural frames. Then be prepared to break the rules when necessary.

    Urban landscape 08

    Always think before you shoot. Look around you and see if taking a different viewpoint would improve your shot. Can you get higher and look down or even lie on the ground and shoot upwards?

    Unfortunately, in major cities buildings are often so close together they can restrict your options and movements as a photographer, but make sure you’re at the optimum position for your subject. The difference between a winning shot and a mediocre one can sometimes be measured in the space of just a few feet.

    Urban landscape 09

    #6. People

    One area where urban landscapes differ greatly from the traditional is in the number of people you’re likely to encounter. It can be frustrating when you arrive at your dream location, only to find it swarming with tourists, as well as the locals going about their daily business, all seemingly determined to clutter up your shot. Along with the great light, it’s another good reason to be up and about in the early hours of the day, while everyone else is still tucked up in bed.

    But people make great subjects for candid portraits as you wander the streets. Big cities attract some real characters, and capturing them in their home environment can lead to some winning images.

    One thing to remember is to always ask your subject’s permission before you shoot. The vast majority will be more than happy to oblige so long as you’re polite. (Take this from a man who once got a severe and humiliating telling off from a Buddhist monk in Thailand for taking his picture without having the courtesy of asking first. They’re not as chill as you’d think!)

    Urban landscape 11

    #7. Reflections

    Modern cities seem to be more glass than anything else. This is great news for you as a photographer. You can use that beautiful reflective quality in your compositions to create some wonderful, quirky effects.

    The major landmarks in every city have been photographed a bazillion times. So, you have to work a little harder and think a little more creatively to come away with shots that are distinctly your own. Shooting a famous and easily recognizable building reflected in the windows of another gives an interesting change of context, especially as it often contrasts the old and the new.

    Urban landscape 12

    Many big cities are built along the banks of hefty rivers as well, which gives you another opportunity to utilize reflections in your shots. Clear skies offer the best results, preferably at the start or end of the day to give a little color. A dull, overcast day will be reflected in the water, giving it an ugly, muddy quality.

    Urban landscape 13

    #8. Monochrome

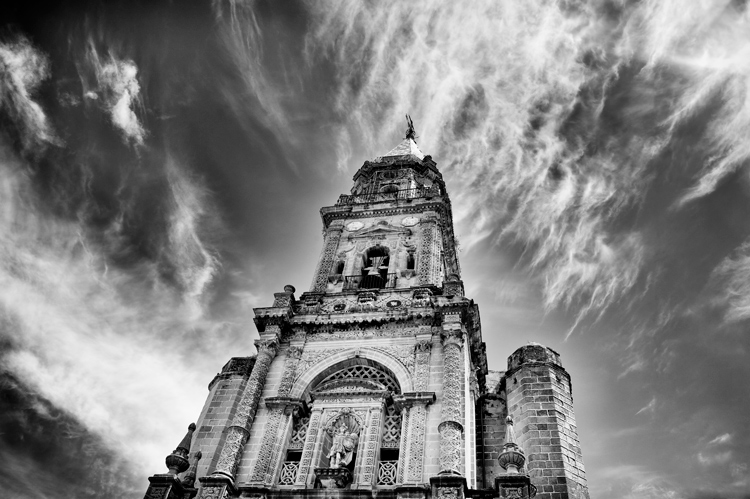
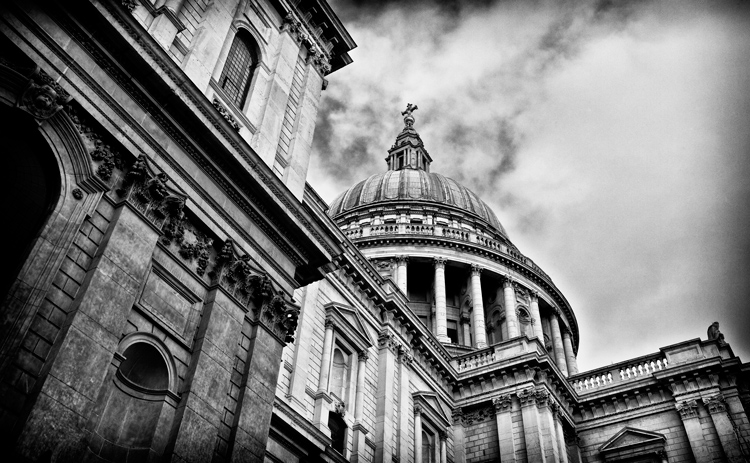
    Urban landscapes are very well suited to the simplicity of black and white photography. Taking away the distractions of the vast range of different colors on show in any city and focussing on just the tones and textures, gives a completely new dimension to your shot.

    Urban landscape 14

    The increased contrast of a monochrome image benefits architecture especially, enhancing the shape of buildings and accentuating their details. Again, the light is all-important. A low sun highlights surfaces and gives areas of rich shadow for added depth.

    Try and avoid using the black and white function on your DSLR and shoot RAW if you can. Then use your post-production software for the conversion. It allows you much more control over the final image.

    Conclusion

    Shooting urban landscapes can be a richly rewarding experience and gives you the opportunity to try out several different disciplines at once.

    You have the chance to flex your portraiture and architectural photography muscles, as well as experimenting with close-up abstracts and shooting in black and white. Plus, you get to practice all that while staying firmly in civilization and never more than a few feet from a decent cup of coffee!

    Urban landscape 15

    Of course, all that added convenience comes at a price. Shooting in cities has its inherent risks and you always need to keep your wits about you. Watch where you stand to shoot and make sure you’re not in any danger from fast-moving traffic or trespassing on anyone’s property.

    Also, keep a tight grip on your equipment, especially if you’re shooting at night. Cities have more than their fair share of bad people who’d not think twice about running off with your expensive kit. If you’re nervous, it’s the perfect opportunity to buddy up with another photographer and explore the location together.

    Please share your urban landscape photos in the comments below.

    googletag.cmd.push(function() {
    tablet_slots.push( googletag.defineSlot( “/1005424/_dPSv4_tab-all-article-bottom_(300×250)”, [300, 250], “pb-ad-78623” ).addService( googletag.pubads() ) ); } );

    googletag.cmd.push(function() {
    mobile_slots.push( googletag.defineSlot( “/1005424/_dPSv4_mob-all-article-bottom_(300×250)”, [300, 250], “pb-ad-78158” ).addService( googletag.pubads() ) ); } );

    The post 8 Tips For Doing Stunning Urban Landscape Photography by Andy Callan appeared first on Digital Photography School.

    Digital Photography School

  • Has a new champion been crowned? Sigma 85mm F1.4 Art lens review

    The Sigma 85mm F1.4 Art hasn’t been on the market long, but it has already begun to make some serious waves. Lenstip and DxO have rated it the sharpest 85mm lens ever created, beating out even the legendary 85mm F1.4 Zeiss Otus, which isn’t something that we take lightly. We were lucky enough to get our hands on the lens back in mid-November and we were very impressed to say the least, so much so that it took top honors for the ‘Best Prime Lens of 2016’ as chosen by our staff.

    It has, without a doubt, been a pretty big topic of discussion not only amongst our staff members, but also amongst portrait photographers around the world. With that said we just had to get our hands on it to see how it really performs and to see how it holds up next to some very stiff competition at 85mm. The Sony FE 85mm F1.4 GM is a very formidable competitor and arguably the best modern 85mm F1.4 on the market (behind the manual focus Zeiss Otus, of course). With that in mind, the question is; can the Sigma hold its own? Our review will answer that question and more.

    APS-C   

    With an equivalent focal length of 136mm and an equivalent aperture of F2.2, this lens can be usefully used on an APS-C camera. Even with its slightly longer focal length, it does still fit into the focal range that’s often used by portrait photographers and the fast aperture does allow for it to be used in low-light situations as well. However, its size, weight and price makes it worth considering 85mm F1.8 lenses instead.

    Sigma 85mm F1.4 DG HSM Art headline features

    • F1.4 maximum aperture
    • 85mm max fixed focal range
    • 2 FLD glass elements (low-distortion glass with fluorite-like performance)
    • 1 Aspherical SLD element
    • Canon EF, Nikon (FX) and Sigma SA Bayonet mounts

    Specifications Compared

      Sony FE 85mm F1.4 GM Sigma 85mm F1.4 DG HSM Art
     MSRP $ 1800.00  $ 1199.00
     Lens Type Prime Prime
     Focal Length 85mm  85mm 
     Filter Thread 77mm 86mm
    Image Stabilization No No
    Lens Mount  Sony FE Canon EF, Nikon (FX), Sigma SA Bayonet 
    Aperture Ring Yes (w/ d-click feature) No
    Maximum Aperture  F1.4 F1.4
    Minimum Aperture F16  F16
    Minimum Focus  0.80 m (31.5?) 0.85 m (33.46?)
    Diaphragm Blades  11 9
    Elements  11  14
    Groups  8 12
    Special Elements/Coatings  1 ‘Extreme Aspherical’ element, 3 ED elements and ‘Nano AR’ coating 2 FLD glass elements and 1 Aspherical SLD element
    Autofocus  Yes Yes
    Motor Type  Ring-type Supersonic Wave Ring-type Hypersonic
    Full Time Manual  Yes Yes
    Focus Method  Internal Internal
    Distance Scale  No Yes 
    DoF Scale  No Yes
    Full Weather Sealing  Yes No (dust and splash proof)
    Weight 820g (1.81 lb) 1131g (2.49 lb) 
    Dimensions  108 mm (4.23?) x 90mm (3.52?) 126mm (5.0″) x 95mm (3.7″)
    Hood  Yes ( ALC-SH142) Yes

    As you can see the lenses are fairly different in terms of build and design. The Sony 85mm has a manual aperture ring that can not only function on its own, but the aperture can also be adjusted with the camera by switching the ring to ‘A’. This ring also features a special de-click feature for smooth, silent aperture changes while shooting video. The Sigma 85mm lacks the weather sealing that the Sony has and there’s also a fairly substantial difference in size and weight as the Sony 85mm is a fair bit smaller and lighter. The price point is one area of the where the Sigma really prevails over the Sony, on paper, at least.

    Specifications are fun to look at, but the real question is how do these lenses perform? Read on, to find out.

    Articles: Digital Photography Review (dpreview.com)

  • The Fuji XF 18-135mm – a Versatile Travel Lens

    From one article comes another – One plus of being a Fuji X Photographer is that Fuji will lend you gear to try. When I did an overview of the 18-55 Kit lens, a commenter asked about the difference between it and the Fuji XT 18-135mm. I don’t own that lens, but through my Fuji connection, I was able to borrow one for a short while and give it a go. So thank you to the commenter that allowed me to find out I could borrow stuff to test!

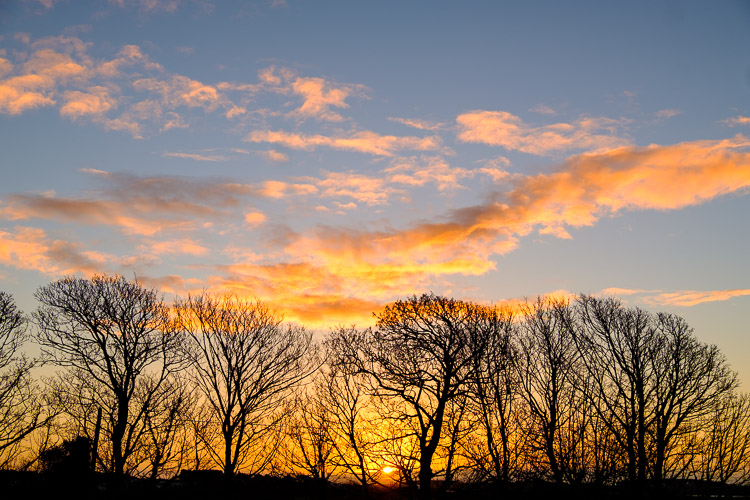
    Fuji XF 18-135mm sunrise

    The sunrise on New Years Day. I had no hesitation using the lens, over lenses I own already, to capture this image.

    First thoughts on the Fuji XF 18-135mm lens

    Straight up, I think this is a great travel lens, despite the issues with the lens that are common to most kit lenses. But, these issues are outweighed by the usefulness of this lens. The weight and size were fine in general use, and I never felt that I was being let down by the lens. When I got the lens, I did a walkabout locally where I familiarized myself with it.

    Fuji XF 18-135mm

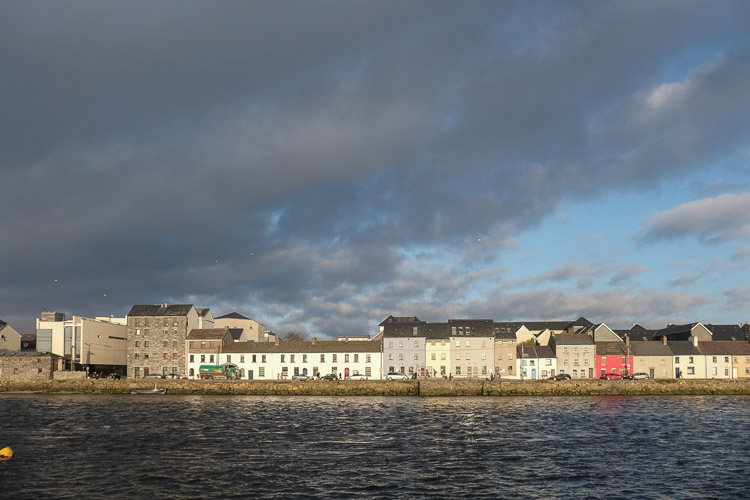
    A wide shot of Long Walk in Galway. The Museum is on the left of the shot.

    Fuji XF 18-135mm

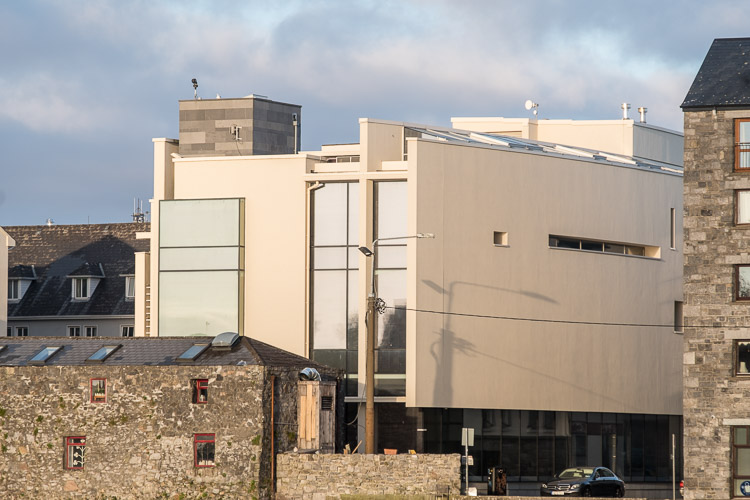
    Here’s the Museum from the same position at 135mm.

    Fuji XF 18-135mm

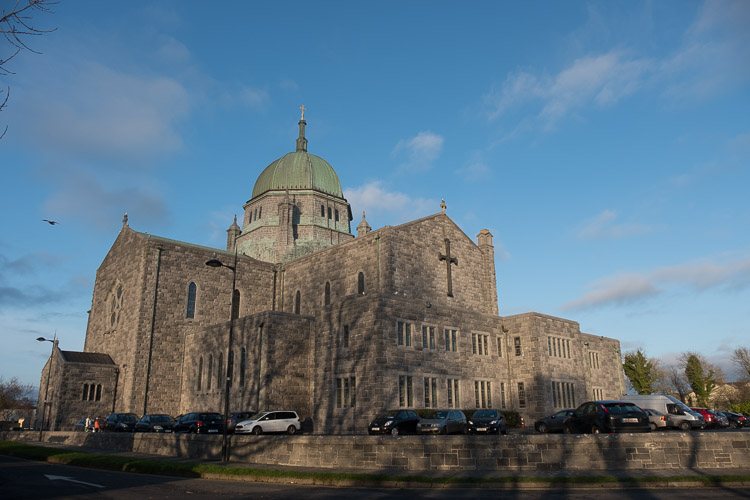
    Galway Cathedral at 18mm.

    Fuji XF 18-135mm

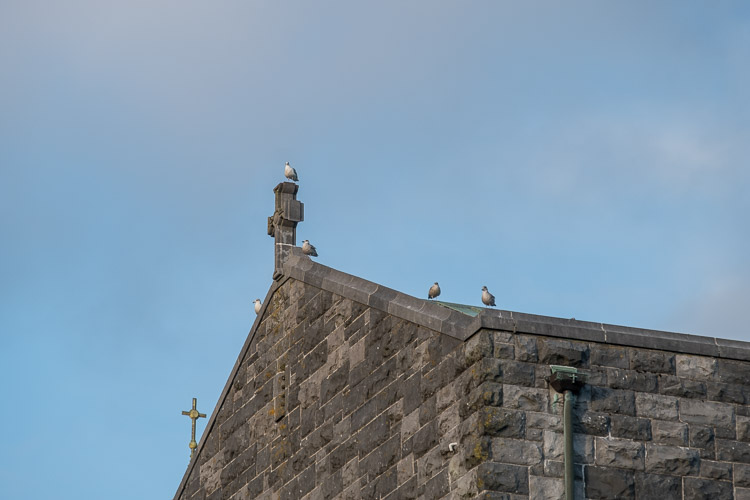
    A detail shot of the roof to the left of the some at 135mm.

    Fuji XF 18-135mm

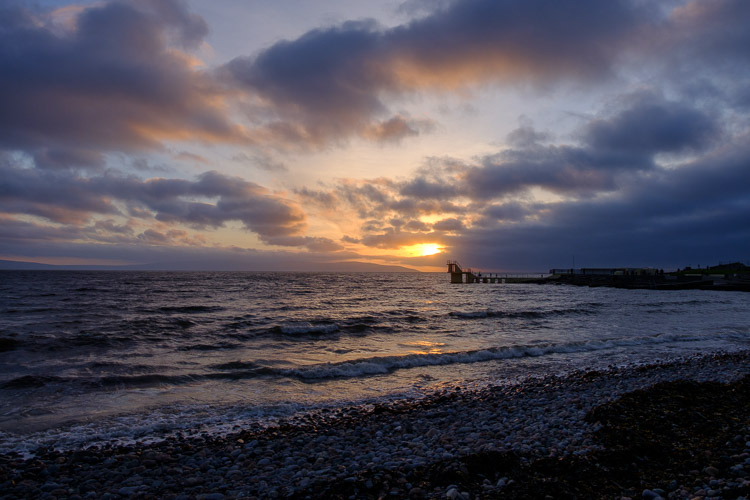
    Salthill with the sun setting near Blackrock Diving Tower.

    Fuji XF 18-135mm

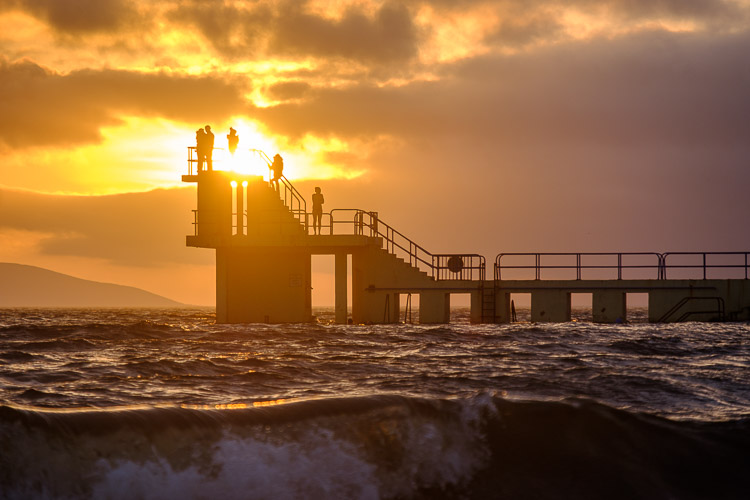
    I moved slightly to frame the sun in the tower, but still roughly the same distance away, zoomed in to 135mm.

    Fuji XF 18-135mm

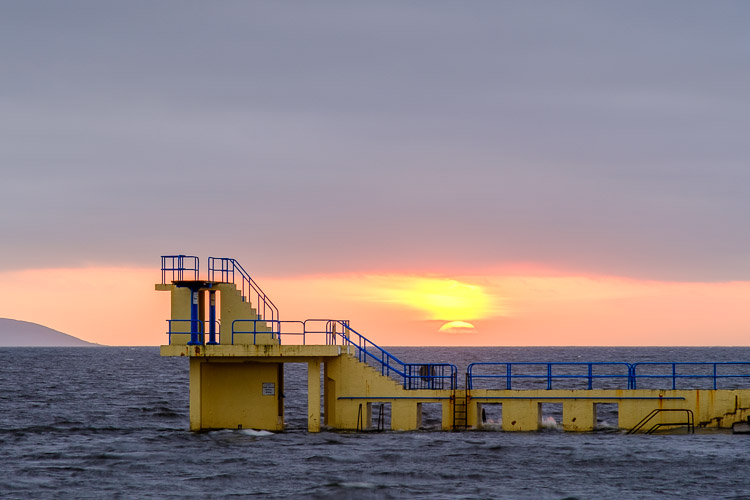
    The sunset didn’t quite pan out, but I used the 135mm end of the lens to frame it with the diving tower.

    Specs of the Fuji XF 18-135mm lens

    The Fuji XF 18-135mm weighs 409 grams (just shy of one pound). It’s not lightweight, but it’s not heavy compared to similar lenses in this class. Aperture runs from f/3.5 at 18mm to f/5.6 at the 135mm end. The full frame equivalent is 27-200mm. I owned the Canon 28-200mm for a while and sold it because of the softness. This Fuji 18-135mm, while not as sharp as the XF 18-55mm, is not as soft as the Canon version.

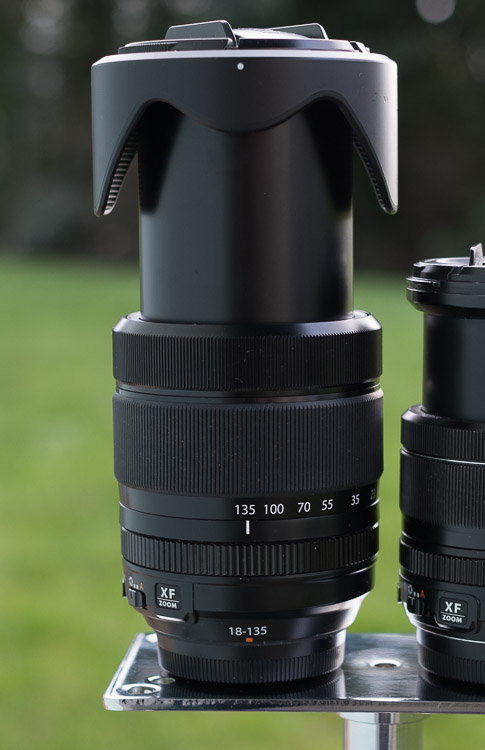
    The lens extends in length as you zoom it. The lens barrel doesn’t rotate, so attached filters remain in the same relative position. It comes with a plastic lens hood, and the filter ring is 67mm. As with the 18-55mm, the lens has OIS to reduce camera shake. Fuji claims that this offers up to an impressive 5-stops of camera shake reduction. It’s in the WR (Weather Resistant) range of lenses also, meaning you can use it out in the rain, something I did when visiting London.

    Fuji XF 18-135mm

    Travel and the Fuji 18-135mm lens

    Super zooms, by and large, make for great travel lenses. The width is usually good enough for any situation. If you need more, it’s easy to shoot two overlapping shots and create a panorama later. The longer focal length means you can easily capture street portraits or zoom in to get details. Wide shots often have to include other tourists, especially when handheld. Detail shots can give a better flavor of an attraction, and give you something not everyone else thinks to shoot. The best part? Not having to change your lens to get both shots.

    The weight of the lens isn’t a cause for concern, even carrying around all day. With a small messenger bag like the Think Tank Retrospective 10, you can use the lens mounted on a Fuji X-T2, while carrying a bottle of water and all your accessories. When traveling I had this combo, a 35mm f/1.4, a flash and trigger set, along with a small shoot-through umbrella. Also in the bag were an iPad mini, a power bank, and a foldable bluetooth keyboard. I never felt like I was weighed down and was quite productive with this setup. Whenever a shot presented itself, I simply grabbed the camera and was ready to go.

    London

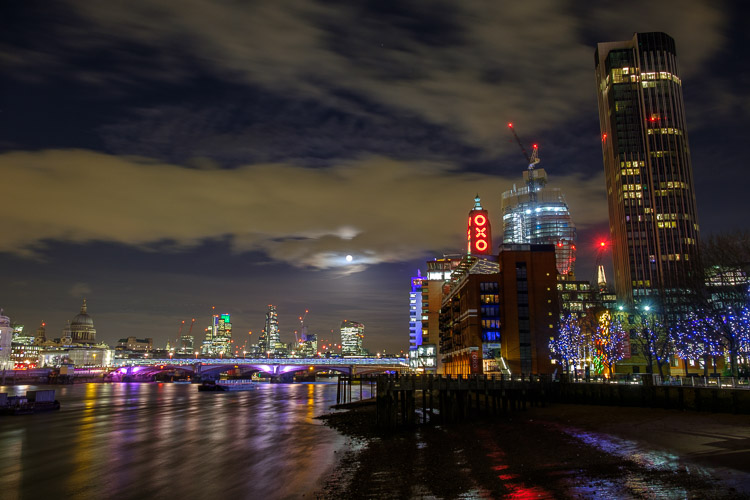
    During the time I had the lens, I was at The Societies convention in London. It was a perfect chance to use the lens as a tourist. Some of the attendees organized a night shoot down by the river Thames. We walked along South Bank to the Millennium Bridge, shooting along the way.

    Fuji XF 18-135mm

    A shot of the London night skyline showing the OXO tower and St Pauls’ Cathedral.

    Fuji XF 18-135mm

    The same view at 53mm

    Fuji XF 18-135mm

    And again at 70mm, longer than the 18-55mm could do.

    Fuji XF 18-135mm

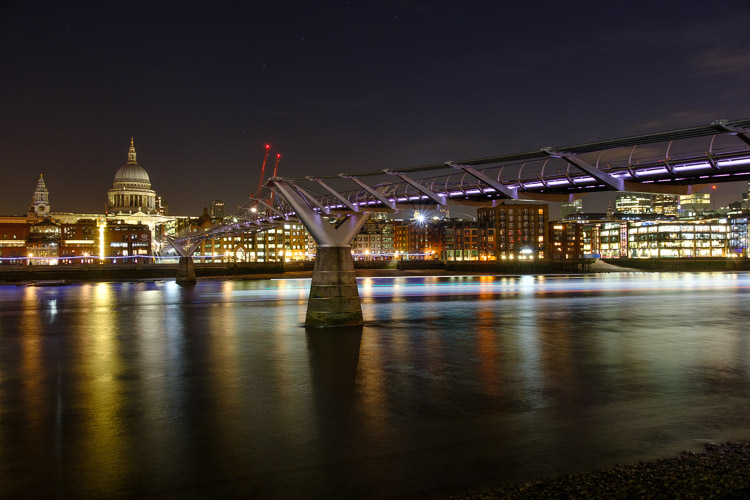
    The Millenium Bridge and St Pauls.

    Fuji XF 18-135mm

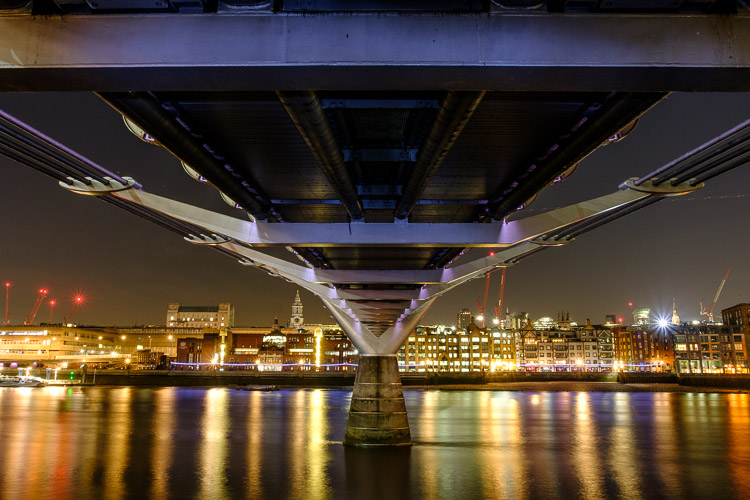
    Under the Millenium Bridge I light painted the beams with a torch (flashlight) to get a little more detail into them.

    Fuji XF 18-135mm

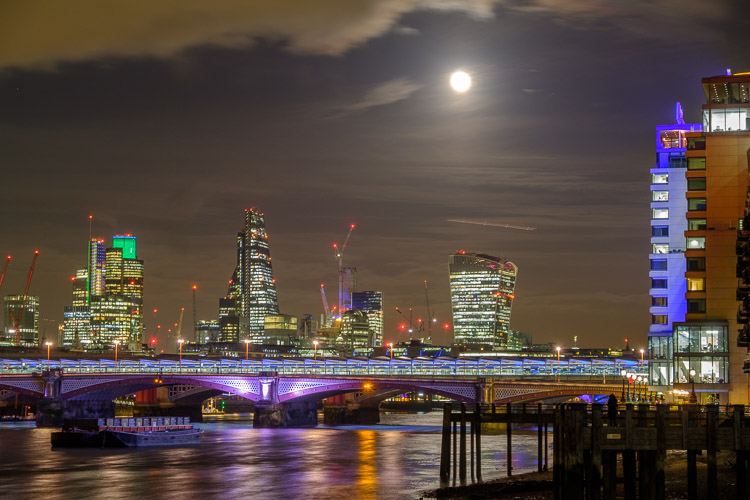
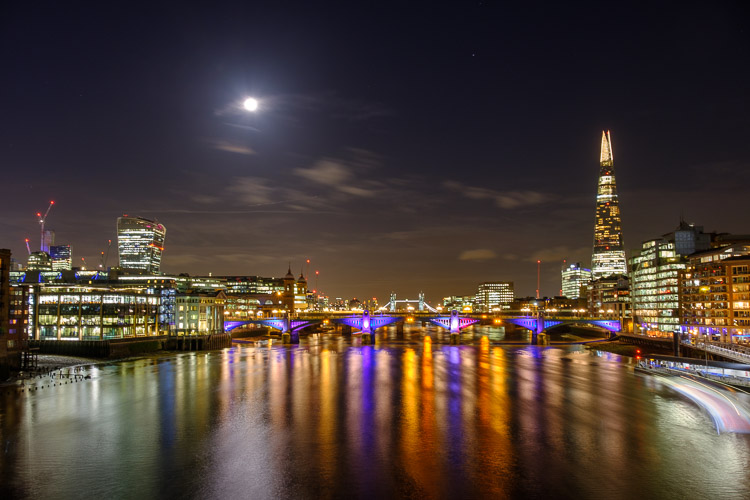
    A wide view of the river showing the Moon and the Shard

    Fuji XF 18-135mm

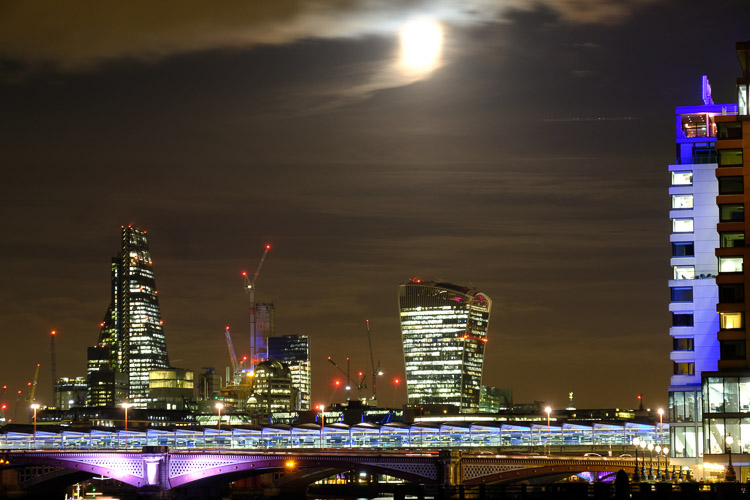
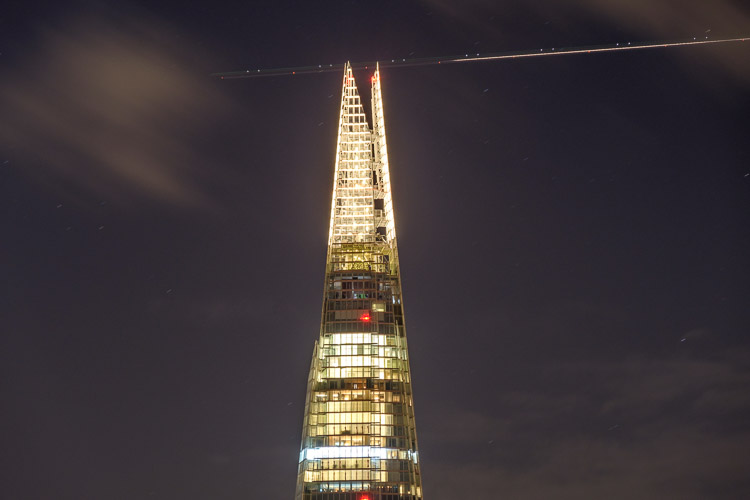
    A 135mm zoomed-in view of the Shard with a plane flying past.

    I also did a little walkabout the morning I was leaving. It was raining, but I kept the lens in the bag when not in use and it performed perfectly. Knowing it was weather sealed also made me more inclined to shoot in these conditions.

    Fuji XF 18-135mm

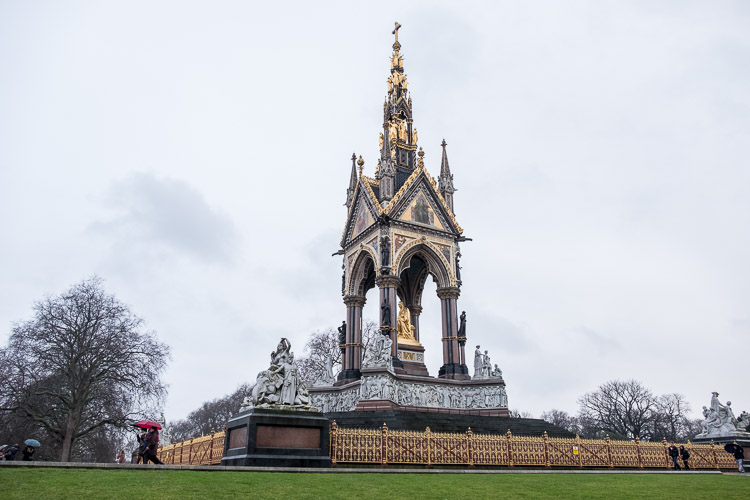
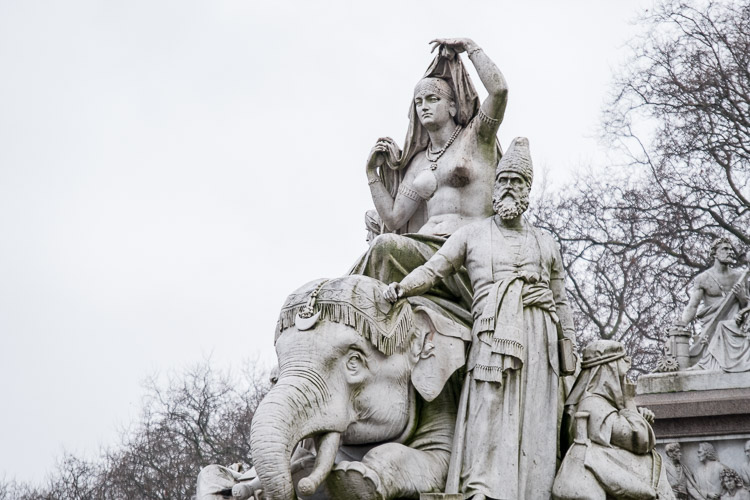
    The Albert Memorial, complete with tourists.

    Fuji XF 18-135mm

    The Asia Group visible in the bottom left of the previous image at 135mm.

    Fuji XF 18-135mm

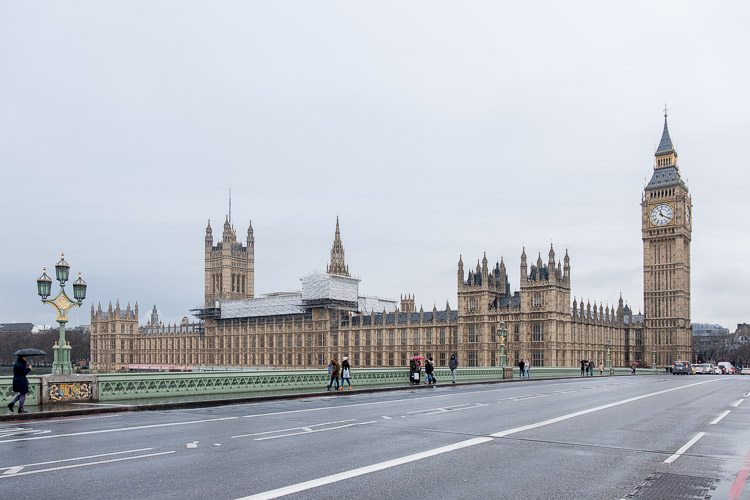
    The Houses of Parliament from Westminster Bridge. Technically the bell is called Big Ben, not the clock tower.

    Fuji XF 18-135mm

    The clock tower that houses Big Ben.

    People

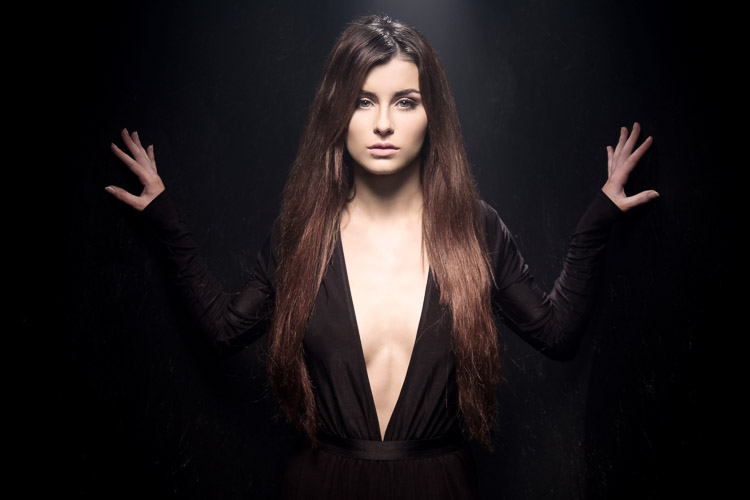
    I also made use of the lens in the studio, where it performed equally well. Shooting in studio tends to be around f/8-f/11, which is the sweet spot of most lenses. The Fuji XF 18-135mm lens didn’t disappoint.

    Fuji XF 18-135mm

    A model shot taken in the studio.

    Issues

    The main problem with the lens is that shots are a little soft. It’s simply a function of producing the zoom range to a price point. This isn’t really a problem, as the files can be sharpened in Lightroom or another raw converter as a batch process.

    Versus the Fuji 18-55mm lens

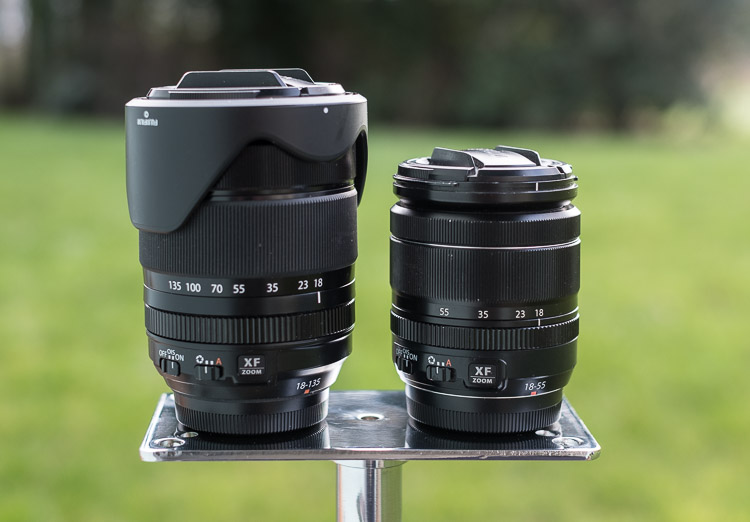
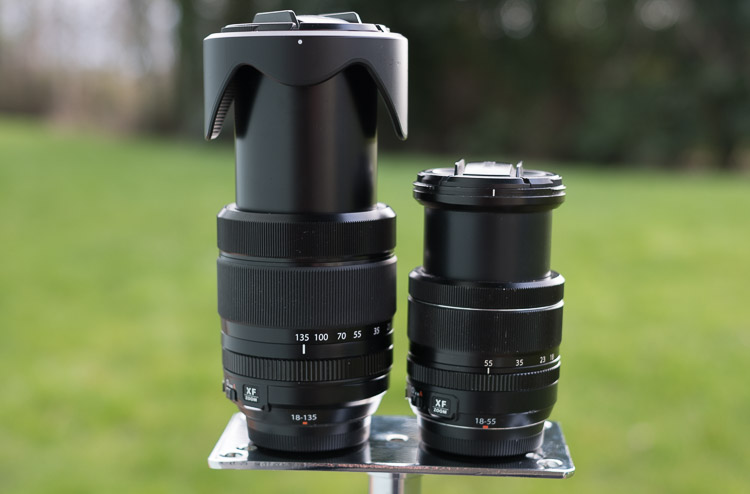
    As both the 18-55mm and the 18-135mm are offered as kit lenses, you may wonder which is better for you. The 18-135mm is larger, heavier, and slower than the 18-55mm. It’s also not as sharp. If a smaller size and faster aperture are important to you, go for the 18-55mm. If you want more reach and don’t want to bring two lenses while traveling get the 18-135mm. Here’s what the two lenses look like side by side.

    Fuji XF 18-135mm

    The Fuji XF 18-135mm lens with the XF 18-55mm.

    Here’s the full extension on both lenses. I had to tape the back of the 18-55mm to stop it from slipping (zoom creep) for this shot. The 18-135mm was solid the whole time.

    TheFuji XF 18-135mm lens with the XF 18-55mm, both at full extension.

    Verdict on the Fuji XF 18-135mm lens

    This is a great travel lens that needs a little post-processing to bring out its best. Despite already owing the 18-55mm, I would consider getting this lens specifically for travel

    Pros

    • Great reach (zoom or focal length range).
    • You only need one lens for travel making it really convenient.
    • It’s still compact compared to full frame equivalents, like the Canon 28-200mm or 28-135mm IS.
    • The built-in OIS (stabilization) is great for handheld shots.
    • It’s Weather Resistant.

    Cons

    • It’s still heavier than the 18-55mm lens.
    • This lens is a  little softer than other Fuji lenses, especially at 135mm.
    • The edges of the frame are a little softer than the centre.

    Shop for this lens on Amazon.com or on B&H Photo’s website.

    googletag.cmd.push(function() {
    tablet_slots.push( googletag.defineSlot( “/1005424/_dPSv4_tab-all-article-bottom_(300×250)”, [300, 250], “pb-ad-78623” ).addService( googletag.pubads() ) ); } );

    googletag.cmd.push(function() {
    mobile_slots.push( googletag.defineSlot( “/1005424/_dPSv4_mob-all-article-bottom_(300×250)”, [300, 250], “pb-ad-78158” ).addService( googletag.pubads() ) ); } );

    The post The Fuji XF 18-135mm – a Versatile Travel Lens by Sean McCormack appeared first on Digital Photography School.

    Digital Photography School

  • Sony announces compact HVL-F45RM radio-controlled flash

    $ (document).ready(function() { SampleGalleryV2({“containerId”:”embeddedSampleGallery_0529851436″,”galleryId”:”0529851436″,”isEmbeddedWidget”:true,”standalone”:false,”selectedImageIndex”:0,”startInCommentsView”:false,”isMobile”:false}) });

    Sony has announced its new HVL-F45RM external flash. This compact flash is ‘ideally suited for a7-series’ and offers a guide number of 45m (at ISO 100), 2.5 sec recharge time and the ability to take 210-shot bursts. It also has a built-in LED lamp for video recording.

    The HVL-F45RM can control up to five groups of radio-controlled flashes, with a 30m range. With three flashes per group, that’s a total of 15 external strobes. It can also control three groups via ‘optical’ control. As you might have guessed, the F45RM can also serve as a receiver. 

    The flash can rotate 180° in either direction and tilt up 150° and down 8°. It has an intuitive interface and a 4-way controller with customizable buttons. The F45RM is sealed against dust and moisture incursion.

    The HVL-F45RM will ship this May for about $ 400 US and $ 550 CA.

    Press Release

    Sony Introduces 100mm F2.8 STF G Master™ with Highest Ever Quality Bokeh for an ? Lens

    New Full-frame 85mm F1.8 Mid-telephoto prime lens and Compact Radio-Controlled Flash announced as well

    LAS VEGAS, Feb. 7, 2017 – Sony Electronics, a worldwide leader in digital imaging and the world’s largest image sensor manufacturer, has today introduced two new lenses for their popular line of E-mount interchangeable lens cameras.

    Sony’s new lenses include one of their flagship G Master Series – an FE 100mm F2.81 STF GM OSS mid- telephoto prime lens (model SEL100F28GM) built to deliver breathtaking bokeh with a unique STF™ (Smooth Trans Focus) design, and a new compact, lightweight FE 85mm F1.8 mid-telephoto prime lens (model SEL85F18) that is a welcome addition to the bag of any hobbyist or enthusiast photographer looking to create amazing portraits.

    They have also introduced a new powerful, compact flash (model HVL-F45RM) with radio-controlled wireless communication that is ideal for professional shooting with Sony’s lineup of ?7 full-frame cameras.

    FE 100mm F2.81 STF GM OSS Telephoto Prime Lens

    A specially designed mid-telephoto, full-frame prime lens, the new 100mm STF is built to produce truly unique, magnificent and beautiful bokeh while maintaining the exceptional standard of resolution that is showcased by Sony’s entire line of flagship G Master series lenses, making it a powerful photographic tool for any portrait, fashion, nature or wedding photographer.

    These impressive defocus capabilities are made possible by the lens’ advanced optical structure, as it features a newly designed 11-bladed aperture and a unique optical apodization lens element. Similar to a neutral density filter that increases in density towards the edges, the apodization element creates beautiful transitions of in-focus to out-of-focus areas within an image, making for exceptionally soft, smooth bokeh that adds depth and dimensionality. This allows the subjects to stand out against beautifully defocused elements in both the foreground and background, producing an image that is naturally pleasing to the eye. The design of the lens also ensures that vignetting is kept to an absolute minimum, ensuring optimum image quality.

    Additionally, the new 100mm lens supports both contrast AF and focal-plane phase detection AF2, and has a high-precision, quiet direct drive SSM (Super Sonic Motor) system that ensures exceptionally fast and accurate AF performance. The SEL100F28GM also offers up to 0.25x close-up capabilities with a built-in macro switching ring, built-in Optical SteadyShot™ image stabilization, a customizable focus hold button, AF/MF switch, aperture ring and more. It is dust and moisture resistant as well3.

    FE 85mm F1.8 Telephoto Prime Lens

    The new 85mm F1.8 mid-telephoto prime lens offers an extremely versatile, lightweight and compact telephoto prime lens solution for a variety of Sony camera owners ranging from working professionals to emerging enthusiasts that have stepped up to full-frame or APS-C cameras for the first time. With its wide F1.8 aperture, it can produce impressive, exceptionally sharp portraits with soft background defocus that take advantage of its 85mm focal length and wide F1.8 maximum aperture.

    The new prime lens features a 9-bladed circular aperture mechanism that ensures smooth, natural looking bokeh, and a double linear motor system to allow for fast, precise and quiet focusing. It also has a focus hold button that can be customized and assigned together with functions in the camera body like the popular Eye AF feature. There is a smooth, responsive focus ring and AF/MF switch as well, and the lens is also dust and moisture resistant3.

    New Compact Radio-controlled Flash

    Sony’s new HVL-F45RM flash enhances the radio-controlled lighting system capabilities of their growing system, offering a compact professional shooting solution when combined with the currently available wireless remote controller FA-WRC1M and receiver FA-WRR1.

    The new flash, which is designed to complement the compact bodies of Sony’s E-mount camera lineup including full-frame ?7 models, produces a maximum lighting output as expansive as GN454. This ensures sufficient illumination even when shooting with bounce lighting or high-speed-sync (HSS) flash. The radio capabilities of the HVL-F45RM allow it to be used as a transmitter or a receiver at up to 30m (approx. 98 feet5), making it an ideal fit for creative lighting with multiple flashes. Additionally, unlike optical flash systems, radio-control flashes do not require a direct line-of-sight between components to function properly, while also minimizing any impact that bright sunlight has on signal transmission and control.

    The HVL-F45RM flash has an impressive battery life of up to 210 bursts, and can tilt up to 150o vertically, a complete 360o horizontally and up to 8o downward to maximize versatility. Usability has been maximized with a new large, bright and highly visible LCD display, an LED light, dust and moisture resistant design3 and a revamped menu system that mimics those of Sony’s newest camera systems.

    Pricing and Availability

    Both of the new lenses and the new flash unit will ship to authorized dealers throughout North America.

    The new FE 100mm F2.8 STF OSS GM Telephoto Prime Lens will ship this March for about $ 1,500 US and $ 2,050 CA.

    The new FE 85mm F1.8 Mid-Telephoto Prime Lens will ship this March for about $ 600 US and $ 800 CA.

    Replacement lens hoods for each of the new models will also be available for purchase as well.

    The new HVL-F45RM flash will ship this May for about $ 400 US and $ 550 CA.

    1. T-number (T) =5.6
    2. With compatible ?camera bodies. Please visit Sony support webpages for details.
    3. Not guaranteed to be 100% dust and moisture proof.
    4. Guide Number (GN) 45 (105mm, in meters at ISO 100)
    5. Sony internal measurement

    Articles: Digital Photography Review (dpreview.com)

  • Moment rolls out Kickstarter for redesigned lens and new cases for iPhone 7 / 7 Plus

    $ (document).ready(function() { SampleGalleryV2({“containerId”:”embeddedSampleGallery_5370414927″,”galleryId”:”5370414927″,”isEmbeddedWidget”:true,”standalone”:false,”selectedImageIndex”:0,”startInCommentsView”:false,”isMobile”:false}) });

    Mobile photo accessory provider Moment is introducing two iPhone 7 / 7 Plus cases via Kickstarter: a battery case for storing extra charge, and a standard case. Both cases are compatible with a new wide-angle attachment lens designed specially for the 7 and 7 Plus.

    The Battery Photo Case offers a two-stage shutter release button. When used with Moment’s camera app a half-press will acquire focus. Apple’s stock camera app will only recognize a full press and shoot accordingly. The case does not use Bluetooth to communicate with the phone, unlike previous Moment cases. Instead, it uses the Lightning connector, which the company says is 75% faster.

    Moment’s new Photo Case is a cheaper alternative without the shutter button or backup battery. It’s slim and offers basic protection from wear-and-tear, and offers an attachment for a wrist strap.

    Both cases provide a mount for the new Wide Lens (as well as an adapter for existing Moment lenses), which can be positioned over the phone’s wide and telephoto lenses. Moment says the lens has been re-designed considering the iPhone 7 and 7 Plus’ wider aperture lenses. The slightly larger lens is also lens prone to vignetting cause by misalignment. 

    Planned MSRP for the Wide Lens is $ 100, the Photo Case is $ 30 and the Battery Photo Case is $ 100. The company is well on its way to its $ 500,000 Kickstarter goal, and is offering discounts to early backers. As with any Kickstarter project things might go awry, but if all goes to plan Moment will ship the new cases and lenses starting the end of May.

    Articles: Digital Photography Review (dpreview.com)

  • Sony shows off 3-layer stacked smartphone image sensor that can shoot 1000 fps at 1080p

    Sony has today announced the development of a 3-layer stacked CMOS image sensor with DRAM for smartphones, making it possible to capture video at 1000 fps. The new chip comes with a DRAM layer in addition to the conventional 2-layer stacked CMOS structure with a back-illuminated layer of photo-sites and a circuit layer for signal processing. The DRAM acts as a temporary buffer for image data that is recorded at very high speeds, before it is put out at normal speed to a conventional image signal processor.

    The new design results in very fast readout speeds of 1/120sec for a 19.3 MP image which is approximately 4x faster than conventional chips. Due to the reduction of time it takes to read each line of pixels, the so-called Jello-effect, which occurs when shooting fast-moving subjects on cameras without mechanical shutter, has been greatly reduced.  

    The sensor has also been designed to keep noise generated between the circuits on each of the three layers at a minimum. Given the technology is currently still in development stage, there is no way of knowing when it will appear in any production devices. That said, looking at the quite impressive slow-motion footage in the sample video reel below, we sincerely hope it won’t be too long. 

    Articles: Digital Photography Review (dpreview.com)

  • How to do Multiple Exposures In-Camera

    Combining two or more exposures into a single image is a technique that almost certainly began as an accident (much like photography itself). When using early film cameras, it was all too easy to press the shutter button while forgetting to change the plate – a faux pas that was generally rewarded with an overexposed jumbled mess. When roll films became popular, camera manufacturers thought it prudent to build a mechanical interlock into the film advance mechanism to prevent accidental multiple exposures (unless you used a special override button).

    Most digital cameras carried on the tradition of discouraging such mischief by simply not providing the facility at all. As a consequence, a distinctive style of this sometimes serendipitous art began a steady decline – until recently. Today, the thirst for retro styles is gaining popularity and many photographers are once again experimenting with this old technique.

    Traditional multiple exposure methods

    If you cannot do the electronic equivalent of resetting the shutter without winding the film, how can you achieve this effect? Unless your camera offers you special multiple exposure options, you’re limited to doing everything during one long exposure so that your image can accumulate on the sensor.

    One method is to build up your image by firing a flash several times during a long exposure, under low ambient light. This technique is often used by cave photographers as it allows them to create what appears to be a floodlit underground chamber by popping off a number of flashes in different parts of the scene. The disadvantage is that you need a dark environment, but the technique can be effective – particularly when using a flashgun set to produce a rapid burst of flashes in strobe mode to capture fast-moving action.

    In normal daylight conditions, the only way to achieve a long exposure is to employ a neutral density filter, which will allow you to achieve an exposure time of ten seconds or more. During this time, you can cover and uncover the lens as needed to superimpose a series of still images.

    Since both of these methods rely on accumulating more and more light on the sensor from different subjects during a long exposure, it’s easy to produce a result that’s overexposed unless you carefully compensate by underexposing each shot in the sequence. It’s also somewhat tricky to see how your composite image is turning out until the exposure is complete.

    New possibilities

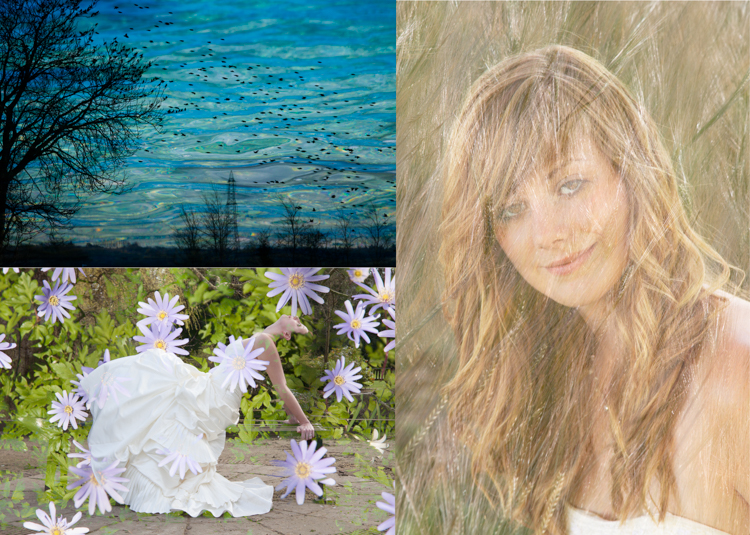
    Some digital cameras now offer a multiple exposure function, that not only provides a simple means to recreate the traditional effect but also extends the creative possibilities by using more sophisticated blend modes. In addition, the technology is not limited to just high-end DSLRs. Now even smartphone users can enjoy making multiple exposure images using apps such as Multiple Exposures for the iPhone or Photo Blender for Androids.

    Photo #1

    Photo #2

    Combined using the Photo Bender app.

    If you have a recent camera model, it’s increasingly likely that it will sport some form of multiple exposure feature. Check your camera user manual for details. The specific facilities on offer will vary from one camera model to another, but all those that have this feature will be able to simulate the original technique. So let’s start with a simple double-exposure example using a Canon 5D Mark III.

    Double-take

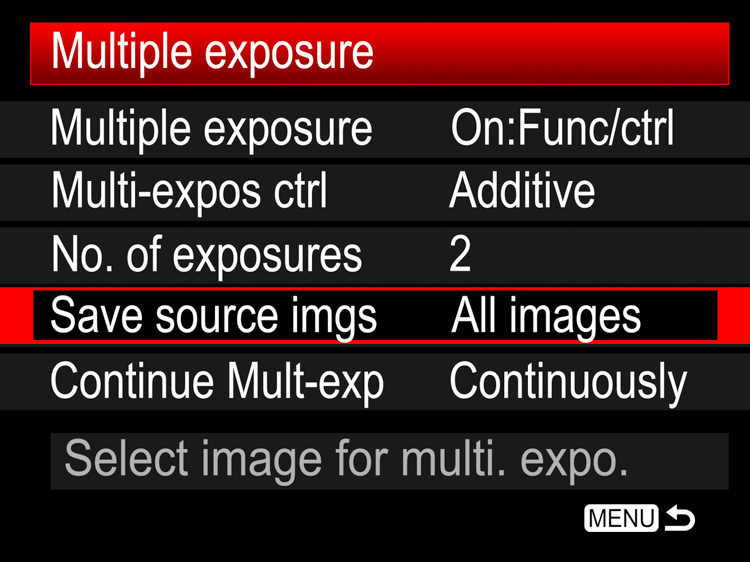
    In this technique, both images are exposed normally and then added together. This means that the brightest parts of the final image will be made from the brightest parts of either of the two component images, a fact which can effectively be used to make each image cut out the other. Set the camera’s multiple-exposure setting to take two photos and blend them in the Additive mode, as shown here for the 5D Mk III:

    In camera multiple exposures 01

    Shooting the images

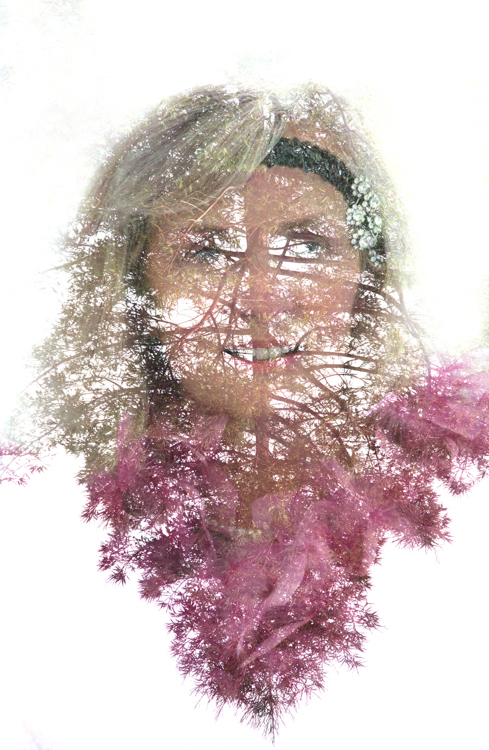
    For the best results, you will need two images with light backgrounds. In this example, my subject was photographed indoors against a fairly light background (below left). If your subject is outdoors, it’s often useful to position yourself low down so that your subject is against the sky.

    In camera multiple exposures 02 In camera multiple exposures 03

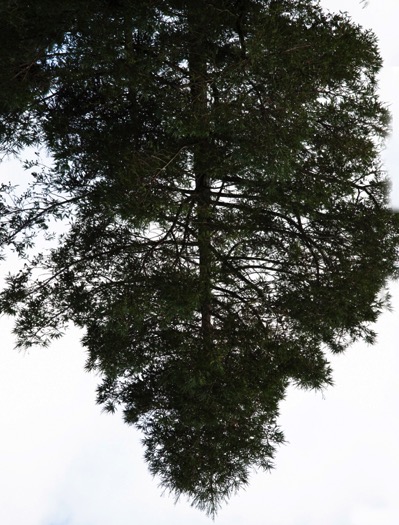
    For the second image, look for a high contrast subject that has white areas where you want the first image to be cut-out. In this case, I chose to photograph a tree against the sky (above right), remembering to use the camera in portrait mode but rotating it such that the tree was inverted.

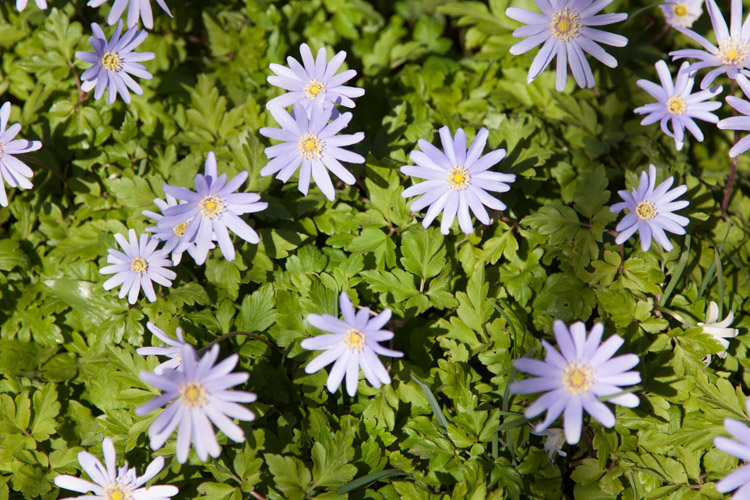
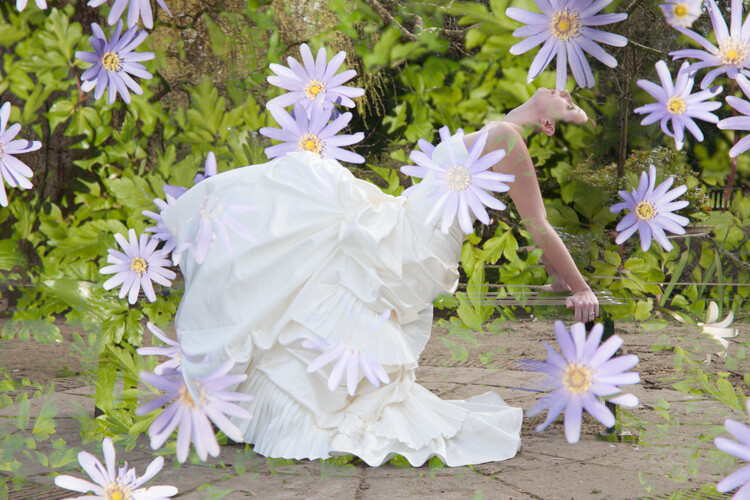
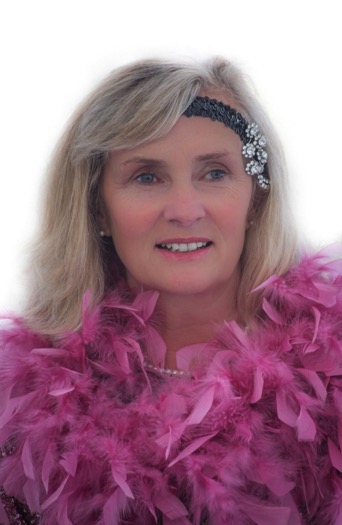
    When the images are added in the camera, the light pixels around the subject’s head overwrite the dark pixels from the tree. In the same way, the light pixels from the lower left and right corners of the tree image overwrite the pink feather boa in the first image. Depending on how light the background is in each image, this pixel addition will produce something between a faint high-key effect to a full blown-out white wherever the two subjects don’t overlap.

    In camera multiple exposures 04

    Camera settings

    By default, the multiple exposure setting is disabled. When it is activated on the 5D Mk III, it can be set to either allow you to review and change some settings between exposures or just fire away continuously without slowing down to review images. For this example, I chose the “On:Func/ctrl:” option to allow me time to compose the next shot. One big advantage of selecting that option with Canon cameras is that it enables you to switch to “LiveView where you can see an overlay of your previous shot to help you line up the next one.

    Using a previous image

    Canon cameras allow you to combine a photo taken the conventional way, with an exposure taken in the multiple exposure mode. To try this, choose the “Select image for multi.expo” option. If you’ve set the total number of exposures to two, you now only have to shoot one extra exposure in multiple exposure mode to complete your composite.

    Nikon cameras take this a step further by allowing you to select any two images from the camera’s media card and combine them using a feature Nikon called “Image Overlay”. This is particularly flexible because you can simply keep combining pairs of images and applying exposure adjustments as needed to make your composite raw image.

    Auto exposure compensation

    If you shoot in this Additive mode and don’t want to exploit the cut-out effect, then you need to reduce the exposure of the individual images according to the number of shots you include in your composite. For example, you should underexpose each shot by one stop if you’re combining two images, or by two stops if you’re combining four images. Alternatively, you can leave the adjustment to the camera. Since you’ve already told the camera how many exposures you wish to combine, it can work out how much exposure compensation to apply in order to create a composite that still retains details in the highlights.

    To apply this compensation automatically, simply select “Average” instead of the “Additive” option and set your camera to either aperture or shutter priority mode. If you want to experiment with overlaying textures and making abstract patterns, Average is a good initial blend mode.

    Bright and dark

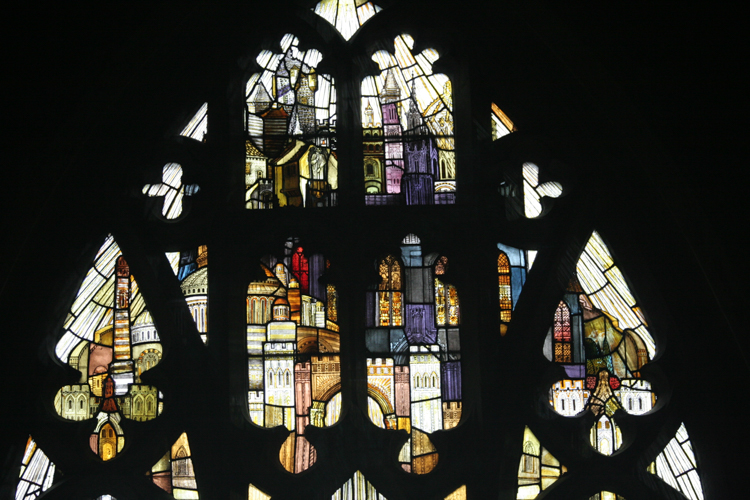
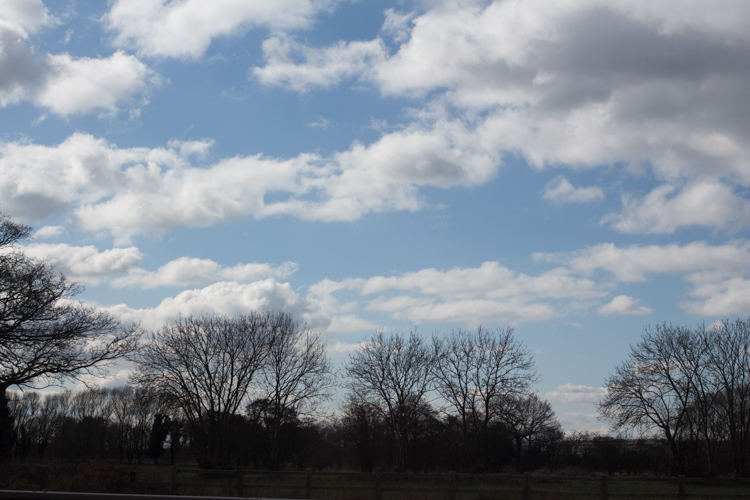
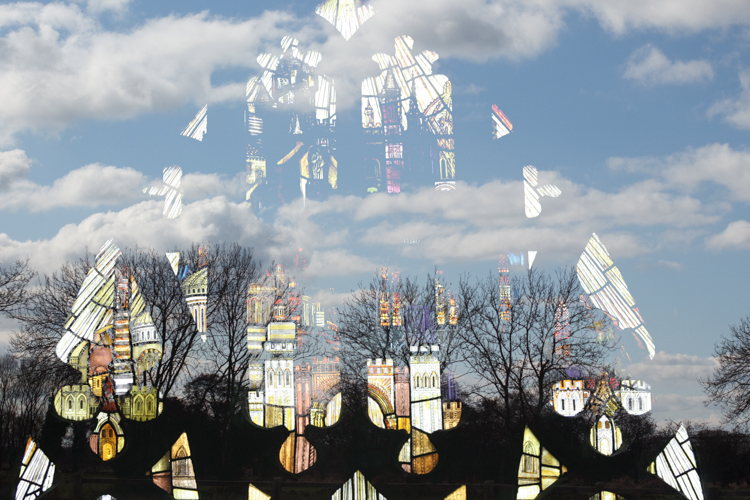
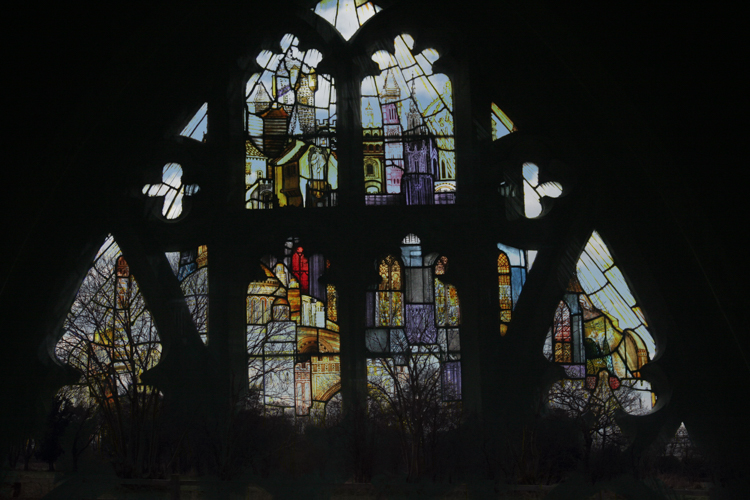
    Both the Additive and Average options effectively just accumulate one image on top of another with optional exposure adjustment, so these modes are not that different to conventional film multiple exposures. However, thanks to the increased computing power on some DSLRs, you’re no longer limited to just overlaying images by simply adding their brightness values. Images can also be combined by taking pixels from either one source image or the other, based on which one is brightest (or darkest). To show how this works, consider this combination of window and clouds.

    In camera multiple exposures 05

    In camera multiple exposures 06

    Selecting the Bright mode gives priority to the clouds, which will appear in front of the window at the top of the composite. The dark trees will be excluded in favour of the brighter parts of the window at the bottom of the composite.

    In camera multiple exposures 07

    If you select Dark, then the darkest pixels win and the clouds appear behind the window in this rather more subtle version.

    In camera multiple exposures 08

    Other creative techniques

    Having tried out the various blend modes your camera has to offer, it’s worth considering what changes you might want to introduce between shots. As long as you don’t turn the camera off, you could swap lenses, filters or even countries between shots so that you could combine, for example, a macro image with a landscape. Since cameras invariably allow you to combine a live image with one previously stored on the card, there’s a great deal of scope for creatively combining images. Here are two simple examples you might want to try.

    Layering a landscape

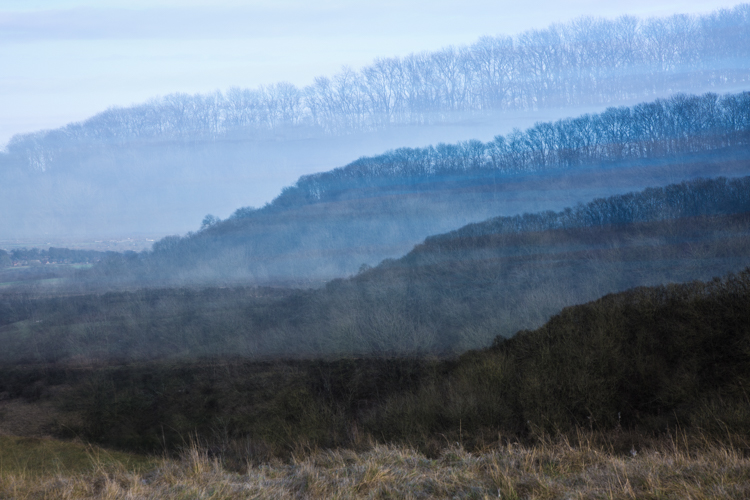
    Zoom lenses provide a very convenient way to create a layered effect from a simple skyline. In this example, I combined four shots of different parts of the horizon and also adjusted the camera’s white balance for each exposure to simulate a distance haze.

    In camera multiple exposures 09

    To produce this effect, follow these steps:

    1. Set up your camera to take four exposures in Average multiple exposure mode using either aperture or shutter priority.

    2. Set the white balance to 2500ºK to produce a strong blue tint and zoom out for a wide-angle shot. Position the horizon in the top quarter of the viewfinder and take the first photo in the sequence.

    3. Turn on LiveView and zoom in slightly so that you can see the magnified overlay which will become your next nearest line of hills. Pan the camera to a different part of the horizon to create some topographic variety and tilt the camera up to position the next horizon just below the previous one. Set the white balance to 4000ºK to create a less intense blue bias and take the second photo.

    4. Reposition the horizon lower still on the LiveView screen. Zoom in a little more and with the white balance set to 5500ºK, take the third photo.

    5. Finally, zoom in fully, pan the camera again for some foreground interest and position the horizon near the bottom of the screen. Increase the white balance to 7000ºK and take the final photo.

    Focus effects

    Most of the time, we strive to achieve a sharp focus in our pictures, perhaps with some creative background blur. Shooting multiple exposures enables you to combine a pin-sharp image with a soft out-of-focus one of the same subject to smooth out highlight details or make it glow with an unusual soft-focus effect. Here are the steps used to make a highlight-smoothed image:

    1. Set the camera on a tripod and set the multiple-exposure blend mode to Dark.

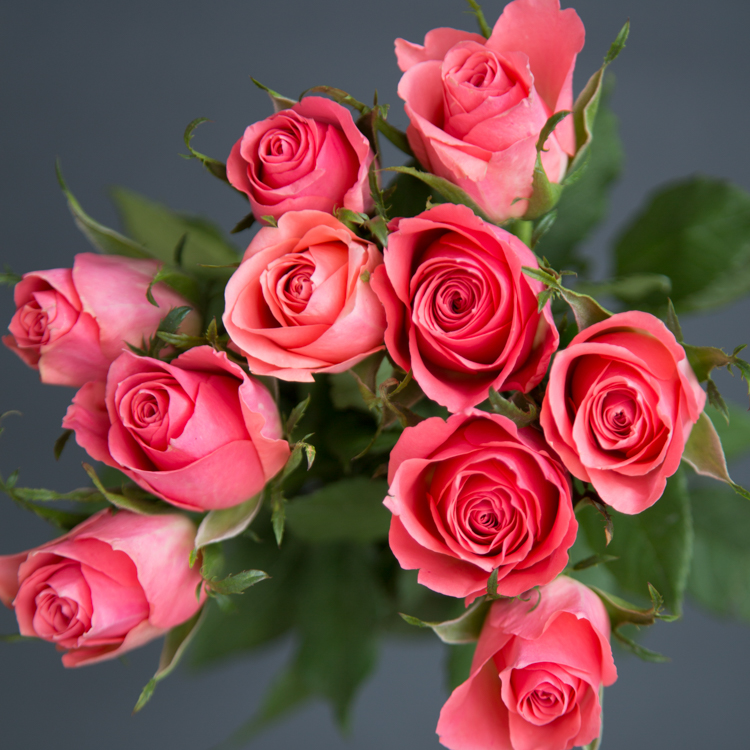
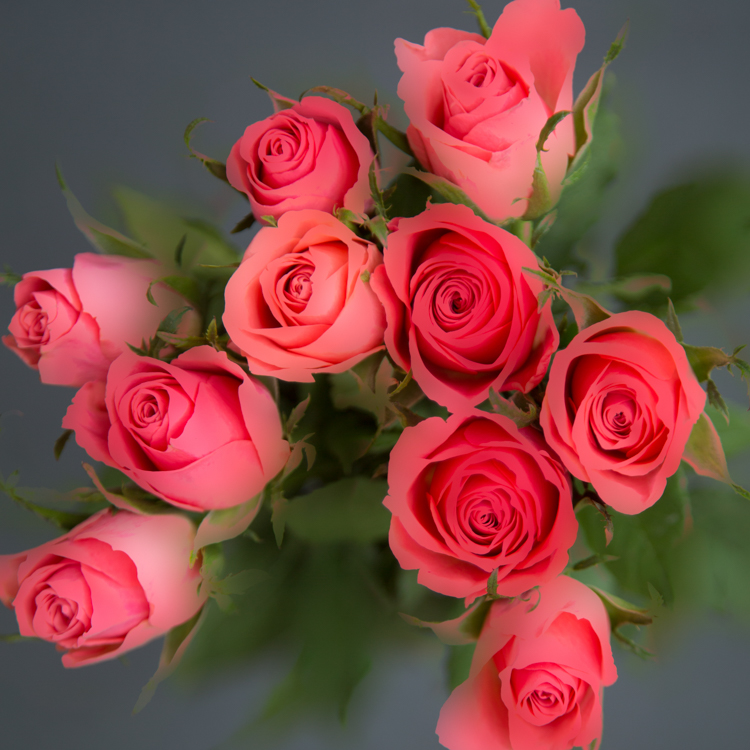
    2. Take a sharply focused photograph of the subject. In this case, some roses were set against a dark background to give them more definition in the final image.

    In camera multiple exposures 10

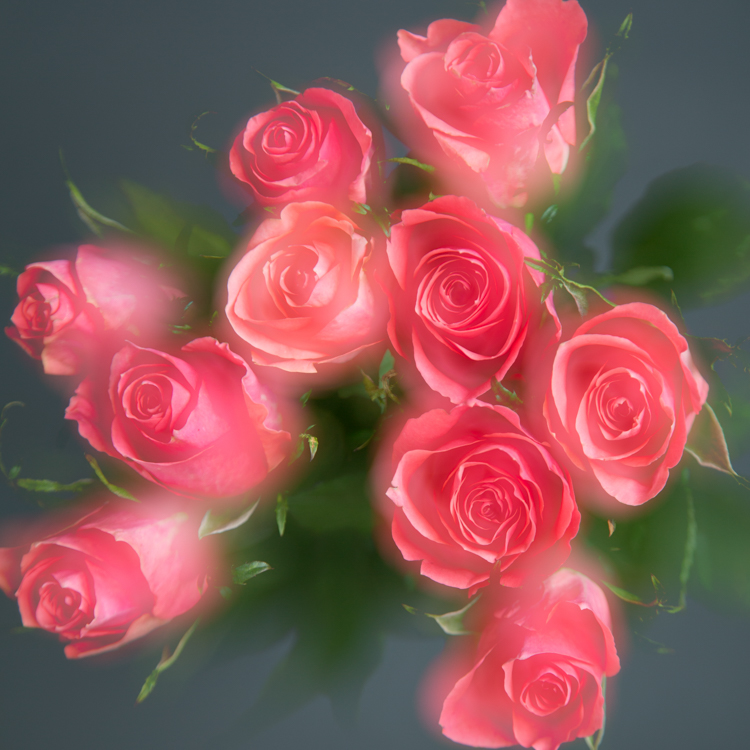
    3. Defocus the image (set the lens focus to manual to stop it refocusing on the next shot). In this example, I’ve defocused rather drastically to illustrate the effect.

    In camera multiple exposures 11

    4. Take the second photo.

    Since the highlights are blurred, they become darker. In the Dark blend mode, these darker tones make it to the final image instead of the original highlights. The dark background from the sharper image also takes priority over the fuzzy edges in the defocused image, resulting in a composite image that’s well defined against the dark background but with highlight details smoothed out.

    In camera multiple exposures 12

    For a more traditional soft-focus effect, it’s necessary to preserve the highlight detail and add the highlight blur around it. You can achieve this effect by simply selecting the Bright blending mode to produce a soft glow, as shown here.

    In camera multiple exposures 13

    Action shots

    In the techniques considered so far, the camera has been set up to review the image after each shot in the sequence and if your camera allows, to store each component image to the media card. This is useful to help line up each new image with the previous one.

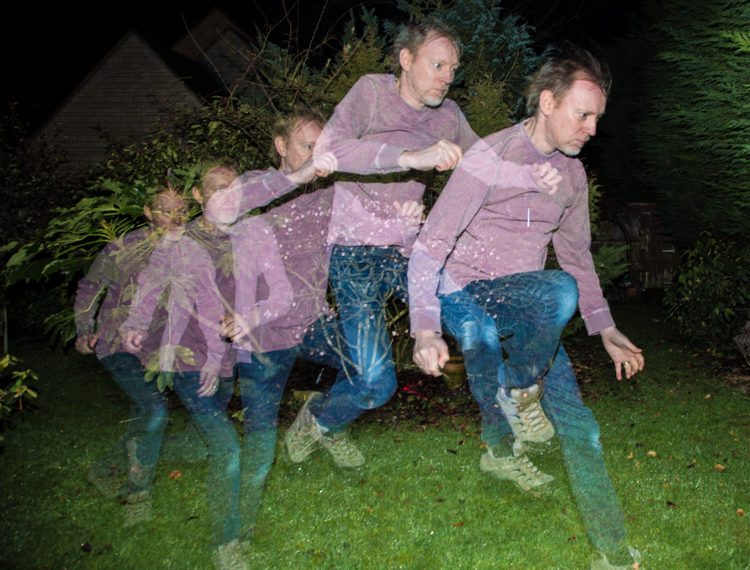
    But for fast-action shots, this takes too much time to process in-camera. If you want to take a composite photo of someone jumping over a fence, (then apart from arranging for a bull to be located in the same field as the subject) these are the basic steps to follow:

    1. Set the multiple exposure mode such that it doesn’t display the image after each shot or write to the card. On the 5D Mk III, this is achieved by setting the Multiple Exposure menu item to “On:ContShtng” for continuous shooting.

    2. Set the number of exposures according to the speed of the action you’re anticipating (more exposures for faster action) and set the shutter speed and aperture to values that will be able to capture a sequence of sharp images.

    3. Set the camera on a tripod and pre-focus at the distance where the action is to take place. Set the lens focus to manual to ensure the focus doesn’t change during the shoot.

    4. Set the drive mode to continuous high speed burst.

    5. When the action takes place, press and hold the shutter button to ensure that all the individual exposures are taken.

    Blend modes

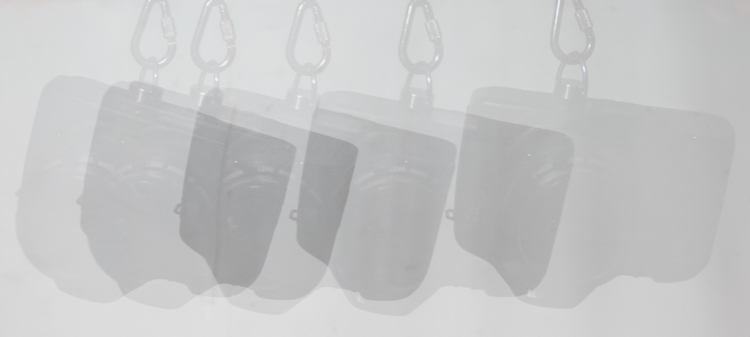
    If you leave the blend mode set to Average, you’ll get a solid background with a number of ghostly overlays corresponding to the various exposures. This is because the exposure of each image in the sequence is automatically reduced to prevent the accumulating image from becoming too bright, but the results can be rather thin and disappointing, like this shot of a Canon camera swinging against a light background.

    In camera multiple exposures 14

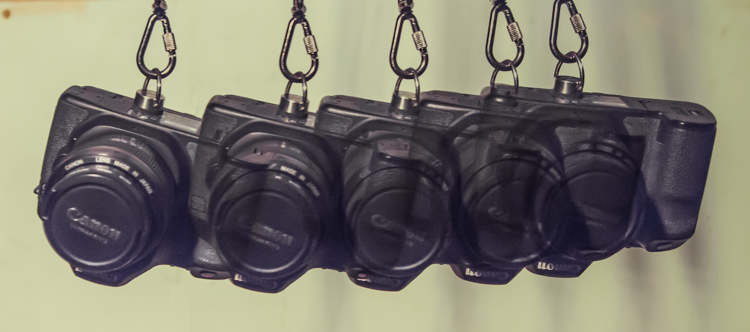
    If you set the blend mode to Dark when using a light background, the results will be much more defined like this:

    In camera multiple exposures 15

    It follows that the converse is also true. When you are shooting a lighter colored object moving against a darker background, the best results are obtained by selecting the Light blend mode:

    In camera multiple exposures 16

    Slowing down

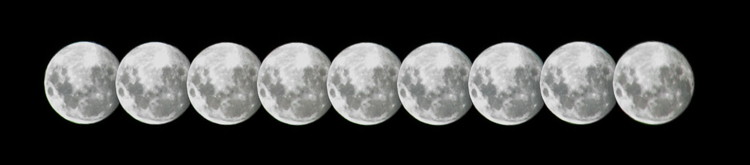
    Not all multiple exposure action shots need to be frantic. This image was made using an EOS 6D in multiple exposure mode set to take nine exposures in the Bright blend mode. One image was taken every two minutes.

    In camera multiple exposures 17

    Look for future image material

    Much more sophisticated multiple exposure techniques can be achieved by using dedicated editing software such as Adobe Photoshop. At the moment, you may only be interested in combining some images in-camera, but bear in mind that you might want to experiment on your computer in the future. Even if you’re not familiar with powerful desktop editing software just yet, it’s always worth getting together the raw material you can process on a rainy day.

    The next time you’re out and about with your camera, think about photographing interesting textures, silhouettes, and fast-action sequences, instead of just taking single photos. You’ll soon be on your way to creating some eye-catching multiple exposure photos.

    googletag.cmd.push(function() {
    tablet_slots.push( googletag.defineSlot( “/1005424/_dPSv4_tab-all-article-bottom_(300×250)”, [300, 250], “pb-ad-78623” ).addService( googletag.pubads() ) ); } );

    googletag.cmd.push(function() {
    mobile_slots.push( googletag.defineSlot( “/1005424/_dPSv4_mob-all-article-bottom_(300×250)”, [300, 250], “pb-ad-78158” ).addService( googletag.pubads() ) ); } );

    The post How to do Multiple Exposures In-Camera by Dave Baxter appeared first on Digital Photography School.

    Digital Photography School

  • Panasonic Lumix GH5 shipments may be delayed due to high number of pre-orders

    Update: Panasonic US has clarified that this announcement is intended for customers in Japan, and availability will vary by country. The GH5 is slated for March 30th availability in the US.
    Panasonic Japan has announced that customers who have ordered a Lumix GH5 may face a longer wait due to the high number of pre-orders. The camera is scheduled for release on March 23, and Panasonic is prioritizing pre-order shipments. The GH5 was officially announced at the beginning of January, and Panasonic targeted a ‘late March’ shipping timeframe in its initial announcement.

    Via: Photo Rumors

    Articles: Digital Photography Review (dpreview.com)