Month: October 2017

  • Review: Struman Lenses for Mobile Phones

    As the use of mobile phones as cameras become more popular people want to get the best possible images with them. In some ways, they are very limited in how you can take photos. There are many companies now making lenses for mobile phones to help you get much better images.

    Some are better than others with most requiring a magnetic ring to attach them to your phone, over the camera lens. They can have varying degrees success. Some have good lenses, but the rings don’t work, while others are designed for a particular camera and aren’t good on other models.

    Review: Struman Lenses for Mobile Phones

    The Struman Optics case, the clip, and three phone lenses.

    Struman Optics has come up with a set of lenses that consider all aspects of using them along with different phone products. Through phone cases for the most popular brands, or a special clip for the others, you can now use their lenses (the macro, fisheye, wide-angle and telephoto) with any phone.

    Phone cases

    Unlike many other lenses for mobile phones, the Struman Optics ones have covers for the top two brands – both iPhone and Samsung. The phone covers have a section where the camera is that allows you to screw in the lens so it is aligned perfectly with the camera.

    The case makes taking photos a lot easier as you can hold your phone in any manner, and not worry about the lens coming off. It makes the whole system much sturdier.

    Review: Struman Lenses for Mobile Phones

    The phone case with a lens screwed into it ready to be used.

    Clip

    If you have one of the lesser known phone brands or models, the lenses come with a clip that allows you to put them over the phone. They come with a spongy surface that sits against the screen so it won’t scratch. This takes a little more mucking around to get the lens correctly aligned, but once it’s done you can take your photos.

    You can put the empty clip to help you work out where it should go. You can then screw in the lens that you want to use and take your images. If you decide you want to change to another lens, it isn’t a problem as they are easy to swap out.

    Review: Struman Lenses for Mobile Phones

    The clip on the phone with a lens in it.

    The Lenses

    There are two kits available. The first includes a macro, wide-angle and fish-eye lens. The second is a telephoto lens that also has a holder for your phone and small tripod that you can use to help you steady the camera.

    Macro Lens

    Trying to get really close to objects for macro photography with your phone seems to be something that so many of us try to achieve. Some phones do it well, while others struggle. My current phone has trouble getting close and it can be frustrating. I do like macro photography, so having a lens I can put on my phone is great.

    The Struman Optics macro lens is incredible. It will allow you to get a lot closer to your object than your phone can. It gives you a great amount of detail and is very sharp. When you go to take an image you can get as close as a couple of centimeters or an inch away from the subject.

    Review: Struman Lenses for Mobile Phones

    This photo was taken with my phone and the macro lens screwed into the phone case.

    Perhaps the one negative thing about this is that you don’t have a lot of choices, you only get the one focal range. All images have to be taken from the same distance, which is really close. However, if your intention is to get as near as possible, then you will love this lens.

    Review: Struman Lenses for Mobile Phones

    This is as close as you can get with just my phone and no added lens.

    Review: Struman Lenses for Mobile Phones

    When you screw in the Struman macro lens, you can get a whole lot closer and capture a lot more detail.

    If you decide you want to get a little further away the wide-angle lens is what you need.

    Wide-Angle Macro Lens

    The wide-angle lens will let you take photos at any distance. You can get a wider angle than what your phone will take. If you have a subject that is hard to photograph because you can’t quite get it into the frame, then this lens will allow you to get a wider angle of view.

    Compare the images below. The first image shows you the lighthouse taken with the phone and no lens. It is a tight image, and to get more distance I would have to move farther back. But as there was a cliff behind me so that was not an option.

    Review: Struman Lenses for Mobile Phones

    The lighthouse taken with the phone and no lens attached.

    The Struman wide-angle lens was attached to the phone and now you can see that there is a lot more room around the lighthouse. This made it a better image.

    Review: Struman Lenses for Mobile Phones

    Same Lighthouse, but with the wide-angle lens attached.

    The lens also has macro capabilities. If you find that you don’t want to get as close as you have to with the macro lens, put the wide-angle on and you can get that distance. It is good for photographing the whole flower or getting more than one in the shot. It is a great lens to go with the macro.

    Fish-eye Lens

    The fish-eye lens is a lot of fun. When you use one for the first time it is addictive to see what you take with it. This lens is similar to other fish-eye lenses for phones in that the image is a circle. If you give your subject enough space you can crop it so it is square or rectangle. However, if you do that you are reducing the size of the file.

    Review: Struman Lenses for Mobile Phones

    Fish-eye lens used to photograph the lighthouse and then cropped to make a normal rectangular image.

    Like the wide-angle lens, the fish-eye can also do macro. It can be used when you want to highlight an object in particular. It creates a bokeh effect with everything around it.

    Review: Struman Lenses for Mobile Phones

    Some shelves with an assortment of things, taken with the fish-eye lens.

    Carry Case

    The above three lenses and the clip all come in a little case that fits in your bag or your pocket. It makes it very easy to carry them around. There is a little pocket that has some instructions and a cleaning cloth for the lenses. The case is not soft and is quite solid, so it keeps everything inside safe.

    Telephoto Lens

    As stated earlier, Struman Optics also makes a telephoto lens which you can purchase in a kit with a stand and a holder for the phone. This also fits into the phone cover case or the clip to help hold it still. You do really need the stand and phone holder as it’s a large lens. It is hard to hand-hold it to take photos.

    When you find a subject you want to photograph, you have to be a certain distance from the object, a meter or a yard away. You do have to focus it manually, so if you find it is too hard to focus that could your subject is either too close or too far away.

    Out of all the Struman lenses, this is the hardest to use. You do need to use the stand, or a stand with the phone holder. It does mean you have to carry a bit more equipment with you if you want to use this lens.

    Review: Struman Lenses for Mobile Phones

    The telephoto lens in the phone case, with the phone secured by the holder and kept up-right on the stand.

    Stand and Phone Holder

    The stand is basic and not very big, though it is easy enough to carry around. You do need to have a surface to put it on and that isn’t always possible.

    The phone holder screws onto the top of the stand and you put your phone in it. It is easy to use, though it can be a bit stiff to mount your phone. The holder will also fit on other tripods or Gorillapods. That allows you to use it with your other gear if you decide to throw the holder and lens in your kit when you go out.

    Review: Struman Lenses for Mobile Phones

    This flower image was taken with the wide-angle lens, shot very close to the flower.

    In Practice

    When I went away recently I put the cover on my phone so I could use the lenses anytime I wanted. I didn’t take the telephoto lens with me, but I most definitely packed the other three. They were always with me, either in my bag, or my pocket.

    They are the best mobile phone lenses I’ve seen yet. The images are amazing and the detail you can get in your images is so sharp. If you love using your phone for photography and want to get more out of it, then here are the lenses that may be perfect for you. Struman Optics is an Australian company, but they ship all over the world.

    I would give these lenses 9 out of 10, I love them.

    The post Review: Struman Lenses for Mobile Phones by Leanne Cole appeared first on Digital Photography School.


    Digital Photography School

  • Surprise! Google hid a custom-built image processor inside the Pixel 2

    Google’s Pixel 2 launch event on October 4th put a lot of emphasis on the new smartphone’s camera capabilities. However, the presenters at the event left out one very interesting detail: Google Visual Core.

    Visual Core is a custom-built system-on-a-chip (SOC) designed to power and accelerate the Pixel 2 phones’ much-lauded HDR+ function that achieves better dynamic range and reduced noise levels through computational imaging. The new Pixel 2 phones already come with the chip built in, but it has not been activated yet. It appears Google ran out of time before the Pixel 2 launch to fully optimize Visual Core implementation in the device.

    The good news is it will be activated at some point “over the coming months”, which should make HDR+ processing on the new devices even quicker and smoother than it already is (and it’s already far faster than on the original Pixels). According to Google, it will then be 5x faster and use less than 1/10th of the the energy,” a real advantage over the current general purpose processing. In the future the chip could also take over additional image processing tasks.

    The company will also enable Pixel Visual Core as a developer option in its Oreo 8.1 preview, allowing access to HDR+ for the developers of third-party camera apps. All of this is currently limited to Google’s Pixel 2 devices, but there’s hope other manufacturer will pick up the Visual Core technology and associated software in the future.

    Articles: Digital Photography Review (dpreview.com)

  • Leica is resurrecting the soft-focus Thambar 90mm F2.2 portrait lens from 1935

    $ (document).ready(function() { SampleGalleryV2({“containerId”:”embeddedSampleGallery_3871588870″,”galleryId”:”3871588870″,”isEmbeddedWidget”:true,”standalone”:false,”selectedImageIndex”:0,”startInCommentsView”:false,”isMobile”:false}) });

    Leica is getting into the lens resurrection game, announcing earlier today that it will bring back the Thambar-M 1:2.2/90: a portrait lens from 1935 that’s famous for exceptional spherical aberration that creates extremely soft images. The Thambar-M will be an accurate reproduction of the original lens, only this time around in the M mount instead of the L screw mount.

    The lens features a 20-bladed iris that produces round, out-of-focus highlights, and only four elements arranged in three groups. Its softness comes about through uncorrected spherical aberrations that are more obvious when the lens is used wide open, and which can be emphasized via the use of an included centre spot filter that prevents axial light passing through the construction.

    With the light from the centre of the lens blocked, the majority of image recording light comes from the edges where the aberration is at its strongest.

    $ (document).ready(function() { SampleGalleryV2({“containerId”:”embeddedSampleGallery_1148566037″,”galleryId”:”1148566037″,”isEmbeddedWidget”:true,”standalone”:false,”selectedImageIndex”:0,”startInCommentsView”:false,”isMobile”:false}) });

    Without the centre spot filter the lens is still soft, but becomes sharper as the aperture is closed and the aberration subsides. The barrel of the Thambar has twin aperture markings that show in white the reduced aperture values when the spot filter is used, as well as the recommended range of apertures that can be used with the filter in place.

    Originally made only in a run of 3,000 in 1935, this new version will be much more widely available starting mid-November, and will cost you £5095/$ 6495. For more information see the Leica website, or read this article on the Leica blog.

    Press Release

    Leica Camera AG presents a modern renaissance of the classic lens – the Leica Thambar-M 1:2.2/90

    A legend reborn: following the Leica Summaron-M 1:5.6/28, Leica Camera AG has further expanded its lens portfolio with the Thambar-M 1:2.2/90, the modern renaissance of another classic lens. Just like its namesake from 1935, the contemporary incarnation of the lens is distinguished by its characteristic soft-focus effect and unmistakeable bokeh. Its focal length of 90 mm is suitable for photography in a multitude of scenarios and is as good as predestined for capturing portraits with a uniquely aesthetic atmosphere that cannot be reproduced in digital postprocessing. The new Thambar-M is thus an exciting addition to the existing Leica M lens portfolio and brings photographers entirely new possibilities for creative composition.

    The optical design of its ancestor remains almost unchanged in the new Thambar-M 1:2.2/90. It has therefore also inherited the characteristic properties of its predecessor. The only difference is that the four elements in three groups that make up the design have now been single-coated to protect the glass against environmental influences and surface corrosion. The 20 blades of its iris deliver a unique bokeh with perfectly round rendition of point light sources.

    The soft look of the Thambar is the result of intentionally accepted under-correction of spherical aberration. This under-correction increases towards the edges of the optical system with the consequence that not only the depth of focus, but also the degree of softening can be precisely controlled by means of the stepless aperture setting. The effect is more pronounced as apertures increase, and is continually reduced as the lens is stopped down to smaller apertures.

    The design of the original lens has been almost completely preserved in today’s Thambar-M 1:2.2/90. The black paint finish, the proportions of the lens and its aperture engravings in red and white correspond to the appearance of the original. In addition to this, slight modifications have been made that bring the lens into line with the current, minimalist design of modern M-Lenses. These include the knurling, the lettering and scales and the specific use of sharp edges and bevelling that underline the precision of the lens design.

    ‘The name Thambar has always been preceded by the adjective ‘legendary’ – rightly so. It portrays people with a wonderful aura, in a romantic way – but landscapes too are raised to a higher, incomparably aesthetic plane. The addition of a new incarnation of this classic lens to our selection of vintage lenses was one of our greatest wishes – to my great delight, this wish has now been fulfilled.’ emphasises Dr. Andreas Kaufmann, majority shareholder and chairman of the supervisory board of Leica Camera AG.

    As is the case with all Leica lenses, the Leica Thambar-M 1:2.2/90 is also manufactured in strict compliance with the most stringent quality criteria. The use of only the best materials in its construction guarantee the familiar long working life of all Leica lenses. As was the case with the original lens, the lens hood, the ring of the centre-spot filter and both front and rear lens caps are made of metal. Even smallest details, like the felt lining of the lens hood and the front cap, contribute to the exceptional perceived quality of this lens. The design of the rigid lens keeper in ‘Vintage Brown’ leather is identical to that of the original from 80 years ago in almost every respect and, as in the past, the centre-spot filter can be safely and conveniently stowed away in its lid.

    The Leica Thambar-M 1:2.2/90 will be on sale from mid-November 2017.

    Articles: Digital Photography Review (dpreview.com)

  • LURVIG for Pets: IKEA Debuts its First Line of Animal Furniture & Accessories

    [ By WebUrbanist in Design & Furniture & Decor. ]

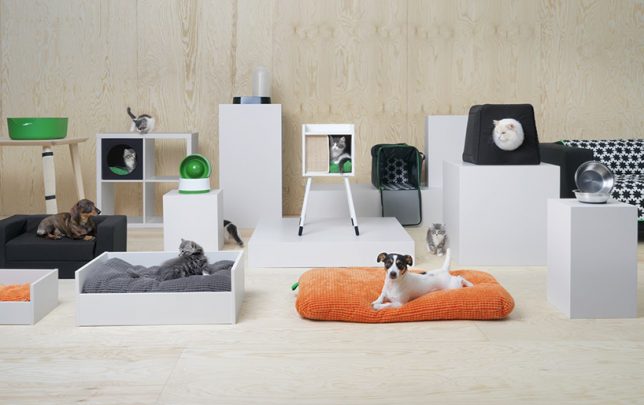
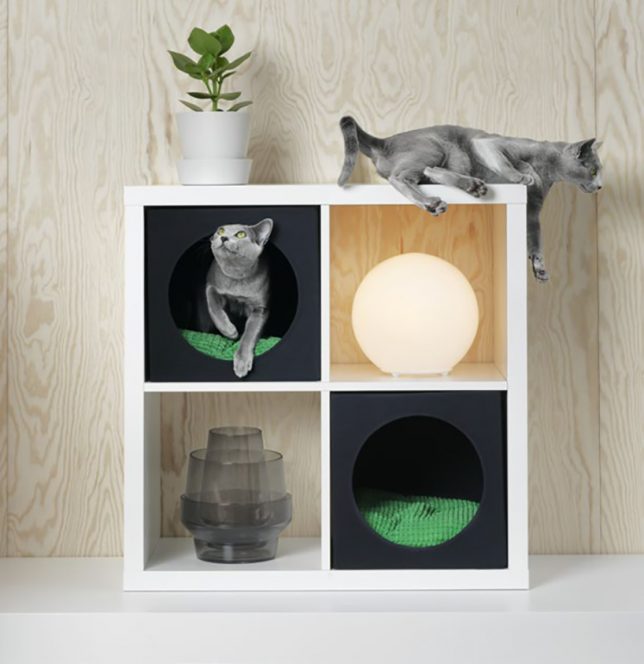
    Made to be compatible with other IKEA furnishings and fixtures, this new first-of-its kind pet collection has something for all your favorite furry friends.

    The 62-piece collection was designed by Inma Bermudéz and aims to fill a market gap with quality, aesthetically pleasing but affordable pet products.

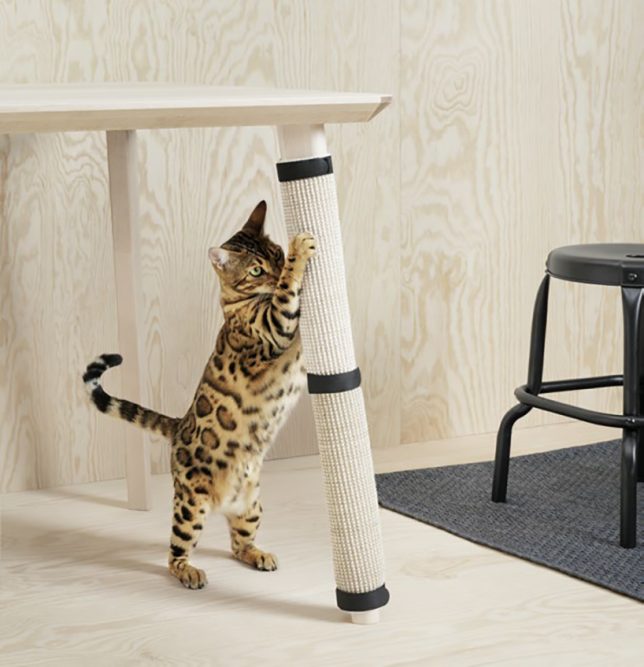
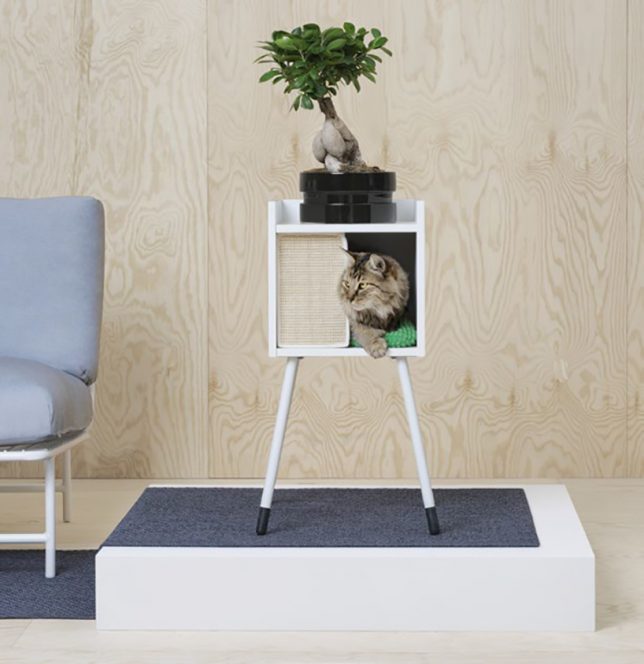
    Some of the objects extend existing uses, helping customers save money and space, like kitty-scratching materials that attach to existing IKEA table legs or puppy beds that slot into bookshelf systems already on offer.  A number of the products are designed to pack flat and fold away when not in use.

    The designs reflect extensive research into pet needs and behaviors, including a bed designed to be stuffed with old clothes, blankets and towles to help dogs feel comfortable and familiar around their human family.

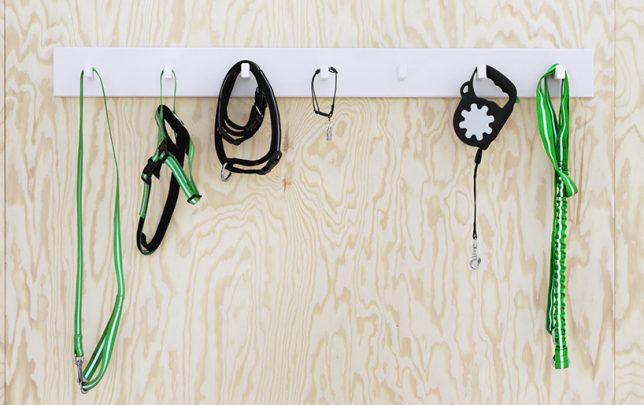
    Aside from pet sleepers and carriers, the LURVIG line features an array of brushes, bowls, leashes, bag dispensers spanning eating, playing, sleeping, traveling, walking.and other cat and dog activities.

    Perhaps the biggest surprise in this stellar new collection is that no one at IKEA thought to do this sooner — thankfully, now they have.

    Share on Facebook


    [ By WebUrbanist in Design & Furniture & Decor. ]

    [ WebUrbanist | Archives | Galleries | Privacy | TOS ]


    WebUrbanist

  • Microsoft unveils updated Surface Book 2

    Microsoft has announced the next generation of its Surface Book hybrid device, the Surface Book 2. Like its predecessor the Surface Book 2 is targeted at creative types and gamers. Microsoft says it offers “the power of a desktop, the versatility of a tablet, and the freedom of a light and thin laptop in one beautifully designed device.”

    The new models come with Intel’s 8th generation Core processors and NVIDIA GeForce GTX 1050 and 1060 GPUs. According to Microsoft that makes the Surface Book up to five times more powerful than the original model and twice as powerful as the latest MacBook Pro.

    Despite powerful processing components the hybrid device offers all-day battery life, with up to 17 hours of video playback. The detachable 15″ PixelSense multi-touch display comes with a 3240 x 2160 resolution, the smaller 13″ variant still offers a very dense 3000 x 2000 pixel count but is lighter than its larger cousin (3.38lbs vs 4.2lbs).

    In addition the new Surface Book 2 comes with a full array of ports, including USB-A, USB-C, and a SD card reader, reducing the need for dongles or other connection accessories. You can find the complete Surface Book 2 specifications on the Microsoft website. The new model can be pre-ordered from November 9 and will start at $ 1500.

    Articles: Digital Photography Review (dpreview.com)

  • DJI ‘AeroScope’ tech shares your drone’s ID and location with law enforcement

    DJI has launched a security solution that enables law enforcement and other ‘authorized parties’ such as aerospace agencies to receive identifying information and location data from DJI drones being operated nearby.

    The company calls this solution AeroScope, and explains that it is based on existing communication technologies. Put simply, AeroScope uses the communications link between a DJI drone and its remote control to broadcast telemetry data and either a serial number or registration number to anyone with an AeroSpace receiver. In addition to location and ID, the data that is being broadcast includes details such as altitude, flight speed, and direction.

    AeroScope is already in use at two unspecified international airports and DJI says that testing is underway in other environments.

    During a demonstration last week, DJI explained that AeroScope receivers automatically detect when a related drone powers on nearby, plotting the drone’s location on a map alongside its serial or registration number. With this information, officials can determine who the device’s registered owner is; however, DJI was adamant that this system does not broadcast personally identifiable data (though that could change in any jurisdiction that establishes regulations requiring such info).

    AeroScope is DJI’s way of addressing growing concerns from law enforcement and governments around the world over the ability (or lack thereof) to identify and track drones that violate UAV regulations. There have been, for example, instances of drones flying in restricted airspaces, at too high of altitudes, over crowds, and over prison yards. Identifying the owner and operator of these drones remains difficult.

    On the other side of the debate are concerns over privacy, which is why DJI decided to use existing communications tech to locally transmit info—rather than the Internet. This, explains DJI, prevents governments from automatically cataloging this data in a database. Only authorized parties will have access to the AeroScope receiver.

    The receiver is already compatible with all current DJI drones, but other drone makers can configure their products to transmit ID information that can be picked up by AeroScope, in case law enforcement decides to set this up as some sort of ‘standard.’

    Press Release

    DJI Unveils Technology To Identify And Track Airborne Drones

    AeroScope Addresses Safety, Security And Privacy Concerns While Protecting Drone Pilots

    12 October 2017 – DJI, the world’s leader in civilian drones and aerial imaging technology, today unveiled AeroScope, its new solution to identify and monitor airborne drones with existing technology that can address safety, security and privacy concerns.

    AeroScope uses the existing communications link between a drone and its remote controller to broadcast identification information such as a registration or serial number, as well as basic telemetry, including location, altitude, speed and direction. Police, security agencies, aviation authorities and other authorized parties can use an AeroScope receiver to monitor, analyze and act on that information. AeroScope has been installed at two international airports since April, and is continuing to test and evaluate its performance in other operational environments.

    “As drones have become an everyday tool for professional and personal use, authorities want to be sure they can identify who is flying near sensitive locations or in ways that raise serious concerns,” said Brendan Schulman, DJI’s Vice President for Policy and Legal Affairs. “DJI AeroScope addresses that need for accountability with technology that is simple, reliable and affordable – and is available for deployment now.”

    DJI demonstrated the system today in Brussels, Belgium, showing how an AeroScope receiver can immediately sense a drone as it powers on, then plot its location on a map while displaying a registration number. That number functions as the equivalent of a drone license plate, and authorities can use it to determine the registered owner of a drone that raises concerns. In March 2017, in response to growing calls by governments worldwide for remote identification solutions, DJI released a white paper describing the benefits of such an approach to electronic identification for drones.

    AeroScope works with all current models of DJI drones, which analysts estimate comprise over two-thirds of the global civilian drone market. Since AeroScope transmits on a DJI drone’s existing communications link, it does not require new on-board equipment or modifications, or require extra steps or costs to be incurred by drone operators. Other drone manufacturers can easily configure their existing and future drones to transmit identification information in the same way.

    Because AeroScope relies on drones directly broadcasting their information to local receivers, not on transmitting data to an internet-based service, it ensures most drone flights will not be automatically recorded in government databases, protecting the privacy interests of people and businesses that use drones. This approach also avoids substantial costs and complexities that would be involved in creating such databases and connecting drones to network systems.

    This system is consistent with DJI’s problem-solving approach to drone regulation, which aims to strike a reasonable balance between authorities’ need to identify drones that raise concerns and drone pilots’ right to fly without pervasive surveillance. DJI has led the industry with safety and security advances such as geofencing and sense-and-avoid technology, and believes the rapid pace of innovation provides the best means to address new policy concerns.

    Drone identification settings will be included in DJI’s initial drone software to allow customers to choose the content of their own drone’s identification broadcast to match local expectations both before and after identification regulations are implemented in different jurisdictions. To protect customers’ privacy, the AeroScope system will not automatically transmit any personally identifiable information until regulations or policies in the pilot’s jurisdiction require it.

    “The rapid adoption of drones has created new concerns about safety, security and privacy, but those must be balanced against the incredible benefits that drones have already brought to society,” said Schulman. “Electronic drone identification, thoughtfully implemented, can help solve policy challenges, head off restrictive regulations, and provide accountability without being expensive or intrusive for drone pilots. DJI is proud to develop solutions that can help distribute drone benefits widely while also helping authorities keep the skies safe.”

    For more information about AeroScope, please contact aeroscope@dji.com.

    Articles: Digital Photography Review (dpreview.com)

  • Polaroid Moto Mod leaked, straps an instant printer to your smartphone

    Leakster Evan Blass has tweeted an image showing two Moto Mods, one of which is said to be a Polaroid instant print camera module for printing photos directly from your smartphone. As with any Moto Mod, this particular module will be compatible with the Moto Z handsets, including the Moto Z Play and Moto Z² Force Edition.

    The Polaroid module is a device that connects to the back of a compatible Motorola smartphone to give it extra functionality—in this case, printing small instant prints and essentially turning your phone into an ‘instant camera.’ Blass didn’t provide details about the module, but presumably it would use the same ZINK (Zero Ink) inkless printing technology as Polaroid’s existing instant digital camera.

    For now this is just a leak, but it’s not the first time we’ve seen the Polaroid Moto Mod; late last month, two images of the same device appeared on the website Technoblog. So it does appear that this attachment is the real deal.

    Articles: Digital Photography Review (dpreview.com)

  • MeFOTO launches MeVIDEO brand with new GlobeTrotter travel video tripod

    Manufacturer of colorful travel tripods MeFOTO is launching its first video tripod via a Kickstarter campaign, and there’s a new brand name to along with it. The MeVIDEO GlobeTrotter will be the first of this ‘new’ company’s tripods, and will feature a new leveling head design and a choice of aluminum or carbon fibre legs.

    With a maximum payload of 8.8lbs/4kg, this travel tripod is aimed at the serious video market, including those using large DSLRs and lower end dedicated professional video cameras.

    The MeVIDEO GlobeTrotter comes with an aluminum ball and socket-style leveling platform, and a head that offers a long panning handle. The handle can be switched for left or right-handed users, and the four-section legs spread to three positions as well as reverse folding for storage.

    For low angled shooting, the center column can be split in two so the shoulders can be dropped close to the ground, and the top half of the column can be attached to one of the tripod legs to create a monopod. MeVIDEO also allows the head to be completely removed from the shoulders and leveling platform, so it can be used on other accessories such as a slider or crane.

    The GlobeTrotter will have a maximum height of 65.7in/166.8cm and packs away to 21.9in/55.7cm. It will weigh 6.06lb/2.75kg in carbon fibre and 6.64lb/3.01kg in aluminum.

    Users will have a choice of black or ‘titanium’ finishes, both of which are expected to cost $ 500 for the aluminum version, and $ 700 for the carbon fibre version although there are, of course, special deals for those pledging support for the campaign at an early stage. The company expects to ship in January 2018.

    For more information or if you’d like to put down a pledge of your own, visit the MeVIDEO Kickstarter page.

    Press Release

    MeFOTO Announces Launch of MeVIDEO Offering First-Of-Its-Kind Travel Video Tripod

    MeVIDEO’s sleek design and unmatched usability provides on-the-go filmmakers with an exceptional video tripod experience.

    MeFOTO, the innovative tripod manufacturer, today announced the launch of MeVIDEO, a new sister company focusing on the film and video market with a travel video tripod available now on Kickstarter. Incredibly durable, lightweight, thoughtful and intuitive, MeVIDEO is the ultimate high-quality and full-featured travel video tripod.

    “We created MeVIDEO with one simple goal: to create the best compact, travel-friendly, user-friendly video tripod ever for today’s on-the-go filmmakers and videographers. We wanted to create a tripod that makes sense from the moment you put your hands on it; something detailed, yet approachable – and then, to make it incredibly beautiful”
    Brian Hynes, MeFOTO + MeVIDEO Brand Marketing Manager.

    MeVIDEO GlobeTrotter features include:

    • Reverse folding legs to allow for a more compact folded form that makes it perfect for traveling
    • Integrated Leveling Platform for precise, intuitive positioning of your camera on the center column without needing to adjust legs.
    • Removable Flat Base Head featuring ratchet-style metal adjustment knobs for leveling.
    • Head can be used on other flat surfaces such as certain sliders, jibs, half ball adapters and more.
    • Split/center column allows for maximum flexibility as well as providing the ability to get very low to the ground.
    • Support for multiple cameras ranging from the Sony A6500, Panasonic GH5, Sony A7SII, Canon 5D Mark IV to the Canon C100.
    • Independent locking positions for the legs allow for easy setup on any terrain.
    • Integrated, stainless steel spikes can be expanded or retracted into the rubber feet for stability on any surface.
    • Converts to a monopod. Simply unscrew the center column and combine with the padded leg.
    • Available in anodized aluminum or carbon fiber in black or titanium and comes with a padded canvas carrying case for additional protection when traveling.

    Kickstarter

    MeVIDEO launched their Kickstarter campaign today, with the goal of raising $ 50,000. Kickstarter contributors will receive a discounted rate of $ 349 for the aluminum and $ 499 for the carbon fiber model. When MeVIDEO publicly launches in early 2018, the retail price is expected to be $ 499 for the aluminum and $ 699 for the carbon fiber model.

    About MeFOTO:

    MeFOTO offers two styles and multiple sizes of strategically designed travel tripods in both aluminum and carbon fiber in a variety of colors. They are ideal for on-the-go photographers, and now filmmakers, at every experience level. www.mefoto.com and www.mevideo.co

    Articles: Digital Photography Review (dpreview.com)

  • Floating Tent: Pole-Free Inflatable Structure Pops Up in Minutes

    [ By SA Rogers in Design & Products & Packaging. ]

    Camping season may be just about over for the casual fair-weather enthusiast, but in any case, here’s a fun piece of gear to add to your Christmas wishlist. Have you ever gone paddle boarding or kayaking, and wished you could just sleep out on the water? Or maybe you’ve fantasized about living in a houseboat, but owning one is a bit impractical. The ‘Shoal Tent’ by SmithFly is like a cheaper, more casual version of heavy-duty floating fishing tents, and it’s way easier to set up.

    Noting that 70% of the surface of the Earth is covered in water, the Ohio-based outdoor goods retailer offers an inflatable floating raft with a tent topper that lets you sleep out on the water, and requires no poles to set up. You just use a pump to fill the three raft body air chambers and tent frame with air to make the world “your waterbed.”

    Since the tent floor is inflated, your air mattress is built right in, and it features a 6” drop to keep you dry, along with heavy-duty waterproof fabric and sturdy #8 zippers. The top and sides attach with velcro, so you can get in and out easily if you need to (no struggling to position the door just right.)

    The tent features an 8’x8’ footprint and can sleep people up to 6’3” tall, with the same standing room height in the center. It packs down to a burrito-roll-style bag and comes with a patch kit and manual foot pump. At 50 pounds, it’s not exactly lightweight, but depending on your plans, it’s probably worth it. It’s currently on pre-order sale at a discount for $ 1274.15, with an MSRP of $ 1499.

    Share on Facebook


    [ By SA Rogers in Design & Products & Packaging. ]

    [ WebUrbanist | Archives | Galleries | Privacy | TOS ]


    WebUrbanist

  • How to Supercharge Your Photography with Highlight-Weighted Metering

    Modern digital cameras have a variety of metering modes that they use to evaluate the light coming through the lens and help you choose your exposure settings. Each one is different and designed to fit a specific need. As you gain experience with them you will start to know which metering mode to use for any given scene you are shooting.

    If you’re shooting portraits you might want to use Spot or Center-weighted metering, while landscape shooters may prefer the versatility of matrix or evaluative mode. Knowing which mode to use often comes with time and practice. But what if I told you there was a metering mode built-in to some cameras that could basically guarantee your shots would come out properly exposed every single time? Well, if you believe that then I’ve got a bridge in New York I’d like to sell you.

    Highlight-Weighted Metering Mode

    However, if your camera has Highlight-Weighted metering it will certainly help you get better results from your photos. While I can’t guarantee your pics will be perfect every single time, it can really come in handy if you’re not sure how to meter your scene and want a solution that you know you can rely on.

    How to Supercharge Your Photography with Highlight-Weighted Metering

    Different metering modes for different situations

    The reason photographers use specific metering modes when shooting various scenes is that they want to make sure the right thing is properly exposed. For example, if you’re shooting a portrait it’s important to make sure your subject’s face is neither too bright nor too dark, even is it means some background elements will end up bright white or pitch black.

    Center-weighted metering can solve this problem by helping you arrive at an exposure setting such that whatever is in the middle of the frame (i.e. your subject’s face) is exposed just right. Other metering modes such as Spot, Matrix/Evaluative, and Partial Metering all perform similar functions in that they help you make sure you have just the right camera settings to get precisely the important part of your composition properly exposed.

    Highlight-weighted metering tosses all that out the window. In the process, it could also dramatically alter your approach not only to metering a scene but to photography as a whole.

    How to Supercharge Your Photography with Highlight-Weighted Metering

    I used Center-weighted metering here to make sure this couple was exposed just right, even though the background is a bit too bright. I cared more about the couple looking good than the tree leaves behind them.

    Enter Highlight-Weighted Metering for Select Nikon Cameras

    Available on only a few Nikon cameras, (D5, D850, D810, D750, D500, and D7500 as of the time of this writing) Highlight-weighted metering utilizes the incredible dynamic range of modern image sensors to give you a massive degree of control over your photos. Provided you don’t mind doing a bit of legwork in Lightroom, Photoshop, Luminar, or other post-processing software.

    It works by looking at the brightest elements of a scene (instead of specific areas like the center or the focus point) and using those as the basis for taking an exposure reading. On the surface, this might seem like a terrible idea because doing so would obviously mean a great deal of your photo could, as a result, be much too dark and underexposed to be usable.

    Accessing Highlight-Weighted Metering

    I’ve talked to some photographers who own cameras that can do Highlight-Weighted metering, and some of them aren’t even aware that their cameras have this capability. It’s not that surprising since Nikon doesn’t seem to go out of its way to advertise the feature, and even if you know about it you still may not know how to enable it.

    To access this feature, press the metering button on your camera and then turn the control dial until you see an icon that looks the same as spot metering, with the exception of an asterisk in the top-right corner.

    How to Supercharge Your Photography with Highlight-Weighted Metering

    You will see the same icon if you look at the rear LCD screen of your camera, and as soon as it appears you’re good to go. However, figuring out how to enable Highlight-Weighted metering is one thing but understanding how it works, when to use it, and how to get the most out of it is another matter entirely.

    Exposing for the Highlights

    Before I get too deep into what this all means, it’s important to understand that Highlight-Weighted metering isn’t really the best solution to use for everyday shooting. It’s designed to make sure the brightest portions of your composition are not overexposed, which means a great deal of the photo is going to be shrouded in darkness.

    You also won’t really see the advantages of using it unless you shoot RAW because it’s designed to give you an image that is extremely flexible due to the amount of data you have to work with during the post-production phase. Since JPEG files toss out such a huge amount of image data, they’re not much use with Highlight-Weighted metering because you simply don’t have much room to edit your photos when developing them in Lightroom.

    Metering Mode Comparison

    As an illustration of how Highlight-Weighted metering works, consider this series of three images. I took the following shot using Matrix metering mode, which tries to get a good overall balance between highlights and shadows. It’s a mode that many people use by default since it helps you get properly-exposed images in most shooting situations.

    How to Supercharge Your Photography with Highlight-Weighted Metering

    Matrix metering resulted in a good overall exposure but the sky is so bright that it can’t be fixed in post-production.

    You can see that the camera tried its best to balance out the highlights and shadows, and the resulting image is decent but there is a massive portion of the sky that is simply too bright and can’t be recovered in Lightroom, Photoshop, or any other post-processing software.

    Using Highlight-Weighted metering meant that my camera helped me adjust the exposure settings such that the brightest parts (i.e. the sky) were not overexposed, which resulted in an image that seems unusable at first.

    How to Supercharge Your Photography with Highlight-Weighted Metering

    Highlight-weighted metering preserved the brightest portions of the image but left the rest vastly underexposed. This is the image as it came right out of the camera.

    Fortunately, due to the incredible dynamic range in modern camera sensors, an image like this is perfectly usable. The key is that the highlights haven’t been lost or clipped, so the sky is exposed just fine while the dark portions of the image still contain so much data (because I shot in RAW) that it can still be transformed into a print-worthy photo with just a few clicks.

    How to Supercharge Your Photography with Highlight-Weighted Metering

    The sky was exposed properly, with plenty of shadow details still available for editing. This is the same image as above, after processing to pull detail out of the shadow areas.

    Some Caveats

    As you might expect, there are some caveats to using this approach as well as a few questions.

    First of all, experienced photographers might wonder what the big deal is with this approach since similar results can be had by simply using exposure compensation. That is if you take a shot and see that the image is overexposed, just compensate by underexposing it a few stops. The problem with this approach is that it’s a multi-step solution which means a critical moment can sometimes pass you by while you are adjusting the exposure. However, using Highlight-Weighted metering ensures that the brightest parts of your image will never be clipped and therefore have plenty of data to use when editing.

    It’s also worth pointing out that in order to get the benefits of Highlight-Weighted metering you need to be willing to edit your photos afterward in order to bring up the shadows and adjust your images accordingly. If you’re used to shooting JPG or doing minimal editing, it might not be worth the additional time that this solution adds to your workflow.

    Finally, to get the most benefits you need to use low ISO values since the data from the sensor will be more usable. Sensor dynamic range drops off at higher ISO values so if you find yourself shooting at ISO 6400, 3200, or even 1600 you won’t be able to bring up the shadows nearly as well as you could with images shot at ISO 100 or 200.

    Another example

    For one more example, here’s a series of photos of a goose that illustrate this concept in action. This first image was taken using standard Matrix metering which did its job pretty well. Overall the scene is properly exposed, except for one glaring exception: the overexposed part right at the base of the bird’s neck.

    How to Supercharge Your Photography with Highlight-Weighted Metering

    Matrix metering, unedited RAW file.

    After seeing my results I quickly switched to the Highlight-weighted metering mode. In doing so, my camera made sure that the brightest part of the image was properly exposed, which left the rest extraordinarily dark.

    How to Supercharge Your Photography with Highlight-Weighted Metering

    Highlight-weighted metering, unedited RAW file

    Fortunately, there was plenty of color data to extract from the shadows, so a little finessing in Lightroom resulted in an image that I’d be happy to post to my Instagram feed.

    How to Supercharge Your Photography with Highlight-Weighted Metering

    Highlight-weighted metering, edited in Lightroom to pull out the shadow detail.

    What if you don’t have a Highlight-weighted metering mode?

    If you don’t have Highlight-weighted metering built into your camera you can approximate its effects by using Spot metering and the exposure lock button on your camera. This would allow you to set exposure values based on what you deem to be the brightest part of the composition, lock in your settings, and then recompose your shot before snapping the shutter. It’s not as simple or elegant as having the camera automatically meter the scene based on the brightest part of the composition, but it’s worth trying if your camera doesn’t have this function.

    Conclusion

    I like to think of Highlight-weighted metering as another useful arrow to have in my photography quiver, but not something I use all the time for every one of my shots. For most images, I tend to default to Matrix metering since it will usually give me a properly-exposed shot that I can tweak if I need to.

    However, when I find myself in situations with extreme contrast between the lightest and darkest portions I will often switch over to Highlight-weighted metering so I can stop worrying about checking my settings and dialing in exposure compensation. That way I know that I’ll end up with images that I can edit however I need to in Lightroom because nothing will be overexposed.

    The post How to Supercharge Your Photography with Highlight-Weighted Metering by Simon Ringsmuth appeared first on Digital Photography School.

    Digital Photography School