Das Bild des Tages von: Martin Dietrich
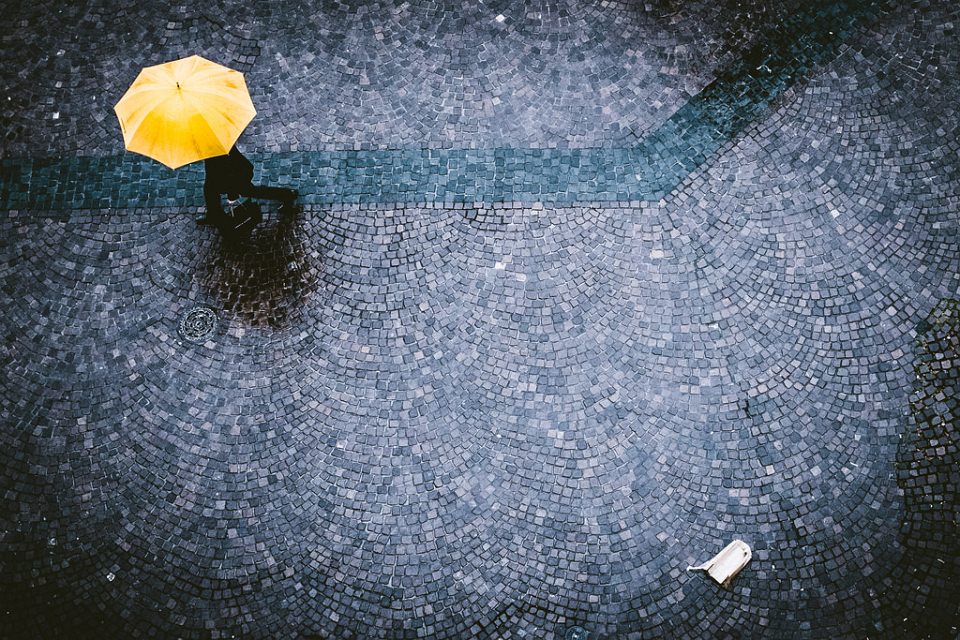
Im Ausblick: Nachteile der Viralität, ein Video über Peter Lindbergh und Instagram.
kwerfeldein – Fotografie Magazin | Fotocommunity
Das Bild des Tages von: Martin Dietrich
Im Ausblick: Nachteile der Viralität, ein Video über Peter Lindbergh und Instagram.
kwerfeldein – Fotografie Magazin | Fotocommunity
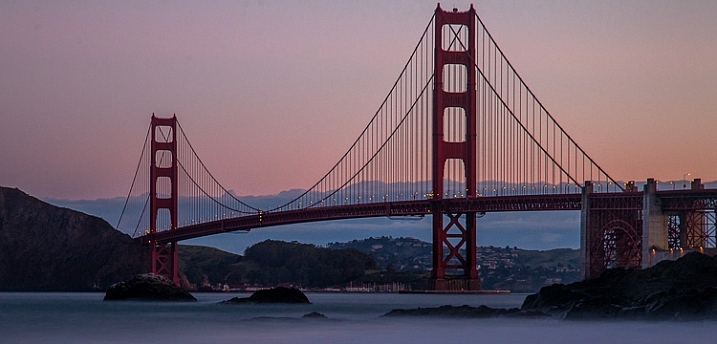
Taken at ISO 800 (shutter speed of 30 seconds and aperture at f/8.0)
ISO has long been called the third corner of the exposure triangle, but was it really? In the film days you couldn’t even change your ISO, except by changing your film. In the early days of digital, you could change your ISO after each shot, which was a definite improvement. But, if you dared to increase the ISO, your picture would probably end up with a lot of digital noise in it. The reality is that most of us were confined to a very narrow range of ISO values when making our exposures.
Times have changed though. Newer cameras offer a lot more flexibility when it comes to ISO. First of all, they are capable of taking pictures at higher ISOs. Cameras now will routinely shoot at ISO 25,600 (and higher), which was almost unheard of just five or six years ago. Secondly, when newer cameras do shoot at higher ISOs, they produce less digital noise. Check out this chart from DxO Mark showing the ability of cameras to shoot at higher ISOs without being ruined by noise:
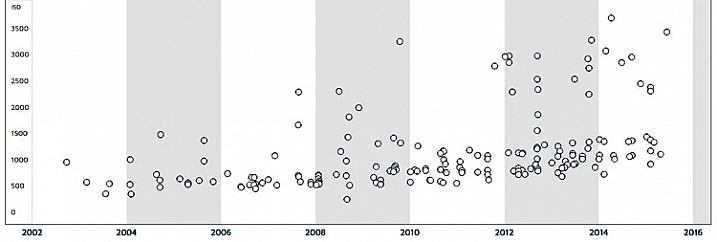
The chart shows the maximum useable ISO for given cameras introduced over the last 12 years. Notice how the dots are higher on the chart the further you go to the right. The newer cameras are to the right of the graph and the tests show that they can shoot at higher ISO values with less digital noise.
In addition, seemingly mindful of the desire of photographers to change their ISO more frequently, camera manufacturers have made it easier to change ISO on the fly. Some, like Fujifilm, have even put ISO on par with shutter speed and aperture by giving ISO its own dial. As a result, it is easier to change the ISO and it truly has status as an equal partner in the exposure triangle.
Even beyond cameras, however, we now have a much greater ability to remove digital noise from our pictures. Much of this improvement is thanks to Lightroom. With a quick slider adjustment, we can eliminate much digital noise from our pictures, without making them blurry. Further, if you have a severe noise problem, there are dedicated plug-ins like Noiseware and Photo Ninja, designed to reduce noise in your pictures, which have continued to improve.
As a result of all of this, you have a lot more flexibility when it comes to ISO. But how does this really impact your photography? And where should you set your ISO in different situations?
If you are just getting started, you might be bewildered by the numbers, or perhaps don’t even know where to start. If you have been shooting for a long time, you may be locked into some habits that were engrained before all these changes in technology. Either way, here are some tips to help you put ISO to work, to improve your photography.
If you have been shooting for a long time, you might be in the habit of keeping your ISO at 100 to keep noise out of your pictures. As mentioned above, given the state of camera technology, this was a prudent practice. Now, however, there is almost no discernible difference between a shot taken at ISO 200 and ISO 100 in most cameras. You may as well use ISO 200 as a default to give yourself an extra stop of light. It will result in better pictures. How so? In one of two ways:
By using ISO 200 instead of 100, you will enjoy a little extra flexibility in your exposure settings, without an increase in digital noise. It is pretty much a case of something for nothing.
Do not hesitate to move the ISO up to 400 (or even higher depending on your camera) when the need arises. If you are outdoors and there are any clouds, or if the sun is starting to move toward the horizon, go ahead and move to ISO 400. You will find there is very little increase in digital noise in most cameras at this level.
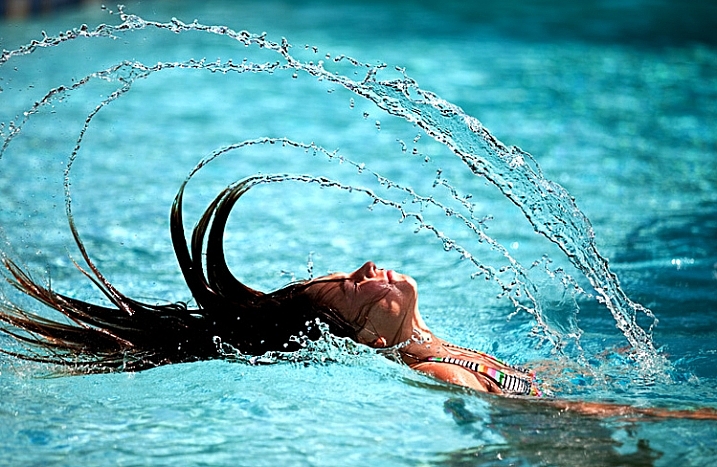
Even though this was a bright, sunny day, the need for a super-fast shutter speed meant that I needed to increase my ISO to 400 to get this shot. Exposure info: 1/8000th, f/2.8, at ISO 400
Previously, you faced a dilemma when trying to stop the action. Should you:
Obviously, neither choice was ideal. But now, with better cameras and noise reduction tools, there is no reason not to increase your ISO when you are photographing action (assuming you are not trying to blur it). In that case, start by moving the ISO up to 800.
As soon as you move indoors, increase your ISO to 1600 if there is reasonably good light. Move it even higher if the lighting is poor. There is a lot less light indoors, even though it often doesn’t look that way to you (your eyes adjust very quickly).
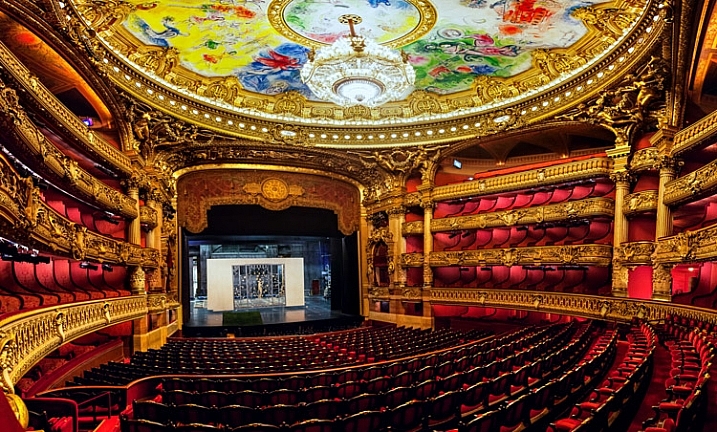
It was not possible to use a tripod in the Opera Garnier in Paris. Hence, ISO 3200 for this picture (actually pictures, since it is many pictures stitched together)
Note: If you have, and can use a tripod then keep your ISO lower if possible (there is no moving subject).
I was recently trying to take pictures of a high school play, featuring my daughter. I faced a toxic combination of extremely low light, and a moving subject (flash was not allowed). I had a pretty fast lens, opened all the way up to f/2.8. To keep the subject from being blurred, I needed to use a shutter speed of at least 1/400th of a second. To get a proper exposure, I required ISO 6400. I used it, and then gave it a dose of Lightroom noise reduction later, to get the following picture.

Exposure info: 1/500th, f/2.8, at ISO 6400
Perfect? No. But if I had hedged at all, it would have been blurred and completely ruined. The point is that ISO 6400 might not get you perfection, but it will get you a shot, when the alternative is no shot at all.
Nobody wants to use very high ISO values. But when you’re faced with the choice of a shot at ISO 6400 or 12,800 (which will probably have a noise problem), versus a blurry shot from using too slow of a shutter speed, take the noisy picture every time. You have some hope of curing a noisy picture in Lightroom. You have no hope of fixing a blurry subject.
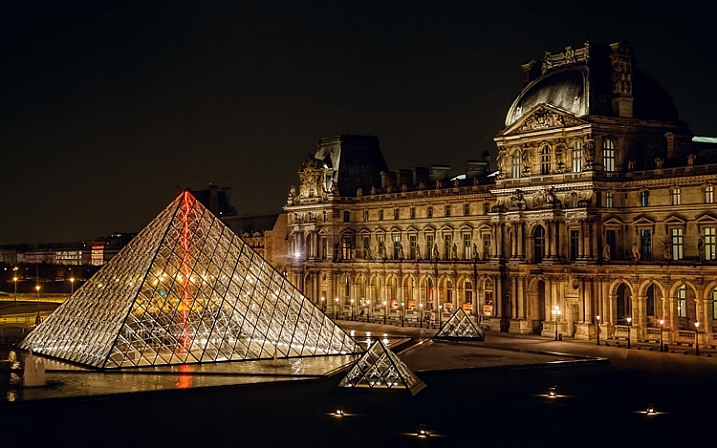
This was shot through a window from inside the Louvre, and using a tripod was not possible. Since I was hand holding, I needed to use ISO 3200. I didn’t like using an ISO that high, but it beats not getting the shot at all (or having it blurry from too slow of a shutter speed). Exposure info: 1/8th, f/4, at ISO 3200
I recognize that, in a sense, this entire article could be summarized as: It is okay to increase your ISO. There is more to it than that though, and that is particularly true if you are just starting out, or getting used to a new camera. I have used hard values in this article to give you default numbers, for some different scenarios. That said, of course, every situation you will face as a photographer is different. Just use these as starting points and adjust from there. In time you will get your own starting points.
Further, your use of ISO will depend on your camera as well. Obviously, newer and more expensive cameras have better low-light performance. How does yours stack up? You can check the DxO Mark rating to start. The best thing to do is to test your camera, which is easily done by taking the exact same picture at different ISO values (while adjusting shutter speed to keep the exposure the same) and then comparing them on your monitor (at 100%). Having done so, you will be well poised to use ISO to improve your pictures.
googletag.cmd.push(function() {
tablet_slots.push( googletag.defineSlot( “/1005424/_dPSv4_tab-all-article-bottom_(300×250)”, [300, 250], “pb-ad-78623” ).addService( googletag.pubads() ) ); } );
googletag.cmd.push(function() {
mobile_slots.push( googletag.defineSlot( “/1005424/_dPSv4_mob-all-article-bottom_(300×250)”, [300, 250], “pb-ad-78158” ).addService( googletag.pubads() ) ); } );
The post 6 Tips for Using ISO Effectively With Your Camera by Jim Hamel appeared first on Digital Photography School.
[ By WebUrbanist in Art & Installation & Sound. ]

House painting is such time-consuming and meticulous work just to get a single color on a facade; perhaps next time you could clad your home in printed image of the night sky instead.


For the Night House, Chicago artist Kate McQuillen covered a suburban house with a contiguous skyscape of nighttime space images digitally printed on weatherproof styrene panels.

The project was funded by sales of a screenprinted poster and created as part of the Terrain Biennial, an Oak Park-based international exhibition of yard, balcony and porch interventions.


Like some kind of suburban camouflage, the covered sections of the home start to disappear against the backdrop of the sky at the right times of early evening and morning. Read also: The Night House, a poem by Billy Collins.

There is simply no way to see the starry skies above the typical urban metropolis – but one photographer has found a way to simulate the stunning potential …
Click Here to Read More »»
For the last two years, artist Ian Strange has traveled the East Coast of the United States, painting suburban homes in shocking shades of red and black, and …
Click Here to Read More »»
With the rise of urbanization, an estimated 80% of the world population has never seen the Milky Way – and while rural dwellers see thousands of stars on …
Click Here to Read More »»


[ By WebUrbanist in Art & Installation & Sound. ]
[ WebUrbanist | Archives | Galleries | Privacy | TOS ]
 |
Phase One has launched Capture One Pro 9, the latest iteration of its tethering and image editing software. Capture One Pro 9 offers a ‘completely updated contrast engine,’ additional brushes, color editor masks and new keyword tools, among other features. Phase One also now offers three activations of the software for each standard license a photographer purchases. Also on the list of updates is the ability to apply curves locally, the addition of a Luma option to the curve tool palette and a battery status icon for the tool bar to view tethered camera battery life.
Capture One Pro 9 is available now for Mac and Windows for $ 299 / €279 to new customers. Capture One Pro 7 and 8 customers can upgrade for $ 99 / €99. Anyone who purchased Capture One Pro 8 after October 30, 2015 will be exempt from the upgrade fee.
Press release:
Unleashes Unprecedented Power, Precision and Quality
COPENHAGEN, November 30, 2015 — Phase One, creator of the world’s finest open-platform, high-end camera systems and professional imaging software today released Capture One Pro 9. Known for its outstanding tethered capture capability, high-quality raw conversion, and precision image editing tools, Capture One Pro is already considered by 100,000 of the world’s leading photographers to be the best image capture application.
Capture One Pro 9 introduces many new image quality precision tools, including a completely updated contrast engine. Capture One Pro 9 also brings powerful new asset management capabilities, including unprecedented sortable keywords capability. It has been designed to help speed the image-management process for volume keyword applications. Besides new physical workflow features, Capture One Pro 9 also gives customers three activations for each standard license to support on-location activation management, as requested by photographers.
NEW IMAGE EDITING TOOLS
Revised contrast engine – Changes have been made to the algorithms of color, saturation and contrast. And the color editor has been revised to align design with the color balance tool. Handles are made easier to use and adjust, and the tool is now scalable when undocked.
Masks from color editor – The color editor now allows the user to make a mask from a color edit.
New Brush pack – Tool changes include the addition of flow, airbrush, straight line brushing, and the ability to link brushes.
Luma curves and local curves – Added to the curve tool palette, Luma curves can be used to create contrast curves without affecting saturation. Also, curves can be used locally.
Battery status for toolbar – This new tool can be placed on the tool bar where it gives a power supply overview to the attached tethered camera, warning photographers of low power during a shoot.
Export EIP for catalogs – Catalog users can now benefit from EIP export for easy transportation of RAW and Settings, off system. In the Export originals panel, there is now an option to Export as EIP. Sessions users can also choose to Export originals. This creates a workflow in which the original RAW and adjustments are not packed – instead a copy is made, packed as EIP.
DNG colors – This new feature allows Capture One Pro to treat and display supported camera files that have been converted to DNG (and include the RAW file in the DNG package), as if in their original format.
NEW ASSET MANAGEMENT TOOLS
Keywords Tool – Keywords may be added and removed from images. The standard Capture One tool tips for local reset, local copy apply, pre-sets and help are available for this tool.
Keyword Libraries – Used to manage the list (or lists) of keywords in a catalog or a session. As the Keywords tool adds keywords to images, the document Keyword Library is populated. This forms a keyword list for any and all terms in the current document and is unique for the session or the catalog.
Sortable Keywords – Unique to Capture One Pro 9, users are able to reorder keywords in the Keywords tool for single image selections.
Originally developed to render the exceptional image quality captured by medium format Phase One camera systems, today Capture One Pro supports more than 400 different camera models. Capture One Pro is designed with more than enough available “headroom” to satisfy requirements for the highest resolution now and in the future. Whether or not photographers own a Phase One camera, all photographers can benefit from Capture One Pro’s exceptional image quality and workflow advantages.
“Capture One Pro is essential for all commercial shoots; we use nothing else,” said Jonathan Rose, Company Director, DigiBoutique Ltd.
“Capture One Pro 9 is all about quality of life improvements for working photographers – whether they’re in the studio, or shooting landscape or portraits,” said Henrik O. Håkonsson, President, Phase One. “And those who are switching or stepping up from mainstream software might now find that Capture One Pro meets more, if not all, of their needs, beyond its legendary raw conversion capabilities.”
For illustrative & tutorial videos and details on all the new and improved features in Capture One Pro 9, including new cameras and lenses supported, please go to: www.phaseone.com/tutorials
Availability and Pricing
Capture One Pro 9 is available now for the Mac and Windows operating systems online at www.phaseone.com/store and from Phase One authorized partners worldwide. www.phaseone.com/partners. New with this release, each license permits three activations.
New customers can purchase Capture One Pro 9 for 299 USD or 279 EUR. Owners of previous versions of Capture One Pro 7 and 8 may upgrade for 99 USD or 99 EUR. For customers who have purchased Capture One Pro 8 since October 30, 2015, Phase One is offering a grace period, exempting them from the upgrade fee. Eligible customers should contact support www.phaseone.com/support to have their keys upgraded.
Capture One Pro is also available by subscription. Capture One Pro 8 subscribers can simply download the new Capture One Pro 9 release. A single-user subscription is 15 USD / 12 EUR per month for a 12-month plan. Please see all subscription options at www.phaseone.com/store
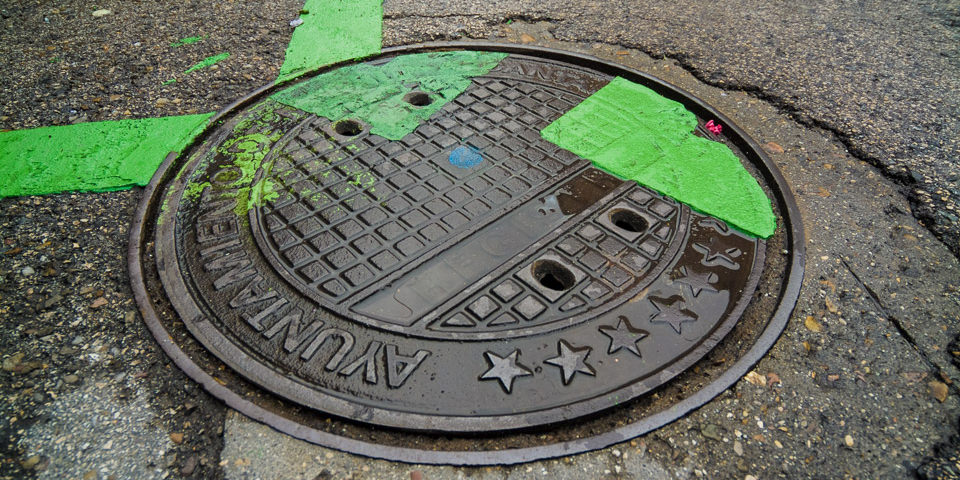
Ein Beitrag von: Stephan Maria Aust
„Bist du noch ganz gescheit?“ Diese Frage stelle ich mir tatsächlich, wenn ich auf Knien und Ellenbogen teilweise im Dreck herumrutsche, um Schachtabdeckungen zu fotografieren. Immer wieder kommt es vor, dass man mich anspricht oder ich sehnsüchtig von einem Hinter-der-Gardine-Lauerer erwartet und für einen Zuständigen der Stadt gehalten werde, der sich endlich um den seit Monaten kaputten Kanaldeckel „kümmern“ wird. Ich habe mich daran gewöhnt.
kwerfeldein – Fotografie Magazin | Fotocommunity
Das Bild des Tages von: Alexander

Im Ausblick: Geldgeile Fotografen, Pirelli und Klimawandel.
kwerfeldein – Fotografie Magazin | Fotocommunity
The team behind the Lumu smartphone light meter has launched a Kickstarter campaign to fund the production of Lumu Power, their next generation device. In addition to ambient light levels, the Lumu Power is also capable of measuring flash exposure and color temperature. Read more
 |
Nikon has released firmware updates for its D750 and D4S DSLRs, providing both with a new external recording control option for use with external recorders using Atomos Open Protocol. At the end of a list of bug fixes, Nikon also mentions that the D750’s firmware version 1.10 introduces ‘optimal vibration reduction’ with vibration reduction lenses. We’re hoping this addresses a glitch in which VR can sometimes contribute to image shake.
Other notes on the firmware updates for both cameras relate to bug fixes in movie live view, and the D750’s update addresses some minor problems with HDR mode and in-camera Raw processing among other things. See below for more details.
Download Nikon D750 firmware version 1.10
Download Nikon D4S firmware version 1.30
Note:
[ By WebUrbanist in Architecture & Cities & Urbanism. ]
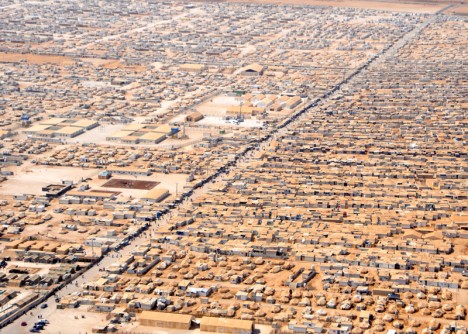
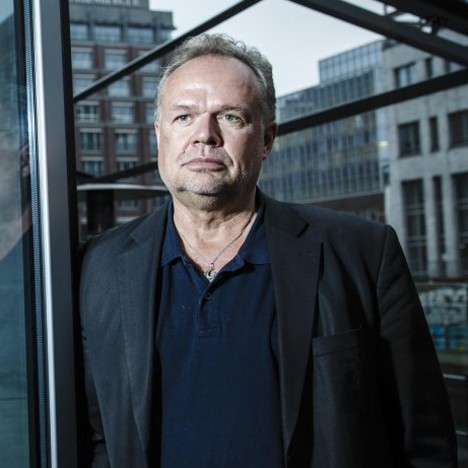
Former mayor of the world’s second-largest refugee camp, humanitarian Kilian Kleinschmidt notes that the average life of a refugee camp is 17 years, “a generation,” and these places need to be recognized as what they are: “cities of tomorrow,” not the temporary spaces we like to imagine. “In the Middle East, we were building camps: storage facilities for people. But the refugees were building a city,” Kleinschmidt told Dezeen in an interview. Short-term thinking on camp infrastructure leads to perpetually poor conditions, all based on myopic optimism regarding the intended lifespan of these places.
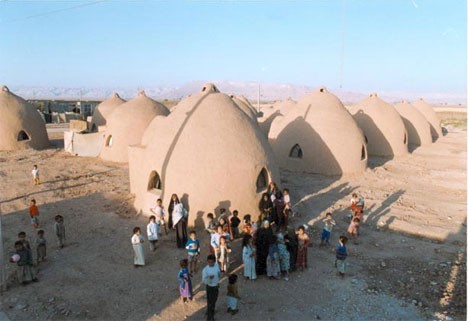
Many refugees may never be able return home, and that reality needs to be realized and incorporated into solutions. Treating their situation as temporary or reversible puts people into a kind of existential limbo; inhabitants of these interstitial places can neither return to their normal routines nor move forward with their lives.. On the one hand, assert experts like Kleinschmidt, planners need build up refugee camps to be durable and sufficient places in their own right. On the other, they also need to move refugee migrants toward countries and regions where they will end up virtuously integrated into struggling economies, including (though controversially): areas of nearby Europe with unused housing and high labor needs.
Beyond providing more thoroughly for essentials, Kleinschmidt sees additional opportunities to enable refugees with new technologies: “With a [3D-printing] Fab Lab people could produce anything they need – a house, a car, a bicycle, generating their own energy, whatever,” he said. Unfortunately, governmental bureaucracies and aid organizations are reluctant to push boundaries and try new approaches. More fundamentally: they frequently fail to recognize the need for robust solutions that help facilitate refugees who are themselves working hard to create real places for living.
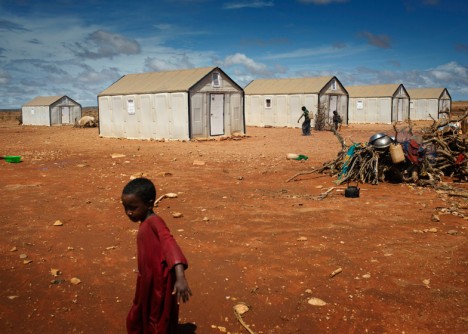
“I think we have reached the dead end almost where the humanitarian agencies cannot cope with the crisis,” he said. “We’re doing humanitarian aid as we did 70 years ago after the second world war. Nothing has changed.” Kleinschmidt worked with the United Nations and their High Commission for Refugees for 25 years before starting an independent consultancy that continues to address humanitarian issues around the globe.
His previous senior roles included deputy humanitarian coordinator for Somalia, deputy special envoy for assistance to Pakistan, acting director for communities and minorities in the U.N. administration in Kosovo, executive secretary for the Migration and Refugee Initiative (MARRI) in the Stability Pact for South Eastern Europe, and many field-based functions with U.N.H.C.R., U.N.D.P. and W.F.P. He worked extensively in Africa, Southeastern Europe, Pakistan and Sri Lanka.
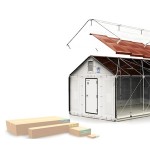
Emergency shelters are designed to be short-term solutions, and many cannot withstand rain, wind and sun for more than six months. Yet the average stay in …
Click Here to Read More »»

The dystopian bemusement pop-up theme park known Dismaland, a project of UK artist Banksy, is now closed but its dismantled pieces and parts will find second …
Click Here to Read More »»
What will New York, Los Angeles, San Francisco and 7 other cities look like in the future? Concept art depicts them in various states of decay and splendor.
Click Here to Read More »»
[ By WebUrbanist in Architecture & Cities & Urbanism. ]
[ WebUrbanist | Archives | Galleries | Privacy | TOS ]
 |
Adobe has updated Photoshop CC 2015 with the new features it detailed a few weeks ago as its MAX conference. Among the new, mostly designer-oriented features is a high-contrast touch-enabled interface, the ability to customize your Photoshop CC toolbar, direct SVG importing, Artboard improvements and support for Fuse CC, a 3D design application.
Joining the Photoshop CC update is the release of Fuse CC (Preview), which can be connected with Photoshop for ‘significantly greater design flexibility and creative options.’ At this point, Fuse CC is only available in English.