Month: December 2015

  • Canon 35mm F1.4L II: a photojournalist’s perspective

    By Jordan Stead

    I prefer prime lenses to zooms because I can already see the frame before I raise the camera to my eye. After you’ve shot with a lens for a long time you get used to it. After looking through a 35mm lens for so long, I can visualize the field of view instinctively. And 35mm suits the way that I shoot. It’s challenging, and at the same time, a very versatile focal length. 

    The original Canon EF 35mm F1.4L USM, wide open at F1.4. (Photo: Jordan Stead, seattlepi.com)

    A tendency when I’m using zooms is to shoot at the widest end most of the time. I always try to put myself as close to something as I possibly can, and so I end up zooming out as much as I possibly can. By being fixed at 35mm, it’s not super wide, it’s not tight, but it can be both simply by stepping back or stepping forward. It forces me to think about composition, it makes me work harder, and it makes me think more about layering.

    The author with a typical camera and lens outfit for a two-photographer team shooting professional sports. More specifically, Super Bowl 49. Several camera bodies, several long sports lenses, and at least one 35mm F2 prime.

    Photo: Josh Trujillo, seattlepi.com

    I remember buying my original Canon EF 35mm F1.4L from a strange man in a California parking lot during an internship years ago. I can safely say that shooting with it as extensively as I did enabled me to build my personal vision as a photographer. It’s been a staple in many photographers’ bags since the 1990’s, and it’s by no means a bad lens following the release of the Mark II.

    The original Mark I offers good sharpness, robust build quality, and despite the fact that it isn’t technically weather resistant, I can guarantee you it actually is very weather resistant in normal use. Even bodily fluid resistant. And somewhat drop resistant. The durability of that era of L-series lens is impressive.

    Using a 35mm and want a 50mm or 85mm field of view? Step in and think layering instead of zooming. Shot on the original Canon EF 35mm F1.4L USM at F4.5. (Photo: Jordan Stead, seattlepi.com)

    There are a couple of downsides to the original EF 35mm F1.4, but only if you’re pixel peeping. Corner sharpness isn’t outstanding: It tends to have kind of a smear to it, which I don’t actually mind too much. I’ve always enjoyed a little natural vignetting, because it tends to draw your eye more to the center of the frame, but there are times when the chromatic aberration can be pretty bad. If you’re shooting something like a lot of backlit trees, or a portrait of somebody with blond hair, backlit, your photograph will contain some wild Christmas colors. 

    Shot on the original Canon EF 35mm F1.4L USM at F4. (Photo: Jordan Stead, seattlepi.com)

    After years and years of heavy use, my original 35L was repaired three or four different times, due to being abused in just about every possible way. It had been dropped many times, slammed against something while dangling off my shoulder while running, soaked through with snow, rain and probably a fair amount of beer, too. At the end of its life, it would only work when shot wide open at F1.4. I do recall the autofocus switch assembly popping completely out of the lens body at one point with a long trail of electronics dangling out after. I pushed the guts back into the body, gaffer taped it over, and kept on shooting.

    Canon EF 35mm F1.4L II USM

    Price: $ 1,799 USD

    Aperture range: F1.4-F22

    Nine rounded aperture blades

    Two Aspherical Elements, One UD Element

    Blue Spectrum Refractive Optics

    Weather-sealed design

    Once my original 35L turned to dust, I found myself unwilling to spend $ 1,300 to replace it. Canon’s non L-series EF 35mm F2 IS was getting outstanding reviews across the board and it was much smaller and lighter than the F1.4 version. The 35mm F2 doesn’t have a big red ring on it, so it’s a little subtler (and cheaper), and comes with image stabilization. I’ve discovered now, having shot with the 35mm F2 for over a year, that IS on short glass can be truly amazing – especially when panning or shooting in low light and keeping ISO low.

    Can you tell the difference between F1.4 and F2? If you can’t – or don’t care – opt for the cheaper, lighter, IS-equipped Canon EF 35mm F2 IS USM, used here at F2. (Photo: Jordan Stead, seattlepi.com)

    With IS, you can get away with a 0.5 second exposure if you are super, super still. That’s something you’d be hard pressed to be able to get away with on a non-IS lens, including the old 35mm F1.4. Then there’s the price. For so much less than the F1.4, you’re still getting solid build quality, with stabilization, and all you’re really losing in return is a stop of light. But you definitely don’t get that particular, dreamy F1.4 look, unless you’re close enough to a subject to throw their background significantly out of focus.

    Having now shot a lot with the new EF 35mm F1.4L II, the first thing that stood out to me was the size; nearly the same as the Canon 24-70 F2.8 Mark II! Then again, compare it against the Sigma 35mm Art F1.4 and it’s around the same bulk.

    It’s almost not worth talking about the image quality. I figured if the Sigma Art was as good as everyone says it is (and it is), then for $ 1,800, Canon had to have at least matched if not exceeded it. I was confident that the quality was going to be outstanding, and it is. The 35mm F1.4L II is eye-searingly sharp. Colors are amazing, bokeh is beautiful and the lack of CA is unmatched. I’ve never worried about CA a whole lot, but it was apparent when shooting the 35L II in a challenging environment (such as a backlit, daylight scene), it definitely holds its own better than both its predecessor and cheaper F2 sibling.

    Canon EF 35mm F1.4L II USM: if sharp is what you want, sharp is what you’ll get. Taken at F1.6. (Photo: Jordan Stead, Red Box Pictures)

    What I’ve come to really enjoy about the Mark II is the focus accuracy and speed. The Mark I is great, I’ve had tons and tons of good luck with it, but the Mark II is just so fast and so accurate, especially when paired with a body like the EOS-1D X. Considering when you first get a prime and all you want to do is shoot it wide open for a month, you judge it harshly on whether the focus is landing correctly, especially when you know your technique is up to snuff. It was great to go into my edit and see I was having a much better hit rate at F1.4. And it’s not just because of the relatively low 18MP resolution of the EOS-1D X, I’ve had similar results with the EOS 5DS R and 5D Mark III.

    The fear is that I’ll probably buy a Mark II version for myself now. The 35mm F2 is just so convenient, and I really do appreciate the weight, but it can’t quite beat the image quality and autofocus performance of the 35L II. 

    “F1.4 and be there?” Not the best advice (nor how the saying goes), but the Canon EF 35mm F1.4L II USM sure makes shooting wide open more fun – and rewarding. Taken at F1.4. (Photo: Jordan Stead, Red Box Pictures)

    Putting this new lens on my camera has made me enjoy shooting at F1.4 more and, in turn, worry less about CA. Compared to the original 35mm F1.4 there are many advantages across the board. I really have nothing bad to say about the Mark II besides its hefty size, but that’s just the standard at this point for 35mm F1.4s, anyway.

    With the inevitability of more high-megapixel bodies on the way, it is important to consider that you’re not necessarily buying a lens like the Mark II just for right now: you’re buying it for the future. With cameras like the 5DS R, older lenses – even L-series lenses – can mostly still deliver decent results, but the 35mm F1.4L II is a step up in terms of sharpness, color and CA control. If a high-megapixel body is something you’re considering in the future, you’re going to want to pick up this lens.

    Articles: Digital Photography Review (dpreview.com)

  • Spread That PJ Love With All New Gifts Made Special by Us!

    GG1

    Good things come in threes and our third gift guide is no exception. We’ve got four new Photojojo gifts, including an upgrade to an all-time favorite: a better, brighter Pocket Spotlight! Check our tip-top tools for stepping up your phoneography game or that of a present-worthy friend … or three!

    (…)
    Read the rest of Spread That PJ Love With All New Gifts Made Special by Us! (0 words)


    © Erin for Photojojo, 2015. |
    Permalink |
    No comment |
    Add to
    del.icio.us

    Post tags:


    Photojojo

  • Out of Surface Space, Island of Singapore Expands Underground

    [ By WebUrbanist in Architecture & Cities & Urbanism. ]

    subsurface urban expansion

    Bound by water on all sides, the city-state of Singapore is pioneering subterranean urban development, starting with storage and transportation systems and escalating with plans for power plants, sports stadiums, libraries and more.

    rock cavern expansion

    In an interview, Jian Zhao, professor of geomechanics at Monash University, noted that “with the limited land available, one of the best possible ways to increase space is to create it underground.” Wealthy but spatially limited,  “Singapore is leading the world on exploring underground space as part of the urban development.”

    subsurface singapore development

    Currently in progress, the Jurong Rock Caverns, for example, are designed to store vast amounts of oil. Nearly ten stories tall, they can house 150,000,000 cubic meters of oil. This is one of the many projects under construction or in development at the behest of the government’s National Innovation Challenges: Land and Liveability.

    rock cavern diagram

    The caverns were created through a combination of drilling and explosives, hollowing out the rocky subsurface, then bolstered with a water curtain that keeps the hydrocarbons in place through hydrostatic pressure. A series of support infrastructure projects includes access shafts and operation tunnels, many hundreds of feet below the ground. Other densely-populated islands, from Manhattan to Hong Kong, may be looking to these projects as examples of how to increase development in areas where land expansion simply is not feasible. Images courtesy of the JTC Corporation.

    Share on Facebook


    [ By WebUrbanist in Architecture & Cities & Urbanism. ]

    [ WebUrbanist | Archives | Galleries | Privacy | TOS ]


    WebUrbanist

  • Weihnachtsgeschenke für Fotografen

    Geschenktipps

    Weihnachten ist nah und für alle, die noch passende Geschenke für ihre Fotografenfreunde suchen, haben wir hier eine kleine Liste mit feinen Dingen, über die sich Fotografen sehr wahrscheinlich freuen werden, für Euch zusammengestellt.
    kwerfeldein – Fotografie Magazin | Fotocommunity

  • 6. Dezember 2015

    Das Bild des Tages von: Ina Echternach

    © Ina Echternach

    Im Ausblick: Ein Foto aus zwölf.
    kwerfeldein – Fotografie Magazin | Fotocommunity

  • Butcher Chopped: 15 Bloody Unusual Meat Markets

    [ By Steve in Design & Products & Packaging. ]

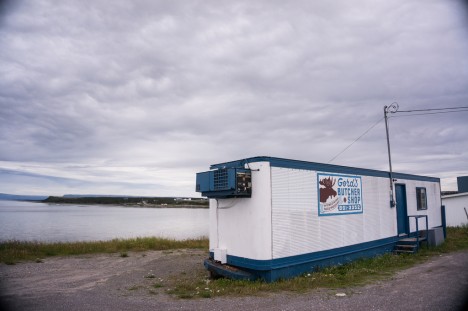
    butcher-shops-1a
    Traditional independent meat markets are dying off faster than the products they serve, though these 15 unusual butcher shops somehow managed to make the cut.

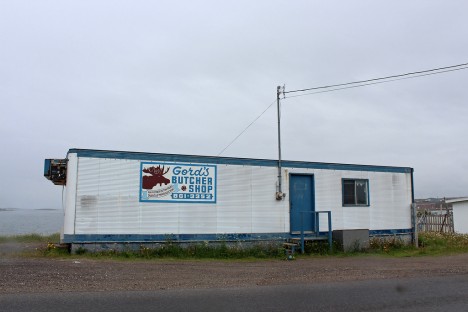
    butcher-shops-1b

    If a møøse ønce bit yøur sister, here’s your chance for revenge… or so it would appear. Gord’s Butcher Shop was run (by Gord, presumably) out of an abandoned trailer in Port au Choix, Newfoundland and Labrador, Canada. The above images taken in January and September of 2012 don’t reveal if Gord really butchered moose (mooses? meeses? whatever!) inside, and we may never know for sure: when Flickr user Oleo snapped the store in 2015 it had lost its power connection. Don’t ye be messin’ wit’ da moose, lord tunderin!

    We Bloody Well Deliver

    butcher-shops-2a

    Flickr user Dan Field (FieldDan) came across this curious Granada Hills, CA combination meat/mail market on September 15th of 2007. “Going postal is much easier when you have a meat cleaver,” observes one of the commenters at the photo page… gee thanks, Erik, for that disturbing observation.

    Edible Animals

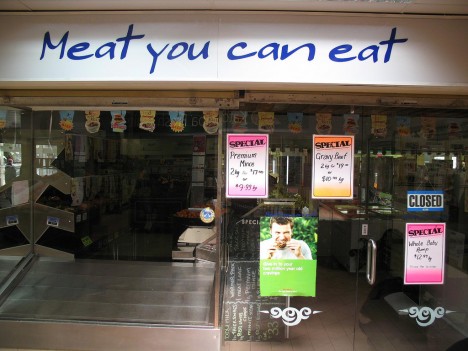
    butcher-shops-3a

    If the sign says Meat You Can Eat, you know you’re not in my kitchen. Flickr user(s) Stig & Lisa snapped this snappily-named meat market on July 27th of 2008 though the shop was closed at the time. As the sign in the window advertises “Whole Baby Rump,” one would hope local child protection services made the closing permanent.

    Abe Froman, I Presume?

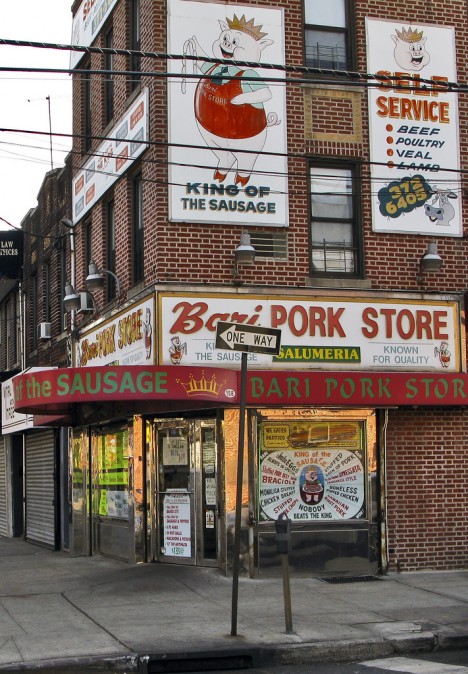
    butcher-shops-4a

    No, Bueller-fans, the Bari PORK STORE is located in Brooklyn, not Chicago. Flickr user Frank Winters snapped the self-styled “King Of The Sausage” on February 16th, 2009. Known For Quality, the Bari PORK STORE offers “self service” (butcher your own hogzilla?), caters parties – sausage parties, most likely – and proudly boasts “Nobody Beats The King”… at least, not in the category of over-the-top store signage.

    Too Fresh Flesh

    butcher-shops-14a

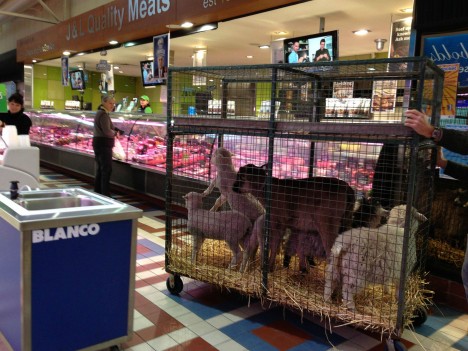
    OK, we all know where the packaged meat sold in supermarkets originally comes from but isn’t this a little too close for comfort? Won’t somebody think of the children? Speaking of which, hey little Jimmy, stop petting that rib roast!

    Next Page – Click Below to Read More:
    Butcher Chopped 15 Bloody Unusual Meat Markets

    Share on Facebook


    [ By Steve in Design & Products & Packaging. ]

    [ WebUrbanist | Archives | Galleries | Privacy | TOS ]


    WebUrbanist

  • Tips for Getting Started with Still Life Photography

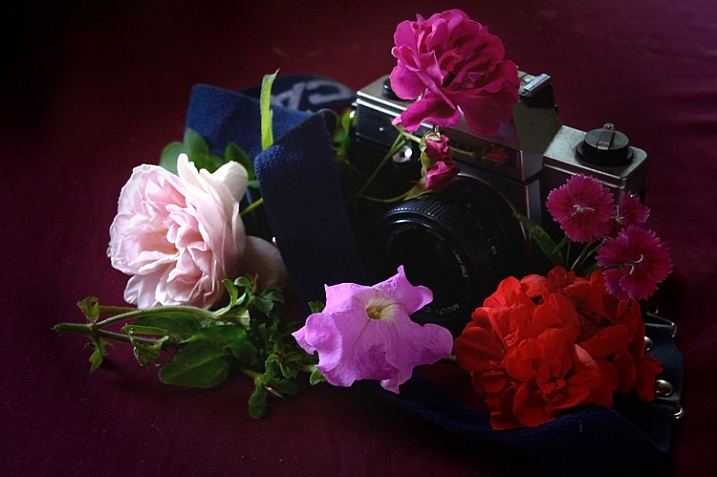
    breakfastW

    When photographing a still life subject, you are creating an image rather than capturing a moment. You are constructing your photograph; from background, to subject, to lighting. With the subject matter being inanimate objects, their tendency to stay very still allows you to take time to refine your lighting, and experiment with your composition. It’s a very pleasant way to photograph, and you don’t need any fancy gear. It’s also a great way to learn about lighting and composition, the key elements to any photographic style.

    Here are some tips to get you started on still life photography:

    Subject matter

    Subject matter doesn’t really matter. Generally the words “still life photography” conjures the image of traditional paintings of a vase of flowers, and a few carefully arranged items. But essentially as long at it stays still, it is a still life.

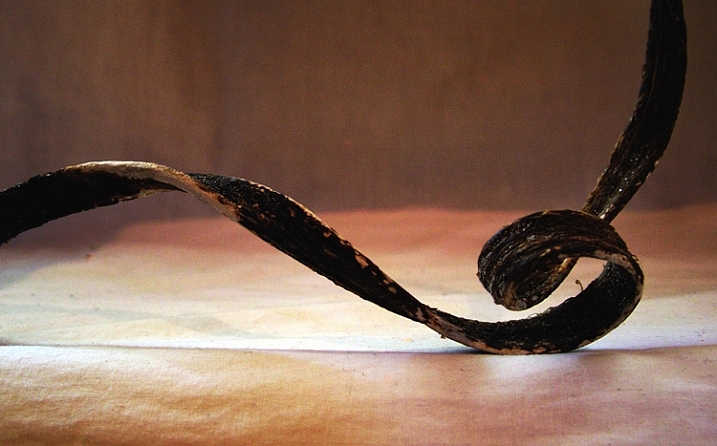
    Still life photography

    As long as it is still, technically it is a still life. This is a piece of dried seaweed on some calico.

    You could group a bunch of items together simply because you like them, or they look pleasing, or you can gather related items to tell a story. The image at the beginning of this article tells the story of my breakfast.

    Or you can find still life arrangements that already exist, their story or mood already set up for you.

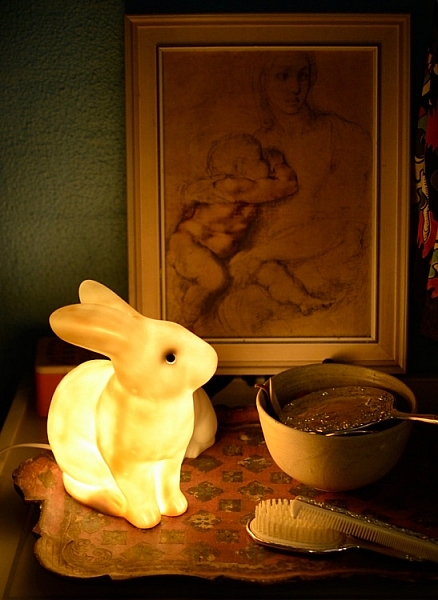
    Still Life Photography

    A arrangement on a friend’s bedside table of heirloom items, made for an already set up still life image.

    You can use things that are simply visually pleasing, or you can make it personal. If you’re stuck for a still life subject, I suggest finding some things that are personal and important to you, give the photograph some meaning. Plus, then you’ll have a photograph of this important thing. Bonus!

    Backgrounds

    A good background can really make a still life. Fabric, cardboard or paper, or an existing wall, are all easily accessible backdrops. For the image of my breakfast I used old potato sacks. Just make sure whatever you use is not too distracting from your subject matter. Keep it simple. If you’re using fabric, make sure you iron it first! Few things are more distracting than a wrinkled backdrop.

    Still Life Photography

    I like to call this one, Still Life With Slightly Wrinkly Backdrop.

    A bright color, or busy backdrop, can pull too much attention away from your subject matter. Plain, neutral-toned, backdrops are a good place to start, then experiment from there. You may be surprised what backdrop will end up making your image really pop.

    Still Life Photography

    After trying different colored, plain backdrops for this image, I experimented with some reflective cardboard, which worked much better.

    You can also experiment with focus and depth of field, having the whole image completely sharp or certain elements, such as the background, in soft focus. A blurry background could help out, should you not have an iron handy, or if you are not handy with one and need to knock back that wrinkly background.

    Lighting

    You don’t need anything fancy to light a still life. Natural light from a window will do the trick. A lamp, light painting with a torch, or a makeshift soft box are great fun to experiment with. A bunch of tips on these lighting methods and more in my DIY  lighting using household items article.

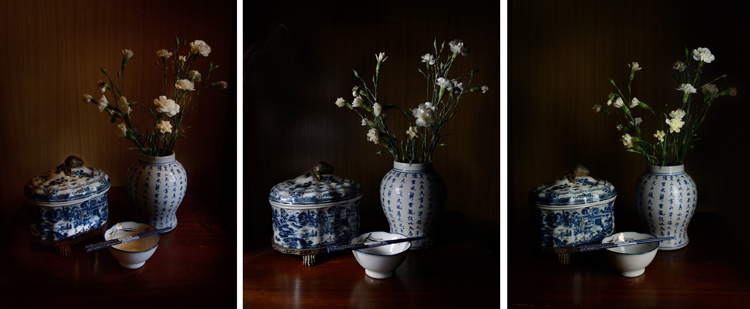
    Still life photography works well for longer exposures, allowing you to use a really subtle light source, such as single candle. You’ll need a tripod, or to steady your camera on a solid box, or pile of books. You can literally paint your still life with light using light painting, and all you need is a small flashlight.

    Still Life Photography

    A quick setup of different lighting. From left: Natural light from nearby window, light painting with a flashlight, and lighting from a single soft box.

    Your subject matter is still life, it’s not going to dash off on you, so take your time here and really play with your lighting.

    Try out different intensities of light, by either a curtain if using window light, or moving your light source in and out. You can also combine different light sources such as a small flashlight to fill in any dark spots when using natural light, or perhaps use both a lamp and a candle. (Just be aware of different colors of light each may produce)

    How you angle your lighting is important. Experiment with different positions for your light source. If you’re using natural light you’ll obviously have to move your subject to change angles, much easier than rebuilding your window! With a movable source, start with some side lighting, and then try a few different angles. Pay attention to where the shadows fall, as well as what happens with any reflective surfaces. You don’t necessarily want to turn your still life into a self-portrait, with a reflection of yourself and your camera staring back at you.

    Composition

    Good composition skills go a long way with still life, and is as important as good lighting. There are many wonderfully informative articles here on dPS on the basics, and sometimes not so basics of composition. Understanding things like the rule of thirds can be very helpful, even if you choose to then ignore it.

    With still life photography, if you just keep moving your arrangement around, you will find one that works. Don’t just settle on the first one you set up. Keep your eye out for overly empty gaps, or too much going on. Placing an item on an angle will lead the eye in that direction, does the item lead the eye nowhere, out of the frame, or subtly towards another part of the arrangement? A small tweak of the angle of your subject’s placement can make all the difference.

    Also try photographing from different angles, even if you need to shoot directly front on, try raising or lowering your camera for a few shots, then zoom in or out a bit and see what happens. It might work, it might not, you won’t know until you try.

    Editing

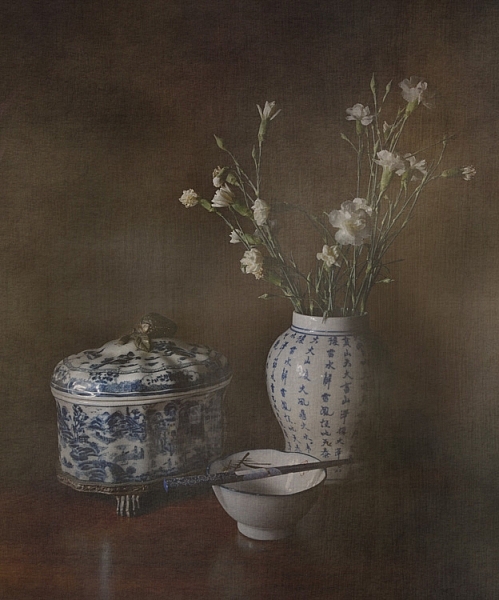
    There is loads of fun to be had in the editing stage. Different processes can completely change your still life image. HDR is a popular process for still life photography, and can be very effective. Or you could play with layer masks with a couple of different exposures, and paint in and out certain areas of your image. I like to add a texture to give the image a painting-like look. Here’s a link to a beginners guide to applying textures.

    Still Life Photography

    Adding a texture in the editing stage can give a painting like effect

    Experiment and enjoy

    Unlike most other forms of photography, when photographing still life you can really slow down and take your time, and enjoy the process . You don’t have to limit yourself  to the traditional still life, experiment with subject matter as well as your lighting and editing. Indulge in a little photographic play time!

    Still Life photography

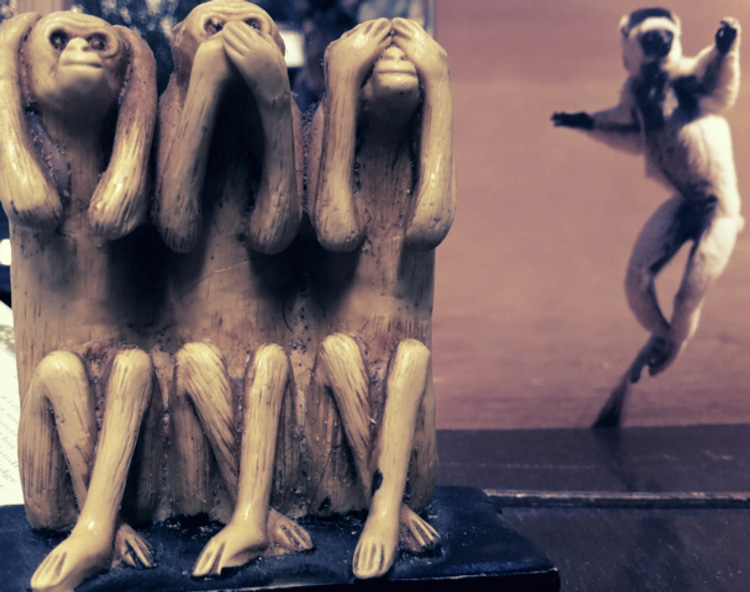
    An arrangement of this monkey sculpture next to a post card made for an interesting still life image.

    Try a still life today. Share your photographs or any further still life tips you’ve learned along the way in the comments below.

    googletag.cmd.push(function() {
    tablet_slots.push( googletag.defineSlot( “/1005424/_dPSv4_tab-all-article-bottom_(300×250)”, [300, 250], “pb-ad-78623” ).addService( googletag.pubads() ) ); } );

    googletag.cmd.push(function() {
    mobile_slots.push( googletag.defineSlot( “/1005424/_dPSv4_mob-all-article-bottom_(300×250)”, [300, 250], “pb-ad-78158” ).addService( googletag.pubads() ) ); } );

    The post Tips for Getting Started with Still Life Photography by Lea Hawkins appeared first on Digital Photography School.


    Digital Photography School

  • Readers’ Showcase: Giuseppe Milo

    Readers’ Showcase: Giuseppe Milo

    The foggy bridge – Dublin, Ireland. Photo by Giuseppe Milo

    Giuseppe Milo credits his interest in landscape and architectural photography with helping to shape a series of street photos he calls ‘Faceless.’ His fascination with the interaction between humans and the built environment are a common thread through the series, a project he calls ‘endless’ with new additions every week. Take a look at a selection of his photos and learn more about his history with photography. You can see more of his work at his website and Flickr. 

    Would you like to be featured in an upcoming Readers’ Showcase? Let us know! Be sure to include your DPR user name and a link to your online portfolio.

    Readers’ Showcase: Giuseppe Milo

    Advanced selfie – Chicago, United States. Photo by Giuseppe Milo

    Tell us where you’re from and what your history with photography is.

    I’m from the Amalfi coast, Italy, but I’ve been living in Ireland since 2010. It’s in Dublin that I started to take more pictures and study photography. I’ve always loved photography and initially I spent a lot of money on gear; then I realized that buying books and reading articles would have been more helpful so I started doing that. In 2012 I became addicted to street photography which is the genre I like the most.

    Readers’ Showcase: Giuseppe Milo

    Dancing in the water – Valletta, Malta. Photo by Giuseppe Milo

    What do you shoot with now?

    For the past 2 years I’ve been shooting with a Sony a7. When I shoot on the street I generally use a Sony FE 35mm F2.8 lens. 35mm is my favorite focal length. I love this combo because both the camera and the lens are very compact and light and the image quality produced is amazing. I also own a Sony Cyber-shot DSC-RX100 III which I like as well, but the image quality is not comparable with the a7.

    Readers’ Showcase: Giuseppe Milo

    Another working day – Chicago, United States. Photo by Giuseppe Milo

    How did your ‘Faceless’ series start and how has it evolved?

    A few weeks ago I was looking at my street pictures and I realized I was very passionate about silhouettes and images of people who are not recognizable. This is maybe because I’m not really interested in people in the pictures I take but I’m more interested in the composition, the light, the interaction between man and environment.

    Readers’ Showcase: Giuseppe Milo

    Bryggen – Bergen, NorwayPhoto by Giuseppe Milo

    (cont.) I don’t really like to shoot people randomly and look for expressions or characters. I want to communicate a feeling with every picture I take so I always pay attention to composition and light, natural contrast, balance. Faceless is still evolving: it’s actually an endless project, so you can check my website weekly for new pictures.

    Readers’ Showcase: Giuseppe Milo

    Raining – Chicago, United States. Photo by Giuseppe Milo

    How do you think your approach to street photography differs to others’?

    Most street photographers are interested in expressions, funny moments, people interaction. I started photography shooting landscapes, so maybe that’s the reason why I’m more interested in compositional elements. I also try to give my pictures a cinematic look: this is why I’ve chosen to use the 16:9 format for most of my pictures. This is the way I like street photography. I think everyone has to find his personal style and I guess I found mine.

    Readers’ Showcase: Giuseppe Milo

    Stairs – Lisbon, Portugal. Photo by Giuseppe Milo

    What have the challenges been in creating a book for your project? 

    Creating the book was actually a very straightforward process. Both my wife and Lightroom have helped me a lot but the most important thing about the book creation was that I had a clear idea of what I wanted to achieve: I just had to create the layout. 

    Readers’ Showcase: Giuseppe Milo

    The path – Dublin, Ireland. Photo by Giuseppe Milo

    What advice would you give another photographer interested in self-publishing a book?

    Use Lightroom and Blurb. It makes book creation very easy, and you can also choose to sell your book on Amazon. I think there are other options but my experience was very good. I like Lightroom, so it was fun to work on my book with the same software I use for editing my pictures.

    Readers’ Showcase: Giuseppe Milo

    Opera house – Oslo, Norway. Photo by Giuseppe Milo

    What are some of your favorite locations to shoot?

    Everywhere there is a good light and contrast. I don’t mind the location if there is a fantastic light. Otherwise, if light is not very good, I try to pick a location that allows me to create a good composition. I like architectural photography as well, and that’s why some of my street shots are a mix of the two genres. I also like to explore new places. I happen to travel often for various reasons, so I can always change the location of my pictures.

    Readers’ Showcase: Giuseppe Milo

    The photographer – Dublin, Ireland. Photo by Giuseppe Milo

    What’s the best advice you’ve received as a photographer?

    Learn how to see the light. Light makes a big difference in creating a beautiful or an average picture. I’ve also learned to spend money on books and education. When you’ve learned enough, pick the camera you like to shoot with. Photography is about light, composition and balance, not about the gear. The moment I realized this myself, I really started to take better pictures.

    Articles: Digital Photography Review (dpreview.com)

  • How to Identify Three Common Image Problems and Fix Them in Lightroom

    I hear it over and over, “I have a nice camera but my pictures just don’t come out as good as I expect.”

    What ensues is an interrogation first about equipment selection, settings, and general technique. More often than not when we finally get down to the nitty gritty, the fact is that many people not only have a difficult time identifying what’s wrong with their photos, let alone determining how to prevent it, or fix it in post-processing.

    jumping through hoops

    Common problems that plague your images might be able to be fixed, but you might have to jump through some hoops to do it.

    Although there are two sides to this topic (one side being nailing the shot in-camera), we are going to take a look at some common image problems that might be plaguing your photos, and ways to fix them in post-processing. This may be helpful if you want to revisit images you have in your library that may be salvageable.

    I’ll be referring to Lightroom (LR) as the post-processing software, although the general adjustments can be adapted for use in other software.

    #1 Washed Out

    The term washed out refers to a photo which seems to have been shot through a translucent fabric. There is a uniform haze which reduces color saturation, sharpness, clarity, and contrast. There are several factors that can contribute to your pictures being washed out. It could be anything from poor quality lenses, to ghosting from shooting directly into a light source (lens flare).

    The good news is that with the features and power that we have in LR, this problem can often be overcome.

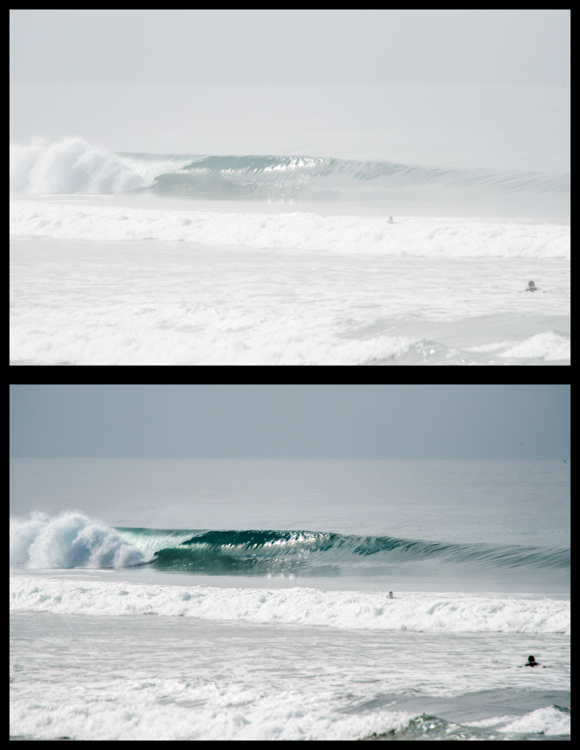
    Let’s look at this photo of a beautiful wave, shot early in the morning. It was shot at 200mm with a 2x teleconverter (an effective focal length of 400mm). Teleconverters increase focal length, but are notorious for eating light, and reducing contrast and sharpness.

    washed out image

    Although teleconverters can wreak havoc on your images, all is not lost.

    As you can see, the original shot is not very appealing. In an attempt to bring it back from the brink of unacceptability, I have made the following adjustments:

    Basics panel

    • Contrast increased (+)
    • Highlights decreased (-)
    • Shadows decreased (-)
    • Whites increased (+)
    • Blacks decreased (-)
    • Clarity increased (+)
    • Vibrance increased (+)
    • Saturation increased slightly *+)

    Tone Curve panel

    • Lights decreased
    • Darks decreased
    • Shadows increased

    The trick here is to go back and forth between the different sliders that control darks and lights. For example, I will adjust the Highlights and Whites sliders, go to the Tone Curve panel and adjust the Highlights and Lights, then return to the Highlights and Whites again to fine tune how I want that end of the spectrum to look.

    #2 Color or Tint

    In my opinion, this is one of the strongest arguments for shooting in RAW format. Shooting in RAW allows you way more control correcting White Balance in post-processing, opposed to other file formats – and incorrect White Balance is the primary cause of off-colored images, or ones with a color tint.

    If you haven’t developed an eye for identifying this problem, you might miss it. I see many really nice photos that have a slight tint, which is unintentional. The key is to look at areas of the image which are a neutral color, or white – this is where it is easiest to notice the off-color tint. Note that editing on a monitor which is not color calibrated may limit your ability to achieve correct White Balance.

    incorrect white balance and tint

    Sometimes noticing if an image has incorrect White Balance, or a color tint, can be tricky. I used LR’s White Balance eye dropper tool where the red square is (top image) – it got pretty close, but still a bit too magenta.

    The first line of defence is to give LR’s Auto White Balance tool a shot. I find it to be somewhat inaccurate, but a good starting point nonetheless. Once activating the eye dropper tool, a pop-up window will show a magnified view to allow you to select pixels as close to a neutral color as possible.

    From this point, you can use the White Balance and Tint sliders to fine tune the image. If there are people in the photo, your goal should be making the skin tones look as natural, and pleasing as possible.

    #3 Too Much Variation in Contrast

    Being confronted with a drastic contrast range is one of the most common problems you are likely to face in your shooting. After all, this is why many photographers are equipped with a polarizing filter, and why new camera models strive for an expanded dynamic range.

    Luckily, you are not stuck with the image that you download onto your computer. If you are shooting in RAW there is a lot of information about details, color, etc., which you can exploit in post-processing.

    Let’s take a look at this photo I snapped from inside a bookstore. It was pretty dark inside with the midday sun shining outside the window. Sure, I could have shot bracketed photos to merge into an HDR (high dynamic range) image, used a flash to balance the dark interior with the lighter exterior, or used a polarizer to darken the window portion of the scene. But I only had my camera with one lens, just grabbing some snapshots while out and about for the afternoon, so I didn’t have the means.

    high contrast image

    The camera struggled with this high contrast scene, but a little work in LR breathed new life into it.

    So to what extent can this image be salvaged?

    As you can see, the camera actually captured a lot of information, and it was just a matter of telling LR what to do with it. Here is a list of changes made to this image to give you an idea of how to do this yourself:

    Basics panel

    • Contrast decreased slightly (-)
    • Highlights decreased (-)
    • Shadows increased (+)
    • Whites decreased (-)
    • Blacks decreased (-)
    • Clarity increased (+)
    • Vibrance increased slightly (+)
    • Saturation increased slightly (+)

    Tone Curve panel

    • Highlights decreased
    • Lights decreased
    • Darks increased
    • Shadows decreased

    Lastly, I used the Adjustment Brush to mask off the window portion and made these adjustments:

    • Exposure decreased (-)
    • Contrast increased (+)
    • Highlights increased (+)
    • Shadows decreased (-)
    • Clarity increased (+)

    Conclusion

    Of course, there are a host of other problems you can run into while out shooting, but these are a few of the most common you’re most likely to encounter. Don’t overlook the fact that you should try and get the best image possible while out in the field. Although editing software is very powerful, you will get best results when you don’t have to push the limitations of your editing software.

    Hopefully this article has given you some guidance on how to salvage images that you may once have considered lost. Show us some examples of photos that you have saved in the comments below.

    googletag.cmd.push(function() {
    tablet_slots.push( googletag.defineSlot( “/1005424/_dPSv4_tab-all-article-bottom_(300×250)”, [300, 250], “pb-ad-78623” ).addService( googletag.pubads() ) ); } );

    googletag.cmd.push(function() {
    mobile_slots.push( googletag.defineSlot( “/1005424/_dPSv4_mob-all-article-bottom_(300×250)”, [300, 250], “pb-ad-78158” ).addService( googletag.pubads() ) ); } );

    The post How to Identify Three Common Image Problems and Fix Them in Lightroom by Jeremie Schatz appeared first on Digital Photography School.


    Digital Photography School

  • Die 5 Fotowettbewerbe des Monats

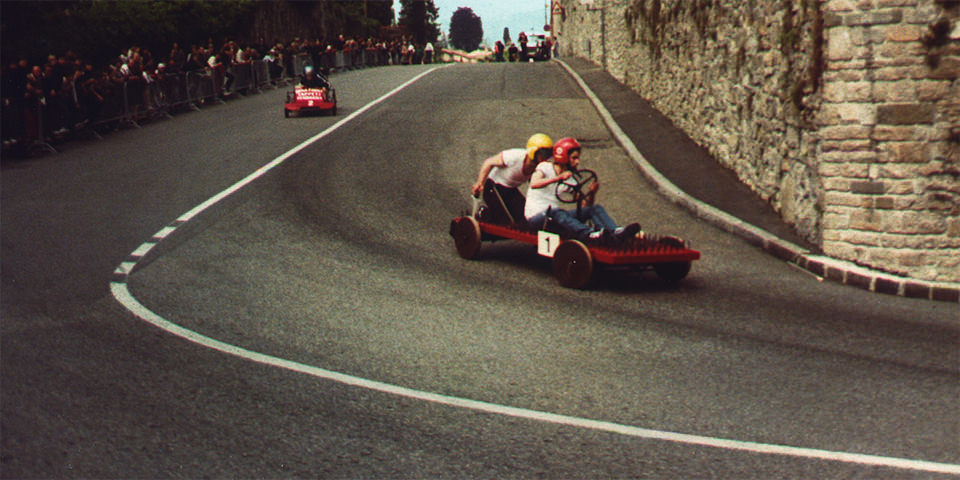
    Seifenkistenrennen

    Unsere Fotowettbewerbe sind dieses Mal sehr vielfältig. Angeboten werden nicht nur Geld- und Sachpreise, sondern auch ein Portfolio Review und ein Stipendium. Mitmachen lohnt sich also auf jeden Fall. Wir wünschen Euch wie immer viel Erfolg!
    kwerfeldein – Fotografie Magazin | Fotocommunity