Month: December 2013

  • Metabones now available for Blackmagic Pocket Cinema Camera

    20131127_pr_06_copy-thumbnail.png

    Metabones has introduced two new versions of its Nikon-F to Micro Four Thirds mount Speed Booster adapters. This time they are designed specifically for the Blackmagic Cinema and Pocket Cinema cameras. The new 0.64x Speed Booster reduces the full-frame crop factor of the Blackmagic Cinema Camera from 2.39x to 1.53x. The 0.58x Speed Booster reduces the crop factor of the Blackmagic Pocket Cinema Camera from 2.88x to 1.75x. Learn more

    News: Digital Photography Review (dpreview.com)

  • 4 Tips for a Perfect White Background in High Key Photography

    A guest article by Tony Northrup, author of Stunning Digital Photography, on sale 20% off – now at SnapnDeals.

    A bright, white background creates a high energy, happy, and distraction free scene, perfect for pictures of your friends and family. Known as high key photography, this technique instantly cures problems with ugly backgrounds and focuses the viewer’s attention on your subject.

    Besides being a popular for portrait photographers, it’s a more modern choice, rather than traditional (ie., painted muslin). Here are my favourite tips for creating high key photos.

    4 tips for perfect white backgrounds in high key photography

    Tip #1 – Use a Solid White Background to Eliminate Distractions

    I used a big, white piece of paper as the background for this portrait of my twin nieces because anything natural for a background would have clashed with their colourful outfits. The brightness also perfectly matches their expressions.

    high-key-white-background-portraits-01b

    High-key backgrounds focus your attention on the subject

    High key photography was the perfect choice for this picture of my daughter eating a strawberry because there’s nothing to distract the viewer from her eyes and the strawberry. You don’t need to use an expensive camera or lens for this type of picture, because you can use any camera for high key photography.

    High key white background portraits 02

    The solid white background eliminates all distractions

    Tip #2 – use sunlight as your background

    A white background isn’t everything you need to create a perfect high key photograph, however. You need one additional ingredient – light. A white background without light doesn’t appear white in the photo, it appears grey. My flash failed to fire for this next photo, causing an ugly, grey background.

    If you don’t light your background, it will be grey

    If you don’t light your background, it will be grey

    To create a solid white background, you need to completely overexpose your background without overexposing your subject. That means you’ll need much more light on your background than on your foreground subject; about 16 times more light (or four stops of light).

    Fortunately, we all share a very powerful and free light source: the sun. For this photo of a radio talk show host and his dog, I had him kneel in my kitchen at midday when the sun was streaming through the glass doors behind him. I added three stops of exposure compensation to properly expose their faces. Because the sunlit background was much brighter than the shade in my kitchen, the camera captured it as solid white.

    High key white background portraits 04

    You can use the sun to create a bright background

    Tip #3 – use a flash on the background

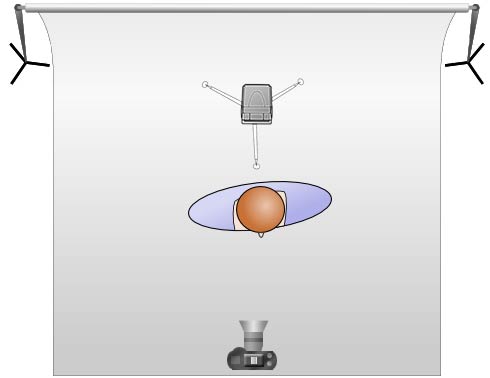
    Another easy way to create a bright background is to light it with an off camera flash. Simply move your model four to six feet away from your background and hide a flash behind your model, pointing it at the background. When you take your photo, the flash will light the background to overexpose it and make it appear completely white.

    An off camera flash doesn’t have to be expensive. Any manual flash with an optical slave will work, including the $ 60 (US) YongNuo YN-560 that I often use. Simply turn on both the flash’s optical slave and your built-in flash. When you take a picture, your flash will trigger the off camera flash to light the background.

    High key white background portraits 05

    Place a flash behind your subject to light the background

    For more information about using flash both on-camera and off-camera, refer to Chapters 3 and 6 of Stunning Digital Photography.

    Tip #4 – don’t over, overexpose the background

    You can overexpose a high key background too much. If you bounce too much light off your background, the backlighting will overtake your model and wash out your picture. For example, the picture on the left had too much light on the background, while the picture on the right had just the right amount.

    If you have too much light on your background, it’ll wash out your subject

    If you have too much light on your background, it’ll wash out your subject

    To get a perfectly white background without washing out your picture, start your background light at its lowest power and increase it one stop at a time until the background is barely overexposed. In this video, my wife Chelsea and I show you exactly how to find the perfect flash output. Our book, Stunning Digital Photography, includes more than six hour of video integrated into the lessons, because photography is a visual art, and often it’s easier to learn by watching than reading.

    Summary

    High key photography is challenging because it requires you to create an intentionally overexposed background while still properly exposing your subject. Once you learn how to use exposure compensation and light your background, you’ll be able to create perfect white backgrounds in just a few minutes.


    Award-winning author and photographer Tony Northrup has published more than 30 how-to books and sold more than a million copies around the world. His photography book, Stunning Digital Photography, is the best-selling photography book in the world and the top-rated instructional book of all time. His photos have been featured on magazine covers, book covers, CD covers, TV shows, calendars, and much more. He runs a stock and portrait photography business with his family, Chelsea and Madelyn, out of his home studio in Waterford, CT. He shoots travel and nature photography everywhere he goes.

    Post originally from: Digital Photography Tips.

    Check out our more Photography Tips at Photography Tips for Beginners, Portrait Photography Tips and Wedding Photography Tips.

    4 Tips for a Perfect White Background in High Key Photography

    The post 4 Tips for a Perfect White Background in High Key Photography by Guest Contributor appeared first on Digital Photography School.


    Digital Photography School

  • Sigma issues advisory on lens compatibility with Nikon Df

    shared:Sigma_logo_new.png

    Sigma has posted a statement on its website regarding incompatibilities between its lenses and the Nikon Df. As with the D5300, both autofocus and image stabilisation may not work correctly; however lenses without built-in focus motors are also affected when used on the Df. The company says it will provide free lens firmware updates to fix the issue, but this may not be possible with discontinued models. Click through for full details.

    News: Digital Photography Review (dpreview.com)

  • The Old Guard – Bristlecone Pine Forest, California

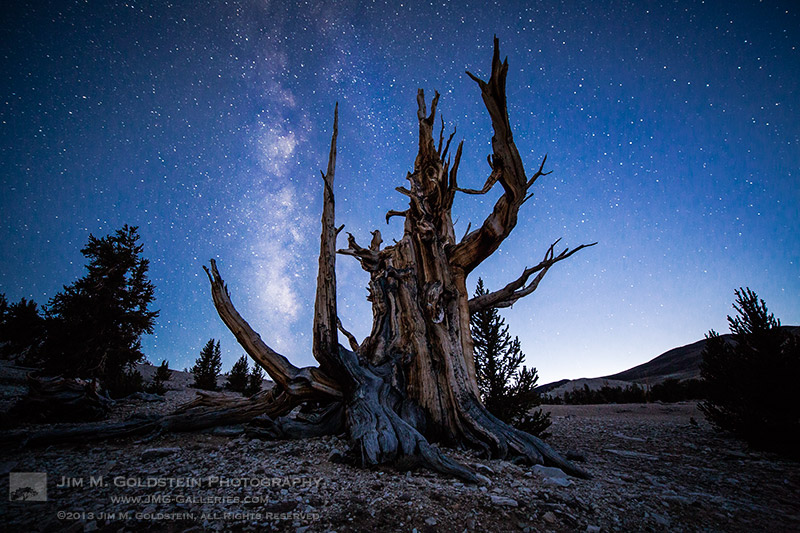
    The Old Guard  – Bristlecone Pine Forest, California

    This is a still from a motion control time-lapse sequence taken during the Fall of this year. While ancient Bristlecone Pine trees are old they look young compared to the stars up above. I was particularly fond of the juxtaposition of the two subjects and I’m eager to see how my lengthy time-lapse sequence comes out.

    If the stars should appear but one night every thousand years how man would marvel and stare.

    – Ralph Waldo Emerson

    Copyright Jim M. Goldstein, All Rights Reserved

    The Old Guard – Bristlecone Pine Forest, California

    The post The Old Guard – Bristlecone Pine Forest, California appeared first on JMG-Galleries – Landscape, Nature & Travel Photography.


    Related Stories

    • The Old Guard – Bristlecone Pine Forest, California – Enclosure
    • The Ancients – Bristlecone Pine Forest, California
    • Sky Rock Under the Stars
    Feed Ads by FeedBlitz
    powered by ad choices


    JMG-Galleries

  • 3. Türchen: MOO

    3. Türchen

    Solltet Ihr irgendwann einmal eine Visitenkarte von einem unserer Redakteure bekommen, so wurde sie sehr wahrscheinlich bei MOO gedruckt. Umso mehr freuen wir uns, dass wir das junge Unternehmen aus London dieses Jahr für unseren Kalender gewinnen konnten.

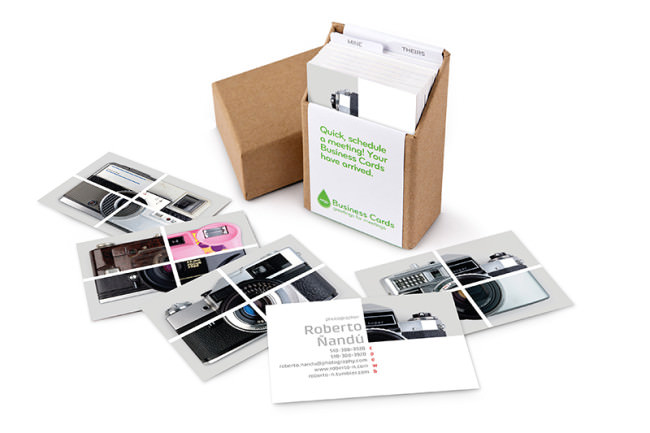
    MOO bietet nicht nur hochwertige Visitenkarten, sondern auch Sticker und Etiketten, Gruß- und Minikarten. Das Besondere bei MOO ist, dass man alles individuell und sehr einfach mit Hilfe des MOO-Designers selbst gestalten kann. Und fehlt einem die Zeit, selbst kreativ zu werden, dann gibt es viele schöne vorgefertigte Designs.

    MOO

    Will man für seine Visitenkarten eines seiner Fotos auf der Vorderseite und kann sich aber einfach nicht entscheiden welches, nimmt man einfach fünf verschiedene, ganz ohne Aufpreis. Man könnte bei einer Bestellung von 50 Visitenkarten sogar 50 verschiedene Motive wählen – der Preis bleibt derselbe.

    Vergleicht man die Preise diverser Visitenkartenhersteller, unterbietet MOO sicherlich nicht alle anderen, aber die Qualität und der Service sind herausragend, wodurch sich jeder Cent mehr lohnt.

    Moo

    Der glückliche Gewinner unseres heutigen Türchens darf all das ganz ausgiebig testen, denn MOO hat einen Gutschein im Wert von 100 € bereitgestellt. Dafür bekommt Ihr nicht nur Visitenkarten, sondern könnt Euch einmal quer durch die ganze Produktpalette testen.

    Um den Gutschein zu gewinnen, schreibe einen Kommentar unter bürgerlichem Namen und gültiger E-Mail-Adresse bis heute um 24 Uhr. Danach verlosen wir ihn per Zufallsgenerator unter allen Kommentatoren. Die genauen Gewinnspielregeln findest Du hier. Viel Glück!


    kwerfeldein – Fotografie Magazin

  • Canon announces EOS M2 in Japan

    eos-m2.png

    Canon has announced the EOS M2 in Japan. An updated version of its EOS M mirrorless camera, the new model promises faster autofocus due to the use of a Hybrid CMOS II sensor, as seen in the EOS 100D / SL1. It also has built-in Wi-Fi and a slightly revised body design. It will be sold either body-only or in kits with one, two, or all three EF-M lenses, and be available in either black or white.

    News: Digital Photography Review (dpreview.com)

  • Geisterstädte in Rumäniens Ruhrpott

    Ein Beitrag von: George Popescu

    Die Schuldenbremse bringt das Ende des Bergbaus und die Bukarester Mittelschicht feiert ihren Sieg über die Barbarei. Wie lebt es sich heute im verarmten Schiltal und wie könnte eine nachhaltige Alternative zum Bergbau in der betroffenen Region aussehen?

    Mit diesen Fragen beschäftigt sich eine geplante multimediale Webdokumentation, die zur Zeit Unterstützer auf der Crowdfunding-Plattform Krautreporter sucht. Es soll eine detailreiche und ambitionierte Dokumentation aus Bild-, Video-, Ton- und Text-Material entstehen, die mit interaktiven Elementen wie Karten unterstützt wird – auf Rumänisch und Deutsch.

    Die Autoren, Osteuropa-Korrespondent Silviu Mihai und Fotojournalist George „Poqe“ Popescu, unterhalten sich im Folgenden über den Hintergrund und die Schwierigkeiten ihres Projektes „Rumäniens Ruhrpott“, das Ihr mitfinanzieren könnt.

    © George Popescu

    George: Silviu, Du wolltest schon immer zu den Bergarbeitern, woher kommt denn dieses Interesse?

    Silviu: Das Projekt hat tatsächlich eine interessante Vorgeschichte. Zum ersten Mal war ich im Jahr 2010 bei den rumänischen Steinkohlebergarbeitern im Schiltal. Damals war der Plan, die letzten Minen zu schließen, noch nicht öffentlich. Doch die Wirtschaftskrise hatte in Rumänien mit voller Wucht zugeschlagen und es war klar, dass die damalige wirtschaftsliberale Regierung die Gelegenheit ausnutzt, um ihre neoliberale Agenda durchzusetzen.

    Und im Schiltal wussten fast alle, dass sie die ersten Betroffenen sein werden, denn der staatliche Bergbau galt schon längst als „unheilbarer Patient“. Auch der Druck vom Internationalen Währungsfonds und von der EU-Kommission war groß. Und die Bukarester Eliten haben nie einen Hehl daraus gemacht, dass sie die Bergarbeiter hassen.

    © George Popescu

    George: Haben Dich diese starken Gegensätze fasziniert?

    Silviu: Ja, klar. Als ich dort vor Ort war, habe ich verstanden, dass es sich nicht nur um eine der üblichen Geschichten von Deindustrialisierung und Strukturwandel handelt, wie man sie überall in Europa – etwa im Ruhrgebiet schon vor 20 bis 30 Jahren – erlebt hat.

    Nein, hier geht es um eine zentrale Machtelite, die eine ganze Region komplett aufgibt, teilweise aus wirtschaftlichen, vor allem aber aus politischen Gründen. Das Schiltal mit seinen Armen, seinen Slums, seinen Waldbeerensammlern passt nicht ins schöne Narrativ vom schnellen Fortschritt in Richtung Europa, das bei der Bukarester Mittelschicht so beliebt ist.

    © George Popescu

    George: Auch menschlich, nicht nur politisch, ist das Schiltal eine ganz andere Welt. Wenn man aus Bukarest kommt und an die hiesigen Verhältnissen gewöhnt – oder besser: von ihnen verwöhnt – ist, dann fühlt man sich im Schiltal wie vom Mond gelandet. Die Geografie und die sagenhafte rumänische Infrastruktur tragen zusätzlich zum Isolationsgefühl bei:

    Egal, ob im Zug oder im Auto, muss man erst durch diese lange, wilde Schlucht in den Karpaten, durch viele Tunnel, bevor man sich endlich in diesem verarmten Reich der Steinkohle befindet. Und einmal dort angekommen, sehen diese industrielle Landschaft, aber auch die Städte ein bisschen wie in „Mad Max“ aus. Man erkennt auf den ersten Blick, dass die letzten Investitionen irgendwann in den 80er Jahren noch vor der Wende getätigt worden sind.

    © George Popescu

    Silviu: Stimmt, leider sehen auch die Hotels genau so aus. Man liegt auf diesen unbequemen, tollpatschig designten Betten und fragt sich, wie viele kleine, staubige KP-Funktionäre aus der tiefsten Provinz hier geschlafen haben müssen. Aber siehst Du, das ist eben wieder die Sicht aus Bukarest – oder aus Berlin.

    George: Klar, aber auch die Menschen im Schiltal sind sich mittlerweile bewusst, dass ihre Region kaum Zukunft hat, dass sie den Kampf endgültig verloren haben. Fotografisch kann man das auf ihren Gesichtern lesen. Diese Sicht aus Bukarest und damit auch massive Schuldgefühle haben sie verinnerlicht.

    Nach dem Motto: „Wir haben es versäumt, uns rasch zu modernisieren und zu europäisieren, wie es andere Teile Rumäniens getan haben. Wir sind immer noch die Rückständigen.“ Deshalb wäre es wichtig, uns für dieses Projekt genug Zeit zu nehmen, damit wir diese Einstellung konkret, im Alltag der Menschen beobachten können.

    © George Popescu

    Silviu: Eben deswegen wollen wir ja nächstes Mal wirklich länger bleiben. Das Problem ist, dass keine Redaktion in Deutschland einen drei- oder vierwöchigen Aufenthalt in der rumänischen Provinz finanziert, auch wenn die Kosten natürlich niedriger wären als die für einen ähnlichen Aufenthalt in einer deutschen Stadt.

    George: Aber auch in Rumänien finanziert niemand so etwas. Das Schiltal interessiert niemanden in den Mainstream-Medien. Für die ist es ein längst geschlossenes Kapitel. Die Bergarbeiter und die ganzen anderen Menschen dort, die alle direkt oder indirekt vom Bergbau lebten, gelten als Verlierer der Transition.

    © George Popescu

    Silviu: Und die Verlierer der Transition sind uncool, weil sie von dem aberwitzigen Arbeitslosengeld nicht einmal ihre Heizungsrechnung bezahlen können. Weil sie sich nicht erlauben, in der Mall shoppen zu gehen oder sich bei H&M Klamotten „wie im Westen“ zu kaufen. Und weil sie im Bus nach Beelitz fahren, um dort den Spargel zu ernten, anstatt kurz mit German Wings nach Berlin zu fliegen, um dort Party zu machen.

    George: Um einen längeren Aufenthalt zu finanzieren, brauchen wir also etwas anderes als die traditionellen Medien. Hinzu kommt, dass man in den traditionellen Medien so gut wie nie die Chance hat, mehr als fünf oder sechs Bilder auf drei oder vier Magazinseiten zu zeigen.

    © George Popescu

    Silviu: Genau. Wir haben uns für Krautreporter.de entschieden, weil wir davon ausgehen, dass das Projekt in Deutschland auf Interesse stoßen wird. Und die ersten Zeichen sind sehr gut, wir bekommen viele E-Mails. Letztlich gibt es nicht nur viele Ähnlichkeiten mit dem Ruhrpott, sondern es geht um die Ursachen der sogenannten Armutsmigration. Wir wollen uns das genauer anschauen: Wie fühlt es sich 1000 Meter unter Tage an? Wie wohnen die letzten Kumpel? Wie leben die Kinder?

    George: Das sind alles wichtige Aspekte, die zumindest fotografisch einen längeren Atem brauchen. Wir müssen diese Menschen im Alltag begleiten. Und Du hast schon gesehen, wie kompliziert es war in der Mine, in Petrila.

    Silviu: Ja, allein das Genehmigungsverfahren hat zwei Monate gedauert. Aus unerklärlichen Gründen stuft der rumänische Staat die Minen immer noch als „Objektive strategischer Bedeutung“ ein, obwohl er sie ja schließen will.

    © George Popescu

    George: Es war aber auch an sich eine einzigartige und abgefahrene Situation. Es ist sehr warm, sehr feucht dort unten und stockdunkel. Blitze oder Lichter darf man wegen der Explosionsgefahr nicht verwenden. Die Methankonzentration in der Luft ist sehr hoch. Man muss mit den Helmlampen klarkommen – nächstes Mal müssen wir viel mehr davon mitnehmen.

    Silviu: Auf jeden Fall. Aber zunächst müssen wir hoffen, dass wir die Finanzierung zusammenbekommen.

    Wenn Ihr jetzt neugierig geworden seid, empfehlen wir Euch sehr den Klick rüber zur Crowdfunding-Kampagne für „Rumäniens Ruhrpott“ auf Krautreporter. Noch bis Anfang Januar sammeln George und Silviu dort Spenden, die auch mit interessanten Prämien wie einem Brocken Steinkohle oder der Original-Arbeitskleidung der Kumpel aus dem Schiltal (natürlich in Eurer Größe) belohnt werden.


    kwerfeldein – Fotografie Magazin

  • Surreal Subterranean Space: Hand-Carved Cave for Sale

    [ By Steph in Architecture & Houses & Residential. ]
    Hand Carved Caves for Sale 1

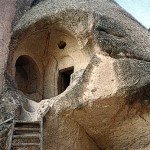
    If you’ve always dreamed about having your very own network of cathedral-like hand-carved caves (who hasn’t?) you’re in luck – such a dreamscape can be yours for less than the average cost of a single-family home in San Francisco. Artist Ra Paulette has spent the last 25 years carving a network of 14 caves beneath the desert of Northern New Mexico with little more than a pick axe and a wheelbarrow, and one of the most impressive of them is now on the market.
    Hand Carved Caves for Sale 2

    Hand Carved Caves for Sale 3

    Paulette’s endeavors were the subject of a documentary called Cave Digger, directed by Jeffery Karoff and shortlisted for an Academy Award nomination. The carvings have been called the Eighth Wonder of the World, each one incredibly detailed with shell-like relief sculptures. Paulette was commissioned to create the caves by private property owners near Taos. Unfortunately, creative differences between the sculptor and the patrons have prevented most of them from being entirely finished.

    Hand Carved Caves for Sale 4

    Hand Carved Caves for Sale 5

    Until now, Paulette’s work has gone largely unrecognized. But ‘Tree of Human Kindness,’ a whopping 208-acre cave, has been listed by Sante Fe Properties for $ 995,000, with subdivided lots available for just $ 49,000 each. Underground power and telephone is available at the lot line. The caves have previously been used for meditation and concerts.

    Share on Facebook


    [ By Steph in Architecture & Houses & Residential. ]

    [ WebUrbanist | Archives | Galleries | Privacy | TOS ]


    WebUrbanist

  • 2 December. 2013 – Antarctica 2013

    Kevin Raber, LuLa’s publisher returned just a week ago from a trip to Antarctica.  This was his 4th trip to the bottom of the planet.  Kevin shares his adventure in the form of a daily log as well as a collection of photos.  There are links in the article to a more extensive gallery of images as well as links to the 2015 LuLa Antarctica trip.  Antarctica is an amazing place and if you can be sure it is on your bucket list. In the meantime enjoy Kevin’s trip and images.  Read . . . Antarctica November 2013 


    The Luminous Landscape – What’s New

  • Tips for Photographing Star Trails

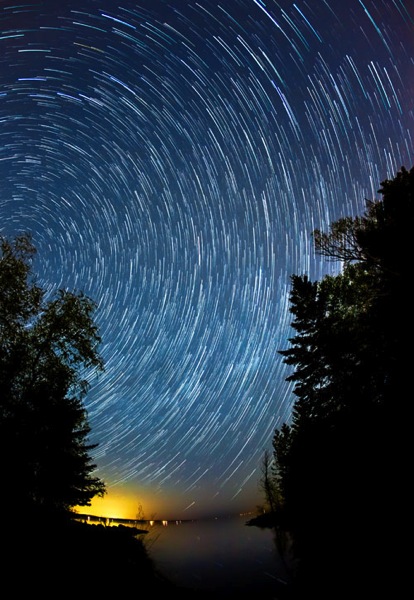
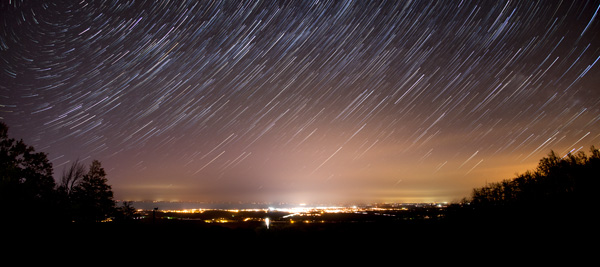
    Photography is a fantastic tool to explore the world around you, especially in ways normally invisible to our eyes. Landscapes at night often reveal untold treasures in the sky, and the stars can be made to swirl around like a dream. The process for photographing the movement of the stars isn’t nearly as difficult as it once was; star trails can be easily captured by any camera with a wired shutter release cable!

    Enjoy these tips for photographing star trails at night! 

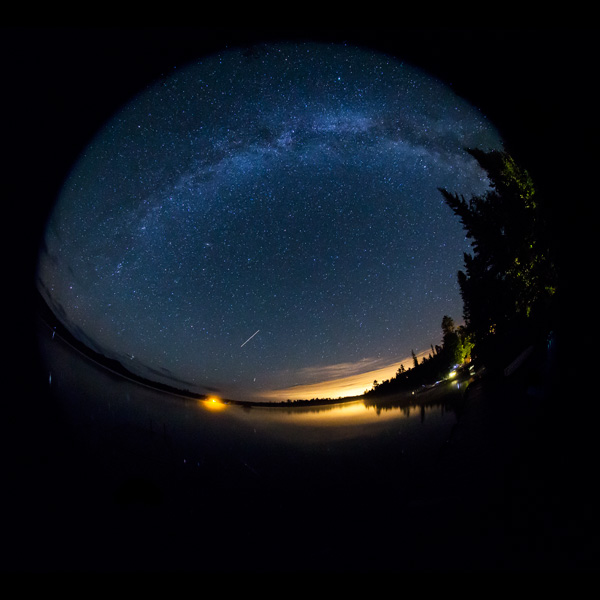
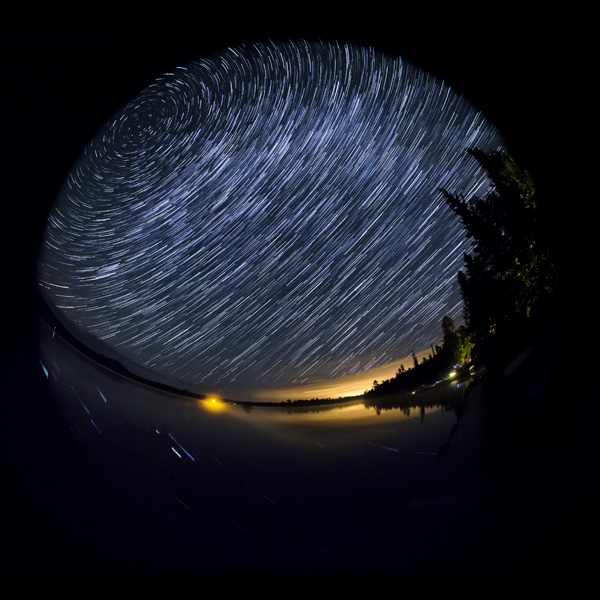
    Star trail open

    Composition comes first

    There are a few things to consider when making a star trail image; the first is composition. As with any good landscape photograph, you should be able to visually navigate through the image. A foreground element is very helpful, and having water in the scene is a bonus – the stars can reflect off the surface of the water. The image shouldn’t only be about the stars, but how they interact with the landscape.

    You should try to shoot with the widest lens you have. This offers more stars to fill the night sky, and also a greater potential to have the North Star somewhere in the frame. Most of my star trail images are photographed with a fisheye lens, because of the 180 degree field of view. The wider the field of view, the more star trails your image can contain.

    As the Earth spins around its axis, the North Star is the only star that doesn’t move (much). All of the other stars appear to spinning around this central location, which can add a visual anchor point in your composition. If you’re not familiar with the exact position of the North Star, simply set your camera to bulb mode and take an extra-long exposure in the neighbourhood of 4-5 minutes. This should give enough of a “spin” so the stars to help you pinpoint the center of the celestial circle.

    Camera settings

    The goal for your final image however, requires a different exposure. Start with the following, set on manual mode:

    • Shutter speed: 30 seconds
    • Aperture: F/3.5
    • ISO: 3200

    Take a test shot and see what you get. If the exposure is too bright, decrease the ISO or choose a smaller aperture (higher F-number). If the image is too dark, try increasing the ISO to compensate. Always leave the shutter speed at 30 seconds. When you get an exposure that looks good on the back of your camera, you’re set. Just make sure the camera is set to continuous shooting mode with long-exposure noise reduction turned OFF.

    Also be sure to set the camera or lens to manual focus. The focus can’t shift from one image to the next, so dial it in manually. I find that focusing on distant light sources using Live View allows for the best depth of field while still keeping the stars sharp. Foreground objects may appear blurry, so going the “extra mile” would be to focus on the foreground and focus-stack the landscape.

    With a wired remote shutter release, press and lock the shutter control. When one exposure ends, the next one will automatically begin. Let the camera continue this way for roughly an hour, and stop it whenever you’re ready to leave. If you left the camera for one hour, it should have recorded 120 separate 30-second exposures. These images can then be combined very easily in Photoshop.

    Forgot your remote shutter release, or haven’t purchased one yet? I’ve found myself ready to make a star trail image and digging around in my camera bag offered me no cable release – it was somewhere at home, far far away. In a rare moment of creativity, I grabbed some tape (always keep some Gaffer’s tape in your camera bag!) and a small pebble from the ground. Simply taping the pebble over the camera’s shutter button with enough force to fully depress the shutter, the camera happily clicked away until the tape was removed. The below image was created this this “rock and tape” trick.

    Rock tape trick

    Post-processing workflow

    Combining 120 images may seem like a daunting task, but the process is fairly straightforward – start by editing one image. In Adobe Lightroom, edit your image to your liking. Common adjustments would usually include shadows and whites, white balance, clarity, and noise reduction.

    Single frame

    Make this one frame as perfect as you can make it, and copy the development settings. Right-click on the image in Lightroom and choose “Settings > Copy Settings” and make sure all of the settings you’ve adjusted are selected.

    You’ll need to paste these settings across the entire range of images. To do this, select all of the images you want to use in the filmstrip, and right-click on any of the selected thumbnails in the filmstrip. Now, choose “Develop Settings > Paste Settings” and your adjustments will appear on all of your images.

    Alternate method to paste settings

    There are a few ways inside Lightroom to copy and paste develop settings. Another way, which is particularly helpful when sharing settings over many images, is to use the “sync” feature. To do a Sync make sure the image you’ve worked on it selected in the filmstrip and visible on screen. Do a “select all” by holding “command+a” on a Mac or control+a on PC. That will select all the images in the folder. Next click the “sync” button in the lower right of the develop side panel. Choose all the settings you adjusted (as above) and click “synchronize”.

    Putting them all together in Photoshop

    You now need to send all of the images over to Photoshop in a single layer. With all of the frames still selected, right-click on any image and choose “Edit In > Open as Layers in Photoshop” and wait. This will take some time as Photoshop loads each frame into the same workspace as layers.

    When all of the layers are finished loading, the next step is simple for users of Photoshop CS6 and beyond. Simply select all of the layers in the layers panel, and switch the blending mode from “normal” to “lighten”. Voila! The path of the stars through the sky will be revealed. This blending mode works by comparing pixels of all layers and displaying the brightest pixel. If the landscape remains static, there won’t be any change there, avoiding the additive effects of light pollution. The stars are moving, and as their position in the image changes the new location will contain brighter pixels.

    Stacked frames

    For users of Photoshop CS5 or previous, this can still be done but it will take some time. You cannot select multiple layers and change the blending mode on them all at once, it must be done one at a time.

    When you’re done, flatten the image and save it. Continue to edit as you see fit, but the star trail is complete!

    An alternative to Photoshop

    Another option if you do not use Lightroom or Photoshop is to use a free program call StarStaX. It’s easy to use, just drop your images in and it does all the magic for you, AND even fills in the tiny gaps between each of the exposures.

    Post originally from: Digital Photography Tips.

    Check out our more Photography Tips at Photography Tips for Beginners, Portrait Photography Tips and Wedding Photography Tips.

    Tips for Photographing Star Trails

    The post Tips for Photographing Star Trails by Don Komarechka appeared first on Digital Photography School.


    Digital Photography School