Month: December 2013

  • Top Choppers: 15 High-Flying Helicopter Designs & Drones

    [ By Steph in Technology & Vehicles & Mods. ]

    Helicopter Drone Designs Main

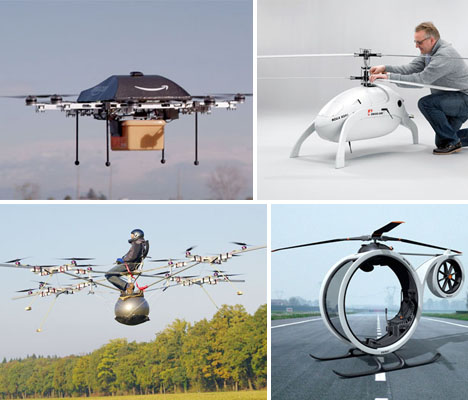
    Everybody’s buzzing about Amazon Prime Air, which will bring the products you order from the mega-retailer to your doorstep in just 30 minutes via helicopter drone. So how else is helicopter tech – both manned and unmanned – moving forward into the future? These 15 designs include pedal-powered flying machines, electric helicopters, self-assembling drones and the world’s most expensive helicopter at $ 21 million.

    Amazon’s Flying Robot Delivery Drones

    Helicopter Designs Amazon Prime Drone

    Amazon CEO Jeff Bezos revealed the possible delivery method of the future for its Prime consumers: helicopter drones, from the warehouse to your doorstep in 30 minutes. Showing off the prototype on 60 Minutes, Amazon announced that its Prime Air program is slated for rollout in 2015, pending FAA approval. So just a half hour after you hit the ‘buy’ button on a product page, the item you want is dropped off by a propeller-powered robot.

    eVolo 18-Rotor Electric Helicopter

    Helicopter Concepts eVolo Electric

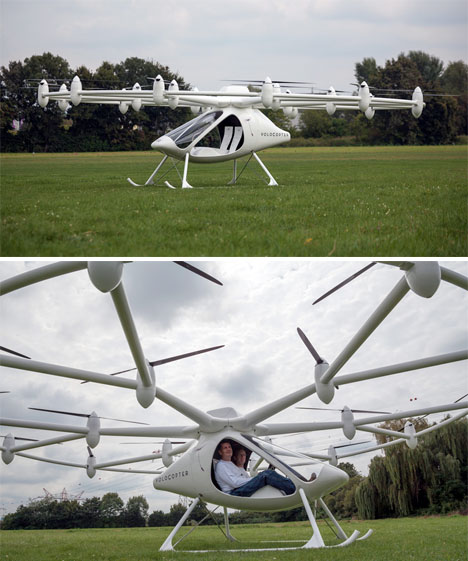
    An 18-rotor electric helicopter made its maiden flight in late November, reaching heights of nearly 22 meters (72 feet.) The eVolo VC200 is capable of carrying two passengers for distances of up to 100km and flight altitudes of up to 6500 feet. It can be disassembled, with all parts connected to an ‘intelligent mesh network’ so that if one or several components fail, the aircraft can still land safely. It’s the first electric helicopter to lift off successfully.

    eVolo Personal Helicopter

    Helicopters eVolo Personal

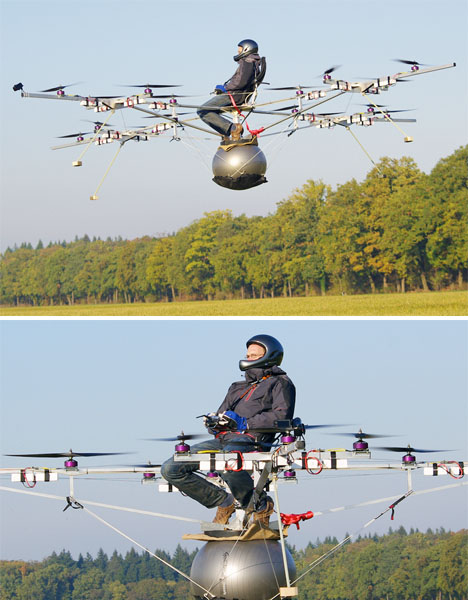
    Another eVolo design, the Personal Multicopter, can elevate a single passenger into the air with a joystick steering system and sixteen propellers. A team of German professionals completed the first prototype and test flight, and envision its use in the entertainment arena as well as for aerial photography, inspection and short-distance travel. A one-hour flight is estimated to cost just about 6 euro’s worth of electricity, and it can land safetly even if up to four of its motors fail.

    Hermes Luxury Helicopter

    Helicopters Hermes Luxury

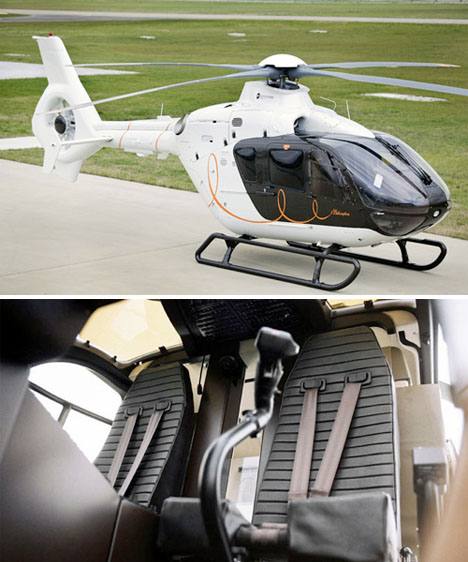
    Perhaps it shouldn’t be too surprising that fashion designers are getting in on the game of designing luxury helicopters, since people with tons of money are always eager for prestigious labels. French fashion company Hermes teamed up with Eurcopter to create L’helicopre par Hermes “for the discerning luxury traveler.” It features a spacious cabin for four, a minimalist color palette, Hermes signature upholstery and calf’s leather banquettes.

    Solar Copter

    Helicopters Solar Copter

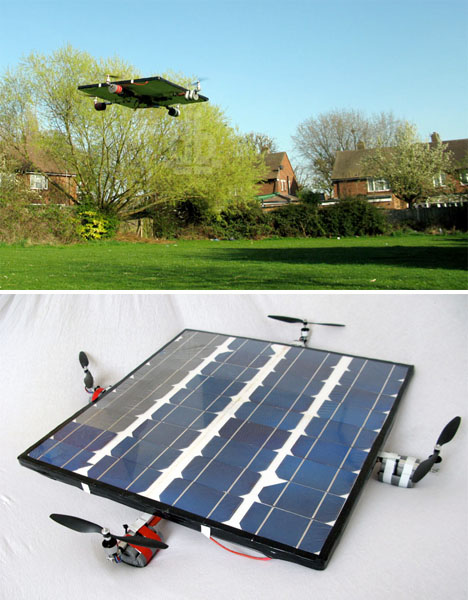
    The world’s first solar-powered helicopter isn’t going to lift much of anything up in the air – but it does work. It’s basically a remote-controlled solar panel liftable via four propellers. This project by masters students at Queen Mary University of London may be small, but it could become the basis for larger and more complex designs.

    Next Page – Click Below to Read More:
    Top Choppers 15 High Flying Helicopter Designs Drones

    Share on Facebook


    [ By Steph in Technology & Vehicles & Mods. ]

    [ WebUrbanist | Archives | Galleries | Privacy | TOS ]


    WebUrbanist

  • Using Sun Flares and Starbursts to Create Stunning Images

    This is a guest post by Katie McEnaney

    An Introduction to Sun Flares and Starbursts

    A sun flare or starburst is an incredibly cool photographic technique and one that is easy to achieve without any special post-processing or editing tricks. You will be amazed at the effects you can create by learning a few simple settings and knowing the proper situations for taking beautiful sun flare and starburst photographs.

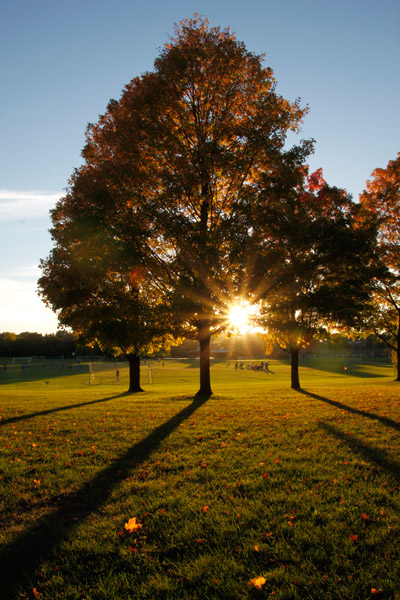
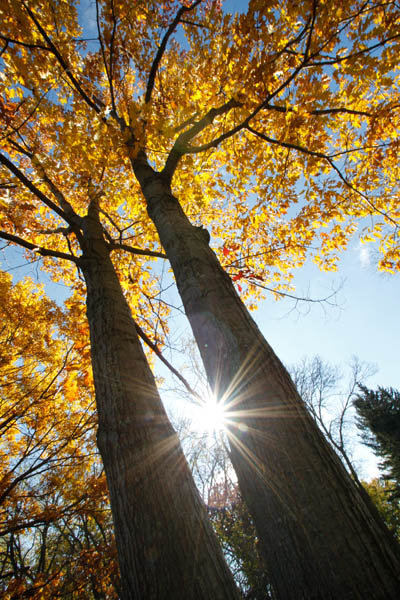
    McEnaney sunflare vertical tree

    How to Shoot Sun Flares and Starbursts

    It is possible to obtain sun flare and starburst images with a point and shoot camera, but for more reliable results, you will want to use a DSLR or interchangeable lens camera with adjustable aperture. A UV filter on your lens is suggested to protect your camera’s sensor, as you will be shooting directly into the sun when capturing sun flares. Stability is critical for capturing starbursts, so a sturdy tripod and remote shutter release are recommended.

    The technique for shooting successful sun flares and starbursts is to use a narrow aperture such as f/22 and a relatively wide focal length like 18 mm. With a narrow aperture, the blades inside your lens close down to create a very small opening for light to pass through. This narrow opening creates a slight diffraction or bending of the light, which causes a point source of light (described below) to become a starburst shape when it hits and is recorded by the camera’s sensor. Different lenses are built with different numbers of blades: the more blades, the greater the number of points on the flare or starburst. The wider the focal length also contributes to the size of the starburst shape, as a wider focal length can create a larger starburst.

    For settings, you want to start by shooting in Aperture priority (Av for Canon or A for Nikon) mode and setting your aperture to f/22. You also want to shoot at a fairly low ISO, around 100-200, to avoid the increased noise of higher ISO values. The camera will then choose the shutter speed. If the final image turns out too dark or too light, you can switch to shooting in Manual mode, dial in the same settings, and then slightly increase the shutter speed for a lighter picture or decrease the shutter speed for a darker picture.

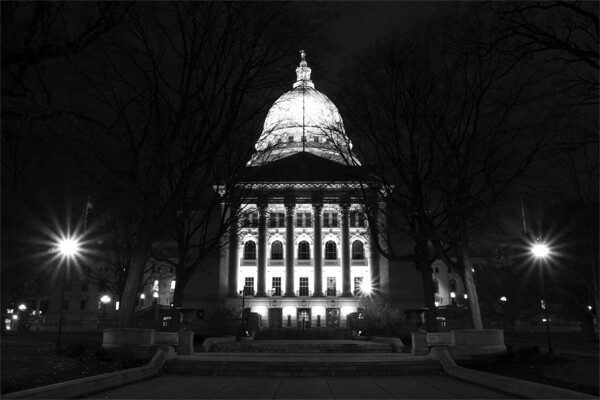
    McEnaney Capitol night starbursts

    In lower light situations, your shutter speed may become so slow that you need a tripod to ensure a steady shot. (The general rule of thumb is that you should be able to successfully hand-hold a shot at a shutter speed of 1 over the focal length of the lens. For example, you should be able to hand-hold a shot with an 18 mm lens at 1/18th of a second or faster or a 50 mm lens at 1/50th of a second or faster.) If you are photographing starbursts after dark, then your shutter speeds will generally be slow enough to require a tripod or other stable surface. The alternative option would be to start increasing your ISO, which will also increase the noise in the final image.

    Along with the tripod, a remote shutter release (corded or wireless) is helpful to avoid shaking the camera when pressing the shutter button. If you do not have a remote, you can set the 2-second or 10-second timer on your camera instead. A remote shutter release also allows you to use the Bulb setting on your camera to get shutter speeds longer than 30 seconds.

    Timing and Strategies for Sun Flares and Starbursts

    Sunbursts and starbursts are created from small point sources of light, rather than larger dispersed or diffused light sources. A point source is one where light is emanating from a singular location: a bulb in a street lamp, a car headlight, a direct flashlight, even strings of holiday lights. A dispersed light source is one where light is emanating from a broader location: a frosted light bulb, an overhead florescent light panel, or the tubes of a neon sign. A diffused light source is one where the location of the light is very spread out or difficult to detect: the sun in an overcast sky, large studio lights with diffusers or softboxes, or light bounced off a large surface or reflector.

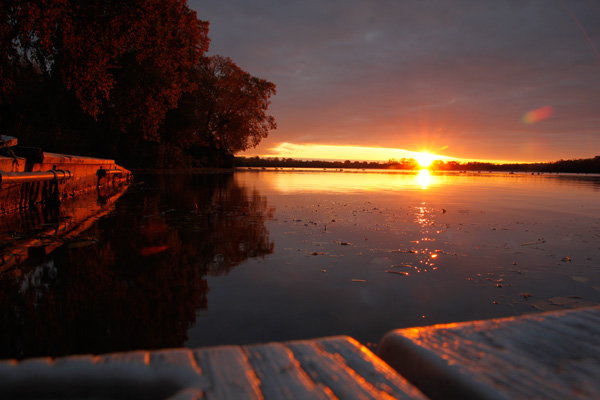
    McEnaney sunrise sunflare

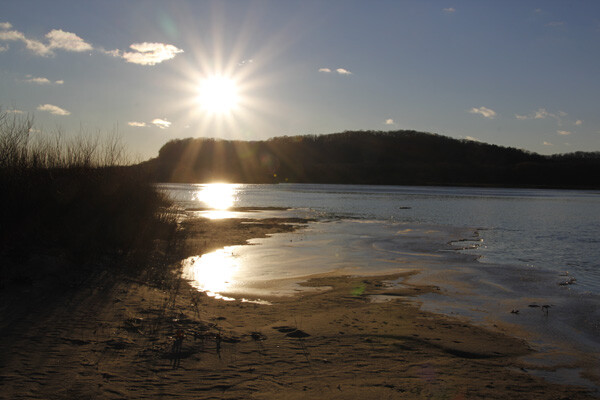
    The sun is not generally a point source of light, as it is often too bright and overwhelming to create a sun flare. So, the best time to capture sun flares is when the sun is low in the sky, either in the early morning or late afternoon. The winter season is ideal for sun flares, as the sun is lower in the sky for longer periods of the day.

    sun flare and starburst photo

    Once you have the right time of day, the second step for creating a sun flare is to position the sun in your composition so that it is partially obscured behind another object, such as a tree or the edge of a building. Even at low angles, the sun can still be so bright that it will overwhelm your scene and create large bright patches rather than a starburst shape. Partially obscuring the sun also serves to amplify the effect of the narrow aperture. Position the camera so that the sun is directly behind the object and determine your final composition. Then, move the camera slightly until the sun is just beginning to peak out from behind the object and take the picture.

    McEnaney sunflare two trees

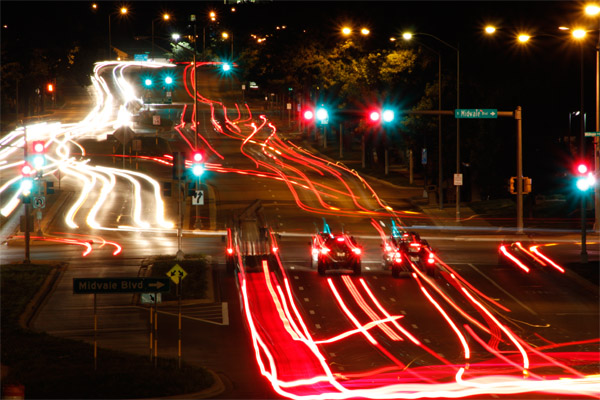
    To create starbursts at night, you need to find suitable point sources of light. Street lamps and strings of lights work well. Because these sources are not as overpowering as the sun, you do not need to partially obscure them. This gives you a wider range of compositional choices. You can also combine multiple point sources of light to create an entire collection of starbursts in a single image. Moving lights will be rendered as blurs or light trails, while stationary lights will become starbursts.

    McEnaney traffic trails

    Composing with Sun Flares and Starbursts

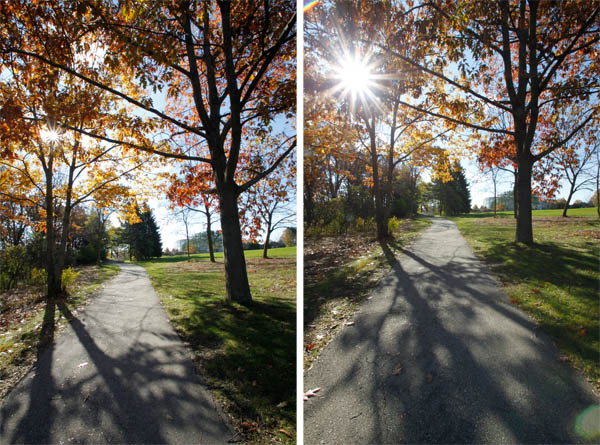
    Be willing to be patient and experiment with your compositions and angles for sun flares. Slight differences in the angle of the sun and the amount of sunlight streaming in can make a big difference in your final image. The two images below were taken of the same tree, two minutes apart. The only compositional difference was backing up several feet for the second image, so that the sun was only barely obscured by leaves rather than partially blocked by the trunk.

    McEnaney sunflare compare

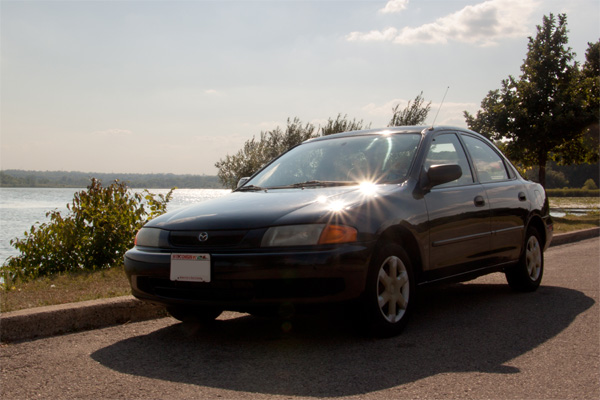
    Once you have mastered the single flare, you can step up the challenge and capture multiple sun flares in a single image. An easy way to do this is to use reflected light. Light reflecting off several points or different surfaces can create multiple individual point sources. Look for situations where sunlight is bouncing off water, vehicles, or other reflective surfaces. In this goodbye photograph of my old car, the multiple flares were created by the sunlight bouncing off the dents and divots of the hail damage on the hood (bonnet) of the car.

    McEnaney car sunflares

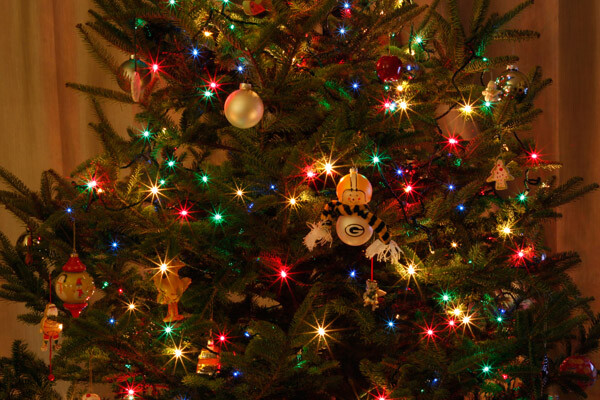
    Starbursts are a great effect to use with holiday lights. Each individual light is a point source and can be rendered as its own starburst. The starburst look adds an extra sparkle to your holiday images, but you can use strings of white or colored lights to add starbursts to any kind of subject you choose.

    McEnaney holiday starbursts

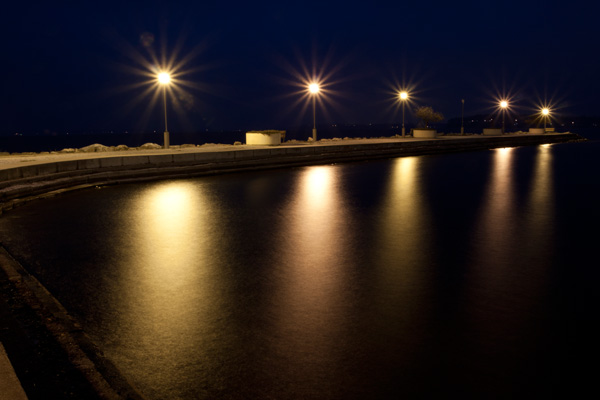
    For cityscape starbursts, seek out locations with congregations of street lights or other point sources of light. The blue hour (the approximate hour before sunrise or after sunset) is an ideal time to photograph lights outside, as the deep blue colors in the sky set off the scene. Your camera will record these blue colors for a short time even after they are no longer visible to your eyes.

    McEnaney starbursts water

    Now that you know the basic idea behind sun flares and starbursts, you will start seeing opportunities everywhere. Get your f/22 aperture ready, and get out there!


    Katie McEnaney is an educator and photographer from Madison, Wisconsin. Read more tips on her blog, Boost Your Photography, and connect with her on Google+, Twitter @archaeofrog, and Flickr. Her first eBook, Boost Your Photography: Learn Your DSLR, will be available soon on Amazon.

    Post originally from: Digital Photography Tips.

    Check out our more Photography Tips at Photography Tips for Beginners, Portrait Photography Tips and Wedding Photography Tips.

    Using Sun Flares and Starbursts to Create Stunning Images

    The post Using Sun Flares and Starbursts to Create Stunning Images by Guest Contributor appeared first on Digital Photography School.


    Digital Photography School

  • Stop Calling Yourself a Real Photographer if You Suck

    It has been about five years since I left my office job to make photos on a full-time basis. Still, I feel quite uncomfortable calling myself a photographer. Yes, my photos occasionally appear on glossy magazines covers; sometimes I see my photos on billboards in the center of the city, but still, am I a real photographer? While this may Continue Reading

    The post Stop Calling Yourself a Real Photographer if You Suck appeared first on Photodoto.


    Photodoto

  • Roger Cicala reveals winners of First Annual Photogeek contest

    retina-crop2.jpg

    Roger Cicala of LensRentals has revealed the winners of his ‘First Annual Photogeek Geek Photo Contest’. What was originally intended as a light-hearted joke ended up receiving over 400 entries from at least 20 countries, and the impressive quality of the entries caused a real headache for the judges. After a lot of deliberation, Rishi Sanyal won ‘Best in Show’ for his remarkable ‘MacroSetUp’ series. Click through to see the extraordinarily geeky winning images, and a link to the full contest gallery.

    News: Digital Photography Review (dpreview.com)

  • Cyber Monday All Day Flash Sales

    We’re putting a new goodie on mega sale every hour.

    … but *you* set the sale price. Follow us on Facebook and share our Cyber Monday posts. Every share drives down the cost of the item we’ve posted by $ 0.01!

    You have one hour to share, one hour to buy.

    Sharing starts at:
    9AM PST – Super Fisheye Lens
    10AM PST – Pocket Spotlight
    11AM PST – iPhone Shutter Remote
    12PM PST – Sony QX Lens
    1PM PST – Lomo Smartphone Scanner
    2PM PST – Instax 90

    Head on over to the Shop to snap up a deal!


    © laurel for Photojojo, 2013. |
    Permalink |
    No comment |
    Add to
    del.icio.us

    Post tags:


    Photojojo

  • 2. Türchen: Photonews

    2. Türchen

    1989 kam die erste Ausgabe der Photonews – Zeitung für Fotografie auf den Markt. Bereits damals mit ihrem bestechend zeitlosen Design und ungewöhnlich großem Format, das sich bis heute kaum verändert hat.

    Ein Grund, warum sich die Zeitung trotz großer Konkurrenz im Printbereich gehalten hat, ist die Leidenschaft der Herausgeber, die man lesen kann und dass sie sich nie den technik- und werbelastigen Magazinen angepasst hat.

    Sie zeigt Portfolios, Interviews, Buchrezensionen, Ausstellungsbesprechungen, Essays und vieles mehr. Auf den letzten Seiten finden sich auch ein schwarzes Brett sowie ein Ausstellungskalender und Hinweise zu aktuellen Stipendien und Wettbewerben.

    Photonews

    Auch immer einen Blick wert ist das Photonews Blogbuch, auf dem vorrangig Fotobücher rezensiert werden.

    Erhältlich ist die Zeitung in Fach- und Bahnhofsbuchhandlungen, in Museen und Galerien und in ausgewählten Kiosken für nur 3 € sowie direkt im Jahres-Abonnement, von denen wir heute zwei verlosen dürfen. Die Abos von Photonews enden nach einem Jahr natürlich automatisch und ihr geratet in keine Abofalle.

    Wer kein Glück bei unserem Gewinnspiel hat, kann sich das Abo, das 10 Ausgaben im Jahr umfasst, für 30 € bestellen.

    Um eines der beiden Jahres-Abos zu gewinnen, schreibe einen Kommentar unter bürgerlichem Namen und gültiger E-Mail-Adresse bis heute um 24 Uhr. Danach verlosen wir sie per Zufallsgenerator unter allen Kommentatoren. Die genauen Gewinnspielregeln findest Du hier. Viel Glück!


    kwerfeldein – Fotografie Magazin

  • Was für mich wichtig ist

    Ein Beitrag von: Mike Peters

    Die Fotografie hat mein Leben gerettet, als ich noch ein Teenager war. Sie gab mir etwas, in das ich eintauchen konnte und eine Rechtfertigung dafür, draußen in der Welt zu sein. Herumzugucken, zu glotzen und schließlich Menschen zu treffen. Über mich selbst etwas zu lernen.

    Die Fotografie gab mir außerdem eine Stimme in einer Zeit, in der ich keine Stimme hatte. Sie war ein Mittel, um zu zeigen, wie ich die Welt sah. Und mit meinen Gefühlen verbunden zu sein, die ich dann in den Aufnahmen ausdrückte.

    Ich fühlte mich allein, einsam und hatte kein Selbstvertrauen. Das Fotografieren war für mich dann sowohl Flucht als auch Rettung.
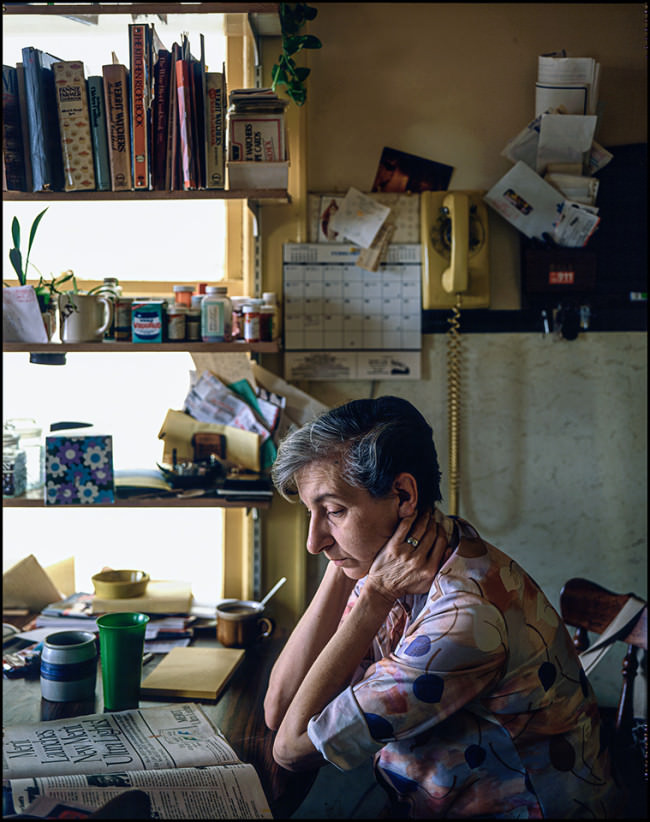
    woman reading 1978 © Mike Peters

    In der Hochschul-Bibliothek brütete ich über Fotomagazinen und las alles Mögliche von Kameras, über Objektive bis hin zu allen möglichen Techniken. Über die Fotografien selbst wurde nur wenig geschrieben und über die Beweggründe der Fotografen auch nicht. Es ging nur um Grundlagen und Kleinkram.

    Dann fand ich die Arbeiten von Robert Frank, W. Eugene Smit, Henri Cartier-Bresson, Walker Evans, Robert Cape, Brassaï, McCullin, Andre Kertesz, Diane Arbus, Richard Avedon, Dorothea Lange und vielen anderen, die zu meiner Inspiration wurden.

    Ich wusste nicht, was ihre Arbeit so gut machte, aber ich wusste, dass das, was ich beim Anblick der Bilder fühlte, mehr war als nur visuelle Freude. Es war tiefer und komplexer.

    Wenn ich daran zurückdenke, waren alle Bilder, die für mich in den frühen Jahren wichtig waren, schwarzweiß. Jahrelang habe ich persönliche Projekte mit 35mm-Schwarzweißfilm durchgeführt, aber wenn ich mir diese nun ansehe, fühlen sich die meisten trivial an. Denn alle meine Arbeiten, die ernstzunehmen sind, sind in Farbe entstanden.
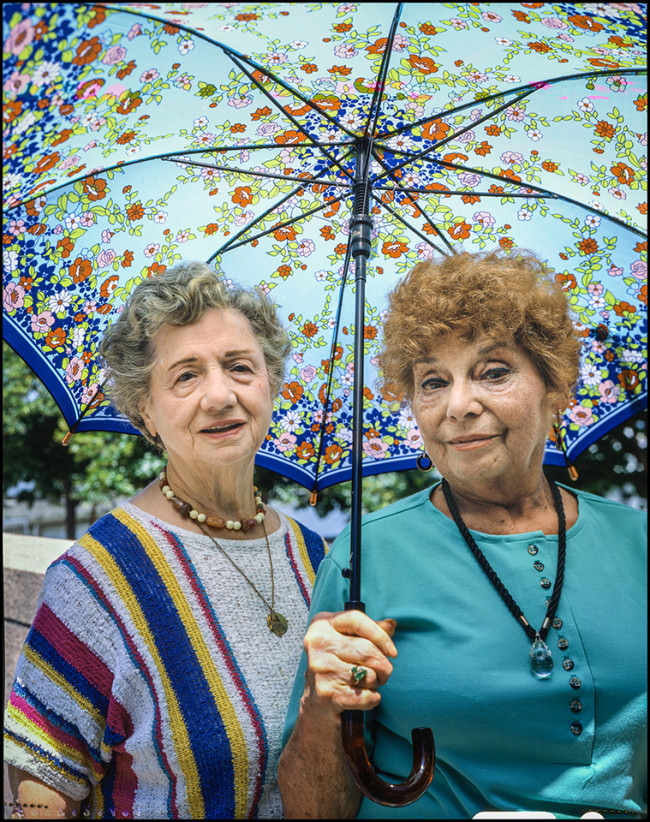
    2 women NYC 1988 © Mike Peters

    Ich bin mir nicht wirklich sicher, was ich daraus schließen soll, aber mir ist klar, dass ich vielleicht zu verkrampft versuchte, „wichtige“ Fotos zu machen, anstatt mehr Zeit in meine eigenen Interessen zu investieren und meinem Herz zu folgen.

    Was ich damals noch nicht wusste: Ich musste mehr erleben, um zu herauszufinden, was für mich wichtig ist. Um eine eigene Meinung über die Welt zu haben und eine große Leidenschaft zu spüren, bevor ich jemals ein Foto mit Inhalt machen könnte.

    Ich war zu sehr in die Fotografie verliebt, um ein guter Fotograf zu sein. Ich musste lernen, das Leben selbst mehr zu lieben.

    Im College hatte ich gelernt, wie man eine 4×5-Großformatkamera benutzt. Mir gefiel die Schlichtheit des Prozesses und der schöne Anblick des Einstellbildes. Zusätzlich wurde mir klar, dass es eine besondere Herausforderung war, Menschen damit zu fotografieren. Denn ich war gezwungen, sehr genau zu planen, wen und was ich im Bild haben wollte.
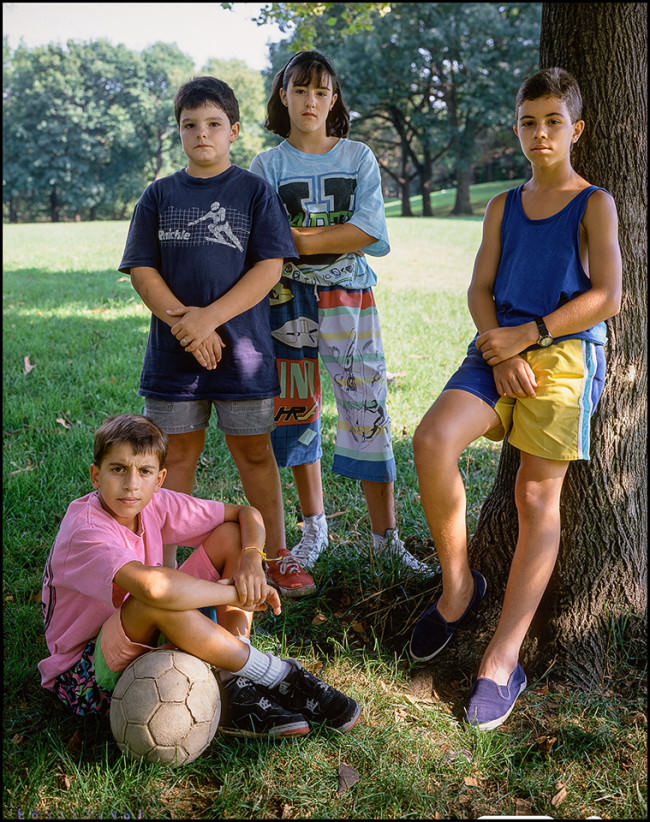
    4 kids Kearny 1984 © Mike Peters

    Zuerst musste ich meine Furcht überwinden, Menschen zu fragen, ob ich ein Bild von ihnen machen dürfe. Weil es eine zeitlang dauerte, bis ich soweit war, konnten die Leute sich entspannen (ich auch) und schließlich setzten sie sich der Kamera aus.

    Ich habe viele Jahre damit verbracht, die Straßen meiner Heimatstadt mit der Großformatkamera auf der Schulter abzulaufen. Ich traf Leute und fragte sie, ob ich sie fotografieren dürfe. Jedes mal war es fürchterlich für mich, Leute so anzusprechen, obwohl die Kamera selbst genügend Anlass zum Gespräch gab.

    Die Signifikanz dieser frühen Aufnahmen ragt weit in mein Leben hinein und dennoch brauchte ich viele Jahre, um die Lehren zu verstehen, die sie mir vermitteln sollten.

    Bis 2001 machte ich Portraits von Menschen mit der Großformatkamera. Doch dann interessierte ich mich mehr für eine spontanere Art und Weise, zu fotografieren. Außerdem fand ich die überzeugende Einfachheit des quadratischen Formates zunehmend spannend.
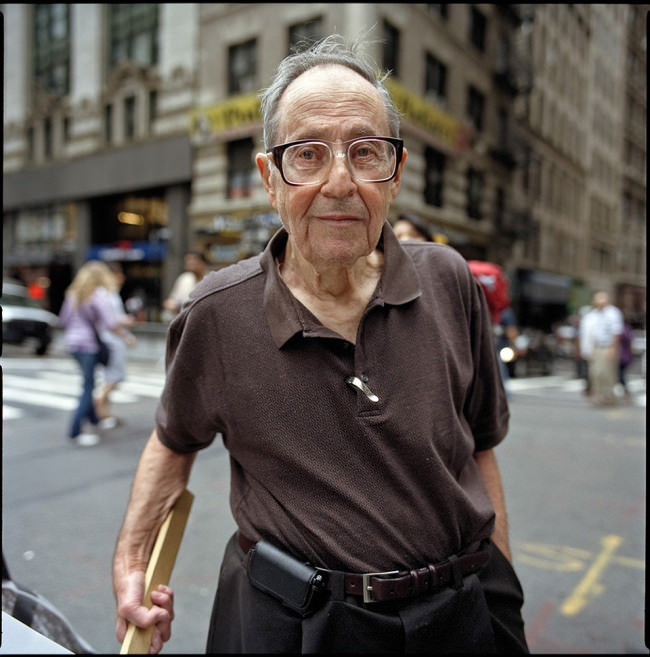
    September 11, 2011, NYC © Mike Peters

    2002 wechselte ich dann zu 6×6-Filmkameras und begann, ungestellte Bilder von Menschen auf der Straße zu machen.

    Das Quadrat hat mich kompositorisch befreit. Ich bin sehr vertraut mit seinen Begrenzungen und mag die Herausforderung, das Bild passend zu komponieren. Weil ich mich nicht mehr entscheiden muss, ob ich quer- oder hochformatig fotografiere, kann ich mich einfach auf das konzentrieren, was vor mir ist und wohin ich mich stellen muss.

    So zu fotografieren ist für mich sehr intuitiv und das Quadrat sehr bequem. Es unterscheidet auch meine persönliche Arbeit von der, die ich für Kunden mache: Die ist stets rechteckig. Wenn ich heute das Quadrat sehe, muss beim Fotografieren das Bild nur mir gefallen.

    Durch diesen Übergang von 4×5 zum Quadrat begann ich, meine frühen Fotografien neu zu studieren. Bald konnte ich verstehen, warum und was diese Aufnahmen in mir zum Schwingen brachten.
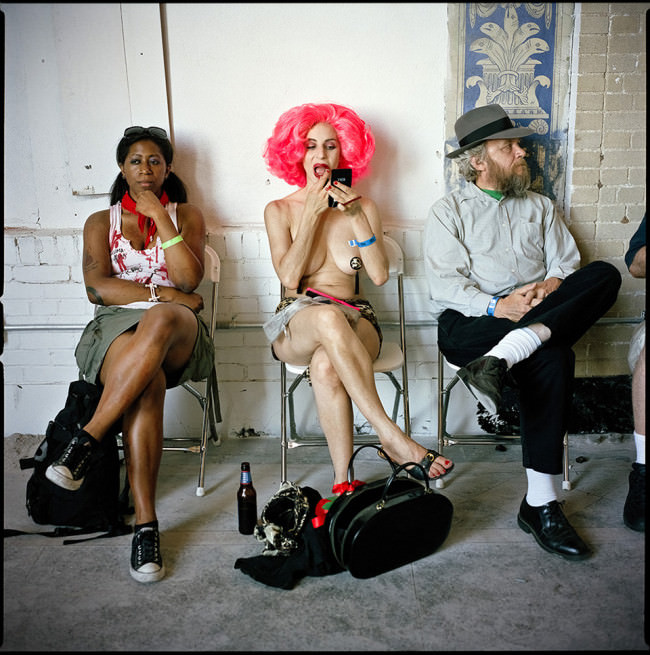
    Pursuit of Happiness Coney Island NYC © Mike Peters

    Ich machte ganz bewusste Entscheidungen betreffend der Menschen, die ich fotografierte und begann, zu sehen, dass jede Person etwas ganz Besonderes hatte, das mich ansprach. Sei dies ein Gesichtsausdruck oder ihre Körpersprache.

    Von da an konnte ich meine Bilder weiter studieren und dieselben Verbindungen herstellen. Endlich hatte ich meine Stimme gefunden!
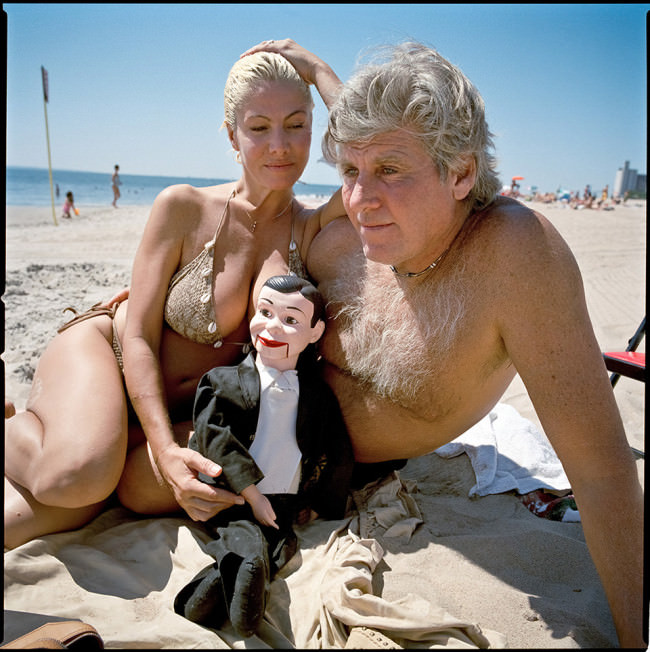
    Pursuit of Happiness Coney Island NYC © Mike Peters

    In diesem Jahr, 2013, habe ich damit angefangen, digital im Quadrat zu fotografieren, um meine Zeit produktiver zu nutzen. Ich bin mittlerweile soweit, dass das Equipment, das ich benutze viel unwichtiger ist als das Bild selbst. Technik und Gadgets sind nur insofern wichtig, als dass sie das Bild liefern, ansonsten sind sie nebensächlich.

    Wenn ich mich jetzt in der Welt bewege, kann ich mich selbst in den Gesichtern der anderen erkennen, sie von der Masse unterscheiden und schnell einen Kontakt herstellen. Wenn auch nur für den Bruchteil einer Sekunde.

    Meine Bilder repräsentieren meine Suche nach universellen Wahrheiten des Lebens – im Gesicht der anderen. Meine Fotografien sind der Versuch, zu zeigen, dass ich hier war und sie bestätigen, dass die Fotografierten auch da waren. Alles, was ich anbieten kann, ist meine Perspektive.

    Ich möchte einen Beweis hinterlassen, dass wir existiert haben. An diesem Ort, zu dieser Zeit. Meine einzige Hoffnung ist, dass meine Aufnahmen in den Herzen und Gedanken anderer etwas bewegen.
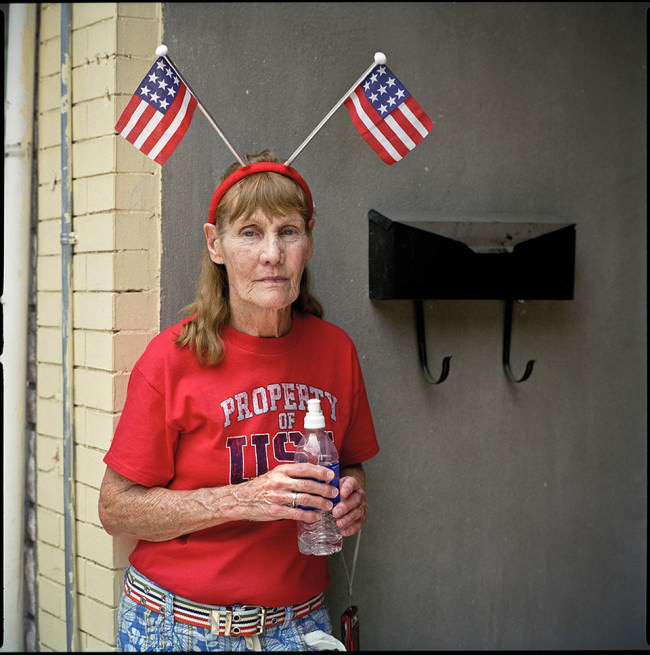
    July 4th Parade, Ridgefilend Park, NJ © Mike Peters

    Im Jahrzehnt nach den Anschlägen in New York City am 11. September 2001, die ich von ein paar Meilen entfernt sah, versuchte ich, meine Gefühle über das, was ich gesehen hatte, zu sortieren. Ich schaute in die Gesichter der Menschen um mich herum und fotografierte, was ich in dieser Zeit des Übergangs und Aufruhrs sah und fühlte. Diese Arbeit trägt den Namen „The Dream“.

    Ich habe mich immer gefragt, was aus dem amerikanischen Traum geworden ist – dass man mit harter Arbeit alles erreichen kann. Ist das überhaupt realistisch und verfolgenswert? Ist der amerikanische Traum heute immer noch stimmig oder müssen wir unsere Erwartungen ändern?

    Was ich weiß, ist, dass das Leben für viele Menschen, die ich täglich treffe sehr viel härter geworden ist. Und dennoch ist da die Hoffnung, dass die Dinge sich ändern werden. Auch ein Verständnis dafür, dass egal, wie hart es wird, wir uns glücklich schätzen dürfen, hier zu leben.

    Seit 2011 arbeite ich an einem weiteren Projekt über eine Gegend in Manhattan, die der „Meatpacking District“ genannt wird. Früher was es dort dreckig, es stank und sah nachts und an Wochenenden total desolat aus. Der optimale Ort für eine wachsende Straßenprostitution und Bars zum Abstürzen.
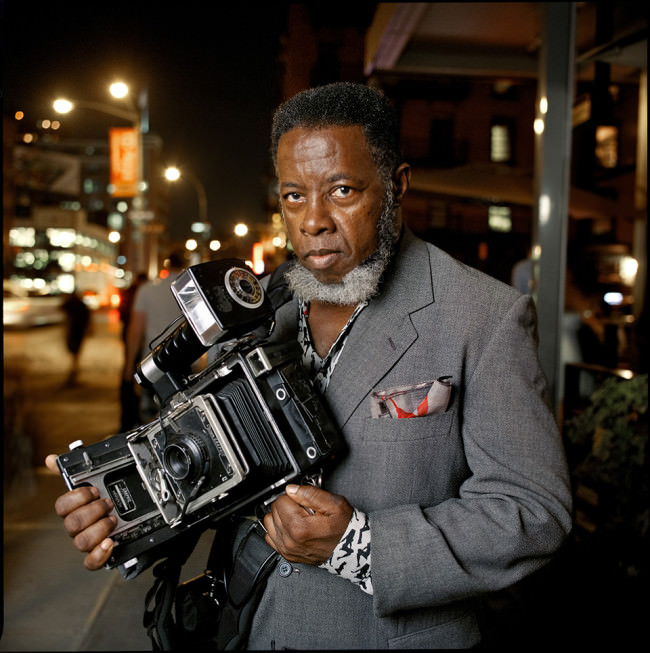
    Meatpacking District, NYC © Mike Peters

    Heute ist der Ort viel moderner geworden. High-End-Geschäfte, Restaurants und Clubs haben Schotter und Ruß durch Glanz und Glitzer ersetzt. Menschen aus aller Welt strömen in die Gegend, um eine gute Zeit zu haben.

    Für dieses Projekt fotografiere ich nachts mit einem Blitz. Ich halte Menschen an, die ich interessant finde und frage, ob ich ein Bild machen darf. Ich ihren Gesichtern erkenne ich denselben verzweifelten Drang, Spaß zu haben, wie ich ihn als junger Mann hatte.
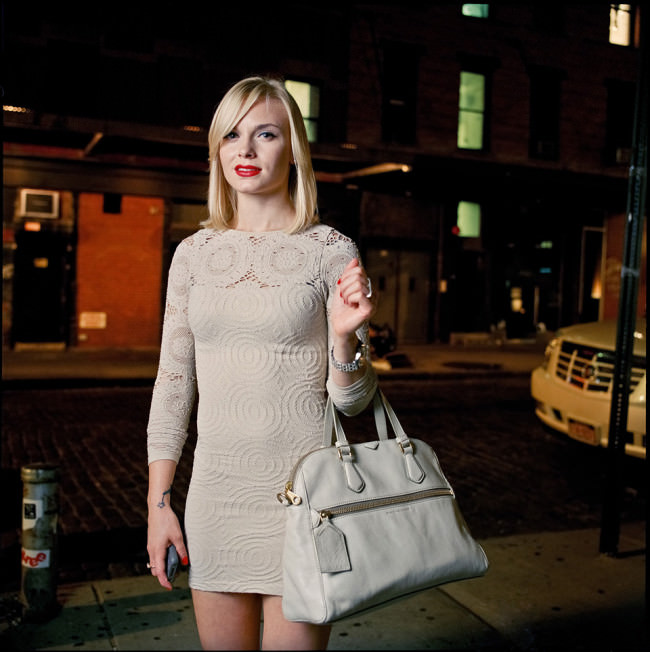
    Meatpacking District, NYC © Mike Peters

    In den (geplanten) Unterhaltungen kann ich meistens Momente der Spontanität und Individualität entdecken. In diesen Sekunden, in denen ich wieder in Kontakt mit meinem Subjekt bin, wenn ich den Menschen meine Aufmerksamkeit für ihr Dasein gebe, teilen sie ihre kostbare Zeit mit mir und öffnen sich für den Prozess, von mir und Euch, den Betrachtern, gesehen zu werden.

    Wie immer bin ich dankbar für die Menschen, die ich fotografiere, denn sie sind es, die mir eine Art Bestimmung geben, wenn ich einen kleinen Teil ihrer Geschichte erzähle. Und langsam aber sicher meine eigene herausfinde.
    Meatpacking District, NYC © Mike Peters

    Die Fotografie hört nicht auf, mein Leben zu retten, hält mich jeden Tag in Kontakt mit Menschen, draußen in der Welt und ernährt mich. Ich bin dankbar für all die Gaben, die die Fotografie mir und meiner Familie gebracht hat. Ich bin in der Tat ein glücklicher Mensch.

    Dieser Artikel wurde von Martin Gommel aus dem Englischen ins Deutsche übersetzt.


    kwerfeldein – Fotografie Magazin
  • Homemade rig captures extreme macro shots of snowflakes

    6895872661_4fc4ac0c28_z.jpg

    Moscow-based photographer Alexey Kljatov is a keen macro photographer, and for the past couple of years he’s been producing closeup shots of snowflakes. His inexpensive homemade rig delivers extraordinary magnification, revealing an incredible amount of detail in the intricate crystals of ice. See his setup and gallery of snowflakes

    News: Digital Photography Review (dpreview.com)

  • Coming soon, DPReview LIVE!

    shared:DPRlogo.png

    We’re very excited to announce a day of live video coverage on Monday December 2nd in partnership with CreativeLIVE. The live stream, which will be broadcast on our homepage will cover product highlights from the past year, as well as live shooting demonstrations and panels discussing the current state of the photography market, and predictions for the future. Click through for more details.

    News: Digital Photography Review (dpreview.com)