Month: October 2013

  • Sony Xperia Z1 impresses in DxOMark Mobile Report

    TS520x0~cms_posts-8667499256-title.png

    The Sony Xperia Z1 is Sony’s top-of-the-line smartphone, and for photographers, the really big news is the Z1’s camera. At 1/2.3-inch the sensor in the Sony’s camera module is larger than the 1/3-inch sensors that are common in the current crop of smartphones. Our partners at DxOMark have put the Sony Xperia Z1 through their comprehensive image quality testing regime. Click through to find out if the Z1’s impressive specs translate into great image quality.

    News: Digital Photography Review (dpreview.com)

  • Canon announces Japan-only special-edition PowerShot S120 and G16

    s120-premium.png

    Canon has announced special edition versions of its PowerShot G16 and S120 digital compact cameras. The ‘premium’ versions appear to be intended for the Japanese domestic market, and will be available in different color finishes, with a custom engraving option. Color customization appears to comprise the option of red, gold, silver and black finished on select components and both cameras are supplied with unique accessories – a cowhide leather pouch for the S120 and a leather hard case for the G16. Click through for pictures.

    News: Digital Photography Review (dpreview.com)

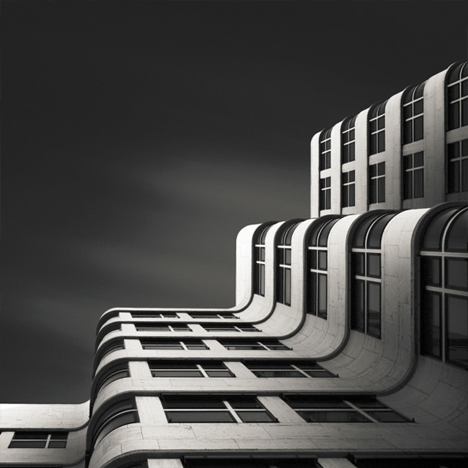
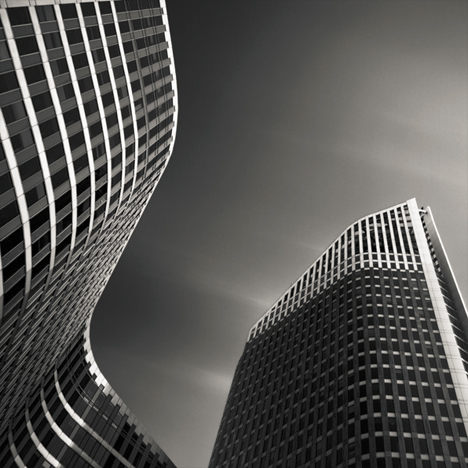
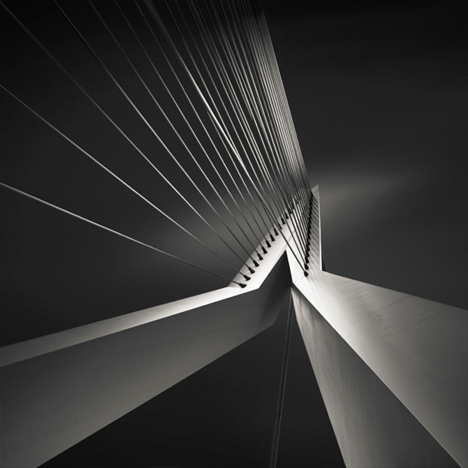
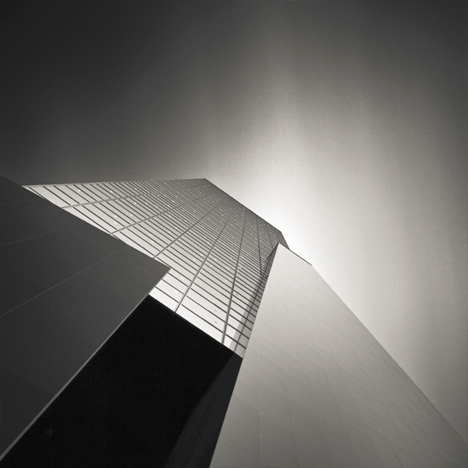
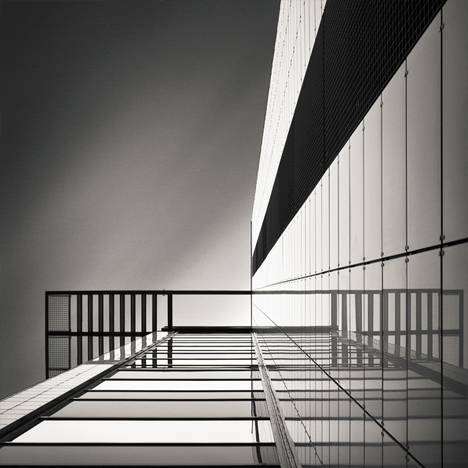
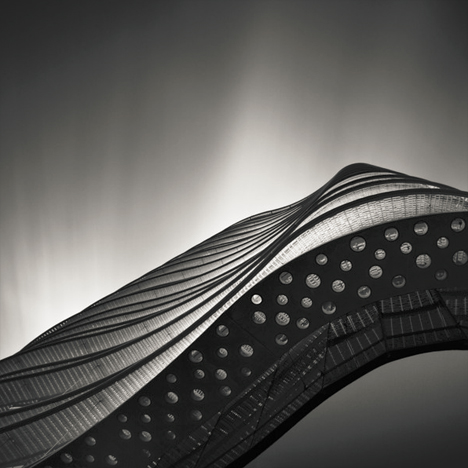
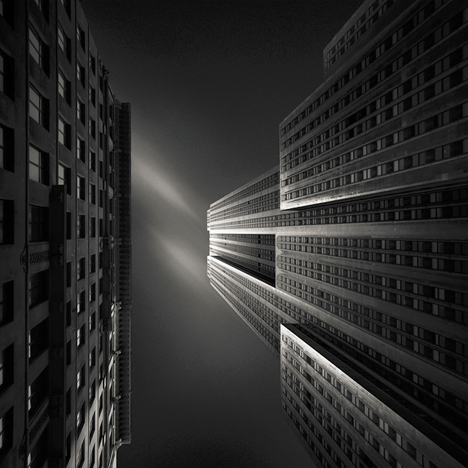
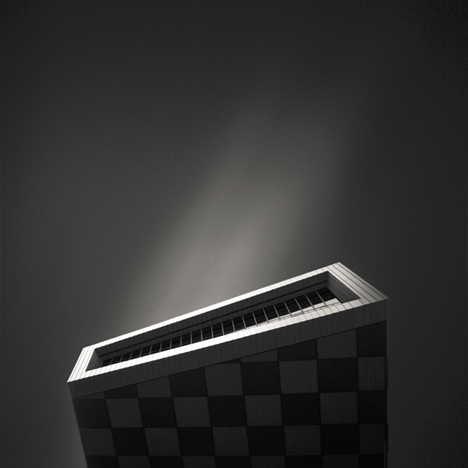
  • Fine Art of Architecture: B&W Photography by Joel Tjintjelaar

    [ By WebUrbanist in Art & Photography & Video. ]

    black white curved facade

    Highly refined yet ever-evolving, the work of this photographer started with portraiture, moved through landscapes and seascapes, and has for a time now focused on architecture, capturing even conventional structures in amazing ways.

    black white curved buildings

    black white tension bridge

    WebUrbanist recently asked Joel Tjintjelaar of BWVision more about his history, process and transition from taking photographs to also teaching photography and post-processing techniques. The resulting interview follows below.

    black white up angle

    black white abstract view

    While the results of his recent work may look like a fine stylistic stopping point to some, Joel states: “My workflow has changed gradually over time and will continue to change. It will never stop changing and it should never stop changing. The day I stop evolving is the day I should quit creating images.”

    black white vertical

    black white historic skyscraper

    black white ledge

    In part, the evolution of that work is tied to the teaching he does in at workshops in real life and also online via master classes and videos like this one on long exposure workflow.  Teaching, he notes, “forces me to be critical at my own work as well and to try to understand my own photography better, and more importantly: what drives me to create the pictures I [take] …. I teach them that fine art photography is not so much about technical qualities and skills but more about being able to express who you really are in a way that offers a completely new point of view for the viewer and leaves him changed.”

    Next Page:
    Fine Art Of Architecture Bw Photography By Joel Tjintjelaar

    Share on Facebook


    [ By WebUrbanist in Art & Photography & Video. ]

    [ WebUrbanist | Archives | Galleries | Privacy | TOS ]


    WebUrbanist

  • Photographer creates ‘virtual panoramic tour’ of North Korea

    Screen_Shot_2013-10-14_at_6.02.12_PM.png

    What’s it like to visit one of the world’s most secretive countries? Singapore-based photographer Aram Pan wanted to find out for himself. North Korea is notorious for stage-managed and highly restricted access for foreigners, but Pan decided to have a go at simply asking North Korean authorities whether he could enter the country and document what he saw. Click through for extracts from his story, and some of his stunning images.

    News: Digital Photography Review (dpreview.com)

  • A Guide to Birth Photography

    This Guide to Birth Photography was written by Lori Peterson

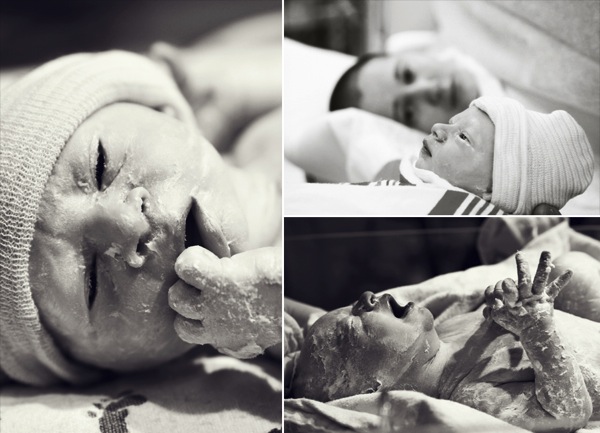
    Few things in this world are as joyous as welcoming a new baby. Seeing such a tiny and perfect little human being stirs emotions in everyone. It’s no wonder that there has been a significant rise in the number of photographers offering their services not only for pregnancy and newborn images, but for photographing the birth itself as a way to complete the story of that particular moment in time.

    Birth Photography

    A Guide to Birth Photography

    1. You are on Call

    If you are interested in birth photography you will want to make sure that you have the time to set aside for it. Births can be short or they can be very long. There is no set time for them (not even with a cesarean because a doctor’s schedule can change if there is an emergency!). Make sure you have arranged for child care for your own children and that you can clear anything off your schedule if the need arises.

    2. You Cannot Set the Scene

    Nurses, doctors, techs, interns are all walking in and out of the room. You cannot ask them to stay out so you can set up the perfect shot. You have to just go with it and work within the space you have and around the people in the room.

    3. No Flash Photography

    Mom-to-be is working hard. Flash is a distraction. Enough said.

    4. It’s not the time to Learn about Medicine or ask a lot of Questions

    Asking questions about procedures, medications, or input of your opinions on childbirth or what they are doing is not necessary or needed. You are there to document, not to quiz medical professionals.

    5. If at all possible, arrange to meet the Doctor before the actual Birth

    Meeting the doctor ahead of time can give you an opportunity to talk to them and find out if they have any particular rules for photographing or recording labor and birth.

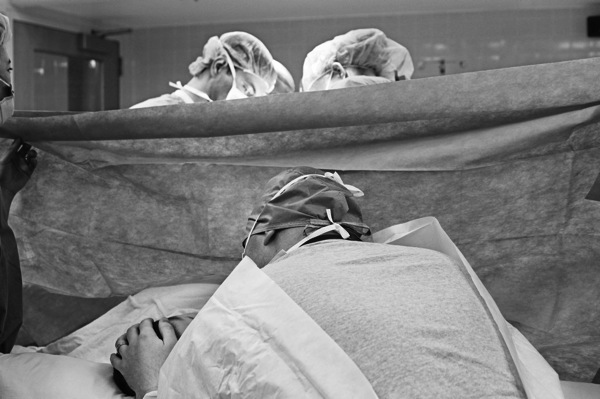
    It also gives you a chance to talk to them about what happens if your client has a cesarean. Some doctors will arrange it with the anesthesiologist to get the photographer back into the OR in non-emergency cases. (In an emergency, you will not be allowed back there.). In most cases the anesthesiologist has the final say because you would be in their area to shoot. Don’t take it personally if they say no to a photographer in the OR. They are looking out for your client.

    6. Have a back up plan in the event of a cesarean and you can’t go into the OR.

    This means making sure you know where the nursery is and where your client will be brought to after delivery. The doctor will fill you in during your meeting about their standard protocol, but make sure you know where everything is once you are there.

    Birth Photography OR

    7. Be Prepared for the Unexpected with Birth Photography

    Babies pay no attention to your time frame, the doctor’s time frame, or anyone else’s. They come when they want to. Be ready for a short labor and be even more prepared for a long one. Make sure you have battery supply for your camera and your phone and extra memory cards. Make sure you have money for vending machines.

    It’s better to have all of that and not need it as it is to not be prepared and find yourself on hour 13 and needing something to snack on and your camera battery has only 10% charge left!

    8. Make sure that your Images are telling the Story of that Day

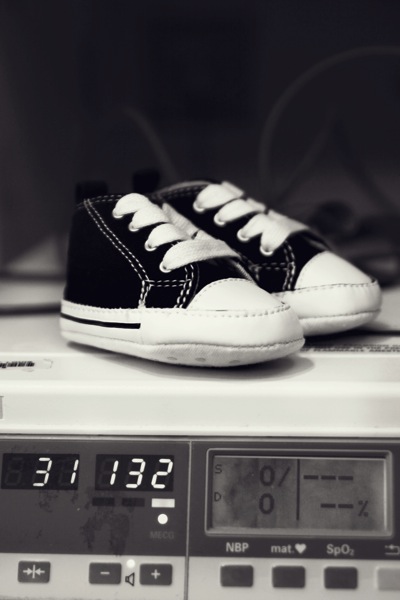
    Flowers, balloons, visitors….they all help tell the story. Capture the moments that you think that they will want to remember. Even take a photo of the dry erase board where their nurse writes her name and their room number. They will want to remember their nurse’s name. If there is a shift change, take a new photo of it.

    Record it until the baby is born. They may have a favorite nurse and you will help them remember her name. Some parents send thank you cards to the staff and it’s nice when they can include the names of the people who took care of them.

    Birth Photography Chucks

    9. Remember that this Day is NOT about You

    Don’t try to chat with everyone and make the focus of the day you. It’s easy to get consumed in the activity and not even realize that you have taken focus from the real star of the day….the mom-to-be. Let her know that you are there documenting everything she wants you to. That makes her job a little easier and allows her to focus.

    10. Convert the images to black and white, but give them the color versions as well.

    Give them color versions, but also black and white. The reason is very simple.
    Some people do not like medical stuff. Some people can’t stand the sight or even the idea of blood, or even the vernix (that cheesy type substance that covers newborns).

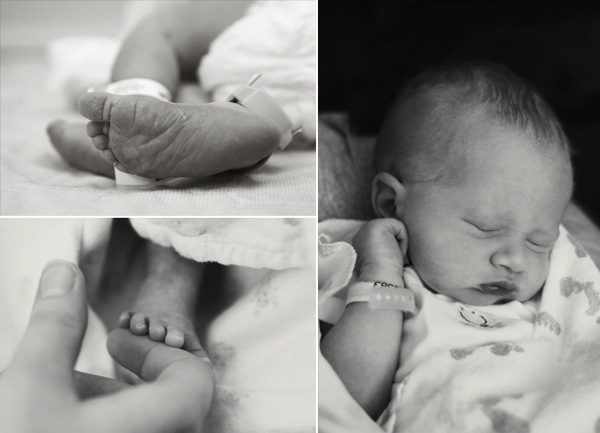
    When they put together their scrapbook for the birth, they might want black and white. Don’t let them be the ones to convert the images. Take control of the edits and make sure they have the images in black and white. They might use all the color ones, but give them the option. Make sure you capture the little details of the baby like toes and ears when you take the photographs as well.

    Those are always loved and appreciated by the parents.

    Birth Photography Story 2

    Birth photography is unlike portrait photography. You may not get everything perfect. People may walk into the shot. Someone may turn on a light or turn off a light. Things happen. The scene can move quickly.

    Make sure you are prepared with camera in hand and make sure to expect the random things that may happen. Document the moments and learn from your experience. The next birth will be easier and you will gradually learn to adapt and easily navigate your way through the whole birthing process and tell better stories each time. Your clients will love you for it and you will grow as a photographer, an artist, and as a person with each moment you help bring to life.

    Lori Peterson is an award winning photographer based out of the St. Louis Metro Area. Her dynamic work ranges from creative portraits to very unique fine art photography. Lori’s work can be seen at www.loripetersonphotography.com and also on her blog at www.loripetersonphotographyblog.com. You can follow her on Facebook at https://www.facebook.com/LoriPetersonPhotography.

    Post originally from: Digital Photography Tips.

    Check out our more Photography Tips at Photography Tips for Beginners, Portrait Photography Tips and Wedding Photography Tips.

    A Guide to Birth Photography

    The post A Guide to Birth Photography by Guest Contributor appeared first on Digital Photography School.


    Digital Photography School

  • Nikon sues Sakar for infringement with Polaroid iM1836 Android camera

    shared:NikonLogo.png

    Nikon Inc. has announced a lawsuit against Sakar International Inc. over the design of the Polaroid iM1836, a planned Android camera that bears a resemblance to one of the Nikon 1 series of mirrorless cameras. Announced this morning in a Japanese language press release on Nikon’s Japanese website, the lawsuit was filed in the US District Court for the Southern District of New York. The lawsuit seeks an injunction against both manufacture and sale of the Polaroid iM1836 digital camera.

    News: Digital Photography Review (dpreview.com)

  • Brennpunkt New York

    Ein Beitrag von: Anne-Kathrin Knuth

    Meine Reise begann lange vorher. Lange vor dem Jahr 2011, als ich durch New York reiste, um aufrüttelnde Bildmotive zu finden und zu zeigen, dass es so nicht weitergehen konnte. Dass Arme keine Chance auf ein besseres Leben haben sollten und Banker und Reiche viel zu fettbäuchig, satt und selbstgefällig durch die Straßen eilten. Blind für das Elend zu ihren Füßen und unwillig, zu helfen.

    Ich bin aufgewachsen mit den Werten einer Kriegsgeneration. Zwar bin ich erst 26 Jahre alt und weit davon entfernt, aber mein Vater ist 81 – ein Generationensprung. Geschichten und Weltanschauungen übertragen sich oft unbewusst auf die Kinder. Mein Vater war Banker. Immer im Anzug. Die Haare immer säuberlich gekämmt. Er war immer sehr sparsam, um nicht zu sagen geizig.

    Brennpunkt New York © Anne-Kathrin Knuth

    Ich bekam die Lebenseinstellung vermittelt, dass man anderen helfen sollte. Die Sparsamkeit habe aufzuhören, wenn einer einen um Hilfe bittet. Auf der anderen Seite verachte ich meinen Vater aber auch für sein Gönnertum. Ich denke, er ist kein guter Mensch. Er teilt zwar sein Essen, aber man hat immer das Gefühl, er tut es, um sich dadurch besser zu fühlen.

    Ich denke immer darüber nach, wie ich den Menschen helfen könnte, mit dem, was ich ausrichten kann. Mit Geld kann ich nicht dienen. Mein Traum war es immer, ein Heim für Obdachlose zu errichten und so beschloss ich, Fotografien zu erstellen, um die Menschen, die Mittel und Wege besitzen, durch Fotografien darauf aufmerksam zu machen.

    Brennpunkt New York © Anne-Kathrin Knuth

    Im September 2011 war ich auf einem Fotoworkshop in New York und sollte mir für die Ausstellung, die an die Reise anschloss, ein Thema überlegen. In der Stadt herrschte tiefe Trauer, da es gerade zehn Jahre her war, dass zwei Flugzeuge die Twin Towers zum Einsturz gebracht hatten.

    Doch kam für mich ein anderes Themengebiet mehr in Frage: Ich wollte mich mit den sozialen Unterschieden in dieser Stadt befassen. Schon in Berlin hatte ich angefangen, mich fotografisch mit armen Menschen auseinander zu setzen.

    Brennpunkt New York © Anne-Kathrin Knuth

    Jedoch fiel mir mit der Zeit auf, dass in Berlin das soziale Netz die meisten Menschen durchaus auffängt und dass die Ursachen hier eher Alkohol und anderen Drogen zuzurechnen ist, die Menschen zu Boden fallen lassen und sie nicht mehr aufstehen lassen.

    Menschen in Deutschland müssen nicht auf der Straße leben. Sie bekommen ein Bett und etwas zu essen, solange sie es noch schaffen, aufzustehen, zum Amt zu gehen und einen Antrag zu stellen.

    Als ich nach New York kam, wurde mir sehr bald bewusst, dass hier ein anderes System herrscht. Ich sprach mit einem Bekannten, der in der Nähe von New York lebt und ich erfuhr, dass es dort durchaus nicht der Standard ist, eine Ausbildung zu bekommen.

    Brennpunkt New York © Anne-Kathrin Knuth

    Er erzählte mir, dass er für sein Studium 80.000 USD bezahlt habe und es ganz normal sei, dass eine Ausbildung in den USA soviel koste. Wenn man keine Ausbildung hat, bekommt man keine Arbeit. Keine Arbeit, kein Arbeitslosengeld. Das heißt, auf der Straße leben zu müssen.

    Ich lief durch New York von einem Viertel ins nächste und es war erschütternd, welche Kontraste dort herrschten. Die sonnigen Gesichter der im Anzug gekleideten Bankertrüppchen neben dem perspektivlosen Ausdruck derer, die alles verloren hatten.

    Brennpunkt New York © Anne-Kathrin Knuth

    Ich schoss jeden Tag ein paar Bilder, auf denen beide Extreme vereint waren: Reich und arm und erstellte daraus eine Serie. Am 28. September, kurz vor meiner Abreise, begann eine Demonstration der „Occupy Wall Street“-Bewegung. Ein Kampf gegen die Armut und die Macht der Banken.

    Die Demonstration schien zunächst relativ unbedeutend zu sein, aber ich machte dennoch Fotos, da sich ja genau damit meine Fotoserie befasste. Als ich dabei dann von Polizisten von der Straße gejagt wurde, schlich sich bei mir das Gefühl ein, dass es nicht erwünscht war, die Wahrheit ans Licht zu bringen.

    Kaum war ich wieder in Berlin, war in den Nachrichten zu hören, dass die Situation in New York eskaliert war. Hunderte Demonstranten waren festgenommen worden.

    Brennpunkt New York © Anne-Kathrin Knuth

    Nach der Abschlussausstellung des Workshops, in der viele Teilnehmer Portraits präsentierten und bunte Bilder von New York, die weder Unglück noch Armut zeigten, fragte ich mich, warum ich mich eigentlich immer wieder mit Themen auseinandersetze, die doch eher die grauen Seiten der Menschen zeigen. Und ich wusste, dass es das Resultat meiner Erziehung war.

    Meine Serie soll zeigen, dass es viel zu wenige Menschen gibt, die Mitgefühl für andere Menschen entwickeln können. Ich hoffe, dass mein Projekt dazu beiträgt, mehr Empathie in jedem Einzelnen auszulösen.


    kwerfeldein – Fotografie Magazin

  • Priceless: Banksy Shop in NYC Sells Art to Clueless Public

    [ By Steph in Art & Street Art & Graffiti. ]

    Banksy New York City Sale 1

    A few lucky people had no idea what they were actually purchasing when they bought black-and-white graffiti works on canvas from a street stall in Central Park for sixty bucks a pop. Those works of art are worth thousands of dollars each – because they’re Banksy originals. The elusive street artist held an unannounced sale in New York City on the thirteenth day of his ‘Better Out Than In‘ residency, and most people failed to notice the incredible bargain right under their noses. But don’t bother coming back tomorrow: this was one a one-day-only sale, and you (and everyone else) just missed it.

    Banksy New York City Sale 2

    That’s not only because the stall was manned by a bored-looking old man who sat around for four hours before making a sale. Banksy knock-offs can be found all over the place, and these canvases hardly stood out as anything different. But they’re signed, original, 100% authentic works of art worth as much as $ 30,000 a piece.

    Banksy New York City Sale 3

    One guy, purchasing art for his Chicago apartment, walked away with four – we bet he’s happy about that decision today, if he even realizes what he has are originals (in which case one has to wonder why he did not buy more). Murals by the artist, removed from the urban settings in which they were painted, routinely fetch as much as half a million each, with one even netting $ 1.1 million.

    Banksy New York City Sale 4

    The clueless public who passed on these original Banksy canvases won’t get another chance – it was a one-time deal. Banksy will be in town for the rest of the month, adding to the stencils, installations and mixed media pieces he’s already put up during his time in the city. Those works include two mobile pieces, like a delivery truck converted into a garden, complete with a waterfall.

    Share on Facebook


    [ By Steph in Art & Street Art & Graffiti. ]

    [ WebUrbanist | Archives | Galleries | Privacy | TOS ]


    WebUrbanist

  • Understanding Aspect Ratio

    apect-ratio

    It seems that clients are becoming more and more knowledgeable every day regarding the various facets of what we do as professional photographers. Maybe it’s because we live and work in the most highly tech-savvy society ever, or maybe it’s because anyone with a smart phone and a few good photo apps can turn out amazing results (for which I applaud them, by the way). High-quality DSLRs, mirrorless cameras, and fast lenses are available and well within the reach of  the average photographic consumer. Even those not necessarily interested in taking their own photos still know all the buzzwords. “Excuse me– Is that a full-frame camera?”  Or there is always that old refrain, “We don’t want albums or prints. We just want the RAW files.”  Our clients are learning our language, even if they don’t always completely understand it.

    One concept they still don’t seem to grasp, however, is aspect ratio. And with good reason– we’re not doing a very good job of educating them on the subject. Even photographers will often get that glassed-over look in their eyes when their clients ask why what looks great as a 5×7 makes an awful 8×10. This is not a blanket statement about all photographers. When pressed, though, many are only able to offer a partial explanation. They know that it has something to do with proportions– that a 5×7 doesn’t look the same as an 8×10, for instance– but they don’t know why.

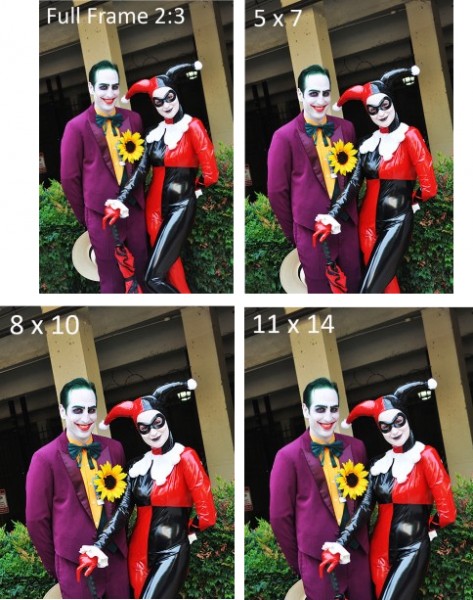
    Aspect ratio is nothing more than a size relationship between the long and short sides of a photo. The most common aspect ratio in DSLRs today is 2:3, which is based on that of 35mm film. A 35mm negative is actually 24mm x 36mm. Simplified, this becomes 2×3, or 2:3 when expressed as a ratio. Several print sizes can be made from the 2:3 aspect ratio without any cropping of the image (e.g., 4×6, 8×12, 10×15, 12×18, 16×24, 20×30, etc.).  Many of the most popular print sizes, however, cannot be simplified the same way. That is why 5×7, 8×10, and 11×14 all require a crop of the original 2:3 photograph. This results in a loss of part of the image, from either the long or short side, depending on the image and the crop.

    In the examples above/below I retained the top edge of the photo in all four aspect ratios in order to illustrate the dramatic effect that each crop can have, relative to the original 2:3. Remember that everything you see in the full frame image will appear in a 4×6, 8×12, etc. But when we start cropping with ratios that can’t be simplified or reconciled with the 2:3, we see an obvious loss along the bottom edge of the frame. There is not at much of a difference between the 8×10 and the 11×14 relative to each other, but it is clear that you can lose a significant portion of your image when it’s time to order prints if you aren’t careful with your composition.

    apect-ratio

    By using either the Joker’s hat or Harley Quinn’s knee as reference points, you can see for yourself just how important it is to not only compose your photos based on your own personal aesthetic, but also with an eye towards how you or the client might intend to print and eventually display the image.  The simplest solution is to compose your shot and then either zoom back out (or take a step or two back if using primes) before you actually press the button. Shooting a little bit loose will give you more options when it’s time to order prints.

    Aspect ratio is a basic concept which can have some pretty significant ramifications if you don’t properly plan your shot. Make sure to give yourself enough room in the frame that you don’t have to worry later about whether the client wants an 8×12 or an 11×14. After all, it will be much easier to give them the sizes they want, rather than explain to them why you can’t.

    Post originally from: Digital Photography Tips.

    Check out our more Photography Tips at Photography Tips for Beginners, Portrait Photography Tips and Wedding Photography Tips.

    Understanding Aspect Ratio

    The post Understanding Aspect Ratio by Jeff Guyer appeared first on Digital Photography School.


    Digital Photography School