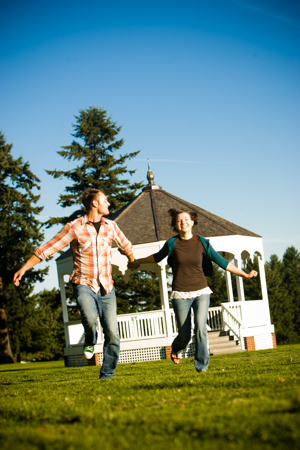
Category: Photography

  • SUPing and Trying Different Camera Angles


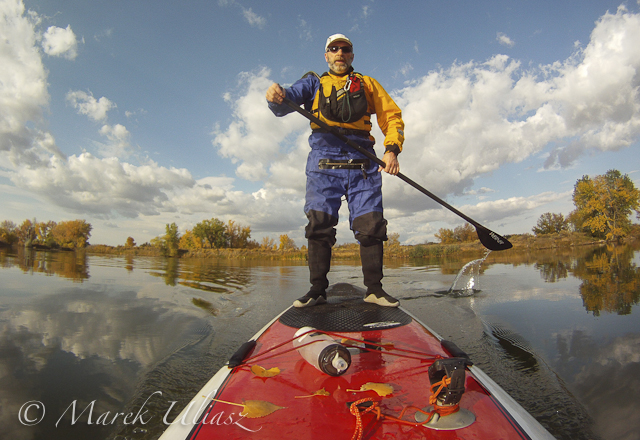
    stand up paddling with different camera angle

    October 18, 2012. Trying dIfferent camera angles on my paddleboard. Beaver Pond (Arapaho Bend Natural Area, Fort Collins). Camera: GoPro Hero.

    I am experimenting with different placement of GoPro Hero camera with a suction cup mount and a long leash. I will try to use similar camera angles with Canon 5D DSLR camera dressed up in Eva-Marine waterproof housing. I still need to figure how to mount it on a paddleboard.

    Related posts:
    Daily Paddling Picture Gallery
    SUP (Stand Up Paddleboard) in Riverbend Ponds Natural Area
    Bark Expedition Stand Up Paddleboard in Fall Scenery


    paddling with a camera

  • Photoshop Content-Aware Fill [Video Tutorial]

    In this tutorial Phil Steele from Photoshop Basics for Photographers shares a great little tutorial on a feature called ‘Content Aware Fill’ that is in recent versions of Photoshop CS and Photoshop Elements.

    Check out more of Phil’s quality training at:

    • How to Shoot Headshots and Portraits on a Budget with Small Flashes
    • Photoshop Basics for Photographers
    • Lightroom Made Easy

    Post originally from: Digital Photography Tips.

    Check out our more Photography Tips at Photography Tips for Beginners, Portrait Photography Tips and Wedding Photography Tips.

    Photoshop Content-Aware Fill [Video Tutorial]


    Digital Photography School

  • Preparing for Winter SUP (Stand Up Paddling) Season


    stand up paddling in drysuit

    October 13, 2012. Paddling Expedition Bark SUP in Beaver Pond (Arapaho Bend Natural Area, Fort Collins) and trying a drysuit in preparation for a cold season. Camera: GoPro Hero.

    I haven’t paddled in my drysuit for years. Last time I used it probably 5 or 6 years ago when paddling in rain and snow on the Dismal River in Nebraska during Thanksgiving Day weekend. I am going to use the drysuit on a SUP in cold season. Of course, it’s not so much fun as paddling in shorts. I just need to replace my neck gasket.

    Related posts:
    SUP (Stand Up Paddleboard) in Riverbend Ponds Natural Area
    Bark Expedition Stand Up Paddleboard in Fall Scenery


    paddling with a camera

  • So You Want to Keep your Camera Safe? Here’s How

    A Guest Post by Ben Evans

    So we got my girlfriend her first proper camera last week. A Nikon D5100 with a 35mm f1.8 prime lens; which is my recommendation for a modest budget. She’s super excited, not least because she’s got something to do now when I’m photographing!

    New Photographer!

    Barcelona is great but while there’s not much violence, it rivals Naples for petty theft.

    I’ve learned a lot from photographing here, so I put together this guide about keeping your camera safe. My girlfriend and students have found it really useful so I thought I’d share it with you too.

    1. Insure It

    Some manufacturers have long warranties that are useful, but look for additional insurance against accidental damage and theft. Camera insurance is pretty reasonable now.  
    Shop around and see what you can find. You might even be covered by your home insurance; worth checking.

    2. Use the Camera Strap

    Some people don’t. Do! It’s often saved my Nikon from a fall. Make sure it’s securely attached, and keep it wrapped twice around your wrist when you’re shooting.

    Otherwise, wear the camera either across your body with the top nearest your hip, or on one shoulder with a rucksack worn over the top.

    This keeps the lens closest to you and prevents theft, which is becoming more common.

    The strap that came with your camera probably has a bright logo which only attracts thieves; keep it hidden or get a new strap.

    Upstrap is good because they’re ‘sticky’, but avoid getting anything with buckles because they’re not safe.

    3. Adopt the ’Backward Look’

    When you leave anywhere, have a good look behind you before you go.

    This has saved me hundreds in lost gear already! It’s surprisingly easy to forget a new camera when you’re in a rush.

    4. Sand and Water Kills Cameras

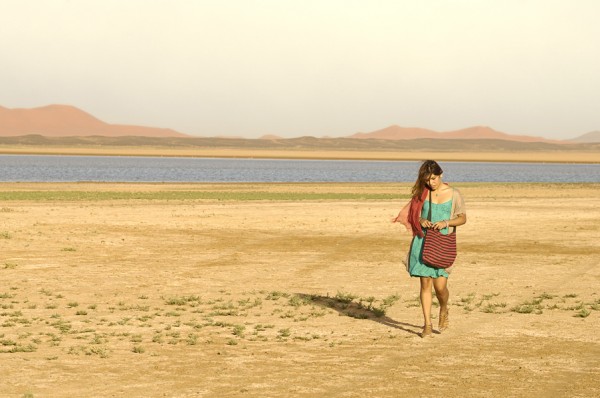
    Sand acts like grit, destroying from within. I normally don’t recommend a UV filter to protect your lens, but found one essential in the Sahara desert when storms sand-blasted the glass.

    Sahara Sand Storms

    Closer to home, I’ve had more than one camera die at the beach. Even a quick dip will put an end to the toughest dSLR, though the photos on the memory card will probably be okay. Surfing shops sell dry-bags that will protect your camera from water and sand.

    5. Your Sensor Attracts Dust

    This shows up as small black spots or lines when you use small apertures like f22.

    Some try and shake it off, which helps a bit, but isn’t totally effective. Prevention is much better than cure.

    You need special, overpriced tools to clean your sensor, and the process is a pain in the arse! Also, every time you clean the sensor you damage it a bit; and it’s all too easy to ruin it if you slip.

    So avoid having to clean it by only changing lenses when necessary, keeping the camera held downwards when you do.

    Try not to change lenses in dusty or windy environments. And don’t clean it when there’re only one or two tiny specks of dust in the photos. It’s pretty easy to airbrush them out; Photoshop is your friend.

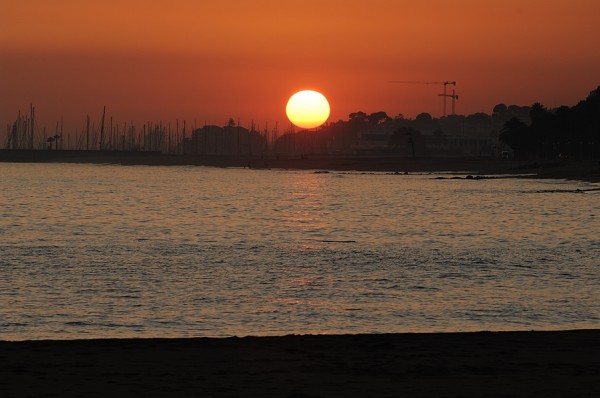
    Beach & Sea Sunset

    6. Never lend your Camera

    Unless they are happy to replace it if it breaks; which they won’t be! Accidents happen, and it’s not worth upsetting a friendship for.

    It goes without saying that asking strangers to take photos of you risks having them run away with it.

    If you must, choose someone who looks trustworthy; and who you could outrun!

    7. Don’t let People in your Bubble

    I actually opted for a Krav-Maga training course instead of camera insurance when I was travelling around Bosnia. This idea of personal space was one I learned there.

    Downtown Sarajevo, Bosnia

    Essentially, if no-one comes within a meter of you, it makes it much harder to have anything stolen.

    Therefore, don’t accept random offers for ‘free hugs’ from strangers, nor let them get too close at all.

    Either move away or tell them not to touch you. Watch Derren Brown’s videos about pick-pocketing to see how skilled people can be.

    8. Scratch your Email Address on the Bottom and on the Battery

    My girlfriend flat-out refused to engrave hers, so we settled on stickers! They’ll help honest souls return your camera to you, while an engraved name ruins resale value and makes it easier to trace so might help with theft. Email your serial number to yourself today.

    So that’s it! Not the normal wow-factor but really essential to be aware of. I’ve taken my main camera everywhere and while it’s had a few close calls, it’s survived intact. Lots of people aren’t so lucky; follow this advice and make sure you’re not one of them! And in case you haven’t already done so, remember to get your copy of my book Photography: The Few Things You Need To Know for less than an espresso HERE NOW to ensure you get the most value from these articles.

    Ben is an English Photographer who works internationally. Ben teaches photography classes in Barcelona and keeps a photoblog of ‘fine art street’ photos of Barcelona at www.i-Barcelona.com.

    Ben is working on two photography teaching projects, Better Than 90 Percent and Holistic Photography.

    He shoots Nikon, Hasselblad, Apple (iPad 3) and those little throwaway waterproof film cameras with the plastic lenses.

    Post originally from: Digital Photography Tips.

    Check out our more Photography Tips at Photography Tips for Beginners, Portrait Photography Tips and Wedding Photography Tips.

    So You Want to Keep your Camera Safe? Here’s How


    Digital Photography School

  • YouTube for Photographers: 3 Ways to get Started Using YouTube to Show and Promote your Photography

    A Guest Post by Marlene Hielema

    Video is all the rage. With virtually all digital cameras now able to capture live video, if you’re not shooting video you’re going to start to feel left out.

    But video has a very steep learning curve!

    Yes it does, but that doesn’t mean it’s impossible to get going. In this post I’m going to tell you about three ways you can use video to promote your photography, and I’ll start on the shallow end of the learning curve.

    Why YouTube and not Vimeo or private hosting?

    In a word: Traffic.

    The goal of these videos is lead generation and they are used for marketing.

    • Video helps people to know, like, and trust you
    • From the video you can send them to your website where they can learn more about you
    • Then, get them to buy your photos, or to book a photo shoot with you

    I’ve talked to photographers who have been scared off of YouTube. I say, “Embrace it and use it for what it’s best at”. Use YouTube for traffic, visibility and lead generation. Use YouTube for your public side, and save Vimeo and private hosting for private client videos.

    google-youtube-logo.jpg

    Benefits of YouTube

    • YouTube is owned by Google and is the #2 search engine (Google is #1).
    • Like other social media, it’s possible to build community on YouTube by getting comments, likes and subscribers.
    • Unlike other social media, YouTube videos are easy to keyword, and as a result easy to search and find.
    • Random access and always available – YouTube videos don’t disappear down the stream like Facebook and Twitter posts.
    • YouTube videos get better with age. More time online, equals more views. 
    • Your YouTube videos will show up alongside other related videos so that people you don’t even know, will see them. 
    • With other social media – people have to follow you or like you to see your content. Not so with YouTube.
    • Google likes videos, so it’s highly likely your videos will rank higher in search results than your website content.
    • And people are turning to video, and especially YouTube, more than ever to learn things and find out about products and services.
    • You don’t need a full fledged video production setup to start taking advantage of YouTube’s benefits.
    • Read the official YouTube stats here

    yt-for-photo.png

    Three types of videos you can make for YouTube

    1. Portfolio video: Slideshow of still images – simplest way to get a video online

    • Take a gallery of no more than 20 photos – make it very specific not everything you do – for example family portraits
    • Use Lightroom’s Slideshow feature and export to video – Simplest and fastest way to get your photos to video
    • If you don’t have Lightroom, use PowerPoint or Keynote to make a slideshow of your photos 
  • Upload to YouTube
  • Add keywords and phrases in the description and title of your video when you upload it – Example – Calgary family portrait photographer
  • Make several galleries of each type of photography you do
    • weddings – you can also break these topics down further
    • destination weddings
    • second time around weddings
    • maternity
    • babies
    • kids
  • Music: yes or no? It depends on your market, but current trends say “no”
  • 2. Profile: About you – builds trust and rapport

    • Involves you getting in front of the camera and that can be hard, but you’ll just need to get over it. 
    • It’s a great way for people to see if you’re a good fit for their photo shoot.
    • Your profile video can also be done with a voiceover and photos, but I think it’s best to get in front of the camera so you can speak directly to people.

    3. Behind the scenes: Show what happens on one of your photo shoots

    • Maybe you’re a nature photographer and you can show how you approach a landscape or a wildlife shoot. You can do this with still photos and a voiceover similar to your portfolio video.
    • Keep the production simple and use your iPhone.
    • This adds value to your photographs as people see the amount of work that goes into a shoot.
    • Stop motion videos are also fun and easy to make and you can do behind-the-scenes videos this way too.
    • Some family and wedding photographers are using stylized stop motion videos as a bonus to a shoot.

    Video editing options

    Shooting video is relatively simple, especially if you start by using your iPhone. The steep part of the learning curve is the editing and exporting for web use.

    • You can use simple video editing software or screen recording software to produce your videos
    • iMovie – Free for Mac users
    • Camtasia for Mac and PC
    • Adobe Premier Elements – for Mac or PC. An affordable choice for beginners.
  • You can edit a movie right within YouTube as well.
  • START NOW!

    If you’ve never done video before, start with the portfolio video.

    • Review the steps above and remember to:
    • Keep it short 1-2 minutes in length.
    • Add a watermark – your url is best.
    • Add a picture of yourself too – remember this is to build trust. 
  • Embed the video on your website or blog too.
  •  

  • Share it on Twitter, Facebook and G+.
  • Repeat the process with another group of images.
  • Remember it’s better to have more videos of shorter length than to have a large group of photos in a 20 minute video.
  • Before long you’ll have a collection of searchable, randomly accessible videos and you’ll be sending people to your website.
  • In future tutorials I’ll show you how to approach each method in greater detail, and some tools you can use to produce your videos.

    Do this next: Watch the video above to see an example of how I used it to drive traffic to this blog post. I’ve got an invitation and a benefit at the end of the video for you too.

    Are you using video to promote your photography yet? Let us know what technique you use in the comments.

    Marlene Hielema teaches photography and photo editing online, in the classroom, at corporate workshops and one-to-one. She’s also a camera raw evangelist and YouTube video blogger. Find out more about what she can help you with at www.imagemaven.com and look for her weekly video blog post on YouTube.

    YouTube: 

    Post originally from: Digital Photography Tips.

    Check out our more Photography Tips at Photography Tips for Beginners, Portrait Photography Tips and Wedding Photography Tips.

    YouTube for Photographers: 3 Ways to get Started Using YouTube to Show and Promote your Photography


    Digital Photography School

  • Sharing Your Photography On The Web

    A Guest Post by Anne McKinnell

    Wading through the sea of options to get your photographs seen online

    Most of us start out in photography because we love to make images, it gets us outdoors, and helps us explore our creative selves. We do it for ourselves because it makes us happy.

    But there is different side of photography that adds another dimension to the experience: sharing images with others. It’s one of the most popular things to do on the internet.

    We do it to share experiences with our families and friends, get feedback from other photographers, and attract customers or clients.

    There are three steps to making a big impression online:

    1. Selecting images for your online portfolio

    So, you want to put all of your images online for everyone to see, right? That’s a really bad idea. Not putting them online – the bad part is putting *all* your images online.

    Imagine you are looking at a photographer’s portfolio and they have hundreds of images. Some are architecture, some are seascapes, some are portraits, some are still life. You’re going to see a lot of these. Hundreds of photographers will all blend together in your mind because they are indistinguishable from each other.

    On the other hand, let’s say you look at a photographer’s work and they have 20 images all of which are black and white seascapes. He becomes the “black and white seascape guy”. Or let’s say they are all dog portraits. She becomes the “dog portrait woman” in your mind.

    That doesn’t mean that if you are the dog portrait woman you cannot make images of architecture. You don’t have to choose right at the beginning what kind of photographer you want to become. Just choose one selection of your images to show the world right now. That will make you stand out in people’s minds and you will grow a bigger following because people can identify with you.

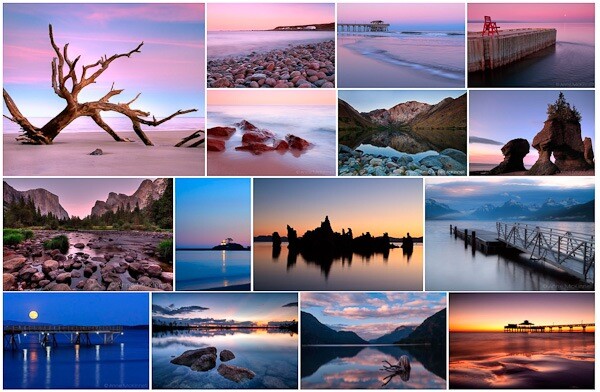
    Pick a theme to work on. My first theme was seascapes at twilight.
    twilight.jpg

    Notice how all the images have a certain look to them. They fit together as a group. And there are less than 20. That’s what you need to do.

    2. Creating your web gallery

    Now that you have a great set of images to share with the world you need to choose a method for getting them online.

    But … where to start? There are so many options!

    So many that I could never summarize the pro’s and con’s of every available alternative but I will share what I have learned so you can get going quickly and easily. And I’m only going to suggest sites where your photos are sure to look great (sorry Flickr that leaves you out)!

    The first thing is to determine what your goals are right now.

    • Do you want to share with your family and friends with no intention to sell?
    • Do you want to share and sell your images?
    • Do you want to have a blog where you can share stories with your images?
    • Are you ready to have your own website with your own domain name and either take on the technical aspects of this or hire someone to do so?

    Let’s look at these options one step at a time.

    You want to share with your family and friends with no intention to sell

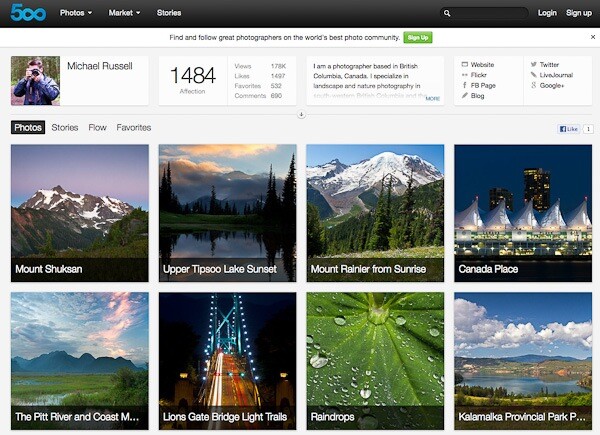
    500px is the best option for you. Images look absolutely stunning on the site and it is free if you upload fewer than 10 images per week. For only $ 20 per year you can upload as many as you like.
    michael 500px.jpg

    This screenshot is from Michael Russell‘s page on 500px.

    Note that you can sell digital downloads on 500px too. The only print product you can sell is a fixed price canvas print which just doesn’t cut it if you are interested in selling print products.

    You want to share and sell

    SmugMug, Redbubble, DeviantArt, Photoshelter, Photocrati, Snapfish, Twitpic, Zenfolio – the options are endless and you could research forever before being able to make a decision.

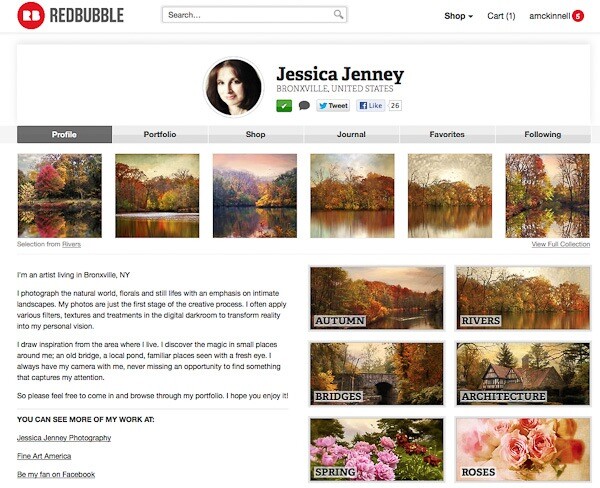
    I’ve tried many of these services, some paid, some free, and I’m going to tell you which one is super easy, looks great, and is totally free. It’s Redbubble.
    jessica redbubble.jpg

    This screenshot is from Jessica Jenney’s page on Redbubble.

    Redbubble offers lots of different products. I have ordered many of them myself and am always impressed with the quality. You can set your own prices and Redbubble makes a small commission from any sales. The only drawback is that you cannot sell digital downloads – only products.

    If you want to sell both products and digital downloads take a look at Zenfolio.

    You want to have a blog where you can share stories or articles

    The two big players in this field are Blogger and WordPress.

    Blogger is very easy to setup and adding content is straightforward but there are fewer options for design and custom features than WordPress offers.

    WordPress has a steeper learning curve but if you are going to have a blog you probably want it to have a really nice design and some customizable functions. And it’s way easier to just start with WordPress than it is to try to move a blog from Blogger to WordPress later.

    You can start a WordPress blog at wordpress.com or you can start a WordPress blog on your own website with WordPress.org.

    The bottom line is that Blogger is a better option if you want your blog to be super simple to set up and add content and you don’t need a lot of bells and whistles. WordPress is a better option if you want more advanced features and customization.

    Both options are free and both have plugins that allow you to display your gallery.

    You want to have your own website

    If you are already really serious about your photography and you want to have your own website with your own domain name and have a blog and a gallery in the same place, and perhaps sell products and advertising, then get ready to roll up your sleeves or get out your wallet! (Probably a bit of both.)

    You might want to hire someone else to set up the website for you if you’re not tech-savvy and then all you have to do is add blog posts and new images.

    If you want to take it on yourself you need to choose to a webhost, buy a domain name (yourname.com) and a web hosting package. If you want to blog you will need to install WordPress and find a theme you love and install that.

    Next you will need to choose a method for displaying your image gallery:

    • if you just want to display your gallery without selling and do not have a blog, check out jAlbum. I have used it on a number of website and found it easy to use, it looks great, and it’s free;
    • if you have a blog and just want to display your images without selling, you can use a WordPress plugin such as NextGEN or Lightbox;
    • if you have a blog and also want to sell images from your gallery, and have the same design for both, you should check out a premium service like SmugMug, Photocrati or Photoshelter.

    Creating your own website is a huge topic so if you are going to delve into it you have some researching to do.
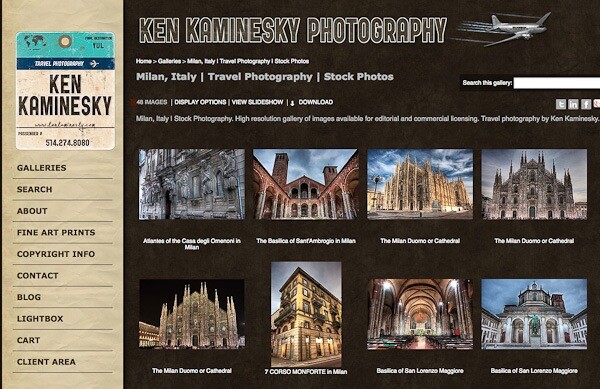
    ken photoshelter.jpg

    This screenshot is from Ken Kaminesky’s website built with Photoshelter.

    For my own website, I use WordPress with a theme from Graph Paper Press and Photoshelter for my gallery.

    3. Building your audience through social media

    If you want to promote your photography beyond your family and friends you should start building your audience right away. Using social media is the best and fastest way to find people who love to look at your images and might become customers or clients in the future. As well, they will be your marketing department by helping to spread the word about your photography.

    There are so many different social networks out there. Again it is a learning curve just to figure out which ones will work best for you and how you should use them. So let me give you a quick primer on the five social networks that have worked best for me.

    Twitter

    Twitter is my favourite social network and the first one I started. A “tweet” has a maximum of 140 characters so it is quick to sift through a lot of information to find what you are interested in.

    Most photographers post links to their images and their blog posts. If you are interested you click, if not you move on.

    If you want to grow your audience on twitter it is important to promote other people’s work as well as your own.

    Google+

    Google+ is the social network that was designed for photographers. In many ways it is the opposite of twitter because people tend to post very long posts and have conversations in the comments section.

    Because of this engagement within G+, people rarely click links which makes it difficult to drive traffic to a blog. But if you put your whole blog post on G+ you might get more interaction and comments there than you do on your blog.
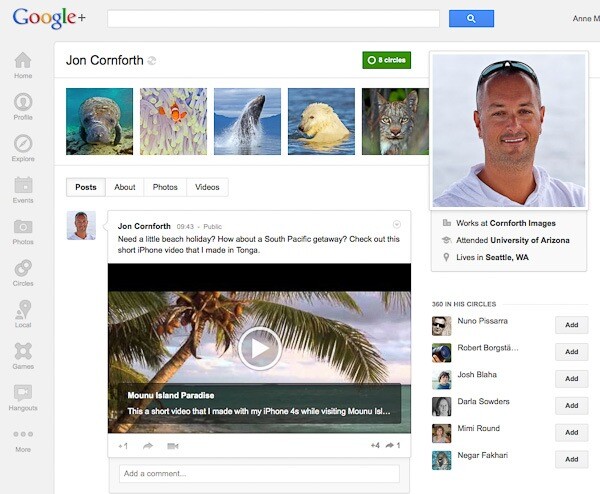
    jon gplus.jpg

    This screenshot is from Jon Cornforth’s page on Google+.

    StumbleUpon

    StumbleUpon is a bit like rolling the dice. You have no idea what it is going to land on but it will be something interesting to you. The idea is that you follow people who have similar interests and when you “stumble” you see the pages that they like. Or you can stumble certain topics like photography or travel.

    The difference here is that you are not supposed to stumble your own links and you get penalized if you do it too often. It’s really better to put a StumbleUpon button on your website or blog and hope that other people stumble it. When they do you will get a huge spike in traffic.

    Pinterest

    Do you like scrap booking or collecting things? This social network is the one for you.

    In Pinterest you have boards where you pin groups of images you like, just like pinning an image you cut out of a magazine on a cork board. It’s a great place for collecting images that inspire you, or places you want to go, or whatever you are interested in.
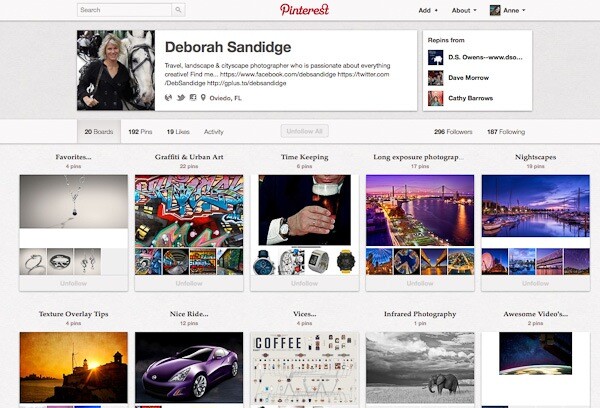
    deb pinterest.jpg

    This screenshot is from Deborah Sandidge’s page on Pinterest.

    When you follow someone you will see the images they pin on their boards. If you like an image and want to add it to your collection you simply re-pin it to one of your boards. You can pin your own images too and people who follow you will see them.

    Facebook

    I hate to say it but I do get a lot of traffic from Facebook and it would be negligent of me to leave it out. Even though it is the most difficult, confusing, frustrating and sometimes outright stupid system to use. But because it was first almost everyone is on it.

    Unfortunately, I don’t have the power to make everyone stop using it so it’s one of those “if you can’t beat them, join them” kinds of things. Regardless of my opinion, Facebook will generate traffic and help you build your audience.

    In Short …

    If you do not yet have a gallery of images or a blog and you just want to get some stuff online quickly and easily, start with Redbubble. It is free, easy to use and comes with a great community of photographers. It’s a great place to get your feet wet.

    Anne McKinnell is a photographer, writer and nomad who travels around North America in an RV photographing beautiful places. You can read about her adventures on her blog. She is also the author of several eBooks on photography. This post contains excerpts from her latest eBook “8 Ways To Accelerate Your Photography.”

    Post originally from: Digital Photography Tips.

    Check out our more Photography Tips at Photography Tips for Beginners, Portrait Photography Tips and Wedding Photography Tips.

    Sharing Your Photography On The Web


    Digital Photography School

  • On Assignment: Gone in 86 Seconds

    Two of my favorite admonitions from The Princess Bride are: "Never enter into a land war in southeast Asia," and, "Never go up against a Sicilian when death is on the line."

    To that I can now add, "Never try to schedule a bunch of CEOs for photo shoots in August."

    Because that's exactly what I was doing this past August. Which, in turn, led to this portrait being done in a grand total of 86 seconds. Read more »


    Strobist

  • Engagement Portrait Shoots: 7 Professional Tips to take your Engagement Shoots to the Next Level

    Engagement-Shoots

    Today portrait photographer Christina N Dickson shares tips on how to shoot engagement portraits. Christina’s work can be found at www.ChristinaNicholePhotography.com.

    Shooting engagement portraits are perhaps some of the most enjoyable for photographers. Most often, they are taken before the whirlwind of wedding planning is fully underway, and the couple is still quite enamored with one another. How do you take advantage of this time and produce incredible images? Follow these few steps to achieve real and vibrant engagement portraits.

    1. Be involved!

    As a photographer, you must keep your people skills sharp. With engagement photos, you have to do your research on the couple you are photographing. What are they like as a couple? What are they like as individuals? What is their wedding going to be like? How did they meet? This is going to affect the way you want to build your images and portray them.

    2. Encourage affection!

    Rather than posing each shot, ie, “okay, now you kiss her cheek!” encourage your couple to show as much affection as possible. Every couple does certain things to show one another love. If you want to capture them accurately, you will urge this type of interaction.

    3. Be observant!

    A couple is most natural when they are focusing on one another. Try to direct the shoot by suggesting they talk to one another, telling one another most embarrassing moments, or 5 things they love about each other– topics that will pull out expression, interaction, and affection.

    4. Remember that space determines relationship!

    If a couple is leaning in for a kiss, or walking arm in arm, you will be able to communicate a message of intimacy. Sometimes you can get sweet shots with contrast and tension in the picture by placing the couple far apart in the frame, but be sure that this is your purpose if your going to do it.

    5. Tell a story.

    No love story is the same. Find unique traits about the couple, and then pull this out in the creation of your images. If the couple is perfectly at ease with one another because they have been best friends for 10 years, you can create images with a laid back and contented feel. If the couple has had a whirlwind romance after meeting on e-harmony.com, it will be natural to pull out the affection and passion of their relationship

    6. Be open to suggestions!

    Often times the bride to be will have an idea for a shot she will suggest to you before hand. Other times her fiancé may think of an idea on the spot during the shoot. If you can integrate these ideas into your shooting, you will delight the couple, and possibly find yourself inspired by new ideas.

    7. Be personable!

    If you get to know your couple, and allow them to fall in love with your personality and style, you have a good chance of booking them for a wedding also. Your job is not only to take good pictures, but also to give them a fabulous time they will remember for the rest of their lives.

    Post originally from: Digital Photography Tips.

    Check out our more Photography Tips at Photography Tips for Beginners, Portrait Photography Tips and Wedding Photography Tips.

    Engagement Portrait Shoots: 7 Professional Tips to take your Engagement Shoots to the Next Level


    Digital Photography School

  • On Assignment: Smokin’ Joe

    I am spending lots more time lately trying to recognize and understand color as a component of lighting. It's not easy for me, as I have never had a strong sense of color in design.

    So my approach has been a mix of working harder at seeing light in the real world and occasionally just flailing around, throwing stuff against the wall to see what sticks.

    The photo above, of Irish dancer Joe Duffey, is a good example of both. Read more »


    Strobist

  • Art Streiber Lights Bear Grylls for Outside

    Literally.

    -30-


    Strobist