Category: Photography

  • Annie-Tated Video: Leibovitz Shoots Rihanna for Vogue

    Oh hey, it's time for another fully annotated Annie Leibovitz BTS video—this time featuring the lovely and talented Rihanna, shot for Vogue.

    Hit the jump and follow the bouncing ball to see what we can learn with a little close examination. Annotations follow, below… Read more »


    Strobist

  • Tips on How to work with Models

    A Guest Post by David Haworth.

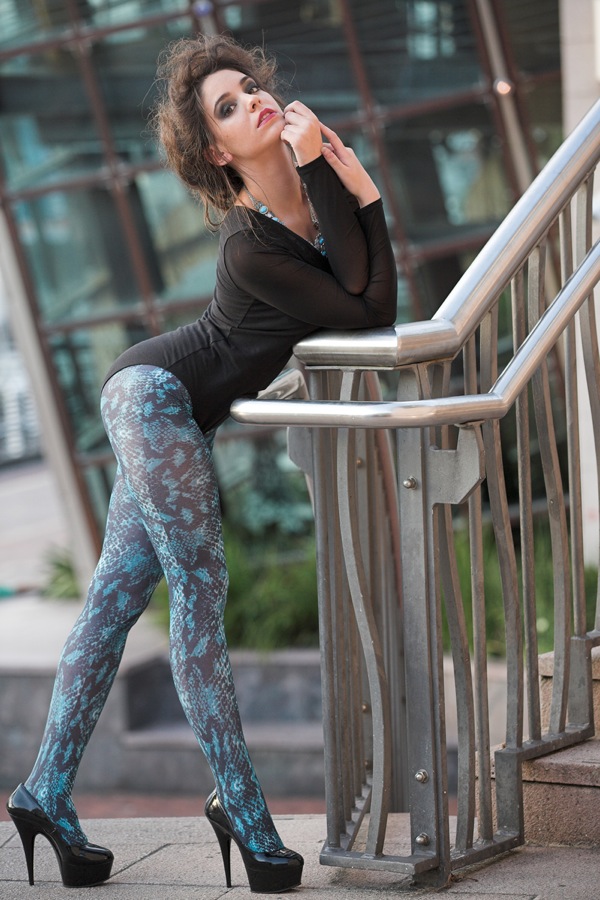
    Lucy 21 sml

    I’ve no doubt you’ve read many articles on the ins and outs of portrait photography. Many words have been written giving advice on the use of flashes, studio lighting or using natural light on location. Posing techniques and making the best use of the subject’s features, while addressing each model’s physical attributes, are covered in a myriad of magazine and online articles.?
    The purpose of this article is to share my experiences with you, and by doing so I hope to help you avoid the mistakes I made and give you the benefit of advice passed down to me by experienced mentors

    Elizabeth 5 sml
    ?You have made contact with a willing model (for this article’s purposes, a female) and wish to know how to proceed. If at all possible I advise you to meet with the person first. This will give you a good idea of her personality, her confidence level, her physical appearance and put you on a friendly footing. Photographers planning involved shoots with props and stylists will often use a test shoot to assess potential models. ??At the very least, move beyond the impersonal communications of texts and internet messages and call her on the phone to discuss her expectations and your requirements. Part of the enjoyment of doing portrait shoots on a regular basis is meeting new people and developing your people skills. I was quite shy and not a really good conversationalist. I had to learn to initiate conversations and really listen to my model. If you are being comfortable with yourself, you will project an air of confidence to the model, which in turn will help make her at ease. This will come with practice.?
    My advice on meeting a model, at the start of a shoot, is to leave your camera in its bag and to engage her in conversation. If you can find some area of common interest it will break down barriers quicker. Ask her questions about her previous modeling experiences, her clothes or makeup and be genuinely interested in her answers.

    Drea 7 sml
    ?Remember, she may have a degree of nerves and trepidation about being in front of a camera with a photographer she does not know.?
    I approach a shoot with the realization that unless the model is very experienced, the first 30 minutes of the shoot will rarely produce the best images. This is the period of building a rapport with the model and getting her comfortable with you and the camera. If you are on location I suggest the best areas of the locale be saved for the latter half of the shoot.??If you are in a studio setting I am a believer in the power of music to create a comfortable ambience. I provide a player and ask the model to bring music she enjoys. This is played as background music allowing conversation and interaction.
    ?While shooting there are a few rules I have made for myself. I find the model appreciates being shown the progress by reviewing the camera screen at intervals. Often they will pick up on awkward shapes, slipped bra straps and have suggestions of how they can improve what they are doing. This also involves the model in the process. Some models have told me that they don’t like working with photographers who decline to do this. Always be respectful and professional in your interactions. This does not mean that you cannot have fun and one of the best comments you can get at the end of a shoot is “I really enjoyed that!”??If you are working to a concept, either keep the concept photos in your head or on your phone. Don’t show your model photos of other models. Your model is the most important person in the world while you are shooting.

    Rebecca 4 sml

    Praise while shooting will give positive reinforcement and spur her on to better things. To point your lens and just shoot, is to have the model working in a vacuum.  If you engage your model in conversation while you are shooting you will create an atmosphere of camaraderie. You will find when you are working well as a team that the shoot will flow. The model will respond to the click of the camera or the flash of the strobe as an indication that she is finding the right look and position and will be encouraged to find new poses.??New and inexperienced models will need direction on the shoot. Point out to them that they do not need to look at the camera and many of the most attractive photos will be when she is looking away. Move in and out and around your model, ask her to change position of her own volition and if she finds a great position, this is the time to stop her with a superlative and work to refine that photo with small adjustments. Beginner models need to be shown how to move and refine positions in very small incremental movements. Alternatively it is just as acceptable to free shoot with your model and let the shoot happen organically with little adjustments from you. ??Variation in expression is important. You don’t want a camera full of images with the one expression. Ask your model to remember things that made her happy, sad, melancholic or any other moods she can think of. When you are confident in your rapport ask her to play-act scenarios. Variations such as mouth open, half open or closed and even eyes shut should be tried. Asking a model to close her eyes and imagine something and then open her eyes before you shoot can produce good results. Use movement even to the point of blur. Dancing around will often produce a sense of fun and physically relax the model. Dancers often make wonderful models as they have a great awareness of their bodies.??One of the best pieces of advice I was given is to consider that you will only ever be in the one place with this model at this time and to make the most of it. I was capturing up to 200 images per three hour shoot. I now shoot between 400 and 500 images. Capturing that pose with the right expression is more likely to be a success if you maximise the possibilities.??Zoe 1 sml

    When the shoot is finished, be prompt and professional. Your model will be very interested in the results. Try not to make them wait longer than necessary. Every photographer will have their own way of dealing with this process. My choice is to shoot small Jpeg along with RAW and upload a PRIVATE set of Jpegs to my Flickr pro account with an emailed invitation to view. This can be done on the evening of the shoot and I then can process the model’s choices as well as my own favourites. Surprisingly these only occasionally coincide. I then email small web size images as I process them so the model can upload them to the web as she sees fit.??Models can be found on the websites Model Mayhem and Starnow
    ?It’s best to join these websites when you have at least 8-10 quality images as models will look at what you can do when you approach them. Photograph friends and acquaintances, ensuring you get their permission to show their photos on the web.
    ?Facebook is a great place to meet models and makeup artists and get inspiration from other photographer. I have a personal page and also a fan page where I promote my photography. Most models you will shoot will have a Facebook page and will know other people in the industry. Women’s fashion retailers, both mainstream and alternative clothing companies have pages and you will soon build a network of models, photographers ?hair stylists and makeup artists. It’s a good idea to comment on other’s photos when you see impressive work and you will become well known to them and they will encourage you when you post your work. There are also groups such as Women in the Industry and Artistic Collaborations where you can arrange to work with others or find collaborators for your projects.?When you have a body of work, be sure to set up a website as well, as not everyone uses Facebook. Print some business cards with your website email and Facebook fan page addresses and hand them out at all opportunities.??Working with models creating unique and personal images is fun, challenging and ultimately very rewarding.

    See more of David Haworth’s work at his website and connect with him on Facebook.

    Post originally from: Digital Photography Tips.

    Check out our more Photography Tips at Photography Tips for Beginners, Portrait Photography Tips and Wedding Photography Tips.

    Tips on How to work with Models


    Digital Photography School

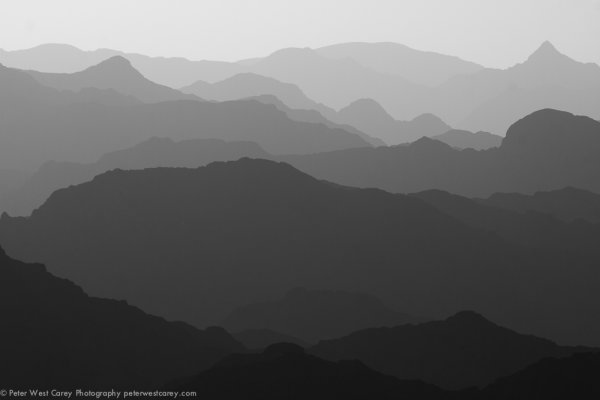
  • How I Shot And Edited It – Layers, Oman

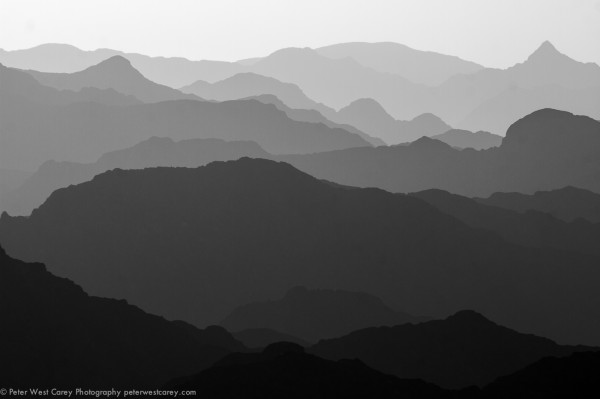
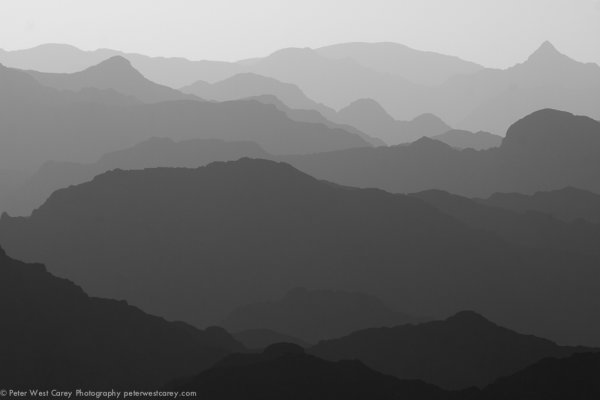
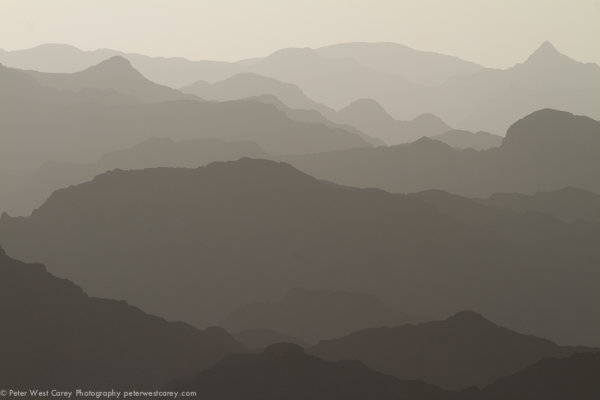
    The image above was shot in Oman near sunset and I have received a number of requests to explain how it was shot and processed. I hope this post helps you understand the process I used so it may be of service to you.

    Starting at the start, I got lucky. This image is not too far off what I captured while standing on the side of the road, sweating in 100F+ heat. My girlfriend and I were driving the mountainous regions of Oman on holiday with very few particular objectives so it was hapenstance that we came upon this scene about an hour before the sun set. This shot is facing East to North with the sun coming in slightly off to the side.

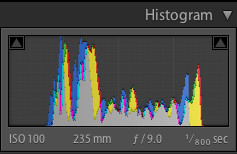
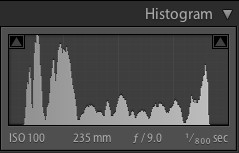
    The shot was taken with a Canon 7D and Canon 28-3400mm L lens. The settings were: ISO 100, 235mm, f/9 and 1/800the of a second. No tripod was used.

    I downloaded the image into Lightroom 4 and it was pretty decent from the start. (Click on any image for a larger version.)

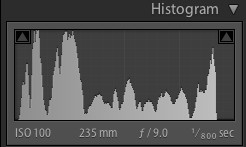
    I was happy with the range in the capture. Here is the histogram for it at the start.

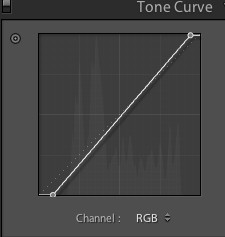
    After removing some spots that showed up with the f/9 setting, I adjusted the Tone Curve to bring in the white and black point.

    This expanded the histogram a little.

    So far, so good. A few more spots showed up and I removed them (I’m not showing that part so as to not completely bore you). I also adjusted the Luminance Smoothing by +12 because, even with ISO, I wanted things even smoother when it came to tone.

    It was at this time I decided to use Seim Effects Silver Shadows 2 to change the image to black and white. Having played with this product for a while, I knew the Dynamic Silver effects would render a great result. There are over 100 presets and I’m not patient enough to go through them all, so I stick with a few tried and true favorites. In this case, it was specifically 3:01 Dynamic Silver I.

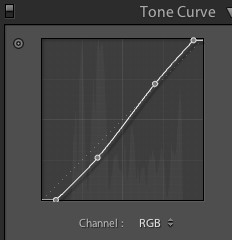
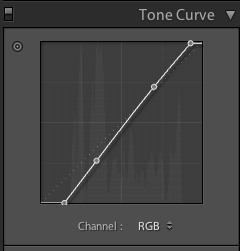
    Then, I gave a slight curve to the Tone Curve to accentuate the contrast. I have had a problem as of late of going overboard with curves, so I kept this one subtle.

    The curve looked like this and the result is after it.

    It’s hard to tell the difference without flipping between the two images, I realize, but that is good in my book.

    I found another spot (tip: clean your sensor before your next trip) and then decided on one last change. I brought the black and white points even more to stretch the tonal range as such:

    Not every photo needs to have a ton of edits in post production. And thankfully this image was pretty nice to start with, fitting well within the sensors capabilities.

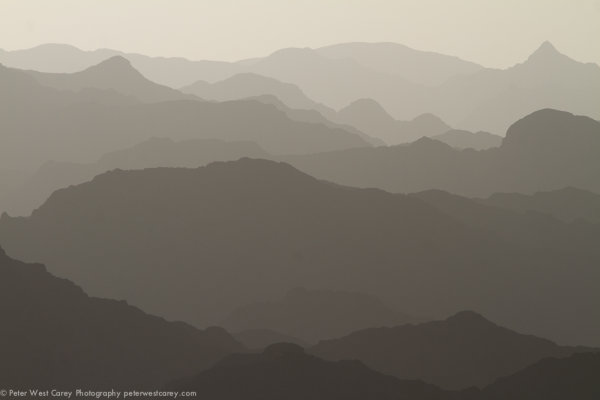
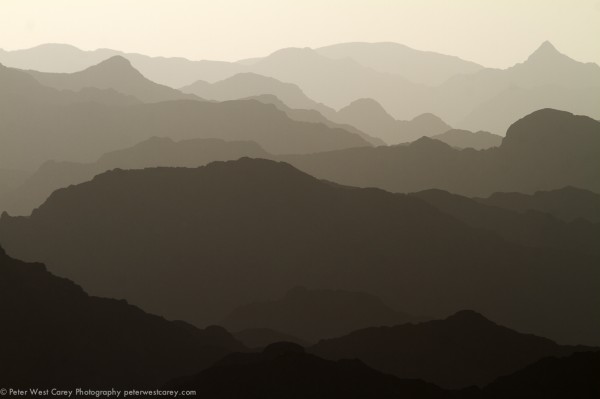
    The problem with an edit like this is it’s impossible to please everyone. After I posted this image on my Facebook page, I received requests for the original color version with edits. To that end, I submit it here for your opinion.

    Which do you like better, the B&W version or the color?


    Post originally from: Digital Photography Tips.

    Check out our more Photography Tips at Photography Tips for Beginners, Portrait Photography Tips and Wedding Photography Tips.

    How I Shot And Edited It – Layers, Oman


    Digital Photography School

  • My Thoughts on SmugMug’s Price Increase

    A lot of people have asked me over the weekend what I think about SmugMug’s price increase. On Friday SmugMug co-founder Chris “Baldy” MacAskill presented a video outlining why SmugMug needed to raise prices. Basically it comes down to the fact that Pros really do use a TON of storage and now more than ever. SmugMug (like everybody these days) uses cloud storage and replicated storage for terabytes of data (possible for a single customer with today’s DSLRs and fast bandwidth speeds) is EXPENSIVE.

    Back in 2005, when SmugMug last changed their pricing, it was harder to really flood a site with with serious storage. Bandwidth speeds were slower, file sizes were smaller, processing technology wasn’t as fast. Today Nikon’s D800 has a whopping 36.3 megapixel image. We’ve grown used to super fast bandwidth and now with my new MacBook Pro the only thing slowing me down in Lightroom is me. I can process so many more images today in Lightroom than I could with Photoshop back in 2005.

    So SmugMug was faced with a tough decision — continue losing money on many of their best customers, or raise prices. Well, they had other choices as well, but none of them fun. They could start charging based on how much storage you use, but this would hit their highest grossing Pros even harder in many cases. They could start throttling your upload speeds to slow you down. Can you imagine how frustrating that would be (that’s how most of the cheapo cloud storage backup providers do it for dollars a month). They could take a higher percentage of your photo sales, but again this would cost many working photographers even more money.

    What SmugMug decided to do is to ask their business customers (the ones who use the most storage and make the most *money* off the site btw) to pay $ 100 more.

    Nobody likes to see prices raised — especially the working Pro photographer. Times are tough and every penny counts. It bothers me though to see SmugMug being attacked online. If Canon charges $ 100 more for a lens do Pros complain? Sure, but not like some of the comments I’ve read regarding SmugMug’s price increase. If Canon raises the price of a lens $ 100 does David Pogue from the NY Times feel the need to tweet about it? Canon, a huge nameless faceless corporation can raise prices and people don’t even notice, but SmugMug an accessible family run business does it and people take it out on them.

    I pay Canon $ 500/year for their platinum CPS service. This is a service that gets me things that are valuable to me (discounted repairs, expedited shipping, loaner lenses), things that ultimately help me make money. It’s a cost to me but I justify it because I make money off my photography. I bet a lot of the other Pros on SmugMug use this service too. It’s part of the cost of doing business.

    It’s odd for me to see people trying to compare this move by SmugMug as Netflix like. Huh? A consumer DVD rental company vs. a professional services company used to sell your photos? Let’s compare the situation to something a little more similar. Last year I made about $ 3,600 off my Flickr photos. I made this money through the Getty/Flickr deal. Flickr charges me $ 25/year to store my photos and won’t let me sell my photos myself on Flickr. Do you know how much Flickr/Getty grossed with my photos? About $ 18,000.

    If people want to complain about high fees, how about complaining about Getty/Flickr payouts. Last year they took around $ 14,400 of the money made by *my* photos. You see Getty pays photographers 20% and keeps 80%. SmugMug on the other hand gives Pros an ecommerce engine that can sell both stock and prints and they pay out 85% of mark ups and keep 15%.

    Yesterday a client contacted me about using a photo for stock that I own. I had to redirect them to Getty because Getty also demands an exclusive right on my images that they represent. Bummer! 20% instead of 100% sucks. I still use Getty/Flickr though. It’s a cost of doing business. SmugMug likewise is a cost of doing business for a photographer. If you don’t want to do it for business then just use the cheaper plan without the ecommerce engine.

    The fact of the matter is that Pros have flocked to SmugMug because it gives them a very valuable tool that they need. Unlimited storage, an ecommerce engine with a high payout and really some of the most amazing customer service on the planet. They are a truly wonderful unique family run business operating in the photography space. What they are not, however, is a charity. They are in business to make money and they can’t continue losing money on their most active customers year in and year out. If someone doesn’t need the ecommerce engine the price is the same. If someone DOES use the ecommerce engine though (the biggest storage users and the ones making money off the site) then they will have to pay more. This sounds fair to me.

    So those are my thoughts on SmugMug’s price increase. I support the company, one that has done so much for the photography community, and hope that this tough business decision is something that people can come to terms with and move on beyond.

    [Disclosure: SmugMug is a former sponsor of my former photography show Photo Talk Plus, they are not a current sponsor of anything I’m doing though as we’re taking a break with the show. I also consider many of the wonderful people who work there personal friends.]


    Thomas Hawk Digital Connection

  • What? An Interview with Thomas Hawk! Thanks PetaPixel!

    Thanks to Michael Zhang and PetaPixel for featuring an interview with me today. I’ve been a huge fan of PetaPixel for a long time now. Michael is probably doing a better job blogging photography than anyone else on the web right now and publishes great stories pretty much every single day. In this interview with Michael I talk about my own background in photography and where I think online photo sharing is headed in the next five years amongst other things.

    It’s truly an honor to be featured on such a great photography blog!


    Thomas Hawk Digital Connection

  • Halloween Photography Tips

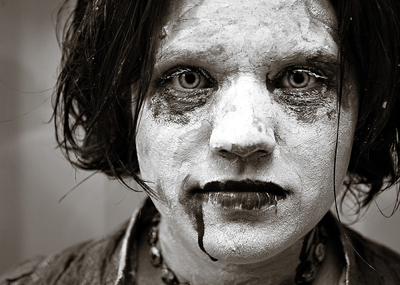
    Halloween-Photography-Tips-1
    Photo by Maharepa

    With Halloween just around the corner I thought it was time to update our Halloween Photography Tips article with some new information and photos.

    Photography Tips to Keep in Mind for Halloween

    There are plenty of subjects around to photograph at Halloween ranging from the traditional jack-o-lantern through to people in costume, to trick or treat ‘treats’ etc. It’s a time of color, emotion and lots of interesting subjects.

    The keys to capturing them are not that different from the normal keys to good composition in photography. As you photograph Halloween this year keep in mind some of the basics of good digital photography. I’ve selected the following tutorials that we’ve written before that should be helpful in your Halloween photography:

    Get more tips like this by Subscribing to Digital Photography School

    Find Points of Interest

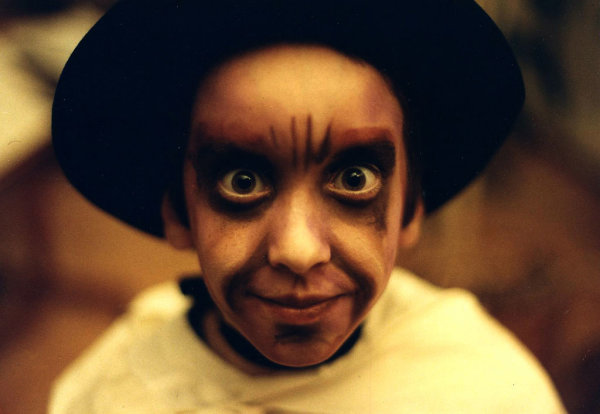
    Halloween-PhotographyPhoto by Sara Heinrich

    Before hitting the shutter ask yourself ‘what is the focal point (or point of interest) in this image?’ All good images have something in them that holds the attention of those who view them – learn more about focal points and how to enhance them here.

    Rule of Thirds

    One way of enhancing the composition of your shots is to place your points of interest inn smart positions. While the rule of thirds can be broken with great effect it’s a useful principle to keep in mind.

    Fill Your Frame

    Halloween is a time of drama and you can add to this in your images by getting in nice and close and filling the frame with your subjects. Whether it’s people or objects – getting in nice and tight will usually add punch to your shots.

    Give Subjects Space to Look into

    When photographing people one of the most effective compositional techniques is to use the space around their faces effectively by giving more room on the side of their face that they’re looking into.

    Find Fresh Angles

    Halloween-TipsPhoto jen clix

    I suspect that the day after Halloween that photo sharing websites will be filled with images of pumpkins that all look much the same. Make your images stand out by finding fresh perspectives to shoot from.

    Photograph the Details

    It’s easy to be distracted by the flashy parts of a time like Halloween but it’s often when you step back, take a look around and notice the smaller details that you find the ‘money shots’. Times like Halloween are filled with all kinds of smaller details and photo worthy moments including decorations, carving the pumpkin, people getting dressed in costumes, sleeping kids at the end of parties, bags full of treats at the end of the night, the ‘fangs’ in Aunt Marie’s mouth, before and after shots of parties, close ups of food etc

    Group Photos

    Halloween is a time that people gather together and it’s an ideal time to practice your group photo techniques.

    Image by John Althouse Cohen

    Candid Photography

    Halloween parties are a great time to get your camera out for some candid photos of your friends and family having a great time dressed up in all manner of costumes. Check out these 11 candid photography techniques.

    Shooting in Low Light

    Halloween-Photography-TipsPhoto Sara Heinrich

    The type of images that come to mind when I think of Halloween are fairly dark and spooky ones – candles in pumpkins etc. After all, the real action of Halloween seems to happen after dark. As a result you’ll want to think carefully about the light sources for your shots.

    To really capture the mood of these situations you’ll want to avoid the stark and bright light of flash photography (or will want to at least pull it back a few stops and diffuse it) and so you’ll need to switch off your flash and do one (or all) of three things to some extent (this is from our exposure triangle series of posts):

    • increase your ISO – the larger your number the more sensitive your image sensor is to light and the darker conditions you can shoot in without having to slow down shutter speed. On the downside you’ll get more grainy/noisey shots.
    • slow down shutter speed – choosing a longer shutter speed lets more light into your camera. On the downside you’ll see any movement in your shots blur (which might add to the spookiness of the image but could also ruin it). Consider using a tripod if you lengthen your shutter speed.
    • use a larger Aperture – this widens the hole in your lens and lets more available light in. It will also lessen the depth of field in your shots. If you have a DSLR with a few different lenses is to use the ‘fastest’ lens you own as it will let you choose larger apertures. For example my f1.4 lens handles low light much better than my f4 lens.

    Diffuse Your Flash

    HalloweenPhoto base10

    Another strategy that I’ve heard of some readers doing at this time of year is diffusing the flash on your camera with colored cellophane to try to lesson its impact upon your shot and also to give the light it produces a glow that might add to your shots – Red might be a good color to try. You’ll probably want to test this before the big night as getting the right density of diffuser will be critical.

    Jack-o-Lanterns

    Photographing Jack-o-Lanterns is particularly tricky as to get the full effect of the glowing inside the pumpkin is a bit of a tightrope walk between overexposing and underexposing due to the light and dark patches in the shot you take. Instead of just one candle inside it is probably worth using two or three to give a little extra light. Also take a number of shots at different exposures (exposure bracketing) and you should get one or two that give you the impact you’re after.

    Got some Halloween Photos to Share? Post them we’d love to see them over at our Forum.

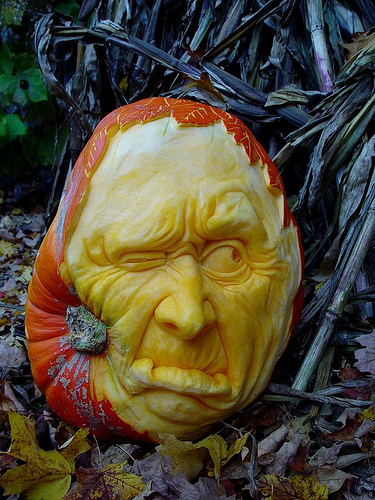
    PS: here’s one more shot from one of our forum members who has submitted some amazing pumpkin carving photographs here:

    Halloween-Photography-Tips-2

    Get more tips like this by Subscribing to Digital Photography School

    Post originally from: Digital Photography Tips.

    Check out our more Photography Tips at Photography Tips for Beginners, Portrait Photography Tips and Wedding Photography Tips.

    Halloween Photography Tips


    Digital Photography School

  • 14 Ways To Significantly Improve Your Photography Today

    © James Brandon | All Rights Reserved

    As photographers and artists, we all hit creative walls. We work and work to improve our skills, and we learn new things, and then it seems we hit a wall. Maybe our images start looking dull to us, like they are missing something. Sometimes I think we over complicate problems like this, searching for some magical trick out there that will give us the creative perspective we are looking for. If you are like me, you know that usually doesn’t work. Instead, here is a collection of tips you can go out and try today to improve your photography and creative eye. Pay no attention to the order, they are all completely random and spontaneous.

    1. Visit an Art Museum | Fall in Love with Art

    I can’t stress enough the importance of art appreciation as a photography. If you want to get better at photography, become an admirer and student of the world of art. Visit a museum and spend the day studying the work of great artists. Better yet, take a pen and paper with you. When a painting or work of art grabs your attention, jot down why. Write down everything you love about it, and the reasoning behind it. If you find something you don’t care for, write that down too.

    Museums are abundant in most big cities. In fact, in a lot of cases, they are even free. If they aren’t free, there may still be ways to get in for free. For example, if you have a debit or credit card through Bank of America, you can get in free at over 100 museums nationwide.

    2. Freshen Your Perspective

    Take a day and focus on perspective. Experiment with different camera angles that you may not have tried before. This tip is only limited by how far your willing to get out of your comfort zone. If your shooting a portrait session, bring a ladder with you. If you don’t have a ladder, climb a tree or find a perspective above your subjects head. Not only is this different, looking up is almost always flattering to your subjects features, especially if they are prone to double chins! If you are photographing flowers, consider shooting them from underneath. While this may get you dirty, I promise it will be rewarding. Play with the angle of the sun and capture the translucency of the flower as the sunlight pours through it. A fresh perspective can almost always give you that creative boost your looking for.

    3. Take a Trip To Your Local Zoo

    Visiting a zoo is one of my favorite things to do as a photographer. Mainly, because I’m doing it simply for me. There is no pressure. I don’t have a client that wants a certain type of image, I don’t feel the need to create a certain look or feel to the photos. It’s just me, my camera and hundreds of exotic animals at my fingertips! Zoos are cheap, and most of them have one day a week where you can even get half off.

    Here’s a challenge: When you go, try and conceal the fact that the animals are at the zoo. That means I had to get creative with the way I framed my shots. This can be challenging at times, but it’s very rewarding. If there is a fence, an obviously fake looking rock or object, or if the surroundings just don’t click, don’t take the picture. Or, simply change your perspective until the framing works. This mindset will get your creative juices flowing, and I promise you will have a blast!

    4. Minimize Your Possibilities

    That’s right, minimize. While being able to shoot thousands of images is nice, it can also dull your creative thought process. With seemingly unlimited images you can just click away, firing off shots left and right all day long. With this mentality, you’re sure to get a few keepers. Right?

    Consider this instead; next time you’re out taking pictures (and not for a client!), take the smallest memory card you have. One that will only allow you a very limited number of shots. And don’t take any other cards. Or, if you only have large capacity cards, just set a limit in your head of only taking 50 images the entire day.

    All of the sudden, there is a certain and definite brevity in the amount of images you can take. You can’t just walk around snapping pictures at everything you see. This will take you back to the limitations of film, and you will have to carefully consider each shot you take. The flip side of this is that (again) your creative juices will begin to flow, and you will be more alert and keen to what is going to make a good image.

    5. Take Your Camera Everywhere

    In his book Visual Poetry, Chris Orwig states that, “Even without taking pictures, carrying a camera enhances life.” I couldn’t agree more. Carrying a camera is an instant way to put your senses on high alert. It causes you to look at the world as if your camera was always pressed to your eye. It gives you a reason to slow down, to take everything in, no matter where you are. Commit to carrying your camera with you everywhere, at least for a certain amount of time. Take pictures knowing full well that the world may never see them. Create photographs of everyday things, moments in time that normally wouldn’t require a photograph. The trick will be to see these subtle events in a new way, and to find a way to make them interesting. Even if you just use your camera phone, this tip is a solid way to improve your creative eye.

    6. Always Be a Beginner

    The moment you adopt the mindset that you’re the best at something (or even the best in your circle), that’s the moment you become unteachable. Great photographers like Douglas Kirkland always keep the mindset of a beginner. I’ve met my share of people who think they know it all. You know the kind. You try and tell them something that you’ve learned, and they shoot you down, saying they already knew that. Or they refuse to except anything new because they aren’t willing to change their ways. I’m telling you, this is a death sentence to your creativity. Set aside your pride and be willing to learn from others, even if you feel you’re at the top of your game. If are at the top, be willing to learn from others who aren’t.

    7. Pick a Color, Any Color

    Pick a color and create a portfolio around that color. If you have time, do this with several colors. Go out and create images that obviously and predominately focus on a single color. If you choose blue, consider subjects where this color is evident. Focus on pictures by water, or the sky. Go out past sunset and into the realm of “nautical twilight,” when the setting sun casts shades of deep blues across the sky and earth. Find textured walls that are painted in different colors and shades of blue. If you choose yellow, scout out a field of sunflowers. Shoot subjects straight into the sun, bathing the frame in golden sunlight. You can make the color even more obvious in post processing by applying filters of your chosen color over the image.

    8. Shadow an Admired Photographer

    For the most part photographers are nice, generous, and giving people. Sure, there are plenty out there who won’t give the time of day to a photographer looking for a mentor, but who wants to shadow or even follow the work of someone like that? Find a photographer that inspires you and form a relationship with them. Offer to take them out to lunch. If you’re lucky, you will be able to learn from that person, and maybe even shadow them. Ask to hold lights for them during their photo shoots, or just carry around their gear. You will learn a lot just observing how they interact with their clients. If they shoot landscapes, the same applies. Offer to carry their gear as they scour the places they photograph. Invite them out for a photo walk and offer to buy dinner, or even a drink afterward. Becoming a great photographer is a tough road to take by yourself, having a mentor can make the difference between success and failure.

    9. Discover the Golden Ratio

    Also known as the Golden Mean, Divine Proportion, the Fibonacci Rule, the Rule of Phi, etc. The Golden Ratio is a common ratio discovered by Leonardo Fibonacci and found throughout nature, architecture, and art. The ratio is believed to make things appealing to the human eye. In nature, it is also believed to be the most energy efficient form of design among living things. There is some debate around it, but it is very interesting. The Golden Ratio is basically the “Rule of Thirds” on steroids. If you have a few minutes, visit YouTube and watch this very interesting (albeit sort of creepy) video of the Golden Ratio. Becoming knowledgeable on topics like the Golden Ratio can drastically increase your chances of creating images that attract viewers attention.

    10. Find a setting, stick with it

    If there is a setting on your camera you are unfamiliar with, go to your camera and dial over to that setting. Now, commit to yourself that you won’t take your camera off that setting until you are fully comfortable with it. If you are only comfortable with automatic, I wouldn’t suggest going straight to manual. But certainly get out of the automatic settings and into the creative ones. You should view the automatic settings on your cameras as poison to your creativity and photographic skill. These settings take away your say in how the image will look, just short of composing the frame and pressing the shutter. Start out with either Av (Aperture Value) or Tv (Time Value) or P (Program) mode. Dedicate at least an entire day to shooting under just that one setting. If you need help, there is always a wealth of information on this site, but the most readily available resource is your cameras manual. Most photographers don’t realize how much they can learn by simply reading the manuals that came with their cameras. I’ve been known to even read my manual on plane rides. What better time than when you have nothing else to do? Once you get one setting down, move to the next one, and work your way up to the infamous “Manual” setting.

    11. Consider the Difference Between Inspiration and Creativity

    There are a number of articles on the web similar to this one, giving a list of ways to get better at photography. Almost all of those lists will tell you to go online and troll the work of other photographers for inspiration. While this may be a good idea in moderation, I’m tempted to take the side of staying away from it. How are you going to develop your own style by mimicking the work of others? How are you going to exercise your creative juices when you get all your ideas off the coat tails of other artists? Owen Shifflett of Viget.com wrote an incredibly interesting (and incredibly popular) blog post called “Consumption: How Inspiration Killed, Then Ate, Creativity,” and I think any photographer or artist, new or seasoned, should read this article.

    If you’re preparing for a portrait session of a family, avoid hopping online to scavenge other photographers sites for posing ideas and post processing looks. Where is the uniqueness in that? With the age of the internet, any bit of information is available at our finger tips within seconds. When we immerse ourselves in the work of other photographers, we end up ripping off our own creativity. Instead, sit down with a pencil and paper and start brainstorming. It’s going to be tough, it’s going to take some time, but what if out of all that, you came up with something completely unique? Something completely yours? After all, how do you think all these other poses came to be? What about all the filters, actions, and presets in your post processing? Think about it, and act on it.

    12. Find something you’re not comfortable shooting, and go after it

    Getting better at anything involves getting out of your comfort zone. If all you do is photograph families and seniors, go out and shoot landscapes one weekend. All of the sudden, your images are going to require completely new camera settings. No more people to pose, no more assistants to hold your flash, no more backdrops or props, no more shallow depth of field or fast shutter speed requirements. Now you have to think about your subject in a complete new way. A landscape doesn’t listen to you. You can’t tell it to move the left or right, or use a flash to reveal a bit more light in a certain area. For the most part, landscapes require deep depth of fields, slower shutter speeds, tripods, and a whole new eye for composition and lighting. If you spend time photographing things your not used to, I promise you will come away with new ideas for what you are comfortable shooting. And a deeper understanding of your camera too.

    13. Use a Tripod

    So far (according to the latest poll here at DPS), somewhere around 70% of readers use a tripod less than 50% of the time. Personally, I know very few photographers who carry a tripod around with them. And you almost never see it with amateurs.

    Something interesting happens when you attach your camera to a tripod. Suddenly, everything slows down. There’s no more snapping photos left and right and quickly filling up memory cards. When you use a tripod, you really have to take the time to compose your image. This mainly happens because you can no longer move the camera around freely. You now have to adjust the tripod to be level with the horizon. You have to move it left or right manually to adjust the position of your subject. Just by doing this, you have to actually slow down and really think about your image.

    Go out and take 10 images hand held, then immediately take 10 more on a tripod. See which set comes out better. I’m willing to bet it will be the latter.

    14. Join a Local Photography Club

    One of the best things you can do as a photographer is network with other photographers. Sure, networking online is a great tool and shouldn’t be overlooked, but having face to face interaction with like minded people is so much better! There are plenty of ways to seek out local photographers. You can join the local PPA division in your city, or just google photography clubs in your area. One of the best clubs I ever joined was a local photography group through Meetup.com. This group has a wealth of very talented photographers and they hold around 4-6 events every month! Whether it’s just doing a photo walk around the city, or getting a VIP pass to the local sports stadiums, these groups are a blast to be a part of!

    Conclusion

    There you have it, 14 ideas you can implement immediately into your photography. Of course you can’t do all of these at once, but any time you feel you need a boost, be sure to check back here. If you have more ideas and/or tips, I’d love to here from you. If these tips have helped you in any way, I’d love to hear from you as well. Be sure to leave a comment below or send me a tweet (@jamesdbrandon) and let me know your thoughts. Be sure to suggest this page to any other photographers you may know. Thanks and happy shooting!

    portrait-photograph-tips.jpg

    Post originally from: Digital Photography Tips.

    Check out our more Photography Tips at Photography Tips for Beginners, Portrait Photography Tips and Wedding Photography Tips.

    14 Ways To Significantly Improve Your Photography Today


    Digital Photography School

  • Photo Hunting in a Zoo: That’s Easy and Absolutely Legal

    Animals photography is one of the most simple kinds of photography (at least beginner photographers think that there’s nothing but waiting and flicking). You don’t need to ask models to turn their heads to the right, to explain them how to strike poses for the camera. Animals don’t care about you – they just lay, jump and stare. That’s a Continue Reading
    Photodoto

  • Top 5 Tips on How to Photograph Food

    A Guest Post by Deidra Wilson.

    Food Photographer Vegas Deidra Wilson DPS

    Many of you may want to step up your food photography from iPhone to fabulous, but you’re sure that it’s quite impossible to do without a food stylist and ten grand worth of gear to help you make that dish look amazing. I am living proof that that’s just not the case. If you have a team that is willing to work hard and a location that allows for great lighting, you’re more than halfway there.

    1. Work with a great Team – Even if You’re the Only One on it

    Since you likely don’t have a food stylist, make sure you have a chef that’s willing to go above and beyond when it comes to plating the dish. You want everything to be brightly colored and placed neatly. Any garnishes should be super fresh (no wilted greens, please!). Sauces, when used as decoration, should be bright and shiny. Since you don’t have a stylist, you’re in charge of styling the food on the plate. Look through your lens and take a few test shots. Look at the images and determine what (if anything) is detracting from the image. If there is, fix it and try again!

    2. Keep it Fresh

    If you must photograph for an extended period of time, you may wish to replace parts of the dish as needed. For example – melted cheese will harden quickly and no longer appear appetizing. If you are photographing any type of meat, it will likely start to release juices that will mar the plate. Re-plate it and keep shooting! It’s better to take the time to redo something, rather than try to correct it in post-production.

    3. Focus on the Details

    For example, if you have a piece of meat that is grilled, make sure those grill marks are beautifully straight and perfectly criss-crossed. If you have a sushi roll, make sure the pieces are placed in an appealing manner and that any details like sauces or garnishes aren’t detracting from the image. Sometimes less is better when it comes to food photography. A plate with too much going on will easily detract from the star of the image.

    4. Use an Abundance of Natural Light whenever Possible

    Natural daylight tends to be the most flattering for any subject, food included! I love to shoot food right next to a big window. You can either backlight it by shooting into the light, or use the available light to light your image. If you must use lights, try to use daylight-balanced hot lights or strobes (around 5000K if possible). This will nearly replicate natural light and allow you to achieve beautiful results.

    5. Use a Shallow Depth of Field

    This creates interest and drama in the subject and allows you to make the best of the available light. When you shoot with a shallow DOF, you’ll want to keep the focal point towards the front of the image. So, if you’re photographing a sushi roll, don’t focus on the pieces furthest from your lens – focus on the piece closest to the front and let the rest of the roll elegantly fade into a beautiful bokeh.

    Overall, have fun with it! I’ve been photographing food as a commercial photographer for more than a decade. Every shoot is different and I’ve worked under nearly every condition imaginable, including completely dark rooms. Be creative, be willing to think outside the box and get ready to experiment and have fun.

    Deidra Wilson is a Las Vegas Photographer who loves to make the best out of any lighting situation and create incredible images from seemingly nothing. You can follow her on Twitter at @deidraphoto

    Post originally from: Digital Photography Tips.

    Check out our more Photography Tips at Photography Tips for Beginners, Portrait Photography Tips and Wedding Photography Tips.

    Top 5 Tips on How to Photograph Food


    Digital Photography School
  • My Neighbourhood: Weekly Photography Challenge

    The Old Church in the heart of AmsterdamThis week your photographic challenge is to shoot and share an image on the theme of ‘my neighbourhood’.

    This is based on the rise in the interested of street photography and urban photography that we’re seeing among many of our readers – although it also leaves room for you to explore a variety of types of photography.

    You might wish to photograph people in your neighbourhood (either posed portraits, environmental portraits or candid street photos), some architecture, abstract objects or anything else that gives us a glimpse into the area you live.

    It should be fascinating to see the neighbourhoods of our global audience.

    Once you’ve taken and selected the ‘Neighbourhood’ image that you’d like to share – upload it to your favourite photo sharing site or blog and either share a link to it or – embed them in the comments using our embed tool to do so.

    If you tag your photos on Flickr, Instagram, Twitter or other sites with Tagging tag them as #DPSNEIGHBOURHOOD to help others find them. Linking back to this page might also help others know what you’re doing so that they can share in the fun.

    Also – don’t forget to check out some of the great shots posted in last weeks challenge – Textures challenge where there were some great shots submitted.

    Post originally from: Digital Photography Tips.

    Check out our more Photography Tips at Photography Tips for Beginners, Portrait Photography Tips and Wedding Photography Tips.

    My Neighbourhood: Weekly Photography Challenge


    Digital Photography School