Category: Photography

  • Custom Workspaces in Photoshop

    Ps custom workspaces opener

    I like Photoshop to open and “look the way I want to see it”. But sometimes ‘the way I want to see it’ is different than others. I’m fickle – but thankfully Photoshop plays nice with me – the secret is its Workspaces. These Workspaces let me preconfigure my Photoshop screen for various scenarios, to save them so I can reuse them, and to put everything back in its place when I mess them up.

    If this sounds like something you could use – here’s how to give your Photoshop window a custom look with workspaces.

    The first thing I do is to set up Photoshop the way you want it to look and that means hiding all the panels you don’t want to see and displaying those that you do.

    Then arrange them on the screen exactly the way you want to see them. For me, I prefer my toolbar to be in two columns rather than one long one. I like my layers and paths palettes visible but not much else.

    Once the screen is organized the way you want it to look, from the dropdown list in the top right corner choose Essentials > New Workspace and type a name for the workspace. Select the options for keyboard shortcuts and menus select and click Save.

    Ps custom workspaces 1

    You can repeat this process, if desired, and create other workspaces. You might make one for photo-editing, one for collage, one for illustration or one for videoing depending on your own personal needs.

    In future you can set up your screen by choosing the workspace of your choice from the dropdown list.

    Ps custom workspaces 2

    If you move things around and things go a bit crazy it is easy to reset a workspace back to how it was when you last saved it.

    To do this, first make sure you are viewing the workspace to reset and then open the Workspace menu and choose Reset .

    Ps custom workspaces 3

    Likewise you can return to Photoshop’s default workspace anytime by selecting Essentials then click Reset Essentials.

    Ps custom workspaces 4

    And one last word on workspaces…
    If you want to see what’s new in Photoshop CS6 click the New in CS6 workspace and you can see what is new in Photoshop. Open a menu and any new options in it will show as blue on the menu.

    Ps custom workspaces 5

    Post originally from: Digital Photography Tips.

    Check out our more Photography Tips at Photography Tips for Beginners, Portrait Photography Tips and Wedding Photography Tips.

    Custom Workspaces in Photoshop


    Digital Photography School

  • An Interview With Thomas Hawk

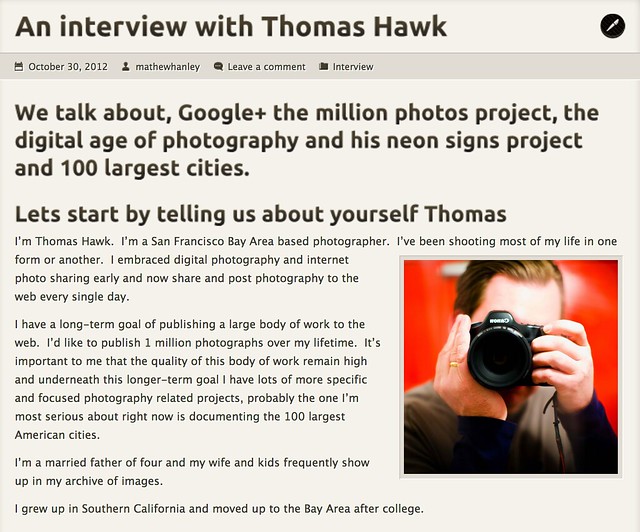
    An Interview With Thomas Hawk

    Photographer Mathew Hanley has an ambitious goal to interview as many Google+ photographers whose work he likes as possible. I’m his fourth interview. I love seeing people pursue projects like this where they promote photographers on the web. In the interview I talk about my neon signs project, my 100 largest American cities project, and other ideas around photography and the web.

    Check it out here, add him to your circles on Google+ here, and if he asks to interview you say yes.


    Thomas Hawk Digital Connection

  • How To Become A Professional Photographer. Now.

    I see more and more magazine articles and blog posts where disillusioned photographers advise aspiring young passionate artists not to enter this career. A few weeks ago, for example, I picked up a popular photography magazine and was left depressed because just about every article talked about photography being a dying profession and the inadequacy of it to pay bills. Continue Reading
    Photodoto

  • How To Deal With A Dirty Camera Sensor

    yachts-sensor-cleaning

    Have you ever noticed little black specks appearing in brighter parts of your photos? These are dust specks that have found their way on to the sensor of your DSLR. Although not a serious problem, I think they’re amongst the most infuriating things photographers encounter! So I’m going to provide an easy, step-by-step process for removing them.

    Firstly, I’ll just mention that one very simple means of preventing dust from landing on your sensor in the first place is to angle your camera body downwards when changing lenses. Similarly, when a really good shot appears to have been blighted by the presence of these pesky blobs, just use the clone-stamp tool in Photoshop or Lightroom to eliminate them.

    yachts-sensor-cleaning-1

    Cleaning Your Sensor, Step-By-Step:

    1. First things first. Get an idea of what you’re dealing with by taking a test shot. The idea here is to create an image that shows any senor dirt at its absolute worst.You’ve probably noticed that sensor dirt is only visible against bright parts of an image, like the sky. It’s also exaggerated when the aperture is at a wide setting. So, find a plain white subject, like a wall or a featureless overcast sky, focus on infinity and select the maximum aperture. Take the shot.
    2. Now it’s time to inspect the image. So upload it to your computer and open it on whatever processing software you use. Increase the contrast a touch to make things even clearer, before zooming in to 100%.This should give you a really clear idea of what needs to be done, and in what position some of the worst offending specks are.
      sensor-preview-dirty
    3. In your camera’s menus find the ‘mirror lock-up’ option and turn it on. Sometimes this is called ‘sensor cleaning mode’ or similar. This causes the reflex mirror inside the camera body to swing up and remain open, exposing the image sensor.
    4. The first tool you’ll need is a ‘bulb-blower’, which is a rugby ball shaped rubber air pocket with a thin plastic tube attached. Squeezing it causes air to be propelled at reasonably high pressure, and quite accurately, from the end of the tube.Remove the lens from your DSLR and hold the camera at a downward angle (this is important as it allows the dust to fall out of the camera). It’s not a bad idea to secure the camera in position on a tripod. Now carefully move the tube of the bulb blower towards the sensor, being careful not to make contact with any internal parts. Pump air for about 30 seconds to disperse any loose dust particles. Return the air blower to its pouch and re-attach the lens to your camera.
    5. Now take another test shot, exactly as in steps 1 and 2. Has the air blower been successful? If there are no longer any visible dust specks, job done. If there seem to be a few very faint ones, you can decide whether it’s worth having another go with the blower (remember, your test shots show the dust particles at their very worst).Sometimes you’ll find that there are some truly stubborn marks which haven’t even moved position in the slightest. Often these appear with a slight ring around them and have been become attached to the sensor with more than just static. If you see some of these, it’s time for step 6.
    6. To get rid of more stubborn marks, a sensor cleaning brush can be an effective tool. Select mirror lock-up (step 3) and position the camera at a downward angle, using a tripod if you wish to have maximum control. Take a sensor cleaning brush and carefully swipe it across the face of the sensor once.Don’t be tempted to go back and swipe it across the sensor again, for obvious reasons. The whole idea is to transfer the dust from the senor to the fine bristles of the brush. So once you’ve picked them up, remove the brush from the camera and blast air through the bristles with the air blower to clean them. Now you can return to the sensor and swipe the brush across it another time. When finished, return the brush to its storage box so that it doesn’t pick up any dust.
    7. Now for another test shot (as per step 1). Inspect the image and decide whether further cleaning is needed (as per steps 2 and 5). You may well find that those really stubborn marks have still stayed put, in which case it’s time for step 8.
    8. The last tool for cleaning sensors is a sensor swab, which comes with a special solution. Set everything up as before, with mirror lock-up on and lens removed. For this, it’s best to work sitting down with the camera body facing upwards for easy access.Apply a small amount of cleaning solution to both sides of a swab. It doesn’t want to be dripping or almost dry, but wet enough to budge stubborn particles. Swipe both sides of the swab across the sensor once. Use downward pressure (remember, you’ve already failed to get rid of these specks with an air blower and brush), but do treat it like the extremely expensive object that it is. Discard the swab and repeat with a new one.
    9. Re-attach the lens and take another test-shot (as in step 1). You should find that even those dust specks that seemed to have put down roots have now been blasted away! Zoomed in at 100%, you should have a satisfyingly pristine sensor.
      snesor-preview-clean
    10. If it turns out that there are still little specks of dirt, you have a couple of options: a) Have another go with the swabs, this time applying a touch more downward pressure and using a bit more solution, or b) send your camera off for a professional clean.

    There’s no need to be afraid of cleaning your camera’s sensor yourself. As long as you use the right equipment and are not heavy handed, you should rarely need to spend money on a professional clean. Personally, I tend to find that the air blower does the trick 90% of the time. Don’t forget the clone stamp tool either, which is an invaluable asset for rescuing dust-affected images.

    Josh Austin is a photographer based in the UK, with a particular interest in landscape, travel and street photography. When not out shooting he shares tips on digital photography through his blog Photography Art Cafe.

    dslrBlog

  • Bird Photography Near Feeders

    A Guest Post by Lithuanian Photographer Tadas Naujokaitis.

    Bird photography is quite difficult because birds don’t do what a photographer wants. Moreover, it’s often hard to get close to them. And when you have more experience in photography, you realize that it’s even more difficult to take a good bird photo, because you need a good background and a beautiful environment. However, there are a number of ways you can improve the bird photos you take. In this article, I’ll explain some tips on photographing birds near feeders.

    The place

    The place is the first thing you need to consider. You need to decide what bird species you want to photograph, and work out where you’ll find that kind of bird.

    Depending on your location, even your backyard can be a great place for a feeder to attract the species you’re after. I wanted to photograph forest birds, so I chose a local forest. I searched for the exact place in that forest quite a long time—mainly, I needed to consider the background, and the amount and direction of the light that reached the feeder.

    Ideally, your location will have a smooth background (when I search for a background, I use manual focusing at ~4m and take many test shots) and enough light. I’ve found it’s best when the sunshine reaches the feeder in early morning. Also, be sure to ask for a permission to feed and photograph the birds if you are not the land owner.

    The hide

    Once you’ve worked out the exact place where you’ll put your feeder, you need a hide. I recommend using a permanent hide, because birds will understand it as a part of environment, and you won’t need to set it up and then wait while the birds get used to it each time you decide to take photos.

    You can build the hide from whatever you like—even an old door can be very useful. I built my hide from the branches I found in the area. It required a bit more work, and it isn’t waterproof, but I didn’t want to use expensive materials because there is always the risk that your hide can be damaged by other people if you don’t build it in your own backyard.

    One more thing to note: the hide should be large enough for you to stay in it comfortably, because you may spend many hours in it. This is how my hide looks:

    2-birdphotography.jpg

    The feeder and food

    The construction of the feeder itself isn’t very important. I prefer the platform feeder because, if you like, you can put many decorations on it when you’re photographing birds.

    However, the food is very important. I recommend using sunflower seeds, peanuts, and suet cakes. Other similar products should be fine, too, but be sure the food you choose won’t harm the birds you’re photographing. The food must not be tainted, salted or smoked. And if you feed birds in the colder seasons of the year, you must feed them constantly until the weather becomes warm and the snow melts—otherwise many birds can die. Be prepared to spend some money on food. As am example, you may need even more than 100kg of sunflower seeds for one winter if you use them as the main food.

    3-birdphotography.jpg

    The perch

    If the birds have already found the food, you can start shooting. Find a beautiful perch, twig or rotten stump and put them on the feeder or near it. If you’d like, find some decorations to add to the scene—berries, for example. They will make the composition of your shots more lively.

    Be creative: try using various perches, or put the food in such place that you don’t see it though the lens. You can use holes in the feeder, put the food on the side of the perch that isn’t visible, or simply place it below the perch on which the bird will sit.

    The food can also be put in such location that the perch becomes an intermediate stop for birds moving towards the food. Often it’s difficult to photograph the bird without food in its bill. If this is your goal, try to hide some food so the bird will need to search for it. You can also take some pictures of birds without food, when the food has just run out, but you won’t have much time to shoot before the birds realise that there’s no more food and fly away.

    My recommendation, however, is to always have plenty of food in the feeder, which will attract more visitors to the feeder, and be ready to quickly take a photo before the birds take any food.

    4-birdphotography.jpg

    Equipment

    You should get good results with any DSLR and a 100-200mm lens. However, with longer focal length, you’ll get a better background. A tripod is usually necessary, too.

    5-birdphotography.jpg

    Camera settings

    Exposure: 1/50-1/500 or even shorter, depending on how fast the birds are (faster birds need a shorter exposure), and how much light you have (if there isn’t much light, you may need to set longer exposure if you don’t want to use high ISO settings).

    Aperture: if you don’t have enough light and want the best possible background, select the largest aperture (the smallest number). If it’s difficult to get the whole bird in focus, close the aperture a bit.

    ISO: use as low an ISO speed as possible. However, if you don’t have much light, it’s better to set ISO 800 and get sharp pictures than ISO 200 and take blurry ones.

    The light

    The best time for photography is morning or evening because the light is soft and has a pleasant hue, shadows are not so distinct, and it’s easier to get details from very bright and dark areas. Overcast days are better than sunny ones because the shadows are less distinct. However the midday sun can be your friend if its rays are diffused by trees.

    6-birdphotography.jpg

    Composition

    It’s usual to leave some space in the direction in which the bird is looking or flying. Try using the rule of thirds in your composition. Avoid any distracting elements and take the picture at the bird’s eye level. Don’t always try to fill the frame with a bird: remember that birds are very fast creatures, so they need space. Even in the photo!

    7-birdphotography.jpg

    Conclusion

    The best part of bird photography near feeders for me is that I have a great time. It’s usually hard to believe that 10 hours have already passed – I always wish I had more time. I hope you will have a good time photographing birds near feeders, too.

    8-birdphotography.jpg

    About the Author:

    Tadas Naujokaitis lives in Lithuania. See more of his work at www.tadasnaujokaitis.tk and connect with him on his Facebook page.

    Post originally from: Digital Photography Tips.

    Check out our more Photography Tips at Photography Tips for Beginners, Portrait Photography Tips and Wedding Photography Tips.

    Bird Photography Near Feeders


    Digital Photography School

  • It’s all About Framing!

    A guest post by Sévrine Monnay, New York Photo Tours company citifari’s copywriter

    How to make a great picture? What are the keys elements that help shooting pics successfully? What should we have to be careful about to get the most out of the scene we want to remember?

    Why Framing?

    Of course the camera settings and the subject choice play a role, but the framing is most critical. We don’t take pictures. We build them. Let’s take an example: on vacations and you may want to photograph a famous monument. You have chosen your topic and you are ready to press the shutter. Just few questions: have you paid attention to the elements around? Is there another way to approach the picture? Must the subject necessarily be at the center of the composition? Photography is not only to put in the box the subjects you want to remember. Photography is more about feelings, than things. Give life to your subjects! Retransmit sensations! Be the master of your pictures! In short, think out of the (camera) box!

    20120428 IMG 2909

    Framing or Composition?

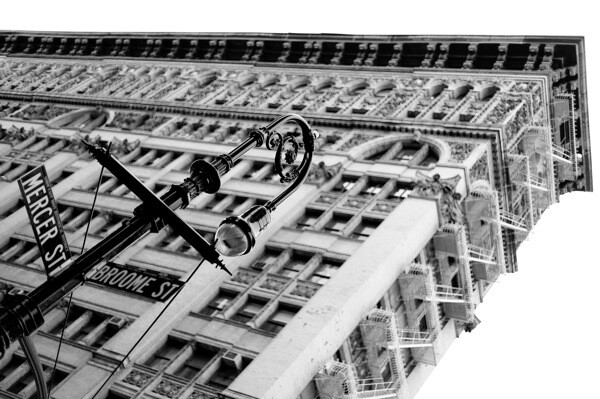
    However, basics framing rules must not be forsaken. There is a difference between composing and framing. Composing is an artistic process, while framing is about defining your creation. To put a strict frame will not harm your composition; on the contrary, it will give character to your pictures. Let’s take the picture below. The first rule of framing is not to cut your main subject, in this case, this magnificent cast-iron building and its timeless charm. But it’s interesting to play with the particular form of the subject too. That’s why the picture is shot from below to give the sense of depth. Then the second choice is about the subject size. The building is not shot from top to bottom to keep the length dynamic. The floor lamp, as the second subject of the picture, is taken in the same way. The last adjustment is made with the photo slightly turned to pass the feeling that the building is tilting forward.

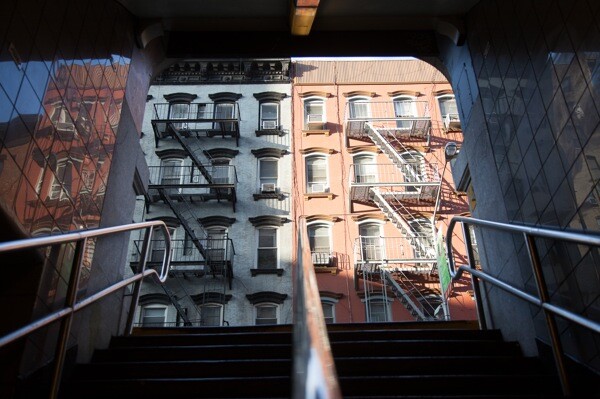
    20120325 IMG 1916

    How to get it?

    It is not that hard to pay attention to everything when you are taking your pictures. No panic! Remember to train yourself for your next pictures and it will rapidly become a habit that you don’t think about. Soon you’ll have the perfect picture in mind well before taking out your camera and you will produce next picture perfect candidates.

    20120826 IMG 5078

    How to Practice Framing?

    Citifari offers photo tours in New York City. Structured as a 2-1/2 hour practical workshop, citifari tour helps you get comfortable with your camera settings and take great shots in New York City. They currently offer 3 photo tours: New York Landmarks, New York by Night, and Central Park. The new Soho tour will be launched on 29th September and will pay tribute to the timeless architecture of the famous Cast Iron District. For more information about citifari:

    www.citifari.com
    www.facebook.com/citifari
    www.twitter.com/citifari
    pinterest.com/citifari@citifari
    citifari.tumblr.com

    Post originally from: Digital Photography Tips.

    Check out our more Photography Tips at Photography Tips for Beginners, Portrait Photography Tips and Wedding Photography Tips.

    It’s all About Framing!


    Digital Photography School

  • Friday Night Lights Follow-Up: Don’t Try This at Home. Or Away.

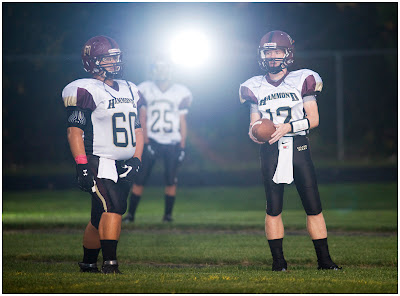
    Remember last month's post on lens-axis fill flashing high school football? I promised to get back with you after experimenting with lighting a game with off-camera flash—way off-camera.

    I spent a decent amount of time figuring out how to approach it: what flash, what beam throw, light position, dealing with the coaches, remotes, fill light, ambient balance, yada yada.
    Here's what happened. Read more »


    Strobist

  • LowePro S&F Camera Exchange AW Bag 100 [REVIEW]

    I see a lot of bags and packs that look like gimmicks trying to be passed off as something the average consumer can’t live without. Often they are toured as such. Few of them live up to the concept of making photography easier.

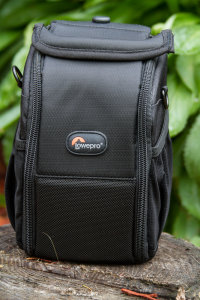
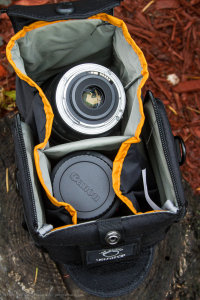
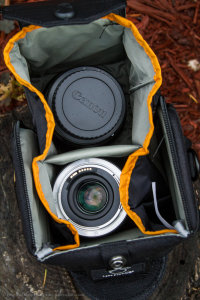
    And that is why I eyed the LowePro S&F Lens Exchange 100 AW with a skeptical eye. “Look!” I imagined the PR rep shouting from on high, “You can change lenses more easily!!” I’m not a fan of individual lens cases and I usually only carry one extra lens not on my camera when I travel. But with my recent need to test a Tamron 90mm Macro, I decided to see if the small bag could deliver when I used it in conjunction with a Canon EF 10-24mm.

    Specifications

    • Internal Dimensions: 11 x 11 x 17 cm (4.33 x 4.33 x 6.69 in)
    • External Dimensions: 14 x 14 x 19.5 cm (5.51 x 5.51 x 7.68 in)
    • Weight: 0.4 kg (0.88 lbs)

    In The Real World

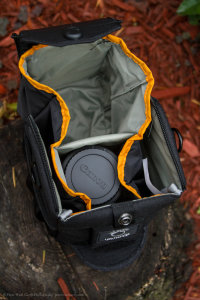
    The concept is simple: When opened, this bag has holders for two lenses. It can’t hold them both when closed, but the idea is you open the bag, expand it out, drop one lens into the empty holder, swap end caps and put the first lens on your camera. It’s meant to make things easier for one handed operation when you don’t have a place to set your second lens during a swap.

    And it works! I’ve been using the under-the-arm technique for a while and it frankly frightens me. I’m not the steadiest of hands at times and dropping a $ 1500 lens is a bad idea. This bag actually cures that problem.

    What’s more, this bag doesn’t try to be everything to everyone and I really like that. It holds a smaller lens (like a 16-35mm, 50mm or even 90mm) well and has space for another. I didn’t try it with a 16-35mm and the wide lens hood, but it should fit as well. It can’t handle a 70-200mm but for that it has a big brother, the 200 model.

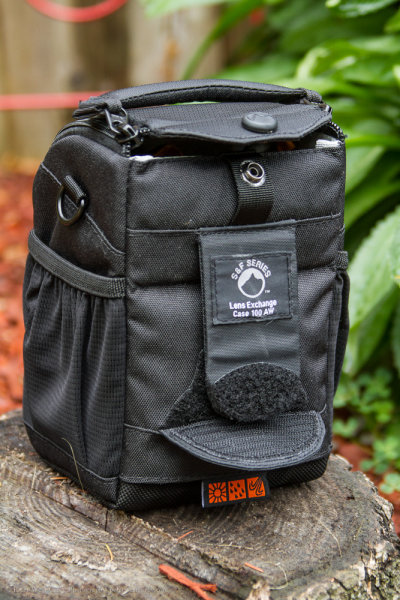
    There are a couple of elastic pouches on the sides to hold lens or end caps. Beyond that, the bag isn’t larger than it needs to be to accommodate extra stuff. No pockets for keys or extra cards or cell phone. Just a lens bag.

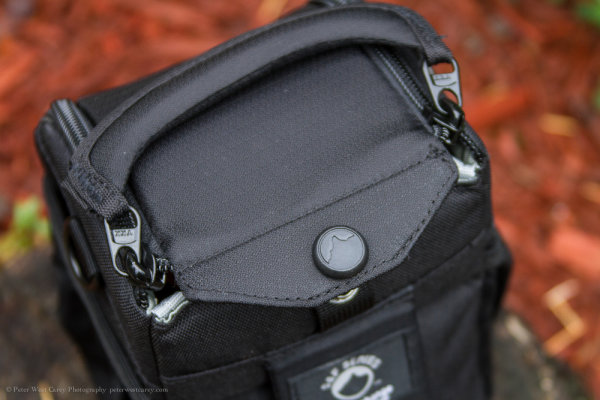
    There is a nice belt loop velcro attachment on the back built in the normal, rugged LowePro fashion. The zipper pulls on the top are smooth, as I’ve also come to expect from LowePro and the use of a single handle is astonishingly easy. I’ve tried binding it up and it keeps on working properly. Very well designed for being so dang simple. There’s also a snap on the back (when both of your hands are free) to help secure the bag.

    A shoulder strap is supplied and there is a rain cover. The rain cover seems a bit silly to me especially since it has holes form the shoulder strap. There is no way to get into the bag with the shoulder strap attached and the rain cover on. I have to remove the shoulder strap then take the cover off, which obviously requires more than two hands and a place to set the bag, most likely. If the rain cover were not attached to the bag (a long time gripe of mine about LowePro rain covers in general) I could flip the rain cover the opposite way and still work the system with one hand.

    Conclusion

    The LowePro S&F Lens Exchange 100 AW works and despite me not wanting to like it (or lens pouches in general) I will be using it with my other bags when I want a slimmed down kit. I can attach it to the hip belt of a f-stop bag or the outer loops on a smaller camera/lens bag. I can also just loop my belt through it and forget about the bags altogether.

    It also works better for me than the standard LowePro lens cases. With this bag, the case opens wise (I find those single lens bags have a lid that likes to flop closed when I don’t want it to) and the opening with a handle is just easier.

    Get a price on the LowePro S&F Camera Exchange AW Bag 100 at Amazon.

    Post originally from: Digital Photography Tips.

    Check out our more Photography Tips at Photography Tips for Beginners, Portrait Photography Tips and Wedding Photography Tips.

    LowePro S&F Camera Exchange AW Bag 100 [REVIEW]


    Digital Photography School

  • What I Learned from Meeting Bruce Gilden

    by Michael Ernest Sweet

    Bruce Gilden

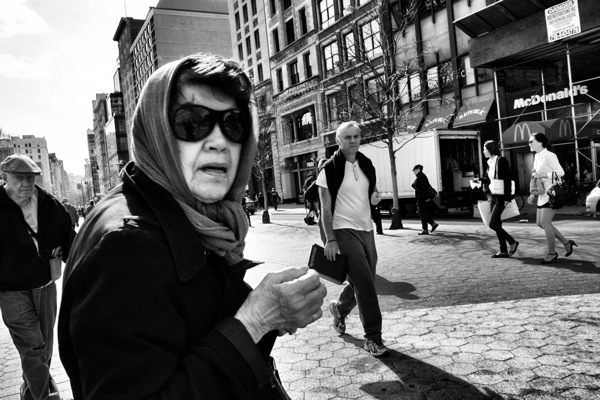
    It was bound to happen. I had already been in New York City for a couple of weeks and planned to spend the rest of the summer working the streets. As a street photographer, Times Square is a natural draw. So, Times Square is where I began and that’s where it happened. First, a flash of light, then, a snippet of a safari jacket. At once, I knew this would be the day I met Bruce Gilden.

    Bruce Gilden is the stuff of legend for street photographers all over the globe. A full member and vice president of Magnum Photos – the storied international collective of photographers – Gilden is one of the most prolific street photographers at work today. It was in the 80′s that he began seriously working the streets of New York City and quickly developed his signature style. Gilden is known for up close, black and white photographs punctuated by off-camera flash. His subjects: unique and startled looking strangers which Gilden refers to as “characters”.

    So, what did I learn from this chance meeting with a great photographer? A lot. I’ve summed up the twenty minute sidewalk master class in four major tips:

    Great photographers care about great photographs, not cameras. This was an important aha moment for me. I’ve never had GAS (gear acquisition syndrome) too badly, but there have been a few late nights reading B&H.com. Right away, I noticed Gilden’s very old and very used Leica M6. Now, here is a man that could have any camera he wants (and certainly a new one) and what does he use? The same camera he’s been using for decades but why? Because he knows the camera inside and out. He knows how it’s going to react in every situation. Despite this I had to smile, it was not only tapped up, I think it may well have been tapped together! I asked him about it. He replied that a camera is just a tool. He gestured toward my Ricoh GR IV and told me that my camera was just as capable as his. It’s the guy (or gal) behind the lens my friend. He admired my camera a bit more and well, I was ticked pink as the saying goes. Here’s Bruce Gilden admiring my little Ricoh. I’ve not wasted time lusting over gear since.

    Just do it! I watched Gilden work. He’s not scared of anything. Imagine getting into a stranger’s face (mere inches away) and firing a flash. He does that, over and over again. The most interesting part? No one seems to care. Gilden even thanks people afterward more often than not. So much for the old saying about never making eye contact. He not only looks at people, he speaks to them. This was crucial for me to witness firsthand. I’ve been up close and personal with my camera ever since. In fact, the image below (Jackie Who?) was taken moments after my meeting with Bruce.

    Jackie Who

    It may not be my best shot ever, but it’s an important photograph for me. It was the beginning of my own style, it was the picture which brought me out of my shell and allowed me to get close to people. I get so close now that people can smell my camera. Whatever you do, don’t shoot the streets though a long lens. The photos will lack a background story and are ultimately boring. Get a 28mm and get close, really close. Hey, if someone does say something to you just use this line: “Do you know that guy Gilden? He’s even worse!” I told Bruce about this quote and he laughed and said he’d be sure to use it himself the next time he got cornered.

    Edit before you shoot! Many people don’t seem to be able to edit at all from what I see on Flickr. However, editing before you shoot is even more rare. Until I met Bruce I was trigger happy too. Hey, what the heck it’s digital right? No harm done, so I thought. But watching Bruce work revealed something to me. He doesn’t just shoot. He thinks about what he’s going to shoot, he ‘sees’ it and then decides whether or not to pull the trigger. So what difference does this make you ask. Well, it helps remove the clutter of mediocre shots from your life. Instead of buying five hard drives a year, now you can do with two! I know this sounds trivial and it is hard to explain well in writing. Just trust me on this one. Learn to see as your camera does and edit your shots ‘before’ taking them. If you shoot black and white, learn to see in black and white (as Bruce does) I promise you’ll see the quality of your photography improve. Uploading ten great shots at the end of the day will be a heck of a lot more satisfying than trying to find ten great shots in a hundred. You won’t look back.

    Use a flash when you don’t need one. So who the heck uses a flash outdoors in bright sunlight? Bruce does. It adds effortless drama to the photograph, especially in black and white. You get some background defocus too. Overall it just adds a layer of ‘wow’ to your street photos with little effort. Of course, there is some learning curve here but give it a go and see what happens. All of my photographs were kind of flat and muted until I learned this trick from watching Bruce work. Now I hardly shoot without the flash. I went from a no flash guy to a flash guy overnight. Mind you, using flash will blow your cover. Sometimes you can get away with photographing someone when there’s no flash and they don’t even notice but chances are this won’t happen if you fire a flash. So, increased risk, increased gain.

    My meeting with Bruce Gilden was but twenty minutes. In some ways it seemed like twenty seconds, in others like twenty days. Either way, I took away enough knowledge, tips, tricks and inspiration to last a career. Meeting Bruce Gilden was not only fun, it was ‘fundamental’ to my life and work as a photographer.

    Michael Ernest Sweet is an award-winning educator, writer and street photographer. A recipient of both a Prime Minister’s Award and the Queen’s Medal, Michael divides his time between Montreal and New York City. More of his photography can be viewed at MichaelSweetPhotography.com. All images in this article are (c) Michael Ernest Sweet.

    Post originally from: Digital Photography Tips.

    Check out our more Photography Tips at Photography Tips for Beginners, Portrait Photography Tips and Wedding Photography Tips.

    What I Learned from Meeting Bruce Gilden


    Digital Photography School
  • Last Chance to Get FroKnowsPhoto Video Course at 30% Off

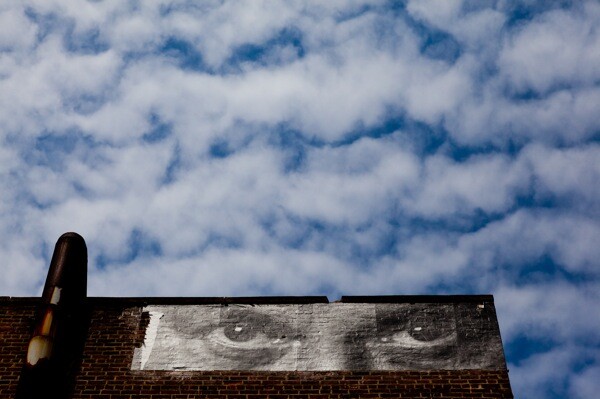
    Over the last couple of weeks our sister site – SnapnDeals (a site for photographers wanting great photographic deals) has been running a special 30% discount on Jared Polen’s ‘FroKnowsPhoto’ video course.

    NewImage

    This has been one of our most popular deals yet so I wanted to write a short post to let you know that it is about to end.

    NewImage

    This course is ideal for anyone with a DSLR who wants an introduction to getting the most out of it.

    So many people now own DSLRS which give amazing power and control to a photographer… yet so many people also never move out of Auto mode and harness that power.

    NewImage

    This course is all about giving you the information you need to do just that.

    NewImage

    Normally $ 97 USD… the price at present via SnapnDeals is just $ 67 USD for the next 48 hours.

    Get your copy of this great course here.

    Post originally from: Digital Photography Tips.

    Check out our more Photography Tips at Photography Tips for Beginners, Portrait Photography Tips and Wedding Photography Tips.

    Last Chance to Get FroKnowsPhoto Video Course at 30% Off


    Digital Photography School