Category: Photography

  • 7 Tips for Photographing Paddlers

    I would like to remind you this old post, How Did you Shoot It? with some updates and revisions. It was written two years ago as part of ProBlogger’s group writing project – “How to …” I hope that these tips are still useful. They represent quite well my own approach to paddling photography.
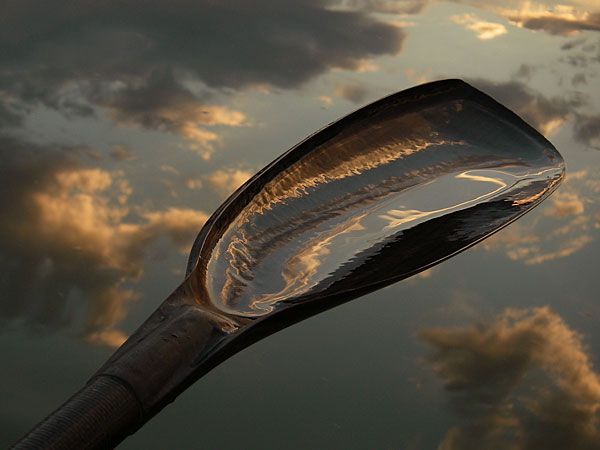


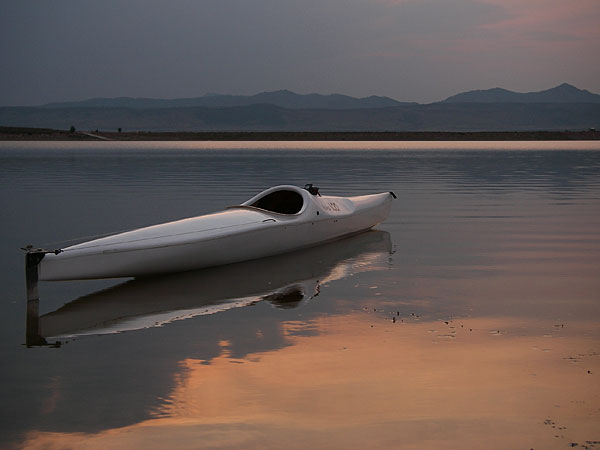
    After posting the above picture, “Paddling in Clouds”, I’ve got several questions: How did you do it? And, I had troubles to provide a reasonable answer since the shot was technically really trivial.

    Finally, I figured out that it is more about seeing pictures than about shooting and wrote these more general comments.

    1. Look and See

    Learn to see pictures. You do not need a camera to practice it. I am often “shooting” without camera, especially, when driving: that would be a good picture, this old barn would look great at sunrise, that dust devil at a horizon can be seen only through polarized glasses.

    I believe that looking at photographs in magazines, books and calendars also help to develop your seeing capability. I am checking all new photography books arriving to my university library and browsing most of photography magazines in a local bookstore.

    There are several good books on the art of seeing. Freeman Patterson comes to my mind first. Recently, I spent a lot of time with Photographer Eye by Michael Freeman.
    2. Have a Camera

    A photographer is shooting pictures, not a camera, but you should have your camera ready. “Ready” means not only accessible. You should be familiar with your camera settings and operations. Learn what camera settings are working for your paddling photography. It may be difficult to figure out camera features when sitting in a tippy kayak and waves are splashing.

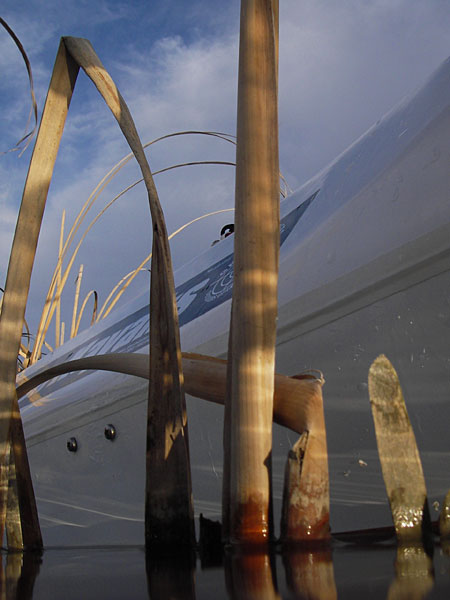
    Compact waterproof digital cameras like Pentax Optio “W” or Olympus Stylus “SW” revolutionized my kayak photography. I can shoot pictures I was not able to execute before, e.g., with a partially submerged camera. I am ready to sacrifice some camera features or to some extend a picture quality for convenience and accessibility of these tiny camera for paddling environment.

    3. Be Aware of Light

    The best light for outdoor photography is when the sun is low, i.e., around sunrise and sunset. I know that I can expect interesting light at the end of my afternoon paddling workout. If the sunset is not very exciting I can shoot water reflections or a tree silhouette.

    Ironically, on paddling trips, we are often passing the best scenery in the middle of day, when the light is harsh and unpleasant. I am still shooting some snapshots for documentary purposes. My primary motivation to start paddling fast kayaks was to get in time to my shooting spots. All that racing craziness came later …

    4. Point (compose) and Shoot

    Do not be afraid to shoot without viewfinder. Well, you don’t have one in Pentax Optio. And, the LCD display is often difficult to read in a bright sun. It shouldn’t stop you from shooting. Use some creative angles as far as you can extend your arm. Remember, you can put this camera under water next to you kayak. The lack of a viewfinder is perhaps the main reason preventing some photographers from buying this camera, but I think that this a reasonable compromise in the camera of this size.

    I didn’t have a clear view of the camera display when shooting my “Paddling in Clouds” picture. I was just trying to keep a paddle diagonally in my frame.
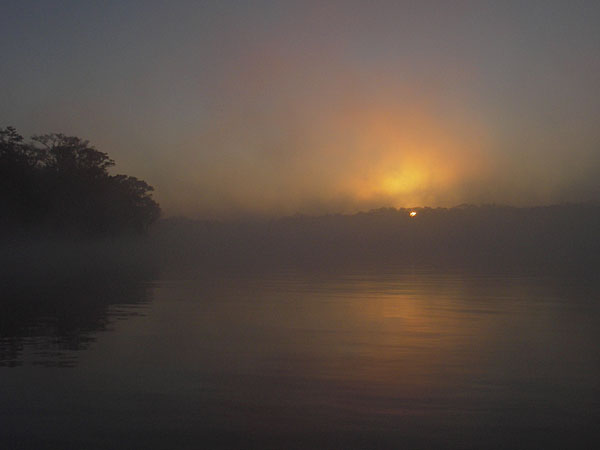
    foggy sunrise over Suwannee River, Florida

    5. Shoot Multiple Frames

    Shooting pictures with a digital camera is cheap. You do not need to worry about film cost. You can always erase the picture and shoot again unless you are after some action shots. So, do not be afraid to experiment and shoot even if you do not see the image in your LCD monitor. Shoot some extra frames. It is helpful to have an adequate memory card.

    I shot about 30 frames trying to catch a sky reflection in water and in my paddle. However, I would show not more than 3 or 4 from those 30 frames.

    6. Practice

    The more you shoot the better you should get. I have shot similar pictures before including reflections and a paddle.

    Review your pictures on the camera LCD if possible. Check the histogram. Analyze your shots after paddling on a computer screen. You have all information about camera setting included in each digital image file. Try to figure out what worked and what not. Learn from mistakes.

    7. Have Fun

    I don’t consider myself a professional photographer. When paddling I am shooting what I like just for fun. Documenting my paddling trips and races is still fun. I feel free to experiment.

    The great Alfred Stieglitz was an amateur photographer too. Anyway, the photography is not a profession…

    Sometimes I sell a picture to a magazine or donate to a book cover. A year ago, I started to sell my pictures through microstock agencies. I am just taking more often my DSLR camera and a tripod for paddling.

    Related posts:kayaking Colorado - Douglas Lake
    • Use Your Paddle to Stabilize Camera
    • No Viewfinder? 10 Tips on Shooting Pictures without Viewfinder
    • Pentax Optio WP/WPi – 10 Tips on Paddling and Shooting
    • Can Pentax Optio waterproof cameras be used in the water?
    • Pentax Optio W10 as a Helmet Cam – Inline Skating along the Poudre
    • Shooting movies with Pentax Optio WP and W10 and Sisson Nucleus 100 kayak


    paddling with a camera

  • Nikon Coolpix A Review

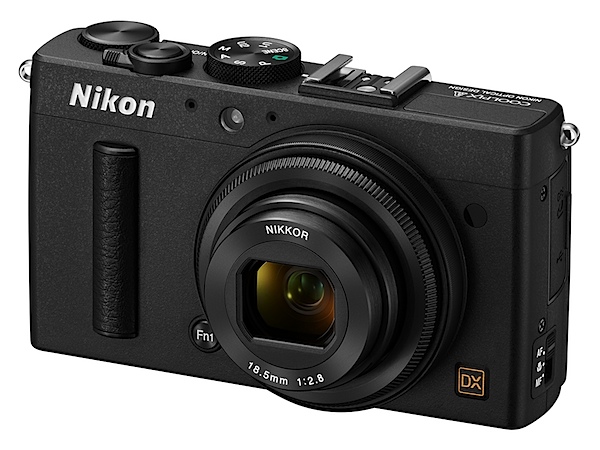
    Nikon Coolpix A BK_front34l_lo.jpgMy how the game has changed. A few months ago everyone was agog (and still are!) with maxi zoom cameras. Now it seems a few major makers seems to be intent on feeding the market with large aperture, fixed focal length cameras. Among them: Ricoh, Sony, Fujifilm, Sigma.

    I’ve used quite a few of these and have to admit their effective use demands quite a bit of restraint and understanding. There’s no point in venturing out to a sports event with the desire to catch superb, close up on-field action; similarly, there’s no joy in banging away on animal and kiddie shots as they duck and weave in an attempt to foil the photographer’s intent; likewise, water-borne subject matter where you have little control of the camera-to-subject distance.

    These specialist cameras come into their element where the photographer has complete control: portraits, people shots in general, landscapes, interiors and so on. Another use for them is to go ‘commando’ and hold the camera out from your body, roughly aiming at your target, banging away when you think you’ve caught a ‘live’ one!

    Their main attraction is that the photographer can work with fewer concerns to distract him or her: no zoom to worry about (or be distracted by!); just set the aperture and shutter speed … and go shoot!

    Where they really sing and dance is where the sensor is on the large side, as with this camera. Another factor (hopefully) is where the camera maker has installed an above average quality lens.
    Nikon Coolpix A_BK_back.jpg

    Nikon Coolpix A_BK_top_lo.jpg

    Nikon Coolpix A_CMOS.jpg

    The Nikon Coolpix A has a largish CMOS sensor, in DX format, sized as 23.6×15.7mm, or nearly half the original 35mm frame.

    The f2.8 lens is fast-ish and has a 35 SLR equivalent focal length of 28mm that is, to my mind, an ideal focal length for fixed lens photography.
    Dee Why church int 2.JPG

    The lens has a seven-blade iris diaphragm which avoids the artefacts captured by odd-shaped lens irises, capturing natural out of focus blurs and highlights.

    The 16.2 megapixel capture creates a maximum image size of 4928×3264, enough to make a 42x28cm print. You can capture in JPEG or NRW (RAW) images at 14-bit depth.

    Video? Full HD MPEG4 video at 1920×1080 pixel resolution. Due to the unusual video recording arrangement (see below), you can’t shoot stills mid video.

    Nikon Coolpix A Features

    The magnesium and aluminium alloy body is accompanied by a small leather speed grip patch at the right edge of the body and the rear corner.

    The camera is without an optical low-pass filter, so expect superior rendering performance and images with superior resolution.

    The ISO range runs up to 25600, thanks to an expansion routine.
    The camera has in-camera movie editing and you can save a single frame as a still JPEG image.

    Continuous shooting at approximately 4fps.
    Flowers.JPG

    Nikon Coolpix A Controls

    Nikon has taken an unusual route to external control points, some of which may take a bit of getting used to.

    First up, there is a function button tucked away beneath a corner of the lens; to this can be assigned such functions as AE and AF lock, RAW capture, AF etc.

    The lens itself has a focus ring which comes in to play when you select manual focus from a three position selector (other positions: AF and macro). The camera includes autofocus with manual override: when the shutter button is held halfway down and the focus ring is turned the camera focuses automatically.

    Top deck: at left is the flash pop up trigger; further right is the mode dial with auto, PASM positions, scene modes (portrait, candle light, silhouette etc), U1 and U2 custom settings.

    The shutter button also stands in as the power button; you swing the lever and power turns on, then you shoot, then swing the lever again to turn off the power.

    Flanking the above is the command dial to cycle through menu choices.

    Rear: at left of the LCD screen is the exposure compensation button, ISO access, screen zoom, screen enlargement in playback, among other options.

    To the right of the screen is replay, menu, four way jog dial, an ‘i’ button which takes you into an information display of current settings.

    I have to say I did not find the whole arrangement intuitive. To get my head around some of the functions took a careful study of the manual.

    For example: there’s no red video record button. To shoot video you tap the ‘i’ button and choose that mode. To get out of it you enter the menu and choose single frame shooting. Far from an ideal arrangement!
    Menu 1.jpg

    Menu 2.jpg

    Menu 3.jpg

    The viewfinder menu is extensive and one that I had no quibble with.

    To me, one of the joys of a fixed focal length lens is simplicity of use. The menu and options arrangement make life unnecessary difficult on the shooting front.

    Nikon Coolpix A Accessories

    Some nice new add-ons could well heighten your experience with the Coolpix A.

    One of these is an optical viewfinder DF-CP1, with a high eye point, approximately 90% frame coverage and 0.52x magnification.

    The camera further supports accessories for Nikon SLRs, such as Nikon Speedlights and the GPS Unit GP-1. The wireless mobile adapter WU-1a can also be used, for easy uploading and sharing of captured images and movies to a smart device.

    Nikon Coolpix A ISO Tests

    Nikon Coolpix A ISO 100.JPG

    Nikon Coolpix A ISO 400.JPG

    Nikon Coolpix A ISO 800.JPG

    Nikon Coolpix A ISO 1600.JPG

    Nikon Coolpix A ISO 3200.JPG

    Nikon Coolpix A ISO 6400.JPG

    Nikon Coolpix A ISO 12800 equiv.JPG

    Nikon Coolpix A ISO 25600 equiv.JPG

    A good result all the way to ISO 6400. It was only when we reached above that level and the camera resorted to ISO expansion did we see evidence of noise and loss of definition.

    At ISO 25600 equivalent the shots would be ‘acceptable’, depending on subject. But plenty of noise!

    Startup Time

    It took about two seconds from power on to first shot; follow-ons came in at a little over a second apart.

    Distortion

    Very slight barrel distortion was evident at frame edges.

    Dee Why beach 1.JPG

    Nikon Coolpix A Review Verdict

    Quality: above average in resolution and colour quality but notice the edge vignetting in the beach shot.

    Why you would buy the Nikon Coolpix A: you like the idea of a fixed focal length lens.

    Why you wouldn’t: fiddly control points; I have encountered better stabilisers when shooting video.

    Nothing more to say except that this one would make an excellent camera, especially when paired to a fully accessorised Nikon DSLR.

    Nikon Coolpix A Specifications

    Image Sensor: 16.2 million effective pixels.
    Metering: Multi, centre-weighted and spot.
    Sensor: 23.6×15.7mm CMOS.
    Lens: Nikkor f2.8-5.6/18.5mm (28mm as 35 SLR equivalent).
    Exposure Modes: Program AE, shutter and aperture priority, manual.
    Shutter Speed: 30 to 1/2000 second.
    Continuous Speed: 4fps.
    Memory: SD/SDHC/SDXC cards.
    Image Sizes (pixels): 4928×3264 to 2464×1632. Movies: 1920×1080, 1280×720, 640×480.
    Viewfinder: 7.6cm LCD (921,000 pixels).
    File Formats: JPEG, NRW (RAW), MPEG4.
    ISO Sensitivity: Auto, 100 to 25600 (with boost).
    Interface: USB 2.0, HDMI mini, accessory.
    Power: Rechargeable lithium ion battery, AC adaptor.
    Dimensions: 111×64.3×40.3 WHDmm.
    Weight: 299g (inc battery and SD card).
    Price: Get a price on the Nikon Coolpix A at Amazon.

    Post originally from: Digital Photography Tips.

    Check out our more Photography Tips at Photography Tips for Beginners, Portrait Photography Tips and Wedding Photography Tips.

    Nikon Coolpix A Review


    Digital Photography School

  • 100 Incredibly Tasty Instagram Accounts for Foodies to Follow

    If you are an Instagram user, I think you’ve clearly noticed a few people who love posting photos of their food. Once, browsing through Facebook, I found a joke that said, “A true hipster does not eat food, he tweets it.” But after looking at my Instagram news feed, I can say that it’s not quite true: People don’t eat Continue Reading

    The post 100 Incredibly Tasty Instagram Accounts for Foodies to Follow appeared first on Photodoto.


    Photodoto

  • Mastering Monochrome Mode

    Mastering monochrome mode

    Andrew S. Gibson is the author of Mastering Photography: A Beginner’s Guide to Using Digital Cameras, on offer now at Snapndeals for a limited time.

    One of the benefits of digital photography that I really appreciate is the ease with which I can convert images to black and white. It was much harder back when I first became interested in photography. I remember wanting to try black and white, and print images in a darkroom, but living in a property with no spare space to build a darkroom meant that it was years before I was able to start learning to print.

    Now, black and white is as accessible as switching to your camera’s monochrome mode. Some people still prefer chemical processes, but for the rest of us it means no more darkrooms and no more waiting to process film and make prints. The process is instant. That has opened up black and white photography to many more photographers, which can only be a good thing.

    Use Raw

    I want to make one thing clear before continuing. You will always get the best results in black and white by using the Raw format and converting your files to black in white in software like Photoshop, Lightroom or a plug-in like Silver Efex Pro 2. But there are still good reasons to switch your camera to monochrome mode for shooting in black and white. Let’s take a look at what they are.

    Monochrome mode helps you visualise in black and white.

    Mastering monochrome mode

    Seeing in black and white is an acquired skill. It takes time to learn how scenes that you are accustomed to viewing in colour translate to black and white.

    The benefit of switching to monochrome mode is that the camera displays your photos in black and white on the LCD screen. This helps you see how the scene looks in monochrome.

    You can take it further by increasing the contrast or changing the colour filter settings (I’ll cover this below if you don’t know how to do this or why).

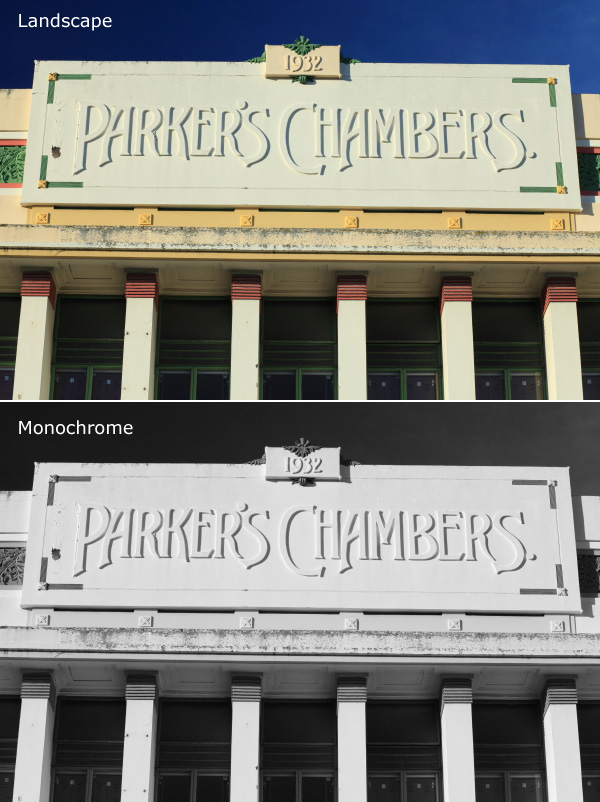
    The photo above is an example. The colour version is what I would see on my camera’s screen if I set the Picture Style to Landscape. Underneath that is what I would see in monochrome mode.

    Monochrome mode helps you take better colour photos.

    Mastering monochrome mode

    Years ago I read an interview with David Muench in which he described his style as ‘black and white photography in colour’. That statement has always stuck with me.

    What did he mean by that? Well, the basis of a good black and white image is tonal contrast – the way that light and dark tones are arranged within the composition.

    David Muench’s colour photos rely as much on tonal contrast as they would if he were shooting in black and white. Tones are an important building block in the composition of his images even though he is shooting in colour.

    That idea has become the basis of much of my colour photography. I believe that strong colour photography utilises tonal contrast as much as good black and white. That’s why using monochrome mode, and learning to see in black and white will make you a stronger photographer in colour too.

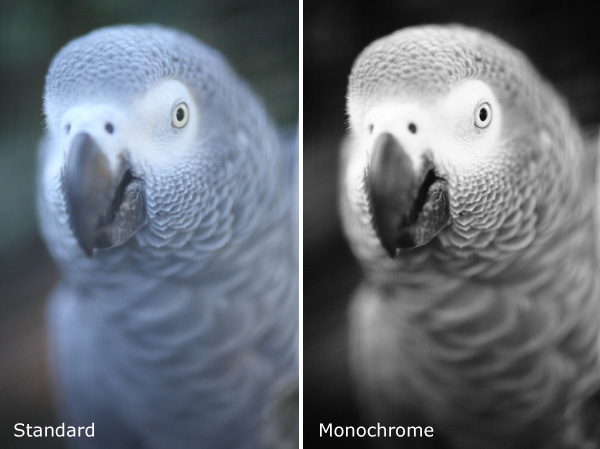
    The photo above is a good example of tonal contrast. The two images show how it would look on my camera’s screen in both standard and monochrome Picture Styles. I increased contrast in the monochrome Picture Style as the light was so flat.

    Monochrome mode helps you take better black and white portraits

    Mastering monochrome mode

    I find that models love to see their photos on the camera’s LCD screen during a shoot. If you want to work in black and white, switching to monochrome mode and showing your model the previews in black and white helps them get an idea of how the processed images will come out. If your model gets excited about the results he or she will work harder to create good images.

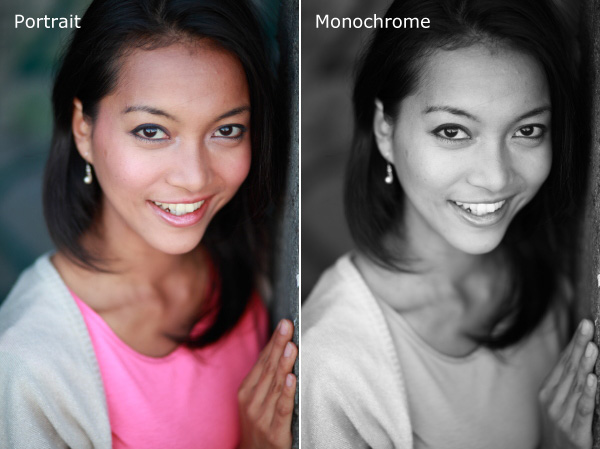
    The example here shows the difference between portrait and monochrome Picture Styles (contrast increased in monochrome mode).

    Monochrome mode – what you need to know

    Every manufacturer approaches this differently, so check your manual, but the basic idea is the same.

    These are the settings you are looking for, by manufacturer:

    Canon: Picture Style
    Nikon: Picture Control
    Sony: Creative Style
    Pentax: Custom Image
    Olympus: Picture Mode
    Sigma: Colour Mode
    Fujifilm: Film Simulation

    Look for the setting labelled Monochrome (or something similar). Once selected, you should also be able to customise it. My Canon EOS cameras have four parameters you can adjust in Monochrome mode:

    Mastering monochrome mode

    Sharpness

    Ignore this if you’re shooting in Raw, as you can adjust sharpness when processing the image. If you’re using JPEG, be careful not to oversharpen – you can increase sharpness in Photoshop if you need to.

    Contrast

    The biggest concern many photographers have about using monochrome mode is that the photos often tend to look flat and consequently somewhat boring and inspired. That’s because the camera manufacturer would prefer to give you a flat black and white image by default, in order to retain highlight and shadow detail. The assumption is that you will adjust contrast in Photoshop if you need to.

    However, increasing contrast in-camera gives you a better preview that can make it much easier to visualise how the scene converts to black and white. Be careful if you’re shooting JPEG, as you won’t be able to pull back any lost shadow or highlight detail in Photoshop.

    But if you’re using Raw, you can set the contrast to whatever you want.

    One thing to watch out for in Raw: the histogram and highlight alert are generated from the preview you see on the screen. If you increase contrast, your camera may tell you that the highlights are clipped, when the detail is actually there in the Raw file. You more you increase the contrast, the more likely this is to happen.

    Filter effect

    Before digital, black and white photographers would use coloured filters to alter the tones of their black and white images. Coloured filters make colours corresponding to the colour of the filter lighter, and the opposite colour on the colour wheel go darker.

    For example a red filter makes red colours go lighter and blue ones (such as the sky) go darker.

    This is how you could use the filters:

    Red: Makes blue skies go really dark. Very dramatic, especially if you increase contrast too.

    Orange: Makes blue skies go dark, but not as dark as the red filter.

    Yellow: Darkens blue skies a little. Also lightens skin tones, and can be good for portraits.

    Green: Makes anything green lighter. Often used to lift photos containing a lot of things that are green, such as grass or vegetation.

    Mastering monochrome mode

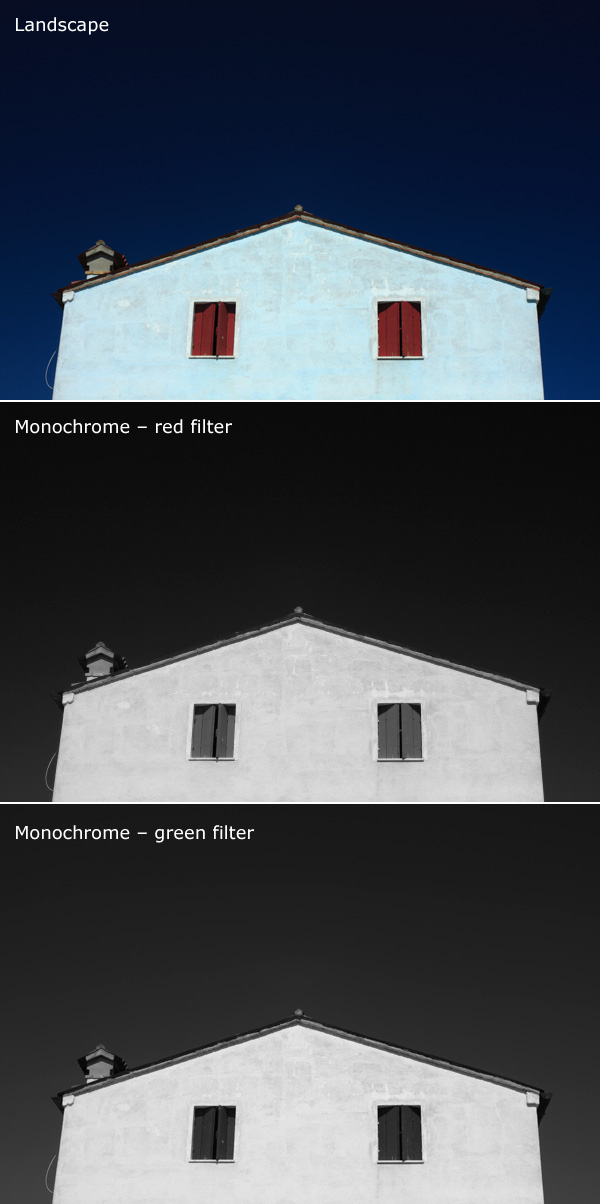
    Here’s an example to help you see the effect of using coloured filters. The differences are subtle, but you will see that the sky is darker and the shutters are lighter in the version with the red filter..

    Again, if you’re using JPEG select your colour filter carefully, as you can’t change it in post-processing. In Raw it doesn’t really matter, just choose the filter, if any, that gives you a good preview. You can apply any filter setting you want when you process the image.

    Toning effect

    On my EOS cameras the toning effects are a bit too strong to be effective. Regardless of whether you are using JPEG or Raw you can tone your photos much more efficiently in post-processing anyway. It’s probably best to leave this setting alone.

    Raw vs. JPEG

    Remember, if you use monochrome mode with JPEG files you will get what you see on the LCD screen – black and white images with whatever sharpening, contrast and filter effect settings you used. That may suit some photographers but I really suggest that you use Raw. That way you have a full colour image that you can process any way you like, including converting to black and white with software that gives a much better result than your camera possibly could.

    Mastering Photography

    Mastering monochrome mode

    My latest ebook, Mastering Photography: A Beginner’s Guide to Using Digital Cameras introduces you to digital photography and helps you get the most out of your camera. It covers concepts such as lighting and composition as well as the camera settings you need to master to take photos like the ones in this article. It’s available now at Snapndeals for a special price for a limited period.

    Post originally from: Digital Photography Tips.

    Check out our more Photography Tips at Photography Tips for Beginners, Portrait Photography Tips and Wedding Photography Tips.

    Mastering Monochrome Mode


    Digital Photography School

  • How to Professionally Retouch Portraits in Lightroom

    The Following is an excerpt from the SLR Lounge Lightroom Preset System v5 and accompanying workshop from the Lightroom Workshop Collection v5.  The Lightroom Preset System is designed to take you from Ordinary to Extraordinary photos in just a few seconds and clicks.

    In this article we’re going to do a headshot retouch to show how capable Lightroom is. Of course for a professional headshot retouch Photoshop is necessary, but Lightroom is also surprisingly capable. We’re going to utilize one of our “Soft Portrait” presets, similar to the one we used in our Color Portraiture with Retouch and Enhancement Tutorial, and then we’re going to utilize our brush presets to make our retouches. The complete written tutorial is below, and you can also watched the video tutorial at the end of this article.

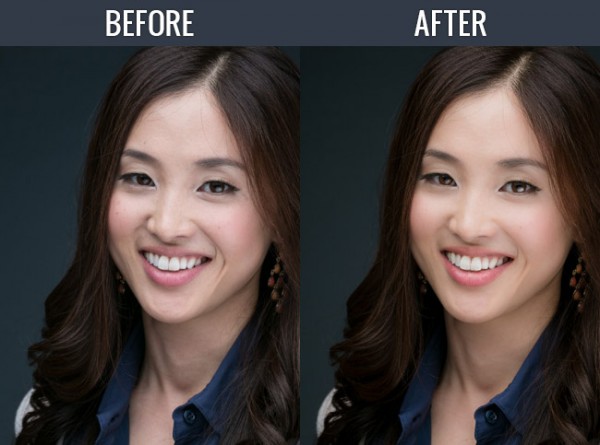
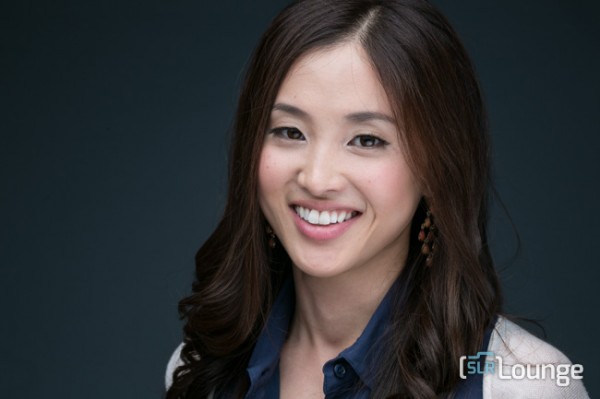
    Here’s a sneak peak at what our image will look like before and after the retouch.

    beforeafter


    Read the Written Tutorial

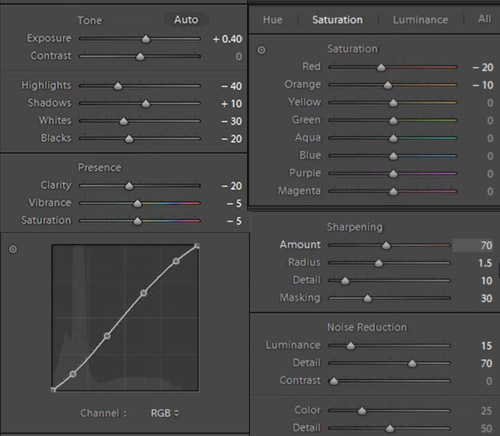
    The first thing we’re going to do is select our “01-10 BASE – SOFT: 11a. Extra Soft – Skin Desat” which will soften the skin by decreasing the Clarity and adjusting the Noise Reduction settings. The preset also adjusted the Red and Orange in our HSL, lowering them slightly so we get desaturated skin tones. We also added a little bit of contrast using the  “03-40 ADJUST – SHADOW BLACKS: 43 Darken – Light (+10,-20)” preset. The Tone Curve is set in s subtle “S” shape, giving us a slight contrast boost, and we have our standard amount of Sharpening applied to this photo. We’re going to set our Color Temperature to 4900 and add +0.40 to the Exposure to give the skin a nice bright look. For those that don’t have the Preset System, here are what our Develop Settings look like after our presets and adjustments are applied.

    alldevelopsettings

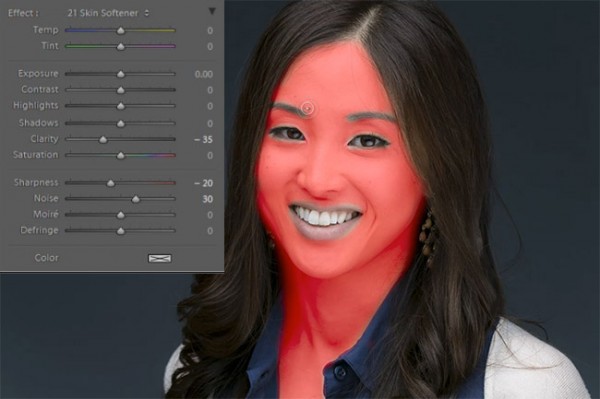
    The first brush adjustment we’re going to be making is for her skin. We’re using our “21 Skin Softener” preset, and you can see settings of our brush in the photo below. These settings will smooth skin without destroying skin texture. We want to make sure we’re only applying this brush to the skin, and you can press “O” to bring up the overlay so you can see exactly where the brush is being applied as shown below. You can also delete  areas of brush application by holding down “alt on a PC or “opt” on a MAC to erase the adjustments.

    skinbrush

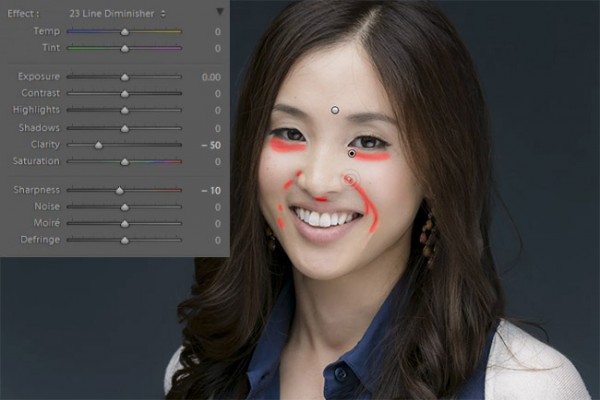
    Moving on, we’re going to hit “New” to  make new brush adjustments, and we’re going to select our “23 Line Diminisher” preset. We want to diminish some of the smile lines and lines under the eyes. This part of the retouch should be subtle, diminishing the lines and not removing them completely. Once again, you can see the brush preset settings and the area of affect in the image below.

    linediminisher

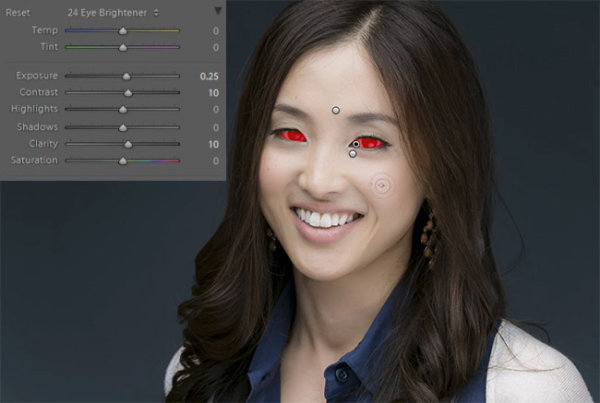
    Now we’re going to hit “New” and select the  ”24 Eye Brightener” preset. We’re going to brighten up the eyes and we want it to be subtle because if the eyes are too bright it will have an abnormal look. The best way to check if eyes are too bright is to simply zoom out to a thumbnail view and check to see if the eyes look like they are glowing or unusually bright based on the surrounding tones.

    eyebrightener

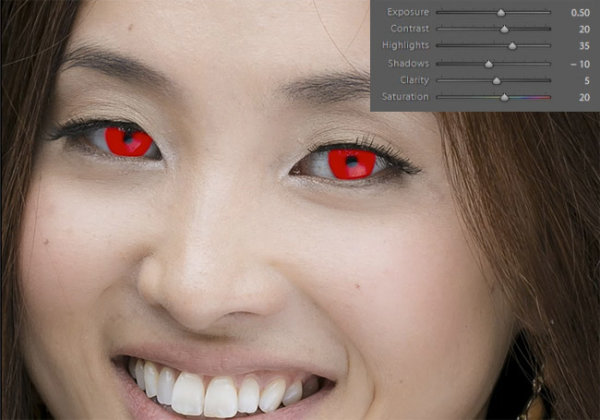
    Furthering our edit on the eyes, we want to brighten up the iris’ to add nice colors to them and to exaggerate some of the nice catch light. We’re using our “25 Iris Enhancer” and we want to make sure we’re only making adjustments on the iris’ and nothing else.

    irisenhance

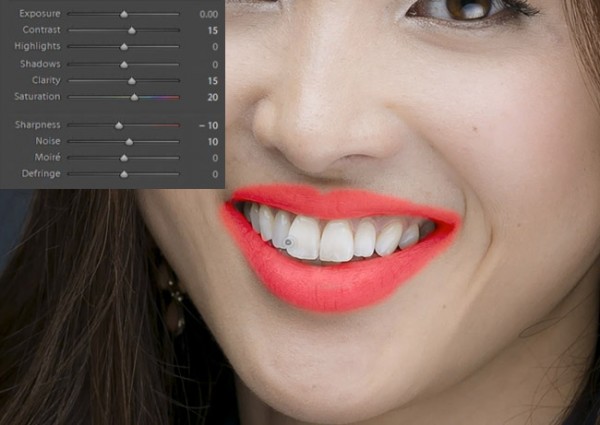
    Now we’re going to move onto our lips. Our “26 Lip Enhancer” preset adds nice color and contrast to the lips.

    lipenhance

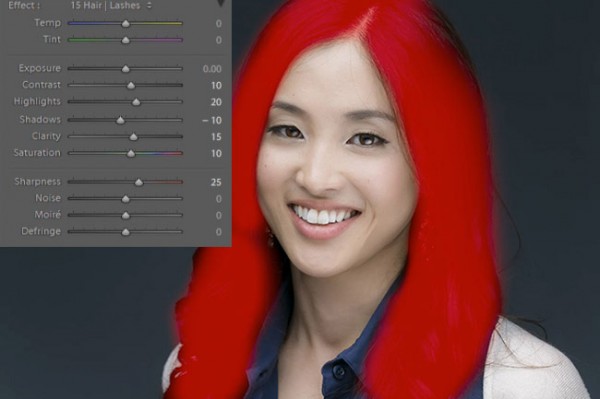
    The last brush we’re going to use is for the hair. With our “15 Hair | Lashes” preset, we’re going to pull out some nice color and texture from her hair.

    wendyhair

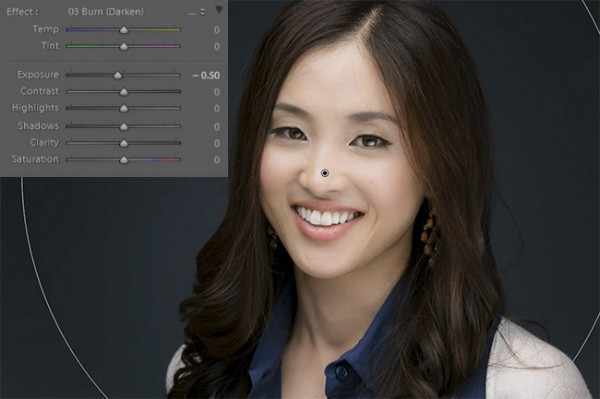
    At this point we’re done with our retouches. If you like you can do some additional blemish removal. When doing blemish removal we recommend keeping blemishes that are apart of their look. The last thing we’re going to do is add a Radial Filter with the Exposure set to -0.50.

    radialfilter

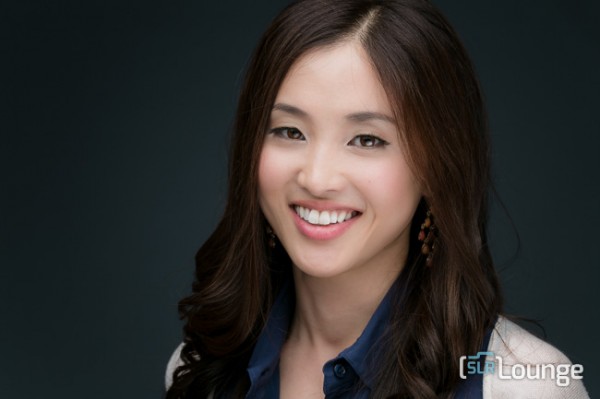
    And now we are left with our final image. Here’s a before and after of our portrait.

    Before

    lightroom-5-tutorial-professional-headshot-retouch-0001

    After

    lightroom-5-tutorial-professional-headshot-retouch-0002

    Watch the Video Tutorial

    [EMBED VIDEO HERE]

    If you would like to see exactly how all of the settings and adjustments were applied, please watch the video below from the SLR Lounge YouTube Channel.

    Conclusion and Learn More

    We hope you all enjoyed this tutorial. If you are interested in learning more or purchasing the SLR Lounge Lightroom Preset System v5 or the newly released Lightroom Workshop Collection v5, please click any of the links in this article.

    Post originally from: Digital Photography Tips.

    Check out our more Photography Tips at Photography Tips for Beginners, Portrait Photography Tips and Wedding Photography Tips.

    How to Professionally Retouch Portraits in Lightroom


    Digital Photography School

  • Stitching Images For Larger Prints

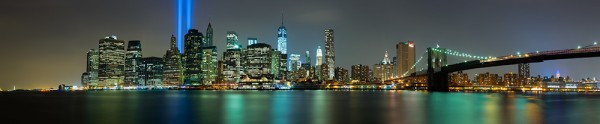
    For this image I decided I wanted to cover all of Lower Manhattan from the Statue of Liberty (far left) to the Empire State Building (far right, under the Brooklyn Bride, colored red, white and blue. I was using a Canon EOS 5D Mark III. My EF 24-70 f/2.8L II at 70mm covered the skyline and water with some sky vertically, so I positioned the camera vertically and proceeded to take 9 shots, moving the camera by turning the tripod head on it's rotating base. I overlapped portions of each frame so Photoshop would have a point of reference when stitching. Each of the nine exposures was taken at ISO 200, 90 seconds, at f/16.

    For this image I decided I wanted to cover all of Lower Manhattan from the Statue of Liberty (far left) to the Empire State Building (far right, under the Brooklyn Bride, colored red, white and blue. I was using a Canon EOS 5D Mark III. My EF 24-70 f/2.8L II at 70mm covered the skyline and water with some sky vertically, so I positioned the camera vertically and proceeded to take 9 shots, moving the camera by turning the tripod head on it’s rotating base. I overlapped portions of each frame so Photoshop would have a point of reference when stitching. Each of the nine exposures was taken at ISO 200, 90 seconds, at f/16.  If printed at it’s native resolution at 300 dpi, it would measure 18.39 inches by 88.25 inches.  My photo lab maxes out at 108″, which it says it can print this image to.

    Several months ago I was asked by a potential client if I had any images that were capable of being printed very large- up to 20 feet across! It pained me to explain that, no, based on my camera’s resolution, I did not have any images capable of being printed that large.  I had never gotten into doing many stitched panoramas or other prints, and couldn’t afford a Gigapan or other panorama photography tool.  For the most part, I’d had no call for it in my daily business. Generally, when shooting landscapes, I think in terms of one frame, and fill it with my composition. This has worked well for the most part, as long as I didn’t want to print much larger than around 48″ inches across.  Suddenly, however, I had a desire to go much larger.

    This past week in the United States, we commemorated the 12th anniversary of the September 11th terrorist attacks. Every year New York City remembers the victims with a tribute in light- two columns of light representing the fallen towers of the World Trade Center.  It seemed a perfect opportunity to start playing with panoramics, especially since one of the images the aforementioned client wanted was a skyline shot of New York City.

    The general rule of thumb for printing on standard inkjet printers is to print at 300 dpi.  To find out how large you can print an image, simply take the pixel dimensions and divide by 300. From a camera such as the EOS 5D Mark III, that means an image of 5760 x 3840 pixels can be printed at about 12.8 inches by 19.2 inches.  It is true, using various resizing techniques you can print larger.  I have on many occasions. But to get to the extreme sizes beyond approximately 48″, you’ll need to start combining images by stitching them together.

    There are currently a few automated panoramic photo options on the market, including Gigapan’s and Panogear’s. Both can be somewhat pricey.  But just because you don’t have these nice accessories does not mean you can’t make stunning panoramic images.  A tripod is helpful, but not completely necessary if you can handhold the shutter speed your camera is set to.  A tripod is helpful for locking your camera in place from shot to shot. The reason a tripod is helpful is that if your tripod head has markings for panoramics on the base, you can use these for reference when repositioning the camera for each shot. More on that in a bit.  Another helpful tool is an L bracket. This will help you position your camera vertically if desired to shoot verticals to stitch the final piece.  L brackets can be purchased from several manufacturers and are usually camera-specific.  Acratech makes a universal L bracket with a quick release that any camera can attach to using an Arca-Swiss style plate.

    You’ll want to start by defining your image in your mind. Where does it start, where does it end? Then, how far up does the image go, and how far down?  can you cover the up and down with one vertical?  Or would you be better off shooting two rows of images. Or more? Keep in mind when planning that you’ll want to shoot with some extra area around the image to leave room for cropping if needed.  You’ll also want to make sure you leave some overlap in each shot so the stitching software can find a point of reference to see where the next shot goes. I used Photoshop for these, but there are other programs out there. Feel free to suggest your favorite in the comments below.

    For the first image in this article, I wanted to shoot the Lower Manhattan skyline, from the Statue of Liberty to the Empire State Building.  I had a 24-70mm lens, and at 70mm I covered exactly what I wanted, from top to bottom, with a vertical shot.  I took 9 shots in that orientation, while rotating the tripod head incrementally until I got my last shot.

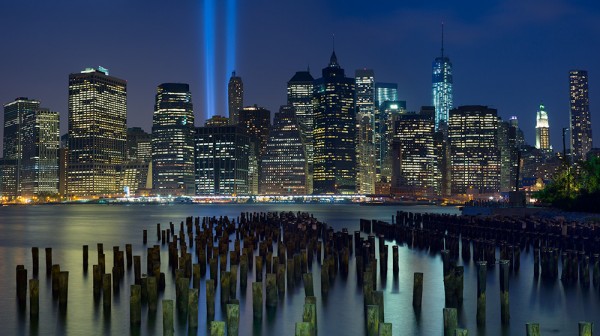
    For the second shot in this article, there was a more prominent foreground element, the pilings from the old pier.  I decided to do this one in a horizontal orientation, using two rows of three shots.  This was again taken using the 24-70mm lens, at 70mm.  I shot this one starting at the far right, shooting in columns- upper right, lower right, lower center, upper center, upper left, lower left.  I used the playback feature on the camera to check my reference points. Again I stitched it using Photoshop’s Photomerge feature.

    This shot was six horizontal shots stitched together. Because of the overlap, the 3 shots across and 2 up and down will not add up to the full resolution of the individual images simply put together. This image came together at  10,531 pixels by 5904 pixels. At 300 DPI the file can be printed at 19.68 inches by 35.1 inches. My lab, however, tells me they can print this image up to 8 feet wide.

    This shot was six horizontal shots stitched together. Because of the overlap, the 3 shots across and 2 up and down will not add up to the full resolution of the individual images simply put together. This image came together at 10,531 pixels by 5904 pixels. At 300 DPI the file can be printed at 19.68 inches by 35.1 inches. My lab, however, tells me they can print this image up to 8 feet wide. They are not using inkjet printers and thus are not subject to the same parameters.  The same still holds true however.  The larger the file, the larger it can be printed.

    I have not yet heard anyone say that any photo stitching program is perfect.  There will be errors in stitching.  A misplaced post, a skewed building. To correct these, I simply opened the source file and added it to the stitched file on a new layer.  Then I created a layer mask to show only the area I wanted shown, which would correct the issue.

    For your exposure, you’ll need to be in manual mode. You need the exposure to be uniform across the image.  If you leave your camera in any auto mode where the camera helps set the exposure, you run the risk of your exposures varying.  For the first image in this article, my exposure was 90 seconds at f/16, ISO 200 for each image.  This is important, particularly when photographing the area around the statue of liberty which had huge dark areas.  In auto mode, the camera will try to brighten these areas, which will cause problems when the stitching if the skies or water don’t match from shot to shot. In the interest of full disclosure, I made this mistake myself with the second image, the six-shot stitch.  I shot in aperture priority and there was a variation of plus or minus 2/3 of a stop from shot to shot.  This caused all kinds of headaches in my first attempt at stitching.  I was able to correct this by reproccessing the RAW files with an exposure adjustment to match the exposures.  In addition, if your camera has a feature for vignette correction, such as Canon’s Peripheral Illumination Correction, turn it on.  This will even out the exposure so there are no dark areas in the corners, which can be difficult to correct later on.

    I’ve toyed with stitching panoramics before, but never seriously.  This is one of my first attempts at a serious pano.  It’s well worth exploring more in the future.  I might even start saving for a new piece of equipment just for that purpose!


    Post originally from: Digital Photography Tips.

    Check out our more Photography Tips at Photography Tips for Beginners, Portrait Photography Tips and Wedding Photography Tips.

    Stitching Images For Larger Prints


    Digital Photography School

  • Documentary Photography – Six Tips for Creating a Legacy

    documenting-dps-02

    We’ve all gone through times in our lives where we’ve lost loved ones. As a portrait photographer I would get calls all the time for “Urgent” family photos where one family member was terminally ill, and yet others that have photos done after the loss of a loved one.

    Why do we wait until it’s too late, or almost too late to capture the lives of those most important to us?

    As photographers (and before you argue that you aren’t a “professional” or you aren’t a photographer, I’m here to tell you that you are! If you take photographs you are a photographer, and this applies to you!) it is almost our duty to record the lives and times of those closest to us, family and friends. I’m not just talking about birthday parties and weddings, which are both important, but how about everyday life?

    Last fall/winter my husband and I lost our two cats who were 18 and 19. He had them for 18 years, they lived with me for five. It hit me hard and I wrote this: “Do What’s Important Photograph Your Loved Ones”.  I vowed to go and photograph my grandmother who is now 92. I finally did that and I have some tips for you on how to go and photograph, and document the lives of your loves ones both young and old.

    So this article comes with both tips AND a challenge, for you to go do the same.

    1. Documentary means as it happens naturally, in their environment.
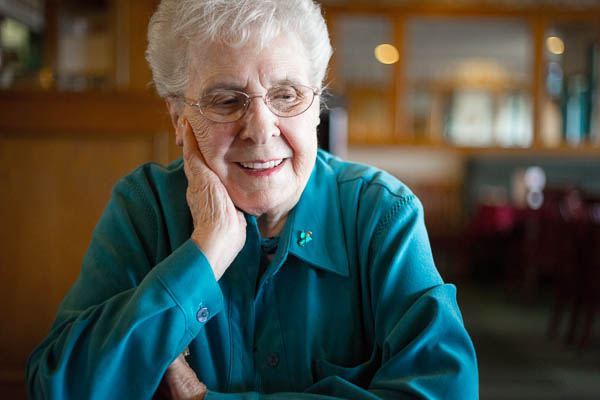
    2. Capture the person’s essence, their real personality
    3. Remember to capture the details and scene setters
    4. Think big picture, take shots for the background of a collage or potential photobook or album
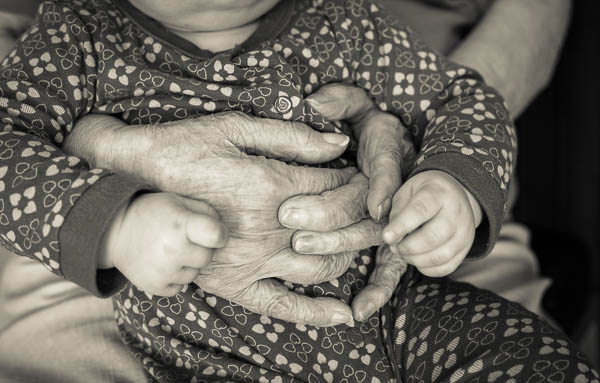
    5. Not every photo needs to show their face. Facing away from camera, hands and body are important too.
    6. Create a story with images, leave a legacy
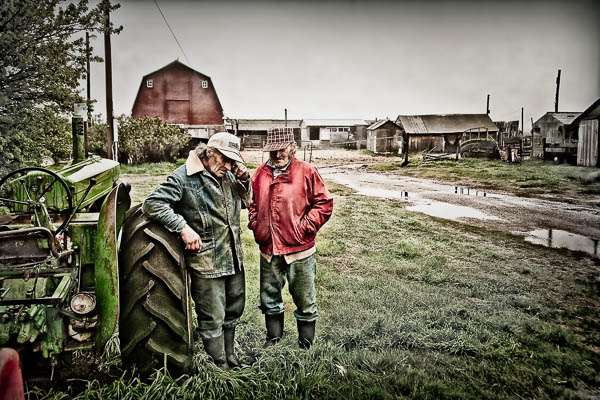
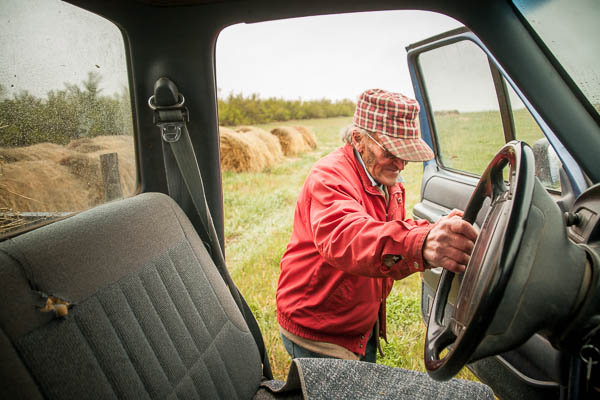
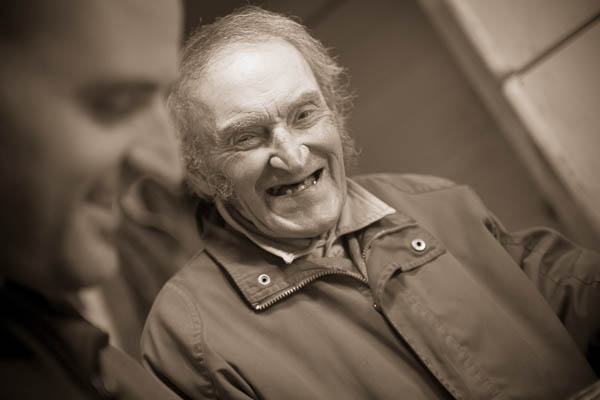
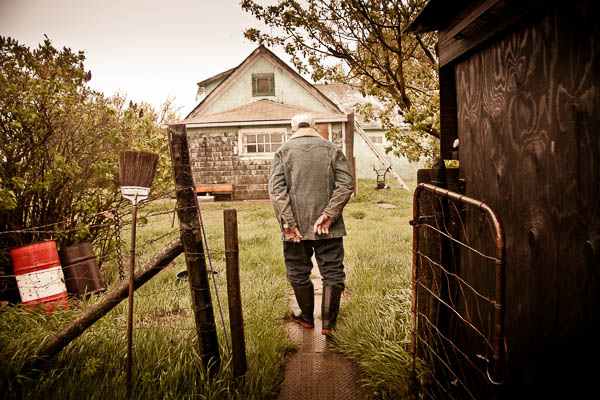
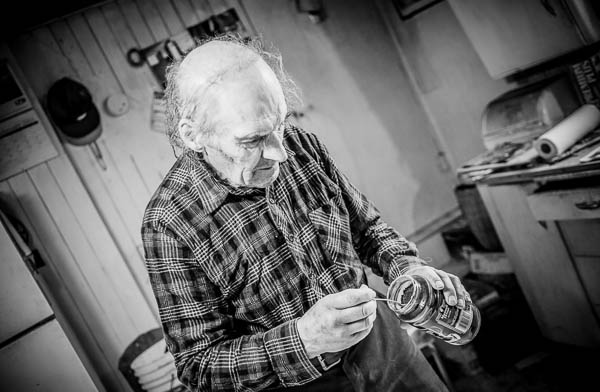
    Unfortunately Uncle Ward has now passed on, but his legacy does live on in these images, now treasured by family.

    Unfortunately Uncle Ward has now passed on, but his legacy does live on in these images, now treasured by family. They sure did love their instant coffee. He even took a spoonful of the grounds and ate it!

    #1 DOCUMENTARY MEANS IT OCCURS NATURALLY

    Documentary photography usually refers to a popular form of photography used to chronicle significant and historical events. It is typically covered in professional photojournalism, or real life reportage, but it may also be an amateur, artistic, or academic pursuit. The photographer attempts to produce truthful, objective, and usually candid photography of a particular subject, most often pictures of people. – Wikipedia

    Get into their day to day life. Plan to go spend a few hours chatting with the person, listen to their stories, capture what comes naturally and what just happens. Don’t create something that isn’t part of them, just be there to grab moments in time that will mean so much down the road.

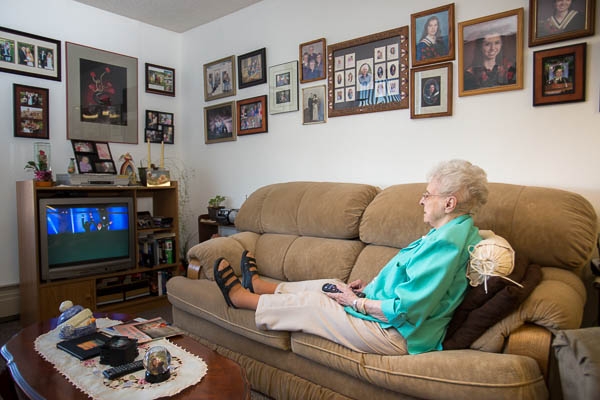
    The afternoon "soaps"

    The afternoon “soaps” among all her family photos that plaster the walls.

    Neil going to feed the cattle

    Neil going to feed the cattle

    #2 CAPTURE THEIR TRUE ESSENCE

    This is not too far off from #1 but let’s take it a bit deeper. Just being in their home, using their environment doesn’t guarantee you’re getting into their heart and soul. If this is someone close to you, as in my grandmother, what is it about them you want to capture? What part of their personality do you want to shine through in the photos:  wisdom,  a gentleness; intelligence, caring, a sense of fun, or all of the above? Is there something quirky about them that makes them unique, how can you show that in your images?documenting-dps-14

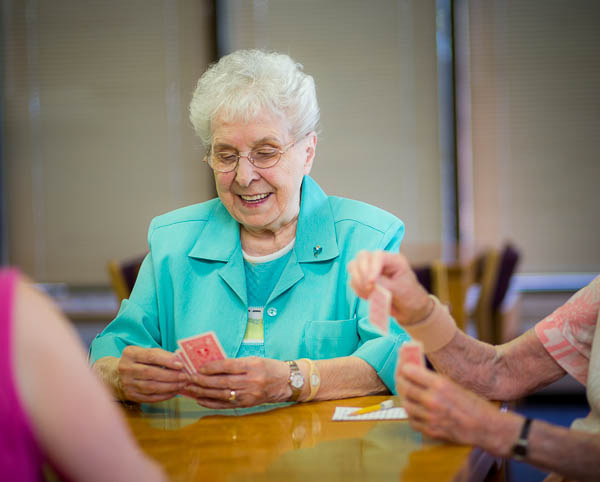
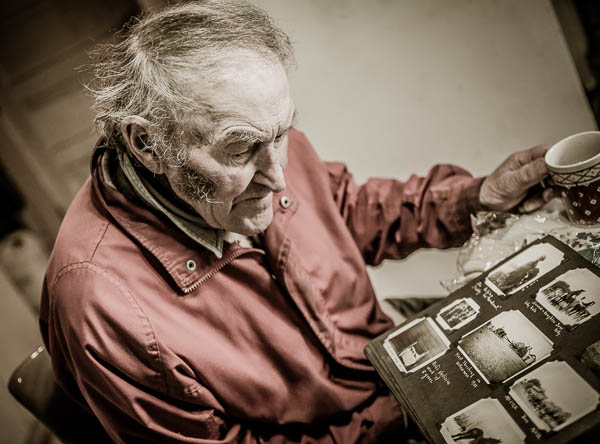
    For my grandmother she is a social butterfly so I photographed her with some friends and playing cards (see above).  My husband’s uncles are farmers and storytellers. We got out the old family photo albums and listened to them for hours while they showed us old photos from the 1940′s. They came alive as they recounted tales of their younger days and when they had a TV delivered “a couple years ago” which we later learned to be around 1975!

    documenting-dps-06

    We found out my husband’s grandmother was a hobby photographer during the 20′s and she had some really great images and albums!

    documenting-dps-17

    The key here is to get emotional. I don’t want to see a studio portrait, or even a lovely window light portrait for this type of project, I go for real, raw, emotion.

    #3 REMEMBER TO CAPTURE THE DETAILS

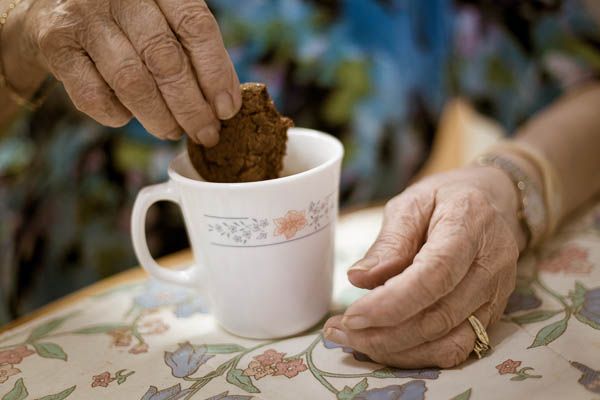
    When photographing a person with the intent of documenting, make sure you think in terms of these three views: overall, medium range, and close-up or details. What that means is don’t forget to get in close on some things, and not just have the whole face or person in every image. Details like how they hold their spoon as they stir their tea (so get in close on the hands or maybe even just the tea cup) can add a lot of impact.

    Tea and cookies at Grammy's. For as long as I can remember she's been feeding us. "Do you want a cookie dear?"

    Tea and cookies at Grammy’s. For as long as I can remember she’s been feeding us. “Do you want a cookie dear?”

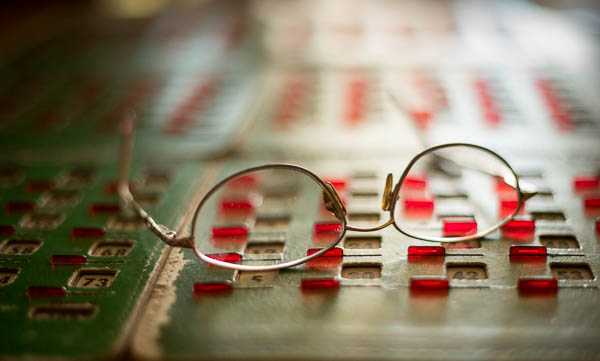
    She does love her Bingo

    She does love her Bingo

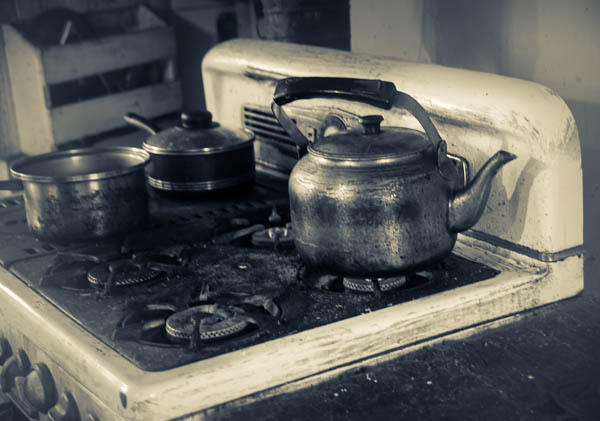
    Tea at the Uncles'

    Tea at the Uncles’

    #4 THINK BIG PICTURE AND SET THE SCENE

    Things around them in their daily life set the scene, so remember to capture some of those things too. If they live in a house make sure to get an exterior shot, some of the garden, and maybe even a close-up of the wall you can use later as a textured background. Does she has a favorite dress, one you always think of when you think of her – if so they photograph it, or a section of the material. Is he a craftsman, then by all means photograph his tools.

    The most important thing in my grandmother’s life is her family and in her small living room the walls are literally plastered corner to corner with family photos. Weddings, graduations, new great grandchildren, and even the pets are all there. Every shelf and horizontal surface has photos on it. You can bet I captured that (even though I’d taken make of those photos over the years, seeing them all up in one places speaks volumes to anyone that enters that room and you instantly know what she’s all about. She also collects angels and always has one pinned on her blouse. She has hundreds of them in her house everywhere.

    documenting-dps-19

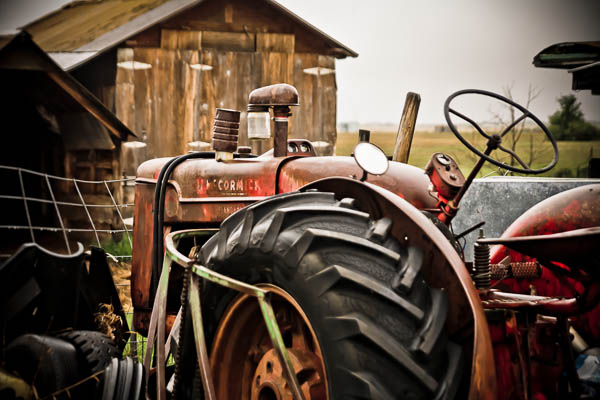
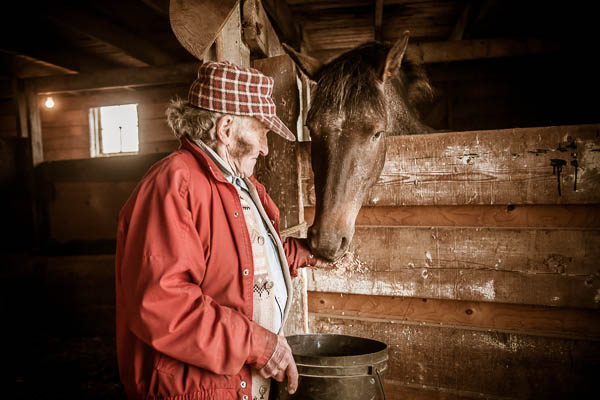
    For the uncles that all consuming thing for them was farming and their animals. So I got lots of images of the barn, farm buildings and old retired machinery. Do all that without their assistance, let them go about their day while you just shoot background stuff. Think about how those images may work together making a photo album or even a digital book.

    documenting-dps-18

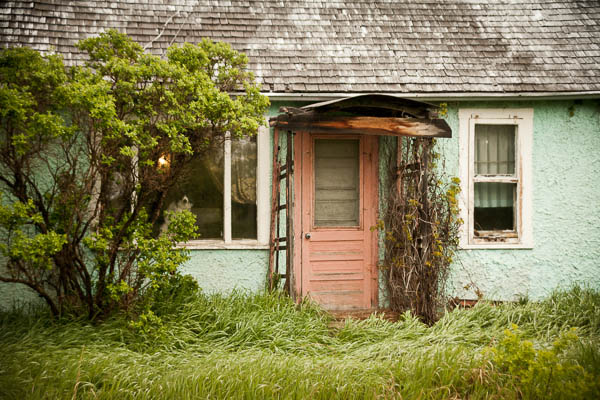
    The Cooper Homestead farmhouse

    The Cooper Homestead farmhouse

    #5 NOT EVERY SHOT NEEDS TO SHOW THE FACE

    Similar to get in and show the details, think outside the box. Not every image needs to show the face or even hands. How about feet? Use a slower shutter speed and add some motion if applicable. Shoot for something different here that the “norm”. Think about how to represent them, and their life without showing their face.

    documenting-dps-16

    With her youngest great grandchild, young and old.

    Unfortunately Uncle Ward has now passed on, but his legacy does live on in these images, now treasured by family.

    #6 CREATE A STORY WITH IMAGES

    Every other point in this article leads directly into this one, telling a story. By following all the tips above you pretty much can’t help but create images that do just that so the only thing I will add here is to do it consciously. Go in knowing you’rl./e creating a story. Intention is a powerful thing. When you show up planning to create a story, your subconscious will naturally kick in and go to work for you, if you aren’t aware (hint:  that’s why it’s your subconscious).

    documenting-dps-12 documenting-dps-08 documenting-dps-09

    One other thing you can do it go look at other photo stories, specifically some of the great photographers, masters of the photo essay. W. Eugene Smith comes to my mind, go study some of his stories for LIFE magazine. Anything by Cartier-Bresson but especially The Decisive Moment. Or some of my favorites Dorothea Lange, Margaret-Bourke White and Walkers Evans who all documented the Great Depression. Find out what draws you in to their images. How do they use scene setters and detail shots? Learn from the masters.

    ACTION PLAN

    If you read my articles regularly you’ll know what I’m going to say – get out there and go photograph someone important to you. That’s the first step! Then DO something with the images that will create a family heirloom. A book is ideal as you can make copies for the whole family.

    To see the full book I made of The Uncles for an example of how to put it all together. Blurb.com is a great way to make books that are high quality that don’t break the bank. I’ve made several copies of this one for family and have done other volumes for special occasions and family events as well as clients. 

    Cheers, Darlene

    Post originally from: Digital Photography Tips.

    Check out our more Photography Tips at Photography Tips for Beginners, Portrait Photography Tips and Wedding Photography Tips.

    Documentary Photography – Six Tips for Creating a Legacy


    Digital Photography School

  • 5 Ways to Take Better Smartphone Photos

    When you think about smartphone photography what comes to mind? My guess is you probably think about Instagram, photo filters, bad selfies and any number of other keywords that describe this new wave of photography.

    hero

    Today, I’m going to share a few tips on how you can improve your smartphone photography and start capturing interesting photographs wherever you are with whatever you have in your pocket. If you like this post you might also want to check out this DPS eBook specifically written for improving your iPhone photography.

    Oh and no just because Apple improved their camera in the 5s doesn’t mean that they’ve created a device that will make you a better photographer – you’ll just get the same boring images – unless you learn how to become a better photographer.

    Take Your Time and Treat it Like a DSLR

    Smartphone photos on Flickr, Facebook and Instagram get a bad reputation for being terrible because well, 95% of them are terrible. One of the biggest reasons that this is the case is because 95% of the photos on these sites are taken not as photographs, but as a way of sharing moments – they’re snapshots.

    IMG_0826-650x650

    People aren’t thinking about capturing a photograph – they’re thinking about how cool that thing that happened in front of them is. If you want to truly impress people with your smartphone photographs you have to first and foremost start treating your smartphone more like a camera and less like a phone.

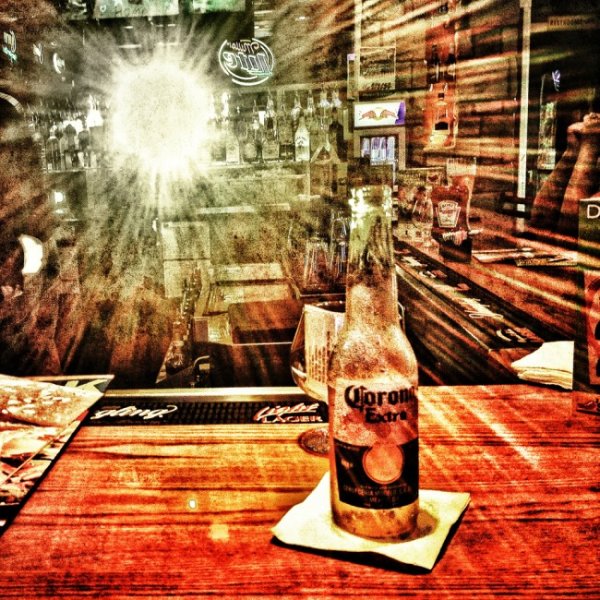
    In the photo above I noticed that the sun setting behind me was reflecting off the mirror at the other end of the bar. I positioned my beer and spent a few minutes taking different shots, both in portrait and landscape orientation, as the sun quickly passed its way below the horizon.

    Think With Filters in Mind

    The great thing about smartphone photography is the ease of which you have to process your captured image. While it might not be true that every photograph looks “better” with a filter, it is certainly true that filters can add interest to an otherwise boring photo. That said you shouldn’t simply think “oh well I’ll just add a filter to it to make it awesome” instead think “that would look really cool with this filter!” and then shoot your photo accordingly.

    IMG_0104

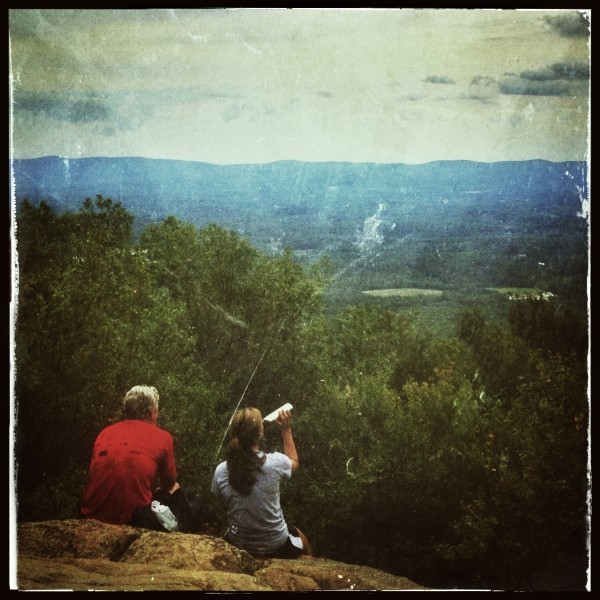
    When I saw these two hikers sit down in front of me on a recent hike I knew right away that it’d make for a great “old time” family portrait style photo. I framed the shot and instantly went in that direction when I process the image – there was no doubt in my mind as to how I wanted the image to look from the moment I captured it.

    Get Into Strange & Uncomfortable Positions

    Smartphones are light, easy to maneuver and have a large screen making it possible to compose your image in awkward positions. Use this to your advantage and don’t be afraid of looking like someone who’s had a few too many hallucinogenic drugs in public. If you’re taking a photo people will understand won’t they?

    So get down on your knees, on your back or hang upside down and have fun capturing photos that you would otherwise be unlikely to get with a larger heavier device.

    Use Third Party Lenses

    In most cases the third party lenses are best used for specialty situations like fisheye or macro photography that the built in cameras just aren’t capable of doing. With the iPhone I use the Olloclip 3 in 1 attachment and absolutely love the macro lens (read my full review here).

    Dragonfly Macro

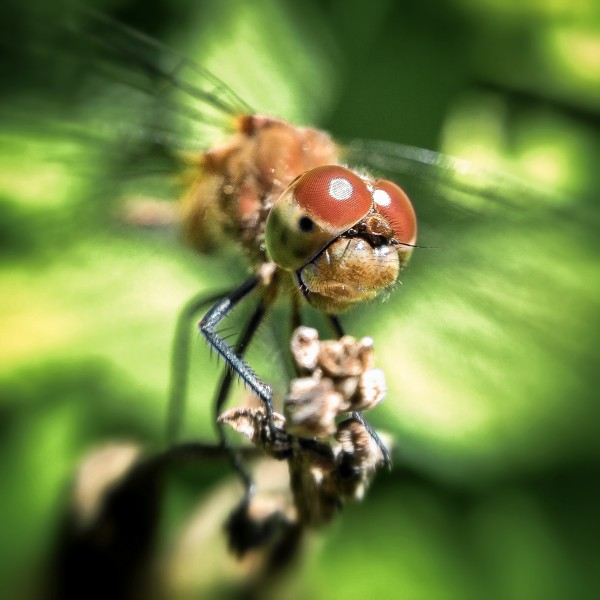
    The above photograph was captured using an iPhone 4S with the Olloclip Macro attachment and to be honest the quality of this photograph even stunned me when I finally got it onto my computer. One of the key points to keep in mind here is that when you are using this lens you are required to be about 10-15 millimeters away from your subject to achieve focus – that’s incredibly close to a an insect that typically is fairly skittish.

    Use Third Party Camera Apps

    Yes the smartphones come with built in functionality, but in most cases they are fairly basic and while they will work well enough if you’re looking to capture a snapshot to go beyond that there are certainly better options out there. Many of the good quality camera apps on the market offer improved stability control, better filter options, and the ability to pick a focus and exposure point separately allowing for better control over the final image. Seeing as there are so many good apps out there rather than listing one that I recommend how about you leave your favorites in the comments below!

    Have Fun and Share

    Okay so ultimately the best part of smartphone photography is how easy it is to share your creations with the world. So now that you’ve learned how to take better smartphone photos how about sharing some of your favorites below – let us know which phone and apps you’re using to capture the images!

    Learn more about taking photos with iPhones with our iPhone PHotography eBook.

    Post originally from: Digital Photography Tips.

    Check out our more Photography Tips at Photography Tips for Beginners, Portrait Photography Tips and Wedding Photography Tips.

    5 Ways to Take Better Smartphone Photos


    Digital Photography School

  • In Motion: Weekly Photography Challenge

    This week your photographic challenge is to take and share an image on the theme of ‘In Motion’.

    Image by Midlander1231

    This gives you a great opportunity to practice a range of photographic techniques (like panning, zooming, slow sync flash) in a variety of settings – after all there’s ‘motion’ everywhere around us.

    Before you head off to shoot your image – here are a few posts from our archives that might help with capturing some motion shots:

    • How to capture motion blur
    • 13 places to practice taking motion blur shots
    • A beginners guide to capturing motion in your photography

    Once you’ve taken your ‘In Motion’ shots, upload your best ones to your favourite photo sharing site either share a link to them even better – embed them in the comments using the our comments tool to do so.

    If you tag your photos on Flickr, Instagram, Twitter or other sites with Tagging tag them as #DPSINMOTION to help others find them. Linking back to this page might also help others know what you’re doing so that they can share in the fun.

    Also – don’t forget to check out some of the great shots posted in last weeks Available Light Portraits challenge – there were some great shots submitted.

    Post originally from: Digital Photography Tips.

    Check out our more Photography Tips at Photography Tips for Beginners, Portrait Photography Tips and Wedding Photography Tips.

    In Motion: Weekly Photography Challenge


    Digital Photography School

  • 30 Jaw-Dropping Examples of Performance Art Photography to Astound You

    Art connects people. That’s a fact. While different cultural backgrounds, social status, genetic factors, personal experiences, upbringing and many other factors conspire to separate individuals, it falls to art to connect people: the artist, who is putting forth a message that is very personal and a deep part of himself, and the audience, who takes the time to listen and Continue Reading

    The post 30 Jaw-Dropping Examples of Performance Art Photography to Astound You appeared first on Photodoto.


    Photodoto