Category: Photography

  • Super Cheap: Replacement Tubes for Your Broken Speedlight

    When it comes down to it, there aren't a ton of things that can go wrong with a speedlight. And if your flash appears to be in working order (i.e., charges, zooms, etc.) but won't fire, it is probably a bad or broken tube.

    While you are probably looking at a three-digit repair bill from your OEM manufacturer, you can also DIY the repair for next to nothing.

    Read more »
    Strobist

  • Behind The Scenes of Three of My Most Popular Landscape Photos

    In the following post I’m not going to remind you again that you need to bring your tripod with you. I’m not here to warn you that weather is unpredictable and you should check the latest forecast before heading out the door.

    Nope this post won’t cover the fact that you should bring a flashlight and a few other miscellaneous tools just in case something goes wrong. And of course I won’t be telling you that you should tell someone where you’re going and when you’ll be back incase you do get lost, hurt or otherwise incapacitated and need help getting home.

    Instead of rehashing the basics or providing some motivational tips to get you off the couch I’m going to show you three ‘behind the camera’ photographs that I took with my iPhone, share the final shot, and talk a bit about how I made each image.

    Sound good? Okay let’s start!

    First Up – A Small Cascade Near Trap Falls in Ashby MA

    IMG_1902

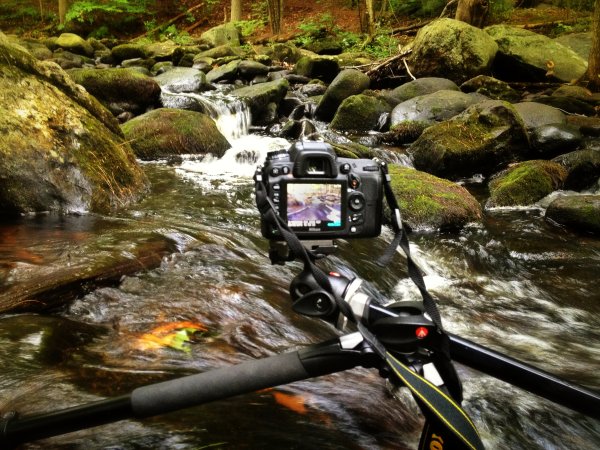
    As you can see the camera was positioned as close to the water as I could comfortably get it – one wrong move and it’s all over for me and my love of photography.

    So does the fear of putting my camera in the drink stop me from attempting to grab a photograph? Not in the least!

    p1637190443-4-650x365

    This shot was something I saw from 100 yards up the bank of the river. I noticed the cascade and knew that it’d be the perfect place to set up my D7000 and Tokina 11-16mm, but how was I going to get into the middle of the river?

    As I got closer to the scene I noticed that there were a few wet stones no larger than an iPad leading out into the middle of the river – right where I wanted to be. All I needed was a little balance and some luck and both my camera and I would make it back to the shore dry and one ‘keeper’ richer.

    Standing on a rock in the middle of the river the size of an iPad is no easy task and trying to fiddle with camera settings and frame a shot doesn’t make it any easier. I used the Manfrotto’s center-column design, which allows you to swing the center column out so that it is parallel to the ground, to get as close to the water as I could, and I used the live view feature on my DSLR to frame the shot and achieve perfect focus.

    After taking a few test shots and fine tuning my exposure I settled on the following settings for the shot: ISO 100, 11mm, f/14, 13.0 seconds. (Note: There is also an ND filter in play here which allows for the longer exposure time).

    Next Up – A Stunning Sunset at Stony Brook in Norfolk MA

    IMG_1713

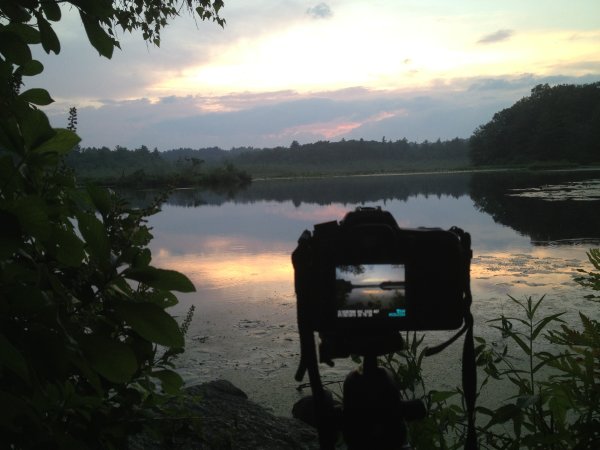
    Okay so this photograph probably isn’t even close to as dramatic as the one above, but it is still able to show you a bit about my thought process when capturing photographs. I could have photographed this scene further back from a nice easily accessible lookout, but I clambered over rocks and got as close to the shore as I could.

    By positioning the camera on the tripod I was freely able to adjust the settings and fine tune the exposure and composition of the shot. The settings I used here were: ISO 100, 36mm, f/10, 1/160.

    sunset at stony brook

    Finally – Capturing Lightning Out Of My Window

    Here in south eastern New England we don’t get all that many storms and due to the tall trees and densely populated urban areas it’s not easy to get a clear view of the sky when they do occur.

    After hearing my phone alert me to a sever thunderstorm watch that was in effect until well after dark and a quick look at the radar confirmed that it looked like it would pan out. I quickly decided to get a plan together to capture my first lightning bolts as a photographer.

    IMG_1571

    With a couple hours of notice I was able to get really creative with my set up. I found a piece of cardboard and some duct tape to make a makeshift shelter for my room and the rest of my camera. I knew I wanted to open the window and the screen to get as clear a sight line as possible, but I didn’t want the rain or mosquitos to get into the house. (If you’re curious I finished sealing the cardboard after I took this photo).

    I made sure to set my focus while I still had daylight to work with as it would get difficult to do so when darkness hit. I used my ND filter to lengthen the shutter speed which would hopefully allow me better chances to capture bolts of lightning and locked down my settings as follows: ISO 100, 13mm, f/9.0, 20.0 seconds.

    Once everything was set up all that was left to do was wait for the storm to get close. As soon as I heard the first crack of thunder I set the Nikon’s intervolometer to capture an image every 25 seconds for about an hour or so, turned out all the lights in my house, and went to bed.

    A few hours later, after the storm had long passed, I woke up curious to see if my trap had worked. The end result was a handful of lightning bolts frozen in time – this is one of my favorites.

    lightning photo

    Do you have any behind the scenes stories to share?

    Tell us about how you captured one of your favorite shots in the comments below!


    Post originally from: Digital Photography Tips.

    Check out our more Photography Tips at Photography Tips for Beginners, Portrait Photography Tips and Wedding Photography Tips.

    Behind The Scenes of Three of My Most Popular Landscape Photos


    Digital Photography School

  • Nikon D7100 Review

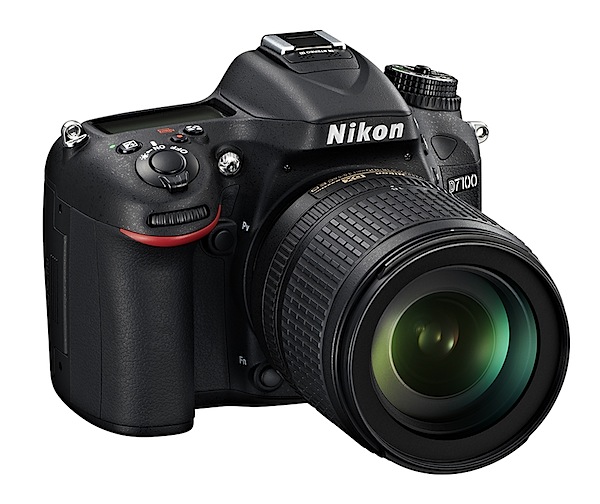
    Nikon D7100 Review.jpg

    An attractive camera, aimed at the enthusiast, the Nikon D7100 follows on from the well-regarded D7000 which, I noted in my DPS review at the time, was described as a ‘professional-standard’ camera, not a professional one!

    Nikon D7100 Review back.jpg

    Nikon D7100 Review top.jpg

    The company has bumped up the CMOS resolution to 24.1 effective pixels from the D7000′s 16.2 megapixels, reason enough to whet your appetite! However, don’t get too excited because the sensor is the same size, which means the pixels are working harder.

    And that’s not all: the LCD screen is slightly larger and has increased resolution (1,229,000 pixels); the AF system performance has been lifted and given a higher low light ability; purists will appreciate the removal of an optical low pass filter. And more.

    ISO range runs from 100-6400, reaching 25600 in expanded mode.

    There is now a maximum rate of 6 fps continuous shooting at full resolution or 7 fps in cropped mode (4800×3200).

    The camera can shoot in cropped mode for both stills and HD video. Stereo audio can be recorded via the inbuilt or an external mic.

    The AF system has 51 points, with 15 of these sensors of the cross type.

    You can attain spot white balance in Live View mode.

    Maximum image size is 6000×4000 pixels, or 51x34m as a print.

    HD video at 1920×1080 pixel resolution can be shot. If you fire off a still mid video recording, the latter will stop.

    Two SD card slots can be used for overflow or backup; files can be copied between cards.

    The camera is built with magnesium alloy and has water and dust resistance.

    Images can be shared wirelessly with an attached WU-1a Wireless Mobile Adapter.

    Possibly because I had not encountered a DSLR for some time or was a little in awe at the swell of positive comment this ‘un was generating. I took things gently at first: by that I mean I jumped in at the deep end and set about the task of shooting my ISO tests without a glance in the manual.

    I dialled A on the PASM dial, adjusted the f stop, dropped the ISO mark to its start point — and shot the tests.

    Very straightforward. Easy peasy. Which means there is a degree of comfortable user friendliness. Well done Nikon!

    Handling

    Immediately you know this is a DSLR if, like me, you’ve recently encountered a swag of compacts, MILCs etc: a bit on the bulky side, with a pronounced speed grip, but with a nice texture on the handling surfaces and evenly distributed weight, so it has an agreeable balance in the hand. With the review camera was the AF-S f3.5/24-85mm lens. Total weight: a manageable 1.2kg. Maybe a little heavy for handheld video shooting.
    House and ocean.JPG

    Pool.JPG

    Sun shapes 2.JPG

    Controls

    You tend to forget the generous real estate in a DSLR, which allows largish, well-spaced control IDs. Another factor is the large, bright white ID texts used on control points.

    Front: off to top left is the lens release button; to the right and flanking the lens are the flash release button, the BK button for bracketting exposure and a tiny two position lever to switching between manual and AF.

    I also noticed that the lens barrel’s lever for auto and manual focus plus another on/off for VR (Vibration Reduction) crammed in very close to the manual/AF button. Suggest you get used to it!
    Scene modes.JPG

    Special effects.JPG

    Top: at left is a generously sized mode dial with positions for auto, PASM, special effects (night vision, color sketch, high and low key etc), U1 and U2 custom settings and scene modes (portrait, child, close up, sunset etc) plus a position for flash off. I should point out that the various positions are secured by a detent button. Brilliant!

    Flowers orig.JPG

    Flowers color sketch.JPG

    Flowers silhouette.JPG

    Beneath the mode dial is a release mode dial offering shooting options: single shot, continuous low and high speeds, quiet shutter release, self timer and mirror lockup.

    Still on top: the control panel display, on/off lever and shutter button, exposure compensation, the poorly placed video record button and one that allows you to directly format any card and swings you through the various metering options; just for’ard is the sub command dial. And a note: swing the on/off lever farther right and you illuminate the control display.

    Rear and above the screen: replay button, trash and across to the right is the AE and AF lock button plus the main command dial.

    Lower and left: menu, white balance (amongst other matters), enlarge display, image quality and size, ISO, the i button to change settings such as image size and quality, screen brightness etc.

    To the right: focus selector lock then, lower down, are the Live View button and display options.

    All in all, quite comprehensive. Many of them you will pick up in the early hours of ownership but I do suggest some trial shooting with manual firmly in hand in the aim of making your camera-person interface intuitive.
    Menu 1.JPG

    Menu 2.JPG

    Menu 3.jpg

    The viewfinder menu system is typically Nikon: comprehensive and clear.

    Nikon D7100 ISO Tests

    Nikon D7100 ISO 100.JPG

    Nikon D7100 ISO 400.JPG

    Nikon D7100 ISO 800.JPG

    Nikon D7100 ISO 1600.JPG

    Nikon D7100 ISO 3200.JPG

    Nikon D7100 ISO 6400.JPG

    Nikon D7100 ISO 12800.JPG

    Nikon D7100 ISO 25600.JPG
    Only at the ISO 6400 level does quality begin to drop off in terms of sharpness and noise.

    ISO 12800 equivalent: noise up but still useable.

    ISO 25600 equivalent: noise and image sharpness make this level a no-no.

    Nikon D7100 Review Verdict

    Quality: excellent as you would expect, with an exceptional range.
    Why you would buy the Nikon D7100: an affordable DSLR with many bells and whistles.
    Why you wouldn’t buy the Nikon D7100: maybe your ambition is to shoot full frame.

    A well-priced DSLR with many pro features makes this number an ideal enthusiast camera.

    I only question the APS-C format for those who want to make really big images or perform severe cropping. But it will sure please many a keen photographer unwilling or uncashed enough to dive into the full frame market.
    Should sell by the truck load.

    Nikon D7100 Specifications

    Image Sensor: 23.5×15.6mm CMOS. 24.1 million effective pixels.
    Metering: Multi, centre-weighted, averaging and spot.
    A/D processing: 14-bit.
    Lens Mount: Nikon F.
    Exposure Modes: Auto, Program AE, shutter and aperture priority, manual.
    35 SLR Lens Factor: 1.5x.
    Shutter Speed: Bulb, 30 to 1/8000 second. Flash X-sync: up to 1/250 sec.
    Continuous Speed: 5-7fps.
    Memory: SD/SDHC/SDXC cards in two slots.
    Image Sizes (pixels): 6000×4000 to 2400×1344. Movies: 1920×1080 to 1280×720.
    Viewfinders: Eye level optical pentaprism and 8cm LCD (1,228,000 pixels).
    File Formats: NEF (RAW), JPEG, NEF (RAW)+JPEG, MPEG4.
    Colour Space: Adobe RGB, sRGB.
    ISO Sensitivity: Auto, 100 to 6400 with expansion up to ISO 25,600.
    Interface: USB 2.0, AV, HDMI mini, DC input, external stereo mic, remote, audio in- and output.
    Power: Rechargeable lithium ion battery, AC adaptor.
    Dimensions: 136x107x76 WHDmm.
    Weight: Approx. 765 g (with battery and card).
    Price: Get a price on the Nikon D7100 (body only) or Nikon D7100 with 18-105mm f/3.5-5.6 AF-S DX VR ED Nikkor Lens.

    Post originally from: Digital Photography Tips.

    Check out our more Photography Tips at Photography Tips for Beginners, Portrait Photography Tips and Wedding Photography Tips.

    Nikon D7100 Review


    Digital Photography School

  • How to Reduce Camera Shake – 6 Techniques

    Pin It

    In this classic DPS post (now updated) photographer Natalie explores 6 ways you can hand hold lenses at low apertures and low shutter speeds and still avoid blurry images caused by camera shake.

    avoid-camera-shake

    I’m a mover and a shaker in general, and this is particularly true when I’m on a shoot. I’m twistin’ and turnin’, climbin’ and jumpin’ and to top it all off, I DO NOT have a steady hand, plain and simple.

    As often as possible I opt for lenses with VR (Vibration Reduction) or IS (Image Stabilization). You pay a pretty penny for this feature. For me, it’s worth the extra cost, and for the point I’m at in my photography it’s a reasonable expense. But that wasn’t always the case, and what about uber slow shutter speeds with no tripod. No IS or VR can hold up under pressure like that. . .no matter how magical they may be. . . and magical they are, trust you me.

    6 Techniques to Reduce Camera Shake

    Here are 6 options for avoiding camera shake and achieving crisp, delicious images no matter the length of the lens, no matter the shutter speed.

    Shooting wide open? NO PROBLEM; I’ve got your back!! Enjoy!

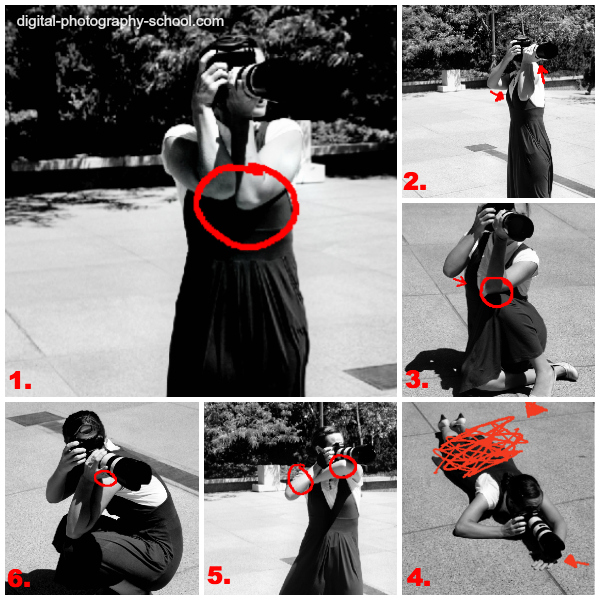
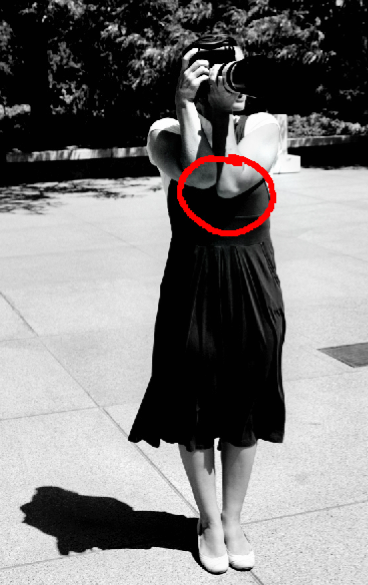
    1. Elbows In

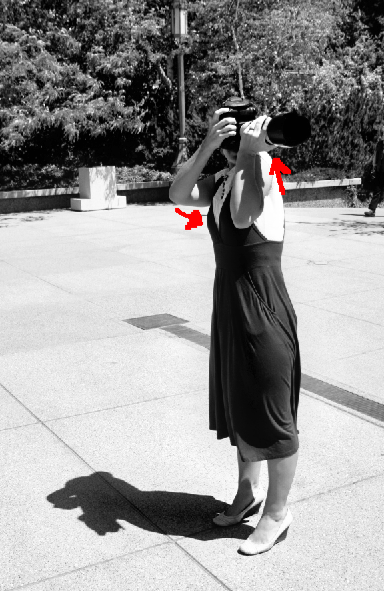
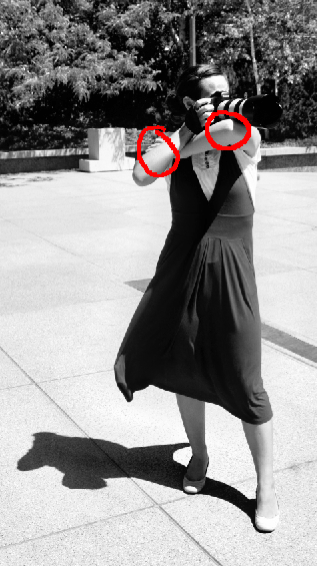
    As often as possible pull your elbows in to your body and exhale completely before depressing the shutter. When you’re working with a wide aperture or low shutter speed (or both), even a breath can introduce shake. Pulling your elbows tight to your body can really help keep you steady. I also press my elbows firmly into my chest for even greater stability.

    Avoiding-Camera-Shake-1

    2. Raise Your Left Shoulder….

    I am definitely a right eyed photographer, but this tip that I learned from “The Moment It Clicks” by Joe McNally, requires that I shift for a moment to my left eye. What I’m doing here is raising my left shoulder, and bracing my left elbow into my rib-cage (no arrow for this one). For further stability, you can pull your right elbow in to your chest. As always, exhale completely before depressing the shutter to avoid introducing shake.

    Avoiding-Camera-Shake-2

    3. Create a Tripod With Your Knee

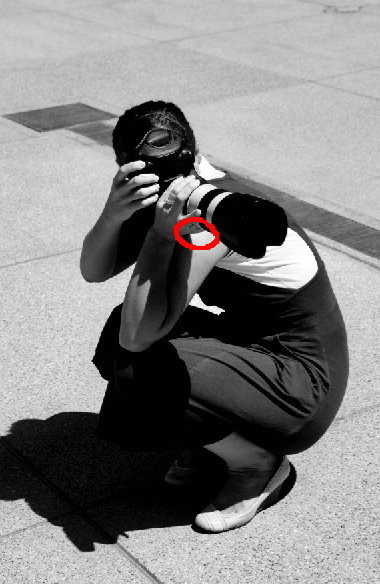
    You can create your own tripod by resting your elbow on your knee while in a seated position. Again, bring that other elbow in for greater support.

    Avoiding-Camera-Shake-3

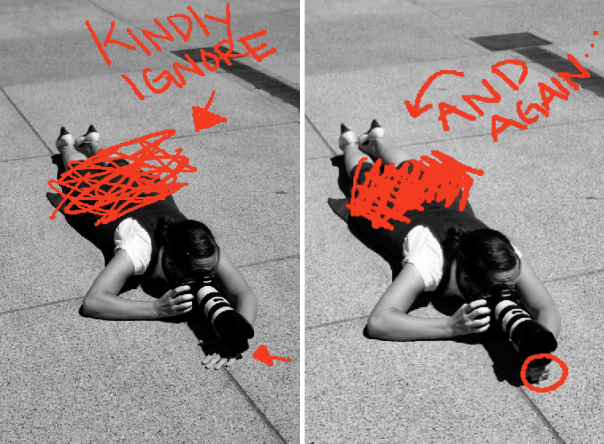
    4. Lay Down

    These two images illustrate perhaps the most obvious way to avoid shake without a tripod. Lie flat and let the lens sit directly on the ground. The problem with this is that you’re likely to have quite a downward tilt to the lens and unless you’re aiming to photograph the pavement, you probably won’t end up with the shot you’re hoping for. In the first image you’ll notice that I placed my hand flat against the cement and balanced the lens on top of it to give myself some height. In the second image you’ll see that I created a fist with my hand to give myself even greater height.

    How To Avoid Camera Shake-1

    5. The Machine Gun Hold

    This next technique is sometimes referred to as the machine gun hold. I rarely use this technique as I find it awkward and difficult to maintain for more than a second or two. Just because it doesn’t work for me, doesn’t mean it won’t for you. . . give it a try.

    Avoiding-Camera-Shake-6

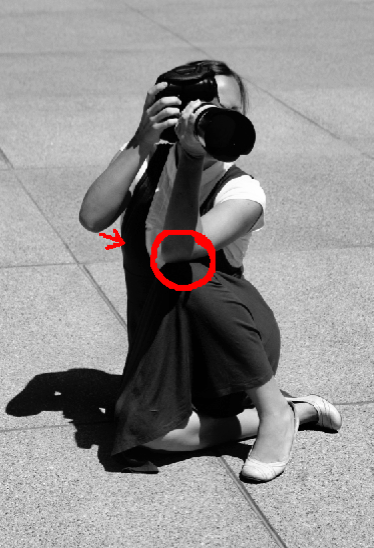
    6. Cradle It

    In this next image you’ll see that I created a sort of cradle for the lens between my shoulder and my wrist. I also stabilized the hold by balancing my elbow on my knee.

    Avoiding-Camera-Shake-7

    Well there you have it. That’s how I avoid “The Shake” (I’ve named him that because he’s like an evil monster who comes in and ruins my otherwise perfectly delicious images). Please share YOUR tricks and techniques in the comment section below, and as always. . .

    Happy Shooting! – Get more daily tips like this one by subscribing to Digital Photography School
    Further Reading on Camera Shake

    • How to Tell the Difference Between Camera Shake and Poor Focussing?
    • How to Hold a Digital Camera

    Post originally from: Digital Photography Tips.

    Check out our more Photography Tips at Photography Tips for Beginners, Portrait Photography Tips and Wedding Photography Tips.

    How to Reduce Camera Shake – 6 Techniques


    Digital Photography School
  • Spotlight: Patty Carroll, Photographer Extraordinaire

    America is a relatively young country. This is reflected in its visual iconography. In Europe and Asia, history is found in the religious symbolism embedded not only in the architecture, but within the social and cultural infrastructure. In the USA, the visual language is to be found in the motifs of a dynamic, developing culture, which is rooted in the Continue Reading

    The post Spotlight: Patty Carroll, Photographer Extraordinaire appeared first on Photodoto.


    Photodoto

  • Rediscovering Backlit Subjects

    Back-LightingPhoto by naughton321

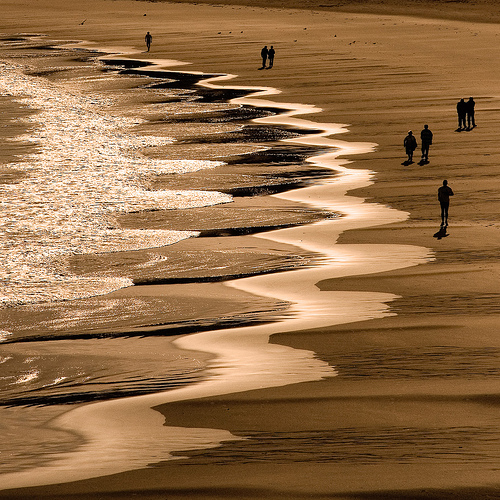
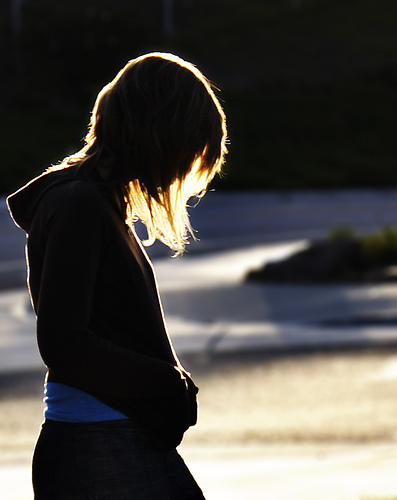
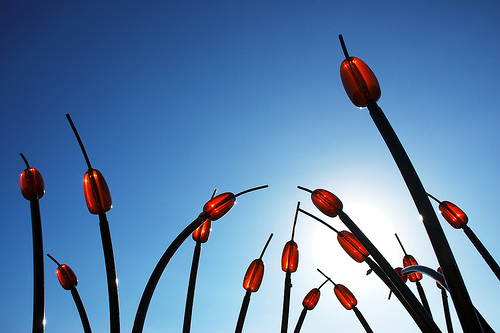
    “Look where the sun is coming from – then position yourself with your back towards it so that it light up your subject’s face.”

    This was the very first piece of photographic advice that I was ever given as a child entrusted with the family’s camera for a school excursion.

    The intention behind it was good and in many photographic situations over the years it has actually served me well.

    However…. sometimes in photography it can be easy to get trapped in a mindset that actually limits the potential of your shots.

    My suspicion is that many people are being limited by the above piece of advice – lighting your subject from the front and avoiding back lighting at all costs.

    The problem with ignoring back lighting images is that:

    • backlight can add drama to an image
    • backlit images can show the delicacy of a subject (think transparent or translucent things like flowers or insects)
    • backlight can help create real mood in a shot
    • backlit images can highlight details on the edges of subjects
    • backlight can reveal textures that might previously have been hidden
    • backlit images can show off the shape and form of a subject
    • backlight can create shadows that add points of interest to an image

    I’m not arguing that backlit subjects are the way you should approach every shot – but ignoring it as an option ca leave you potentially missing out on a very powerful technique.

    Check out some of the following images that show the beauty of power of ignoring the age old advice of always lighting a subject from the front.

    PS: just because your subject is backlit doesn’t mean you need to forget about how they are lit from the front. Using a Fill Flash and/or some sort of reflector is often a great way to get the balance right for a well exposed shot.

    BacklightPhoto by Ty-Dan

    BacklitPhoto by benefit of hindsight

    Back-LightPhoto by ‘SeraphimC

    Back-LitPhoto by limonada

    BacklightingPhoto by serni

    Post originally from: Digital Photography Tips.

    Check out our more Photography Tips at Photography Tips for Beginners, Portrait Photography Tips and Wedding Photography Tips.

    Rediscovering Backlit Subjects


    Digital Photography School
  • The Soul Behind the Subject by Kelly Kirkpatrick

    To quote Jean-Luc Godard, “when you photograph a face you photograph the soul behind it”. While I have been a shutterbug all my life, it wasn’t until 2006 when I really started studying photography and working as a professional. Through education and building on my own experience, there are many things I could say on […]
    dslrBlog

  • The Sabattier Effect

    I have a rule when it comes to Photoshop, Lightroom, and post-processing in general. I have always felt that image manipulation should be a tool, not a crutch. Photoshop can make a good photo better, but a bad photo is just a bad photo. I strive to get it right in the camera. When people look at my work I want them to say, “That’s a great photo.” I don’t want them saying, “Hey, you’re really good with Photoshop.” As my friend Zack Arias is fond of saying, “If you ever hear yourself saying ‘I’ll fix it later in Photoshop,’ you need to immediately stop whatever you’re doing and slap yourself as hard as you can.” I’m not saying that I don’t edit– or “finish” as I like to say. I don’t judge photographers who like to dive deeper into their editing, but for me it’s usually a matter of a contrast bump, a white balance tweak,  a little bit of skin smoothing, maybe a little sharpening. Hopefully, that’s it. Get it right in the camera. That’s the rule.

    Except for when it’s not.

    Every once in a while you need to break out of the day-to-day and try something different. That’s not to say that my portrait style is going to be changing any time soon, but photography is art and sometimes you need to evolve as an artist. This was my thinking when I recently came across something called the Sabattier Effect.

    What Is it?

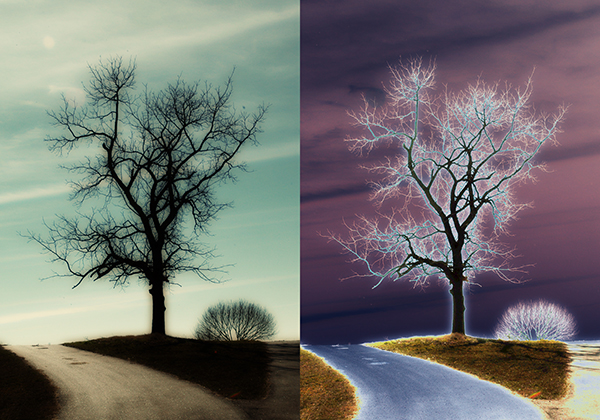
    It gets a little technical, but let’s see if we can get into it without getting lost in the science. If you’ve spent any time exploring your way through the Photoshop filters menu, you may already be familiar with the solarization filter. When a partially developed negative or print is briefly exposed to white light, some of the tone values are reversed. Dark areas appear light and light areas appear dark. French scientist and doctor Armand Sabattier (1834-1910) described the process as “pseudo-solarization.” Over time, the “pseudo” has been dropped, but the effect is the same– the reversal of image tones due to extreme overexposure. Run an image through the solarization filter and you’ll see what I mean. In the days of film, the effect manifested itself one of two ways. The first would be an extreme overexposure of the negative in the camera. In the darkroom, it could have been something as simple as turning the lights on and off while processing the negatives.

    The Sabattier Effect takes solarization a bit further. In addition to the overall tone reversal, the Sabattier Effect includes a narrow band or rim of low density, which is formed at the edges between adjacent highlight and shadow areas. This white band, or Mackie Line, appears around areas of high contrast. It was a popular darkroom technique for a while, but became increasingly less popular due to the combination of long hours in the darkroom and unpredictable results.

    Creating the Effect in Photoshop

    The first thing to keep in mind is that the effect can be drastic, so not every image is going to be a prime or even suitable candidate. The best images for the effect will be black and white photos with simple outlines and bold shapes. Color images can work also, particularly when the coloring is only slight. The results will show partially reversed hues and tones.

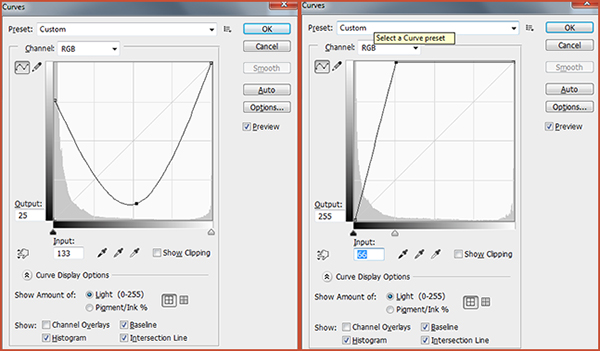
    After you have selected an image and opened it in Photoshop, convert it to black and white. Next, duplicate the background layer (Ctrl/Command-J) and set the blending mode to Exclusion. The initial results will be obvious and immediate. You can then adjust the effect with either the Levels or Curves adjustments. Levels allows you to tweak the black, white, and mid-points in the image. Playing with the sliders will either lighten or darken the effect. Curves allows you to adjust the same values as Levels, but also gives you control over the contrast and specific tones of the image. While both Levels and Curves can achieve the intended results, I prefer the precision of Curves, which allows me to select individual points along the curve and adjust targeted areas of the image.

    Creating a valley-shaped curve like the one on the left or a sharp angle curve like the one on the left create some of the best examples of the Sebattier Effect.

    Creating a valley-shaped curve like the one on the left or a sharp angle curve like the one on the right create some of the best examples of the Sabattier Effect.

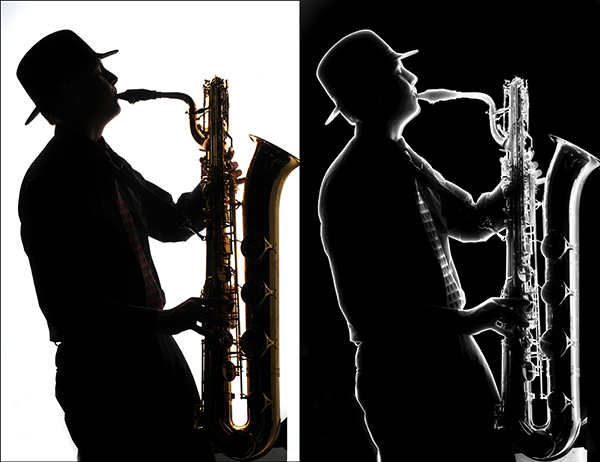
    In this first example, a mostly black & white photo of a musician forms the basis for the effect. We clearly see the white Mackie Line around the subject and the saxophone, marking the edges between highlights and darker areas of the image.

    Sabattier-002-dPS

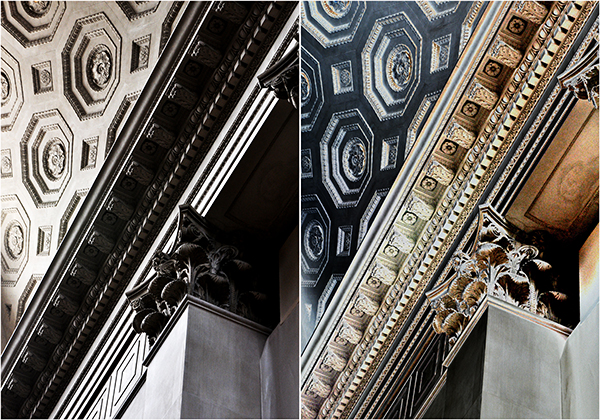
    This second image, taken in the lobby of the New York Museum of Natural History, would not ordinarily make for a good example of this effect, due to some of the more intricate details.  I think it works, however, due to the simple, leading lines, as well as the fairly even tones. With the exception of opening up the dark shadows, the lower half of the image is tonally similar in both the before and after.

    Sabattier-001-dPS

    So far, both examples have been fairly “traditional” attempts at the Sabattier Effect. I’ve used mostly black & white images with simple lines. For this last example, I decided to throw out the “rules” and go with color and some of the most complicated lines I’ve ever photographed. I’ve photographed “Lonely Tree” in all four seasons, but seemingly lifeless in the middle of winter is by far the most interesting of the set. A rather large canvas print hangs in my office, so I’m intimately familiar with the details of this photo. While I doubt I would ever display the Sabattier-ized version, I think it makes a great example of what happens when the effect is applied to a color image with a mix of simple and complicated lines.

    Sabattier-003-sPS

    The beauty of this effect is that there are no right or wrong results– just personal preferences. It’s obviously not natural-looking, so you have much more room with which to experiment. A common mantra in my classroom is, “I don’t care if you break the rules as long as I know that you know them.” For the Sabattier Effect there are no rules to break, just suggestions to either follow or ignore. Either way, you’re bound to get interesting results.

    Post originally from: Digital Photography Tips.

    Check out our more Photography Tips at Photography Tips for Beginners, Portrait Photography Tips and Wedding Photography Tips.

    The Sabattier Effect


    Digital Photography School
  • Photographing Fall Foliage

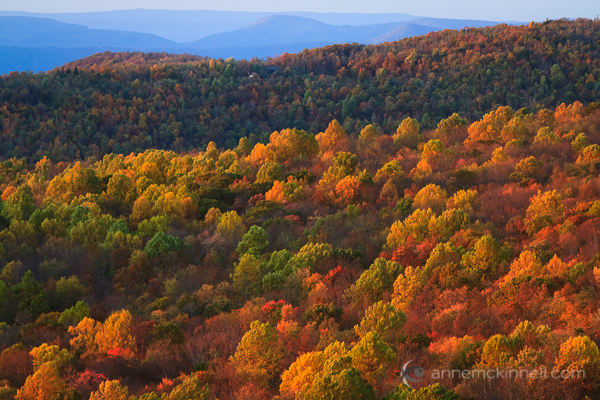
    Fall colours can be very different from place to place. Some areas will have a very short colour-changing season of a week or less, while elsewhere it can last nearly a month. Every location will produce different colours, depending on the type of flora and other factors such as climate and soil.

    The hillsides of New England, which attract thousands of photographers every year, are famous for their dappled assortment of species producing different shades, ranging between reds and greens.

    Shenandoah National Park, Virginia, by Anne McKinnell

    The Sierra Mountains of California and Nevada, on the other hand, are known for their vast yellow forests of Aspen and Birch.

    Do some research into your area to find out when the leaves are expected to change so you can make the most of this opportunity. A quick Google search will help you find the best areas for autumn foliage in your vicinity.

    If you’re planning a photo expedition, you can use services such as Flickr and Panoramio to see what different areas look like at different times of the season, simply by searching tags for the time and place you’re considering.

    Whatever the Weather

    No matter how the weather behaves when you go out shooting, you can get great shots in any type of light. If it’s sunny, you have plenty of light to work with, but you may get harsh shadows and glare that can diminish the colours. To conquer this, try using a polarizing filter, changing your angle of view, or shooting when the sun is low in the sky.

    If the sky is white, simply leave it out of the composition. The soft light of a white sky day is perfect for photographing the smaller details which will be free of bright areas and harsh shadows.

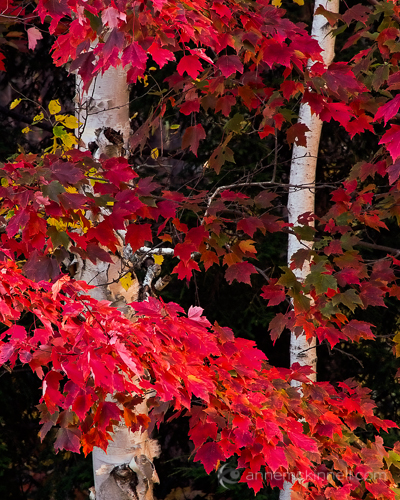
    Fall in New Hampshire by Anne McKinnell

    A rainy day might seem like a wash-out, but water actually brings out colour like nothing else. The best time to shoot is right after it stops raining, especially as the sun peaks through the clouds to illuminate the saturated landscape.

    If there’s a sudden cold snap, you might find some frost forming on your foliage. If you brave the cold, you can capture some amazing textures, particularly in the early morning when the air is crisp.

    Techniques

    Backlight

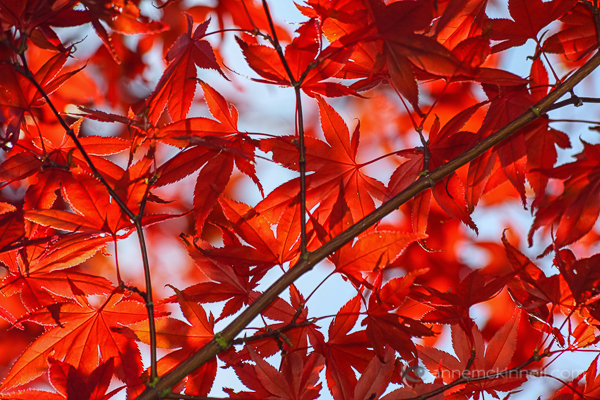
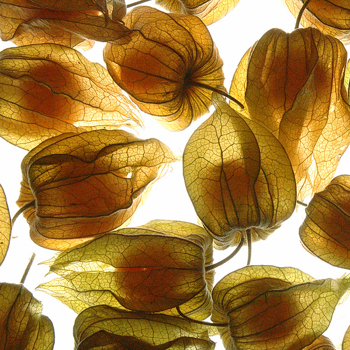
    If you position a leaf between your camera and the sun, the back lighting will illuminate it all the way through making it appear to glow and revealing the details of the veins. If the sky is visible between the leaves, try it on the blue sky day for a beautiful colour contrast.

    Backlit Maple by Anne McKinnell

    Reflections

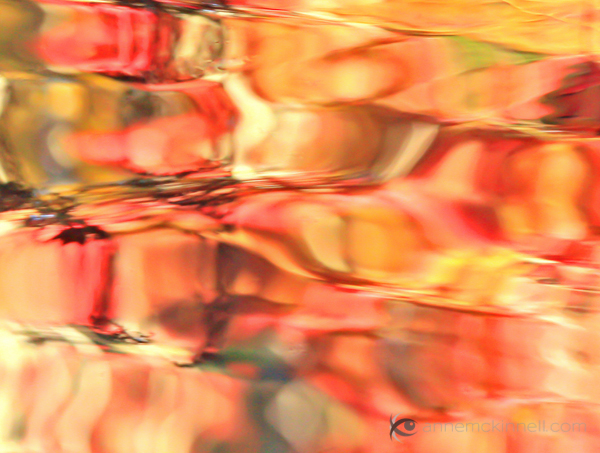
    Photographing leaves can be especially difficult on a windy day. On these occasions I try to find reflections of the fall colours and create a more abstract image.

    Fall Reflections by Anne McKinnell

    Perspective

    Leaves that have fallen on the ground are excellent subjects. Try getting a squirrel’s point of view for a unique perspective.

    Mushroom and Maple Leaf by Anne McKinnell

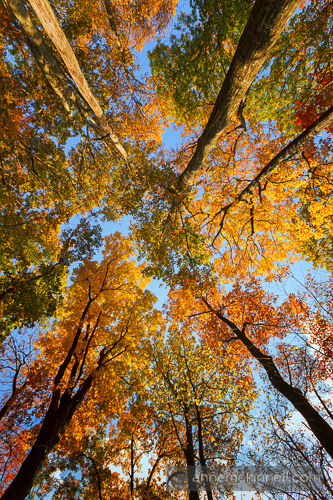
    Try looking straight up into the trees to emphasize their tallness and magnificence.

    Fall Trees by Anne McKinnell

    Waterfalls

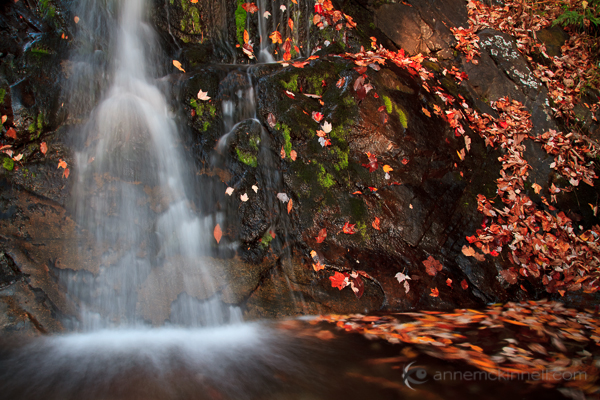
    Combining the beautiful colours of the fall leaves with a silky smooth waterfall can be magical. Try using a long exposure to blur the water as it cascades past the fallen leaves.

    Fallingwater Cascades, Virginia, by Anne McKinnell

    Close-ups

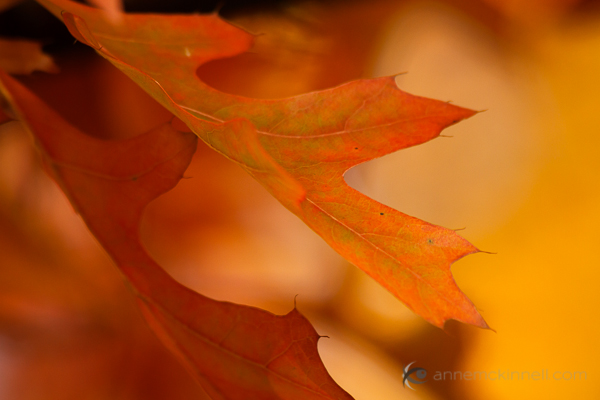
    A simple, minimalist composition can be just as evocative of the season as a complex scene. Try getting close to a single leaf and using a wide aperture, like f/2.8 or f/4 to achieve a shallow depth of field that isolates fine details.

    Autumn Oak Leaves by Anne McKinnell

    Camera Settings

    • Depth of Field: Decide how much of the picture you want to be in focus, and use your aperture to control the depth of field.
    • Underexpose: To deepen the tones and make the colours stand out more, underexpose your image slightly. The easiest way to do this is to locate your exposure compensation (+/-) button and dial it down somewhere between -0.5EV and -1.0EV.
    • White balance: If you’re photographing during the golden hours (just before sunset or just after sunrise), you probably don’t want your camera’s auto white balance to eliminate the light’s yellow-orange tone, which is exactly what it will try to do. However, if you set your white balance to “daylight”, your pictures will retain the sun’s warm glow. Try different settings in any given lighting situation to find the best colour balance. It is particularly important to get this right if you’re shooting JPEG files, but if you use RAW format, the white balance can be perfected in post-production.

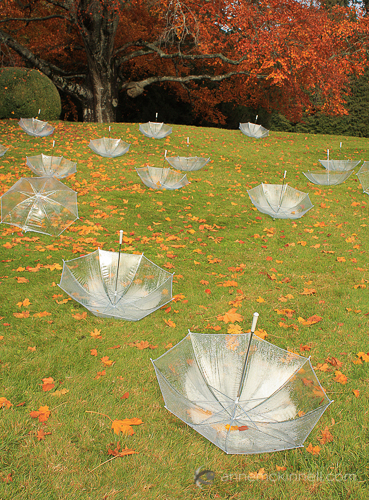
    Fall Umbrellas by Anne McKinnell

    Composition

    When we find a great autumn location full of dramatic colours, it can be easy to become overwhelmed by the colour and forget everything else. Fall colours don’t create a good landscape photo on their own, they simply add an element of colour. The composition should be strong even when turned black and white, so remember your basic rules of landscape composition: create a focal point, and use lines, shapes, and forms to create balance and harmony.

    To create images that stand out from the rest, compose them with thought and purpose, and never be afraid to try a different angle.

    Post originally from: Digital Photography Tips.

    Check out our more Photography Tips at Photography Tips for Beginners, Portrait Photography Tips and Wedding Photography Tips.

    Photographing Fall Foliage


    Digital Photography School
  • My Week With Heisler, Pt. 2

    Editor's Note: Contributor Sara Lando continues her three-part series chronicling her 10-day stint as an assistant/mole with Gregory Heisler in Dubai. This is part two. Part one is here.

    By Sara Lando — "Lighting is a lot like cooking. You have a gazillion different instruments and what you use will depend of what you want to eat. Also, you don't learn how to cook by eating at restaurants. You have to cook."

    When Heisler was talking about this during his lecture, I thought it was cool and made sense. But it was probably only when we stepped into Cavalli Club that I got to realize how much "having to cook" was going to be put into test.

    He was entering the club for the first time himself: for a series of reasons, we weren't able to scout the location beforehand and he only got a glimpse of the place from some cellphone footage. When we stepped into the club, the first word that came through my mind isn't one I'd feel comfortable reporting.

    The place was pitch black.

    Read more »
    Strobist