Category: Photography

  • Who’s Getting in Line for the New Canon EOS 5DS or 5DS-R Cameras?

    It’s that time again. Canon has announced their newest in the 5D line-up – the 5DS and the 5DS R. At a whopping 50.6 megapixels and starting prices rumoured around $ 3699 and $ 3899 respectively – are you taking the plunge?

    People were all gaga over the EOS 7D MarkII and headed out in droves to pre-order one for themselves. I know several people personally who picked one up – either as an upgrade or as a backup to their full frame body.

    So the question is – who is this camera designed for? Clearly it’s for the professional photographer who needs maximum sharpness and detail. Have a look at this video from Canon to see if it’s for you:

    The main difference he mentions between the two new models is the removal of the anti-aliasing filter from the 5DS R. That means even more sharpness.

    There are also many similarities to the 5D MarkIII that users of that camera will find familiar such as: body design and layout of controls, same 61-point focusing system, and it even uses the same battery pack which is refreshing. Yay for once you don’t need yet another battery and charger!

    For an outside opinion on the new cameras, see what Matt Granger had to say in this video:

    So I ask you these questions:

    1. How many megapixels is too many? Opening the RAW file as 16-bit gives you approximately a 288mg file.
    2. What is the advantage of these cameras over a large sensor medium format camera?
    3. If you buy this camera will you likely need a computer upgrade to handle the processing power needed for such large files? Never mind massive amounts of more memory cards.
    4. Are you interested in this or is it way out of your league? Is it a wish list item for “one day”?

    Canon-EOS-5DSTell me in the comments below. I personally own the 5D MarkIII and am NOT considering getting one for myself. Perhaps if I were doing commercial studio product work still I might – but then I’d likely already have a medium format like many of my commercial photographer friends.

    Let’s talk, is this for you?

    googletag.cmd.push(function() {
    tablet_slots.push( googletag.defineSlot( “/1005424/_dPSv4_tab-all-article-bottom_(300×250)”, [300, 250], “pb-ad-78623” ).addService( googletag.pubads() ) ); } );

    googletag.cmd.push(function() {
    mobile_slots.push( googletag.defineSlot( “/1005424/_dPSv4_mob-all-article-bottom_(300×250)”, [300, 250], “pb-ad-78158” ).addService( googletag.pubads() ) ); } );

    The post Who’s Getting in Line for the New Canon EOS 5DS or 5DS-R Cameras? by Darlene Hildebrandt appeared first on Digital Photography School.


    Digital Photography School

  • The Top 5 Sales Mistakes Costing You Money Right Now

    What would you do if you could book more clients and earn more money with your photography? If you’re like me then you’d probably just blow it all on that new lens you’ve been thinking of buying for the past few months. You likely have a few clients every now and then, but for some reason they’re either not booking you and going with someone else, not buying your prints, or they’re just doing a disappearing act never to be heard from again after your first meeting. The truth is that you’re probably making one or several of the sales mistakes listed below and it’s costing you a lot of money.

    Five Sales Mistakes MarkTioxon 0001

    1. Being too focused on making a sale and not helping your client

    Have you ever helped your friend make a decision on whether or not to buy that new lens or camera body? You probably shared your experience and listed six reasons why they should or shouldn’t make the purchase. You weren’t going to profit from the sale but you helped your friend make the best decision for them and their situation. You didn’t focus on making a sale. You were trying to help your friend, and that’s exactly how you need to handle clients.

    You’re the photography expert. They are coming to you for help. Yes they want you to make great photos, but they also want you to lead them through the rest of the process. They need your help to buy the right print packages, canvas wraps, and albums. Basically they need you to help them spend their money! So just help them like you would any good friend (except you probably can’t borrow the canvas prints of their family, like you would borrow a friend’s new lens).

    Don’t try to sell to your clients. How do you feel when a bad salesperson starts trying to run their awful pitches on you? Your clients feel the same way and will probably want to run away the moment you start “selling”.

    2. Asking questions and not shutting up

    Five Sales Mistakes MarkTioxon 0002

    Have you ever tried to have a conversation with someone that doesn’t stop talking? They’ll ask you a question and then give you their answer without listening to you. Too many photographers do that exact thing when they’re meeting with clients. They get so excited, and they want to share everything with their clients that they don’t give anyone else a chance to talk. Clients end up thinking that the only reason the photographer asked any questions was just to listen to themselves talk. Or worse, the clients think that the photographer doesn’t care about anything they have to say.

    After you ask a question, stop talking. Literally just shut up. Don’t say a word until the other person speaks. When they finish speaking, take a breath and see if they have even more to say while you sit there listening.

    You’re not there to ask questions so that you can answer them. You’re there to listen to whatever truths your client will share with you. That’s how you find out how you can help them (refer up above to mistake number one).

    3. Not being an expert of your own product

    Five Sales Mistakes MarkTioxon 0003

    You know why I like tour guides? Because they know EVERYTHING about the tour you’re following them on. They know all the important stats, the history, and answers to almost every question you can come up with. How embarrassing would it be if your tour guide wasn’t very familiar with the exhibits? You’d feel like your time was wasted right?

    That’s exactly how clients feel when photographers don’t know their products inside and out. When you don’t know how much your prints costs, or what options are included, or all of the different ways a package can be structured, it makes your clients start to worry about giving you their money. Definitely not what we want our clients thinking about. Sure you’re an expert at photography, but now the client wants to buy. Are you an expert at selling your product?

    Or to phrase it better, are you an expert at helping clients buy your product?

    You should know your product as well as you know your photography. Remember, your product is more than only the photos you make. In what ways can you help your clients make a buying decision?

    4. Missing the most important person at your meeting

    Five Sales Mistakes MarkTioxon 0004

    Who is the most important person to have at your meeting? The decision maker. It’s a simple answer, but so many photographers have meetings that end up being a waste of time. Have you ever met with a client only to have them say they needed to check with so-and-so before deciding? How much time would you have saved if that person was there for your meeting, or even on the phone? Some photographers never talk to the decision maker even once throughout the whole process. They’ll have three meetings with different people that all have to check with someone else. It’s a complete waste of time.

    A worse mistake is when the decision maker is present, but the photographer doesn’t realize it, or they think the wrong person is the decision maker. The photographer spends all his time talking to one person, but ignoring the most important one! Then they wonder why they didn’t book the client. Make sure you have an opportunity to communicate directly with the decision maker, whomever that may be. It’ll save you a lot of wasted effort.

    5. Not being brave enough to ask for the sale

    Five Sales Mistakes MarkTioxon 0005

    I have a friend who does a great sales presentation with his clients. He explains the benefits, makes everyone laugh and they truly feel like he’s helping them with whatever they need. His clients are often ready to buy when he reaches the end of his presentation. They literally want to give him their money and all he has to do is ask.

    Instead of asking them to sign the contract or if they’d like to put down a deposit that day, he mumbles something like, “I know this a big decision so go ahead and think about it and let me know what you decide.”

    That is not asking for the sale. That’s avoiding asking. That’s putting it off. That’s not being brave enough to ask for your money.

    How do you close a deal? You ask for the sale. It doesn’t have to sound like you’re asking for the sale either. There are many different ways to do this. You can ask how they’d like to pay, cash or credit. You can ask which package they’d like to purchase. You can even just ask them if they’d like to sign the contract. I know it sounds crazy, but if you did your job during the meeting, then they’ll be ready to sign your contract right there in front of you.

    Five Sales Mistakes MarkTioxon 0006

    You’ve done a great job of learning your craft. You’re a great photographer but no one’s hiring you. It’s not your photography that’s the problem. It’s just that you’ve been too busy to focus on the sales part of the business. Not everyone is cut out to make a living at photography but you’re not like everyone else. You can do this. Learn how to correct the mistakes mentioned above and your sales will increase, your clients will be much happier, and you might be at the start of a great photography career. How amazing would that be?

    googletag.cmd.push(function() {
    tablet_slots.push( googletag.defineSlot( “/1005424/_dPSv4_tab-all-article-bottom_(300×250)”, [300, 250], “pb-ad-78623” ).addService( googletag.pubads() ) ); } );

    googletag.cmd.push(function() {
    mobile_slots.push( googletag.defineSlot( “/1005424/_dPSv4_mob-all-article-bottom_(300×250)”, [300, 250], “pb-ad-78158” ).addService( googletag.pubads() ) ); } );

    The post The Top 5 Sales Mistakes Costing You Money Right Now by Mark Tioxon appeared first on Digital Photography School.


    Digital Photography School

  • Winter Season Paddling on Horsetooth Reservoir with Sea Wind Canoe

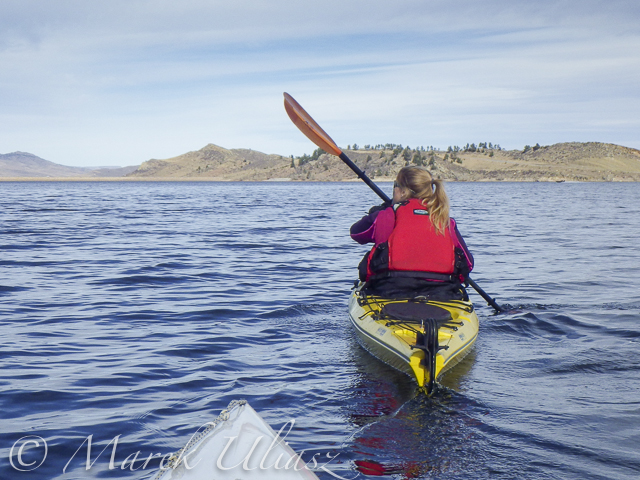
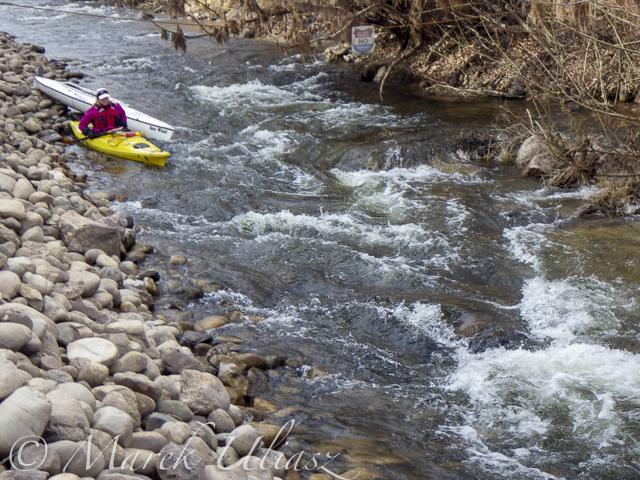
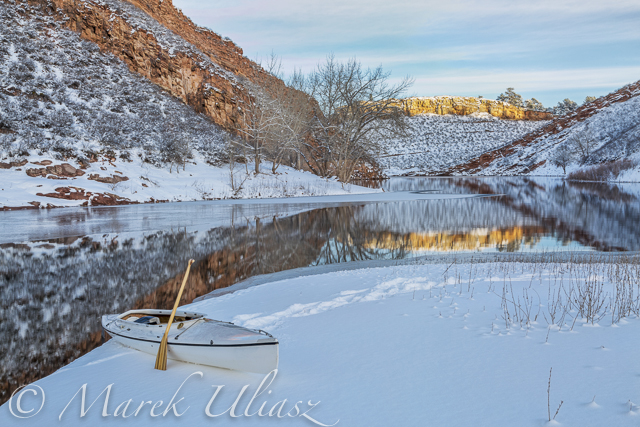
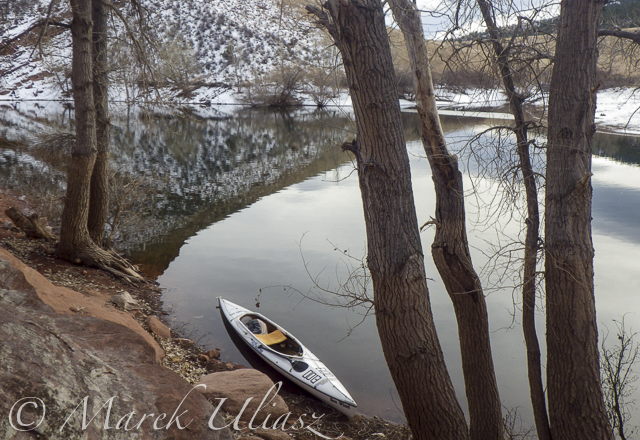
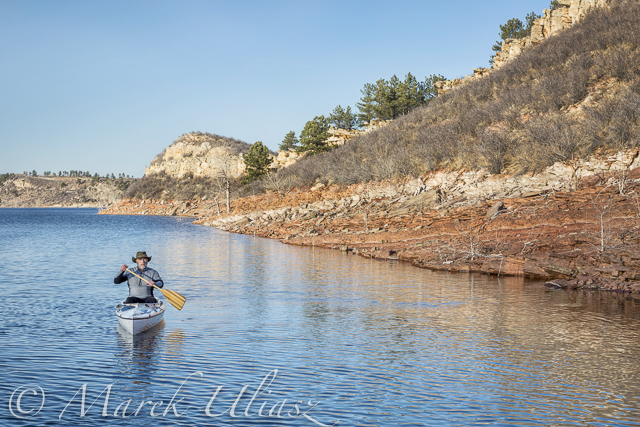
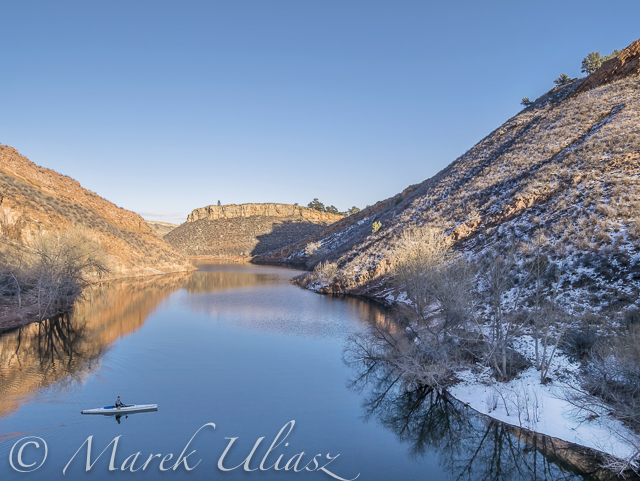
    In a typical winter all lakes in northern Colorado are frozen, so I am paddling on the South Platte River. However, this winter I have not been on the river yet. All time I am paddling Sea Wind canoe on the Horsetooth Reservoir just west of Fort Collins. I didn’t paddle in January when the lake was partially frozen and there was no good access to open water.

    The ice on Horsetooth is usually starting from its southern end. So, if the South Bay is covered by ice it my be still possible to launch in the north at Satanka Cove from a boat ramp or rocky tip next to the Horsetooth Dam. Sunrise Area on the eastern side would be perfect for winter launching, but is closed for a cold season. You would have to use a cart to transport boats from a parking lot down to the water or execute a pretty long portage.

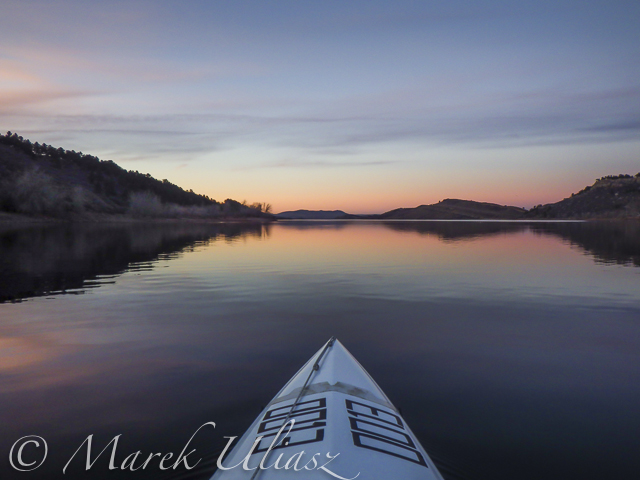
    Pictures below cover all my paddling from late November 2014 till late February 2015.

    winter paddling on Horsetooth Reservoir

    November 27, 2014 – Eltuck Cove

    winter paddling on Horsetooth Reservoir

    December 9, 2014: A quiet evening near Inlet Bay.

    winter paddling on Horsetooth Reservoir

    December 20, 2014 – Exploring Inlet Bay and Hansen Feeder Canal supporting water to Horsetooth Reservoir from the Colorado River through the Big Thompson Project (map)

    winter paddling on Horsetooth Reservoir

    December 27, 2014 – Quarry Cove in winter scenery, my last paddling in 2014.

    winter paddling on Horsetooth Reservoir

    February 4, 2015: Quarry Cove, a month later. My first paddling in 2015.

    winter paddling on Horsetooth Reservoir

    February 13, 2015. Eltuck Cove. Testing a new remote control for my Canon camera – CamRanger with iPod touch.

    February 13, 2015: Sunset over Horsetooth Dam seen from the ELtuck Cove.

    February 13, 2015: Sunset over Horsetooth Dam seen from the ELtuck Cove. Springtime weather.

    winter paddling on Horsetooth Reservoir

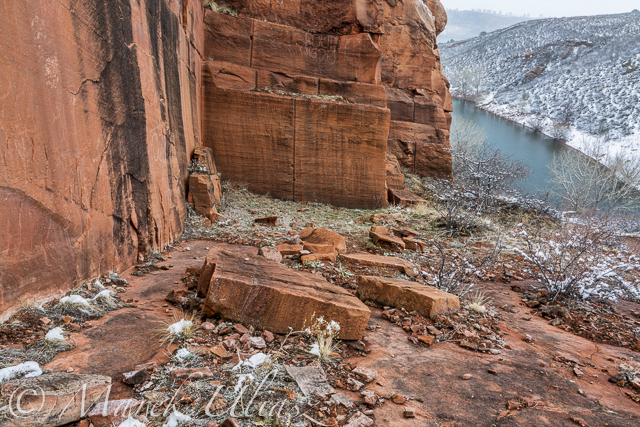
    February 16, 2015: Back to winter weather. It was snowing. Old sandstone quarry in Satanka Cove.

    February 18. 2015: Quarry Cove. Some multitasking: paddling canoe, flying a drone and shooting selfie.

    February 18. 2015: Quarry Cove. Some serious multitasking: paddling canoe, flying a drone and shooting selfie.

    And, winter is not over yet …

    Most of the pictures displayed in this post are included in my stock photography portfolio and are available for license and download as royalty free images. Some of them can also be purchased as prints, posters, cards and other art products.

    Related posts:
    Icy Horsetooth Reservoir – Opening Lake Paddling Season
    Winter Paddling with Sea Wind Canoe on Horsetooth Reservoir – movie
    First Snow Paddling with JKK Multisport Supernova Kayak


    paddling with a camera

  • Weekly Photography Challenge – Wide Opened

    This week’s challenge is all about using a large aperture, shooting wide opened. You can see some examples of this technique using shallow depth of field here.

    Aperture is one side of the exposure triangle and understanding it, and truly mastering it is so important to taking your photography to the next level. This is your chance to practice.

    Evan Leeson

    By Evan Leeson

    Even if you do not have a lens that has f/1.4 or even f/2.8 you can still achieve a shallow depth of field. It also has to do with distance to subject, and focal length. So throw on a long lens and use the largest aperture you’ve got and just go do your best.

    Here are a few examples using wide open apertures:

    Premier-photo.com

    By premier-photo.com

    Mark Strozier

    By Mark Strozier

    Janet Ramsden

    By Janet Ramsden

    Alex

    By Alex

    Susana Fernandez

    By Susana Fernandez

    Share your wide opened images here:

    Simply upload your shot into the comment field (look for the little camera icon in the Disqus comments section) and they’ll get embedded for us all to see or if you’d prefer upload them to your favourite photo sharing site and leave the link to them. Show me your best images in this week’s challenge. Sometimes it takes a while for an image to appear so be patient and try not to post the same image twice.

    googletag.cmd.push(function() {
    tablet_slots.push( googletag.defineSlot( “/1005424/_dPSv4_tab-all-article-bottom_(300×250)”, [300, 250], “pb-ad-78623” ).addService( googletag.pubads() ) ); } );

    googletag.cmd.push(function() {
    mobile_slots.push( googletag.defineSlot( “/1005424/_dPSv4_mob-all-article-bottom_(300×250)”, [300, 250], “pb-ad-78158” ).addService( googletag.pubads() ) ); } );

    The post Weekly Photography Challenge – Wide Opened by Darlene Hildebrandt appeared first on Digital Photography School.


    Digital Photography School

  • 30 Alluring Images with Shallow DOF

    This week we’re going back to the basics and looking at some images that utilize a large aperture to create a narrow or shallow DOF (Depth of Field).

    Often called bokeh, large apertures can create that magical look of out of focus blobs (highly technical term).

    Here are a few images demonstrating these things to inspire you.

    Photograph The Path by Joe Azure on 500px

    The Path by Joe Azure on 500px

    Photograph Can You Smell the Cinnamon? by C Rankin on 500px

    Can You Smell the Cinnamon? by C Rankin on 500px

    Photograph Slither by Justin Lo on 500px

    Slither by Justin Lo on 500px

    Photograph some hooks by Sak Rum on 500px

    some hooks by Sak Rum on 500px

    Photograph Strength  by Nadav Yacobi on 500px

    Strength by Nadav Yacobi on 500px

    Photograph Shades of Orange by Ursula Abresch on 500px

    Shades of Orange by Ursula Abresch on 500px

    Photograph Green, green grass of home by Páll Guðjónsson on 500px

    Green, green grass of home by Páll Guðjónsson on 500px

    Photograph Standing Alone by William Dodd on 500px

    Standing Alone by William Dodd on 500px

    Photograph Shallow DOF: Padlock by Tom Cunningham on 500px

    Shallow DOF: Padlock by Tom Cunningham on 500px

    Photograph 5 string bass by Jim Zielinski on 500px

    5 string bass by Jim Zielinski on 500px

    Photograph Tip of Flower by Srujan Chennupati on 500px

    Tip of Flower by Srujan Chennupati on 500px

    Photograph autumnal farewell by Darragh Hehir on 500px

    autumnal farewell by Darragh Hehir on 500px

    Photograph Healing Crane by JL Kong on 500px

    Healing Crane by JL Kong on 500px

    Photograph A New Heart by Dustin Abbott on 500px

    A New Heart by Dustin Abbott on 500px

    Photograph The Meeting of The Moons by JL Kong on 500px

    The Meeting of The Moons by JL Kong on 500px

    Photograph in flight by Katie Andelman Garner on 500px

    in flight by Katie Andelman Garner on 500px

    Photograph Cupcake by Katie Andelman Garner on 500px

    Cupcake by Katie Andelman Garner on 500px

    Photograph r by belu gheorghe on 500px

    r by belu gheorghe on 500px

    Photograph There There by Sam PortraitsBySam on 500px

    There There by Sam PortraitsBySam on 500px

    Photograph Bull's Eye by Adrian Tavano on 500px

    Bull's Eye by Adrian Tavano on 500px

    Photograph Because i’m Happy by Joseph Saadeh on 500px

    Because i’m Happy by Joseph Saadeh on 500px

    Photograph Laughing dog by Robert Chrenka on 500px

    Laughing dog by Robert Chrenka on 500px

    Photograph When You Wish Upon a Star by Magdalena Ginalska on 500px

    When You Wish Upon a Star by Magdalena Ginalska on 500px

    Photograph Romantic Morning by Roni Hendrawan on 500px

    Romantic Morning by Roni Hendrawan on 500px

    Photograph night view of Setagaya by takashi kitajima on 500px

    night view of Setagaya by takashi kitajima on 500px

    Photograph Mr. Red by Max Rinaldi on 500px

    Mr. Red by Max Rinaldi on 500px

    Photograph Sadhu and Monkey by Anton Jankovoy on 500px

    Sadhu and Monkey by Anton Jankovoy on 500px

    Photograph night shift by G T on 500px

    night shift by G T on 500px

    Photograph Veiled Beauty Redux by Sean Molin on 500px

    Veiled Beauty Redux by Sean Molin on 500px

    Photograph *** by Dimitry Roulland on 500px

    *** by Dimitry Roulland on 500px

    googletag.cmd.push(function() {
    tablet_slots.push( googletag.defineSlot( “/1005424/_dPSv4_tab-all-article-bottom_(300×250)”, [300, 250], “pb-ad-78623” ).addService( googletag.pubads() ) ); } );

    googletag.cmd.push(function() {
    mobile_slots.push( googletag.defineSlot( “/1005424/_dPSv4_mob-all-article-bottom_(300×250)”, [300, 250], “pb-ad-78158” ).addService( googletag.pubads() ) ); } );

    The post 30 Alluring Images with Shallow DOF by Darlene Hildebrandt appeared first on Digital Photography School.


    Digital Photography School

  • How To Create Photographic Illusion With Motion Blur Photography

    Motion blur photography gives an illusion of speed and motion. Apart from taking pictures of objects in motion like in the case of capturing sports related events, or movements of animals like a running deer, motion blur photography also helps add dramatization to stand still photos. It helps focus on aspects and highlights the importance of certain movements. It is Continue Reading

    The post How To Create Photographic Illusion With Motion Blur Photography appeared first on Photodoto.


    Photodoto

  • 10 Ways to Improve Your Travel Photography

    How to improve your travel photography

    Get the most out of your travel photography and capture the moment with these 10 simple tips. Most of these tips are pretty basic and some of them are useful for traveling in general.

    1 – Focus on faces

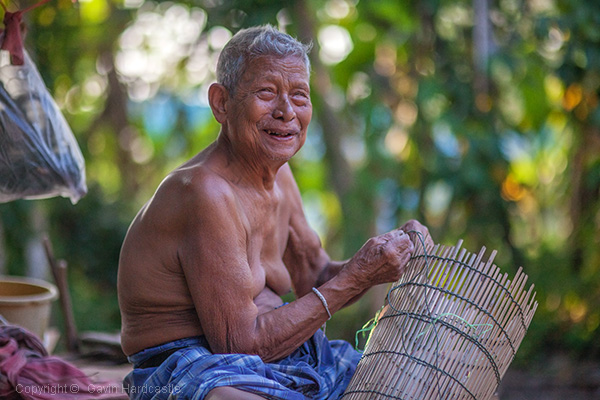
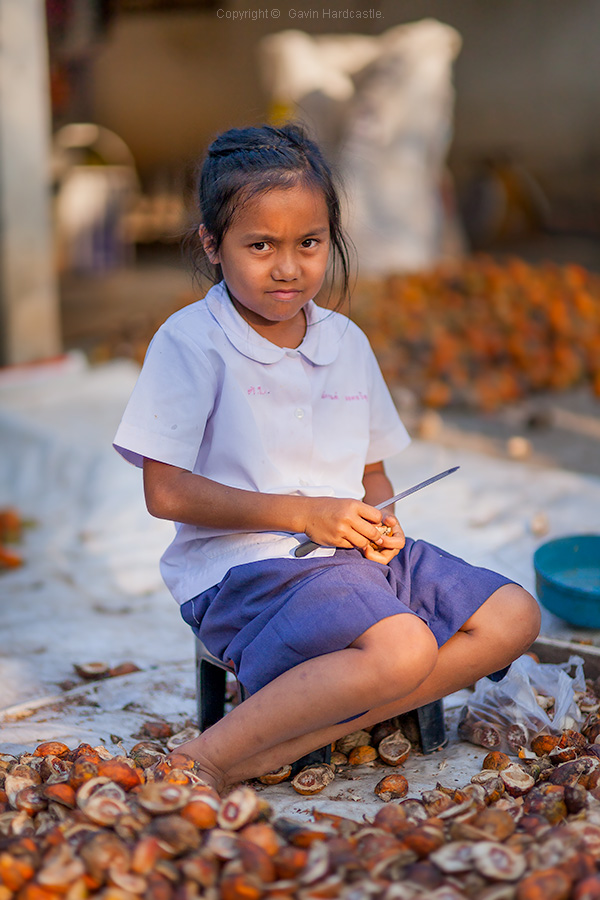
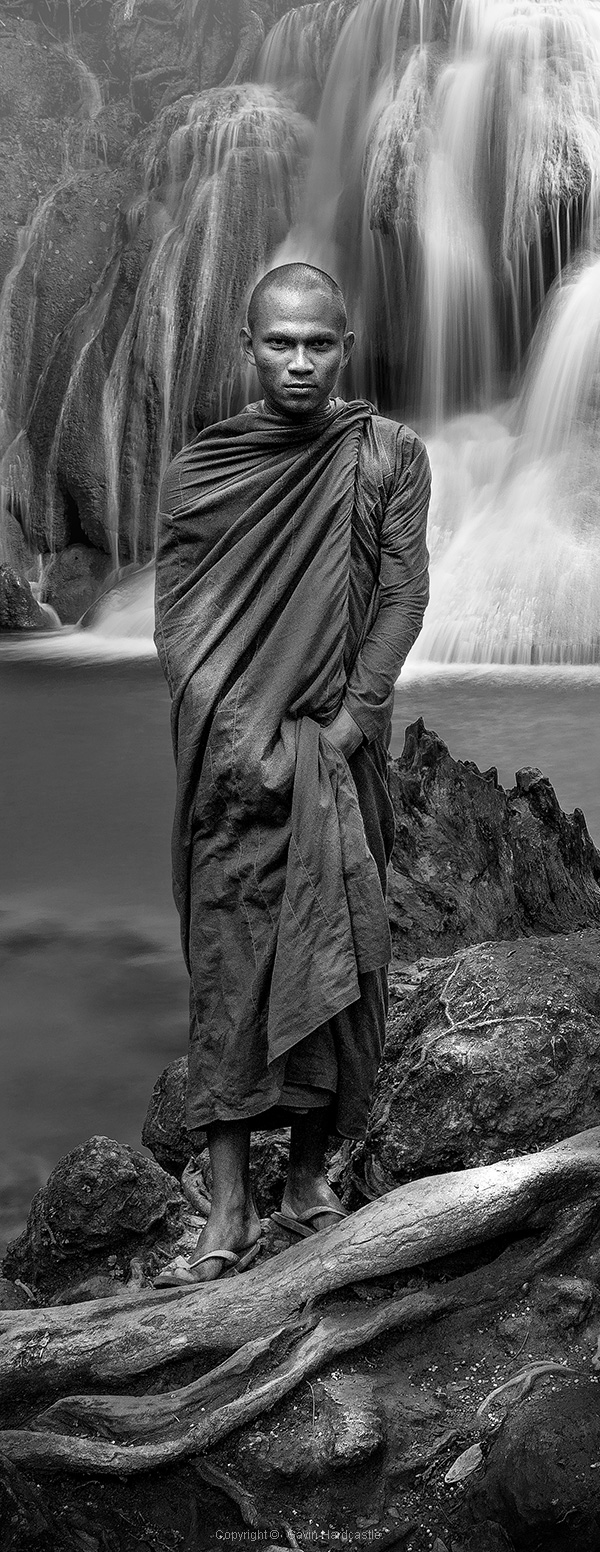
    Sounds obvious I know, but whether it’s wildlife or people, it’s often best to focus your lens on the face of of your most important subject. We are naturally drawn to eyes, so that’s where you’ll usually want to focus.

    10 Ways to improve your travel photography

    2 – Shoot fast

    Photographing people in fascinating cultural situations requires a totally different mindset to shooting landscapes.

    Forget your tripod, forget low ISO settings and think less about image quality and more about capturing the moment. Be ready, by relying on your autofocus and fast shutter speeds to freeze the action. Handheld is the way to go because you just don’t have the time to be fiddling around with tripods.

    In bright sunlight you’ll get away with ISO settings between 400 and 1000 but when the light starts to get low, don’t be afraid to crank that ISO way up into the thousands.

    Use wider apertures like f/2.8 to achieve faster shutter speeds and get a pleasing shallow depth of field to accentuate your main subject. Shooting in Aperture Priority mode (AV) lets you quickly dial in the desired aperture while your camera decides on the shutter speed.

    If your lens has some kind of vibration reduction be sure to switch that on when going handheld.

    Travel Photography tips

    3 – Learn the lingo

    Take at least a few hours while traveling to learn the basic language skills for your location. Knowing how to say ”Hello, excuse me, please, thank you, sorry, yes, no,” etc., goes a long way even in countries where English is spoken in tourist areas.

    Having some basic language skills can make a huge difference to the type of access you’ll get, and the things you’ll get to see. Language opens doors that would otherwise be closed to the average tourist.

    4 – Hire a translator or guide

    Getting access to people’s everyday lives is often difficult if you don’t know any locals, especially if it’s your first time at a particular location. Consider hiring a guide or translator so that you can communicate with locals on a deeper level than just knowing the basic phrases.

    I’ve done this a few times and you sometimes get to make great friends with your guides, who will be happy to introduce you to interesting people and places.

    Travel Photography Tips

    5 – Smile and make friends

    When taking pictures of strangers or communicating with locals, don’t be a dour faced tourist. Smiling is universal and softens what might otherwise be an intimidating approach to people who have little experience with adventurous foreigners.

    If you want people to like you, a smile is a good place to start.

    6 – Ask for permission whenever possible

    If you’re able to ask a person for permission to take their picture, you should. In many countries there is no legal obligation to do so but it’s just good manners, and some people may have religious reasons why they’d really prefer not to have their picture taken.

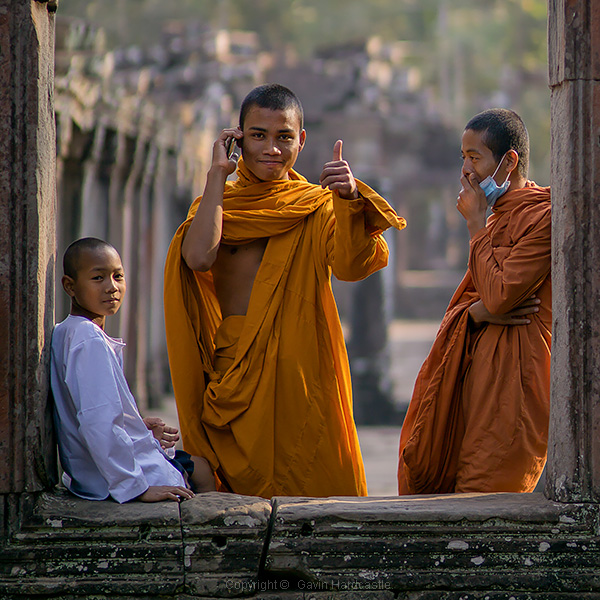
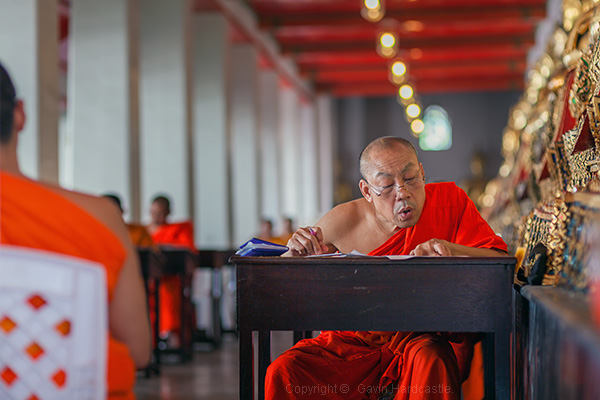
    Conversely, don’t interrupt a delicate social situation if there’s a chance it might be socially awkward. This picture I took at the very famous What Pho in Bangkok is a good example. The monks were taking an exam in front of hundreds of tourists under a high pressure situation so I’m hardly going to walk up and interrupt.

    Wat Pho Thailand - Travel Photography Tips

    7 – Choose the right lenses

    When it comes to capturing atmospheric cultural shots, I’ll choose prime lenses that offer a lovely blurred bokeh effect while keeping my main subject sharp. Typically these will be in the 35mm, 50mm or 85mm, range on a full frame camera. These types of lenses will give you that lovely cinematic look that all-in-one zoom lenses just can’t deliver.

    You can achieve a similar look with big telephoto lenses but those are less portable. Smaller primes also make you look more low-key and have great image quality.

    Best lenses for travel photography

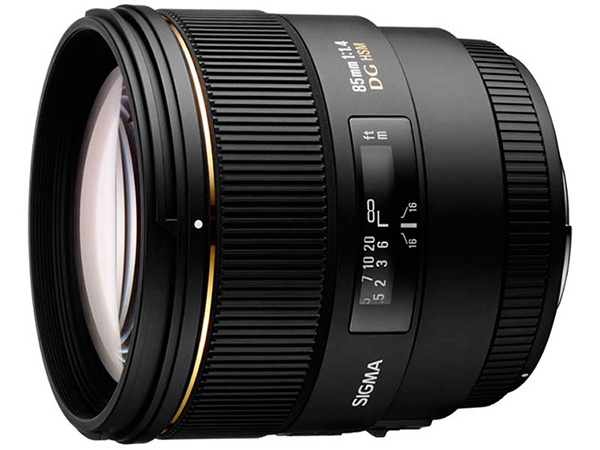
    One of my favourite lenses for travel photography is the Sigma 85mm 1.4 prime.

    8 – Carry two cameras

    This goes back to what I said about shooting fast. With people and animals you often won’t have time to switch lenses, so consider carrying two cameras that have lenses for different purposes. Let’s say a wide angle lens on one camera, and a lovely 85mm prime for portraits on the other. This way you’ll be able to cope with most situations at a fast pace.

    If you are going to carry two cameras, try and keep one in a small bag at all times. If you look too much like a paparazzo it might intimidate some people.

    9 – Step out of your comfort zone

    I’m not advising you to put yourself in danger. You should always use common sense, but consider doing things you might otherwise find yourself saying NO to. That’s where you’ll find the best photo opportunities.

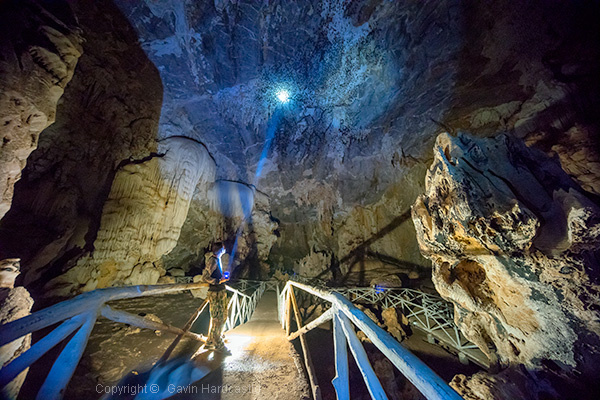
    An example of this would be my recent visit to a mountain cave in Thailand called Phra That Cave in Kanchanaburi Province. The cave has no lights, claustrophobic tunnels and thousands of bats, some of which you’ll have flying right in your face. To me, that’s fun, but to others it’s a living hell.

    10 Travel photography tips

    ”Bats, you say? Thousand of bats?”

    10 – Take responsibility for your ownsafety

    Third world countries (and even some first world countries) have a very vague concept of Health and Safety. Modern day westerners are raised in a bubble of relative safety that can sometimes result in us having a misplaced sense of responsibility.

    Use common sense when traveling, and don’t assume that those hastily built steps you’re about to climb have been passed by a safety inspector.

    Got Your Own Tips?

    I’d love to hear your travel photography tips. From always carrying toilet paper to having your lawyer’s phone number on speed dial, please share your hard earned experiences and let’s grow this tip list.

    googletag.cmd.push(function() {
    tablet_slots.push( googletag.defineSlot( “/1005424/_dPSv4_tab-all-article-bottom_(300×250)”, [300, 250], “pb-ad-78623” ).addService( googletag.pubads() ) ); } );

    googletag.cmd.push(function() {
    mobile_slots.push( googletag.defineSlot( “/1005424/_dPSv4_mob-all-article-bottom_(300×250)”, [300, 250], “pb-ad-78158” ).addService( googletag.pubads() ) ); } );

    The post 10 Ways to Improve Your Travel Photography by Gavin Hardcastle appeared first on Digital Photography School.


    Digital Photography School

  • Upload Your Photos to Multiple Social Media Websites with Expojure

    How many social media websites do you upload photos to regularly? I have five – a Facebook page, my personal Facebook profile, Google+, Flickr and 500px. Some people have more. For photographers who want to get their work out there, this seems like a must. Yet it’s time consuming and, truth be told, an inefficient way of working.

    If this is you, then you’ll be interested in new photo sharing website, Expojure. A startup based in Mumbai, it lets you upload the photos you want to share to a central Expojure account, arrange them in Collections, add keywords, titles, tags and descriptions, then upload them to as many as six photo sharing websites (the five listed above plus SmugMug).

    Expojure review

    I’ve been using Expojure for a few weeks now and I’m very impressed with the setup. The website is well-designed and easy to use. The layout is simple, doing exactly what most people will need it to, without adding unnecessary extras.

    There’s also a plug-in for uploading photos to your Expojure account directly from Lightroom.

    How Expojure works

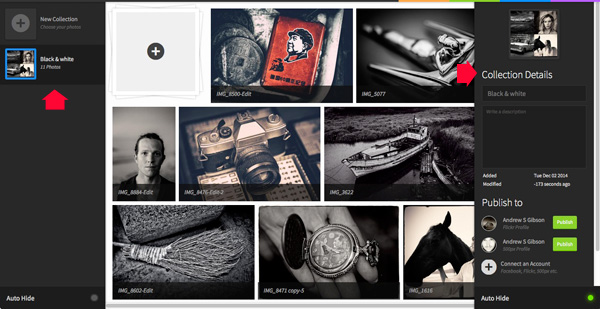
    When you sign in to Expojure you’ll see a page that looks something like this – it is your Dashboard. If you’ve uploaded any photos to Expojure already, you will see them here. If not, you’re presented with the option to sign into the photo sharing accounts you wish to use. Just click the buttons to do so. Connected accounts are shown afterwards on the left.

    Expojure review

    Once you’ve connected to some photo sharing websites, it’s time to go to the Organizer and add photos. Uploaded photos are automatically placed in a new Collection. You can rename the Collection and add a description using the panel on the right. You can also move photos around between Collections.

    Expojure review

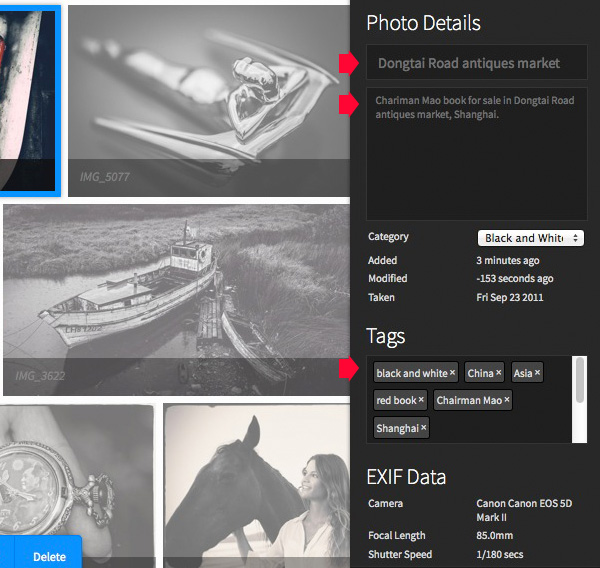
    You can add or amend details of individual photos by clicking on them and entering the new information on the right. If you haven’t already added a title, description, or tags now is your chance to do so.

    Expojure review

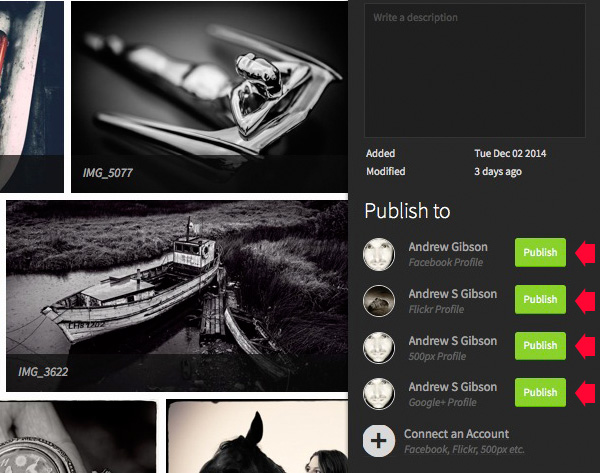
    Click the green Publish buttons in the bottom right corner to upload the photos. Expojure places all the photos in the Collection into a new Set on your selected website.

    Expojure review

    Every photo in the Collection is sent to the chosen website. If you want to upload a single image, you need to create a new Collection and add the chosen photo to that first.

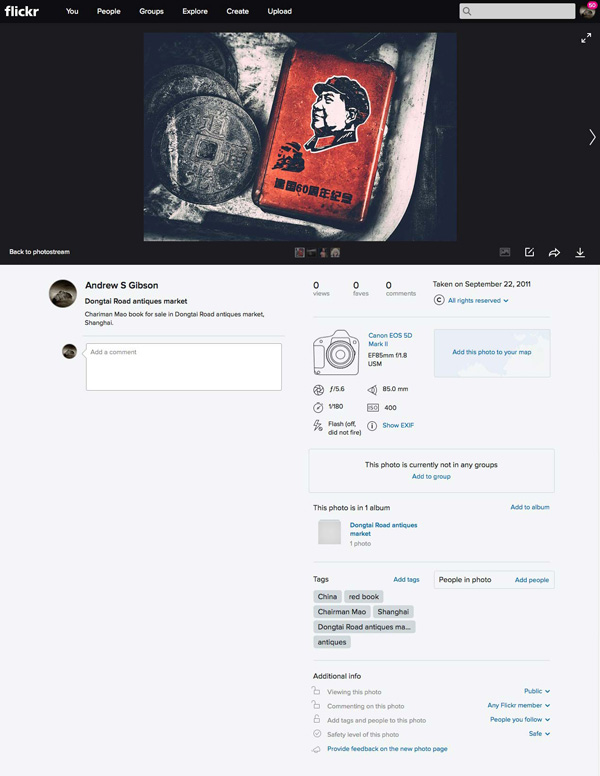
    Here’s a photo that I uploaded to Flickr. The title, description, EXIF data and tags have been successfully added. The only thing left to do is add the photo to any Groups or mark the location on the map.

    Expojure review

    Expojure Lightroom plug-in

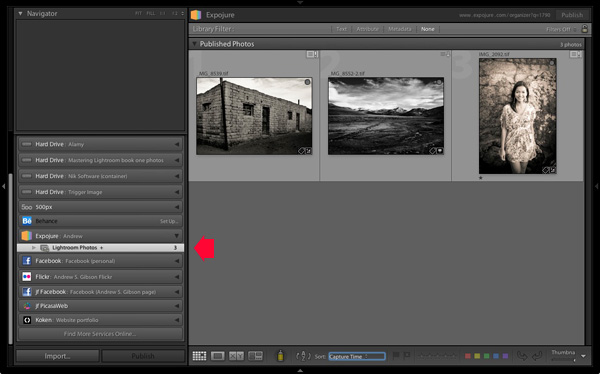
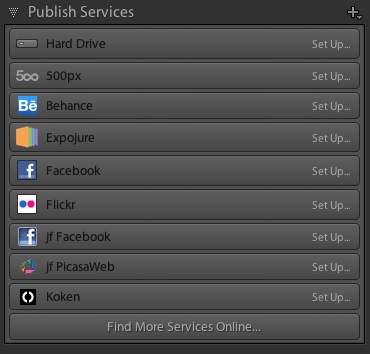
    If you click on the Settings tab at the top of the Expojure website page you can download a free plug-in for Lightroom. Use Plug-in manager to add it. It shows up in Lightroom’s Publish Services.

    Once installed, you can create new Publish Collections containing photos to upload to your Expojure account. Lightroom uploads them when you press the Publish button. The images are held there until you log in and distribute them to your photo sharing websites.

    Expojure review

    Notes about Expojure

    At the time of writing Expojure is free to use, and has been since the service went live. However, at some point (most likely after this article has been written, but before it is published) Expojure is switching to a subscription model. There will still be a free account, which limits you to uploading 20 photos a week and connection to two social media accounts. Paid accounts retain unlimited photo uploads and unlimited social media accounts.

    If you have a free 500px account, you will receive an error message when you upload photos to it. This is because free accounts don’t support Sets. However, your photos are still successfully uploaded to 500px, despite the error message.

    Expojure will add more features, and more services to its supported photo sharing websites over the next few weeks. Some of these may be active by the time you read this article.

    Alternatives to Expojure

    The only alternative to Expojure that I’m aware of is Lightroom’s Publish Services (please let us know in the comments if you know of any others). The benefit of Lightroom’s Publish Services is that it is free (once you own Lightroom). However it’s not as efficient or easy to use as Expojure and doesn’t support websites like Google+ out of the box (plug-ins are available for many photo sharing websites).

    Expojure review

    Conclusion

    Expojure is a well thought out service that greatly simplifies the task of uploading photos to social media websites. If you find the process of adding images to multiple websites frustrating, then please take a look at Expojure’s website, you’ll be glad you did. The video posted at the top of the article gives you a good overview of how it works.

    Which photo sharing accounts do you use and how do you manage them? Please let us know in the comments.


    The Mastering Lightroom Collection

    Mastering Lightroom ebooksMy Mastering Lightroom ebooks will help you get the most out of Lightroom 4 and Lightroom 5. They cover every aspect of the software from the Library module through to creating beautiful images in the Develop module. Click the link to learn more or buy.

    googletag.cmd.push(function() {
    tablet_slots.push( googletag.defineSlot( “/1005424/_dPSv4_tab-all-article-bottom_(300×250)”, [300, 250], “pb-ad-78623” ).addService( googletag.pubads() ) ); } );

    googletag.cmd.push(function() {
    mobile_slots.push( googletag.defineSlot( “/1005424/_dPSv4_mob-all-article-bottom_(300×250)”, [300, 250], “pb-ad-78158” ).addService( googletag.pubads() ) ); } );

    The post Upload Your Photos to Multiple Social Media Websites with Expojure by Andrew S. Gibson appeared first on Digital Photography School.


    Digital Photography School

  • Lessons from the Masters: Robert Capa and Jerry Uelsmann

    Before you or I ever picked up a camera, our photographic forefathers( and mothers) were out shooting, learning, and blazing new trails for us to follow. I’ve always taken great comfort in that fact. Knowing that we are part of a long line of picture takers and image makers should lend us a sense of pride. Through sheer will and determination they worked through hard times, failure, and sometimes controversy in order to give us an incredible head start for becoming better photographers.

    Ironically, many of these giants of photography, like most other people of great influence, did not start out to be such at the beginning of their careers. Many simply needed a job, others needed an outlet for their artistic inclinations, and still others…well, they had failed in what they initially wanted to become.

    In this edition of what I’ve come to lovingly call, The Master’s Series, we will look at two great photographers who didn’t come by their fame easily. You will learn from their hard earned wisdom some tips, that can help you to improve your own photography.

    Robert Capa
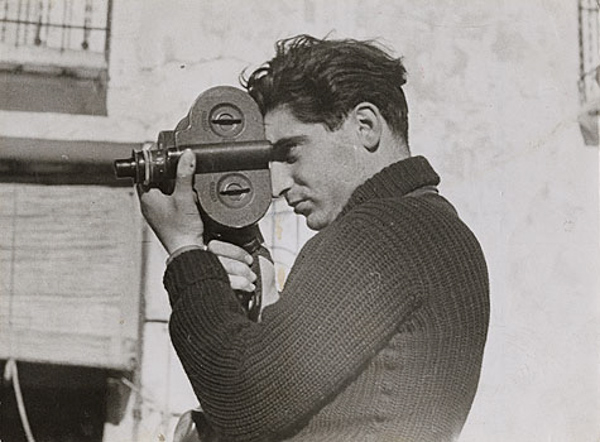
    Capa by Gerda Taro

    Capa by Gerda Taro

    Robert Capa, who was actually born into this world under the name Endre Friedmann, was a Hungarian photographer and photojournalist. His passion was to give war photography to the masses in an up-close and personal way that had never been seen before. He was born in the October of 1913 and met his untimely end on May 25, 1954. In those 41 years Capa shot photographs in the heat of battle during five wars. His work virtually defined the image we have of World War II including the invasion of Normandy from the front lines of Omaha Beach.

    In 1947, Capa was part of a group of photographers who came together in Paris to form Magnum Photos. Among the members of the group where such greats as Henri Cartier-Bresson, George Rodger, David “Chim” Seymour, and William Vandivert. Magnum would become the first worldwide agency for freelance photographers and photojournalists.

    Lessons you can learn from Robert Capa

    Position yourself for the shot

    Increase your chances of making better photos by putting yourself into a position to make them. When I say “better position” I mean this both figuratively as well as literally. Capa was famous for saying, “If your pictures aren’t good enough, you’re not close enough.” Capa was renowned for being fearless and would get right up in the action to make his photographs. Truly, as a general guideline, moving in close to your subject can improve not only the quality of an image but also increase its visual impact with the viewer.

    That being said, putting yourself in the position to produce better work also means that you should know what photograph you are trying to capture. Come prepared to make the photograph, i.e. the right lens, tripod, permissions, etc. Lastly, be sure you know what needs to be done in order to make an exposure to the best of your potential.

    Promote yourself creatively

    Thumbs Up

    Why did Andre Friedmann stop being Andre Friedmann and become Robert Capa? The answer is simply better marketing. If you’re of the exceptionally linguistic sort, you may have noticed that Capa is the Hungarian word for shark. When Capa was a boy, that was the nickname given to him by his friends. You see, Capa wasn’t getting very much attention under his given name, so a new persona was invented as front for his work. This new persona was that of famed but wholly fictional American photographer Robert Capa, who was supposedly touring Europe at the time. Clients loved it. Soon work was pouring in and Capa was on his way to becoming a photographic legend.

    This doesn’t mean that you have to stop being you in order to be more successful as a photographer. It just means that sometimes you need to bring out a little creativity when you’re selling yourself as an artist. In a way, work to manufacture your own identity as an photographer. Cultivate your own style. Be sure to show only your best work. Tell the story of the photo instead of just showing it. Be charismatic and welcoming with your clients and don’t be afraid to speak favorably (not boastfully) of yourself and your work.

    Don’t always obsess over technical perfection
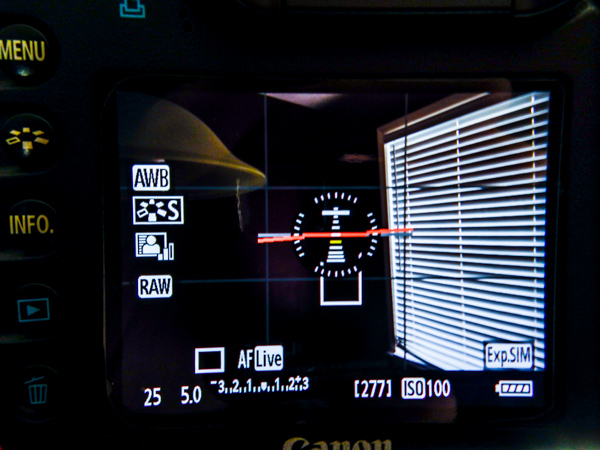
    Camera Display

    This can be a very difficult task to master. It’s easy to get caught up in getting your aperture just right or making sure there’s not too much grain with that ISO. When it comes to photojournalistic imagery such as street photography, the emotions and mood of a scene or subject should command your primary attention. In the amount of time it might take to tweak that focus, the moment may pass by. The important thing is to teach yourself that a good exposure of a great moment, will almost always trump a great exposure of a mediocre scene.
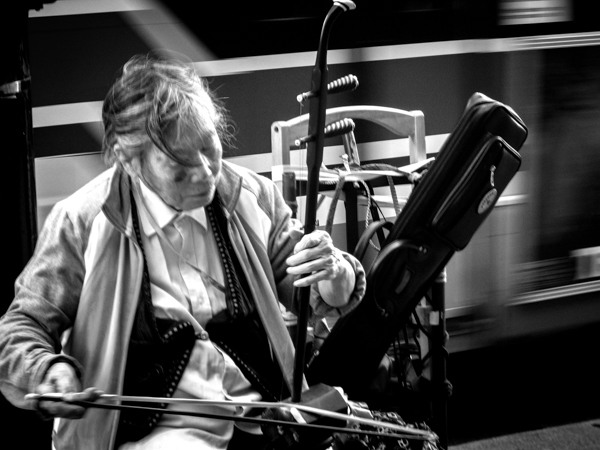
    Street Musician

    This shot could have been focused better, but I might have missed the look of concentration.

    Mentor those who want to learn
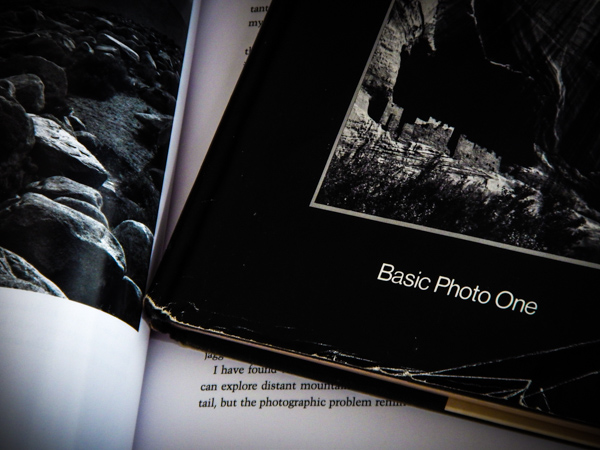
    Books

    This is a biggie, and perhaps one of the most important things you can learn from Robert Capa to help yourself grow as a photographer. Capa recognized that photography would never advance if there were no new photographers coming along to take the place of himself and his colleagues when their time had passed. So he directed a good bit of his time to networking with, and teaching, other photographers the craft.

    When you mentor or otherwise give of yourself to help a new photographer better themselves, you are perhaps unknowingly having an enormous impact on the art of photography. An appreciation for the passing on of photographic principles and techniques is possibly the single greatest contribution a photographer can make to the world.

    Jerry Uelsmann
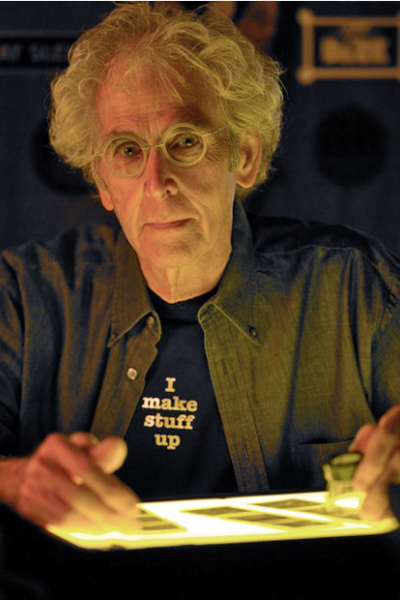
    Uelsmann

    Image courtesy of Indiana University

    To say this next photographer is an interesting individual is both accurate, and at the same time a resoundingly inadequate description. Born on June 11, 1934 in Detroit, Jerry Uelsmann is one of those great artists who flies just beneath the radar of the mainstream, but whose work is truly one-of-a-kind and inspiring. Like many, his rise in the photography world was slow and painstaking. He discovered photography as a teenager. By his own admission he believed that through making photos he was able to live outside of himself and reside in a world of his own creation.

    He would eventually go on to obtain degrees from multiple colleges, and ultimately found himself teaching photography at the University of Florida in the early 1960’s. His career was kickstarted in 1967 when he landed a solo photography exhibition at the The Museum of Modern Art in New York City.

    Jerry began his work about thirty years prior to the advent of photo editing software such as Photoshop. He rose to fame through his production of highly surreal and manipulated black and white photographs. He did everything in the darkroom – using may different negatives with up to twelve enlargers, that he then literally “layered” on top of one another to create his finished product. Many of his images combine elements of the natural world as well as humanistic representations and man-made objects.

    Lessons you can learn from Jerry Uelsmann

    Don’t be afraid to post-visualize

    If you’re just starting out in photography then you likely have heard some key phrases mentioned over and over again. One of the most important is that of pre-visualization. Teachers and writers (myself included) love to verbalize or write poetic analogies about what it means to “see” an image before the shutter is released. What is meant by this is that you can teach yourself to mentally compose, frame, and process a photograph before it is ever made. Making photographs becomes so much more satisfying once you have managed to develop this difficult, yet essential photographic skill.

    The flip-side of that coin is something that seldom gets talked about, but is nonetheless interesting and thought provoking. What we’re talking about here is the act of post-visualization. THis can be thought of as the exact opposite of pre-visualizing a photograph but it’s not exactly that easy. Uelsmann is literally the original master of this process. He photographed distinct objects and scenes, with the express intention of later making a finished work that blends together elements of each. Essentially, he saw the completed photograph after he already had produced a series of otherwise unrelated images.

    Try out post-visualization for yourself. Go through some of your old images and see if the passing of time helps you look at them in a new way. Look for different crops that might make the image stronger. See if an image might work well in black and white and experiment with the shadows. Tweak the white balance and completely change the mood of a photo. That’s really all post-visualization is; looking at something that already exists and seeing what else it could become.
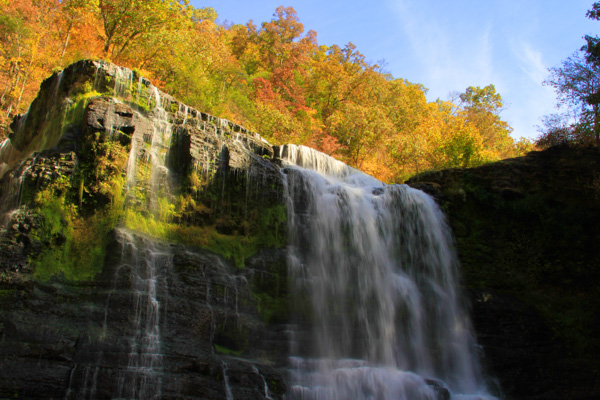
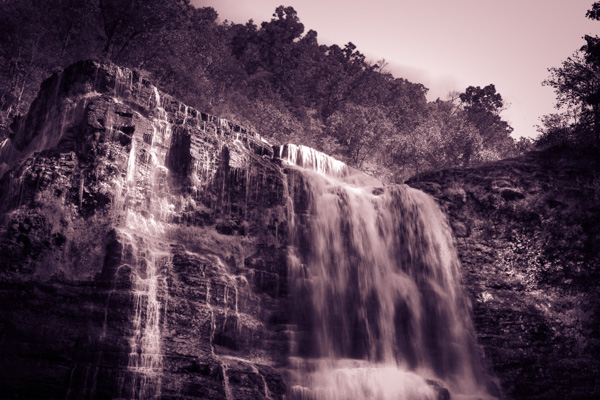
    Waterfall

    An image I made over four years ago.

    Reworked Waterfall

    Here we see it in a completely different way after some recent creative processing.

    Fulfill your vision

    Stay true to your vision. That is the key phrase that you should take away from this point. Uelsmann produced images that were hard to understand by some. They weren’t readily accepted, and the techniques he used where viewed by some as nothing but trickery. Still, he produced the images that he wanted regardless of what manipulation he had to do in the darkroom.

    Do whatever you need to do. Be it post-processing, filters, funky borders, weird color selection – anything. It might not be to everyone’s liking, but thats the beauty of photography. Do whatever it takes to achieve the image that you set out to make.

    You will fail, but you’re not a failure.

    Failure

    Jerry Uelsmann is a classic case of someone who refused to give up. He kept trying despite his initial difficulties in school, and the poor acceptance of his early work. Instead of shutting the doors of his darkroom for good he decided to keep going. Making images that moved him was his goal and he didn’t let life’s friction stop him.

    The very nature of his work which was at first off-putting began to be what people came to love. So if you’re stuck on a project, you have trouble with a client, or even if your camera seems to be unlearnable, just remember to keep going. Nothing worth doing was ever easy.

    googletag.cmd.push(function() {
    tablet_slots.push( googletag.defineSlot( “/1005424/_dPSv4_tab-all-article-bottom_(300×250)”, [300, 250], “pb-ad-78623” ).addService( googletag.pubads() ) ); } );

    googletag.cmd.push(function() {
    mobile_slots.push( googletag.defineSlot( “/1005424/_dPSv4_mob-all-article-bottom_(300×250)”, [300, 250], “pb-ad-78158” ).addService( googletag.pubads() ) ); } );

    The post Lessons from the Masters: Robert Capa and Jerry Uelsmann by Adam Welch appeared first on Digital Photography School.


    Digital Photography School
  • How to Tell Better Visual Stories with Travel Photography

    Take a look at your favorite travel magazine, and you will notice a pattern in the images.

    Establishing 12

    Understanding how to turn a bunch of images into a story – creating series is crucial to any travel photographer.
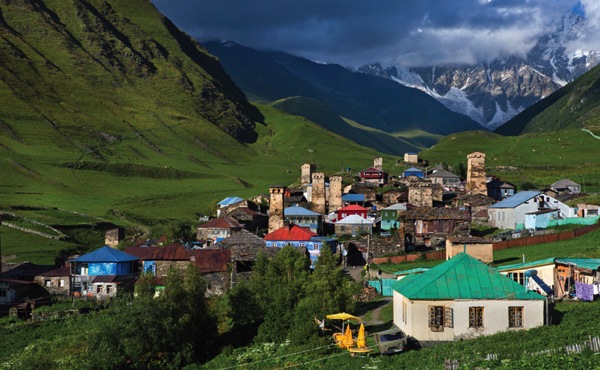
    In this article, we will get familiar with two kinds of very important visual concepts in the travel photography world: the establishing shot (above) and the detail shot (below).

    Detail 1

    It doesn’t matter if you wish to do travel photography professionally, or if you just want to come back home with better pictures from your next trip. Understanding these visual concepts will help you.

    Establishing shot

    The establishing shot is arguably the most important shot in a travel photography series. In a print magazine, this image will usually cover the two first pages of the article (the spread). In a digital-based platform (your website or Facebook page), this will be the album’s opening image. However, you can find the establishing shot later in the series.

    Establishing 10

    The establishing shot’s purposes are to:

    • Give a general idea about the story and the “what” and “where” of this series.
    • Be visually interesting enough so that the viewer wants to read the article or go through the digital album.

    Establishing 8

    From the technical point of view:

    There are no clear rules. But in most cases, the image is a horizontal one (sometimes you will see two vertical images side by side).

    Most important:

    This image is the grand entrance to your story. Make it impressive and epic. It is usually recommended to leave room for text on this image. So take it into account when you create your composition.

    Establishing 9

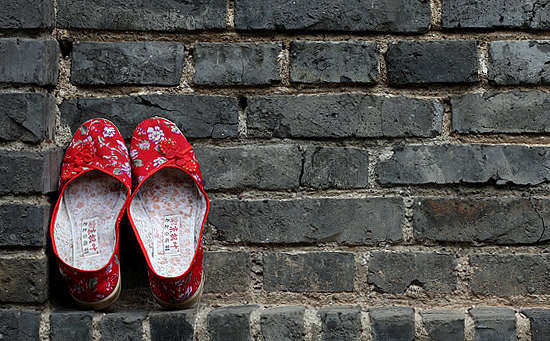
    The detail shot

    While the establishing shot is all about being big and epic, the detail shot is about putting a spotlight on something small and making it the image’s hero.

    The detail shot’s purposes are to:

    • Give attention to different aspects in your story that might get lost in the bigger picture.
    • The detail shot is like sorbet ice cream in a gourmet dinner — it gives balance to the other, bigger images.

    Detail 4

    From the technical point of view:

    It is all about making small things bigger, so a macro lens is useful (but not obligatory) here.

    Most important:

    While in the field, be on the lookout for interesting details of things that relate to your story. If you are doing a series on a city a funny street sign, graffiti, or food in a local market can be your detail shot. If you are doing a story about a specific person, his hands or his work tools can be the hero of the shot.

    Detail 3

    Putting it all together

    Of course, I’m not saying that there are certain rules that you must apply in order to create a well-built travel photography series. But by thinking in terms of visual concepts, such as the establishing and detail shots, it will help you be more focused in the field.

    Examples include taking the extra effort to reach a high vantage point, or getting an “off limits to the general public” pass to an interesting location in order to get that jaw-dropping establishing shot. Or, taking an hour just to “hunt” for interesting subjects to snag the detail shot. From my experience, having a framework to work within allows you to know what you are looking for, and increases the chances you will find it!

    Establishing 14

    Want to get more tips and hints about travel photography in a snap? Check out Oded’s ebook, about travel photography, by dPS and our sister brand – Snapn Guides.

    Note: the author would like to thank Nicholas Orloff for his help in writing this article.

    googletag.cmd.push(function() {
    tablet_slots.push( googletag.defineSlot( “/1005424/_dPSv4_tab-all-article-bottom_(300×250)”, [300, 250], “pb-ad-78623” ).addService( googletag.pubads() ) ); } );

    googletag.cmd.push(function() {
    mobile_slots.push( googletag.defineSlot( “/1005424/_dPSv4_mob-all-article-bottom_(300×250)”, [300, 250], “pb-ad-78158” ).addService( googletag.pubads() ) ); } );

    The post How to Tell Better Visual Stories with Travel Photography by Oded Wagenstein appeared first on Digital Photography School.


    Digital Photography School