Category: Photography

  • How to do a Head Swap using Photoshop

    When looking through your pictures, have you ever had that sinking feeling of seeing everyone in a single image perfectly happy and smiling except for one person who was sneezing, sniffling, or looking at a squirrel? I can recall several times when I have returned from photo shoots being all optimistic about the experience, but realized as I combed through my images, that while I had several good shots where most people were perfectly posed, I didn’t have any shots where everyone looked just right.

    It can be intensely frustrating, especially if you know you did everything in your power to get just the right shot. Fortunately Photoshop can help. With a few simple steps, you can learn how to load up a couple of images and perform a face or head-swapping maneuver with surgical precision, that would make Nicolas Cage blush (as in from the movie: Face Off). If it’s done correctly, no one will ever be able to tell that the final image has been altered.
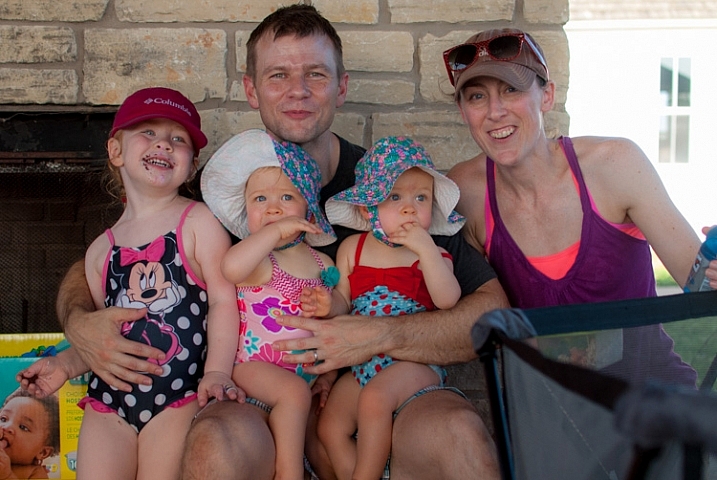
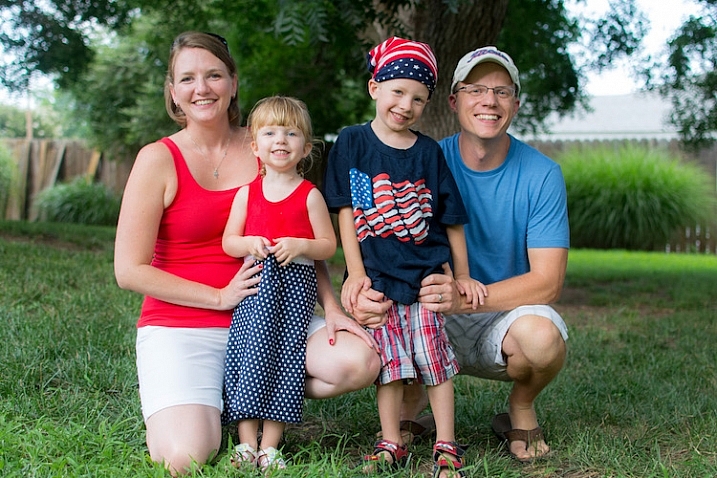
    Face-swapping can be incredibly useful when dealing with squirmy kids. This impromptu photo at a birthday party is actually a composite of three separate pictures.

    Heade-swapping can be incredibly useful when dealing with squirmy kids. This impromptu photo at a birthday party is actually a composite of three separate pictures.

    When going through my pictures, I always start with Lightroom to cull the images down to the best ones, and do initial edits, such as exposure and color adjustments. If I come across a situation where I need to take a face from one photo, and put it in another, I open both pictures in Photoshop (which is a simple matter of right-clicking and choosing: Open as Layers in Photoshop). For example, the following picture turned out fine except for the boy who was distracted by something off to the side.
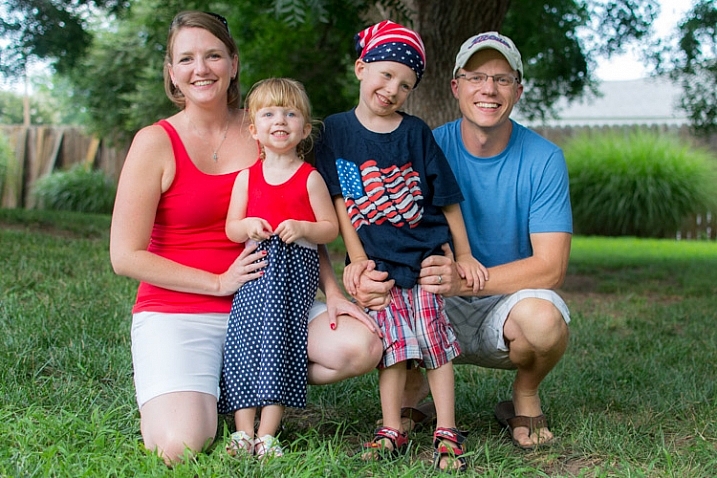
    This family picture I took on July 4 is fine, but the boy's expression is not the greatest.

    This family picture I took on July 4th is fine, but the boy’s expression is not the greatest.

    Fortunately I had another picture that looked great, but in this one the mother was blinking. No worries though – Photoshop was there to save the day!
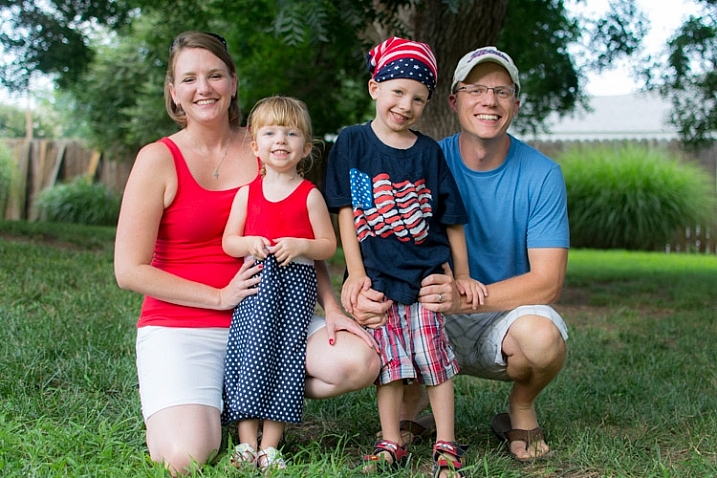
    He has a much better expression in this photo, but his mother was blinking.

    The little guy has a much better expression in this photo, but his mother was blinking. Photoshop to the rescue!

    When working with edits like this it’s a good idea to use as high-resolution of pictures as possible, so you have the maximum amount of data to work with. Do not export your images from Lightroom as low-res JPG files, and then import them into Photoshop. Instead use full-size originals, though I do like to make sure the exposures are as closely matched in each picture first. Edit your white balance, color adjustments, and other parameters such that both images are as close as possible before going into Photoshop, or your composite will look painfully obvious. (Some photographers take the exact opposite approach and do all the Photoshop work first, and then do color adjustments and cropping in Lightroom. Either way works, but I prefer the former method.)

    If you’re unfamiliar with Photoshop, and it seems a bit overwhelming at first, don’t think about all the buttons, menus and options available to you just yet. This face compositing really only requires two sections: the Layers panel in the bottom right corner, and the Brush tool on the left side.
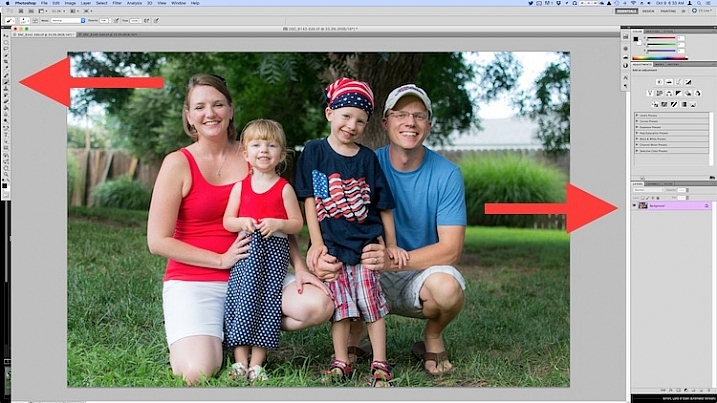
    photoshop-face-swap-workspace

    Open both images as layers in Photoshop

    Select both images in Lightroom and right click, then choose: Open as Layers in Photoshop. Once your images are open in Photoshop, rename one or both so you can tell which is the one to use most people, and which is to copy the new head from.

    photoshop-face-swap-edit-as-layers


    You now have two layers in one image: the background (in this case, the one where everyone but the mother is smiling) and the layer you just copied over (in this case, the one where only the mother is smiling).
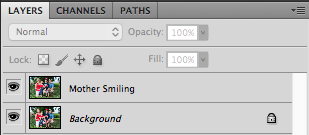
    photoshop-face-swap-multiple-layers

    Make a layer with just the new head to be added

    From here there’s a couple different ways to go about combining them, but when doing a simple head swap the method I prefer is to get rid of everything in the second layer except the face I want to put into the first image. To do this, use the Lasso tool to draw an active selection around the face, and create a new layer which consists of just the face itself. I like to use New Layer via Copy just in case I want to go back to the original for something, but it’s up to you. Make sure to leave plenty of padding around the face so you have enough room to blend it in as you make your adjustments.
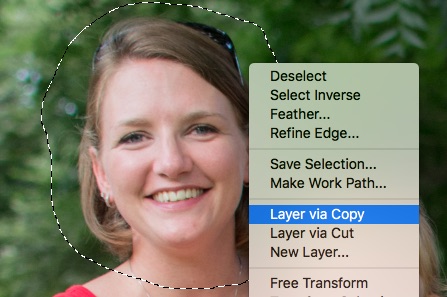
    photoshop-face-swap-new-layer-via-copy

    You now have three layers in the side panel: the original background, the new one you copied over, and the face itself. Since you only need the face, you can click the eye icon just to the left of the layer you copied over, which leaves it intact but invisible (hidden layer).
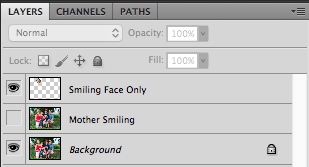
    photoshop-face-swap-three-layers-hide-one

    Compositing or blending them together

    Now comes the fun part – compositing the face! I like this step because I get to be a little creative, and play around with exactly how I want the final image to look. The first thing you’ll notice is the face you are working with is probably going to be out of place, unless your camera was on a tripod, and everyone was perfectly still.
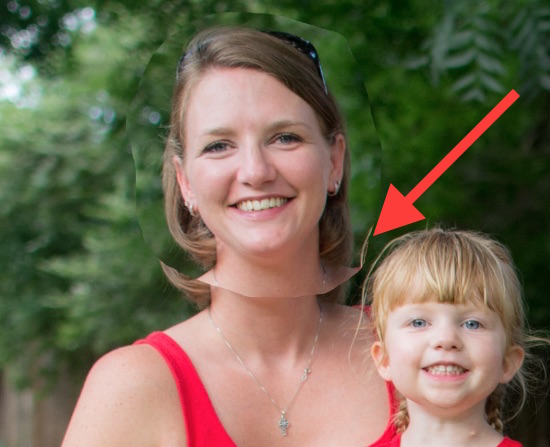
    photoshop-face-swap-initial-composite

    To get the face into the proper position, select it in the Layers panel and change its opacity to about 50%. That way you can see both faces at the same time, which will help you as you start lining them up. (Note: alternatively you can change the face layer’s blend mode to Difference. That will show it sort of inverted (negative) and it makes it easy to position them or align the layers. Then just change it back to normal when done.)
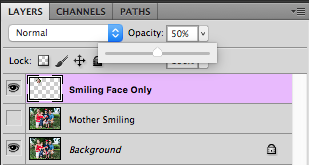
    photoshop-face-swap-opacity

    With the face layer still selected, choose “Transform” from the “Edit” menu, or press command-T on a Mac (control-T on Windows). Use your mouse to drag the face into the proper position, and press the arrow keys on your computer to fine-tune your movements on a per-pixel basis. You can also use the Transform command to rotate the face in case the person has turned his or head slightly. To do this, put your mouse cursor just outside the border near one of the corners, where it will change to a rounded arrow which means you can now click and drag to rotate.
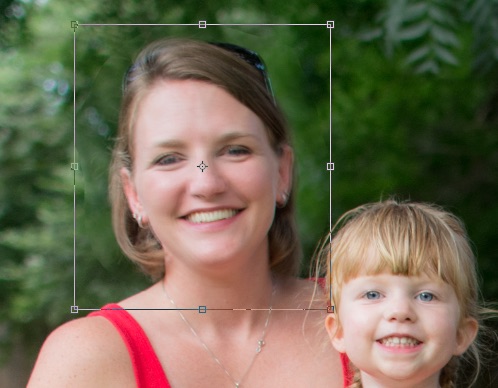
    photoshop-face-swap-line-up-facial-features

    Once you that have the second face lined up properly over the first one, press the [Enter] key to lock it in place, then bring the layer opacity of the face back up to 100%. Don’t worry if you didn’t get things just right: you can always made additional Transformations later by selecting the layer and choosing “Transform” just like before.

    At this point things are looking pretty good, but right away you will notice a harsh border around the face where your selection box was. This needs to be eliminated so you only have the facial features you want, and not the person’s hair or any background elements that might have changed between the shots.
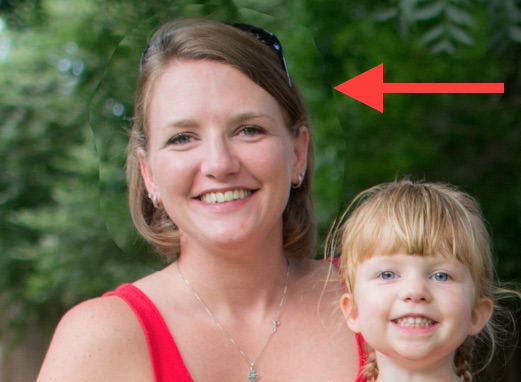
    photoshop-face-swap-harsh-border

    At this point you might be thinking “No problem! I’ll just use the eraser tool to get rid of the parts I don’t need,” but that’s a rookie mistake you will soon regret. The eraser tool is permanent, so instead we’ll use what’s called a layer mask to get rid of any parts we don’t want. It works similar to the eraser tool, but is fully adjustable and even altogether reversible (it’s called non-destructive editing) so that any edits you make can easily be undone at any point. With the face layer selected, click the “Add Layer Mask” button at the bottom of the Layers panel.
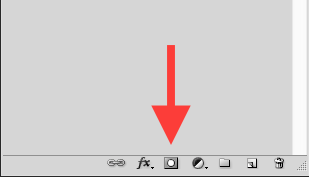
    photoshop-face-swap-new-layer-mask

    Now you can use the brush tool to paint out (using black) any areas of the face layer you do not want, or paint them back (paint with white) in if you do decide to keep them. This layer mask method is far more flexible than using the eraser tool, and it allows you to use varying levels of opacity as well. You can partially erase something, while retaining just enough to allow for a smooth transition, instead of a harsh line. Select the brush tool and choose a brush with soft edges. Play around with your flow rate and opacity settings too. I don’t like to go all the way to 100% opacity right away, so I usually start with 50%-70% to leave some wiggle room. Remember, you can always change your adjustments later.
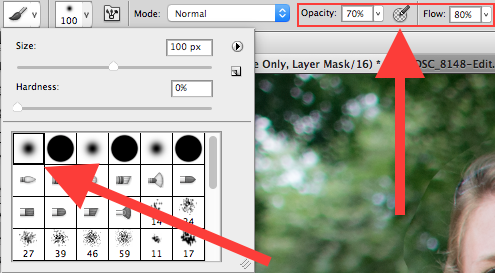
    photoshop-face-swap-brush-selection

    Now you can start blurring the line between the background photo and the face you are compositing onto it. Use the brush tool to gradually erase around the edges of the face, and if you find yourself wanting to brush anything back in just press the X key to reverse the process (X switches your foreground and background colors, in this case black and white) as you apply the brush. Notice that you’re not actually painting on the image of the face, but on a mask that has been applied to the layer. You are basically telling Photoshop which parts of the face layer you want to see, and which parts you want to erase (hide) or mask out. In the Layers panel you will see this mask show up to the right of the original layer as a mostly white box with some dark spots that indicate where you have painted with the brush.
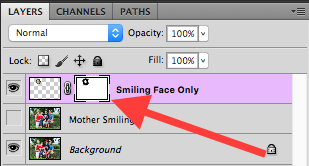
    photoshop-face-swap-edit-layer-mask

    Using brushes on the layer mask is the most part of this whole process as I get to see my edits in realtime, and get as detailed as I want with brushing in the smiling face.
    photoshop-face-swap-final-image

    The final image

    You can use this technique to composite as much as you want, including background elements, multiple faces, or even individual features such as eyes or teeth. Learning this simple head swapping technique is not only handy for creating the perfect group portrait, but can also be your gateway into a much broader world of Photoshop editing in general.

    What are your favorite tips for doing simple edits in Photoshop? Do you have any other techniques that have worked for you over the years? Leave your thoughts in the comments below.

    googletag.cmd.push(function() {
    tablet_slots.push( googletag.defineSlot( “/1005424/_dPSv4_tab-all-article-bottom_(300×250)”, [300, 250], “pb-ad-78623” ).addService( googletag.pubads() ) ); } );

    googletag.cmd.push(function() {
    mobile_slots.push( googletag.defineSlot( “/1005424/_dPSv4_mob-all-article-bottom_(300×250)”, [300, 250], “pb-ad-78158” ).addService( googletag.pubads() ) ); } );

    The post How to do a Head Swap using Photoshop by Simon Ringsmuth appeared first on Digital Photography School.
    Digital Photography School

  • Tips for Pre-Planning City Photography When Travelling

    You have finally arrived. After all the planning and decisions you are in one of the most beautiful places in the world. You have rested, and now you’re ready to go out to see what you can photograph.

    You look around and realize you’re overwhelmed, and you’re experiencing sensory overload. You can’t figure out what to photograph, as there are too many options, and you don’t know what will make a good image.

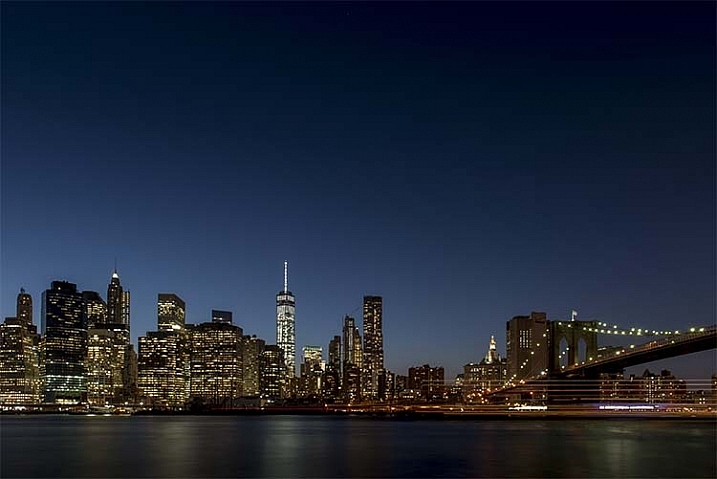
    leannecole-city-manhattan-skyline

    Manhattan at dusk from Brooklyn Park

    This is a common problem when you find yourself somewhere that has so many amazing places to look at, and to photograph. It happened recently in New York to someone I was travelling with. She couldn’t work out what to do and how to approach where she was. She felt lost in a world of so many beautiful things to take photos of.

    If you find yourself in a similar situation, here are some tips to help you get past that.

    Figure out what you want to see

    Think about why you have travelled to this destination. There have to be reasons why you wanted to go there. It might be a good idea to do some research and get an idea of what you would like to see ahead of time.

    Make a list

    Once you have that, the next thing to do is to make a list of the places you want to visit. For example let’s say you are in New York City. Some examples of places to visit and things to do include:

    • Empire State Building
    • The Flatiron Building
    • Walk over the Brooklyn Bridge
    • Times Square
    • Take a ride on the subway
    • Explore Central Park
    • Pay your respects at the 9/11 Memorial

    Of course a city like New York is full of amazing places to go and photograph, these are just a few.

    Work out on a map, or, if you have internet access, Google Maps, where they all are and how many of them are near one another. You don’t want to see them all on the same day, so divide them up over a few days.

    What is the best time of day to shoot your chosen locations?

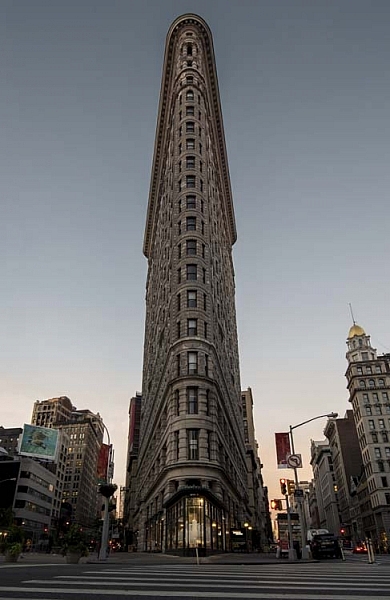
    leannecole-newyork-flatiron-whole

    The Flatiron Building in New York just after sunrise.

    It’s good to see where they are on the map as well for orientation. Can you see where they will be according the position of the sun each day? Take the Flatiron Building for example, would it be better to photograph it in the early morning, or in the late afternoon. Early morning during the sunrise could give you a lovely colour in the sky, but it will also mean that there will be less people around. If you are anything like me and don’t like people in your photos, then early morning can be the best time to see and photograph places.

    Then again, if you want to photograph Manhattan after walking over the Brooklyn Bridge then late afternoon is going to be a better time. You get the sunset and then the lights coming on in the city.

    The number of people at these places is also something to consider. New York is full of tourists, though many popular cities around the world are the same, so you need to think about whether or not you want them in your images. You can get photos without them, but that can take patience.

    How are you going to photograph your chosen spots?

    This is the part that can baffle a lot of people. Once you have narrowed down what you want to take photos, next you have to decide how to do it. There are several options, these might help you decide.

    It is very easy to walk up to a building, hold the camera up to your face, click, and then you’re done. That is often what you see tourists doing, the “I’ve been here and done that” type of image, but as photographers we usually want more than that. You can get a lot more from a location- here are some tips to help you get better images:

    1 – Photograph everything

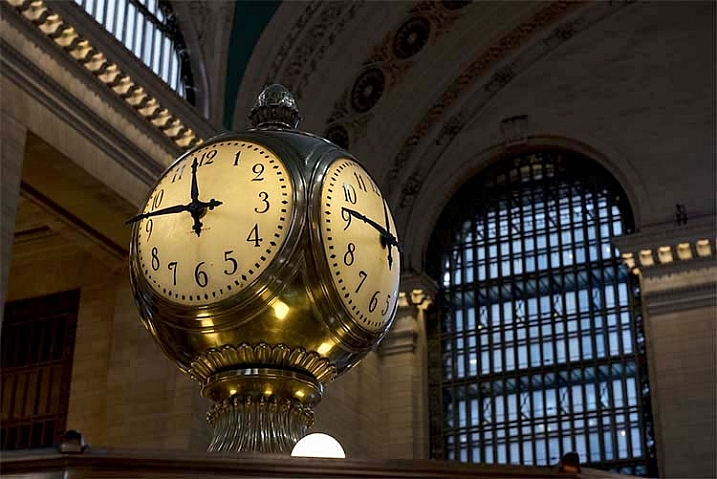
    leannecole-city-grand-central-station

    A close-up of the clock at Grand Central Station or Terminal

    With the age of digital, not having to worry about how much film is going to cost to buy or process, you really can photograph everything. If something catches your eye, then take a photo of it.

    Don’t analyze why, just do it. You can think about things too much, but keep in mind that you are there to take photos and it doesn’t matter, just snap away.

    2 – Focus on the details

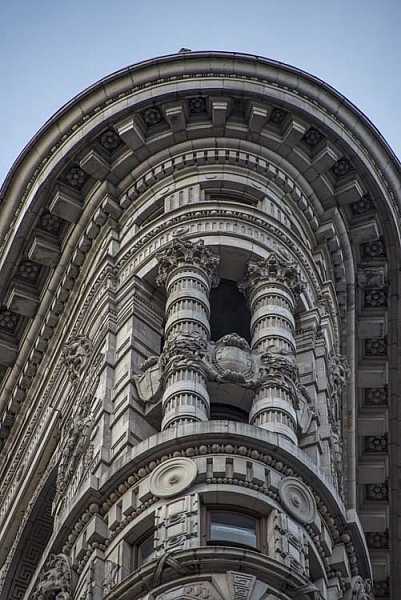
    leannecole-newyork-flatiron-detail

    Detail of the Flatiron Building in New York.

    Sometimes if you just look for the little things, the shape of a door, or some ornate decoration above a window, it can make a big difference.

    Old buildings are great for giving you lots of details. They were often built using heaps of ornamental decorations around doors or windows. Besides taking photos of the whole building or location, think about smaller things, and how a close-up of a certain aspect can help give more of an idea of what it looks like.

    If you look at the Flatiron Building, first you see the oddity of its shape, how it is placed within its environment, and then you start to see the stonemason’s work on the sides. It is covered in lacework and small sculptures.

    New buildings don’t have the type of stonework as the older ones, but you can still get some interesting images. Often instead of small things, the buildings themselves are one large shape. It can be good to find that shape and the best way to take an image of it.

    Take the new World Trade Centre, or, as it is commonly called, the Freedom Tower. It is an incredible shape which stands out all over the city. There is no denying it when you see it. Look at its form, and see if there is anything unique about it.

    3 – Consider its position in the environment

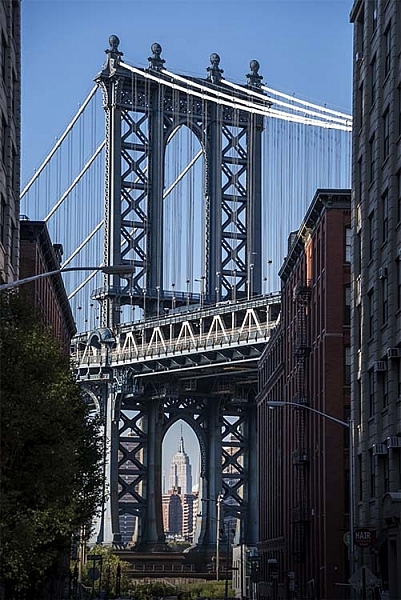
    leannecole-manhattan-bridge-empire-state

    Looking through Manhattan Bridge to the Empire State Building.

    The situation of the object you are photographing can help tell the story of it. Look around and see what else is there. Is it a busy street? Do people use it a lot? Is there a strange juxtaposition of what it is and where it is located?

    Central Park is so big, yet it seems almost a contradiction to see it inside a city of steel and glass. It can be seen as an escape, yet in certain places you can see the city above the line of trees.

    4- Look inside

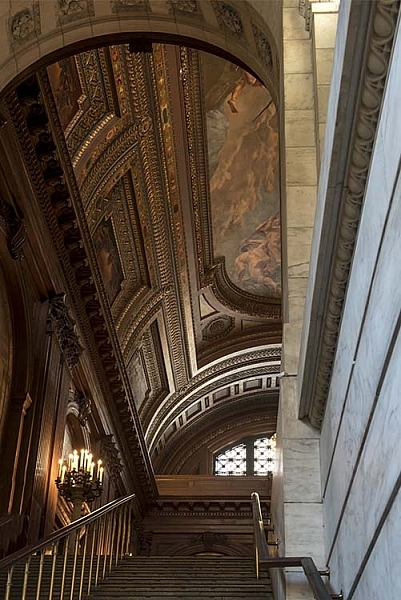
    leannecole-city-newyork-public-library

    The staircase and ceiling in the New York Public Library.

    There are many buildings that you can also photograph inside. Just make sure you have permission to do so first.

    Once inside don’t use the flash on your camera, it will give your a strange look and, if it is a big room, will have little affect. Most public buildings frown on the use of flash as well.

    Once you go into a building you will need to make your ISO higher, so don’t forget to raise it when you go inside.

    Staircases are wonderful to photograph in both directions. Old buildings often have wonderful light fittings and very ornate ceilings, try to capture those.

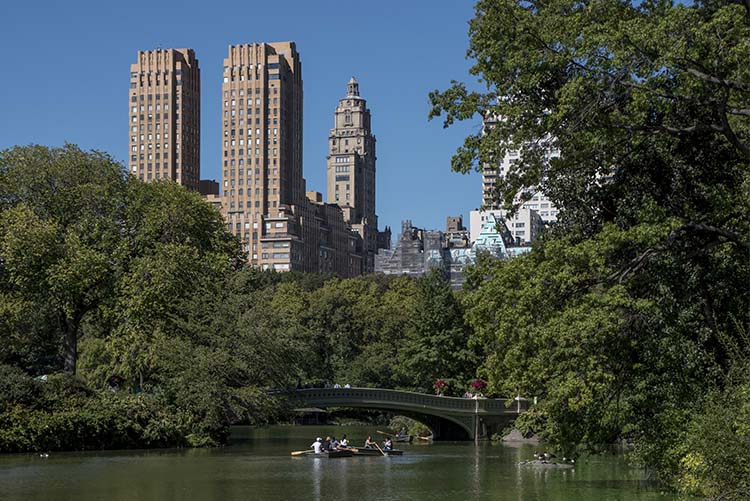
    leannecole-city-central-park

    New York appearing above the trees in Central Park and the Bow Bridge.

    Before you head out the door

    Remember what you want to do when you are out taking photos. If you make a list of what you want to photograph, or a summary of this list, then you will get what you want.

    If you are going to the Flatiron Building your list might look like this:

    • From across the street and straight on
    • From the left looking down the side street
    • Do the same on the right
    • Stand at the bottom and look straight up
    • Zoom-in on some of the different details on the building
    • Move to one side and have the building on the left or right and then show the street it is on

    This can be a good way to get the shots you want. You don’t want to get back home and wish you had done something else.

    If you think about all of these aspects of travel photography then it should help you to get over your feelings of being overwhelmed. It will help you focus on what you want to photograph, and how you want to see the city through your camera.

    googletag.cmd.push(function() {
    tablet_slots.push( googletag.defineSlot( “/1005424/_dPSv4_tab-all-article-bottom_(300×250)”, [300, 250], “pb-ad-78623” ).addService( googletag.pubads() ) ); } );

    googletag.cmd.push(function() {
    mobile_slots.push( googletag.defineSlot( “/1005424/_dPSv4_mob-all-article-bottom_(300×250)”, [300, 250], “pb-ad-78158” ).addService( googletag.pubads() ) ); } );

    The post Tips for Pre-Planning City Photography When Travelling by Leanne Cole appeared first on Digital Photography School.

    Digital Photography School

  • Five Techniques for Creating Impressionist or Abstract Photography

    Whether you are new to photography, or have been photographing for a while, I’m sure you’ve gone through times when the ideas weren’t flowing, and inspiration was nowhere to be found. This happens to all of us. So how do you find ways to stay inspired and get the creative juices flowing again? Try abstract or impressionist photography. Finding inspiration isn’t about stepping outside of your box, it’s about stretching your limits, and abstract photography is the best way to learn to see things in a completely new and different way.

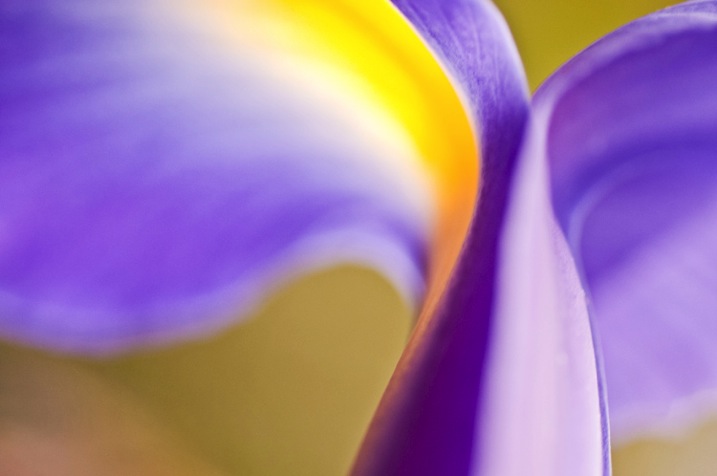
    1 Look for shapes Irys by Eva Polak

    Abstract and impressionist photography leave things to the imagination and help you concentrate on texture, form, and colour. Instead of making everything look real, I invite you to use bold colours, shapes, and lines to make exciting images.

    So let’s start exploring the creative process of abstract photography. Here are five easy techniques that will help you to learn new skills and get your creative juices flowing.

    1. Look for shapes, patterns and textures

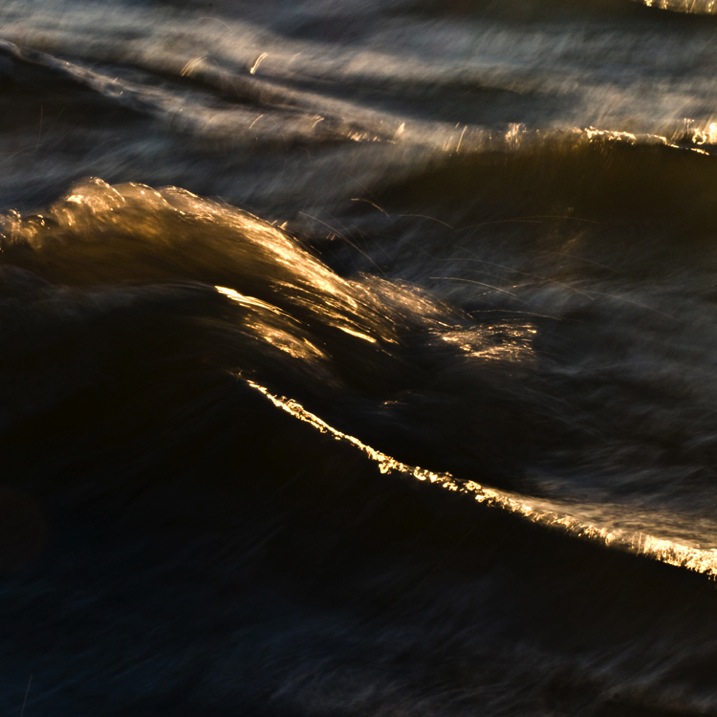
    As you go about your daily activities, notice the shapes around you. Your house is full of interesting shapes, patterns and textures that can be used to make abstract photos. Look closely at different objects around you and consider whether there are any reoccurring shapes or themes within the object – then use them to your advantage. Lines can be used very effectively in a photograph, as the eye will tend to follow a line through a shot. Look at the undulating pattern the wave makes (see below), as it breaks into shore. In the city, look for patterns formed by the buildings. Discover different textures in flowers arrangements in the park (see photo above).

    1 Look for shapes Waves by Eva Polak

    2. Look for reflections

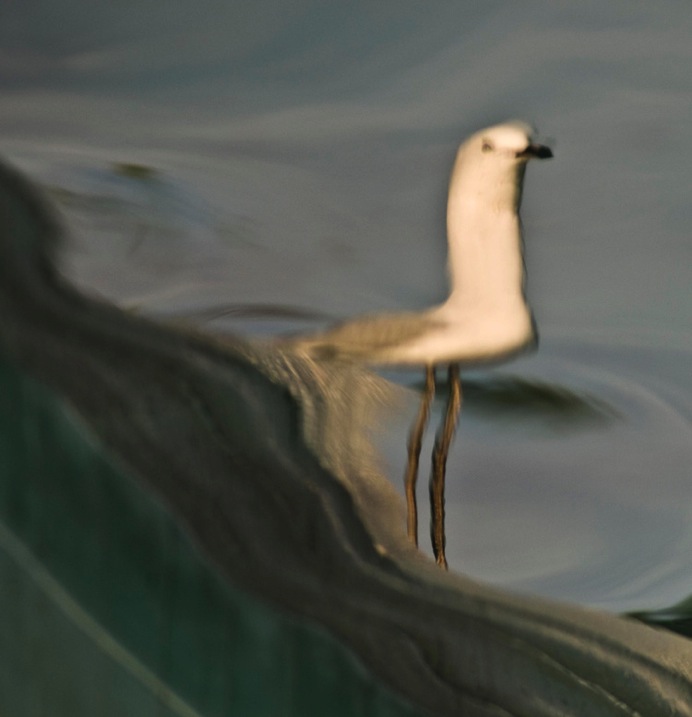
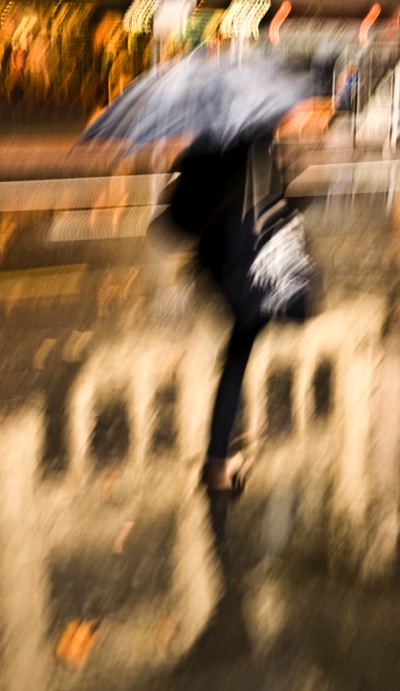
    Reflections are one of the best ways to create abstract and impressionist photography. If you look carefully, you’ll see they are everywhere. As you walk around, look for smooth surfaces. Think about how you can use reflections to capture a viewpoint that you simply couldn’t have shot otherwise. Pay attention for colourful reflections in rain-soaked streets, they will create shimmering images with an impressionistic quality. Also, still lakes and rivers can create some wonderful reflective surfaces. When a surface is textured or shaped, unusual and interesting reflections can appear.

    2 Reflection Seagull by Eva Polak

    2 Reflections Rainy streets by Eva Polak

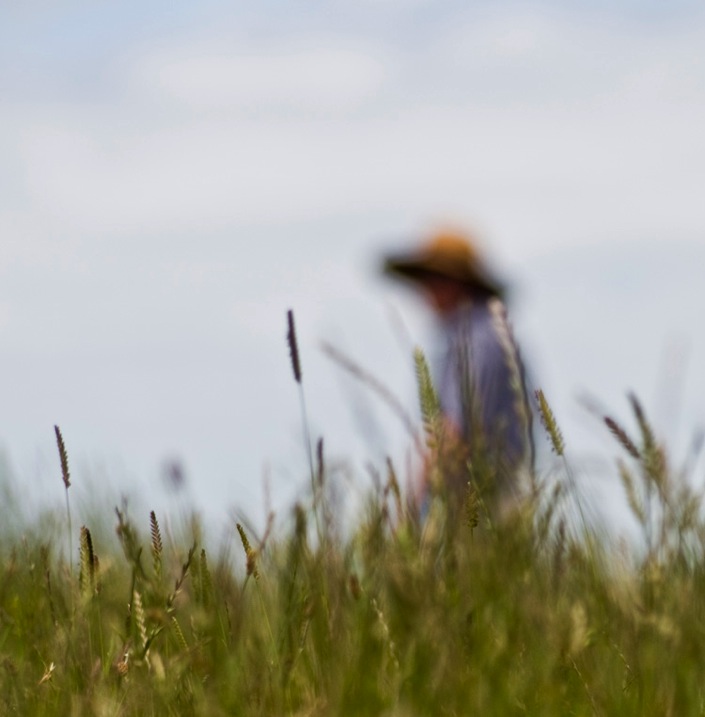
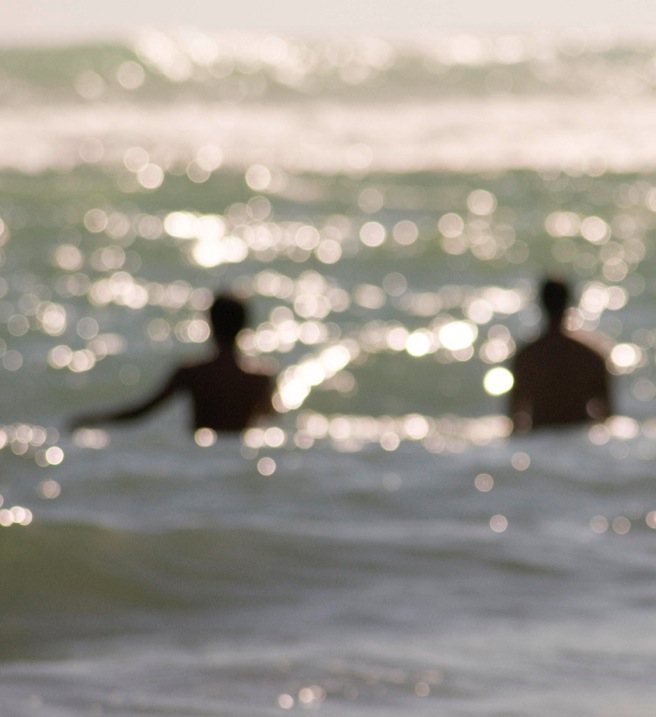
    3. Defocus

    Pulling the lens out of focus is a quick way to give a scene an impressionistic look. Use Aperture Priority mode that allows you to set your lens to the widest aperture (small numbers such as f/2.4 or f/4). This is critical because you want a very shallow depth of field. Switch your lens to manual focus and start looking at things through the camera. Turn the focus ring until everything is blurry. Try varying the focus on the same scene to find out how much blur suits your subject best.

    3 Defocus Lonly  by Eva Polak

    3 Defocus Swimmers by Eva Polak

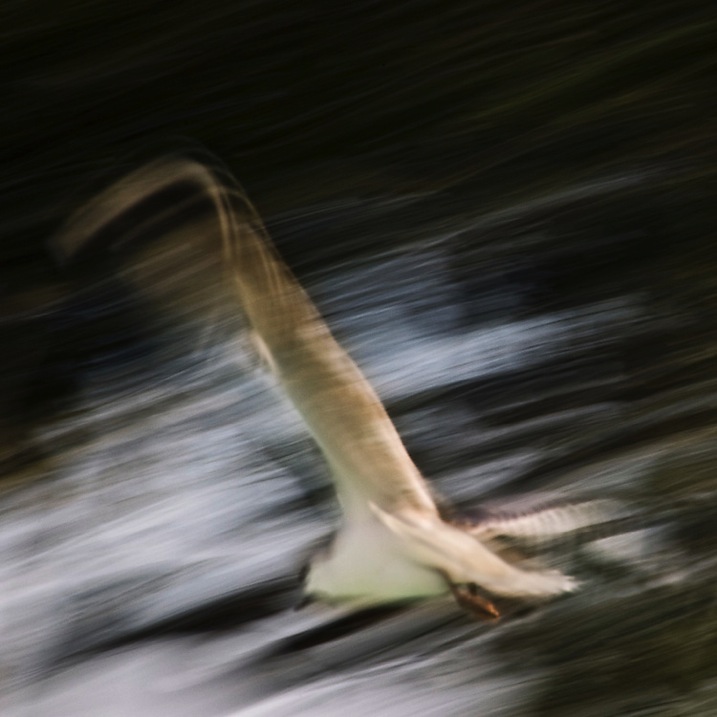
    4. Pan your camera

    Panning is a fun technique to learn, and although it takes some practice, it is relatively easy to get started. You can pan running people, bicycles, cars, or just about anything that is moving. Once you have your subject, set the camera to shutter priority with the shutter speed between 1/10th and 1/60th of a second. As your subject approaches, focus on it and start tracking with your camera until you are confident that you are moving in sync with the subject.

    4 Pan your camera Flight by Eva Polak

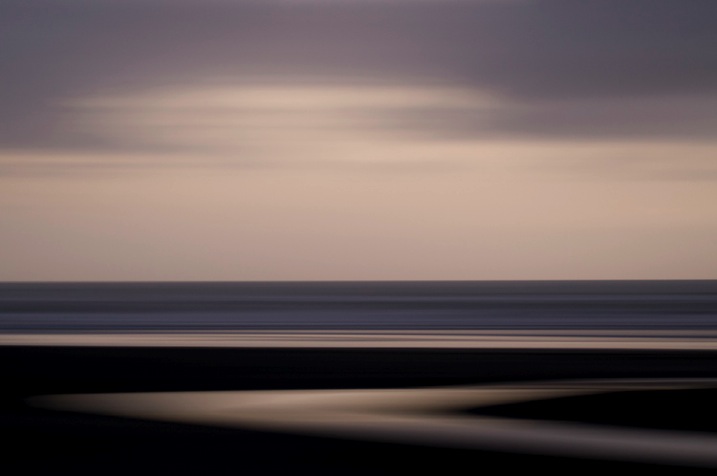
    The trick to a successful camera-panning image is in finding a suitable subject. Strong vibrant colours are ideal, and lines through the frame will keep the colours distinct and separated. Apart from panning moving subjects you can use this technique to create beautiful seascapes and landscapes. The subject distortion will emphasize horizontal lines when panning horizontally, and vertical lines when panning vertically.

    4 Pan you Camera  Wattle Bay  Eva Polak

    5. Zoom

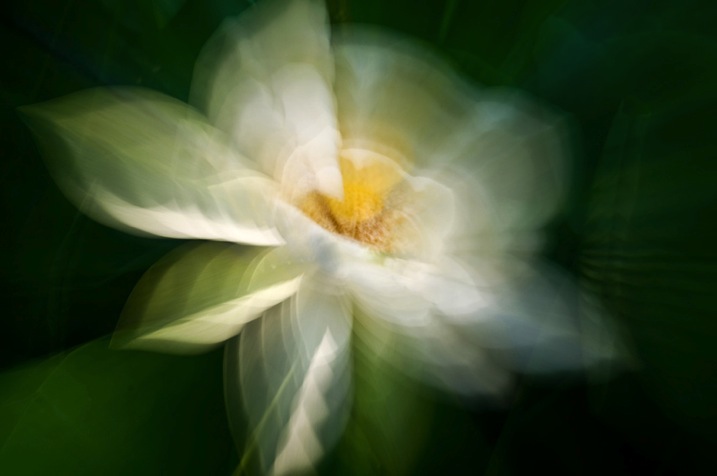
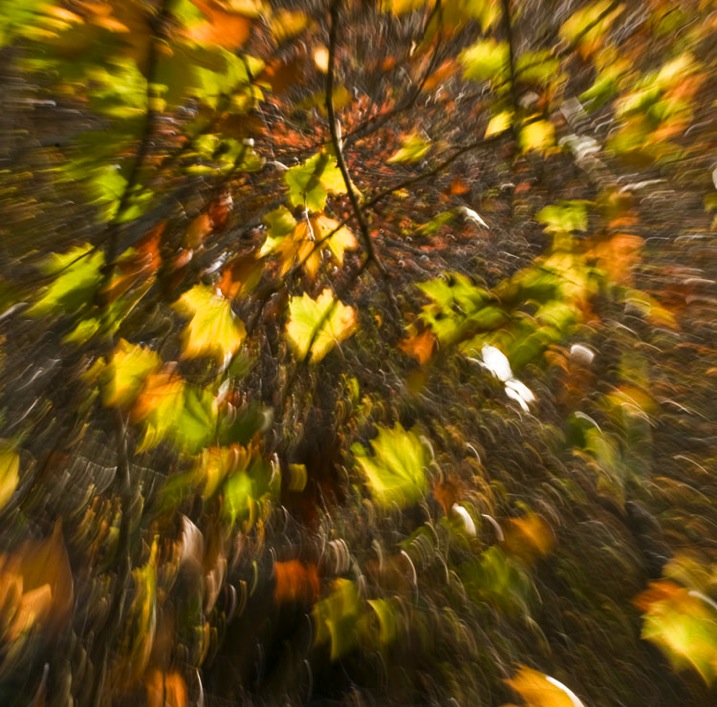
    A zoom burst, or zoom blur, is another technique which is simple, fun, and easy to achieve. It involves changing the focal length of your lens (zooming in or out) while you take a photo, causing the shot to blur from the centre outwards, as if the scene is bursting towards you.

    5 Zoom Water lily by Eva polak

    To use this technique you’ll need a DSLR (or mirrorless camera) with a zoom lens. Set your camera to Shutter Priority. A shutter speed of 1/10th of a second is a good starting point. Compose your photo as you normally would, then just zoom the lens as you press the shutter. The key to success with this technique is to get the amount of zoom burst right. Experiment with zooming speed and direction.

    5 Zoom Autumn Leaves by Eva Polak

    Spend some time with each technique to discover its full potential. Photograph a lot and often. Don’t judge what you do. Analyze your images and try to improve upon them. But, most of all, have fun!

    Tips to remember:

    • Keep an open mind; abstract photography is about seeing the potential in things that other people miss.
    • Spend time exploring everyday subjects and scenes; it’s surprising how many interesting abstracts you will find.
    • Look at familiar things from unfamiliar angles, and you will see them in a completely different light.
    • Forget about what something really is and concentrate on its shape and colour.

    googletag.cmd.push(function() {
    tablet_slots.push( googletag.defineSlot( “/1005424/_dPSv4_tab-all-article-bottom_(300×250)”, [300, 250], “pb-ad-78623” ).addService( googletag.pubads() ) ); } );

    googletag.cmd.push(function() {
    mobile_slots.push( googletag.defineSlot( “/1005424/_dPSv4_mob-all-article-bottom_(300×250)”, [300, 250], “pb-ad-78158” ).addService( googletag.pubads() ) ); } );

    The post Five Techniques for Creating Impressionist or Abstract Photography by Eva Polak appeared first on Digital Photography School.

    Digital Photography School

  • Tripod Review: Gorillapod Focus Field Test

    I personally have one of these guys and find it extremely handy for travel and using in places where you either aren’t allowed to have a tripod, or don’t want to haul a big heavy one around. Check out what you can do with the Gorillapod Focus with X ball head kit in this video from Big Iris Productions.

    They put it in some pretty challenging situations and gave it a mixed review. I would add that I find it to work great just to put your DSLR onto and walk around with. I did that while travelling in Spain – put the camera on Gorillapod, and the strap around my neck as usual  – but then just rested the legs of the tripod on my hip. It takes all the weight off your neck and I found it really comfortable to walk around that way, ready to shoot.

    googletag.cmd.push(function() {
    tablet_slots.push( googletag.defineSlot( “/1005424/_dPSv4_tab-all-article-bottom_(300×250)”, [300, 250], “pb-ad-78623” ).addService( googletag.pubads() ) ); } );

    googletag.cmd.push(function() {
    mobile_slots.push( googletag.defineSlot( “/1005424/_dPSv4_mob-all-article-bottom_(300×250)”, [300, 250], “pb-ad-78158” ).addService( googletag.pubads() ) ); } );

    The post Tripod Review: Gorillapod Focus Field Test by Darlene Hildebrandt appeared first on Digital Photography School.

    Digital Photography School

  • Weekly Photography Challenge – Spooky

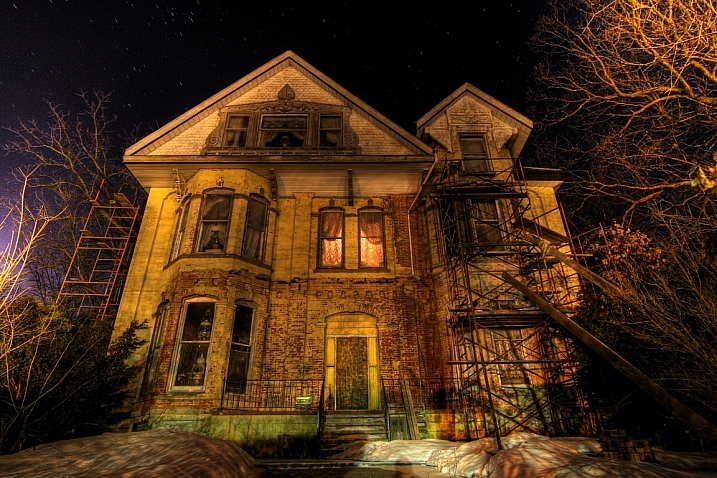
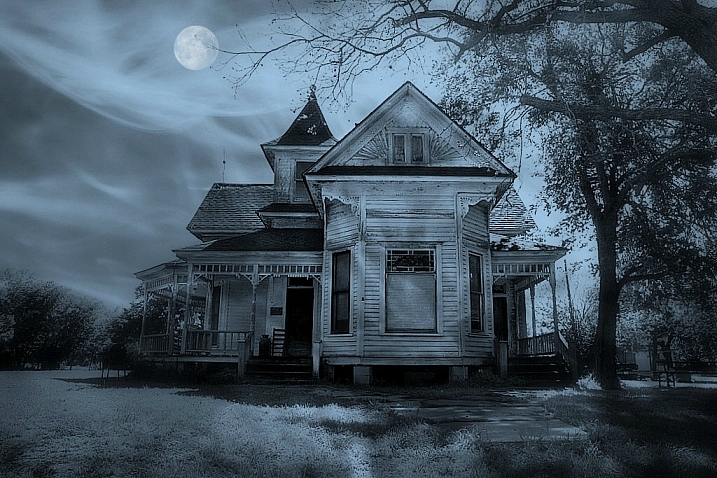
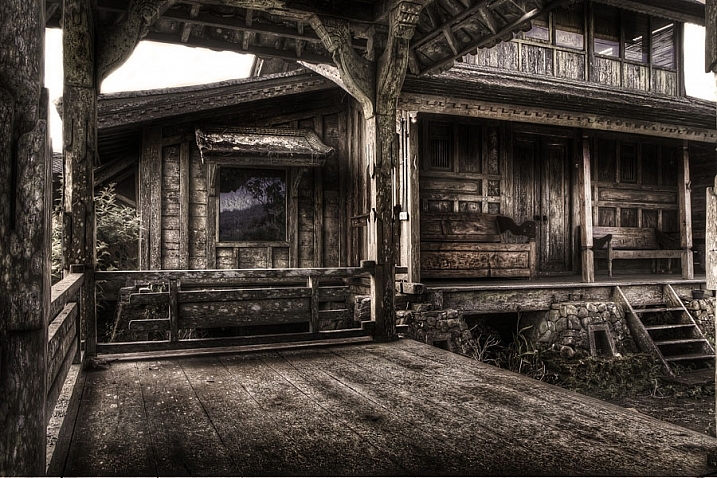
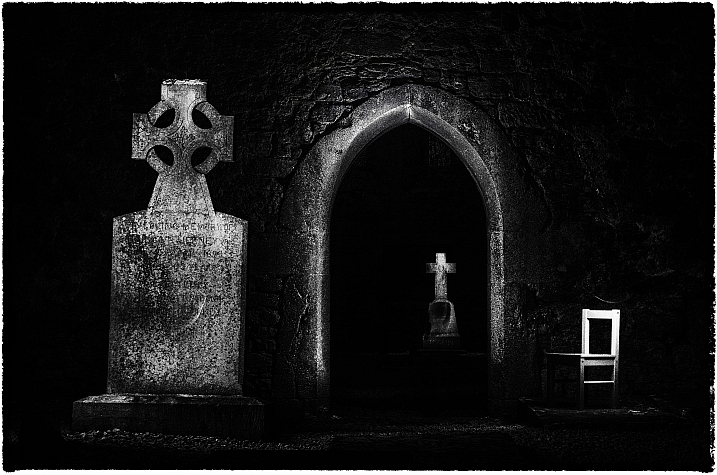
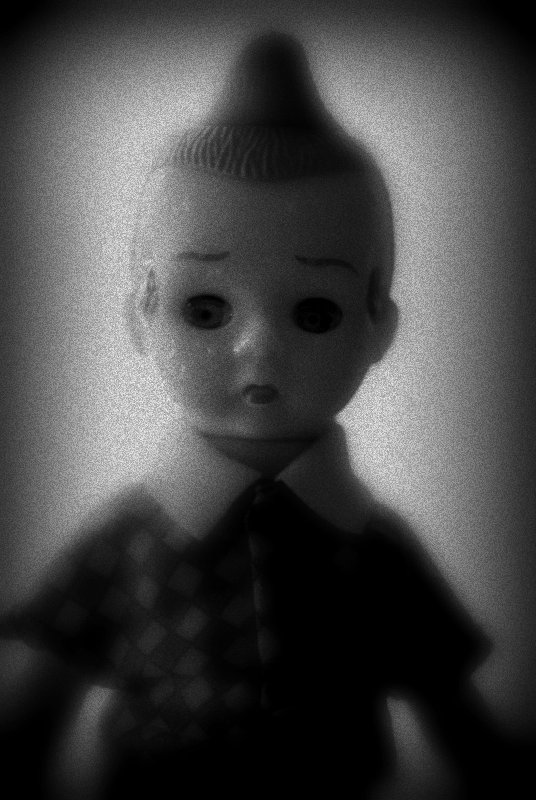
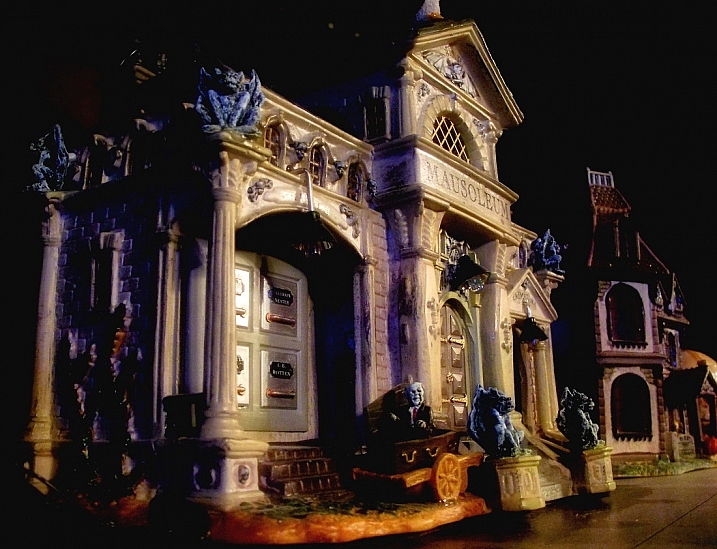
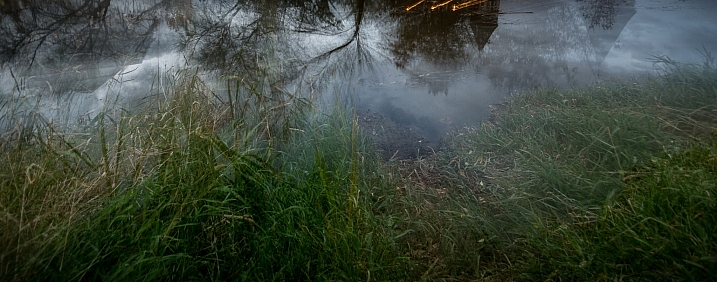
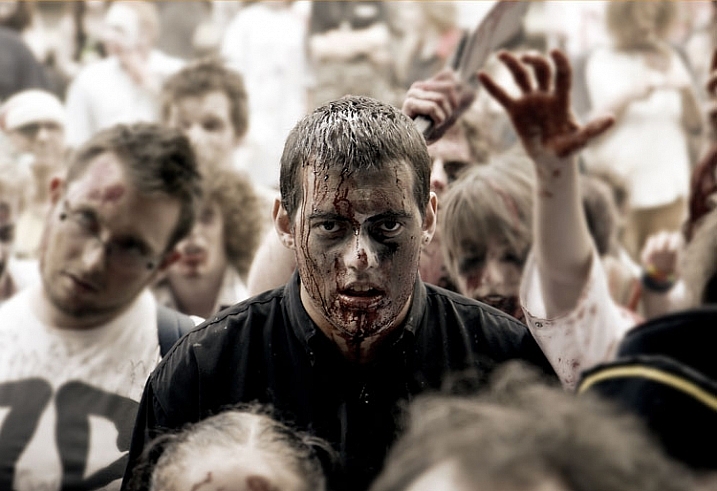
    Ooh scary – it’s halloween and time to get scared. See if these images give you a fright.

    Howard Ignatius

    By Howard Ignatius

    Paul Gorbould

    By Paul Gorbould

    Weekly photography challenge – spooky

    Your job this week to go shoot some scary stuff. Make us quiver in our boots, cry like babies, scream like a little girl.

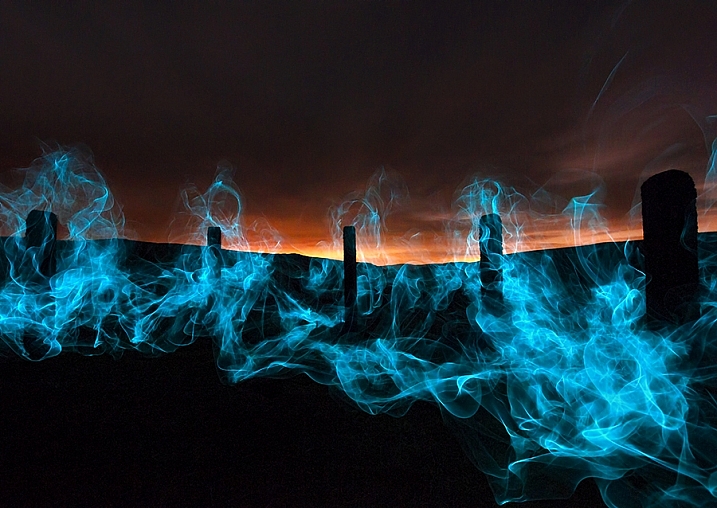
    Maybe you can find a creepy ghost town and do a shoot at night. Or get your kids to help you with some light painting and make some spooky patterns. Set up a jack-o-lantern, or do some funky make-up, get creative with it.

    Tommy Clark

    By Tommy Clark

    Howard Ignatius

    By Howard Ignatius

    Tim Simpson

    By Tim Simpson

    Christi Nielsen

    By Christi Nielsen

    Steve Corey

    By Steve Corey

    Share your images below:

    Simply upload your shot into the comment field (look for the little camera icon in the Disqus comments section) and they’ll get embedded for us all to see or if you’d prefer upload them to your favourite photo sharing site and leave the link to them. Show me your best images in this week’s challenge. Sometimes it takes a while for an image to appear so be patient and try not to post the same image twice.

    googletag.cmd.push(function() {
    tablet_slots.push( googletag.defineSlot( “/1005424/_dPSv4_tab-all-article-bottom_(300×250)”, [300, 250], “pb-ad-78623” ).addService( googletag.pubads() ) ); } );

    googletag.cmd.push(function() {
    mobile_slots.push( googletag.defineSlot( “/1005424/_dPSv4_mob-all-article-bottom_(300×250)”, [300, 250], “pb-ad-78158” ).addService( googletag.pubads() ) ); } );

    The post Weekly Photography Challenge – Spooky by Darlene Hildebrandt appeared first on Digital Photography School.

    Digital Photography School

  • 8 Things to Do in Autumn When You’re a Photographer

    8 Things to Do in Autumn When You’re a Photographer   Autumn is a great time for relaxing at home under warm blanket, with hot tea and a nice book to read or a movie to watch. But not for a photographer. If you still consider autumn not the best time for outdoor shooting… well, any kind of shooting and Continue Reading

    The post 8 Things to Do in Autumn When You’re a Photographer appeared first on Photodoto.


    Photodoto

  • 27 Sinister Images for the Week of Halloween

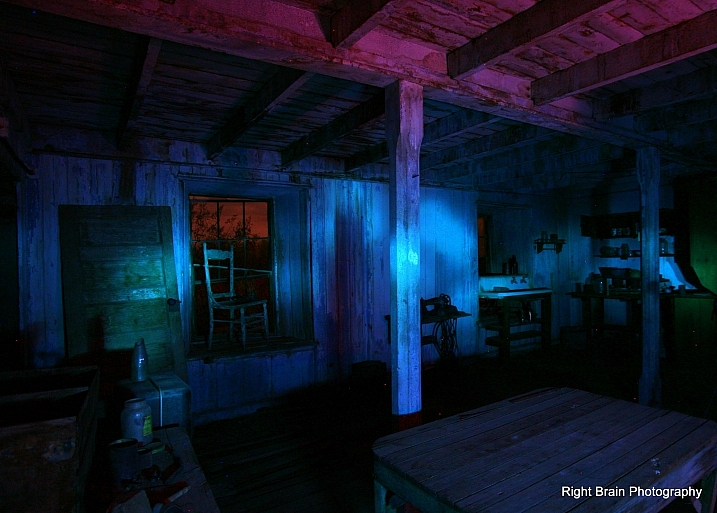
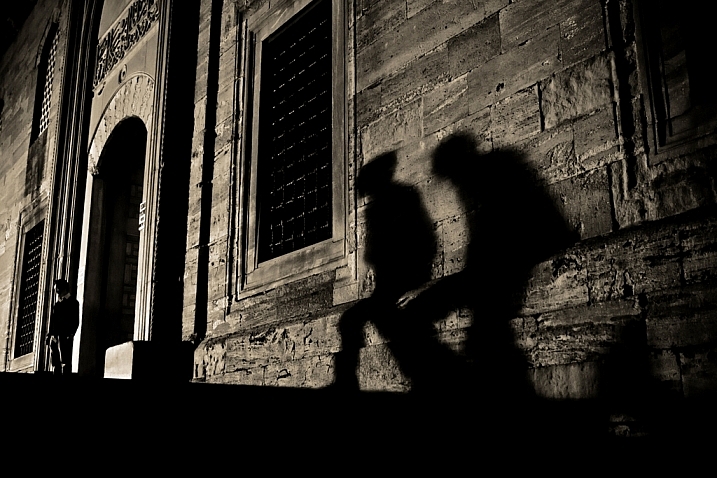
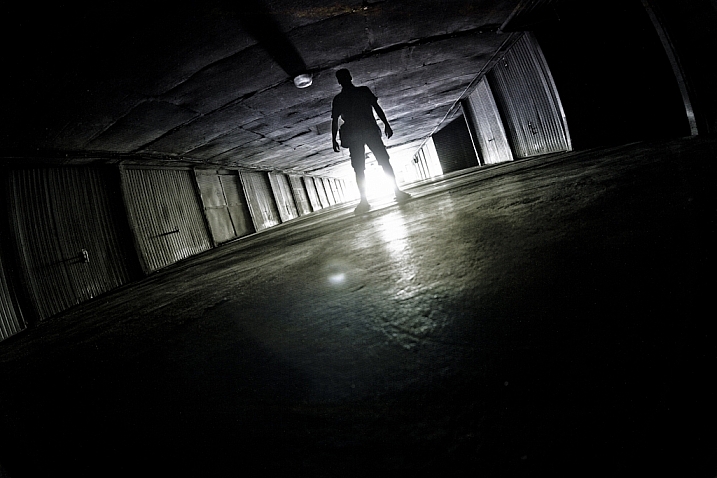
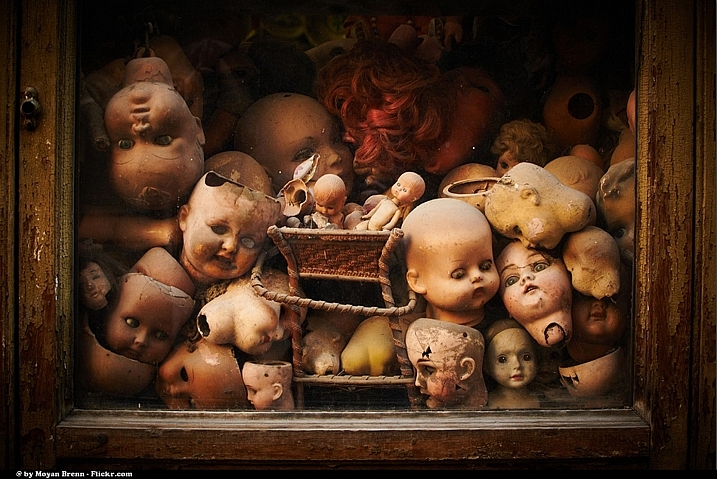
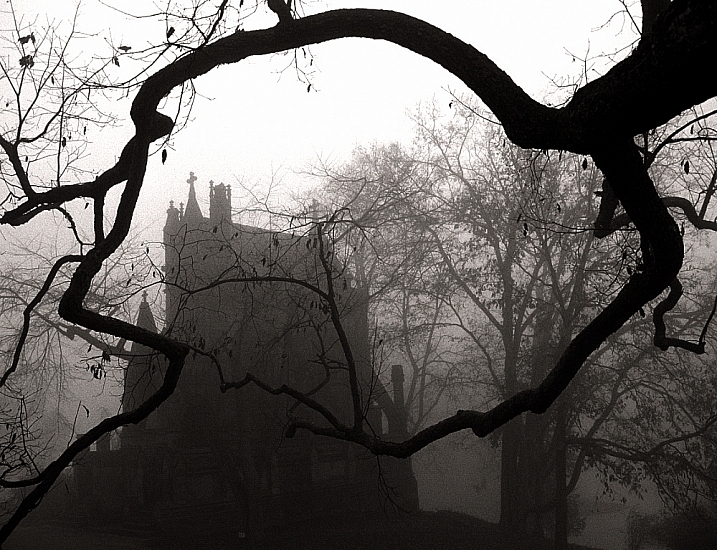
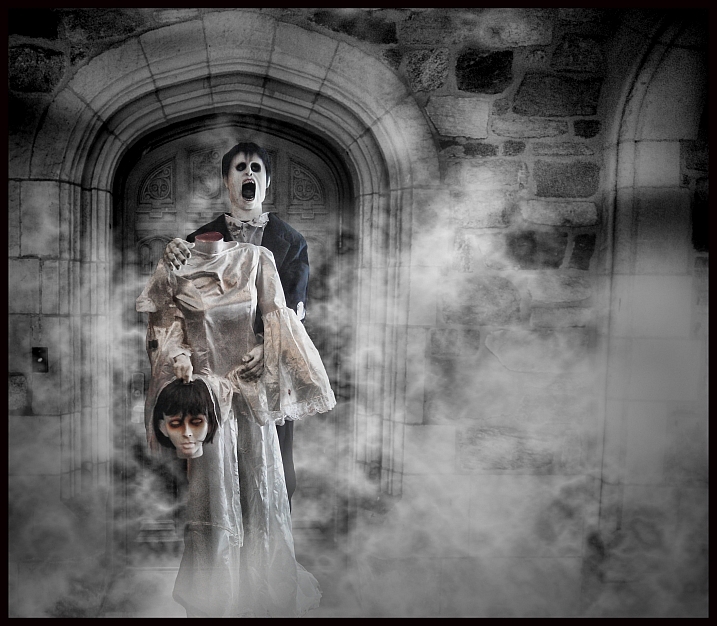
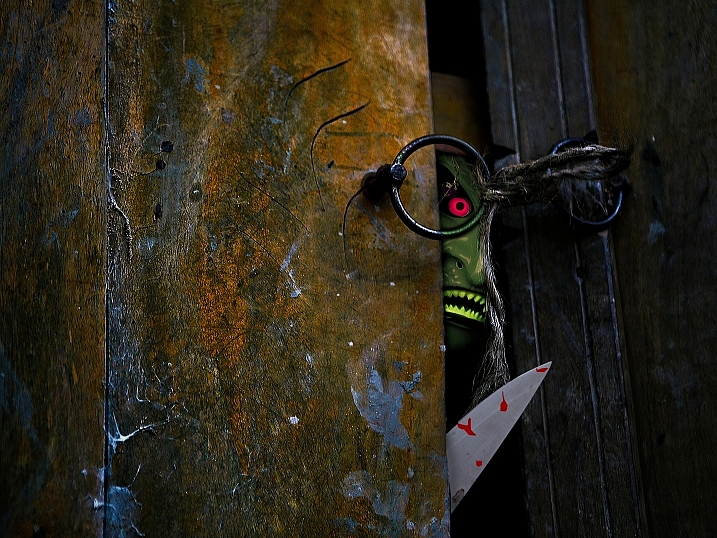
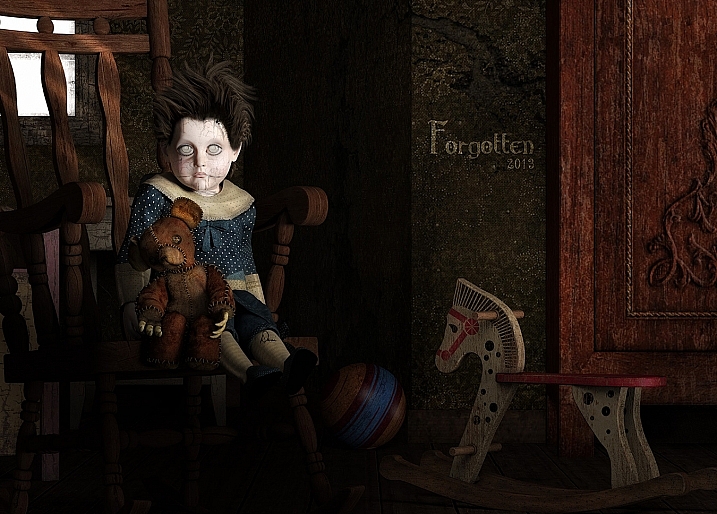
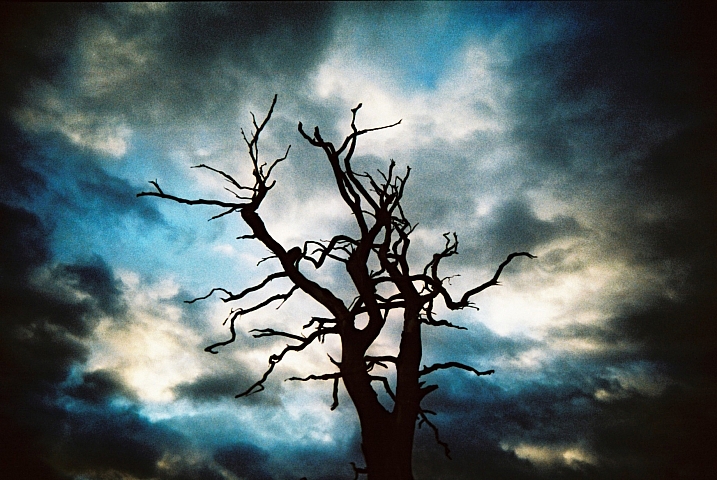
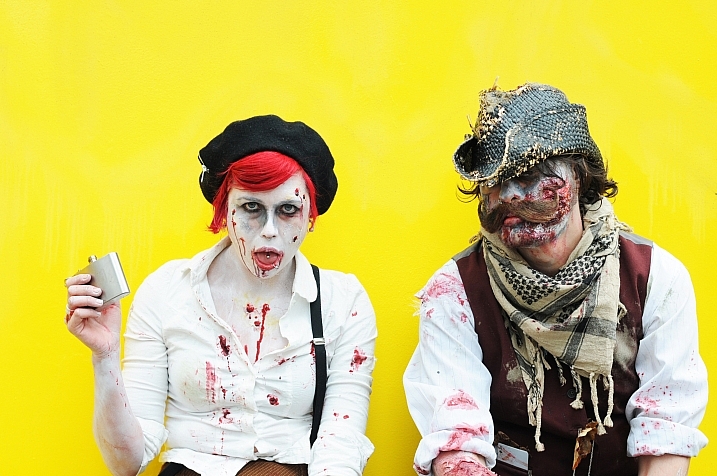
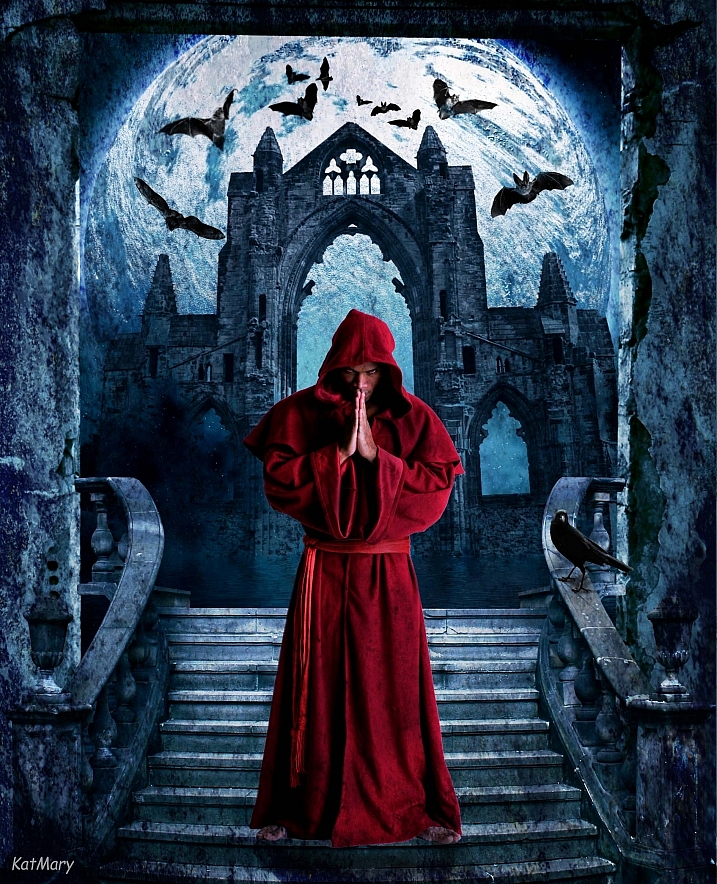
    So next week it is Halloween and the goblins and zombies will be out in full force. To get you in the spirt and maybe scare the pants off you – let’s look at a few spooky, creepy images:

    Shane Gorski

    By Shane Gorski

    Kris Williams

    By Kris Williams

    Shane Gorski

    By Shane Gorski

    TexasEagle

    By TexasEagle

    Jimmy McIntyre

    By Jimmy McIntyre

    Calvin Smith

    By Calvin Smith

    Cosmo_71

    By cosmo_71

    RightBrainPhotography

    By RightBrainPhotography

    Stefano Corso

    By Stefano Corso

    Christophe Verdier

    By Christophe Verdier

    Troy B. Thompson

    By Troy B. Thompson

    Jill

    By Jill

    Moyan Brenn

    By Moyan Brenn

    David Ohmer

    By David Ohmer

    Kasia

    By Kasia

    Aftab Uzzaman

    By Aftab Uzzaman

    Rob

    By Rob

    D.loop

    By d.loop

    Freeparking :-|

    By freeparking 😐

    Darlene Hildebrandt

    By Darlene Hildebrandt

    Mark Lobo

    By Mark Lobo

    Dani Foster Herring

    By Dani Foster Herring

    Slimmer_jimmer

    By slimmer_jimmer

    Yasser Alghofily

    By Yasser Alghofily

    Katmary

    By katmary

    Neil Howard

    By Neil Howard

    Matt MacGillivray

    By Matt MacGillivray

    googletag.cmd.push(function() {
    tablet_slots.push( googletag.defineSlot( “/1005424/_dPSv4_tab-all-article-bottom_(300×250)”, [300, 250], “pb-ad-78623” ).addService( googletag.pubads() ) ); } );

    googletag.cmd.push(function() {
    mobile_slots.push( googletag.defineSlot( “/1005424/_dPSv4_mob-all-article-bottom_(300×250)”, [300, 250], “pb-ad-78158” ).addService( googletag.pubads() ) ); } );

    The post 27 Sinister Images for the Week of Halloween by Darlene Hildebrandt appeared first on Digital Photography School.

    Digital Photography School

  • Two Methods for Shooting Star Trails Made Easy

    As a landscape photographer, it can be easy to find stunning subject matter to photograph during the day. At night, things become more difficult as the sun goes down, but there is still plenty to photograph. With some patience, you can create stunning images featuring the stars as your backdrop, or even your subject.

    star trails, night, photography, sky, astrophotography

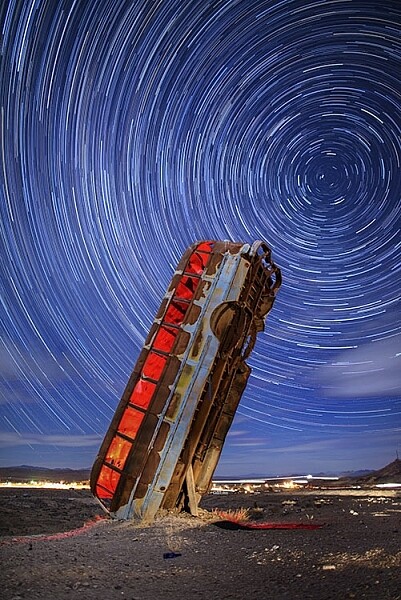
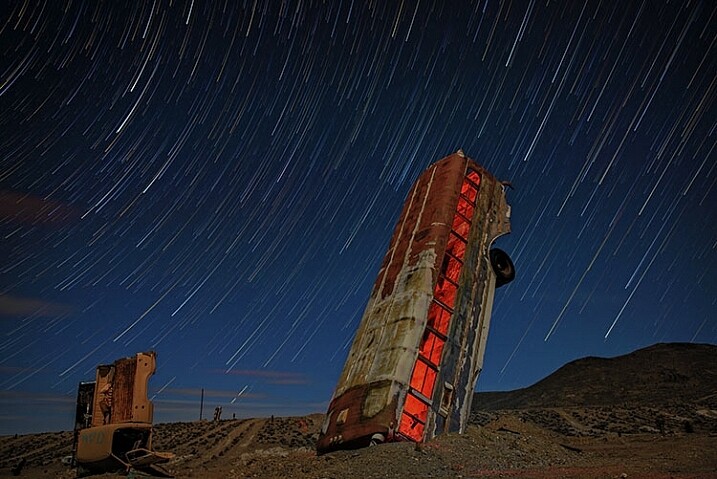
    This image is a composite of 156 separate exposures, merged using StarStax software. Each exposure was ISO 400, f/2.8, 30 seconds. The red glow inside the bus was done by shining a red LED flashlight inside the bus from the other side, during one of the exposures.

    Equipment list

    Before you get started, you’re going to need a few things:

    • A good sturdy tripod is absolutely essential, I’m using an Induro GTT204M2.
    • A wired remote for your camera is also a necessity. Which model you use will depend on the camera you have.
    • A fully charged battery is a must. The vertical grips that are available for some cameras, allowing you to use two batteries at once for longer life, can also be helpful.
    • A flashlight can come in handy, both for finding your way to the location, and for light painting in the foreground.
    • Finally, a large memory card, or two if your camera has dual slots, will be needed.

    #1 – The One-Shot Method

    There are two ways to photograph star trails. The first is the old-fashioned way, using a single exposure.

    For this method, exposures can range anywhere from several minutes, to several hours. This method was the only way to photograph star trails in the days before digital cameras. When using the single exposure method, your camera needs to be in manual mode, with the shutter speed set to Bulb. Some cameras have a separate mode for Bulb. It is like manual mode, but the shutter stays open for as long as the release button is depressed. A time controller such as the Nikon MC-36A, or Canon TC-80N3 can make things easier by allowing you to lock the shutter button down, or program a set amount of time for the exposure.

    ISO should be set to 400. You’ll want to set your aperture somewhere around f/4. The wider the aperture is open, the brighter the star trails will be. If you are photographing in a completely dark setting, with no moonlight, the stars will likely be the brightest object in your scene. Once you’ve set your aperture, you need to decide how long a star trail you want. The longer the exposure, the longer the trails.  The image below was a 30 minute exposure.

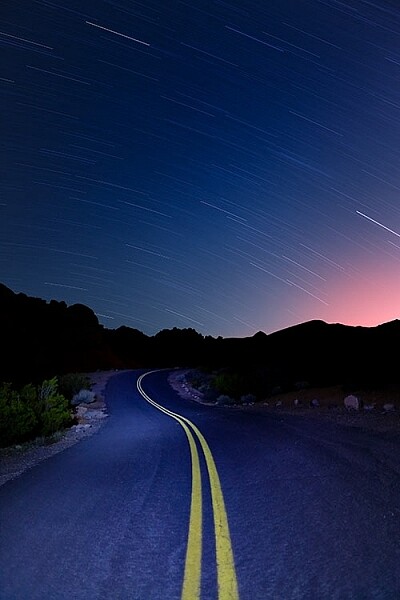
    This image was created as a single exposure. Exposure time was 30 minutes, ISO 100, f/5.6. The star trails are dimmer due to the smaller aperture, the fact that the moon was still in the sky, and light pollution from the city in the distance, seen as the glow to the right.

    This image was created as a single exposure. Exposure time was 30 minutes, ISO 100, f/5.6. The star trails are dimmer due to the smaller aperture, the fact that the moon was still in the sky, and light pollution from the city in the distance, seen as the glow to the right. The street in the foreground was painted with an LED flashlight for several seconds during the exposure.

    One thing you need to be concerned with when using a single long exposure is Long Exposure Noise Reduction. If you choose to photograph star trails using a single exposure, the heat generated on the imaging sensor adds noise to the image. Turning on Long Exposure Noise Reduction reduces that noise by using a method known as dark frame subtraction. I previously discussed dark frame subtraction in the article The Night Sky In Landscape Photography. Long Exposure Noise Reduction doubles the length of time needed to make an image. The camera first takes the exposure. In this case, let’s say the exposure is one minute.Long Exposure Noise Reduction then requires another minute to reduce the noise created by the long exposure. That means if you make a star trail exposure for 15 minutes, your camera will be unavailable to take another picture for 30 minutes. You’ll need to make sure you have enough battery to keep the camera powered while it carries out Long Exposure Noise Reduction.

    This is a single exposure of 10 minutes, ISO 400, f/5.6.

    This is a single exposure of 10 minutes, ISO 400, f/5.6.

    In addition to Long Exposure Noise Reduction, another consideration is the length of the exposure itself. There is nothing worse than standing next to your camera while it makes a 30 or 45 minute exposure, and two-thirds of the way through the exposure, a car goes past, shining its headlights across the scene and ruining the exposure. It’s happened to the best of us.

    #2 – Merging Multiple Exposures

    This is where the second method for photographing star trails comes in. With the advancement of digital imaging, stacking multiple exposures has become possible, and has made creating star trail images easier than ever. By taking a series of drastically shorter exposures, then stacking them in software such as StarStaX, you can increase your flexibility as a photographer, because there are two benefits to this method. The first is that since the exposure are shorter, you can turn off Long Exposure Noise Reduction. The second benefit is that even if a car drives by to ruin the exposure, it’s only one small piece of the sequence, so you can just delete the one frame that was ruined.

    StarStaX works by blending a series of images, allowing you to capture the motion of stars in the sky, similar to a single exposure. The one drawback to using software like StarStaX is if clouds are also moving across the sky, it has a tendency to create a stepped shape with them that doesn’t look natural. Better Star Trails Photographs with StarStax is an excellent tutorial for using StarStaX.

    Camera settings

    To use the stacking method for shooting star trails, set your camera to Manual mode and your camera’s drive to Continuous. Start with your aperture set to f/4. This setting can be adjusted, but the wider the aperture, the brighter the trails. However, be careful to ensure you have enough depth of field, and aren’t overexposing the stars. Shutter speed will be 30 seconds. ISO should be set to 400. Using the time controller or remote for your camera, release the shutter, and use the locking mechanism to keep the shutter button on the remote depressed. With the camera in continuous drive mode, as each exposure ends, another will begin until you stop it. This also minimizes the pause between each exposure, which can cause small breaks in the star trails when the exposures are merged. Alternatively you can use an intervalometer feature if you camera has that, or similar type of remote.

    star trails, night, photography, sky, astrophotography

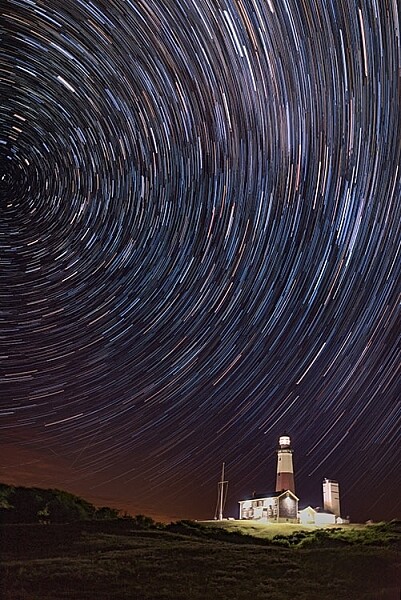
    This image is a combination of 121 exposures merged in StarStaX. Each exposure was 15 seconds, ISO 400, f/1.4. To keep the lighthouse from being so bright that it would overpower the star trails, a 3-stop soft-edged graduated neutral density filter was used.

    It can be easy to forget the rules of composition when photographing star trails, so don’t get so fixated on the stars that you forget to look at the foreground as well. Chances are your foreground will be shrouded in darkness. A flashlight can come in handy for painting the foreground object with light to make it stand out in the darkness. Colored gels can allow you to get creative with the light painting. When stacking images, you’ll only need to illuminate your foreground for a single frame, as StarStax will use the illuminated exposure for that foreground object.

    By the same token, there may be a time where your foreground object is brightly illuminated, as with the lighthouse image above. So I carry a set of graduated neutral density filters, even when shooting at night. For the lighthouse image, I mounted a Vü filters 3-stop soft-edged ND grad on my lens, so that the dark side of the filter was over the bottom half of the frame. This allowed me to keep the lighthouse exposure dim enough to still allow the stars to register in the exposure as well.

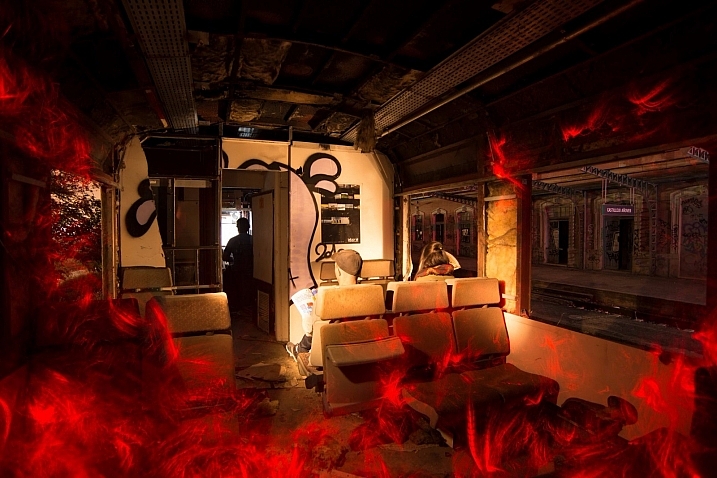
    This image was created by merging 116 separate exposures in StarStax software in comet mode. Each exposure was 30 seconds, ISO 400 at f/2.8. A red LED flashlight was shone inside the bus for the first exposure.

    This image was created by merging 116 separate exposures in StarStax software in comet mode. Each exposure was 30 seconds, ISO 400 at f/2.8. A red LED flashlight was shone inside the bus for the first exposure.

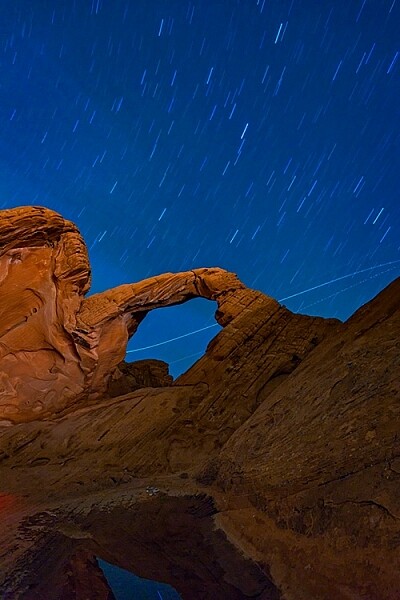
    Once you’ve found your foreground, think about the direction you are facing. When facing north, star trails will form concentric circles. When facing away from the north, star trails will simply be slanted lines or arcs in the sky. Both can create interesting and awe-inspiring images.

    Now that you know you don’t have to put your camera away when the sun goes down, you need to find some dark sky to get the best results with star trails. The International Dark Sky Association has a great tool on their website to help you find the best places for night sky photography.

    Show some of your best star trail images below!

    googletag.cmd.push(function() {
    tablet_slots.push( googletag.defineSlot( “/1005424/_dPSv4_tab-all-article-bottom_(300×250)”, [300, 250], “pb-ad-78623” ).addService( googletag.pubads() ) ); } );

    googletag.cmd.push(function() {
    mobile_slots.push( googletag.defineSlot( “/1005424/_dPSv4_mob-all-article-bottom_(300×250)”, [300, 250], “pb-ad-78158” ).addService( googletag.pubads() ) ); } );

    The post Two Methods for Shooting Star Trails Made Easy by Rick Berk appeared first on Digital Photography School.

    Digital Photography School

  • How to Make a DIY Tabletop Studio Setup

    When it comes to studio accessories, photographers are spoiled for choice. There are a lot of great options available, whether they be dedicated studio tables, extra large reflector panels or even backgrounds that studio lights are fitted onto. These accessories can all be brilliant, but one thing they are usually not is portable. They can also be cost prohibitive. What do you do if you get into a conversation with an acquaintance or a shop-owner, and they ask you to do some photos for them on the spot? You could, of course, decline, and attempt to get them to come to you sometime in the future, but this may lead to complications for what could be an otherwise easy task.

    The easiest way to get around some of these problems is to build your own solution. This may bring about visions of complicated engineering skills and power tools, but it really does not have to be that way. In the end, all you really need is the ability to shape and modify the light you have available to you, and that doesn’t need to be complicated.

    DIY-studio-setup-1845

    This tutorial will teach you how to make a simple tabletop studio setup with things you are likely to already have on hand, or at the very least, you’ll have little trouble obtaining: paper and tape. As it is so simple, this setup is ideal for straightforward record and product shots.

    It can be modified in a variety of ways for different effects, but if you’re looking for an elaborate and permanent solution, this is probably not what you need. However, if you need something that can be set up in moments, with next to no cost, then read on.

    What you need

    •  Two sheets of black paper/ card (thicker paper provides more stability)
    •  One sheet of white or colored paper/card
    •  Tape
    •  A base (a block of wood or similar that will raise your subject above the bottom of the setup.) Simply choose something that will look good in your photos.
    •  Extra paper (assorted colors, plus extra black and white)

    Putting it together

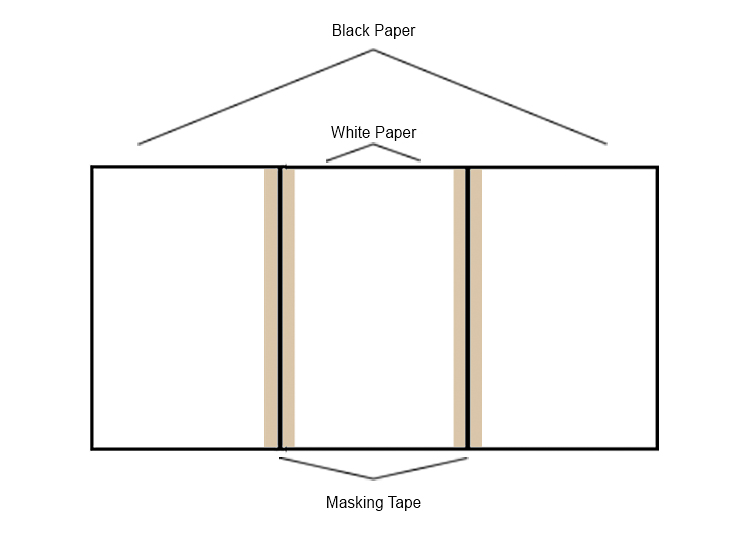
    Assembly is as easy as taping the sheets of paper together as illustrated in the diagram below. The only thing to watch out for is to ensure that the edges of the paper are flush and not overlapping. You should be able to fold each sheet over one another without difficulty.

    DIY-studio-setup-studio-diagram

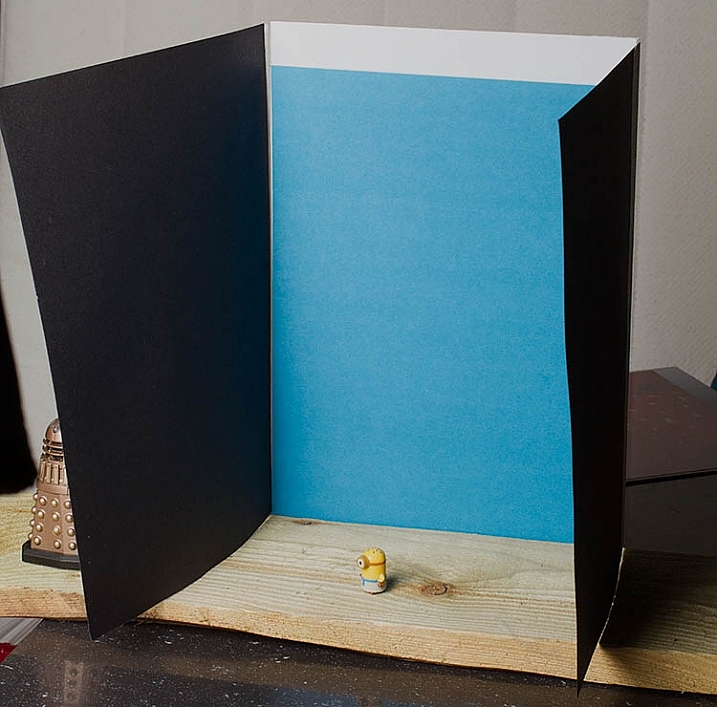
    Here it is is in all of its unbridled glory:

    DIY-studio-setup-1849

    Fortunately, it doesn’t matter what it looks like on the table. You’re the only person who ever has to see it. What matters is the results you can get in lieu of having no other options.

    Putting it to use

    The entire point of any studio equipment is to modify light. It doesn’t matter what the source of that light ism and this setup will work as well with strobes, as it will with natural light. With that said, the best results from this setup will come with a single directional light source.

    With your light source illuminating the subject from the front, the black sides are acting as flags and are controlling how much light hits your subject. This creates, and emphasizes, a narrow strip of light on your subject. It also increases contrast and can help to illustrate depth.

    DIY-studio-setup-1827


    Because the sides are not fixed into position, you can move them inward and outward as you see fit to alter the effect. When doing this though, you need to watch the background. Make sure that the sides are not casting any shadows over any part of the background that will be in your final images. Any such shadows will show up as ugly gradations in your photos.

    Because your subject is mere inches from the background, a proper exposure for your subject should, in most cases, allow for a correct exposure of the background as well. However, if you’re using a white background and the results aren’t satisfactory, try to insert a piece of colored paper and compare the results.

    It really is as easy as that: meter for your subject and go.

    However, you do need to take special care with your compositions. Because of the small amount of space you have to work with, you will need to pay extra attention to ensure that the edges of the background do not make it into the frame.

    Reflectors

    DIY-studio-setup-1836

    In most situations, especially in natural light, your light will probably be coming from above your subject. This can cause deep shadows where you may not want them. The easiest way to combat this is by adding a small reflector and laying it flat in front of your subject. In most cases, this will be enough. Reflectors are easy enough to make, but there are also inexpensive 12″ circular varieties on the market, that are portable and fold up. These make good additions to any camera bag, especially if you find yourself photographing small subjects, such as flowers, a lot.

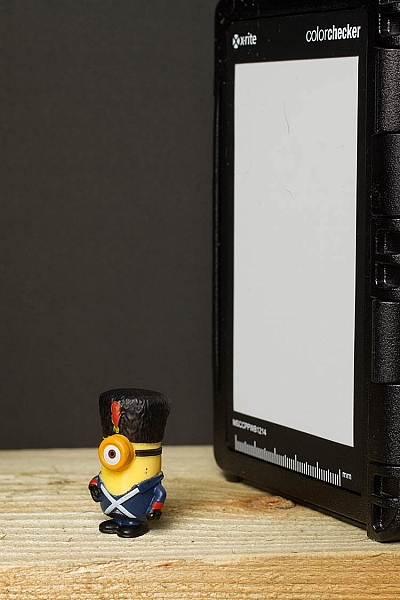
    In situations, like the photo above, where there isn’t a lot delineation between the subject and the background, you can add a reflector from behind. Anything white or silver will do the job. Try something like an index card. In this example, I used the white balance portion of my ColorChecker Passport.

    DIY-studio-setup-1835

    The spice of life

    Aside from simplicity, the real beauty in this setup is the scope of variations. The only limitations for how much you can change things to suit your needs are only limited by your imagination. Here are a few changes you can make to get wildly different results.

    Side panel colors

    Instead of the black cards acting as flags, tape aluminum foil to the inside of the panels. This will still shape the light falling onto your subject, but instead of deepening contrast it will fill in the shadows, and result in brighter images. If the effect is too strong, try making only one side a silver reflector. For a more subtle effect, try using white paper as the sides. The shadows will still fill in, but the effect will not be as strong.

    Exploring these options may result in flatter images, but depending on your needs and taste, that may be perfect.

    Backlighting

    If the paper or card you’re using for a background is thick enough, you can cut most of the center of it out, being sure to leave enough to allow it to be taped to the sides. You could then tape tissue paper to the inside of the background, covering the hole and acting as diffusion material.

    Then face the back of the setup toward your directional light source, effectively back lighting your subject. When doing this, it’s best to use a reflector to fill in the inevitable shadows and high contrast this will cause. To fashion a makeshift reflector, simply tape a bit of foil to a scrap of cardboard.

    Backgrounds

    DIY-studio-setup-1790

    Of course, you’re not limited to solid color backgrounds. As long as the material you choose to make the setup will support the weight, you can use anything from fabric to wood. If it seems like it might work: try it.

    A favorite trick of mine is to use old prints that I have scattered about. Once they’re in position you can have anything from an abstracted, colorful background to a landscape.

    Scalability

    Everything here has been on a pretty small scale, but you can make this setup as big as you need, provided you can find the materials. You may have trouble trying to build one for an elephant, but a trip to a hardware store should provide the right materials to make an affordable portrait sized setup.

    In the end

    This solution may not reek of elegance or creativity, but what it is in fact is: fast, cheap, and effective. Folded up, the whole thing can fit, undamaged, in a bag with a laptop, so it can go anywhere you do. Of course, this is only one option. As such, you could pull it out to isolate a wildflower in a field for a record shot. Or you could build one in minutes to create product photography for a friend’s e-commerce site.

    googletag.cmd.push(function() {
    tablet_slots.push( googletag.defineSlot( “/1005424/_dPSv4_tab-all-article-bottom_(300×250)”, [300, 250], “pb-ad-78623” ).addService( googletag.pubads() ) ); } );

    googletag.cmd.push(function() {
    mobile_slots.push( googletag.defineSlot( “/1005424/_dPSv4_mob-all-article-bottom_(300×250)”, [300, 250], “pb-ad-78158” ).addService( googletag.pubads() ) ); } );

    The post How to Make a DIY Tabletop Studio Setup by John McIntire appeared first on Digital Photography School.

    Digital Photography School

  • How to do Autofocus Fine Tuning on Your Nikon DSLR

    Most of the time your equipment does a great job, but every once in a while you may find that under certain circumstances, your photos may seem a little soft. Although there are no less than a million reasons why this might be, it may simply be that your lens isn’t focusing where it’s supposed to.

    You may be thinking that if this is the case, isn’t something seriously wrong? Not necessarily.

    Some cameras are equipped with a feature to tweak the accuracy of its autofocus – Nikon calls this autofocus fine tuning.

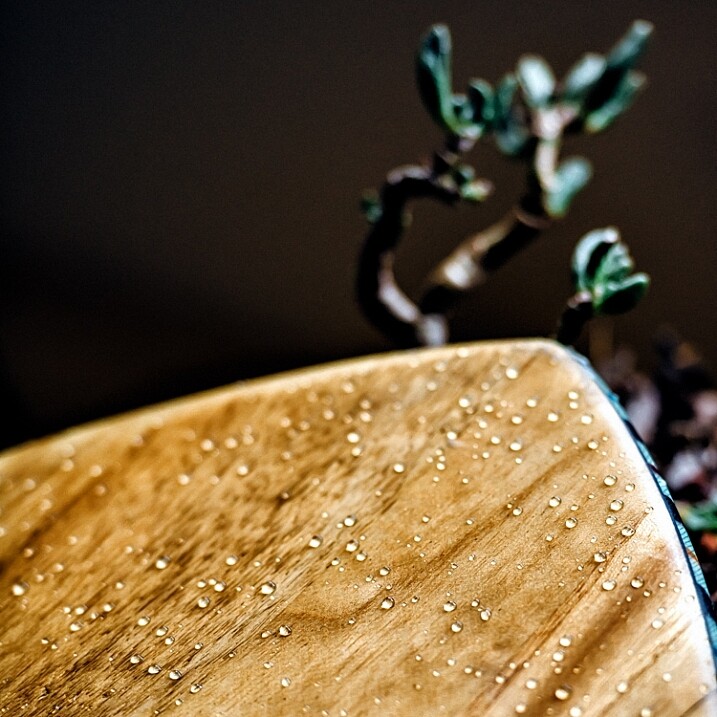
    Depth of field

    Autofocus fine tuning allows you to dial in the autofocus accuracy of a camera/lens combination.

    What is autofocus fine tuning?

    Camera lenses are built, and tuned, to fairly exacting standards and do what they are supposed to pretty well, even lower-end lenses. However, there is a window, albeit fairly minute, that focus tuning parameters fit into. If the lens’ tuning falls right in the middle of that window, the focus will be spot on, but it’s not uncommon for the focus to be at either end of that window while still meeting quality control standards.

    What this means is that in the majority of shooting situations you are going to end up with sharp results. In some situations when you are pushing the accuracy limits of the lens, such as macro photography or shooting at wide apertures, you may discover that the lens focuses a little in front or behind the focus point you’ve chosen. Maybe you’ve seen this shooting a close-up portrait at a wide aperture – although you are trying to get the subject’s eyes in the focus plane, you keep getting their eyebrows or ears sharp instead.

    Why use it?

    This is where lens fine tuning comes into play. What this feature does is allow you to dial in the accuracy of the lens/camera focus point even more precisely than it already is. If you haven’t noticed any problems with your setup, or mostly shoot at smaller apertures, going through this process may be unnecessary.

    This feature can be found on Nikon bodies from the D7000 up and Canon bodies from the 50D and up, as well as several Sony, Olympus, and Pentax cameras.

    Fine tuning settings are specific to the lens/camera combination and once you tune a lens, the camera saves the setting, which it reverts to anytime you mount that lens. Although you need to use a CPU lens to reap the full benefits of autofocus fine tuning, older analog or third party lenses can be fine tuned, and the settings saved manually on Nikon DSLRs.

    What you need

    • A tripod
    • A newspaper or magazine printed with a small font
    • A table
    • A well lit room

    How to do it

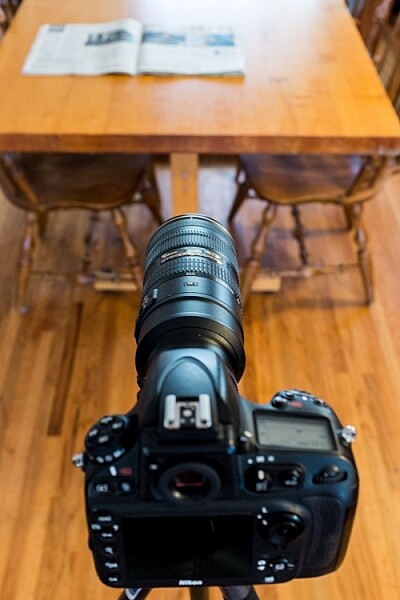
    Step 1 – Mount your camera on the tripod and adjust it so the lens is about two feet above table level. The idea is to have the lens pointed at the newspaper at about a 30-degree angle.

    Set up for autofocus fine tuning.

    The setup to adjust autofocus fine tuning is fairly simple.

    Step 2 – It is recommended to set the zoom (if using a zoom lens) to the focal length and distance which you use most often.

    Step 3 – Set the camera to single-point, single-servo autofocus (AF-S for Nikon, One-Shot for Canon)

    Step 4 – Open the lens to one stop down from its widest aperture (e.g. set an f/2.8 lens to f/4) and the middle of its zoom range (if it’s a zoom lens).

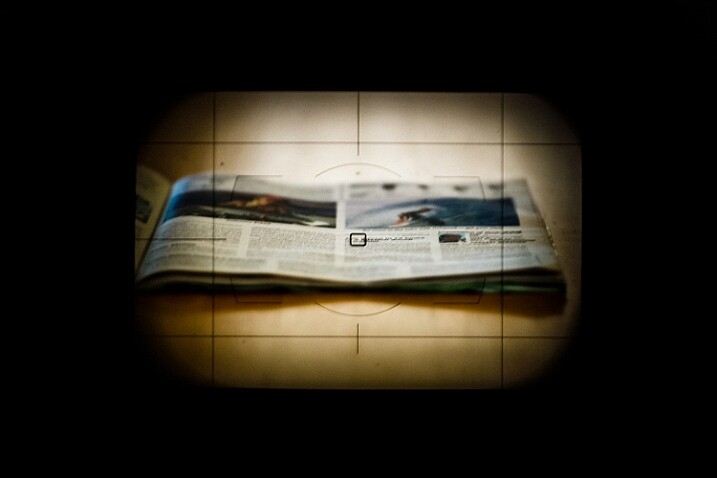
    Step 5 – Place the focus point in the middle of the frame (center dot). I prefer to align the focus point with something recognizable like a letter of bold text among normal text.

    Focus point in the center of the frame

    With autofocus set to AF-S (one-shot), single-point, place the focus point in the center of the frame.

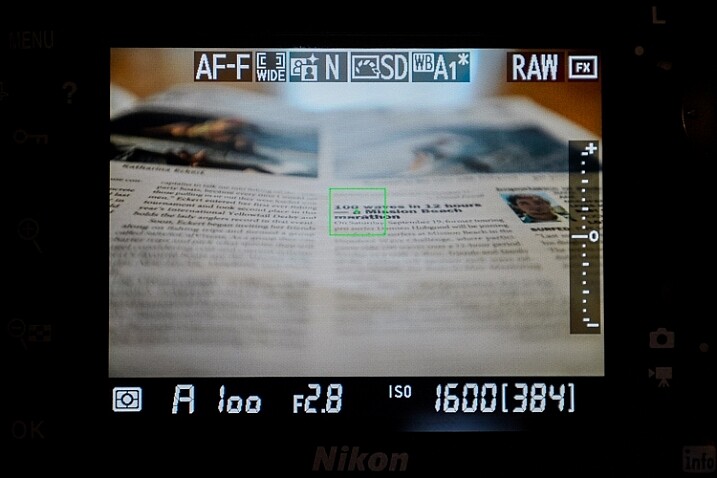
    TIP: A helpful method is to turn on Live View and place the small dot in the middle of the focus box on a letter of text. Zoom in the view (NOT the lens) which gives you a more precise center point than the small box seen through the view finder. Turn off Live View to continue.

    Using live view to align focus point

    Using Live View helps to line up your focus point more precisely.

    Step 6 – Set the self-timer on the camera to at least five seconds to allow the camera to stabilize after pressing the shutter button.

    Step 7 – Turn off any stabilization either in-lens or in-camera.

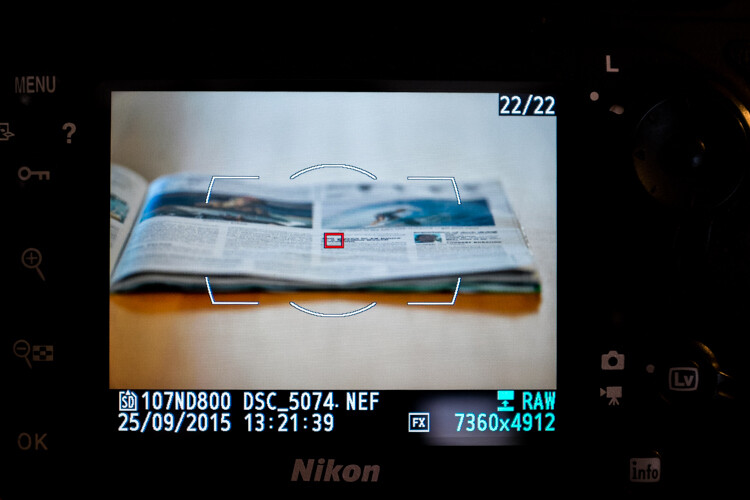
    Step 8 – Make sure focus points are enabled on playback: Menu>Playback Menu>Playback display options>Focus point>Done>OK

    Focus point on preview

    Enabling focus point on image preview allows you to see where the focus was set when the picture was taken.

    Step 9 – Defocus the lens manually and then engage autofocus until it locks onto the focus point and press the shutter button.

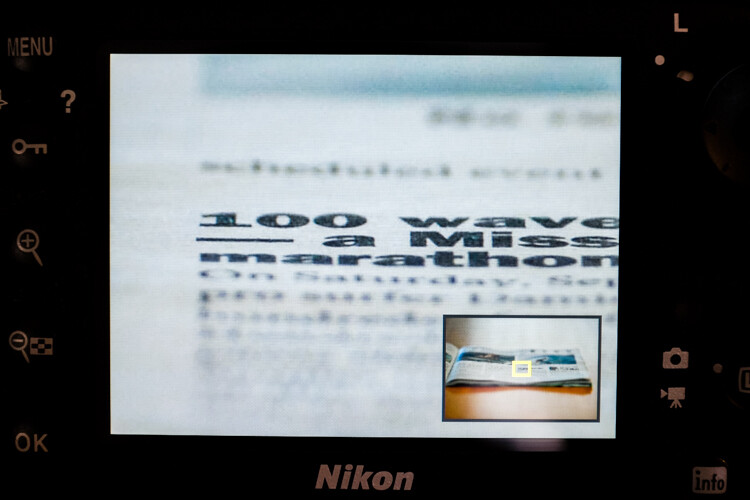
    Step 10 – Review the image and zoom in to check the accuracy of the focus point. Do this a few times for verification.

    Checking focus point accuracy

    Preview the image and zoom in to check the accuracy of the focus point.

    If it appears that sharpness is centered on the focus point, great, your lens’ focus is accurate and you’re good to go. If not, continue reading.

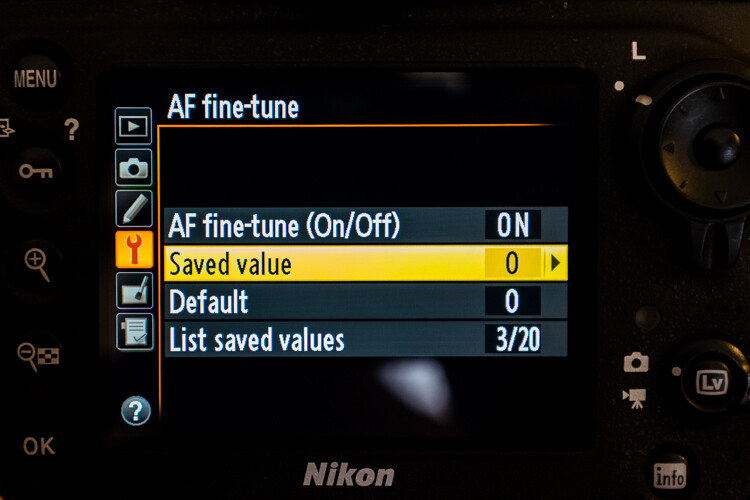
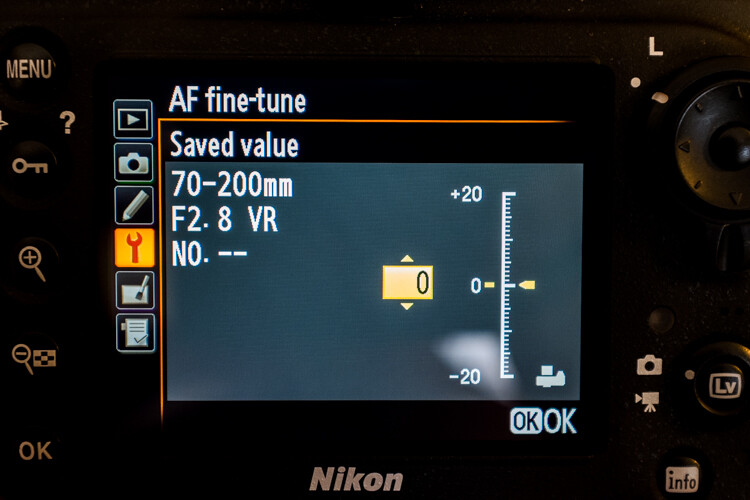
    Step 11 – To adjust the autofocus fine tune go to: Menu>Setup menu>AF fine-tune>AF fine-tune (On/Off) and turn it on. Go back and select Saved value.

    Fine tuning autofocus

    The menu location of autofocus fine tuning.

    Your lens’ information should be displayed in the upper left corner and the fine-tune adjust on the right.

    Step 12 – Positive numbers correct for back-focusing (focusing behind the focus point) and negative numbers correct for front-focusing.

    Adjusting autofocus fine tuning

    Positive values adjust the focus point away from the camera while negative values move it closer.

    Remember, this is called “fine-tuning” so the increments are pretty small – a +1 is hardly noticeable.

    Step 13 – After each adjustment, defocus the lens manually and repeat the steps above until you hit the sweet spot.

    The settings you have applied to a specific CPU lens are saved, and are loaded automatically anytime that lens is mounted to your camera. With non-CPU lenses, you can create a profile for that lens which you can then save and revert to manually when that lens is used.

    If your lens’ focus still fails to hit the mark after attempting autofocus fine-tuning, either go old-school and use manual focus if it’s practical, or you will need to send your lens in to have it calibrated with a special machine.

    If you use a brand other than Nikon check your camera manual to see if your model has this feature and how to use it.

    Good luck and may your images be as sharp as my witticisms – hopefully much sharper.

    googletag.cmd.push(function() {
    tablet_slots.push( googletag.defineSlot( “/1005424/_dPSv4_tab-all-article-bottom_(300×250)”, [300, 250], “pb-ad-78623” ).addService( googletag.pubads() ) ); } );

    googletag.cmd.push(function() {
    mobile_slots.push( googletag.defineSlot( “/1005424/_dPSv4_mob-all-article-bottom_(300×250)”, [300, 250], “pb-ad-78158” ).addService( googletag.pubads() ) ); } );

    The post How to do Autofocus Fine Tuning on Your Nikon DSLR by Jeremie Schatz appeared first on Digital Photography School.

    Digital Photography School