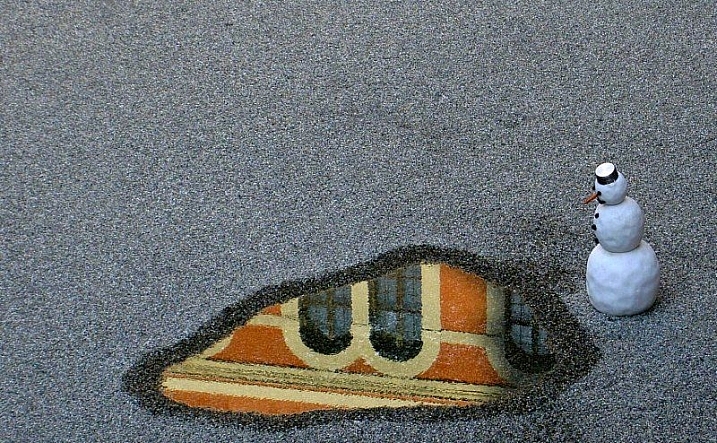
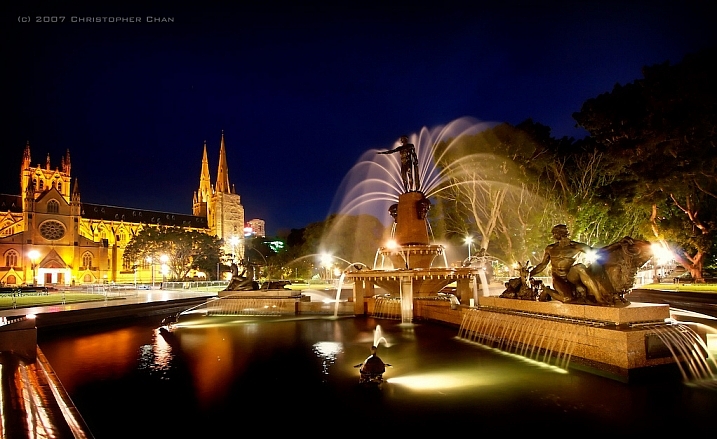
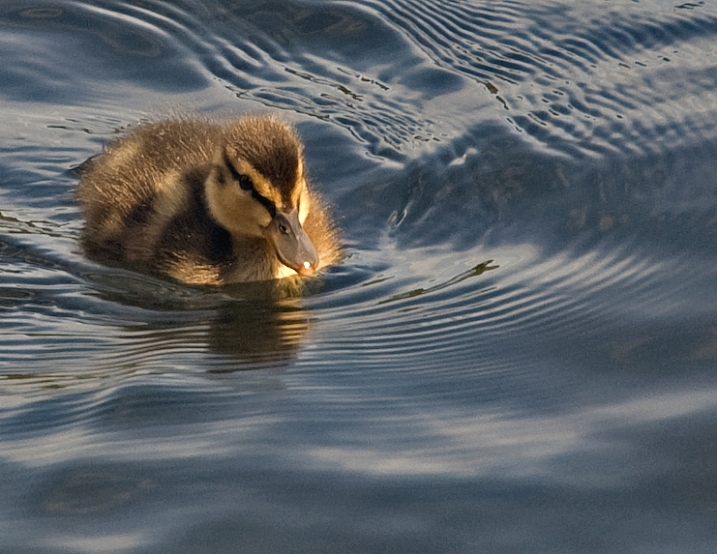
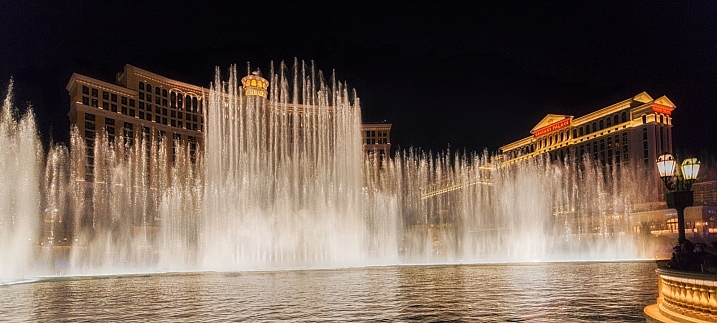
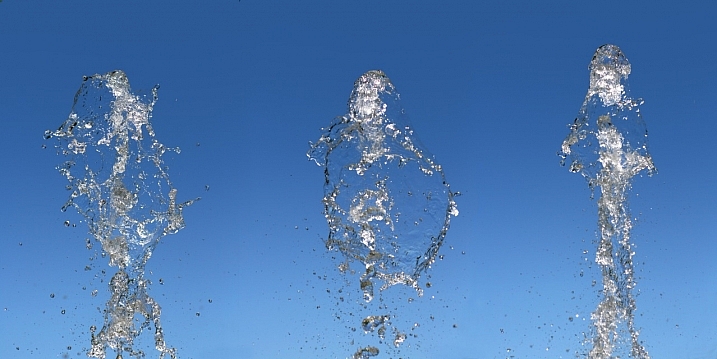
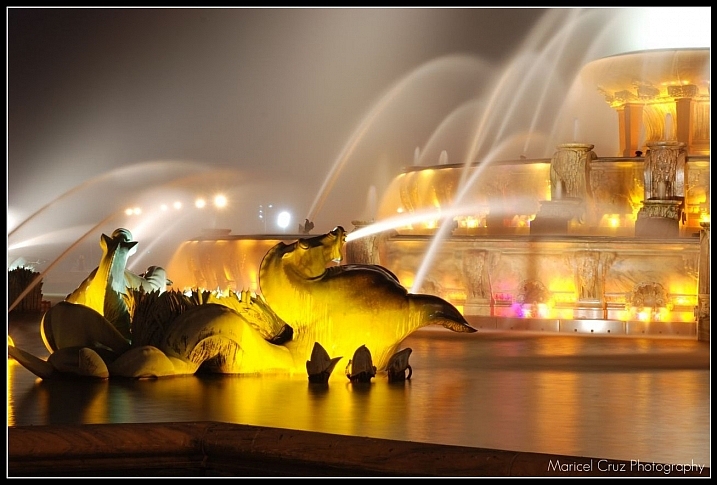
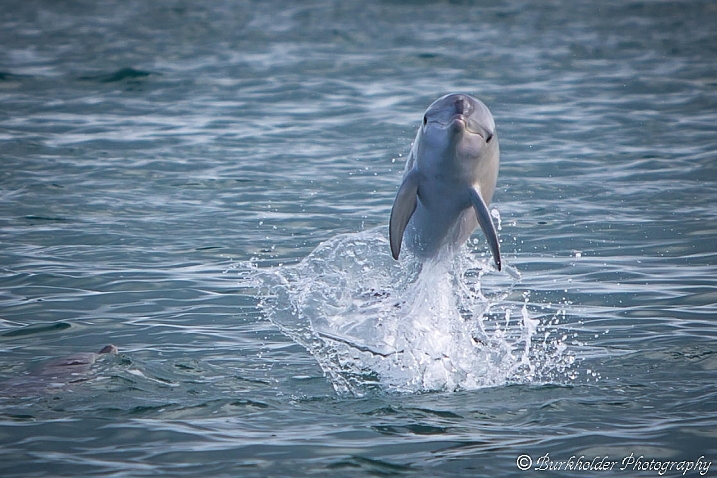
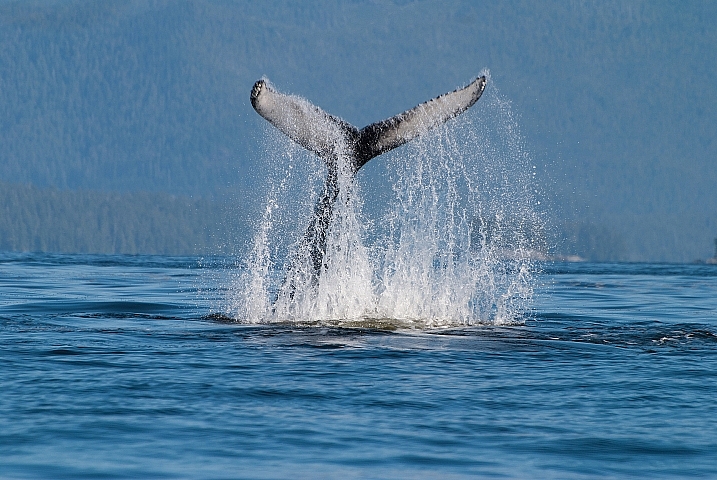
Category: Photography

  • How to do Basic Processing on a Portrait in 5 Minutes Using Lightroom

    There’s a Triangle of Service that you may have seen before which goes something like this: You have three options available (cheap, quick, quality) but can only choose two. I first saw this on a sign in an automotive shop years ago, but it applies in almost any professional setting where goods and services are produced for consumption, and is especially true in photography.

    As a photographer you don’t have unlimited time, but you and your clients expect quality results, and doing so is not always cheap or easy. Fortunately Lightroom makes it simple to do a basic portrait processing job in only a few minutes, which you can then copy and paste to other similar photos, to make your work even faster.
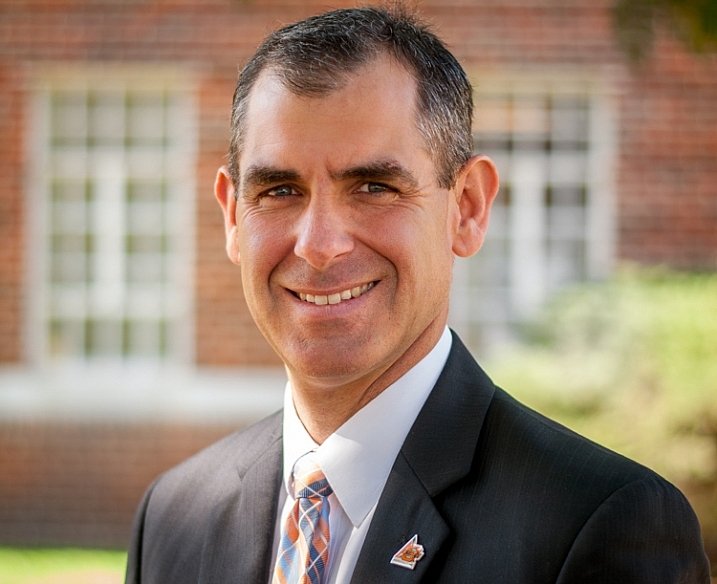
    five-minute-lightroom-portrait-processing-headshot

    Before I get too deep into this article I want to make clear that the following steps are a process that works for me, but your unique solution might be a bit different. The important lesson is to find a workflow that is easy to replicate and repeat, so you don’t spent all your time doing the same types of edits over and over.

    As you work with any editing program – whether it’s Lightroom, Photoshop, Capture One, or even a free tool like Photos or Picasa – it’s a good idea to find an editing style that matches your photography style. I know the look I’m going for when I edit a portrait or headshot, which might be entirely different from what you prefer. Knowing how to achieve my particular style has taken me a while, but now I find that my editing is a lot quicker, because I start each photo with a particular set of steps:

    1. White Balance
    2. Tone
    3. Sharpening
    4. Vignette

    These steps are quick, usually get me 90% of the way towards a finished image, and will often result in a finished portrait with no additional editing required. Let’s look at each step one by one:
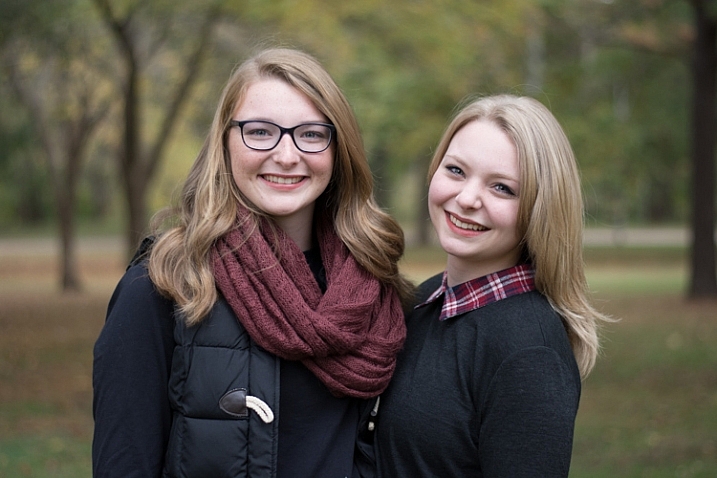
    five-minute-lightroom-portrait-processing-step1-import

    This original is decent but it needs some tweaks before it’s good enough to give to my client.

    Step 1: White Balance

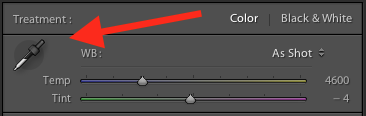
    One advantage of shooting in the RAW format is that you can calibrate the White Balance of your images afterwards, whereas shooting in JPG leaves you much less leeway to edit not just White Balance, but most other aspects of the photo as well. Of course, one drawback of shooting in RAW is that calibrating the White Balance can take a lot of time, but much of this can be mitigated by using Lightroom’s eyedropper tool (targeted adjustment tool) instead of fiddling with the sliders on your own.
    five-minute-lightroom-portrait-processing-white-balance

    To quickly adjust the White Balance, click the eyedropper icon, then find a part of your image that is neutral in color – think slightly gray instead of pure white. The eyedropper tool might not get you the perfect overall color, but it will quickly get you close to your target, after which you can adjust the Temperature and Tint sliders to your liking.

    Another tip to speed things up is to click directly on the Temperature and Tint numbers and use the up/down arrows to adjust their values, or hold down the [shift] key while doing so to make larger incremental changes.

    Step 2: Tone

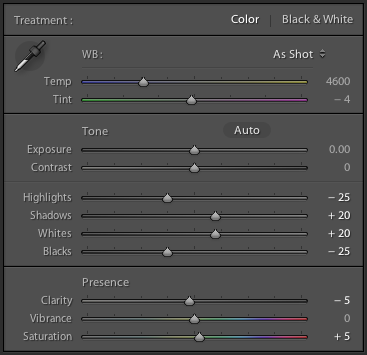
    After you get your initial White Balance set, it’s time to make some initial adjustments using the rest of the Basic panel in the Develop module. To get my particular look, I almost always start off with the following values. You can change each one quickly by highlighting the numbers, entering new values, and pressing [Tab] to move to the next set of numbers instantly.
    five-minute-lightroom-portrait-processing-basic-panel

    Exposure 0, Contrast 0. I don’t change these values until I make the following adjustments you see below. Because they are global, and affect the entire image, that is not usually what I want to do right away. If the image is still too light or dark after doing the rest of the basic adjustments, I’ll increase or decrease exposure accordingly, but rarely do I need to adjust contrast and you’ll see why in the steps below.

    Highlights -25. This helps even out the bright portions of the portrait so any spots that are a little bright are brought down a bit.

    Shadows +20. This is a way of brightening just the dark parts of the portrait to bring out a little more color and definition.

    Whites +20, Blacks -25. I use these sliders instead of adjusting the contrast because it gives me more granular control over the look and feel of my portraits. I’m essentially making the whites and blacks more pure, which helps give the portrait a richer look overall. Some people skip this step and make adjustments to the Tone Curve, but it’s all a matter of personal preference, though I usually find the white/black adjustments to be quicker.

    Clarity -5. Most people bump up the clarity slider which essentially affects edge contrast mostly in the midtones, but I like a slightly more subdued look so I usually start by lowering it a few notches.

    Vibrance 0 (zero). This slider mostly affects colors outside the normal range of human skin, so it can be useful if you shoot outdoors and want to make the nature colors pop. I leave it at zero as a general rule, and then adjust later as necessary.

    Saturation +5. I usually like a bit more color to start things off, so I start with a small value increase here, and then go up or down as necessary.

    I always start with these adjustments, and then tweak as necessary. The whole process only takes a minute and almost always results in an image that is dramatically improved over the initial import.
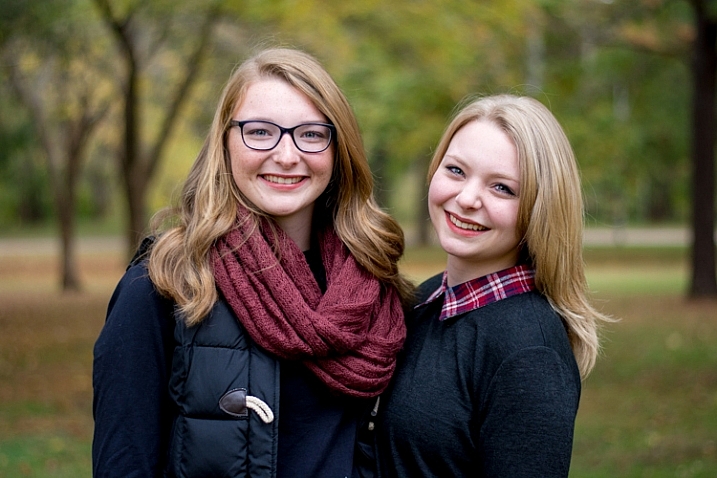
    five-minute-lightroom-portrait-processing-step2-color

    This image is already more vibrant than the initial picture even though most of the adjustments were very basic.

    Step 3: Sharpen

    After the color and tonal adjustments are finished, I almost always apply some degree of sharpening to the image. With portraits, it’s essential that the eyes be in focus and sharp, so the next thing after Basic adjustments, is to use the Detail panel to get the sharpening you want.
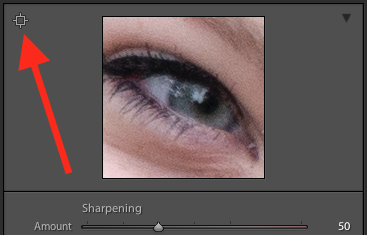
    five-minute-lightroom-portrait-processing-step3-sharpen

    Click the targeting symbol in the top-left corner and then click on your subject’s eye to get a zoomed in view, then adjust your sharpening accordingly. I usually start with a value of 50 and then tweak additional parameters like Radius or Detail if I need to, but this basic adjustment is quick and usually gets me right near where I want.

    I also apply a mask to the sharpening so it doesn’t apply to areas like faces. This helps keep the eyes sharp without adding unwanted texture to people’s skin. If you hold down the ALT key while you click the Masking slider you will see something like this (below). The white areas are where sharpening will be applied, the black areas will not. Use this to decide how far you want to take the masking on your portrait.
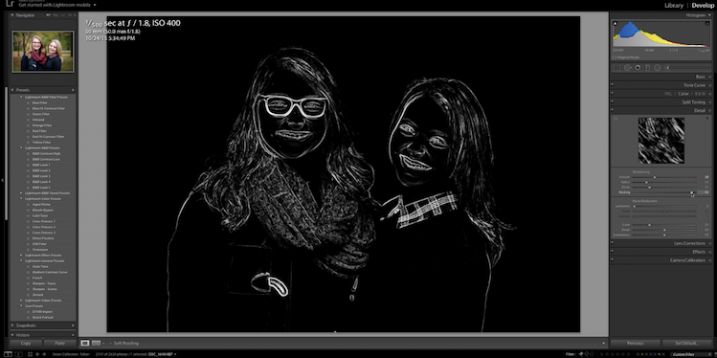
    five-minute-lightroom-portrait-processing-step3-sharpen-mask

    Step 4: Vignette

    This one is a bit controversial – some people like vignettes, and some think they are an abomination unto modern photography, but as I said in the beginning this is all about finding a style and workflow that works for you. I usually add a slight vignette to my portraits, but if that’s not your thing then you can skip this step altogether. It’s not part of everyone’s five-minute workflow but it fits neatly in with mine, which is why I’m including it here. I only use a little bit of highlight priority, dark vignette, and try to keep the effect subtle.
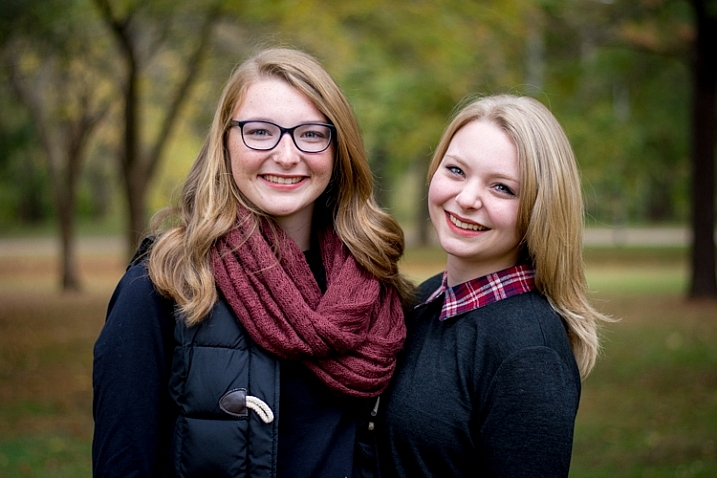
    five-minute-lightroom-portrait-processing-step3-vignette

    That’s it – finished

    Doing these four steps won’t always lead you to a finished portrait, but as the title of this article implies, you can usually get to a very nicely-edited portrait in under five minutes with these simple steps. You might have additional adjustments like adjustment brushes, spot removal, or red-eye corrections to do afterwards, but this will get most of the essentials out of the way.

    five-minute-lightroom-portrait-processing-step1-import

    Before

    five-minute-lightroom-portrait-processing-step3-vignette

    After – subtle but you can see the differences

    Save your settings as a Preset

    One final way to speed things up even more is to create a preset based on your workflow, which you can then apply to all photos on import.
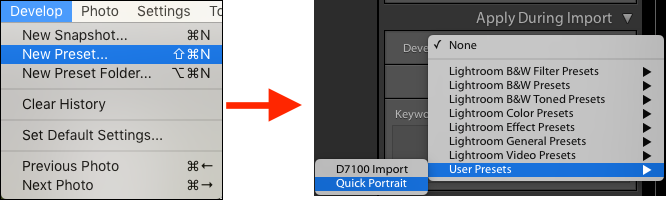
    five-minute-lightroom-portrait-processing-new-preset

    If you take this angle, be sure to err on the side of caution and be a bit more conservative with your edits when creating the preset. You probably won’t want want to apply the same dramatic alterations to every single photo, but if you do find yourself reusing the same workflow over and over it might be worth your time to do an import preset.

    Alternatively, you can create a preset and apply it at will after import by right-clicking on any photo in the Develop module, and choosing your preset from the “Develop Presets” shortcut (or find it in the Develop Presets panel on the left side panel of Lightroom).

    What quick portrait processing tips work for you? Are there any specific actions you have found that save you a great deal of time? Share your thoughts in the comments below, and any example images of what your finished portraits look like are always welcome.

    googletag.cmd.push(function() {
    tablet_slots.push( googletag.defineSlot( “/1005424/_dPSv4_tab-all-article-bottom_(300×250)”, [300, 250], “pb-ad-78623” ).addService( googletag.pubads() ) ); } );

    googletag.cmd.push(function() {
    mobile_slots.push( googletag.defineSlot( “/1005424/_dPSv4_mob-all-article-bottom_(300×250)”, [300, 250], “pb-ad-78158” ).addService( googletag.pubads() ) ); } );

    The post How to do Basic Processing on a Portrait in 5 Minutes Using Lightroom by Simon Ringsmuth appeared first on Digital Photography School.
    Digital Photography School

  • dPS Writer’s Favorite Lens: Rokinon 14mm f2.8

    “What do you mean it’s a manual lens?”

    That is usually the first response I receive when I tell people about one of the favorite lenses I keep in my bag: The Rokinon 14mm f/2.8. I understand their confusion. I never dreamed that I would succumb to the seeming devolution of using fully manual lenses.

    Allow me to attempt to dispel the myth that manual focus/aperture lenses are difficult, and ungainly in the field. In mere months the Rokinon 14mm f/2.8 has quickly became a workhorse of my photo arsenal – let me tell you why. Grab a tissue, because it is a love story.

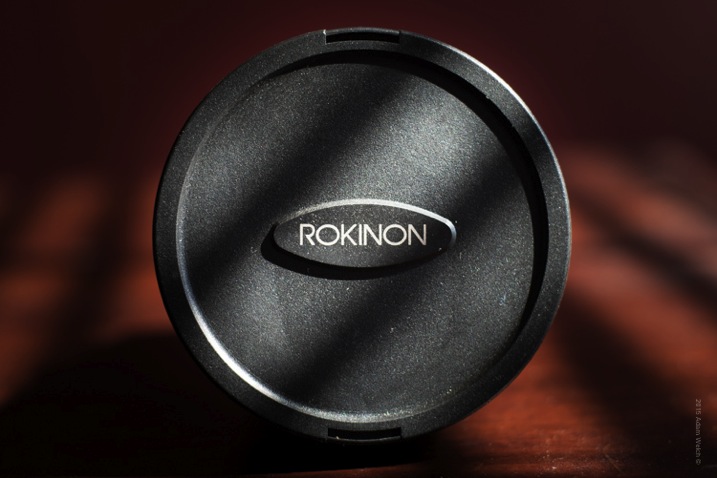
    Lens Logo

    When I say that the Rokinon is a fully manual lens, what I mean is that there is no autofocus, and that the aperture must also be selected manually, using an aperture ring. This is a sticking point for most photographers, who have only used fully automated lenses. Personally, I have used fully manual legacy lenses for years, and have come to love the tangible control they require while I’m shooting. I really feel connected to the experience, more than I do when using an autofocusing lens.

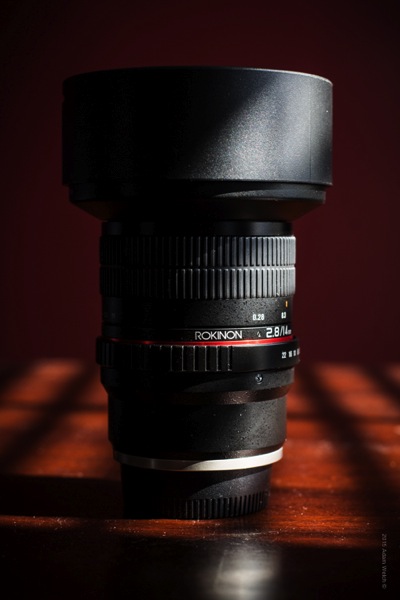
    Lens Full

    I will still admit, however, that a fully manual lens is not always ideal for every situation. So what type of photography suits the Rokinon best? The reason I purchased this lens in the first place was because I needed a fast, wide-angle lens, that can function as a main piece of glass for my astrophotography work. I find myself aiming my camera toward the sky more and more, so I really needed a quality lens that could serve as my go-to for most, if not all, of my nightscapes.

    The wide-angle view, and relatively large aperture of f/2.8, makes the Rokinon ready-made for night photography, but of course, it is also a great tool for ultra-wide landscape shots. Some may find the 14mm focal length to be just a little too wide for a general purpose landscape lens, but it is most definitely capable of filling the role.

    The most incredible quality about the Rokinon 14mm f/2.8 is just that, its quality. For the price, I can honestly say I have never encountered such a well-made lens, that produces tack sharp results throughout its aperture range. My initial test shots surpassed any expectations I could have hoped for from such a budget lens. Reading comments and testimonials from other users of the lens really left me with a healthy dose of, it’s too good to be true, doubt lingering in my mind.

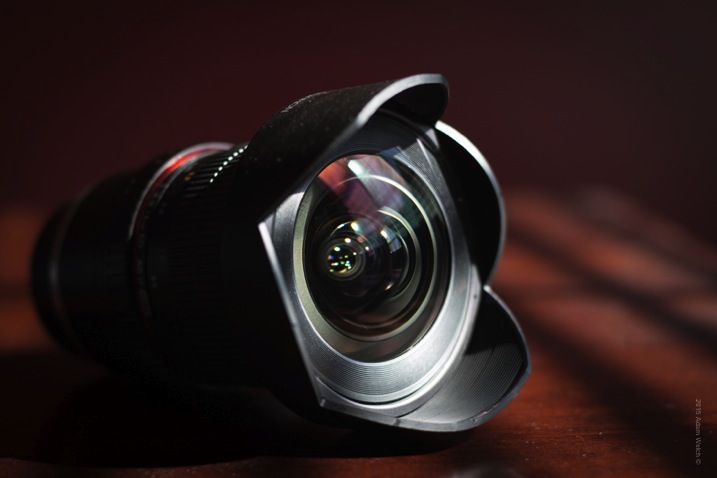
    Lens Element

    The quality of the build, and the subsequent image sharpness, are virtually on par with lenses which cost literally ten times as much as the Rokinon. I’m not suggesting that a lens with an average cost of $ 324 will be exactly the same as a lens costing $ 1,300 – but the gap between price and performance is, for lack of a better word, incredible. The aperture ring is comfortable to use, and produces a click at each f/stop, marking that is solidly satisfying.

    Something that I really like about the Rokinon is the focusing ring. I has a very long travel when acquiring focus; meaning that adjusting occurs relatively slowly. This allows you to achieve tack sharp focus while shooting with the lens wide open at f/2.8, and makes honing in on stars very easy without over or under focusing.

    Sample 2

    A common point of discussion concerning the Rokinon, in regard to its suitability for night photography, is the extreme low occurrence of “coma” when imaging the stars. Coma refers to an optical phenomena called “comatic aberration” (not to be confused with chromatic aberration). Coma is the distortion of small points of light when the light rays enter the lens at sharp angles, which makes small points of light, such as stars, appear to look like comets with small tails. Coma is amplified by imperfections in the lens geometry itself, or in the lens elements, and usually gets worse the further you move from the center of the lens. Yet strangely enough, the Rokinon excels in low coma aberrations, even to the point of OUTPERFORMING higher priced lenses of the same focal length and aperture ranges.

    The Rokinon 14mm f/2.8 lens is one that I have grown to love in a relatively short time. The majority of my work revolves around landscapes, and shooting at wide-angles, often in low light. The Rokinon fills the requirements of my shooting needs, and then some.

    Sample 3

    The full manual functionality of the lens could be odd if are not used to shooting that way, but for me I find it in no way slows me down, or hinders the quality of my images – in fact quite the opposite. The build quality, sharpness, low-light performance, and low coma are bundled together at a price that hovers in the $ 320 USD end of the pool.

    In my opinion, if you are looking for a great landscape and astrophotography lens, or if you’re just wanting to get creative with wide angles, look no further than the Rokinon 14mm f/2.8.

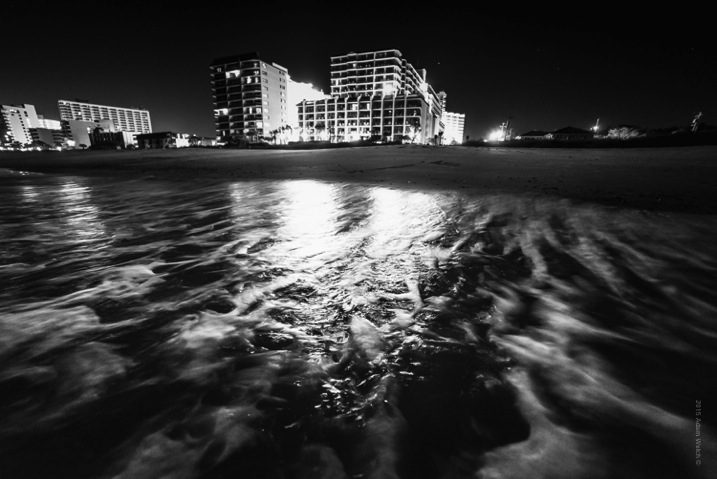
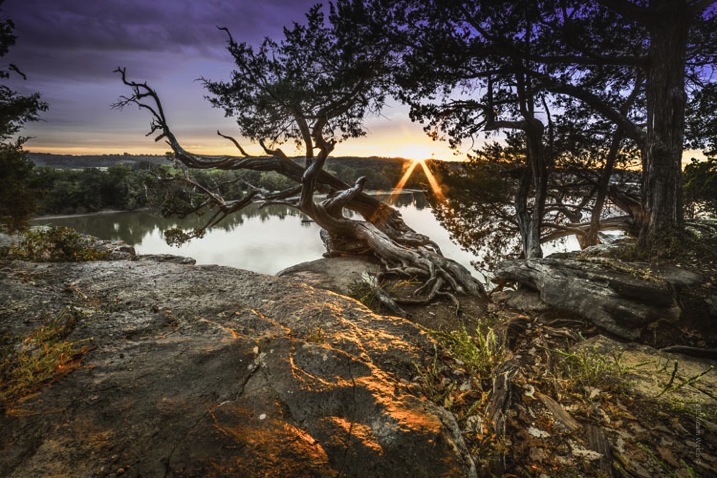
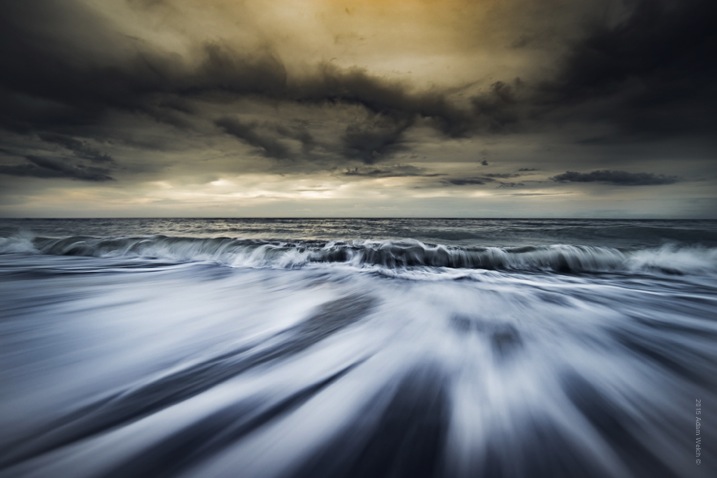
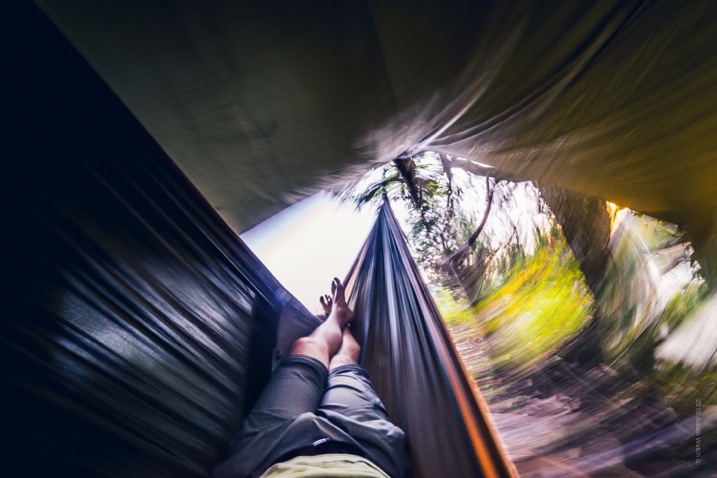
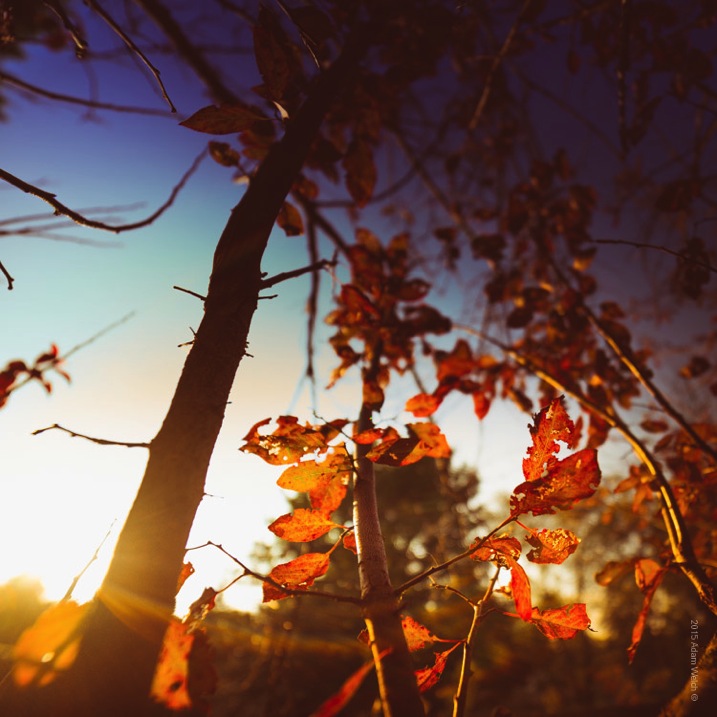
    What you’ve all been waiting for…here are some images shot using the Rokinon 14mm f/2.8! All images shot with a Sony A7r and processed using Adobe Lightroom CC.

    Sample 1

    Sample 4

    Sample 5

    googletag.cmd.push(function() {
    tablet_slots.push( googletag.defineSlot( “/1005424/_dPSv4_tab-all-article-bottom_(300×250)”, [300, 250], “pb-ad-78623” ).addService( googletag.pubads() ) ); } );

    googletag.cmd.push(function() {
    mobile_slots.push( googletag.defineSlot( “/1005424/_dPSv4_mob-all-article-bottom_(300×250)”, [300, 250], “pb-ad-78158” ).addService( googletag.pubads() ) ); } );

    The post dPS Writer’s Favorite Lens: Rokinon 14mm f2.8 by Adam Welch appeared first on Digital Photography School.

    Digital Photography School

  • 5 Tips to Help You Take More Natural Looking Portraits

    You’ve probably seen those beautiful portraits where couples are embracing, and laughing naturally off-camera, or two children are skipping up the beautiful country lane-way, bathed in the most perfect light. Everything in the image looks flawless, yet it still seems like the photographer just happened to be walking past at the exact right moment to capture the perfect shot.

    So why is it when I try and capture those perfect candid moments someone always has their eyes closed, hair is covering half of their face, or the lighting is wrong, or worse still an unsuspecting passerby in bright pink sweat pants walks through the background of the shot.

    Lifestyle 2

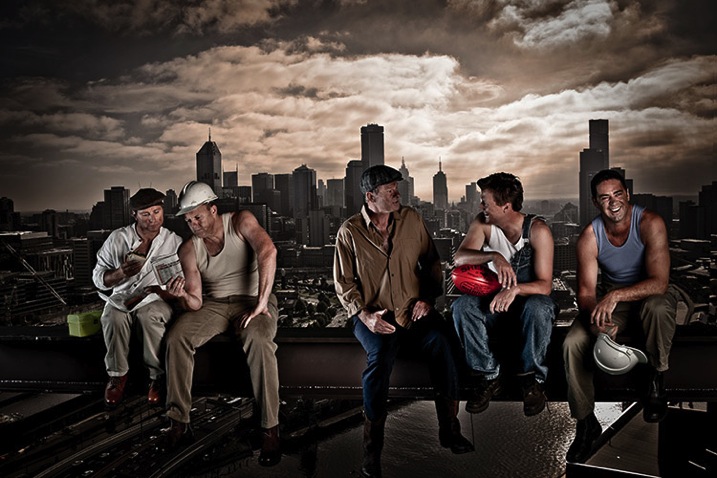
    In this image I gave each model one action to repeat over and over, to achieve a natural candid feel. (The Footy Show cast – image courtesy Nine Network Australia)

    Getting realistic and natural looking shots can be really tricky. If I set up the shot, and try and direct certain poses and reactions, the shots can look really stiff and contrived. If I try and get people to laugh on cue, it tends to look fake.

    I can always leave it to chance in the hope that the people I’m working with do something worth photographing but this isn’t always an option. So what’s the best way to get people to look natural on camera? Here are my five favorite and most successful techniques to help you take more natural looking portraits:

    1. Check your mood

    People tend to mirror, and reflect the mood of the photographer, so if you are having a bad day or feeling grumpy, then your models are going to pick up on that vibe. If you want happy and excited looking expressions, then you need to have that vibe yourself. If you are not feeling it before the shoot, for whatever reason (stuff happens right?) then do whatever it takes to put yourself in a good mood. Listen to a funny podcast on the commute in, call a friend who makes you laugh, read funny stuff. Eat half a jar of Nutella (don’t judge me).

    WW14 192

    2. If you want people to laugh genuinely, then give them something to laugh about

    I’m constantly wisecracking through the shoot, and ever ready to capture the expressions as the joke hits. The best way to do this is to set up your models in the position you want them, start with serious poses, and then throw in a funny remark between frames.

    You don’t even need to be that funny for this technique to work. You only really need two or three good jokes, or lines, that will crack a group of people up. I’ve been using the same lines for years and they still work. The important part is that you make them your own, and it’s something you would say, or feel comfortable saying.

    3. Laugh with people

    GB MEL14 750 Lifestyle 3

    To get this image of the Dalton family (above) I actually just started laughing with them. Laughing with your models is infectious. I felt a bit embarrassed doing it at the start, but soon discovered it was totally worth the genuine laughs, and reactions I got. (The Dalton Family/Foxtel)

    Another great trick to make models laugh is I actually ask my models to laugh, and will start laughing with them. This always starts out really awkward, everyone laughs uncomfortably, and at first they are laughing at me. But, after a while, everyone is laughing with me, and I’m always able to capture some genuine and beautiful laughing shots.

    4. Give each person something to repeat

    Lifestyle 4

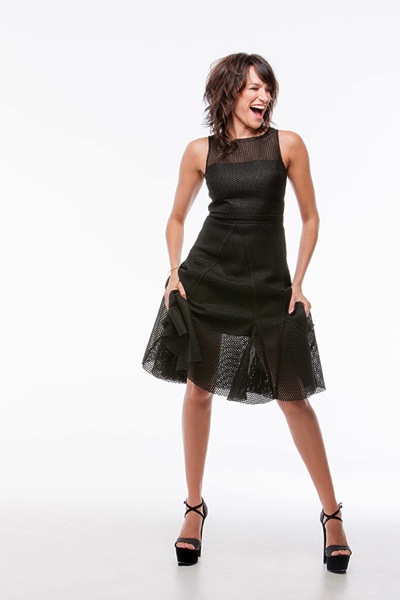
    In this image, I gave each of the girls a specific action and eye-line, while they walked toward my camera. The client wanted a fun, positive, natural-looking shot. If this sort of image is left to chance, all the girls end up looking in the same direction, or have the wrong facial expression.

    Try and give everyone in the group a set of actions to repeat as you shoot. This makes it easier to control the group, and keep the shape of the shot you are trying to get. I find I have greater success when I give each model only one action to repeat, and a direction to look toward.

    An example of the direction I gave for the girls walking above would be:

    • Girl A (use their real names or course!): Walk towards me, look into the camera and smile at me like you’ve just seen your best friend
    • Girl B: Walk towards camera and smile over at girl A
    • Girl C: Tell a story, and gesture with your hands and look over at girl B
    • Girl D: Laugh to yourself and walk towards camera

    5. Keep talking, coaxing, encouraging, directing

    People perceive silence from a photographer as a sign that you are unhappy with what they are doing.

    PPTS Women 0035 PPTS Men 0026W

    What’s your favorite technique for getting natural looking portraits? Do you have any great tricks we could all try? I’d love to hear about them. Please share any others in the comments below as well as your images of natural looking portraits you’re proud of.

    googletag.cmd.push(function() {
    tablet_slots.push( googletag.defineSlot( “/1005424/_dPSv4_tab-all-article-bottom_(300×250)”, [300, 250], “pb-ad-78623” ).addService( googletag.pubads() ) ); } );

    googletag.cmd.push(function() {
    mobile_slots.push( googletag.defineSlot( “/1005424/_dPSv4_mob-all-article-bottom_(300×250)”, [300, 250], “pb-ad-78158” ).addService( googletag.pubads() ) ); } );

    The post 5 Tips to Help You Take More Natural Looking Portraits by Gina Milicia appeared first on Digital Photography School.

    Digital Photography School

  • One Compositional Technique to Transform Your Landscape Photos

    GreenRocks

    Turning the corner from taking snapshots into taking actual compositions is a hard thing to do. It doesn’t come naturally, and it takes experience. Another reason it is difficult to learn composition is that there is no one, hard and fast rule. You can get caught up in looking for various shapes, patterns, leading lines, and other compositional elements until your head is spinning.

    To avoid all of this, I want to share one concrete technique for you to use when you are out shooting landscape photos. It is one way to go about setting up your shot, that will give you a path to setting up a successful composition. Of course, it isn’t the only way to set up your shot, and you won’t use this all the time, but it is great for helping when you are stuck.

    Mushrooms

    And the tip is . . .

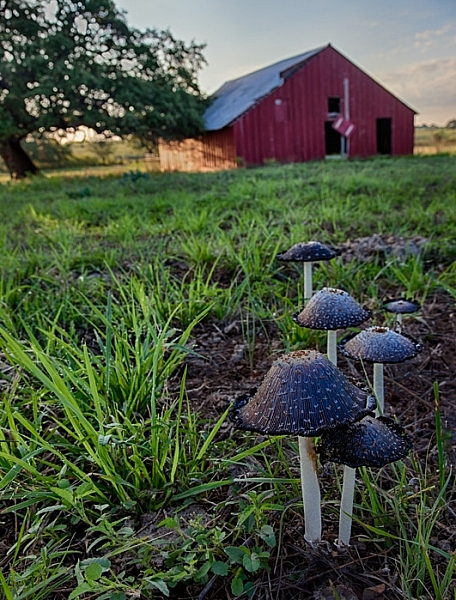
    . . . the next time you are out shooting it a scenic location, just put on your widest angle lens and get right behind something on the ground to take the shot.

    I mean right behind it. That something on the ground can be anything from a flower, to a rock, to a pattern in the sand. It does not matter. What matters is that you are down on your knees with your wide-angle lens right behind it.

    Clogher

    Why it works

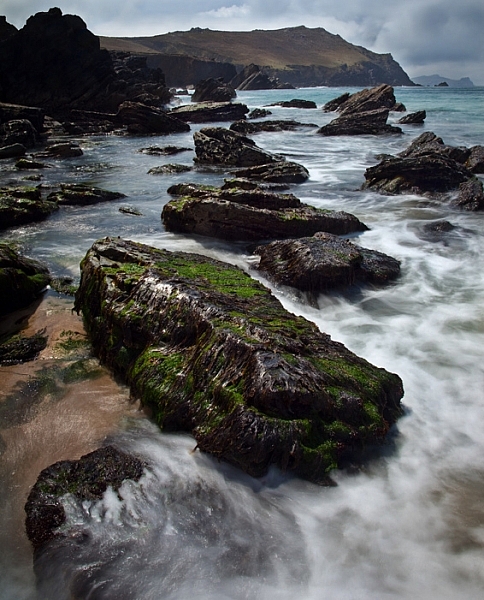
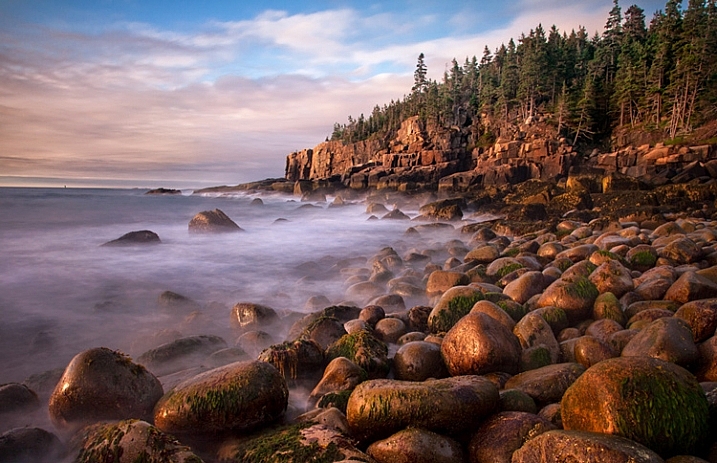
    The wide-angle lens will give the foreground object an exaggerated sense of proportion, but will also pick up the background. By getting right behind something, you are adding a subject to your picture. You are creating a center of interest. You are going beyond just showing the general scenery. The background will still be in your picture as well, you just do not need to focus on that.

    Another benefit is that it gives the viewer a sense that they can walk into the picture. It is providing a real foreground, that adds depth and interest to your photo.

    HydePark

    What typifies a snapshot, is standing at eye level trying to capture the entire scene before you. For many of us when we are just starting with photography, that just intuitively seems like the way to take pictures. We want to capture the whole scene, and not have it blocked by something on the ground immediately in front of us. The problem is that there is no foreground, subject, or center of interest to speak of. In addition, you are presenting the world in the exact same way as the viewer is used to seeing it, which is bound to be rather boring to them.

    Acadia-low

    Putting the tip into action

    How you determine what items on the ground will work as your foreground elements, that is the hard part. There is no right answer. You will just have to look. In fact, it will not be obvious even when you are out in the field looking around. There are times when you might have to walk around while looking at the LCD in Live View mode, or with the viewfinder to your face to find something on the ground to use as a foreground.

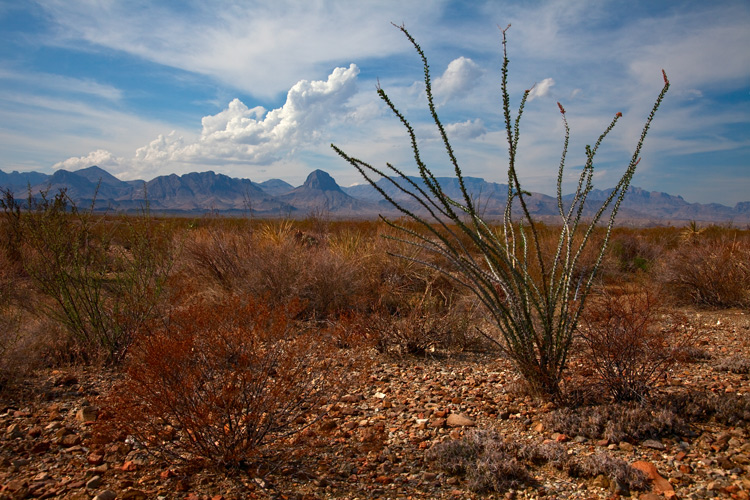
    BigBend

    Here are some examples of things you can use as foregrounds in different contexts:

    • When photographing water – use a reflection in the water
    • When at the beach or desert – find a pattern in the sand
    • When photographing creeks or coasts – use rocks
    • At midday – use shadows
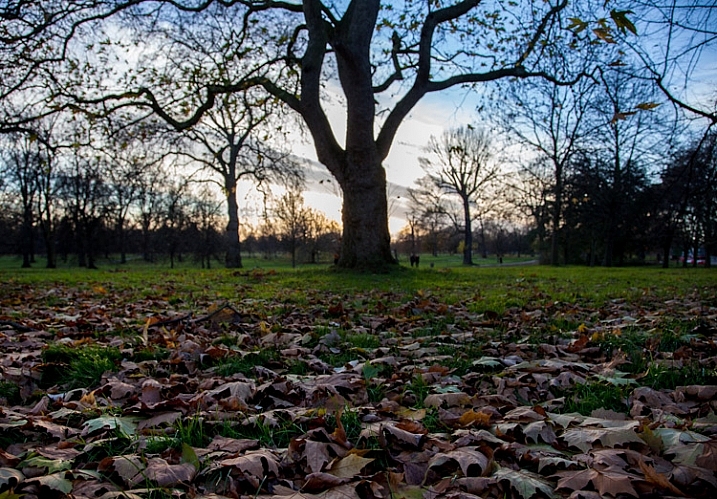
    • In the fall – use leaves

    There are obviously a variety of subjects you can use. Go out and try it next time you are shooting, and if you come across a good item to use in the foreground, leave it in the comments and share your images with us.

    googletag.cmd.push(function() {
    tablet_slots.push( googletag.defineSlot( “/1005424/_dPSv4_tab-all-article-bottom_(300×250)”, [300, 250], “pb-ad-78623” ).addService( googletag.pubads() ) ); } );

    googletag.cmd.push(function() {
    mobile_slots.push( googletag.defineSlot( “/1005424/_dPSv4_mob-all-article-bottom_(300×250)”, [300, 250], “pb-ad-78158” ).addService( googletag.pubads() ) ); } );

    The post One Compositional Technique to Transform Your Landscape Photos by Jim Hamel appeared first on Digital Photography School.

    Digital Photography School

  • dPS Writer’s Favorite Photography Gadgets

    We sure do love our photography gadgets, so I thought it would be fun to see what things our dPS writers like to have in their bags. Things that are super handy to have – above and beyond the obvious camera and a lens.

    Eddy 1

    By Eddy 1

    This is what they a few of them had to say (in alphabetical order by last name, just so there are no favorites):

    Helen Bradley

    • Memory Card Carrying Case – Black / Wallet / Holder / Organizer / Bag – Storage for SD SDHC CF xD Camera Memory Cards With (5) Clear SD Jewel Cases & Everything But Stromboli Lanyard

    James Brandon

    • Opteka RC-3 Wireless Remote Control for Sony Alpha line) – A little $ 7 remote that works for the Sony Alpha line. Great alternative to the expensive Sony option, and it hasn’t let me down yet. Great for long exposures whether it’s 30 seconds or 30 minutes.
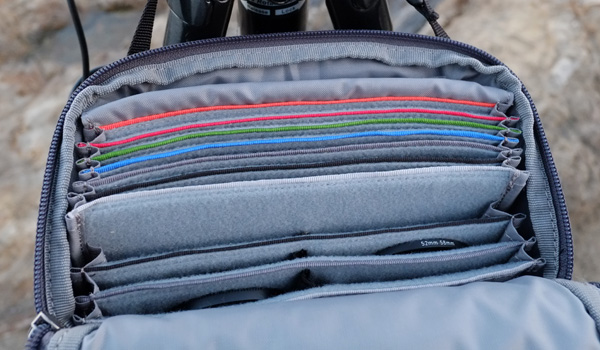
    • Mindshift Filter Hive – An extremely well-made filter pouch from the makers of the Rotation 180 backpack. Fits all of my filters with room to spare and can easily be hung over my tripod while out shooting, for quick and easy access.Filter Nest by Mindshift Gear review
    • Coast HP14 High Performance Focusing 629 Lumen LED Flashlight – The best flashlight you’ll find for light painting. Puts out a clean, daylight balanced, light source at 339 lumens and runs on AA batteries. Push/pull focus mode let’s you easily focus the beam, or scatter it, and has two brightness modes (full power and low at 56 lumens).

    Meredith Clark

    • Professor Kobre’s Lightscoop Standard Version Bounce Flash Device – Universal Model – When I first started and only had a Rebel XS and a kit lens, the Lightscoop was amazing for taking photos inside our house. It was a big improvement over the camera’s flash, and the $ 30 price tag felt do-able even when we were broke newlyweds.

    Leanne Cole

    Carl Berger

    By Carl Berger

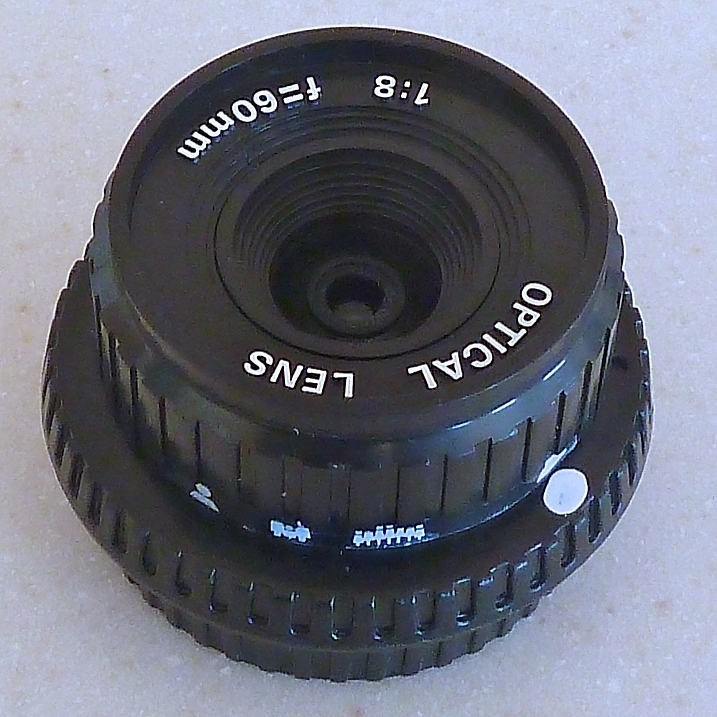
    • Holga Lens for Nikon – Red – The only gadget thing I can think of is the plastic hoya lens I bought which I have some fun with from time to time.
    • I also have some apps on my phone I use a lot for photography, Star Walk 2, Sunrise Sunset, Phases of the Moon, and TPE.

    Ben Evans

    • Neewer 43-inch / 110cm 5-in-1 Collapsible Multi-Disc Light Reflector with Bag – Translucent, Silver, Gold, White and Black – a reflector is just incredibly useful.
    • Leatherman 831426 Wingman Multi-Tool – a multi tool has proven itself invaluable over the years for all sorts of tasks.
    • Extreme Pegs Stainless Steel Clothespins – 20 pack – Lifetime Guarantee – proper pegs: they’re not only great for pinning clothes but also hanging backgrounds, reflectors etc.

    IMG_2208Tim Gilbreath

    • Canon Remote Switch RS60 E3
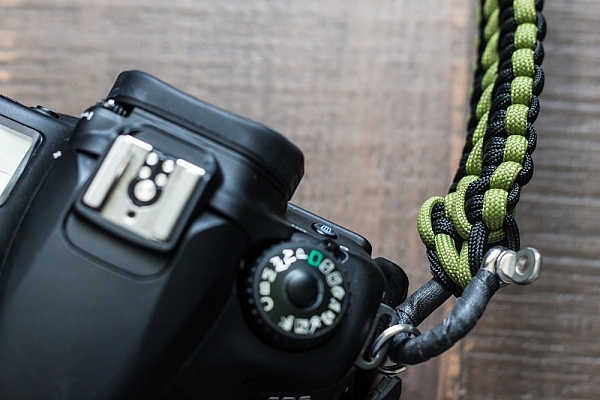
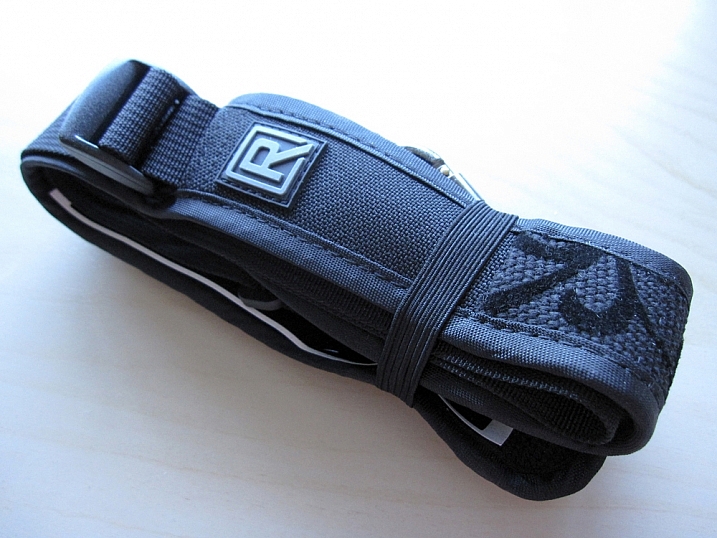
    • Nitz custom handmade camera strap – look for a review of this on dPS soon (see right)!

    Ivo Guimarães

    • Manfrotto 5001B 74-Inch Nano Stand – Black – I use these mainly for off-camera flash support and I really like their portability and lightweight.
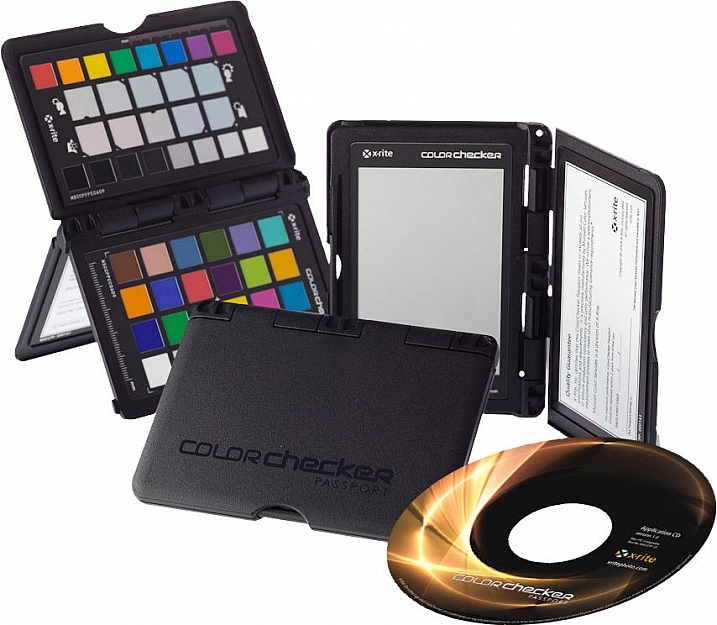
    • X-Rite MSCCPP ColorChecker Passport – Color Checker Passport – I use it mainly for portrait photography, it’s a great help to correct skin tones.
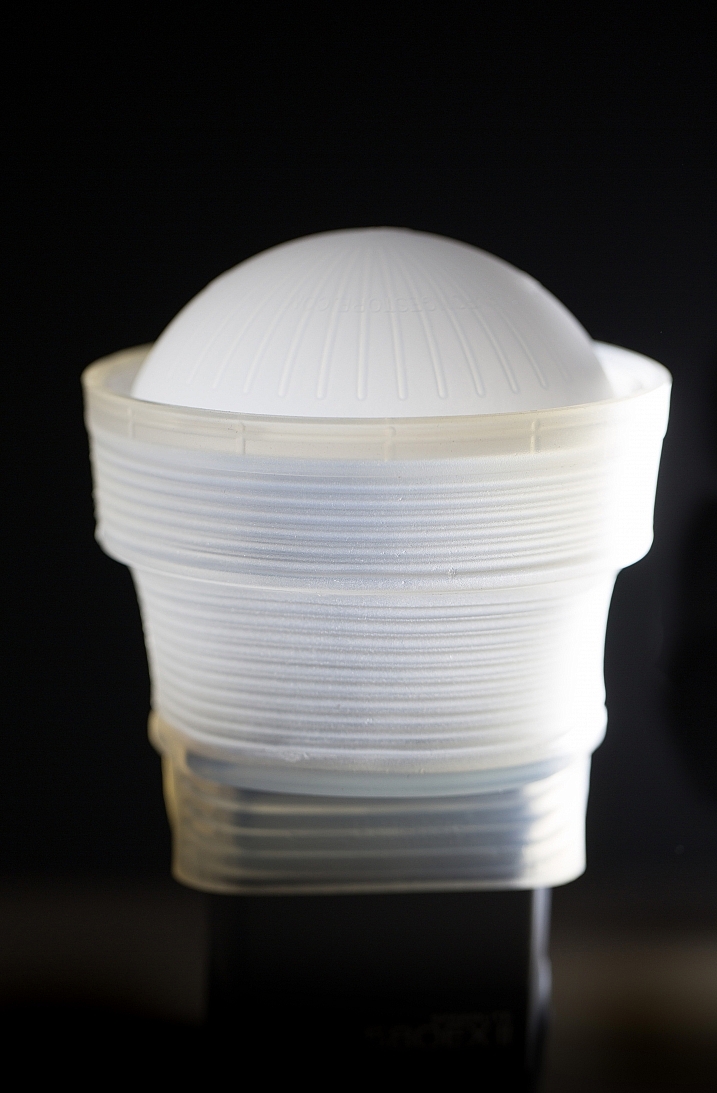
    • Gary Fong Collapsible Speed Mount Light Sphere (White) – I use it for on camera flash diffusion and avoid harsh shadows.

      Keith Williamson

      By Keith Williamson

    Jim Hamel

    • Alpine Innovations Spudz Classic Microfiber Cloth, Screen Cleaner and Lens Cleaner – Somebody else mentioned micro-fiber clothes, but I like the clip-on ones because you can attach them to your camera strap so you never have to hunt through your bag to find it.
    • B+W 77mm ND 3.0-1,000X with Single Coating (110) – 10 stop ND filter: Whenver there is water in the scene, it is a safe bet I have this filter on my camera to smooth it out. Even when there is not water, it creates movement in the skies.

    Lea Hawkins

    • Nikon ML-L3 Wireless Remote Control – Well, I’m not really into gear or gadgets. The only gadget I have is a remote shutter release, or “The Clicky Thingy” as we refer to it in the studio. Mainly used to avoid camera shake on long exposures, and occasionally to amuse/relax portrait subjects by telling them I am so confident in them as a portrait subject that I don’t even need to look as I click over my shoulder, with my back to them and the camera.
    • Other than that, I’d say any small flash light for light painting and my mobile phone camera with different apps. The latter being the most useful of the three, I use it on almost every shoot.

    Darlene Hildebrandt (that’s me)

    • Promaster 77mm Variable Neutral Density Filter – I don’t use a lot of gadgets or filters but I always have this one in my bag. I use it to shoot waterfalls, or to get a larger aperture in bright sunlight.
    • Promaster Go! Universal Digital Battery Charger – this thing is a life saver! It is a battery charger on steroids because it has an internal battery itself. Plug it in and charge it up, and you can then charge about 4-5 batteries on the road, while driving, or away from electricity. Great for travellers or back country hikers.
    • Pacsafe Carrysafe 200, Black, One Size – Another travel must have item, especially if you visit third world countries where your camera is equal to a year’s salary for some people. This strap is slash proof, and locks so they can’t just slide it off without your knowledge. Keeps your camera safe – I have a purse made by the same guys too!
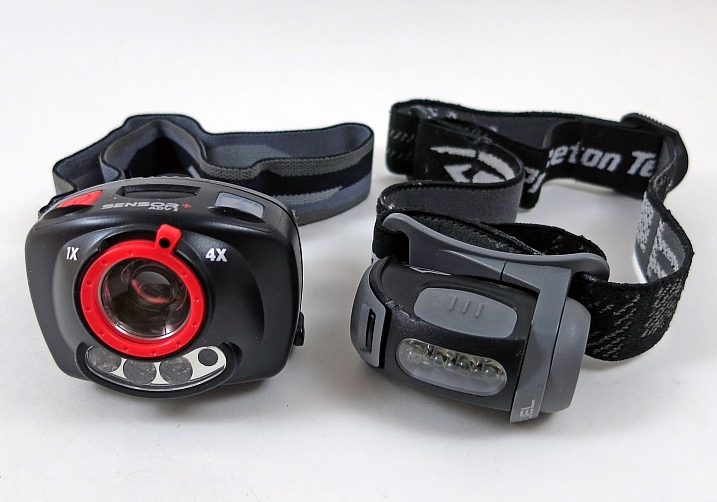
    • A headlamp! I always have one in my bag for night shooting so I can use it to see, or do light painting.
    Joe Loong

    By Joe Loong

    Daniel Korzeniewski

    • Peak Design CapturePRO Camera Clip – Great for quick access to the camera on the go. I can attach it to the strap of my shoulder bag, a belt, or to the straps of a backpack. It can be easily attached to almost anything and your camera is always handy.
    • MagGrip – One the most clever ways to attach diffusers to any flash without being cumbersome, and they are always ready. I particular use the grids, the color gels and… MagBounce
    • NEEWER® 160 LED CN-160 Dimmable Ultra High Power Panel LED Light – This is a little but powerful LED light. I use it mainly as fill for portraits when shooting outdoors, I like the fact that is easy to see the effect right on your subject.

    Lynsey Mattingly

    • Dum Dum Pops 85.5 oz, 500-Count – Never did I think I would be known as The Lollipop Lady more than a photographer, but the promise of one of these gets me a lot of street creed in the 3-8 year old group.
    • Fujifilm Instax Mini 8 Instant Film Camera (White)I still have a love affair with Polaroids, so I bring this for me when I see something and want it NOW, plus kids LOVE this if I can’t win them over with lollipops.
    • Kleenex® 3-Ply Pocket Packs Facial Tissues (8 packs of 10 tissues) – I don’t want to make anyone uncomfortable when the goal is for them to be comfortable, and offering someone a Kleenex seems a lot nicer than saying, “Hey, you totally have something in your nose!”

    John McIntire

    • Wil C. Fry

      By Wil C. Fry

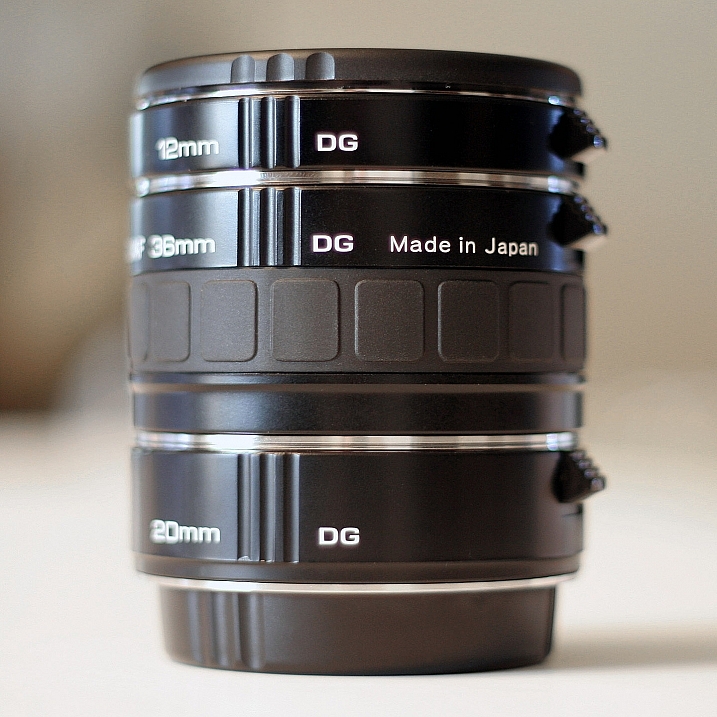
      Extension tubes – Non-mechanical Extension Tubes: They can be a bit finicky since you’re stuck with your lens’ widest aperture and only manual focus but they’re really cheap and so much fun to use.

    • Huion® L4S Tracing Light Box USB Powered with Adjustable Light Intensity – Light Box: Good as a light source that you can put your subject directly onto. Also, unlike my ipad, I’m willing to put food and liquid on it.
    • Index Cards: Always in my camera bag. Taped or rubber banded to a flashgun that’s pointed straight up, they can diffuse the light just as well as any of the much more expensive plastic diffusers on the market.

    Alex Morrison

    • A flash diffuser for macro shooting, made from a plastic milk jug (a possible future dPS DIY article)

    Gina Milicia

    • Knee pads ($ 10) can’t shoot without them.
    • Gaffer tape
    • 5-in-one reflector diffuser

    Suzi Pratt

    • Think Tank Photo Credential Holder V2.0 Short
    • Xlear Spry Power Peppermint Mints, 240-Count
    • Anker 2nd Generation Astro mini 3350mAh Lipstick-Sized Portable Charger External Battery Power Bank with PowerIQ Technology for iPhone, Samsung, GoPro and More (Black)

    Simon Ringsmuth

    • AmazonBasics Wireless Remote Control for Nikon Digital SLR Cameras – I’m normally not a big fan of off-brand stuff, but Amazon Basics is almost always really good quality. So far this remote is no exception.

    Danielle Werner

    Ariane Colenbrander

    By Ariane Colenbrander

    • BlackRapid RS2SW-1AS Women’s Camera Strap (Black) – This camera strap is a life saver. It keeps your camera secure to your hip, easy to bring up to your face without getting tangled, and you can drop it and it slides right down by your side. It keeps the camera out of your way when not using it, plus your neck will be happy that it’s not sore from shooting and traveling all day long
    • Zeiss lens wipes – They are so necessary when shooting all around the world. You never know what could get on those lenses when traveling. These wipes are great for all parts of the camera too.
    • Camera backpacks – This is ideal when you never know where you are going to be and when! Camera is always safe and secure. Plus it’s out of the way and always with you.

    Bruce Wonderlich

    • Hood Loupe – It can be hard to see the LED screen to check your focus, but with the HoodLoupe it is easy to see
    • Extra Large Microfiber Cleaning Cloths – 5 Pack – 8 x 8 inch (Black, Grey, Green, Blue, Yellow)

    Scott Wyden Kivowitz

    • X-Rite MSCCPP ColorChecker Passport – Being a colorblind photographer I find this tool, and its Lightroom software counterpart, essential to my everyday photography workflow. It helps me achieve the most accurate color.

      Jerry Liu

      By Jerry Liu

    • Trigger Trap – I always carry my TriggerTrap with me because it enables me to do much more than what is possible with a standard cable release. I can trigger by motion, sound and much more.
    • AquaTech Tripod Leg Pad – Set of 2, Soft Feel, High Abrasion Resistance – I didn’t want a permanent leg wrap for my tripod, and when I found these I was pleasantly surprised by their comfort and easy of adjustment.

    What are your go-to photography gadgets, or non-photography related ones? Please share in the comments below – we all might need a shopping list when we’re done!

    googletag.cmd.push(function() {
    tablet_slots.push( googletag.defineSlot( “/1005424/_dPSv4_tab-all-article-bottom_(300×250)”, [300, 250], “pb-ad-78623” ).addService( googletag.pubads() ) ); } );

    googletag.cmd.push(function() {
    mobile_slots.push( googletag.defineSlot( “/1005424/_dPSv4_mob-all-article-bottom_(300×250)”, [300, 250], “pb-ad-78158” ).addService( googletag.pubads() ) ); } );

    The post dPS Writer’s Favorite Photography Gadgets by Darlene Hildebrandt appeared first on Digital Photography School.

    Digital Photography School

  • How to use Color Grading for Effect and Tone Control in Photoshop

    Photoshop is a massive tool that can be used to do just about anything on your images. But, knowing how and when to use which tool can be daunting.

    In these two videos you can see how to use color grading with adjustments layers to make special effects and add or control color and tone in your images.

    This one from Clay Cook shows you how to “Color Grade like a Pro” as he walks you through two portraits as he processes them in Photoshop:

    In this second one from SLR lounge photographer, Lauri Laukkanen, goes through how it takes one image from camera to a fashion look using color grading:

    Lastly if you really want to put this information to use here’s an in-depth tutorial on using color grading to make a cinematic poster look to an image:

    Have you tried color grading before? Please show us your results below in the comments if you follow along and give it a go.

    googletag.cmd.push(function() {
    tablet_slots.push( googletag.defineSlot( “/1005424/_dPSv4_tab-all-article-bottom_(300×250)”, [300, 250], “pb-ad-78623” ).addService( googletag.pubads() ) ); } );

    googletag.cmd.push(function() {
    mobile_slots.push( googletag.defineSlot( “/1005424/_dPSv4_mob-all-article-bottom_(300×250)”, [300, 250], “pb-ad-78158” ).addService( googletag.pubads() ) ); } );

    The post How to use Color Grading for Effect and Tone Control in Photoshop by Darlene Hildebrandt appeared first on Digital Photography School.

    Digital Photography School

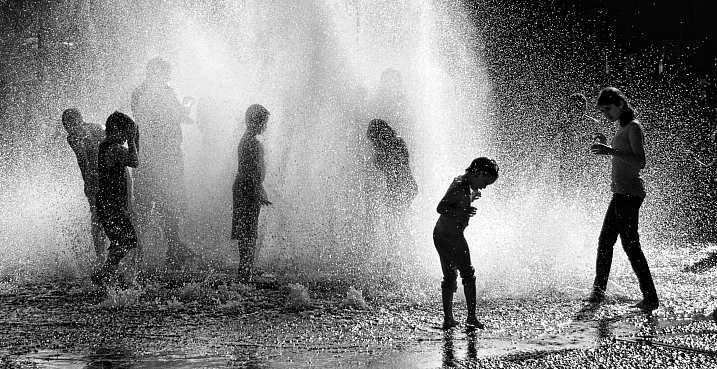
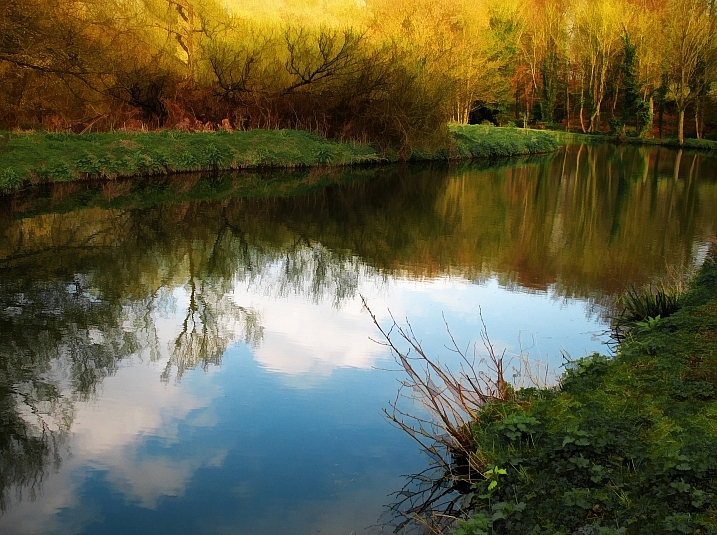
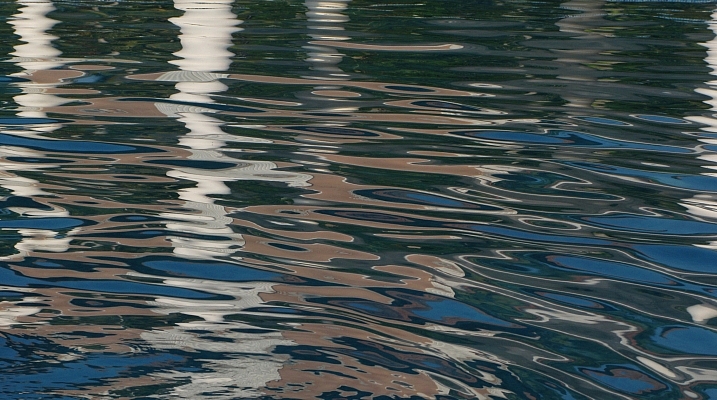
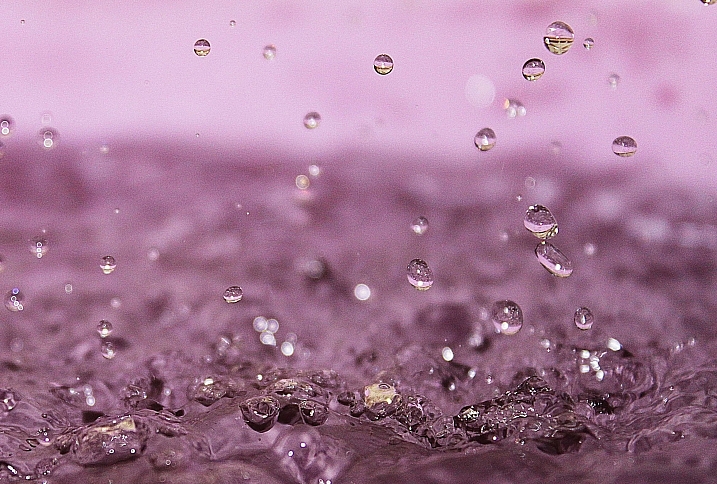
  • 30 Fastastic Wet and Wild Images of Water

    Water . . .

    It’s essential to life for all creatures on this planet. We drink it, we play in it, cook with it, and of course – we photograph it!

    There are many forms of water and many way to photograph it. Let’s look at how these photographers chose to do it:

    Sudipto Sarkar

    By Sudipto Sarkar

    William Warby

    By William Warby

    Southtyrolean

    By southtyrolean

    Christopher Chan

    By Christopher Chan

    Berit Watkin

    By Berit Watkin

    Matthew Paulson

    By Matthew Paulson

    CatDancing

    By CatDancing

    Maricel

    By Maricel

    Kyle Burkholder

    By Kyle Burkholder

    Bram Cymet

    By Bram Cymet

    Hege

    By Hege

    Movement Six

    By Movement Six

    Evelyn Berg

    By Evelyn Berg

    Alexander Rentsch

    By Alexander Rentsch

    Hasin Hayder

    By Hasin Hayder

    Janet Ramsden

    By Janet Ramsden

    Jimmy Brown

    By jimmy brown

    Ravas51

    By ravas51

    Susanne Nilsson

    By Susanne Nilsson

    Kurt:S

    By Kurt:S

    Pam  Link

    By Pam Link

    Barbara  Walsh

    By Barbara Walsh

    Peter Roome

    By Peter Roome

    Caroline

    By Caroline

    -Reji

    By -Reji

    Sightmybyblinded

    By sightmybyblinded

    Massmo Relsig

    By Massmo Relsig

    Hege

    By Hege

    Vern

    By Vern

    Tate Kieto

    By Tate Kieto

    googletag.cmd.push(function() {
    tablet_slots.push( googletag.defineSlot( “/1005424/_dPSv4_tab-all-article-bottom_(300×250)”, [300, 250], “pb-ad-78623” ).addService( googletag.pubads() ) ); } );

    googletag.cmd.push(function() {
    mobile_slots.push( googletag.defineSlot( “/1005424/_dPSv4_mob-all-article-bottom_(300×250)”, [300, 250], “pb-ad-78158” ).addService( googletag.pubads() ) ); } );

    The post 30 Fastastic Wet and Wild Images of Water by Darlene Hildebrandt appeared first on Digital Photography School.

    Digital Photography School

  • Weekly Photography Challenge – Water

    Water, water everywhere. Take a look at some images other photographers have done that involve water as the main subject.

    David Yu

    By David Yu

    Janet Ramsden

    By Janet Ramsden

    Susanne Nilsson

    By Susanne Nilsson

    Susanne Nilsson

    By Susanne Nilsson

    Weekly Photography Challenge – Water

    If you haven’t participated in the weekly themed challenge before, using the excuse, “I don’t live near that” – you can’t use that reason this time. You can literally find some water anywhere you live. Turn on the tap, find a river or stream, or even a fountain in the middle of your city will work. But do take on this challenge and go photography some water. Here are some ideas:

    • Ocean
    • Lake
    • Pond
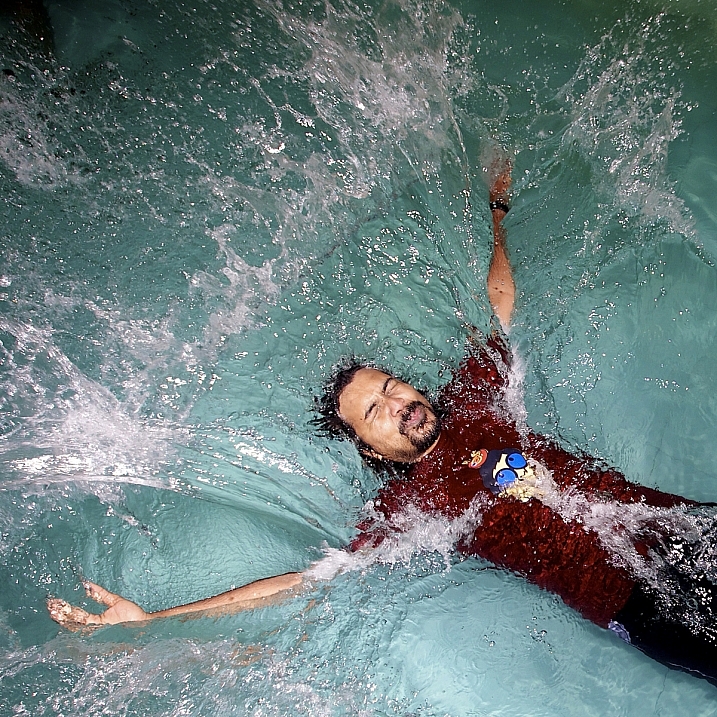
    • Swimming pool
    • Puddle
    • Tap water
    • Dew on a flower or spider web
    • A glass of water
    • Running water like a river or stream
    • A waterfall
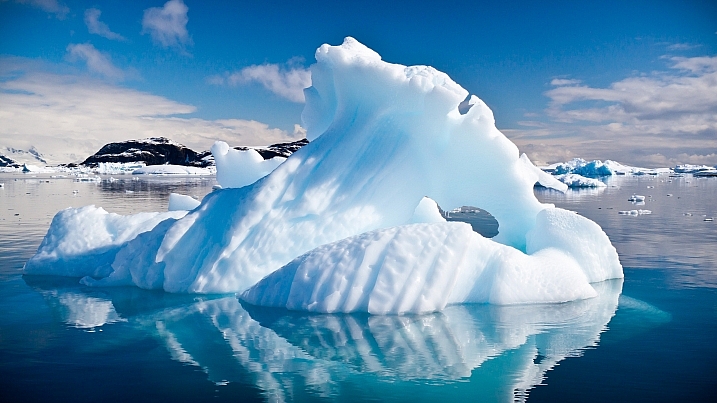
    • Even ice is water
    • A fountain
    • A splash
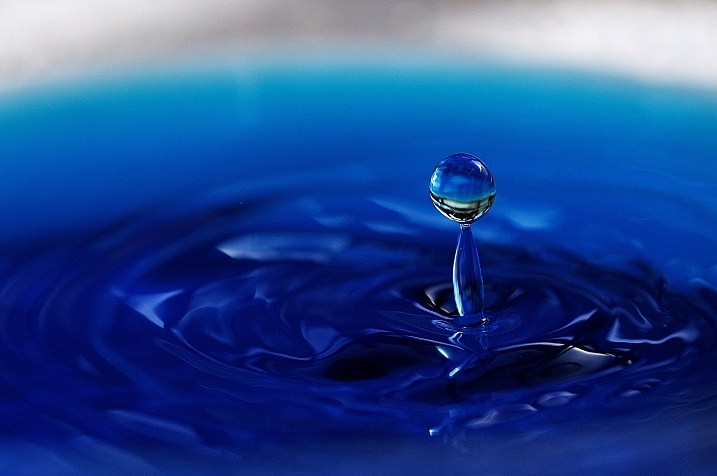
    • Water drops in mid-air

    Get creative! 

    Darlene Hildebrandt

    By Darlene Hildebrandt

    Darlene Hildebrandt

    By Darlene Hildebrandt

    Darlene Hildebrandt

    By Darlene Hildebrandt

    Darlene Hildebrandt

    By Darlene Hildebrandt

    Share your images below:

    Simply upload your shot into the comment field (look for the little camera icon in the Disqus comments section) and they’ll get embedded for us all to see or if you’d prefer upload them to your favourite photo sharing site and leave the link to them. Show me your best images in this week’s challenge. Sometimes it takes a while for an image to appear so be patient and try not to post the same image twice.

    googletag.cmd.push(function() {
    tablet_slots.push( googletag.defineSlot( “/1005424/_dPSv4_tab-all-article-bottom_(300×250)”, [300, 250], “pb-ad-78623” ).addService( googletag.pubads() ) ); } );

    googletag.cmd.push(function() {
    mobile_slots.push( googletag.defineSlot( “/1005424/_dPSv4_mob-all-article-bottom_(300×250)”, [300, 250], “pb-ad-78158” ).addService( googletag.pubads() ) ); } );

    The post Weekly Photography Challenge – Water by Darlene Hildebrandt appeared first on Digital Photography School.

    Digital Photography School

  • 10 Tips for Better Landscape Photography

    Landscape photography is a very popular genre and many amateur photographers start their hobbies doing it. There is, however, a lot more to it than just going out somewhere beautiful, putting your camera up to your face, and clicking the shutter button.

    Have you gone out and taken some landscape photos, then found that they didn’t look that good when you got home? Do you get lost when you go out, and don’t know what to photograph, or how? Here are 10 tips to help you get you do better landscape photography.

    leanne-cole-ten-tips-landscape-3611

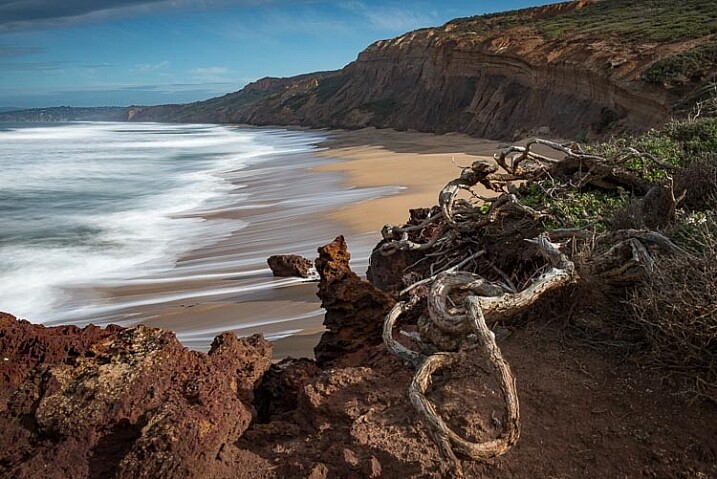
    A bush trying to grow on the edge of some cliffs show how harsh the environment is and leads you to the cliffs.

    1 – Work the scene

    One thing you see a lot of new photographers doing is walking up to a scene, taking one photo, and think they are done. However, a more experienced person will take a lot more photos, and spend time walking around and seeing what they can get from that scene.

    Think about different angles, and different heights. With digital you can take so many photos, and it won’t cost you anything, other than a few minutes. So work the scene, and see what else you can get.

    2 – Leading lines and patterns

    This is something that we all learn from the beginning, find a leading line that will take your viewer into the image. Fences, roads, or anything that is like a line, that starts at the side of the frame, and takes people into your image. It is the invitation to look at the photo.

    Patterns can be a great way attracting attention. If you notice a pattern somewhere, and take a photo of it, there is a good chance that your audience will also find it interesting. Patterns can be anywhere, in the ground, on the bark of trees, how they are planted. They can be fascinating.

    leanne-cole-ten-tips-landscape-3836

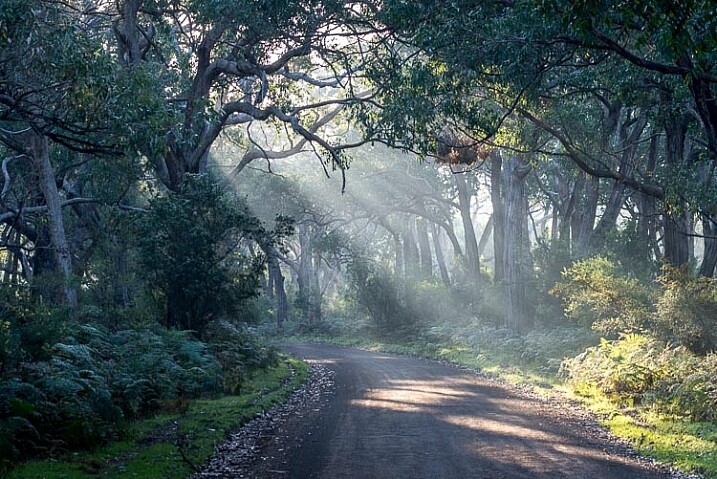
    Roads can be great leading lines to take your viewer into your image.

    3 – Time of day

    This is something that we all learn at the beginning, time of day is important. It is also dependent on the time of the year. Here in Southern Australia you can shoot all day long in winter. The sun is never high in the sky, the shadows are soft, and it is a great time of the year to take photos. On the other hand, summer is terrible. It is hot, the light is harsh, the shadows are sharp, and often the colors in your images can look bleached.

    Think about where you are, and what time of the day is best where you want to take photos. Some people prefer early morning, there aren’t many people around, and you can get what you want before the day starts. Others prefer later in the day, and don’t mind sharing their location.

    Some areas that you want to photograph will be better for sunrise, as you may not be able to get a sunset there. Or it could be the other way around. Many coastal areas on the east coast of Australia mean that is it almost impossible to get a sunset, so you need to get up early and aim for sunrise instead.

    leanne-cole-ten-tips-landscape-0122

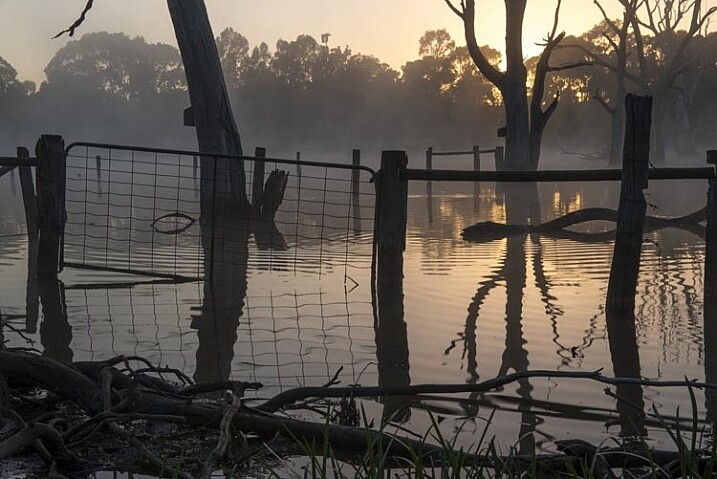
    Early morning can mean sunrise, but at certain times you can also get mist on water.

    4 – Look at your foreground

    The foreground is often forgotten when taking landscape photos, but sometimes what is right in front of you is exactly what you need to make your image stronger.

    Some images of landscapes can be a bit more interesting by adding a small plant or something that is in the front, close to the camera. It can also be a leading point to the scene at the back of the image.

    leanne-cole-ten-tips-landscape-7254

    The foreground plants give interest to the landscape behind.

    5 – Look at what other photographers do

    Without a doubt, one of the best things you can do is to look at other photographers, and take note of what they do. Don’t underestimate how much you can learn by looking at the work of others. Not just good or professional people, but also amateurs, you can see the good and the bad.

    Look work that you like and determine why you like it, exactly what it is that you think makes it work. Can you pinpoint what it is about that image that makes you jealous that you didn’t take it?

    Take notes of images that you don’t think are very good. Analyze them and see what it is that you find isn’t working. Learn from them, and make sure you don’t make the same mistakes.

    6 – Think about the seasons

    It’s very easy to go out one day and take photos of a particular place, then forget it exists, but what about thinking about other times of the year. Some places will look better in summer than they do in winter. Spring could be a time with lots of flowers, while autumn will give you colourful trees.

    Photographing the same place throughout the year can give you a different feeling to your images every time you go there.

    It is also a good idea to think about where you want to take photos, then consider what will be the best season to show it off. The mountains can look sparse and uninspiring in the summer, but in winter they are covered in snow; it adds a different dimension.

    leanne-cole-ten-tips-landscape-1050

    Autumn can bring lots of color to your landscape photography.

    7 – Look for the smaller landscape

    When you are out, it is very easy to put on a wide angle lens, and take all your photos with it. Most landscapes are wide vistas showing the scene that is before you. But, there are other ways to show what is there. Look around for objects or flora that you can use in the foreground. This is especially good if the subject is in the distance. It can give something interesting in front of your image.

    Try taking a zoom or macro lens with you. You might be able to photograph something like the flora. Don’t just zoom right in on flowers that may be growing on it, try considering the whole plant and where it is situated. It can you give it some context as to its environment. This can help you tell a whole other story at times.

    leanne-cole-ten-tips-landscape-7351

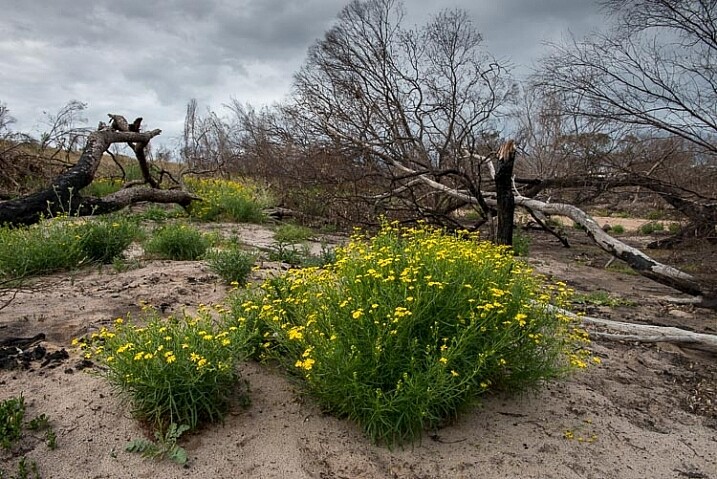
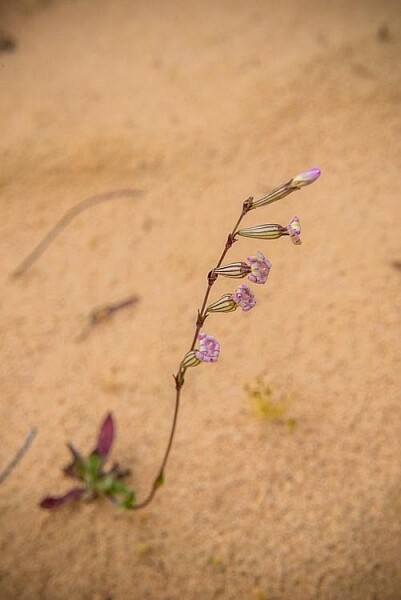
    Flowers trying to grow in sand helps to tell the story of the location.

    8 – What equipment do you need

    You don’t need anything special to photograph landscapes, a camera with a decent lens is enough. You can use a compact camera just as well as a DSLR, it is really up to you.

    If you are using a DSLR then you probably want a wide angle lens, or something a bit longer. Landscape photographers tend to use wide angles more, though many also use up to 200mm lenses as well. You don’t need the best camera that is available, and often it’s the lens choice that will give you the best results.

    A sturdy tripod is good to have. The best advice is to get the best you can afford, don’t skimp on the price, you will regret it later if you do. A remote shutter release is a great piece of kit to have as well, or you can use the self-timer on your camera.

    When you progress, and as you get more skilled at landscapes, the equipment list tends to grow. You will find yourself wanting items like filters for long exposures or better lenses. The list can be endless.

    9 – Tripod: when to use or not

    There is an opinion that if you are a serious landscape photographer, then you will always use a tripod, no matter what. If you are not, then you can’t be sincere about your craft.

    It’s one way of looking at it. But, so many new and experienced photographers, find it can be limiting, or stifle your creative flow; that you can’t move around easily when taking your photos.

    The short answer to this is that you have to feel comfortable when you are doing photography, so there is nothing wrong with not using a tripod. Though you also have to accept that, at times, you may not get the sharpest images – so it’s a trade-off.

    If you are shooting at night then a tripod is a must, especially if you don’t want noisy photos. A tripod means you can use the best settings on your camera to get the highest quality image.

    10 – Look for the story

    There is no denying that some places you go to will seem boring, and you will wonder why on earth you went there. It’s one of those times when you will want to consider other tips here, but one tip that can really help is to find the story of the area.

    Consider where you are, and why you went. Is there some history that you can see that still remains? How can you incorporate that into the image to show the story?

    In many places in Victoria, Australia, you can travel to a town and find very little there. The only thing there might be grain silos, and fields of crops in various stages of growth. Look at the silos up close, and see if you can photograph how long they have been standing there. Look for how they are used. There will always be railway tracks next to them, so shoot how they lead you to the silos (see tip #1 above). Maybe do one from a distance showing the silos standing tall in a flat country. The story becomes all about the silos and that countryside.

    Landscape photography is wonderful, and what you can take photos of is endless. Think about all the tips here and they should help you do your best landscape photography.

    Please share any other tips you have for landscape photography, and your images in the comments below. If you use some of the tips, let me know how they worked out for you.

    googletag.cmd.push(function() {
    tablet_slots.push( googletag.defineSlot( “/1005424/_dPSv4_tab-all-article-bottom_(300×250)”, [300, 250], “pb-ad-78623” ).addService( googletag.pubads() ) ); } );

    googletag.cmd.push(function() {
    mobile_slots.push( googletag.defineSlot( “/1005424/_dPSv4_mob-all-article-bottom_(300×250)”, [300, 250], “pb-ad-78158” ).addService( googletag.pubads() ) ); } );

    The post 10 Tips for Better Landscape Photography by Leanne Cole appeared first on Digital Photography School.


    Digital Photography School

  • 5 Tips for Striking Getting Ready Shots of Brides

    The Bride in her wedding dress, shy and tense, beautiful and alluring. She provides quite a conundrum for a wedding photographer. How does one work towards capturing the emotions that often rush over the bride as she prepares for holy matrimony?

    DPS2

    Over the years that I’ve shot weddings in India, I’ve come to appreciate the Bridal getting ready session. This is the calm before the storm when the bride will look her best, and it is the least interrupted time the photographer has with the bride. Below are a few tips and tricks I’ve honed that help me capture my brides at their best in some pre-wedding getting ready photos:

    1. Work with the most important person in the room.

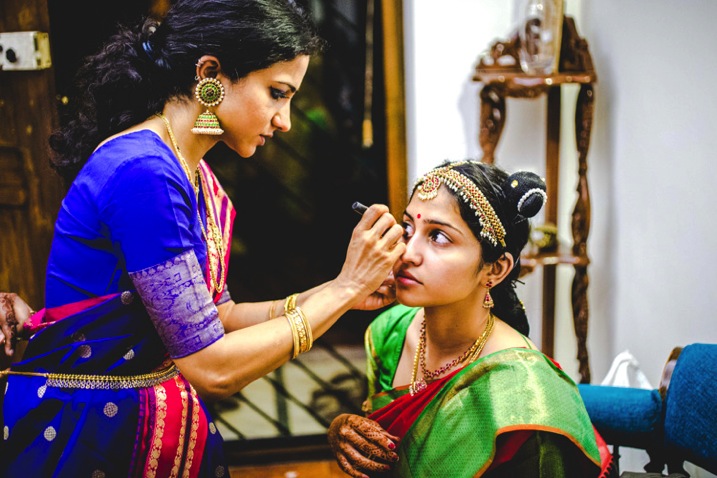
    The bride typically gets ready in a room in the presence of the make-up artist and supportive sister(s) and friend(s). In this group, the most important person is the make-up artist. Work with him or her to understand their work flow. Is she left handed or right handed? What is the order in which she does her stuff? Does she schedule her breaks??
    All this information is critical for you to capture the best angles, and moments, in the getting ready process. You don’t want to interrupt another wedding professional when she is in her zone. Respect her and together you can make the bride look her best and capture the process.

    DPS1

    2.The Three Perspective Rule

    Every wedding photographer has been taught to capture the subject from multiple perspectives. While I agree with this, I believe there are three specific perspectives that are critical for capturing the bride getting ready. They are:

    The Top Down

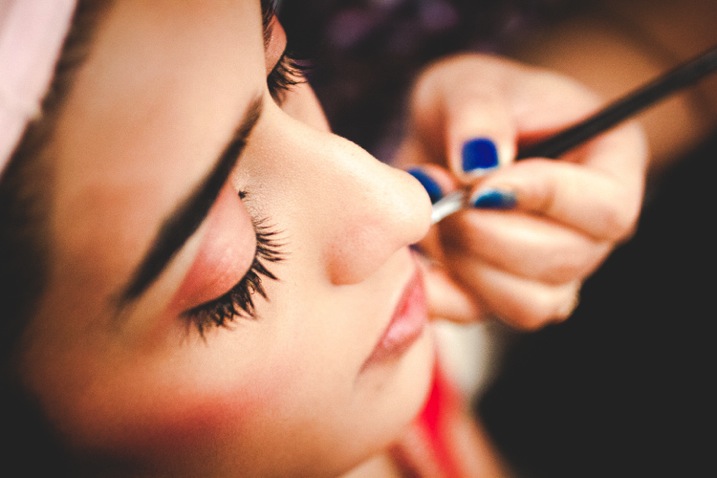
    These shots provide a god view of the process and often help focus the viewer’s eye on a specific aspect of the process. Below is a top-down of the eye liner getting done. A lot of clutter in the room (weddings are messy !) can be worked around and simple moments like the addition of lipstick or the adjustment of a dress can be shown with a certain dramatic flourish.

    DPS3

    The Bride’s View

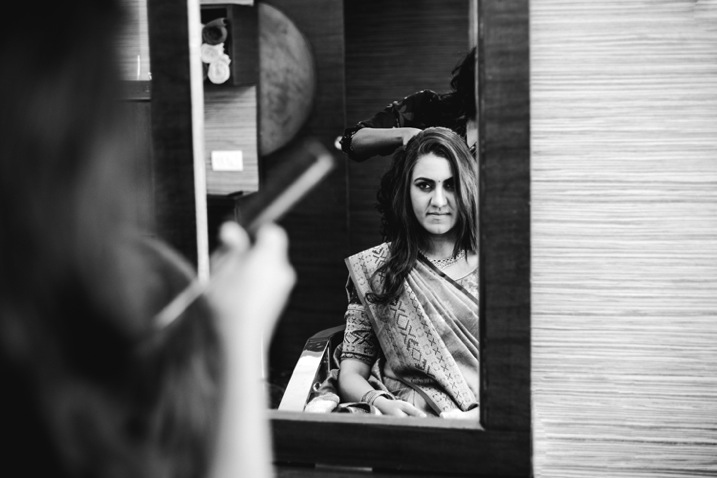
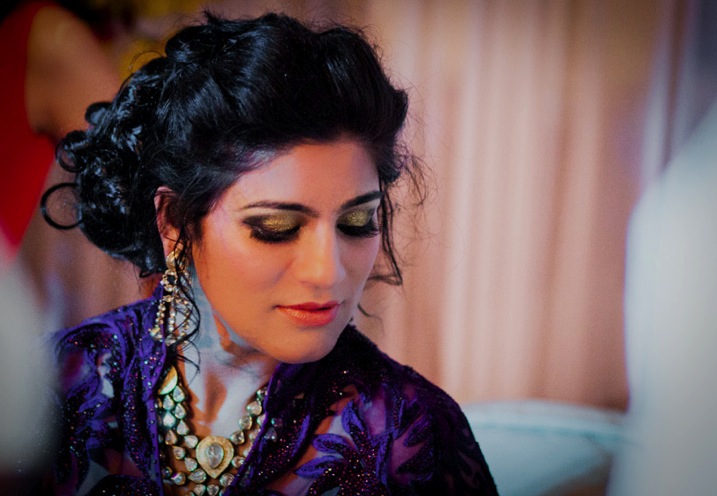
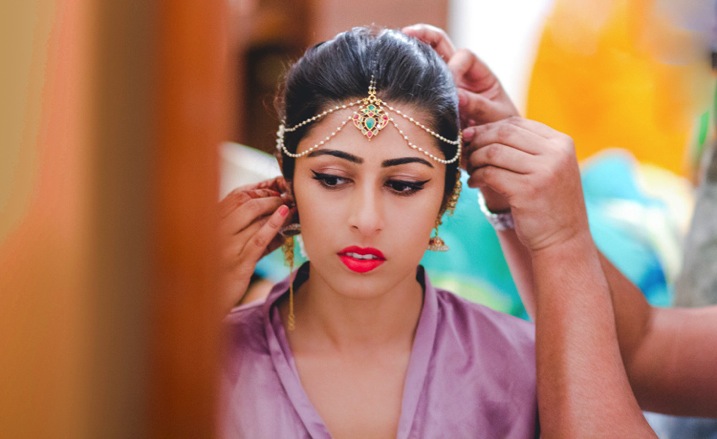
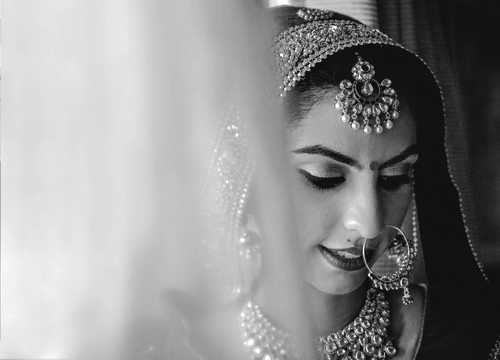
    Do not forget that the most important person after the make-up artist is the bride. It’s important to capture this session from her perspective too. Get down to her level if she is sitting. Imagine what she is going through. Follow her eyes to see what is capturing her precious attention. Make use of a mirror to capture her in a moment of self-reflection. Below is a picture of bride when she is just looking at herself while her friends are helping her with her earrings.

    DPS4

    The Fly on the Wall

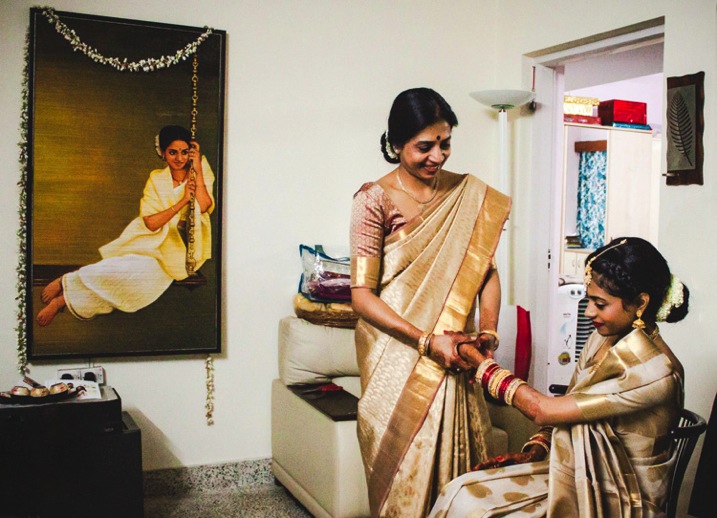
    Remember that clutter I mentioned? That is part of weddings. They are like the handwritings of the bride and her sisters. Try going to the corner of the room with a wide angle lens and capture the confusion and chaos in all its glory. Get on a chair and view the room from above and try to spot what is adding color and personality to the room. Maybe it’s the jewellery spread carelessly on the bed. It could be the mother happily putting bangles on the bride’s arm, or maybe the groom trying to look through the window (it’s happened!).

    DPS5

    3. Expect the Unexpected

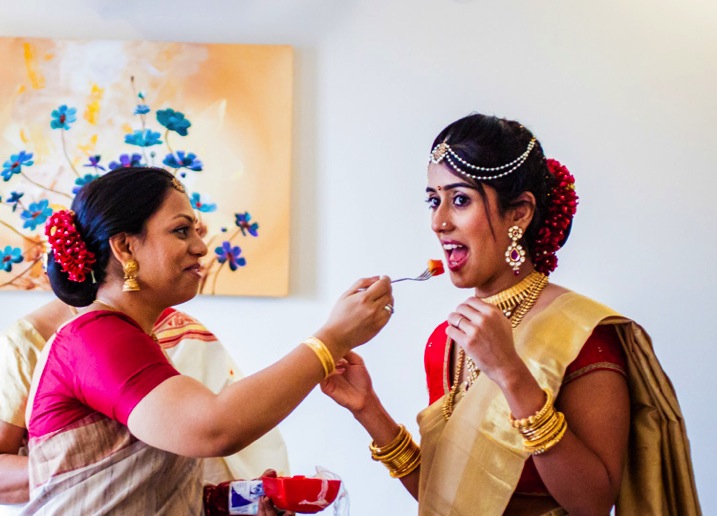
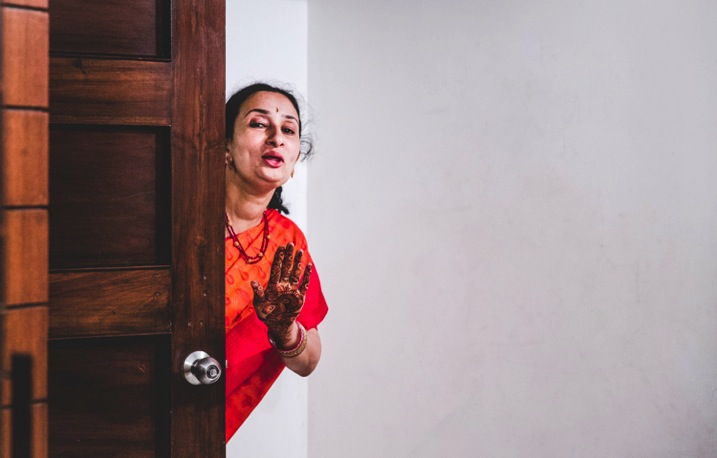
    Wedding photographers should approach the weddings with the attitude of a journalist looking for a scoop. Still, during the getting ready time, it’s easy to let your guard down as everything seems pre-planned, and in motion. Some of my most candid pictures have been taken in moments of delightful serendipity. Below are pictures from different weddings.

    DPS6

    A sister-in-law feeding the bride minutes before she stepped out

    DPS7

    The bride’s aunt reminding her that she has just five minutes to go

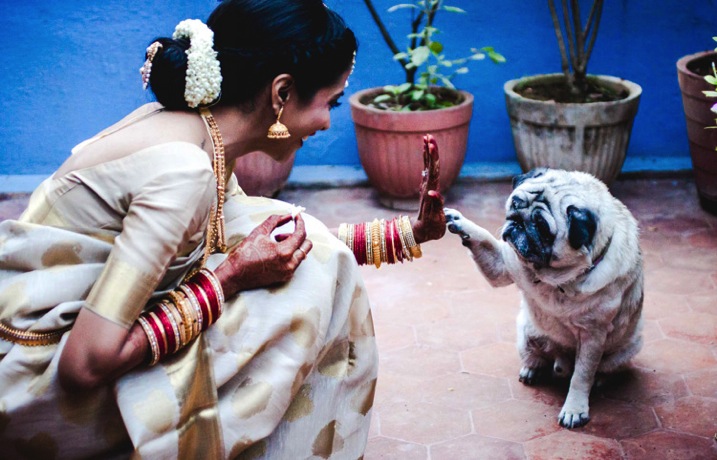
    DPS6b

    And then sometimes the pet just walks in to say the final goodbye!

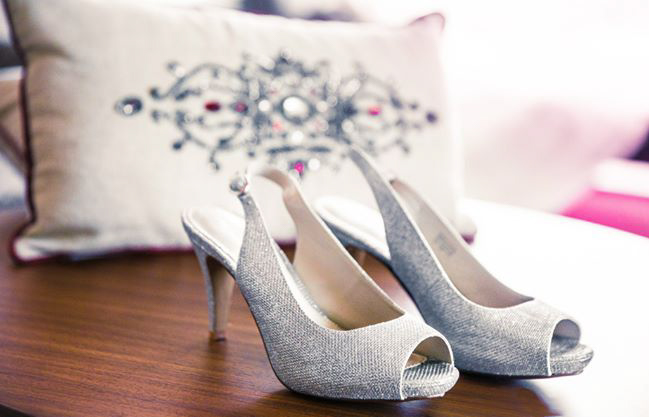
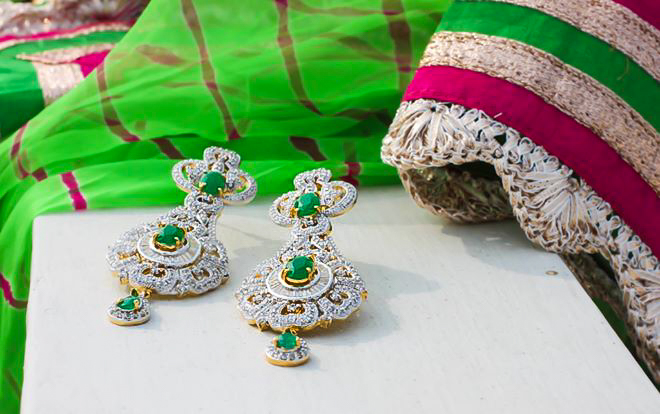
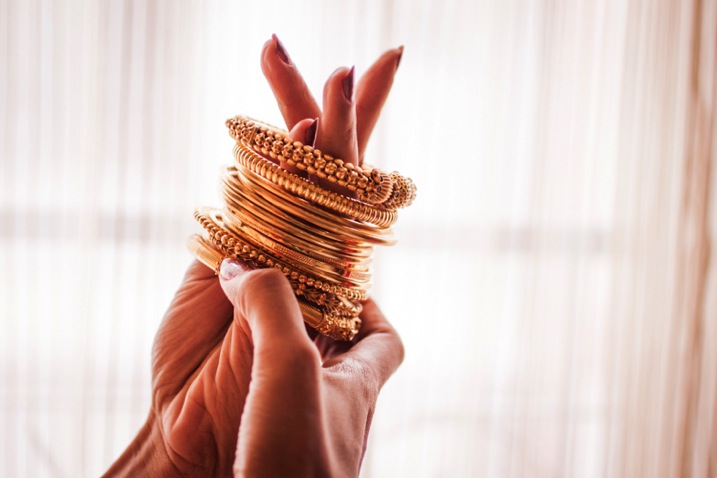
    4. The Trousseau and Trinkets

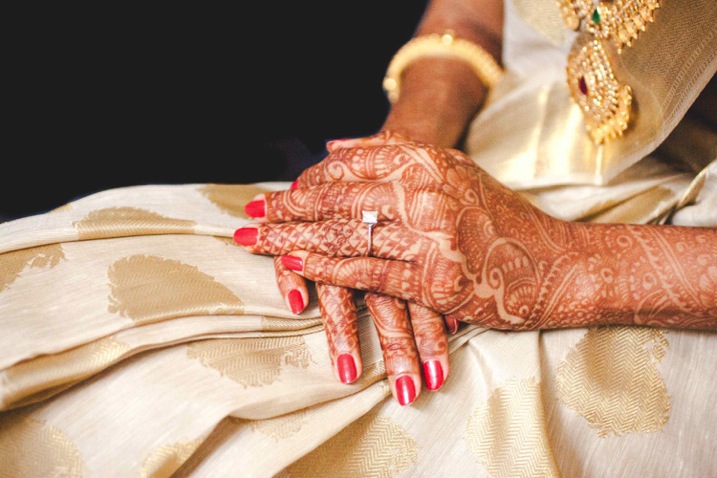
    There are brides that wear a simple white silver bracelet, and others that wear elaborate gold chains, adorned with peacock and mango motifs, that were made nearly a century ago for their grandmother’s wedding. The Wedding Trousseau and the accompanying trinkets say a lot about the personal choice of the bride and her traditions. It is important to capture them with respect, and a certain sensitivity, as these hold meaning for a family more that what we as a person viewing in from outside can appreciate.

    These items could simply be the Wedding Trousseau itself, which the bride, her sister, and friends would have spent weeks agonizing over, and probably spent many woman-hours putting together.

    DPS8b

    DPS8 DPS9


    DPS9b

    5. Lights, Camera, Action!

    Light – what else is there for a photographer to contemplate? The challenge doing portraiture for a bride getting ready is that the event sometimes occurs in a small compact bedroom, studio, or dressing room at the temple, church, or hotel where the wedding is taking place.

    It’s important to understand what the sources of lights in the room are, and perfectly professional to ask the make-up artist and bride to reorient themselves, or the way they face to make the pictures look better.

    Be prepared to use white curtains to bounce of light from your flash or shoot from outside the room through a window to get light right!

    DPS10 DPS11

    I hope you find these tips helpful, whether you are doing wedding photography as a professional, or at a friend or relative’s wedding. Please share your own tips and comments below, as well as your images.

    googletag.cmd.push(function() {
    tablet_slots.push( googletag.defineSlot( “/1005424/_dPSv4_tab-all-article-bottom_(300×250)”, [300, 250], “pb-ad-78623” ).addService( googletag.pubads() ) ); } );

    googletag.cmd.push(function() {
    mobile_slots.push( googletag.defineSlot( “/1005424/_dPSv4_mob-all-article-bottom_(300×250)”, [300, 250], “pb-ad-78158” ).addService( googletag.pubads() ) ); } );

    The post 5 Tips for Striking Getting Ready Shots of Brides by Manvi Gandotra appeared first on Digital Photography School.


    Digital Photography School