Category: Photography

  • How to Use the Canon Camera Connect App

    Cameras with built-in Wi-Fi connectivity are all the rage today, but not necessarily the most intuitive feature to unlock. Luckily, Canon seems to have listened to 6D owners, and increased the ease of use of their Wi-Fi platform by switching up the free mobile phone app that comes with the 6D. Previous versions of the app where called EOS Remote and Canon CameraWindow, but earlier this year, a new improved app called Canon Camera Connect, became the main app endorsed by Canon.

    This is a visual tutorial on how the new app works. Please note that the tutorial is written assuming you already know how to enable Wi-Fi shooting on your particular device.
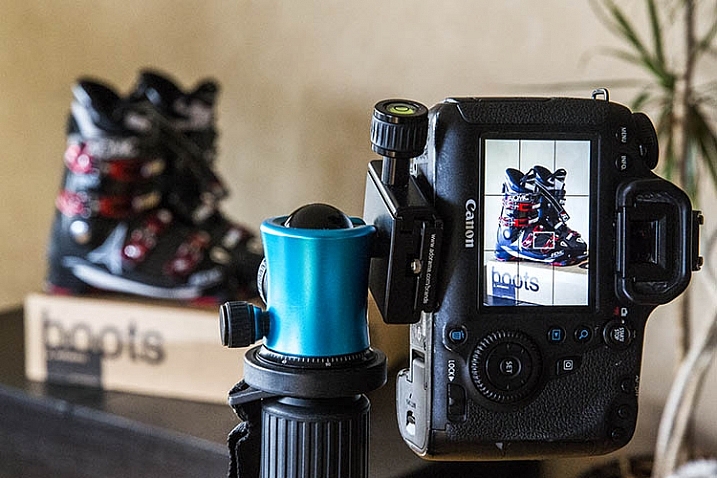
    Canon Wi-Fi App

    Step 1: Check for compatibility and download the app

    Currently, Canon Camera Connect is a free app available for download on Android and iOS devices. The app is compatible with a limited range of Canon digital cameras, including select PowerShot point and shoot cameras, the EOS M2, and the EOS 70D and 6D. You can check full compatibility specs here. This tutorial was created using the Canon 6D camera, and a Moto X Android phone.

    Step 2: Enable the Wi-Fi function on your camera

    This step will likely vary depending on your model of camera. For the Canon 6D, this is a somewhat complicated process that merits its own tutorial, but the methodology can be summarized as such: you are effectively turning your Canon 6D into a Wi-Fi hotspot, that your phone must connect to as a means of communicating with your camera, for either remote shooting or downloading images. Thus, you must first activate the Wi-Fi hotspot on the 6D (or one of the compatible models), then connect to it via your phone’s Wi-Fi networks. Be aware that this WILL temporarily disable your phone’s functionality until you disable the connection with your camera.

    Step 3: Explore the interface of the Canon Camera Connect App

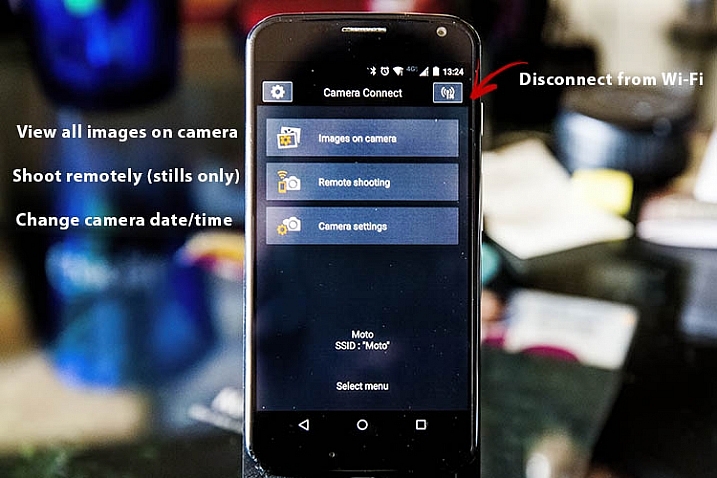
    After you have successfully connected your phone to your camera, the app should launch, and show you the opening screen, as seen below. The app’s menu is minimal, and pretty straightforward. You will most likely stick to the top two options, which are described in more detail below.
    Canon Wi-Fi App

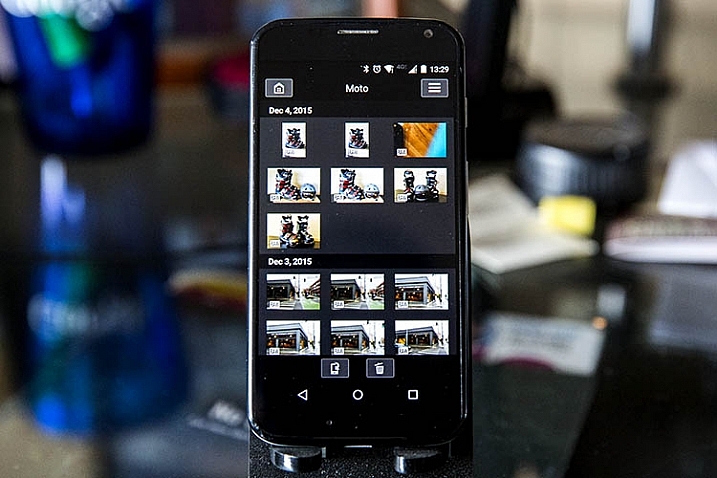
    Images on camera

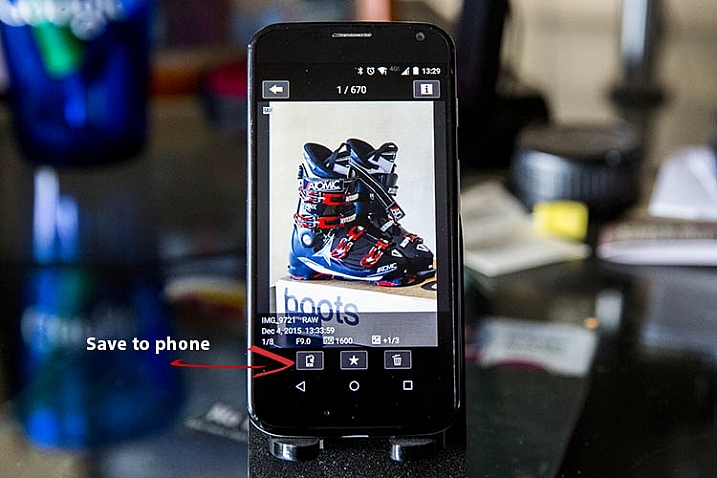
    Pressing this will show you a gallery of all of the images on your connected camera, sorted by the date they were taken. To zoom in to any image, simply tap it with your finger. Three options will then appear at the bottom of the image: Save to phone, favorite (star), or trash. If you wish to share an image via email or social media, remember that you can’t do so without first disconnecting your phone from your camera. To work around this, choose the Save to camera option to store the photo on your phone, and then upload it when your phone has internet connectivity again.
    Canon Wi-Fi App

    Canon Wi-Fi App

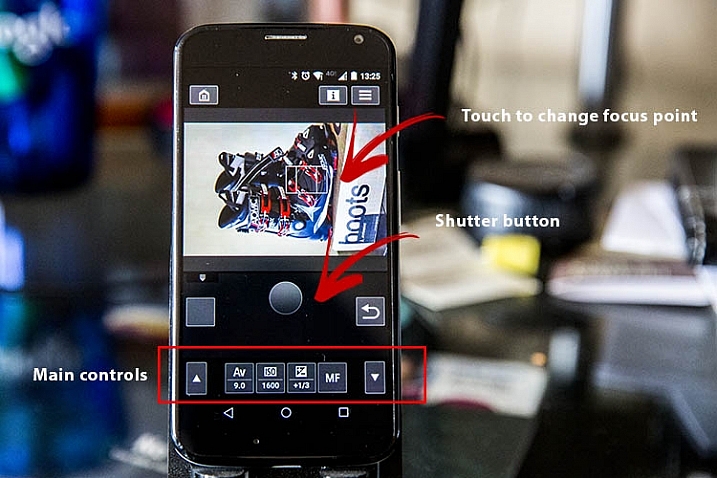
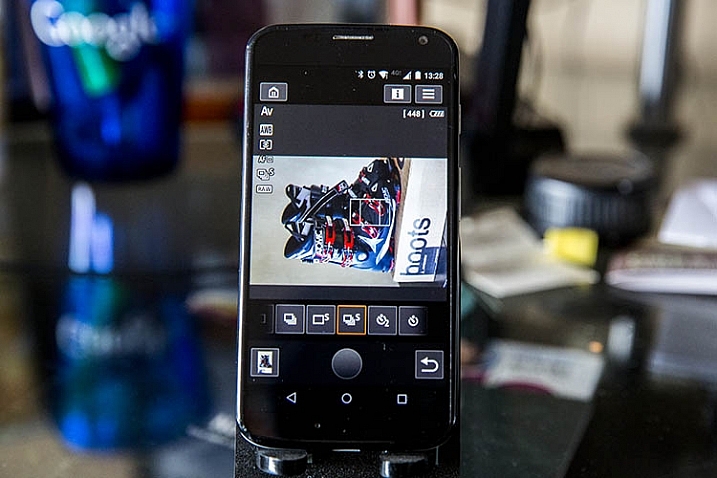
    Remote shooting

    Selecting this option enables live view on your connected camera, and lets you control most of the settings from your phone. Controllable settings include: changing the shutter speed, aperture, ISO, exposure compensation, drive mode, focus mode, and of course the activating the shutter button to take a photo. All the controls can be adjusted and activated using touch screen control. There are a few shortcomings to the remote control settings as listed below, but off the bat the app provides quite a few options for remote shooting.
    Canon Wi-Fi App

    Canon Wi-Fi App

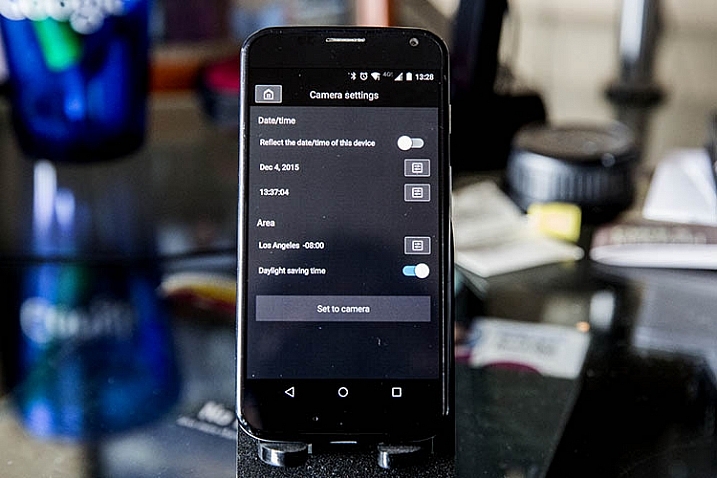
    Camera settings

    The third and final main menu option in Canon Camera Connect app is probably the most useless: it allows you to set the date, time, and time zone of your camera. This is a feature you probably won’t use often unless you take your camera traveling a lot.
    Canon Wi-Fi App

    What the app does

    Shoots in JPG or RAW

    The app is very quick and responsive, even when shooting in large RAW files. Also, it easily resizes RAW files to JPGs when you save images to your phone.

    Will read JPG files taken from any camera

    If you have JPG files taken from any other devices, the Canon Camera Connect will likely be able to read, and transfer them to your phone or tablet. I’ve done this using photos shot from an Olympus Tough TG-2 point and shoot, Fujifilm x100s mirrorless camera, and Canon 5D Mark III, so I would assume it would also hold true for other camera models.

    What the app does not do

    These are shortcomings, specific to using the app with the Canon 6D; some of these issues may not be points of contention when using the app with other compatible camera models.

    Adjust to portrait mode while remote shooting

    If the app does allow this, the user interface needs to be adjusted to make this feature more obvious. As is probably obvious from some demo shots above, I haven’t figured out how to enable it.

    Remote shoot video

    Whenever the Wi-Fi function on your Canon 6D is enabled, you cannot simultaneously activate video recording, so unfortunately remote video shooting cannot be achieved.

    Time lapse

    While you can set your camera to shoot in continuous or self timer mode with the app, there is not the option to shoot time lapses. This is a feature that Canon will hopefully implement in future iterations of the app.

    Hopefully this overview will help you see if this app is useful for you. If you have one of the compatible cameras listed, give it a try and let me know what you think. Do you have any other uses for remote apps I haven’t thought of or mentioned?

    googletag.cmd.push(function() {
    tablet_slots.push( googletag.defineSlot( “/1005424/_dPSv4_tab-all-article-bottom_(300×250)”, [300, 250], “pb-ad-78623” ).addService( googletag.pubads() ) ); } );

    googletag.cmd.push(function() {
    mobile_slots.push( googletag.defineSlot( “/1005424/_dPSv4_mob-all-article-bottom_(300×250)”, [300, 250], “pb-ad-78158” ).addService( googletag.pubads() ) ); } );

    The post How to Use the Canon Camera Connect App by Suzi Pratt appeared first on Digital Photography School.
    Digital Photography School

  • Remodeling a Room? Think Like a Photographer

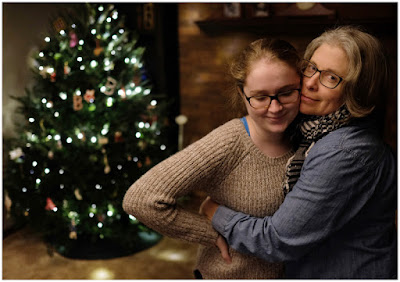
    Long-time readers of this site are already familiar with my family, having watched my kids grow up in photos. Seen above, on the left, is my daughter Emily. You guys met her when she was eight.

    She’s seventeen now, and headed off to college next year. Which meant this is the last time we’ll put up a Christmas tree while we are all living here together.

    I have always tried take lots of photos around the holiday season. And even more so, now that the kids will be graduating soon. And as we have successively remodeled many of the rooms in our house, I have made it a point to pay special attention to the lighting.

    Why? Because you can get a lot of bang for your buck when it comes how a room looks just by thinking like a photographer during the remodel. And another bonus is that your quick available light grab shots will look much better, too. Even if you are just using your iPhone to shoot it.

    Take the living room, for instance. Before remodel, it was lit mainly by a small, four-bulb fixture attached to a ceiling fan. You can probably imagine just how flattering this wasn’t. And it was something that bugged me enough to lobby to get rid of the fan just so we could have more of a choice about our lighting.

    In the end, I got the okay. And I have long been happy that we did it. Here’s a quick run-through on the decision process for this room, in the hopes that it’ll inspire you to think about how you can use your lighting skills to improve the quality of any room you might choose to remodel in the future.
    __________

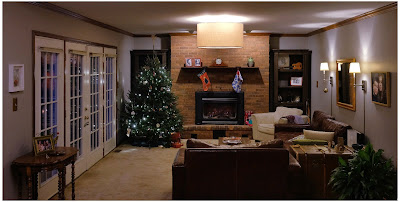
    Here’s a photo of the living room as it exists now. Mind you, this is purposely shot available light, as that is kinda the point. The lighting in the room is not designed to exist in an overall interior shot. (In fact, that’s kind of impossible if the lights are part of the subject matter.)

    But here it is, exposed for the room rather than for the light sources, to give you a sense of how the lights are distributed.

    First and most important is the drum lamp hanging from the center of the ceiling. Remember the four-banger bare-lamp light I mentioned earlier? That’s long gone, and replaced by what is essentially a soft box pointing straight down. It’s three feet across; a legit beauty light.

    And the arrangement of the room around the light means that anyone sitting in the room is sitting under a quality light source, and at a good angle. The only harsh place to be around this light would be directly under it. And you can’t go there. Because guess where we put the coffee table.

    So if you are sitting on the sofa or the love seat or the chair, you look good. When you’re in the room the effect is not unlike sitting in a lounge in a nice hotel, where they have taken the time to design the light for the effect that they want.

    And standing or sitting, pretty much anywhere in the room, a snapshot of you is gonna be reasonably flattering at the very least. And that’s true whether it was shot on a purpose-built camera or a smartphone. To wit, the example at top of the page.

    Over at camera right are two wall lamps, which serve to fill the shadows of the overhead “key” light—or to become pretty nice rim lights for someone sitting on the couch. No major surgery here, as the lamps came with conduit assemblies to run the cords right down the wall. They’re just plugged in behind the couch.

    At back are two “can” lights in the ceiling, washing down on the fireplace. They just keep it from going super dark back there. (And of all of the lights, they are the only ones that are built-in, and pre-dated the remodel.)

    Two other items of note. One, the lights are all on dimmers. This gives us tons of control of both the absolute level of light and the lighting ratios between the different planes. You really can accomplish a lot of looks with a few different planned-out light sources and some dimmers.

    And two, all of the lights are LEDs. Which means that this entire room—seven bulbs—totals only about 36 watts of energy consumption. And that is if they are on full-blast, which they almost never are. I just nuked them up to buy myself some exposure here. We normally keep them pretty subtle and balanced. But that also would look bad in a photo because a light cannot easily serve as both subject matter and light source.

    But dialed down, I would guess we are typically lighting the room with around ten watts of power, total. It’s just well-distributed.
    __________

    Remodel Like a Photographer

    When choosing lights for a room remodel, here are some things to think about.

    • If you can spring for a big, soft main source, splurge. You won’t regret it. This could mean a drum lamp (we had ours made here) or a light that bounces off the ceiling. In our case, the main light does both. Unseen (from almost exactly my camera position) is a smaller version that hangs down over our dining table. The two light their assigned spaces beautifully and tie the double room together visually.

    • Think of task lights as doing double-duty. First, they accent a room. Second, they fill the main light. Oh, wait, make that three—they can also create mood by dimming them down and using them without the main.

    • LED bulbs are getting better and better—they have passed CFL lights—and will save you tons of money over their lifespan. Good quality ones are as low as $ 5 at Home Depot (these are Philips, FYI.) The room shot above is a poor representation of the light color/quality. That’s because the lights are serving as both light source and subject. If I chose one or the other (as in the top photo) they would look good. And to the eye they look great.

    • Dimmers on each circuit and dimmable LED bulbs will give you lots of options to shape the room. Just make sure to use modern “triac” style dimmers (most all sold today are this type). Those work best with LED lights and also don’t just waste energy through resistors when you dim down.

    • In the overall cost scheme of remodeling a room, decent lighting design (and the forethought of a photographer’s approach to lighting) is about the best value you can get for your dollar. I’ve done this with every single room we have remodeled, and have been really pleased with the results.
    __________

    While we’re here, from our family to yours, Merry Christmas.

    Oh, and check back in next week if you get a chance. We are going to unwrap a project we’ve been hard at work on for three years.


    Strobist

  • How to Use Drones to do Stunning Aerial Photography

    DPSLakeSheds

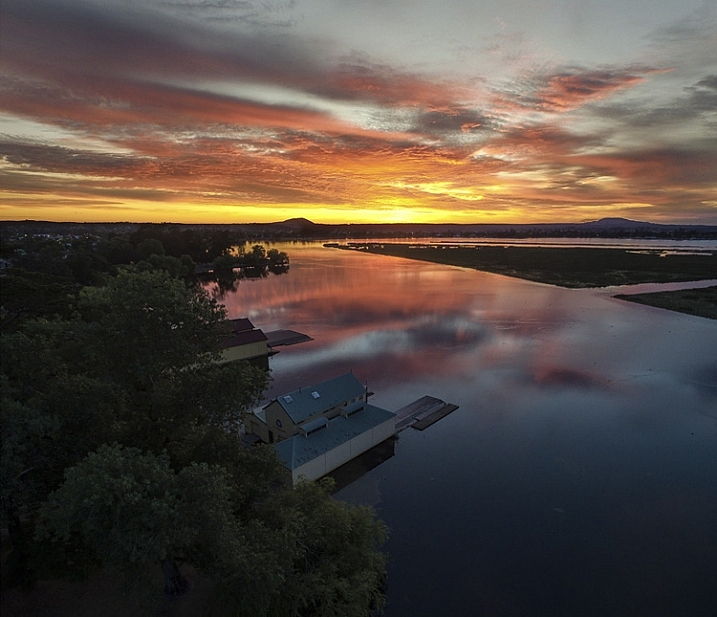
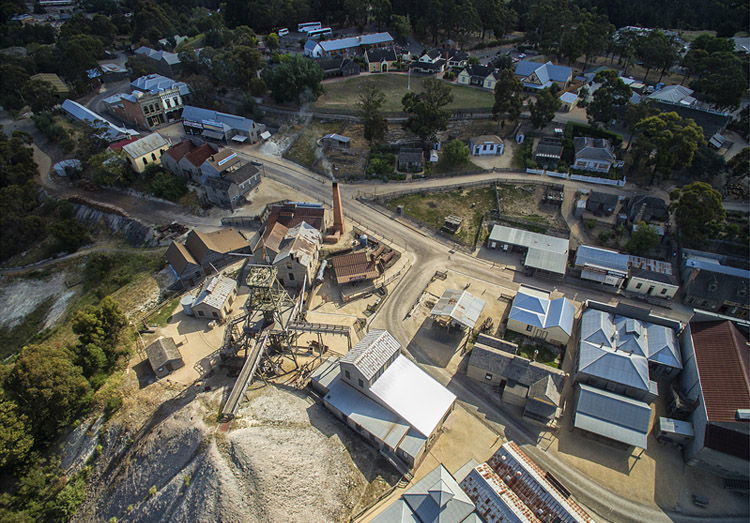
    One of the most exciting developments in photography in the last year or two is the drone – high flying cameras that enable you to capture unique viewpoints of common subjects. Recently the cost of getting a camera into the air has dropped dramatically and if you decide to venture down this road I guarantee you won’t be disappointed. Apart from the amazing images you will capture, they are also tremendous fun!

    DPSBeetWest

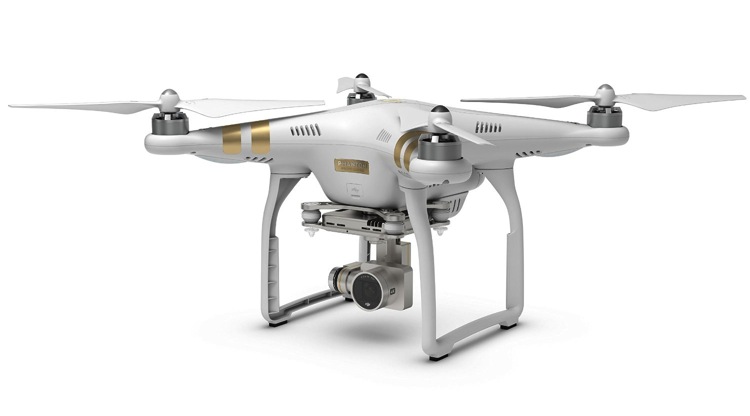
    As with most modern technology there is a vast range of drones, or UAVs (unmanned aerial vehicles), on the market. Similar to camera equipment in general, how much you’re prepared to spend will determine the quality of camera on-board, and the flying characteristics of the drone itself. There are low-cost models that will take very basic images, up to the big boys toys that will happily lift your prized DSLR up into the heavens. You can even add your GoPro on to some units that will take advantage of camera gear you may already have. One company has a range of models that has a large percentage of the market – DJI. Their Phantom range of drones are the first choice for many, and though they do make some high end-models, the Phantom 3 series models are the most popular drone in the world, for good reason.

    Getting Started

    DPSSovHIll

    One of the big advertising features of most drones these days is their ease of operation. “Fly Straight Out of the Box” is a common term you’ll see, and in fact it is also very true. Charge the battery, download the app to your smartphone, fire it up, and away you go.

    However, it must be mentioned that as easy as these are to fly, common sense and care is a big part of aerial flying. It’s suggested you start with some limitations in place, easily set up on the smartphone app that runs the drone. This is usually along the lines of limiting the maximum height you can fly, and also how far away you can send the drone.

    71yjfeMJWwL SL1500

    Photo courtesy of DJI

    Always start somewhere wide open, such as a local oval or park, and spend time getting a feel of the controls before you even think about pressing the shutter button. Always be aware of your location in relation to what’s around you. As these cameras usually have a wide angle lens (20mm equivalent) and it’s easy to mis-judge your positioning when in close proximity to objects such as trees and buildings, especially if viewing the smartphone screen is your prime.

    Rules and Regulations

    Most countries have rules to follow, and while they can’t all be mentioned here, usually they are along the lines of these:

    • Drone must always be in Line of Sight (LOS) – that basically means you should always be able to see it
    • Maximum Height 133 metres (400 feet)
    • Never fly over groups of people
    • Respect others privacy
    • No flying anywhere near airports and other no-fly zones as specified in each country

    It’s suggested you check with your local air safety authorities for particular details in your area.

    DPSBurrumbeet

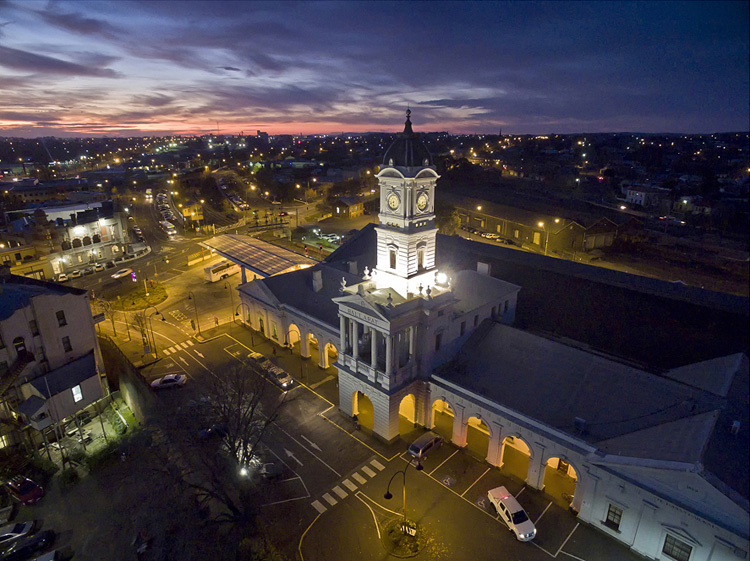
    A few months ago I was flying above my local railway station, looking for the perfect image at dusk, just as the lights came on that illuminate the tower every evening on this historic building. Happily flying for five minutes or so, I looked down to see two local policemen coming over to me. My first reaction in these circumstances is to gauge their reaction to drone flying, and if there are any concerns I bring the machine down immediately. Unfortunately drones have been getting some negative publicity in the press, certainly not helped by the person that crash landed one on the front lawn of the White House in Washington earlier in 2015. Luckily these two policemen were very interested in what I was doing. By showing them exactly on-screen what I was seeing, and explaining the whole procedure and the care I was taking in not flying directly above any people, they left with a very positive attitude.

    I think it’s very important to fly with this attitude in mind. And one other thing about flying in public places….you will need to be prepared to become the centre of attention as people are generally quite intrigued by what you doing!

    DPSRailStn

    Its also tempting to think that aerial imaging is going to be a great new avenue for making some money from your photography. Once again this is another area where the rules vary from country to country, and you should look into the certification you may need in your area to undertake paid aerial work.

    DPSWHeip

    Amazing Technology

    Todays drones have some amazing technology on board that has revolutionized aerial photography:

    • By connecting your smartphone to your handheld remote control unit, you can see on-screen exactly what the drone is viewing. This makes for perfect compositional adjustments.
    • Camera controls are extensive – auto or full manual control, RAW capture, even time-lapse
    • The drone will hover in the one spot with incredible stability, almost like an aerial tripod! You can take your hands off the controls and the drone will stay in that position.
    • Failsafe flight options. With an average 20 minutes flight time per battery charge, the drone can detect when your battery is getting low and will go into RTH mode (automatic return-to-home), ensuring the drone comes back to you! If for some reason the lightbridge connection between the remote control and the machine itself is lost (this can happen when flying behind buildings or trees), once again RTH is activated. Another great use for the RTH feature is when you have lost sight of the drone, which is quite easy to do once it gets some distance away from you, by pressing the RTH button your flying camera will happily return to you before you know it.

    DPSGolden

    Aerial Photography

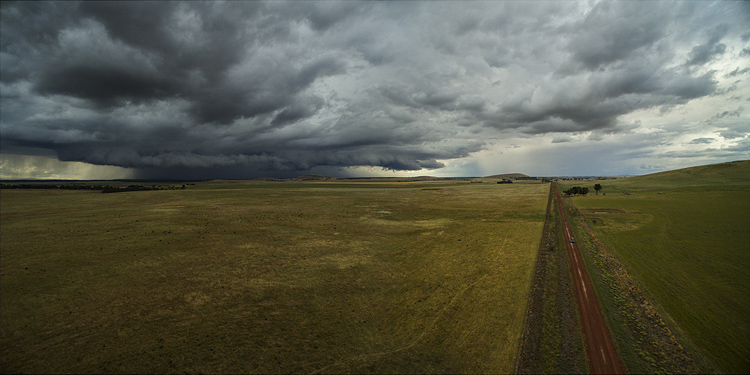
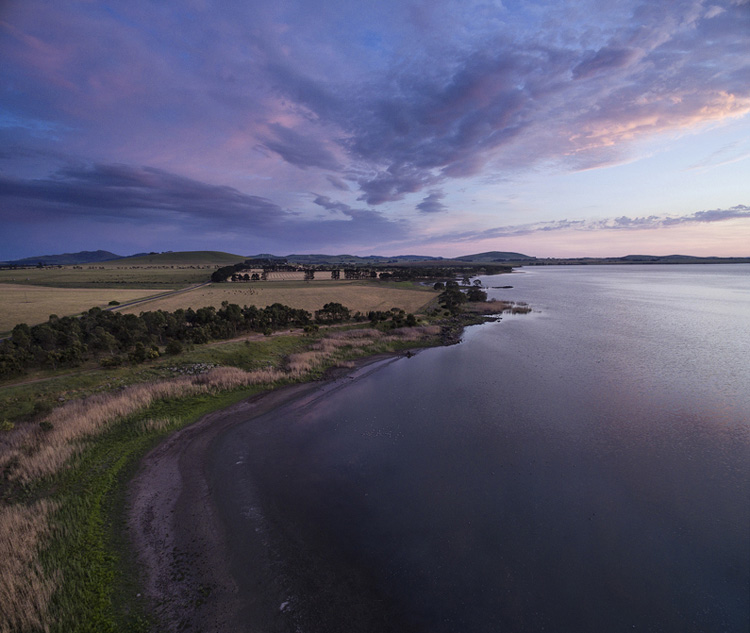
    When you first start flying, it’s very exciting to get home, load your images, and marvel at the amazing scenes you have captured. In my first few weeks of flying, everything I took was thrilling. However, I quickly realized that aerial photography is no different to other forms of photography – it’s still all about the light! So rather than just heading out randomly, I once again started to chase the light and conditions, which has always been the strength of my landscape photography.

    As a landscape photographer I am always aware of weather conditions and what they might offer. Now even more so, as a drone pilot you will have to also take into account the wind forecasts. Drones are not something you fly in high winds (unless you have to get that amazing once-in-a-lifetime scene in front of you!) and you will find yourself looking for calm weather more than any other condition.

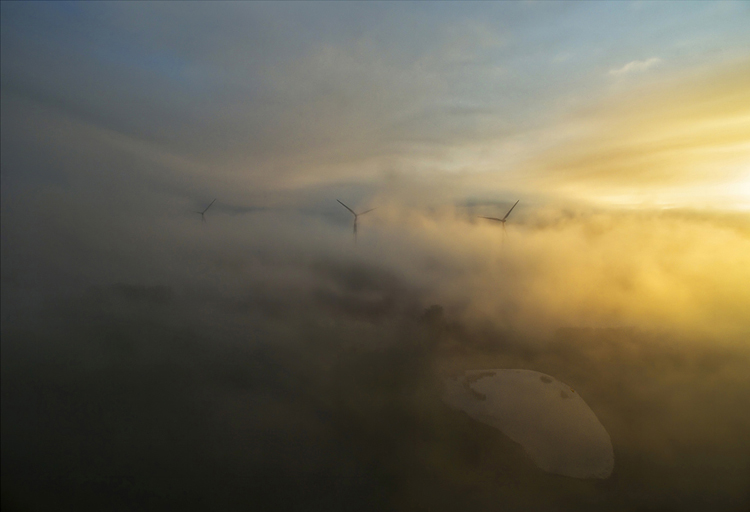
    DPSWindfarm

    At present the in-built cameras on most drones are nowhere near the quality you are used to with your ground level camera. However, I have found the images I have been able to capture are surprisingly good. Though only 12mps, the fact that you can shoot a RAW file gives you more options to work with later on. The jpg files are also surprisingly good, especially if you have been flying in good light.

    Even when shooting in low light the quality has been amazing for such a small camera unit, and the stability of the camera at 300 feet can be quite astonishing. You can also shoot panorama images just as you would when down at sea level, once again creating something very unique. And why not try a time-lapse from 300 feet?! I have had images printed up to A3 size (roughly 8×10) and you would be hard pressed to tell they were taken with a 12mp camera.

    DPSGlengower

    I should also mention that most drones these days shoot high quality video, even up to 4K, which produces stunning aerial footage. In fact, at 4K resolution it’s possible to take a high quality frame directly out of the video.

    Unique Views

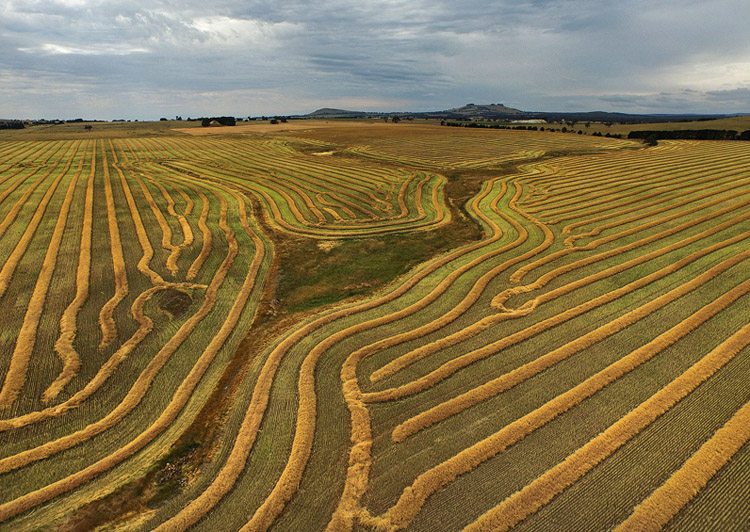
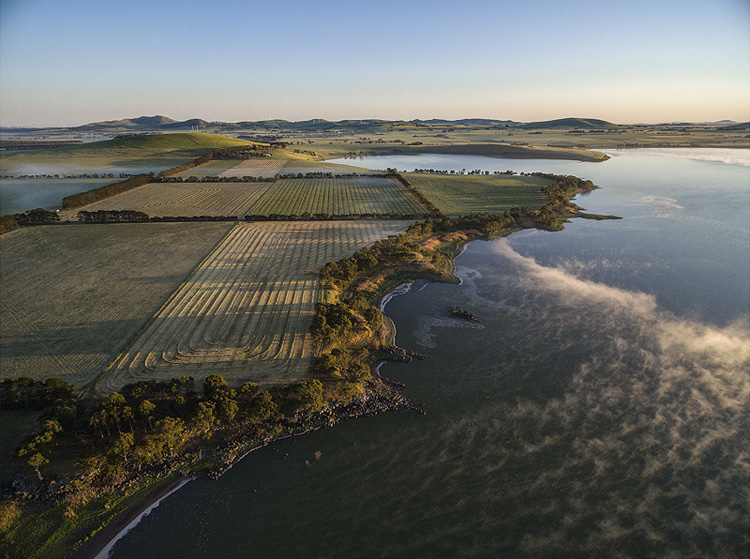
    One thing you will love is the amazing patterns you find in the landscape when viewed from above. Drones allow you to get into the area that most planes and helicopters are not allowed to – below 300 feet. Google Maps makes a great starting point for finding locations that look worth visiting.

    It certainly beats putting your camera on the end of a ten foot pole (yes, I did that a few years ago).

    DPScanola

    As a landscape photographer for a number of years now, I can’t recommend highly enough aerial imaging as a unique way to add that extra aspect to your photography. Everyone you share your images with will be amazed and intrigued, and don’t forget how much fun it is. If you ever tire of it, you may like to try herding sheep with your drone – yes, it’s been done!

    Have you tried out any drone or aerial photography yourself? Please share your tips and images in the comments below.

    googletag.cmd.push(function() {
    tablet_slots.push( googletag.defineSlot( “/1005424/_dPSv4_tab-all-article-bottom_(300×250)”, [300, 250], “pb-ad-78623” ).addService( googletag.pubads() ) ); } );

    googletag.cmd.push(function() {
    mobile_slots.push( googletag.defineSlot( “/1005424/_dPSv4_mob-all-article-bottom_(300×250)”, [300, 250], “pb-ad-78158” ).addService( googletag.pubads() ) ); } );

    The post How to Use Drones to do Stunning Aerial Photography by Andrew Thomas appeared first on Digital Photography School.

    Digital Photography School

  • Our Perfect Portrait Pack of eBooks – 73% Off Today Only

    It is day 9 of our 12 deals of Christmas and it is one we know many of you have been waiting for – crazy deals on our Portrait Photography eBooks by Gina Milicia.

    We’ve got a brilliant bundle option for those new to Gina’s teaching or deals on each individual eBook for those who just want to complete the set.

    Portraits bundle gina

    Either way we’re so confident you’ll love them we’re offering a satisfaction guarantee.

    We do this because they’ve already helped 10s of thousands of people improve their portrait photography.

    It’s your turn today.

    Any of our portrait ebooks just $ 7 (normally $ 19.95)

    • Portraits: Making the Shot $ 7 – Practical tips for bringing your portraits to life
    • Portraits: Lighting the Shot $ 7 – Discover the secrets of beautiful portrait lighting
    • Portraits: Striking the Pose $ 7 – Your go-to guide of natural posing positions
    • Portraits: After the Shot $ 7 – Master portrait post production and workflow

    Learn more about each eBook and grab yours here.

    Save Even More and Get a Bonus eBook When You Bundle Them

    Pick up the whole set for just $ 21 and get our 14 Recipes for Amazing Portraits ebook as a special bonus. That’s 5 books at 73% off.

    I think this deal speaks for itself and I know you’ll love these eBooks for years to come.

    But don’t hesitate – this deal lasts just 24 hours and the clock is already counting down.

    googletag.cmd.push(function() {
    tablet_slots.push( googletag.defineSlot( “/1005424/_dPSv4_tab-all-article-bottom_(300×250)”, [300, 250], “pb-ad-78623” ).addService( googletag.pubads() ) ); } );

    googletag.cmd.push(function() {
    mobile_slots.push( googletag.defineSlot( “/1005424/_dPSv4_mob-all-article-bottom_(300×250)”, [300, 250], “pb-ad-78158” ).addService( googletag.pubads() ) ); } );

    The post Our Perfect Portrait Pack of eBooks – 73% Off Today Only by Darren Rowse appeared first on Digital Photography School.

    Digital Photography School

  • Today Only: Get 4 Great Snapn Guides for just $10 (Save 73%)

    It’s time for our 8th deal in our 12 Deals of Christas and today we have a fun one for you today – and cheap too!

    Today we have two great deals on our must read Snapn guides.

    Snapn guides

    SnapnMotion for just $ 5

    Capturing motion is no easy feat. With this never before released guide, you’ll learn all the techniques for snapping away with a memory card full of keepers, not blurry “what was that?” images.

    Get SnapnMotion here.

    Or Bundle Together ALL 4 SnapnGuides for $ 10 and Save 73%

    Snapn Motion (our brand new guide to photographing ‘Motion’), along with Snapn Food (how to photograph Food), Snapn Paws (how to photograph Pets) and Snapn Travel (a guide to Travel Photography). This super Snapn bundle is just $ 10 today only.

    That’s just $ 2.50 per guide and a real bargain at 73% off their normal retail price.

    If it’s just one snapn, or a snapn frenzy, these handy mini-guides are worth every penny.

    Grab them for a bargain whilst you can

    Yesterdays Presets Deal Extended

    Lastly – we’ve extended yesterdays deal because we had some real server issues and many of you missed out.

    It seems more of you wanted the deal than the servers could handle so we’ve extended the $ 10 deal on Mike Newton’s 104 Lightroom Presets.

    You can grab them here for the next 24 hours only. Our sincere apologies for those of you who had issues accessing the deal yesterday.

    googletag.cmd.push(function() {
    tablet_slots.push( googletag.defineSlot( “/1005424/_dPSv4_tab-all-article-bottom_(300×250)”, [300, 250], “pb-ad-78623” ).addService( googletag.pubads() ) ); } );

    googletag.cmd.push(function() {
    mobile_slots.push( googletag.defineSlot( “/1005424/_dPSv4_mob-all-article-bottom_(300×250)”, [300, 250], “pb-ad-78158” ).addService( googletag.pubads() ) ); } );

    The post Today Only: Get 4 Great Snapn Guides for just $ 10 (Save 73%) by Darren Rowse appeared first on Digital Photography School.

    Digital Photography School

  • Using Smart Objects to Add Text With a Reflection in Photoshop

    Photoshop is a massive program, with many ways to do things. To help you learn Photoshop it’s great to just pick one thing, one new tip, and try it out.

    In this video from Phlearn Aaron Nace will show you how to add text with a reflection to an image, but with a neat little twist that allows you to edit the text any time and have it update your finished image automatically using Smart Objects. Have a look:

    He even goes over the steps as a summary at the end of the video.

    This is a fun project to try on a rainy day – give it a go.

    If you want more Photoshop tutorials check out these:

    • Create Your Own Watermark using a Custom Shape in Photoshop
    • Photoshop Tip: Using the High Pass Filter to Sharpen Images
    • How to use Color Grading for Effect and Tone Control in Photoshop
    • 5 Tips for Using the Blend If Feature in Photoshop
    • 5 Photoshop Tips You Probably Didn’t Know

    googletag.cmd.push(function() {
    tablet_slots.push( googletag.defineSlot( “/1005424/_dPSv4_tab-all-article-bottom_(300×250)”, [300, 250], “pb-ad-78623” ).addService( googletag.pubads() ) ); } );

    googletag.cmd.push(function() {
    mobile_slots.push( googletag.defineSlot( “/1005424/_dPSv4_mob-all-article-bottom_(300×250)”, [300, 250], “pb-ad-78158” ).addService( googletag.pubads() ) ); } );

    The post Using Smart Objects to Add Text With a Reflection in Photoshop by Darlene Hildebrandt appeared first on Digital Photography School.

    Digital Photography School

  • Tips for Capturing the Holiday Festivities at Home so You Can Enjoy Them Too

    If you are a busy parent, you likely rely on your smart phone or pocket camera to capture the events of your daily life, especially at holiday times. But sometimes you want a little bit more than just the usual snaps, without the hassle of your bulky DSLR.

    Photo4b details

    There are some days when you often wish you had the time and ability to take meaningful photos of your family and capture special, magical times. Not the phone snaps that mostly end up as blurry images, but the ones that evoke emotion and feeling, and make new memories. There may be times when you wish you had a handful of quality photos as opposed to a hundred unrecognizable snaps on your phone or pocket camera.

    This article has nothing to do with awesome DSLRs, it is about using the camera that you have with you to document fleeting moments of your family life. But it’s different from just snapping away without a little artistic vision. Instead, it’s about about seeing differently – with a creative eye, and most importantly, having fun doing so.

    Note: Of course if you wish these tips can also be applied using your regular DSLR. It’s about whatever works for you so that you can still have fun participating in the activity with your family

    Remember preparation is key, even if a lot of it is mental preparation and you only devote a few minutes to it. It gets you thinking and creative juices flowing.

    1 photo1a

    Christmas is just around the corner so let’s start get started creatively capturing Christmas at home in 10 images using the humble point and shoot pocket camera.

    Part one: Capture a mini Christmas story at home in five photographs

    Think of a simple theme (decorating a Christmas tree, making a Christmas card or décor, decorating a cake, etc.).
    Choose a subject – a person, little or large. Find a location or corner in your own home and de-clutter the area. Choose a spot with ample light, or a light source such as next to a big window, lamps lit up, tree lights, or better yet just outside the house.

    Select the macro or close-up scene mode. Turn your camera flash OFF as direct flash flattens the image and removes contrast making your photograph looking very two-dimensional. You want a play of light and shadow going on in your image to make it more interesting. Set the scene up as a fun activity with your family.

    Top tip: When taking the photo, tuck both arms in, stay steady or lean on to something if that helps, and hold your breath as you press the shutter (some say press the shutter as you exhale but holding my breath works better for me).

    Get ready to take photos. Wait for your moments. Take your time. Don’t snap loads of photos, rather try looking at the scene with an artistic eye. Remember you are only after 5 photos that tell a mini-story.

    Photo 1: Get close and cosy

    1 photo1

    Choose a Christmas decoration in your home. Get really close to it and shoot at an angle so you need to tilt your camera. Shooting very close or with a wide aperture can help achieve nice blur (bokeh) in the background. In macro mode, shooting a scene that has several focal planes helps in achieving some bokeh.

    Photo 2: Blur it all

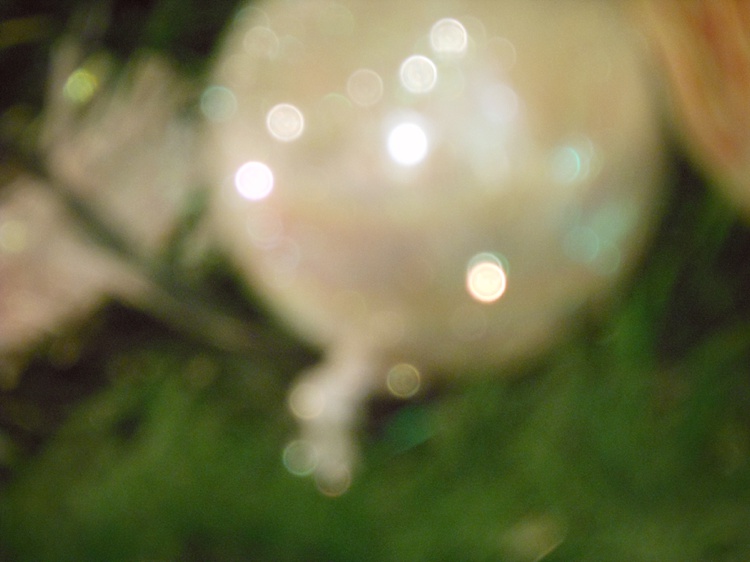
    Include beautiful blur in the background, or use blur as the subject of your photo. Make sure your subject is at some distance, and in front of the light source. Press the shutter while your camera is still focusing. This way you get intentional blur even while using the automatic mode.

    4 photo4

    Photo 3: Capture it

    Choose a very simple activity, for example, ask your child to put a decoration on the tree. Tilt your camera, and fill the frame focusing in on the action. Avoid empty spaces in the background. You will have a more dynamic photo if you go close and fill the frame.

    5 photo5

    Photo 4: Mirror it

    Make sure there is ample available light, then photograph a reflection instead of the subject. Try to use a mirror, or any reflective object like a bauble, to frame your subject.

    3 photo3

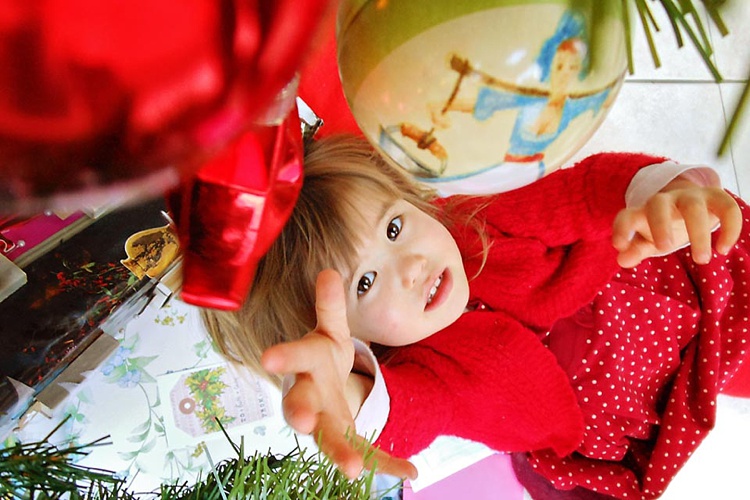
    Photo 5: Look straight down

    Ask your subject to lie down under the tree and play with the baubles. Crack some jokes or tickle tummy and toes to get some genuine expressions. Make sure that the light from the window is illuminating your subject’s face so there is light in their eyes.

    2 photo2

    Part two: Capture a Christmas activity and document the process

    Set the scene, the photos below show a Christmas decorating activity. Get everything ready. Buy a Christmas cake if you haven’t had the time to bake one.

    Choose the look (outfits and colour scheme), as you want some sort of coordination so that there is a focus. For example, if the cake is colourful, you may want to put plainer aprons or outfits on your kids, so that there is contrast and focus, and vice versa. Limit your colour scheme to three or four colors, so there is some sort of harmony and cohesion. Try not to go too matching though.

    Make it a fun activity, but explain to the children that there is a process to follow to ensure a successful outcome, therefore they must allow time for each process. In your head, plan to document this process. Give them a sequence of stages so they look forward to the next step.

    Set your camera to portrait or macro. The automatic settings for these in-camera include a wide aperture so lots of light enters the lens, and a slower shutter speed which allows in more ambient light. The danger here is blur, but you can use that creatively too. To counteract blur, try to be very still, and hold your breath as you press the shutter. You can also steady yourself against a table or wall.

    Get ready to document.

    Photo 1: Set the context

    Photo1 context

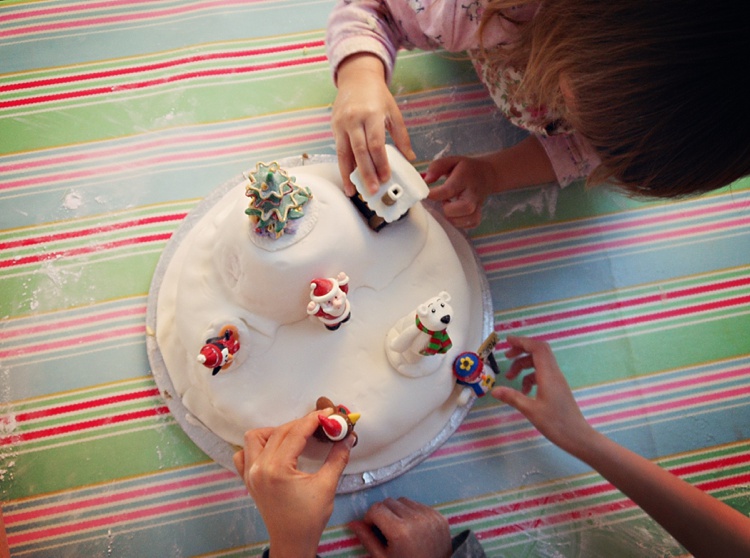
    In this case, it’s the bare, undecorated cake. One of the ways you can shoot editorially is to take the photo from a bird’s eye view. To make it interesting, rather than just photographing the cake on its own, get the kids to wave their hands on top of it for some energy and action. The blurry action creates an effective contrast to the still cake.

    Photo 2: Introduce the characters

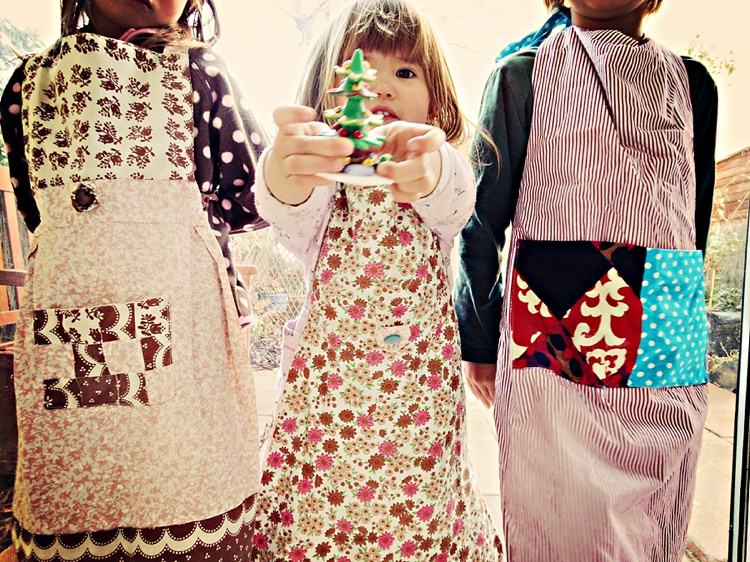
    Take a photo of the kids kitted out in their aprons or outfits you planned for earlier, remember to try and capture expressions. You can introduce the kids by taking a more traditional front view image, or employing some creative cropping for a more interesting take.

    Photo2 characters

    Photo 3: Direct the spotlight on some details

    Details are so important in telling a story, enhancing memory, and evoking emotions. Choose special, or key items in the process to focus on, and photograph them close-up. Avoid too many empty spaces in the background. A full frame engages the viewer more in this case.

    Photo3 details

    Photo3a details

    Photo 4: Document some action

    Movement and blur add so much dynamic and energy to a photograph. They strengthen a story and allows for fun moments too.

    Photo4 action

    Photo 5: Add fun

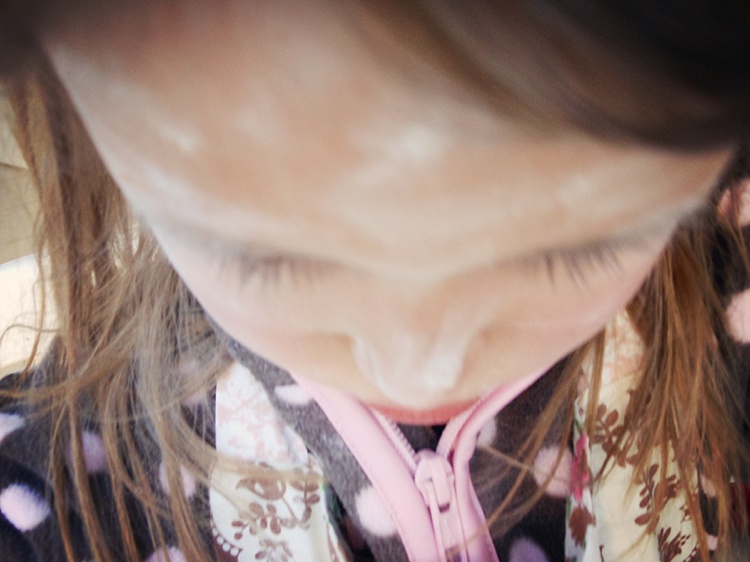
    Talking about fun, allow some silliness in the process, such as painting their faces with a bit of flour, writing their names on flour, waving decorations around while singing Christmas tunes, etc. Make it an experience, not just a secret photoshoot!

    Photo5 fun

    So there you have it, 10 creative photos capturing some Christmas joy in your home.

    Do you have any tips for photographing the Christmas spirit in your own home, or images to share? Share them in the comments below.

    googletag.cmd.push(function() {
    tablet_slots.push( googletag.defineSlot( “/1005424/_dPSv4_tab-all-article-bottom_(300×250)”, [300, 250], “pb-ad-78623” ).addService( googletag.pubads() ) ); } );

    googletag.cmd.push(function() {
    mobile_slots.push( googletag.defineSlot( “/1005424/_dPSv4_mob-all-article-bottom_(300×250)”, [300, 250], “pb-ad-78158” ).addService( googletag.pubads() ) ); } );

    The post Tips for Capturing the Holiday Festivities at Home so You Can Enjoy Them Too by Lily Sawyer appeared first on Digital Photography School.

    Digital Photography School

  • Writer’s Favorite Lens – Canon 50mm f/2.5 Compact Macro

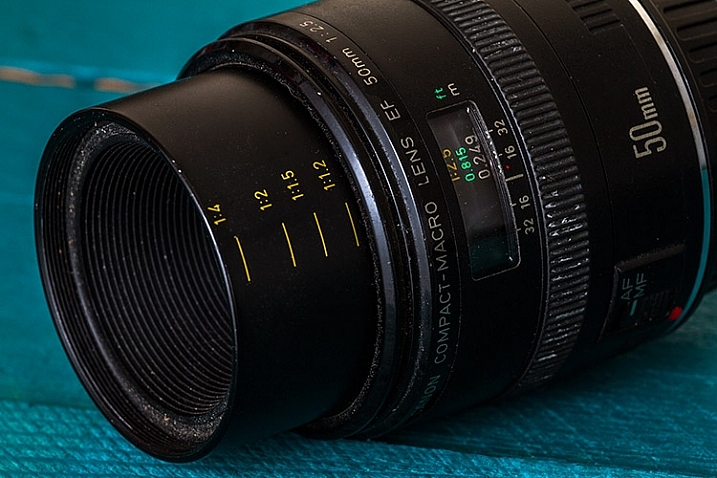
    Canon 50mm f/2.5 Compact Macro

    Sometimes, picking a favorite is hard. If you ask me to choose a favorite song or movie, it just can’t be done. Lenses; however, are different beasts. Ask most photographers what their favorite lens is, and you’ll probably get little hesitation before they start gushing and waxing lyrical.

    At least that’s how I am, and when it comes to picking my favorite, all you have to do is ask which lens is probably on my camera body right now. That is almost always the Canon 50mm f/2.5 Compact Macro.

    This lens is a gem that offers great quality in terms of sharpness, ease of use, durability and versatility, and even though I’ve acquired some fairly serious glass since I bought it 12 years ago, it’s still my go-to lens.

    Making the choice

    Regarding lens choice, one of the most common things new photographers are told is to start with a 50mm f/1.8, often referred to as “thrifty fifties”. The logic here is more or less irrefutable. These lenses are cheap, reliable, versatile, and their large aperture makes them much faster than anything else in that price range. Their versatility makes them perfect for portraits and most other subjects outside of the extremes such as landscapes, which favor wide-angle lenses, and sports, which favor telephoto lenses.

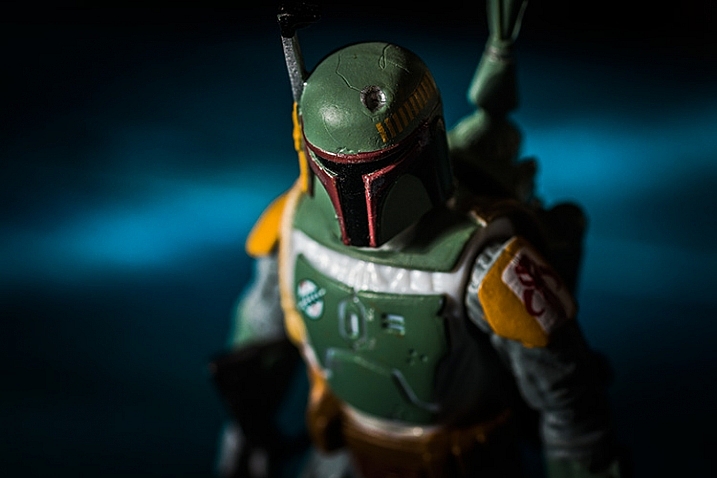
    Boba

    When I was starting out, I spent a lot of time photographing things like food, flowers, toys, and other small things with fine details. I had little interest in other types of photography, and no interest in portraiture.
    As such, the biggest limitation I got from my kit lenses was the focusing distance. I was forever trying to get closer to my subjects using the long end of kit lenses, and falling short every time.

    When it was time to consider upgrading that first lens, research made it clear that neither the thrifty fifty nor the 85mm f/1.8 would do much good towards those aims. On the other hand, a dedicated 100mm macro lens was far out of my price range. Because of all this, I put off upgrading my kit lenses for a long time.

    It was only by chance that I eventually found the 50mm Compact Macro while browsing through Canon lenses on a retailer’s site. To be honest, there wasn’t a lot of research involved. I saw the lens, the price, and the focusing distance of nine inches, and I bought it within the week.

    Pros and cons

    The Canon 50mm Compact Macro is the workhorse of my camera bag and it’s certainly been put through its paces over the past decade. For my purposes, there are no flaws; however, it does have a few qualities that may make it unsuitable for some photographers.

    Pro – Build quality

    It can’t be helped that the first thing you notice about this lens is the build quality. This is particularly true if your previous experiences are with kit lenses. The solid metal casing makes it feel sturdy and the extra weight feels great in your hand.

    It may be worth mentioning that when I did get to use a 50mm f/1.8 a few years ago, I thought that I was being handed a Holga lens. This isn’t in any way an attempt the demean the 50mm f/1.8, but rather as an illustration of how far apart these lenses are in terms of build quality.

    Pro – Durability

    favourite-lens-canon-50mm-macro-2081

    Durability may fall under build quality, but experience makes me feel it’s worth mentioning separately.

    This lens has been dropped on concrete, cobble stone, and Tarmac, and it has been in the ocean. It has been in ash storms, torrential rain, hail storms, and there was one terrifying incident where it was left to stew in a half litre puddle of shower gel for a few hours. Despite all of this, this lens has not once shown any performance issues.

    Pro – Sharpness

    As should be expected from a lens created for the purpose of macro photography, the Canon 50mm f/2.5 Compact Macro cannot be faulted in terms of sharpness. While I’m unable to compare it to the other 50mm offerings from Canon, I can compare it with the excellent 85mm f/1.8 and 70-200 f/4 L IS USM. The differences are almost indistinguishable.

    Pro – Large aperture

    The compact Macro may have a smaller aperture than Canon’s other 50mm lenses, but it is still a fast lens and works well in all but the dimmest of settings.

    In terms of background blur, if you take into account that depth of field is also affected by the distance of the camera from the subject (the closer you are, the shallower the depth of field) you can see that you will achieve a comparable amount of blur to the faster lenses.

    Pro – Focusing

    Whether it’s in auto focus or manual focus, it’s really hard to find fault with this lens. In normal situations, the auto-focus is fast and accurate. The large aperture of f/2.5 allows for a bright image in the viewfinder, making manual focus easy and quick.

    Pro – Focus distance

    Uke

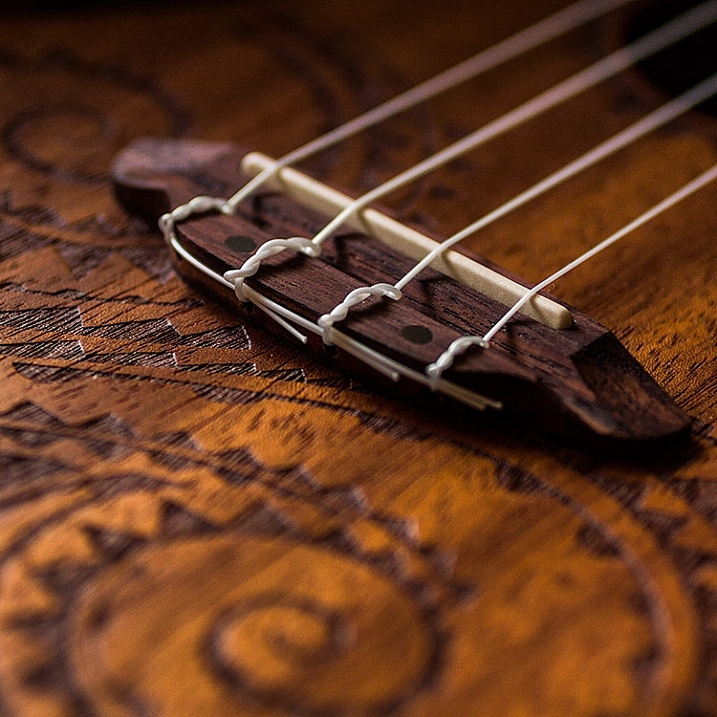
    With a focusing distance of just nine inches (23cm), you can get extremely close to your subjects. Yes, this may be the sole reason for this lens’ existence, but the versatility this adds is wonderful. For example, you are able to take a close-up of someone’s eye, then move a few steps back and take a normal 50mm portrait seconds later.

    Cons

    As mentioned, it wasn’t easy to come up with any negative aspects of this lens. There are; however, a few considerations that could mean this may not fit your specific photographic needs.

    Con – Weight

    At 9.88 ounces (280 grams), the Compact Macro weighs more than twice as much as Canon’s 50mm f/1.8 lens (4.6 ounces/ 130g). If you’re trying to keep your kit bag as light as possible, and the macro functionality isn’t that important, then you may want to consider the alternatives.

    Con – Price

    While I will attest that this lens offers tremendous value for the money, at $ 299 it is a big jump in price from the 50mm f/1.8 at $ 125. If you’re just starting out, and do not yet know what subjects you’re interested in, or whether or not you will stick with photography for long, it may be worth considering a more wallet friendly option.

    Editor’s note: at the time of this article the 50mm f/2.5 Compact Macro lens is listed on Canon’s site as Out of Stock. You may be able to find it used on Amazon.com or go for the even higher priced 60mm f/2.8 Macro at $ 419 USD.

    Con – Light

    There is a slight downside to the lens’ closest focusing distance. When you’re standing that close to your subject, you and the camera effectively block any light coming from the front. Often, this is easily countered with side lighting techniques, or by using a dedicated macro ring flash, but it can be tricky to overcome at other times.

    Con – Magnification

    What may be considered as a deal breaker for a lot of photographers is that the 50mm f/2.5 Compact Macro is not a true macro lens. With a magnification ratio of 1:2, it only creates images at half life-size. This can be rectified with a converter that allows for 1:1 magnification.

    favourite-lens-canon-50mm-macro-5347

    In the end

    I know I’ve been gushing quite a bit, but my experiences with this lens have been outstanding, despite the heavy use and torture I put it through. If you’re in a position where you’re deciding to buy a 50mm, and you like the idea of getting really close your subjects, do consider the Canon 50mm f/2.5 Compact Macro. It really is a treat.

    googletag.cmd.push(function() {
    tablet_slots.push( googletag.defineSlot( “/1005424/_dPSv4_tab-all-article-bottom_(300×250)”, [300, 250], “pb-ad-78623” ).addService( googletag.pubads() ) ); } );

    googletag.cmd.push(function() {
    mobile_slots.push( googletag.defineSlot( “/1005424/_dPSv4_mob-all-article-bottom_(300×250)”, [300, 250], “pb-ad-78158” ).addService( googletag.pubads() ) ); } );

    The post Writer’s Favorite Lens – Canon 50mm f/2.5 Compact Macro by John McIntire appeared first on Digital Photography School.

    Digital Photography School

  • Today Only: 54% OFF Phil Steele’s Event Photography Course

    It is day 5 in our 12 Deals of Christmas and today we’ve got a great deal that is perfect for anyone who gets asked to photograph events (birthday parties, concerts, school plays, reunions, weddings etc).

    It’s 54% off Phil Steele’s Event Photography Course.

    NewImage

    We are all Event Photographers

    While not all of us see ourselves as ‘event photographers’ most of us are. As Phil says:

    “Let’s face it, we are ALL event photographers. Even if you have no desire to shoot professional events for money, if you are the person in your family with a decent camera, then you get called on to shoot the kid’s birthday party, your friend’s concert, the school play, or the family reunion.”

    With 25 videos and over 5 hours of training this course teaches you the techniques used by professionals to get great photos—every time—even in the most difficult conditions.

    See full details of what Phil covers in his training here.

    For the next 24 hours you can pick this practical course for just $ 67 USD – that’s 54% off the normal price of $ 147.

    Lastly – as with all our products during this 12 days of deals this one comes with a money back guarantee. If you buy it and are unsatisfied in any way Phil will gladly refund the purchase price with no questions asked.

    Become a Great Event Photographer

    We are all event photographers – this course will help you to become a great one!

    Get full details of Phil Steele’s Event Photography Course.

    googletag.cmd.push(function() {
    tablet_slots.push( googletag.defineSlot( “/1005424/_dPSv4_tab-all-article-bottom_(300×250)”, [300, 250], “pb-ad-78623” ).addService( googletag.pubads() ) ); } );

    googletag.cmd.push(function() {
    mobile_slots.push( googletag.defineSlot( “/1005424/_dPSv4_mob-all-article-bottom_(300×250)”, [300, 250], “pb-ad-78158” ).addService( googletag.pubads() ) ); } );

    The post Today Only: 54% OFF Phil Steele’s Event Photography Course by Darren Rowse appeared first on Digital Photography School.

    Digital Photography School

  • 7 Quick Tips on How to Use Visual Balance to Make Better Photographs

    Balance is one of the characteristics of good composition. It is the way elements of an image are arranged to create a feeling of stability. If you imagine that your image is a set of scales, all elements of your composition should be balanced to make a photograph feel stable.

    balance 1 eva polak

    There are many ways to create balanced images. The easiest way to achieve it is by using symmetry, as it guarantees left to right, or top to bottom balance. The results look formal, organized, and orderly.

    If you would like to create a balanced composition that feels more casual, free, and energetic, then use asymmetry.
    To understand this concept, let’s go back to our analogy of a set of scales. If you have several small items on one side, they can be easily balanced by one large object on the other side. Visual balance works in a very similar way, but it can be affected not only by the size of objects, but also by their value, colour, texture, quantity, orientation and isolation.

    Different colours, shapes and sizes create different degrees of visual interest. So, to achieve asymmetrical balance you need to arrange elements of all different visual weights, when composing your image, in such a way that each side is still balanced out.

    balance 2 eva polak

    There are seven basic factors to consider when you compose your images with visual balance in mind. Let’s have a close look at how you can use these different factors affecting visual weight and gain some advantage.

    1 – Colour

    1 Colou by Eva Polak

    Colour has many properties that can affect an object’s visual weight relative to others in the photograph, such as saturation, brightness, darkness, and hue. Warm colours advance into the foreground and tend to weigh more than cool colours, which recede into the background. Red attracts attention better than any other colour, and thus has the highest visual weight as opposed to yellow, which has the least visual weight. Also bright colours attract more attention than subdued colours.

    2 – Size

    2 Size by Eva Polak

    Large elements appear heavier than small ones. Size is an evident visual weight factor because, in the physical world, an object that’s bigger than another will naturally be heavier, and will take up more physical space. Large elements command more attention. We naturally see them first, or spend more time looking at them anyway.

    3 – Value


    3-Value-by-Eva-Polak.jpg

    Value is a powerful tool for balancing images. Dark elements feel heavier than light items. The higher the value-contrast (between object and background), the heavier will be the weight of the object.

    4 – Texture

    4-Texture-by-Eva-Polak.jpg


    Texture adds visual weight to items in photographs. Texture is just more interesting and our eyes are drawn to it. Smooth areas will feel lighter than those with a lot of heavy texture.

    5 – Isolation

    Objects isolated in a space appear heavier than those surrounded by other elements. Look at the image below with a brown circle on it. Your eyes go directly to the brown circle first because there’s nothing else to see.

    5-Isolation-by-Eva-Polak.JPG


    6 – Quantity

    A few small objects can balance out a single large object. Repetition of objects can be used here as well. In the example below, the three small berries are balancing out the large berry.

    6-Quantity-by-Eva-Polak.jpg


    7 – Orientation

    Vertical objects appear heavier than horizontal objects. A diagonal orientation carries more visual weight than a horizontal or vertical one. Lines can be very powerful in your composition. Pay close attention to them.


    7-Orientation-Eva-polak.JPG

    Remember, you don’t have to balance colour with colour, or light with dark – you can mix and match your visual weights. For example, a counterweight to a large, bright area might be a small red object. Experiment with different kinds of balance and play around with visual weight. See what works best for your images and the story you want to tell.

    As you go out exploring with your camera on your next photo shoot, keep balance in mind and the seven factors of visual weight. Look closely and try to determine which elements are commanding the most visual weight when you compose your photographs, and see how they affect balance in your images.

    If you have any comments or questions please post them below. And we’d love to see your visually balanced images.

    googletag.cmd.push(function() {
    tablet_slots.push( googletag.defineSlot( “/1005424/_dPSv4_tab-all-article-bottom_(300×250)”, [300, 250], “pb-ad-78623” ).addService( googletag.pubads() ) ); } );

    googletag.cmd.push(function() {
    mobile_slots.push( googletag.defineSlot( “/1005424/_dPSv4_mob-all-article-bottom_(300×250)”, [300, 250], “pb-ad-78158” ).addService( googletag.pubads() ) ); } );

    The post 7 Quick Tips on How to Use Visual Balance to Make Better Photographs by Eva Polak appeared first on Digital Photography School.

    Digital Photography School