Blog

  • Fractal: A supercell thunderstorm time-lapse years in the making

    Chad Cowan is passionate about teaching people the ins-and-outs of storms and extreme weather, as well as how to safely document them. And judging by both his impressive body of work as well as his latest release, Fractal, he certainly seems to know what he’s doing.

    So crank the volume and enjoy some samplings from the last six years of Cowan’s storm-chasing across America’s Great Plains.

    Articles: Digital Photography Review (dpreview.com)

  • Extended Spring Roll Camera Jacket launches for mirrorless cameras

    Japanese company Extended has launched a new protective case for select cameras, the Extended Spring Roll Camera Jacket. This case is compatible with the Leica M series, Leica Q, Fuji X-Pro series, and other similarly-sized cameras. As the product’s name suggests, the Spring Roll protects cameras by wrapping around them; two small snap clasps are used to keep the case closed.

    According to the company’s website, Spring Roll measures 155mm x 290mm when open; the lens cover has a 70mm diameter and a 55mm length. Extended Photographic recently launched the Spring Roll Camera Jacket on its website, where it is priced at ¥12,800 / $ 110 USD with shipping to the US being an additional ¥2,000 / $ 18.

    Via: LeicaRumors

    Articles: Digital Photography Review (dpreview.com)

  • How to Use White Balance as a Creative Tool

    White Balance is almost always used to match what colors our cameras detect to the colors we see with our eyes. Our brains are very good at managing how we see color. A sunny day looks warm and bright, but the actual color of the light is skewed heavily blue. Indoors, incandescent lights are notoriously warm (yellow/orange) and though our eyes may detect little of this warmth, you can bet our cameras will. White Balance is how we correct for that difference in light color, and how we can make images appear “natural” which is to say, how our brains detect it.
    White Balance as a Creative Tool

    Auto White Balance

    It’s useful, certainly, but most of us leave it up to the camera to make the decision about White Balance. I know I do. My cameras are almost always set to Auto White Balance. Since I shoot in RAW, any errors that the camera makes can quickly be corrected in post-processing. At this point, I rarely even think about White Balance. But, perhaps I should…

    White Balance can be more than a mindless setting of camera functions or a digital slider in Lightroom. Instead, it can be used as a creative tool. Slight changes in White Balance can change the tone and impact of your images. From dramatic color shifts to subtle changes in tonality, it’s time to elevate White Balance into the realm of creative options in photography.

    The methods I’ll discuss here can be done either in camera or in post-processing, but it’s easier using the latter since you can see the impact of your choices real time. Although I use Adobe Lightroom, any program that allows you to adjust White Balance will work.

    Dramatic Shifts in White Balance

    Big shifts in White Balance can completely change the nature of your image. Shifts from cool to warm tones can take the image from looking as though it was made during the blue hour to post-dawn, or even make the weather appear to change.

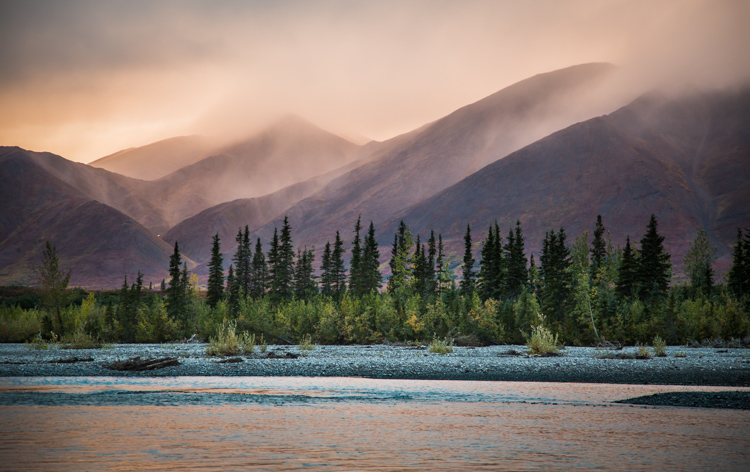
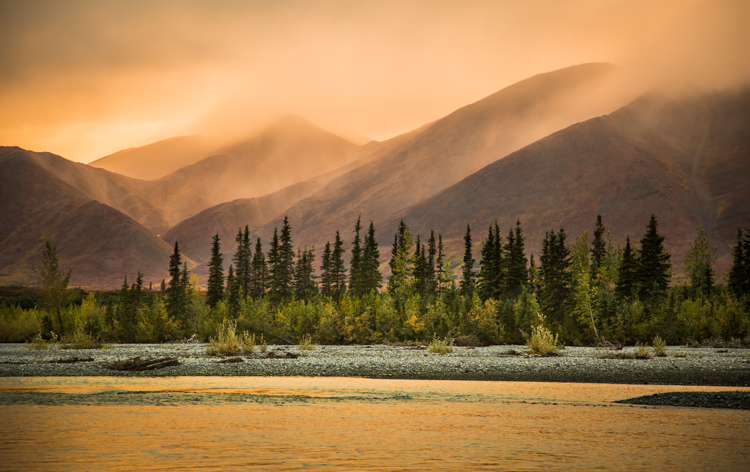
    A few years ago I was leading a wilderness/photo tour in the Noatak National Preserve in northwestern Alaska. One evening, an afternoon storm was clearing off the mountains and I went down to the river to make a few images. The light was pink, the rolling clouds and falling rain lit by the low sun.

    Below are three versions of the same image with only the White Balance changed. You can see the huge difference made by the shift from warm to cool tones. The bluest image is set 3600K, the warmest to 14750K, and the one somewhere in between is 7000K. In the end, you’ll probably choose an image that is neither overly cool, nor overly warm, but how the White Balance setting changes the feel of the image is worth noting.
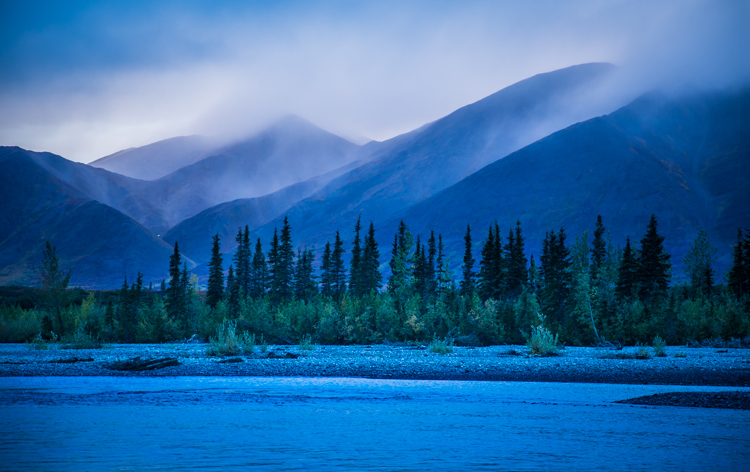
    White Balance as a Creative Tool

    White Balance set to 3600K.

    White Balance as a Creative Tool

    7000K

    White Balance as a Creative Tool

    14,750K

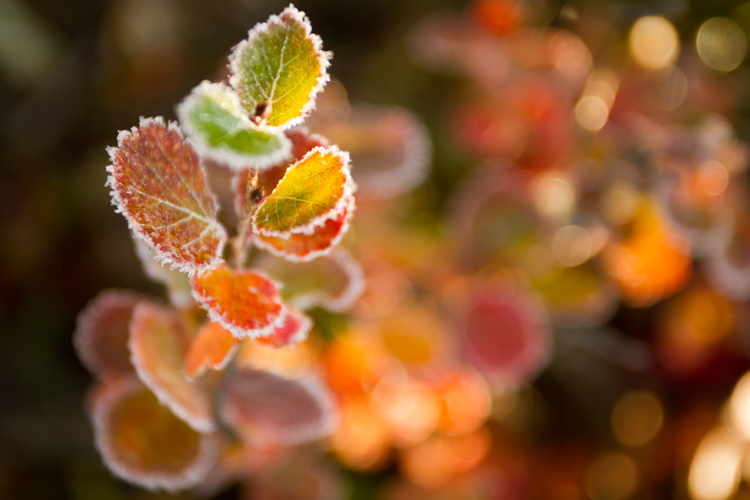
    Here is another example using autumn foliage, in this case, a Dwarf Birch in Alaska. The top image is 5050K, very close to what the Auto function on my camera selected, in the second I’ve warmed the image to 9000K. Although I prefer the cooler tones, I could see the second version appealing to editors looking for an autumn spread in a magazine or catalog.
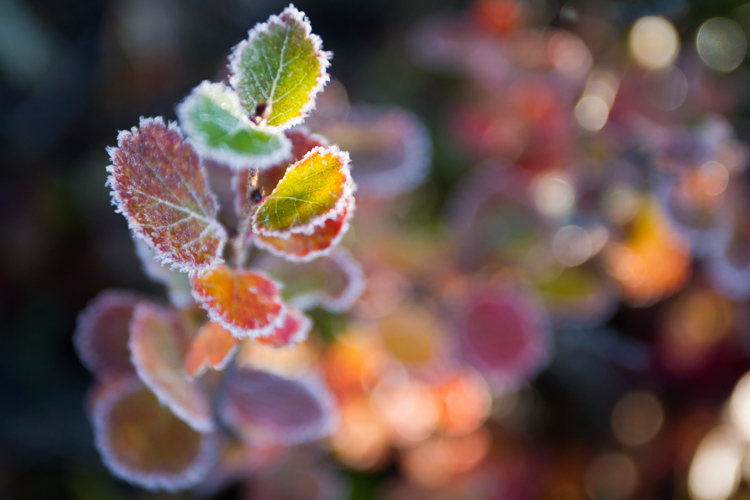
    White Balance as a Creative Tool

    White Balance set to 5050K.

    White Balance as a Creative Tool

    White Balance set to 9000K.

    Subtle Shifts in White Balance
    White Balance as a Creative Tool

    White Balance set to 4350K.

    White Balance as a Creative Tool

    White Balance set to 8700K.

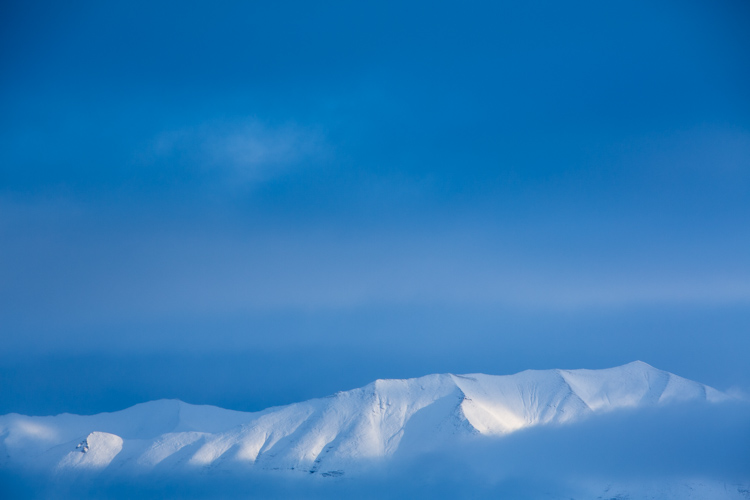
    Subtle shifts in White Balance can also be effective, even though differences between images may be less obvious. A change of a few hundred to a couple thousand Kelvin (the K measurement used in White Balance) can make a surprising difference to the impact of an image. In the top photo, I chose a cool setting (4350K) which brings out the cool winter tones. The second is much warmer, set to 8700k, which to me, (aside from being a bit too warm) feels like an evening storm is approaching. Neither is exactly “accurate” to the scene as I saw it, but neither are they necessarily unnatural. I’ll return to this image shortly.

    Water

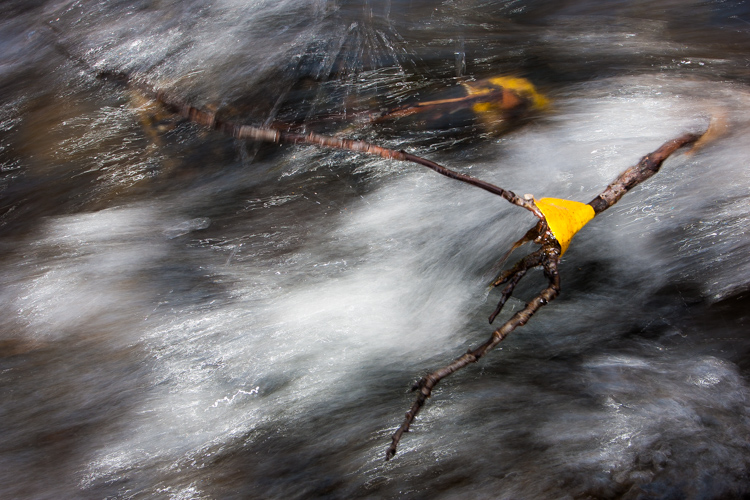
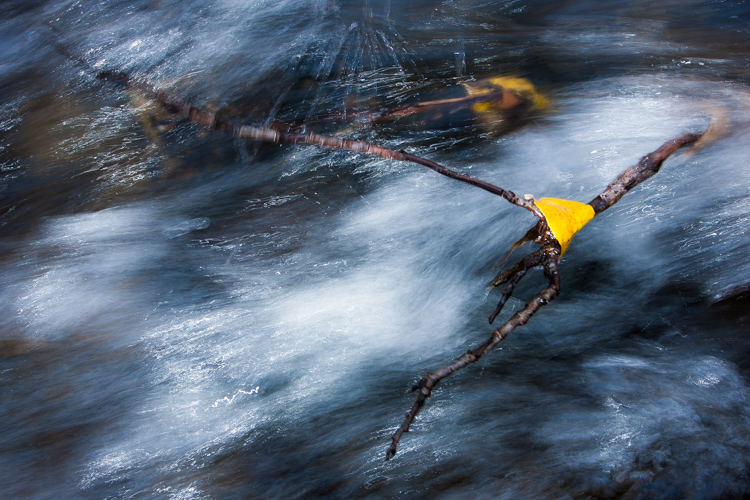
    Water strikes most people as a cool substance, and often it looks better when a White Balance with more blue-tone is selected. I made this image on a day with broken clouds, in autumn, in a small mountain range north of my home in Alaska. Tiny patches of the sun were penetrating the yellow, shrubby willows which surrounded this small creek. The yellow leaves and the partially overcast sky gave the scene a notably warm tone which you can see in the top image, set to 4600K (as selected by my camera’s Auto White Balance setting). I think it’s too warm, so just a subtle push to the blue range (4100K) was enough to retain the warm tone in the single yellow leaf but sufficient enough to cool the water.
    White Balance as a Creative Tool

    White Balance 4600K as chosen by the camera using AWB.
    White Balance as a Creative Tool

    White Balance adjusted to 4600K in post-processing makes the water feel much cooler.

    Sunsets

    Sunsets too can benefit from a little creative tweaking of the White Balance. From the bluff above a beach in Homer, Alaska, I made the image below. The cooler-toned toned image was shot using Auto White Balance (4600K), while the second I warmed up to 6000K in processing. I like both versions. So you can see that selecting a White Balance is very much a matter of taste, and how you want your image to come across to your audience. Which version do you prefer?
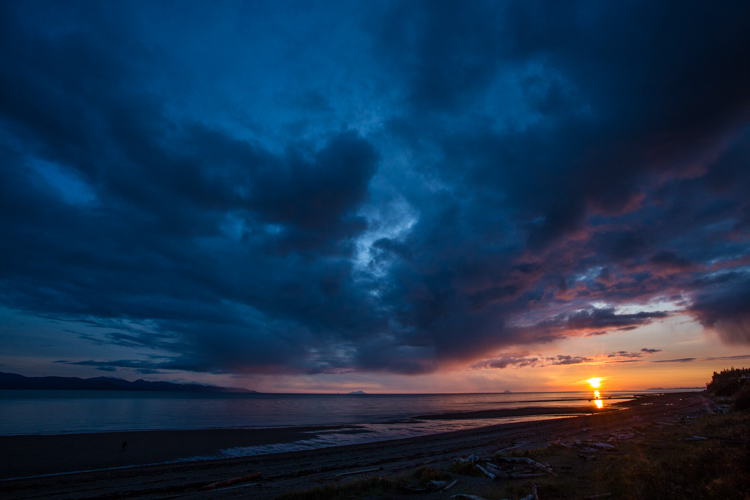
    White Balance 4600K as shot using AWB.
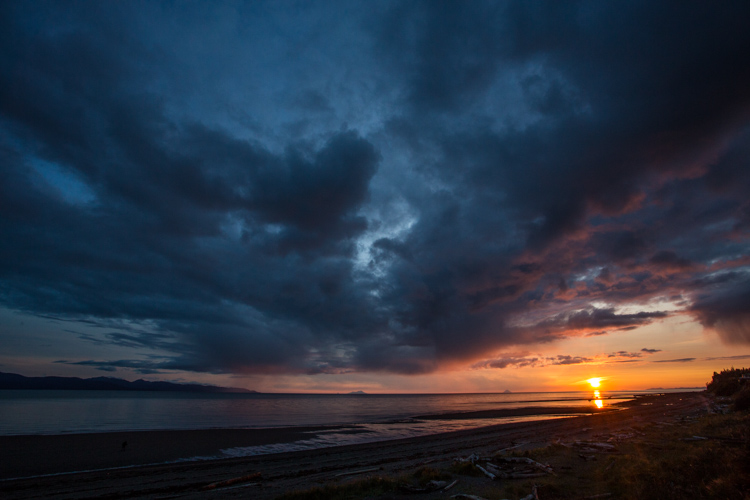
    White Balance adjusted to 6000K in post-processing.

    Selective Changes to White Balance

    The great part about digital post-processing is that you don’t have to choose one White Balance or another, you can mix and match. My choice of software, Adobe Lightroom, allows you to use the Adjustment Brush to grab certain parts of your frame, and independently adjust them from the rest of the image.

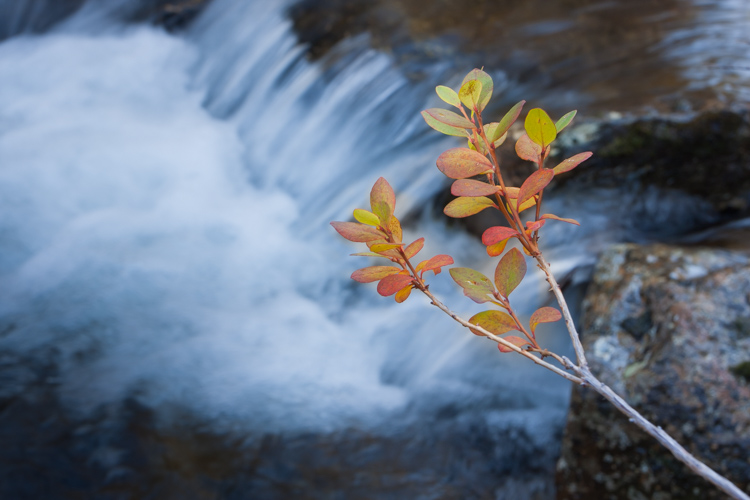
    The photo below was made around the same time as the leaf in the stream I discussed earlier. In this case, a global (over the entire image) adjustment made the sprig of autumn colors look too cool and weird, even though the water was about right. So I cooled the whole image off to 3700K, then selected the sprig and bumped the Temperature setting to +35 using the Adjustment Brush.
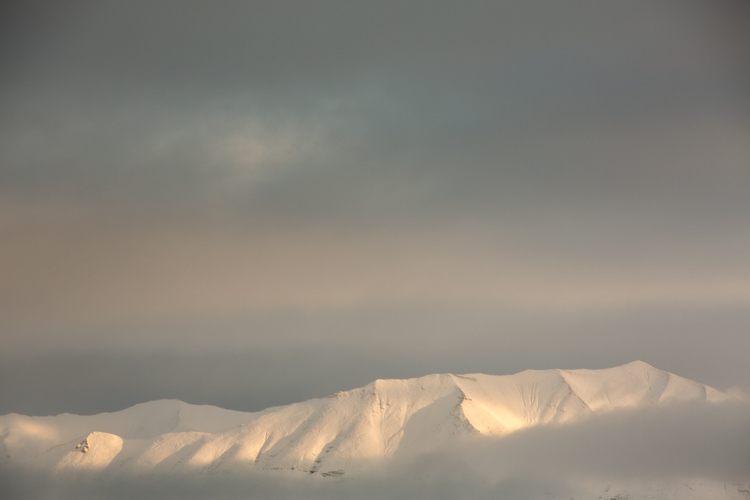
    As I was playing with the snowy mountain image I discussed early, I realized I liked neither the blue nor the overly warm version. I thought some combination might work well. So I set the overall tone slightly blue to 5100K and selected just the mountain, where the hint of sunlight was shedding some warmer light and gave that a boost to +23. The result works.
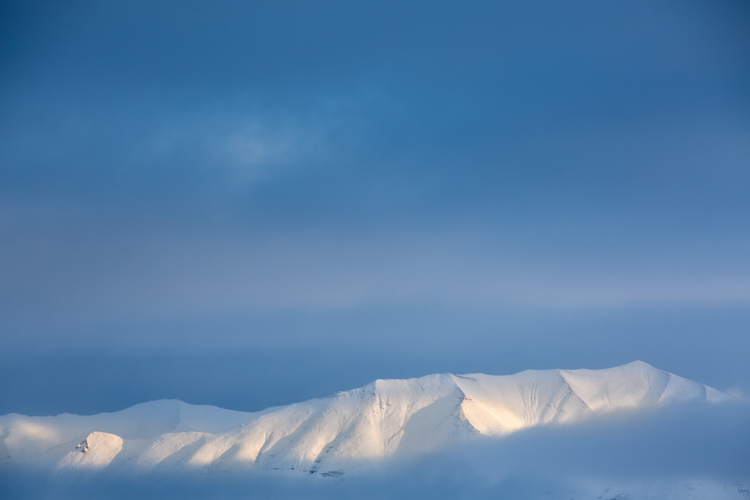
    White Balance set to 5100K overall with warmth added to the top of the mountains using the Adjustment Brush.
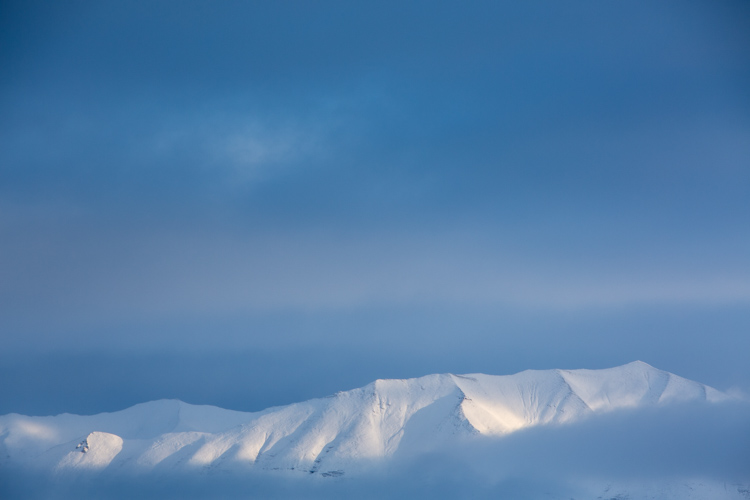
    Compare this version which is at 5000K with no extra adjustments on the mountains. See how subtle the difference is? But the version above feels little warmer in the sunlit areas.

    White Balance in Black and White

    We think of White Balance as strictly related to color, but in fact, it can play an important role in black and white as well. The White Balance used in your final image can impact cont st, and the way different shades of gray are presented in the final image.

    To get the full impact, you need to use that White Balance slider in a big way. That means doing big pushes from warm to cool, not little subtle shifts of a few hundred or thousand Kelvin.

    Examples

    I was on the Alaska Ferry making images on a very gray and rainy winter day when we passed this small speck of an island with a few wind-blown spruce trees growing on it. I knew it was a black and white kind of scene, so I quickly removed the color using Lightroom. When I moved the White Balance to one side or the other it created a big change in the contrast and overall brightness of the photo. The top image is set well to the blue range (3700K) while the second is way over in the warm range (32,700K). You can see how the warm setting removed some contrast and brightened the photo.
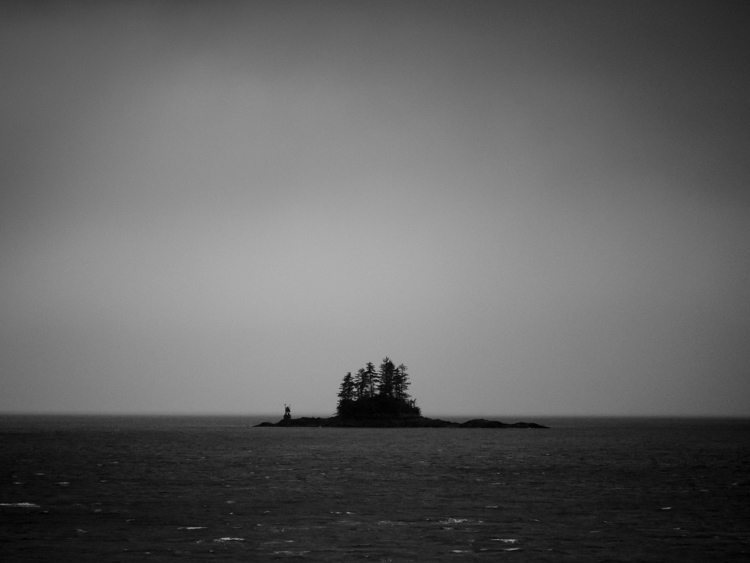
    3700K
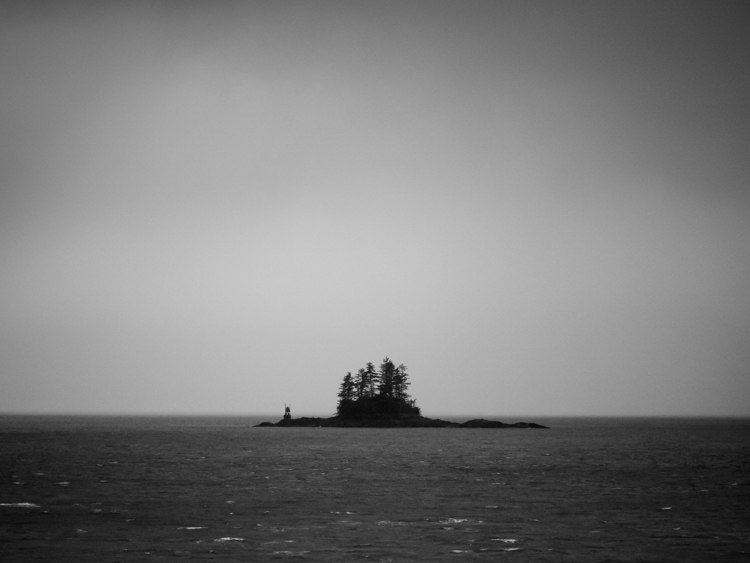
    32,700K

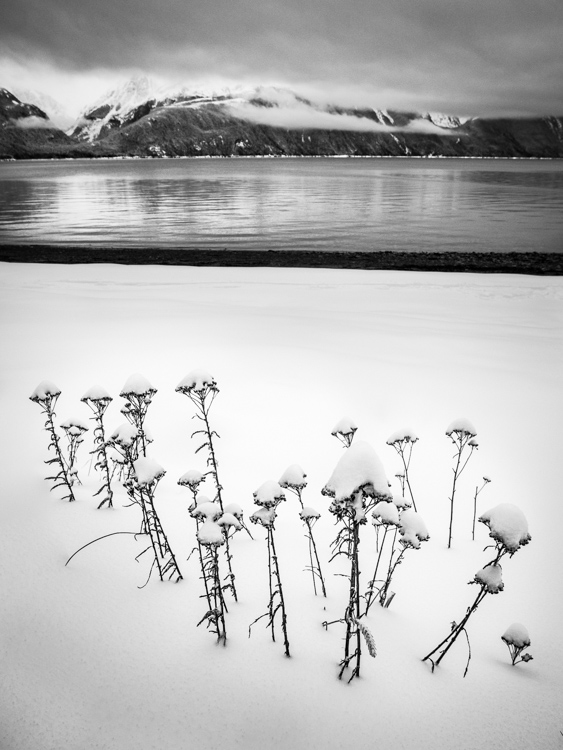
    A snowy landscape image on a beach near Haines, Alaska provided another chance to explore how White Balance impacts a black and white scene. The left image is set to 3700K, the right to 35,000K.
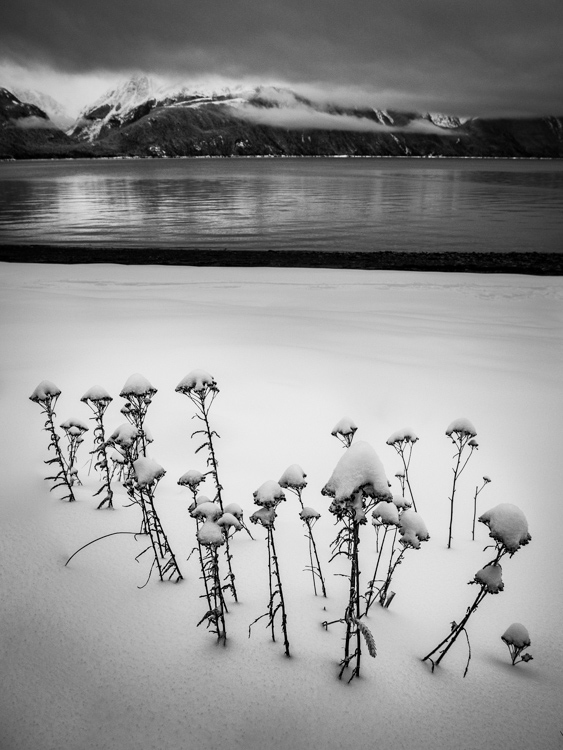
    3700K

    35,000K

    Lastly, is this simple composition of a dew-covered spider web. The top image has high contrast, is dark overall, with clean white dew drops and is set 2000K, (as cool as Lightroom will allow). The second is much grayer, with substantially less contrast, and is as high as Lightroom will allow at 50,000K. There is no question, I prefer the first version. But many images, such as the two examples above depend more on personal taste.

    2000K
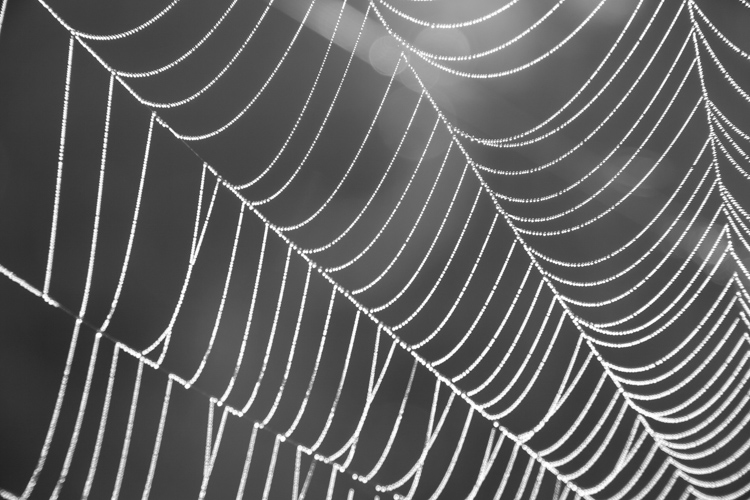
    50,000K

    Conclusion

    It is time to stop thinking of White Balance as strictly a way to accurately present color, and instead, embrace it as a creative tool. Whether it is for dramatic impact, subtle changes, selective adjustments, or even (counter-intuitively) using it in black and white photography – White Balance can play an important part in the outcome of your images. Consider it, use it. Embrace White Balance as more than just a setting.

    The post How to Use White Balance as a Creative Tool by David Shaw appeared first on Digital Photography School.


    Digital Photography School

  • 5 Surprising Habits That Will Make You a Better Photographer

    When you’re learning photography, it seems natural to pay the most attention to the gear and techniques you use to create images. You’ve probably received advice about developing great habits like photographing every day, carrying your camera everywhere you go, trying different compositions, learning processing skills, and backing up your photos. These things are important, no doubt! But there is more to becoming a better photographer than that.

    Getting the shot often comes down to being there at the right time, so these tips have to do with getting out in the field and staying out in the field. If you cultivate these surprising habits, you’ll surely become a better photographer.

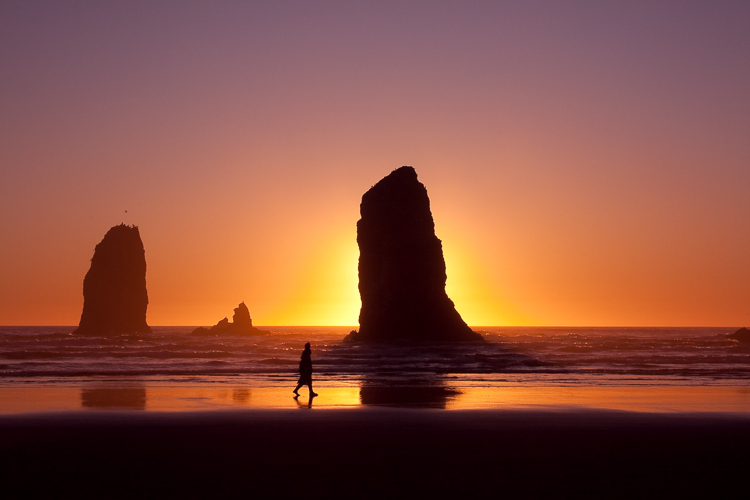
    Canon Beach, Oregon, by Anne McKinnell - better photographer

    #1 – Research Locations

    Before you set off on your photo shoot, doing a little research can go a long way to making better images. First, think about what potential subjects are available. I like to create a Pinterest board and start collecting images I like from the location. Once you get an idea of what is there, how can you create images that are different from what you have seen? Is there a different perspective you want to check out? Or maybe a night shot? Don’t forget to take note of the direction of light in the images you see. Imagine what it would look like at a different time of day.

    Once you get an idea of what is there, how can you create images that are different from what you have seen? Is there a different perspective you want to check out? Or maybe a night shot? Don’t forget to take note of the direction of light in the images you’ve seen. Imagine what it would look like at a different time of day.

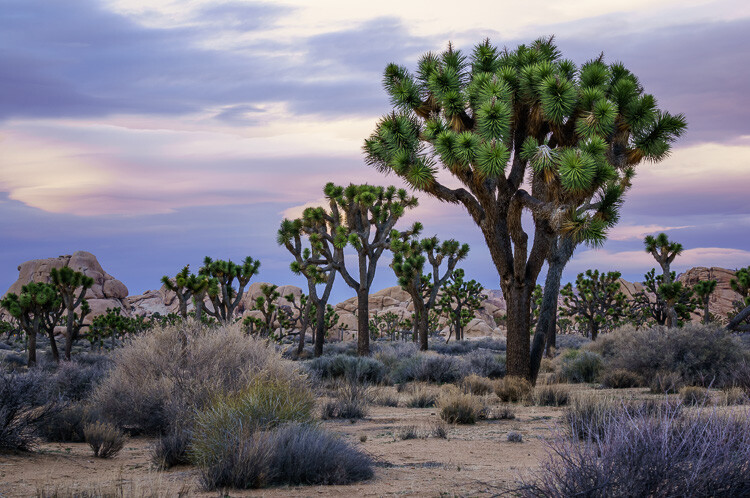
    Joshua Tree National Park, California, by Anne McKinnell - habits better photographer

    This is the location where the Joshua Trees are the densest in Joshua Tree National Park, California.

    The second part of your research should be looking at maps and figuring out where exactly the best subjects are located and how to get there. Is the location close to the road or will you have to hike there? How long will it take?

    #2 – Watch the Weather

    Keeping a close eye on the weather forecast will dramatically affect your photos. Remember, bad weather is usually a good thing for photography! Storms bring the potential for seeing dramatic clouds, wet leaves, and even rainbows. You’ll get photos with fewer people in them too.

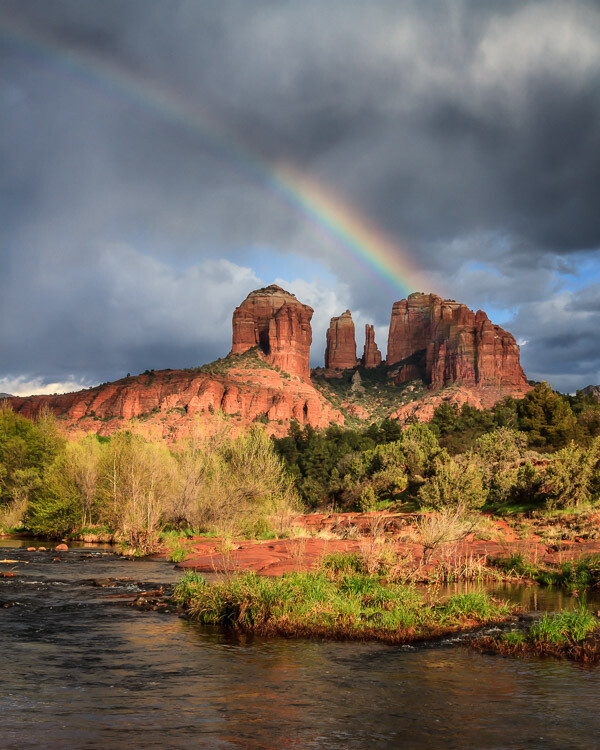
    Red Rock State Park, Sedona, Arizona by Anne McKinnell - habits better photographer

    Waiting for a break in the weather resulted in this rainbow at Cathedral Rock, Arizona.

    When I was visiting Cathedral Rock in Sedona, Arizona, I noticed that there were a lot of people around and it was difficult to get a photo without a lot of tourists in it. Then it started to rain and everyone left. I waited in my truck for 45 minutes during the downpour. Mine was the only vehicle in the parking lot, and when the rain began to die down, I headed out and was rewarded with a beautiful rainbow. I had the location all to myself.

    If a clear sky is in your forecast, instead of photographing your scene with a plain blue sky, you might have the potential for a great night shot.

    While you’re at it, don’t forget to check when the sun rises and sets and when the moon rises and sets. If you’re going to be on the beach, tides are also important.

    #3 – Carry Less Stuff

    Whether you choose to go out with your camera and only one or two lenses or switch your whole system to a lightweight mirrorless system, you’ll undoubtedly find that you can hike farther and get to more remote locations with less weight on your shoulders. The potential for finding unique subjects and unique compositions increases the farther away you get from the beaten track.

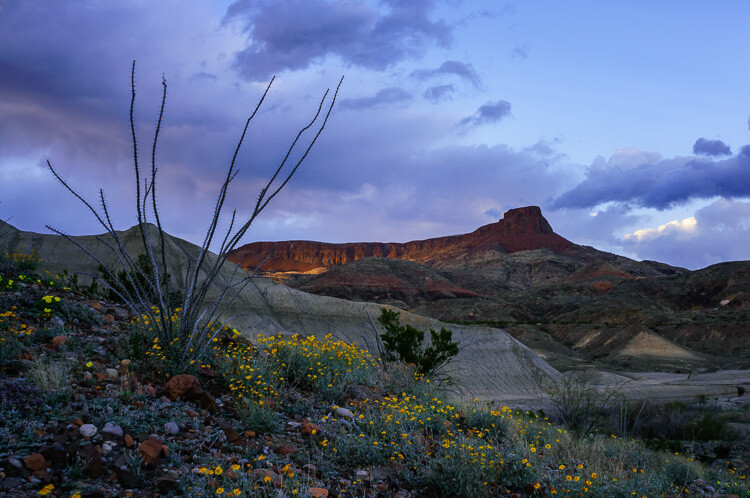
    Big Bend Ranch State Park, Texas, by Anne McKinnell - habits better photographer

    I don’t think I would have made it this far up the hill if I had carried all of my heavy gear.

    #4 – Don’t Forget the Comfort Essentials

    Despite the last tip about carrying less stuff, it’s equally essential that you carry the right stuff to allow you to stay out there longer. Anything that makes you uncomfortable in the field will probably cause you to leave earlier than otherwise.

    Thirst, hunger, being cold or wet, getting bitten by bugs and looming darkness are just a few things that can make you leave a location too soon. A few things on my “always carry” list are food, water, rain jacket, sweater, bug spray, and a headlamp. These items will get you more potential shots than that extra lens.

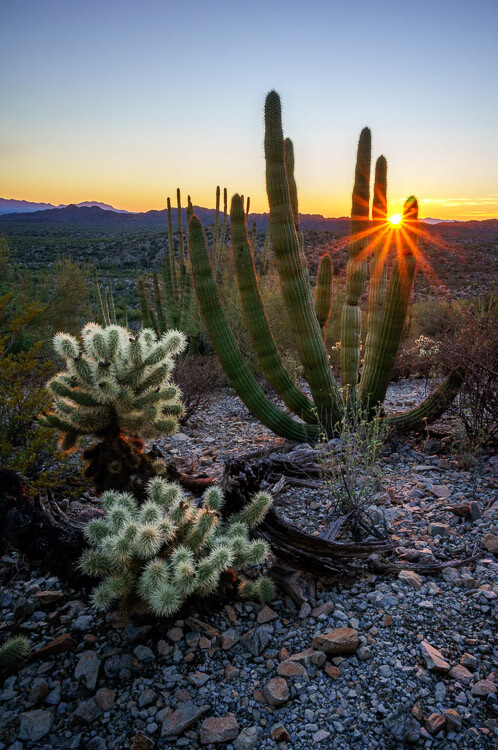
    Organ Pipe Cactus National Monument, Arizona, by Anne McKinnell habit better photographer

    I probably wouldn’t have this photo if it were not for my trusty headlamp that I used to make my way back through the cacti in the dark.

    #5 – Hike With a GPS

    Getting lost is one of my fears when I’m out exploring, so I have started hiking with a handheld GPS. It took me awhile to get used to it because it’s not the fancy kind with built-in maps. All I do is mark a waypoint where I park my truck and then it tracks me as I walk. No cell signal or internet required. I can always figure out the direction to get back to my waypoint, or even follow my tracks to go back using the exact route I took to go out. It’s worth it to carry a couple of extra batteries for it too.

    Now that I have the GPS, I am more willing to go off the trail and explore new things. It’s a whole new level of freedom!

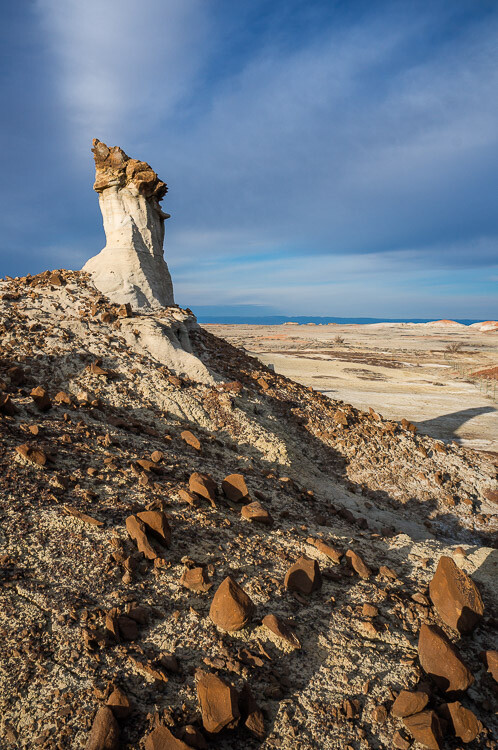
    Bisti Badlands, New Mexico, by Anne McKinnell - habits better photographer

    At Bisti Badlands, New Mexico, it is very easy to get lost with no trails and strange rock formations in every direction. My GPS was a lifesaver.

    Conclusion

    These tips should help you figure out where to go when to get there and make sure you are comfortable in the field so you can stay as long as you like to get that special shot. Sometimes photography is a waiting game, but if you are comfortable you can be patient and wait for the magic moment to happen.

    The post 5 Surprising Habits That Will Make You a Better Photographer by Anne McKinnell appeared first on Digital Photography School.


    Digital Photography School

  • New Nikon D3400 and D5600 firmware improves Snapbridge connectivity

    In our review of the Nikon D5600 we reported connectivity issues with the Nikon Snapbridge app that allows for automatic image transfer from the camera to your smartphone. It appears these issues might now have been resolved.

    Nikon has released firmware updates for the Nikon D3400 and D5600 DSLRs to improve the pairing and connectivity between the Android version of SnapBridge and the cameras. Firmware version 1.12 for the Nikon D3400 and 1.02 for the D5600 are now both available to download and install via Mac OS or Windows PC from the Nikon website. Connectivity issues with the iOS version of the app had already been solved via a previous firmware update.

    Articles: Digital Photography Review (dpreview.com)

  • Father’s Day Gift Guide for Dads of All Kinds

    Maybe you’re shopping for your photo snapping papa, your camera carrying grandad, or your stepdad Ron. Could be that your momma did all the parenting and deserves a second gift this year.

    Whoever you like playing catch with, we’ve got just the gift for them! Plus, a $ 10 discount when you spend $ 30 or more with the code LoveDad, through this weekend.

    Scroll along to find the best description of your favorite father figure and we’ll tell you the perfect present to pick up for Father’s Day.
    (…)
    Read the rest of Father’s Day Gift Guide for Dads of All Kinds (0 words)


    © laurel for Photojojo, 2017. |
    Permalink |
    No comment |
    Add to
    del.icio.us

    Post tags:

    The post Father’s Day Gift Guide for Dads of All Kinds appeared first on Photojojo.


    Photojojo

  • It’s a photo album… and a camera: the Sony Cyber-shot DSC-N1

    In the mid-2000s camera manufacturers had to find ways to differentiate themselves from the competition. Kodak brought Wi-Fi to the camera world with its EasyShare One, Panasonic released the DMC-LX1 that had a 16:9 sensor and Samsung put selfie mirrors on the front of its compacts. Not to be outdone, Sony released its Cyber-shot DSC-N1 in October 2005, which was a compact camera and a 500-shot photo album in one.

    On the front panel, the N1 had an 8.1MP, 1/1.8″ CCD with a top ISO of 800, a 38-114mm equivalent lens, 5-area AF system and a battery that lasted for roughly 300 shots (which is quite respectable). Images and VGA video could be saved to internal memory or a Memory Stick Pro Duo slot.

    Photo quality was typical for 2005, which is to say, good until about ISO 400 or so.

    The real action takes place on the back of the DSC-N1, where you’ll find a 3″, 230k-dot RGBW LCD. The display was touch-enabled and offered features that we take for granted today, like touch AF, menu operation and image playback.

    Enough beating around the bush: here’s what made the DSC-N1 unique. Every time you took a photo, a VGA-sized version would be saved to the camera’s internal memory bank. Album photos are saved ‘first in first out’, which means that older photos will be automatically deleted from the album if you don’t protect or copy them first.

    Images were organized by date and time and you could view slideshows of images from that date or the whole album. Slideshows were accompanied by fancy transitions and generic background music. One nice thing was that you could replace the built-in music with your own, drawing from CDs or MP3s.

    As the photo above says, you could ‘paint’ on top of a photo using an included stylus. You could pick a color and a line size and draw away or add ‘stamps’. Thankfully, an eraser was also available.

    Sony offered an optional dock, known as the Cyber-shot Station, which let you charge the battery or display your slideshows on a TV.

    Read DCResource DSC-N1 review

    Sample Gallery

    $ (document).ready(function() { SampleGalleryV2({“containerId”:”embeddedSampleGallery_0966509639″,”galleryId”:”0966509639″,”isEmbeddedWidget”:true,”standalone”:false,”selectedImageIndex”:0,”startInCommentsView”:false,”isMobile”:false}) });


    Did you have a Cyber-shot DSC-N1 or the DSC-N2 that followed it? Share your memories in the comments! As always, suggestions for future tbt’s are appreciated.

    Articles: Digital Photography Review (dpreview.com)

  • Manual Mode or Exposure Compensation – Which is Best?

    As you may know, cameras often get exposure wrong. The question is, what do you do when you realize that the exposure settings suggested by your camera are not right?

    You have two options. One is to switch to Manual mode and set the ISO, aperture, and shutter speed yourself. The other is to use exposure compensation (and Aperture or Shutter Priority mode).

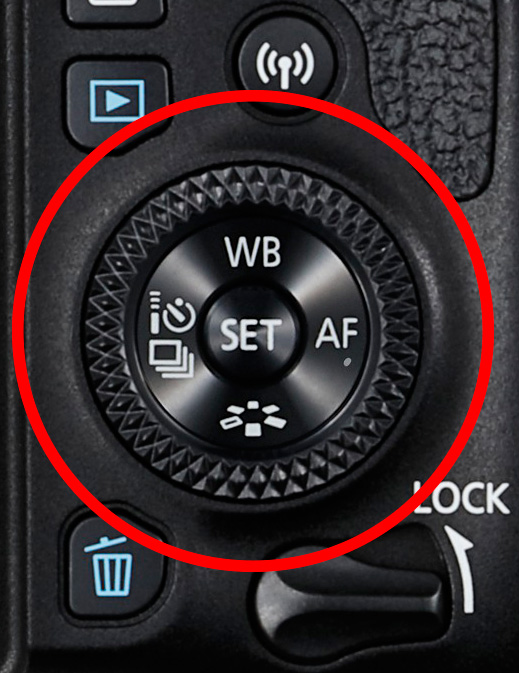
    The best solution depends on the situation in which you find yourself, plus the configuration of your camera’s dials. For example, with a Canon EOS digital SLR it’s easy to apply exposure compensation by moving the Quick control dial on the back of the camera. It’s so simple you don’t need to take your eye away from the viewfinder.

    Exposure compensation versus manual mode

    The Quick control dial on the EOS 77D.

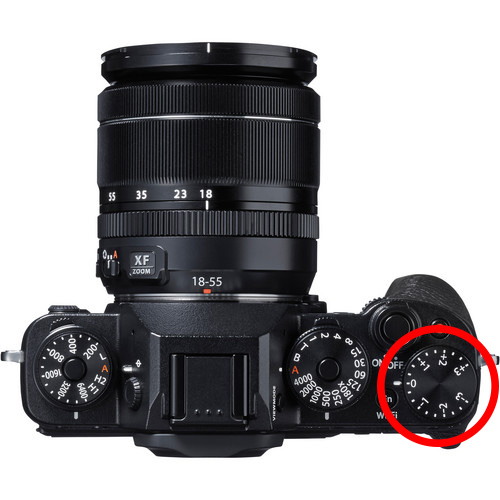
    On my Fujifilm X-T1, the exposure compensation dial is on top of the camera. It’s harder to get at and nearly impossible to adjust without taking your eye away from the viewfinder. But the aperture ring on the lens makes it easy to go to Manual mode and adjust exposure by changing the aperture. An optional live histogram in the viewfinder helps you see if exposure is accurate before pressing the shutter (an advantage of some mirrorless cameras).

    Exposure compensation versus manual mode

    The exposure compensation dial on the Fujifilm X-T1 is much harder to reach.

    These are good examples of how hardware can push you in one direction or another. My Canon SLRs pushed me towards exposure compensation, and my Fujifilm X-T1 pushes me towards using Manual mode.

    Using Manual mode

    Let’s look at Manual mode first. In Manual, you set the ISO, aperture, and shutter speed yourself. There are certain situations when using Manual mode (as opposed to Programmed Auto, Aperture Priority or Shutter Priority with exposure compensation) is beneficial. Let’s look at a few.

    1. Shoot in Manual when the light level is constant

    If the ambient light level is steady, you don’t need to change the exposure settings once you have decided which ones to use. Automatic exposure modes are influenced by the reflectivity of the subject and the exposure reading can change even if the light levels don’t.

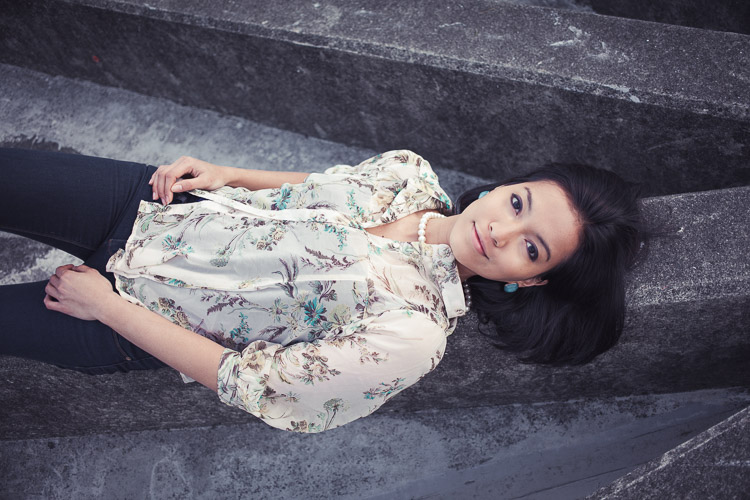
    That makes Manual mode ideal for this kind of situation. Once you’ve set the exposure you don’t need to change it. I like to use Manual mode when making portraits in natural light. Once I’ve set the exposure I’m free to concentrate on directing the model.

    Exposure compensation versus manual mode

    2. Shoot in Manual when you’re photographing landscapes and using a tripod

    In this situation, you have plenty of time to assess exposure. Manual mode is ideal because you can set a low ISO (for image quality), a small aperture (for depth of field) and change the shutter speed to suit the light levels. It’s also easy to make adjustments to allow for any polarizing, neutral density or graduated neutral density filters you may be using.

    If you’re shooting landscapes at dusk, while the light is fading, Manual mode also works well. After you take a photo, just check the histogram. As it moves to the left, which it will as the light fades, dial in a slower shutter speed to compensate.

    Exposure compensation vs. manual mode

    3. Use Manual Mode when you’re using manual flash

    If you’re using a flash set to manual the output from the flash is the same every time. In that situation, it’s best to adjust the camera settings manually so the exposure is consistent from frame to frame.

    To create the portrait below, I worked with both the camera and flash set to manual. Setting your flash to manual only works when the flash to subject distance doesn’t change.

    Exposure compensation vs. manual mode

    4. Use Manual mode for long exposure photography

    If you’re doing long exposure landscape photography and your shutter speed (exposure time) is longer than 30 seconds then you need to use Bulb mode. This is another form of Manual mode. Except that rather than telling the camera what shutter speed you want it to use, you do so by using the camera’s bulb setting and a remote release.

    I used Bulb mode to make this landscape photo with a shutter speed (exposure time) of 82 seconds.

    Exposure compensation vs. manual mode

    Using Exposure Compensation

    The alternative to Manual mode is to set your camera to an automatic exposure mode and use exposure compensation to override the camera’s settings.

    The three best automatic exposure modes to use are Aperture Priority, Shutter Priority or Programmed auto. Other exposure modes, such as Landscape and Portrait, don’t give you enough control. On some cameras (such as Canon EOS) you can’t adjust exposure compensation when using one of these modes.

    These are some of the situations where exposure compensation may be better than Manual mode.

    1. Use Exposure Compensation for street and travel photography

    If you are taking photos of people in the street the required exposures can vary wildly. One moment you may take a photo of something in the sun, the next you may photograph something in the shade. The sun may also be going in and out between the clouds.

    In this situation, you want to concentrate on finding interesting things to photograph and creating a good composition. If you have to stop and think about exposure, then you may miss the shot. Automatic exposure modes help greatly.

    Exposure compensation vs. manual mode

    2. Use Exposure Compensation when you are using on-camera flash in an automatic mode (TTL)

    If you have the on-camera flash set to an automatic mode, then the camera needs to be set to evaluative or matrix metering, the camera’s most advanced metering mode, to take full advantage of that. The camera and flash work together to calculate the correct exposure.

    Setting your flash to automatic (TTL or E-TTL) works best when the subject to flash distance is constantly changing. Using automatic means your camera can adjust the output of the flash as it needs to.

    3. Use Exposure Compensation when shooting sports or wildlife

    This is another situation where the light level is likely to change frequently and you need to concentrate on tracking the action and capturing important moments. You don’t want to be thinking about exposure when trying to capture the peak of the action in sports or photographing fast-moving wildlife. Let your camera do the work, and use exposure compensation if you have to.

    Conclusion

    Everybody works differently, so the points in this article should be taken as suggestions only. The more experienced you become as a photographer the more you will learn to judge whether you should use Manual mode or Exposure Compensation to take control of your exposure.

    It may make it easier to think of it in terms of time. If you have more time to think about your camera settings, then use Manual mode. If you have less thinking time and need to be ready to react quickly to capture the action, then use an automatic exposure mode and Exposure Compensation.

    Do you prefer to use Manual mode or an automatic exposure mode with exposure compensation? Please let me know in the comments below,


    Want to learn how to get perfect exposure on your digital camera? Then check out my new ebook Mastering Exposure and say goodbye to all your exposure problems!

    The post Manual Mode or Exposure Compensation – Which is Best? by Andrew S. Gibson appeared first on Digital Photography School.


    Digital Photography School
  • DPReview on TWiT: Is the Sony a9 worth $4500?

    DPReview has partnered with the TWiT Network (named after its flagship show, This Week in Tech) to produce a regular segment for The New Screen Savers, a popular weekend show hosted by technology guru Leo Laporte.

    On this week’s episode of The New Screen Savers, DPReview editor Carey Rose joins Leo and Iain Thomson to talk about the Sony a9, who it’s for, and whether it’s really worth the $ 4500 price tag. The full episode also takes you on a tour of Jupiter with the Juno spacecraft and a quick review of the latest Lenovo Yoga 2-in-1. Lastly, what if you’re going traveling and want a camera for $ 300? We’ll help you out there, too.

    You can watch The New Screen Savers live every Saturday at 3pm Pacific Time (23:00 UTC), on demand through our articles, the TWiT website, or YouTube, as well as through most podcasting apps.

    Articles: Digital Photography Review (dpreview.com)

  • Imperial Pomp: Strange Post-Soviet Skyscrapers in Remote Russia

    [ By SA Rogers in Culture & History & Travel. ]

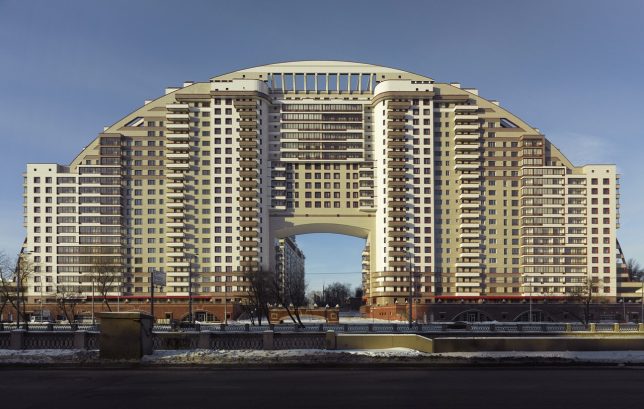
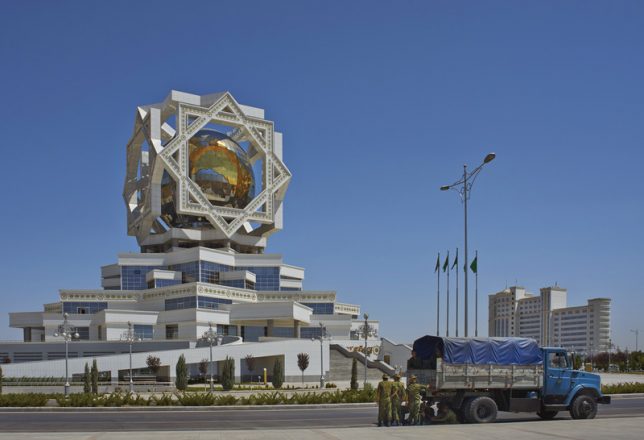
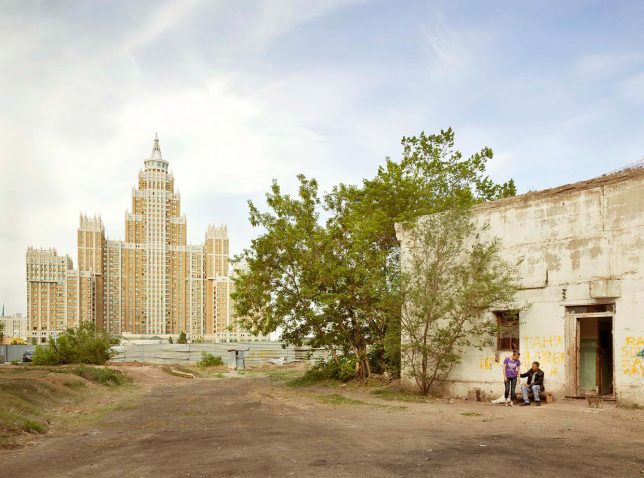
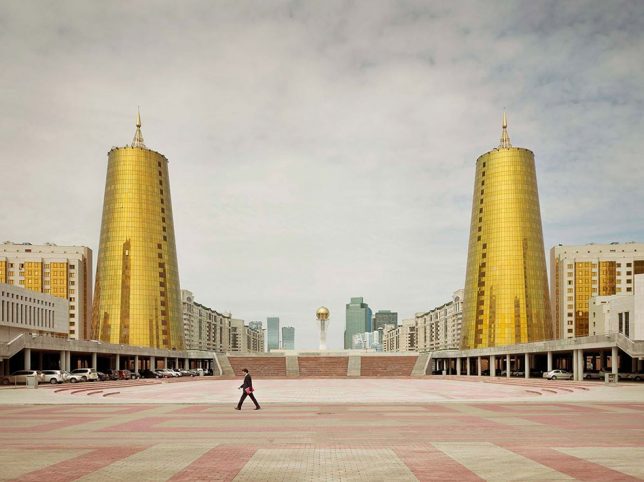
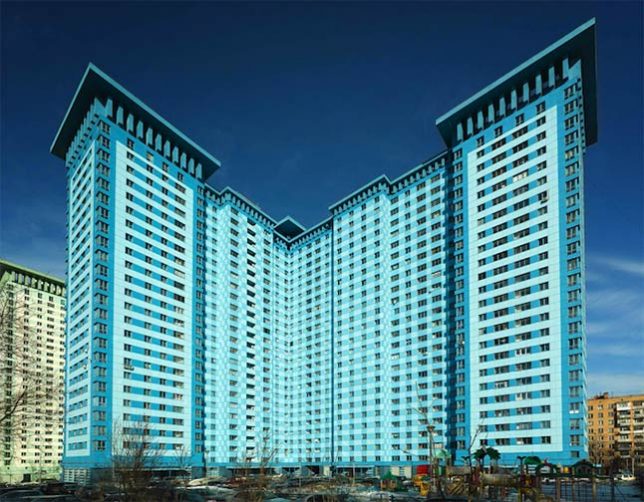
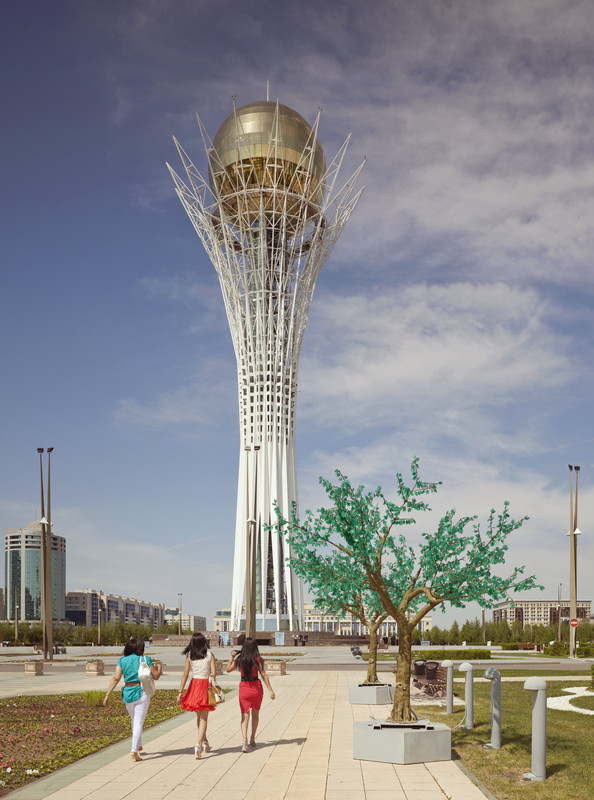
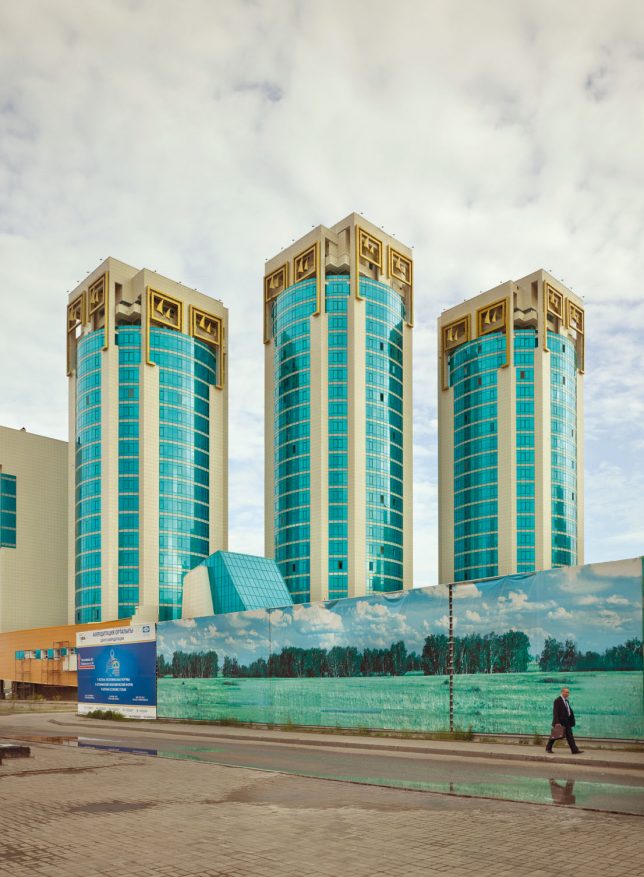
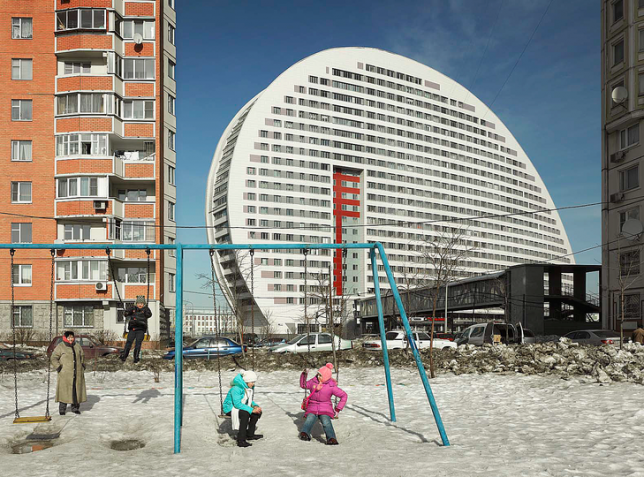
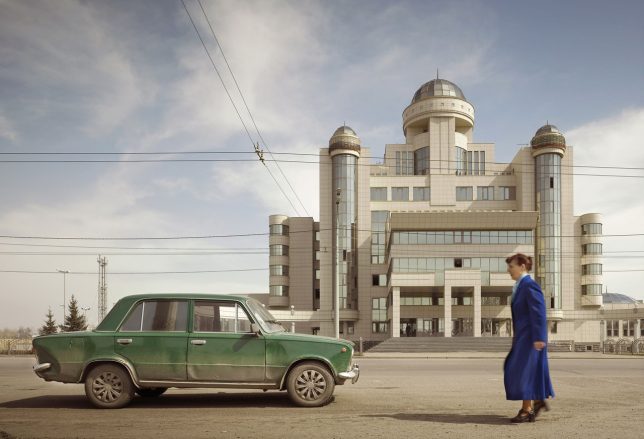
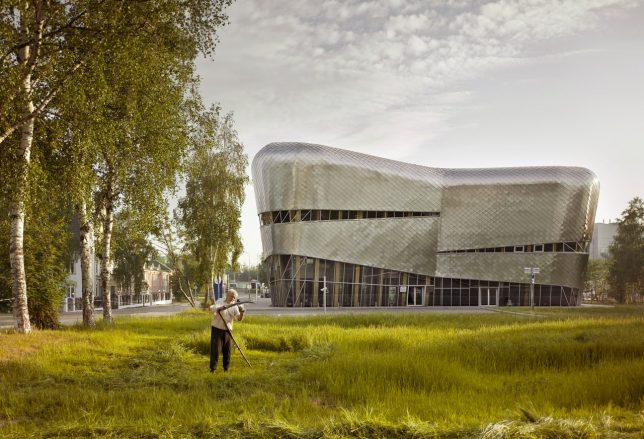
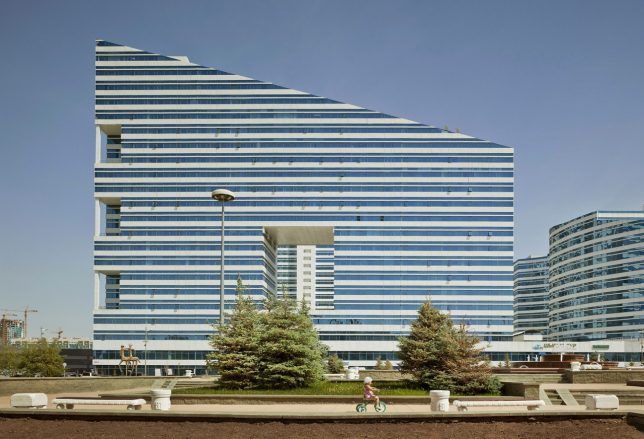
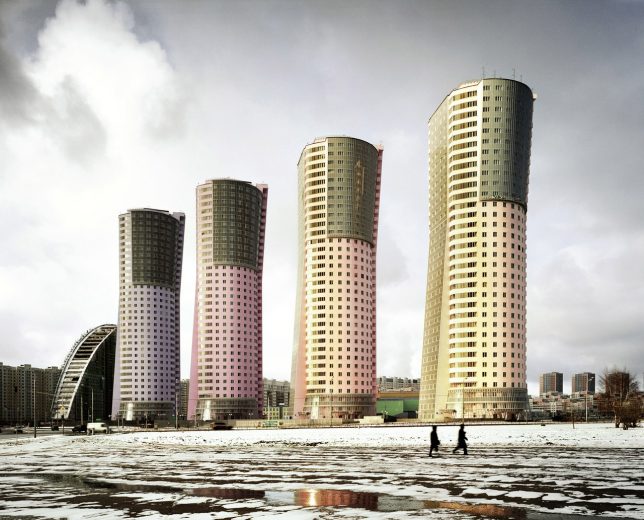
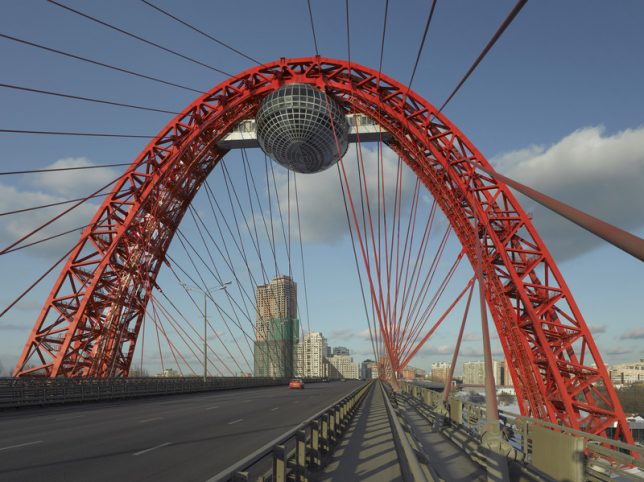
    Deep in the most remote reaches of the Soviet Union, strange skyscrapers glitter against the sky, made all the more out of place by their sleepy rural settings and lack of similarly scaled surroundings. Photographer Frank Herfort calls them ‘Imperial Pomp,’ monstrous and overly ostentatious structures that sprung up throughout the nation and the former Soviet Union in the decades since the collapse of the USSR. Traveling to places that might not otherwise draw many foreign visitors, Herfort captured the skyscrapers in all their strangely proportioned glamour for his photo book ‘Imperial Pomp – Post Soviet High-Rise.’

    “After exploring Moscow’s structures I realized, that in all cities and former Soviet countries you can find such buildings,” says Herfort. “So I traveled to Vladivostok, to Blagoveshchensk on the Chinese border on River Amur, to Astana in Kazakhstan, to Baku in Azerbaijan, to Sochi and to St. Petersburg. And everywhere in between. I was always impressed by these huge constructions while driving through Moscow. Moscow doesn’t have a big skyline or big houses in the cityscape, and then I was even more impressed when suddenly there appeared one of these big new colored buildings. They are standing like single flowers cropped in the landscape.”

    The German photographer notes that he feels like the buildings are “used to manipulate the humans and try to make them feel small.” He says the buildings rarely have infrastructure or real access built around them to invite the public to experience and interact with them, because they weren’t built with a care for anything other than showing off. That would certainly fit with the American perspective on Russia and its strongman fascination.

    The buildings do feel like modern iterations of the strange Soviet-era monuments that still litter much of the former Soviet Union, though they’re nowhere near as creative and sculptural as the wondrous and bizarre relics of what used to be Yugoslavia.

    Herfort’s book is out of stock at the publisher’s website, but a few copies are still available on Amazon, and you can see more of his work at his website.

    Share on Facebook


    [ By SA Rogers in Culture & History & Travel. ]

    [ WebUrbanist | Archives | Galleries | Privacy | TOS ]


    WebUrbanist