Blog

  • Technique: The ‘Dolly Zoom’ can add new dimension to your video

    We all know that a good camera is helpful when it comes to producing high quality video. Just as important, however, is how the camera moves. A good director or cinematographer can utilize camera motion in to set the mood, add emotion, or even to disorient the audience.

    One of the most jarring camera moves – but a very effective one when used well – is the dolly zoom. Hitchcock made the move famous in Vertigo, and it has been used in many other films to add tension to a scene.

    The dolly zoom works pretty much the way it sounds – you simultaneously zoom in or out on your subject while moving the camera in the opposite direction on a dolly. The result is a subject that appears to stay in place as the perspective of the scene changes noticeably. It takes a bit of practice, but employed correctly it can be very effective.

    The video above from YouTube user ‘Now You See It’ does a great job of explaining the dolly zoom and how filmmakers have used it to great effect. It’s not a move to use every day, but it’s worth keeping in your back pocket so that when the opportunity arises you’re prepared to do it.

    Articles: Digital Photography Review (dpreview.com)

  • How to Evaluate and Purchase Your Next New Lens

    It’s a day that comes for of us all at one time or another. You have to take the plunge…the big leap…go all in, take a chance. The decision can make or break you and your photography…or at least it can seem that way. It’s the day you invest in a brand new lens or one that’s new to you. Regardless, purchasing a fresh piece of glass can be confusing, frustrating, and painstaking. I’m here to tell you that we photographers who operate on limited funds (most of us) share in your anxiety when it comes to laying down what is usually a lot of money on something that we hope will improve our work and help us transcend to the next level.


    How do you make the right choices? How do you choose the right lens to fit your particular needs? Well, there is both good and bad news for you. The bad news is that only you can finally determine the right lens to fit your own craft.

    The good news, though, is that there are many ways you can lessen the anguish of lens buying and make sure that you find the right investment. In this article, you will learn how to look beyond just the obvious when shopping around for that new lens, so that you can ensure you make an informed and hopefully less painful decision. Lens reviews can become confusing in their own right. While there are infinite considerations, following these guidelines will help to make more sense of all those lens reviews.

    Optical Performance

    Sharpness

    This is one of if not the most often encountered reasons for buying a new lens. We need better sharpness. But that sharpness, of course, comes at a price. So when evaluating the sharpness of a new lens it’s important to consider all the elements of the equation.

    Are you looking for a lens that zooms or does not zoom? Prime lenses (non-zooming) are often cheaper and faster (have a larger maximum aperture) than zoom lenses of the same speed (more on this later). So, ask yourself if you need a lens that can change focal lengths quickly, such as for events or sports shooting? Or do you need a lens that can cope with more static scenes such as landscapes or posed portraits?


    Sharpness is so subjective that it often takes looking at many sample images to see the actual results from real-world tests. Be sure to note the camera each image was made with and the source of the sample. Pay special attention to the entire frame especially at the corners to judge the overall sharpness. Speaking of corner sharpness….

    Edge Softness

    When we talk about edge softening the reference is to the deterioration of sharpness at the corners of an image. This is brought about by many variables but usually, it is due to the composition and quality of the glass elements within the lens. As you approach the wide or short end of the aperture range of your particular lens this softening almost always become more apparent.

    Shot with the Rokinon 14mm at f/2.8. Note the more prominent loss of sharpness at the far edges and corners of the frame.

    While shopping for a new lens, of course, you want the least amount of “softening” at the edges of the frame. Make a point to inspect the aperture at which each test photo was shot because different apertures carry with them inherent differences in edge sharpness. If you know you will be shooting wide apertures (low light, shallow depth of field) or small apertures (landscapes, large depth of field) pay special attention to test photos shot towards the wide or narrow f-stops.

    Lens Distortion

    Lens distortion is fairly self-explanatory. It is anything that alters the spatial appearance of lines within the frame. There are two main forms of distortion; “barrel” and “pincushion”. Barrel distortion is common with wide-angle lenses and appears as a bulged effect; with the straight lines within the images appearing to bend outwardly.

    An example of “barrel” distortion often encountered with extremely short (wide) focal length lenses

    Pincushion distortion is the exact opposite of barrel distortion. This type of image distortion occurs most often when telephoto lenses are zoomed to their maximum magnification. The appearance is a slight bending inwards of the photo towards the center. However, it’s not nearly as apparent (hardly perceivable at times) as barrel distortion.

    A case of uncorrected pincushion distortion…

    …and now corrected. As I said, almost in-perceivable….

    If you’re in the market for a quality wide angle lens, make it a point to find one with little or relatively little barrel distortion. Keep in mind that the shorter the focal length the more prevalent barrel distortion becomes, even in high-grade lenses. The same is true for pincushion distortion. The higher the telephoto range the more often you will encounter pincushion distortion at long focal lengths.

    Chromatic Aberration

    Chromatic aberration is a technical term for the unsightly discoloration that sometimes occurs around high contrast areas in a photo.

    It is evident to some extent in all lenses no matter the quality, but it is more perceivable at wide or small apertures. The key thing to look for is the least amount of chromatic aberration present at the extreme ends of the aperture range. Much like edge softening, aberrations can be controlled albeit not eliminated.

    Autofocus and what is Image Stabilization anyway?

    Autofocus

    Ah yes, autofocus. Having the ability to focus on subjects by merely pressing a button is a gloriously underappreciated benefit modern photographers share. You probably owe your camera and lens a long overdue “thank you”. Go ahead and thank them…I’ll wait.


    However, the question remains, how important should autofocus (AF) be to you? It all comes down to what type of photos you will likely be shooting. Back when I did location wedding and event photography, I could not have imagined operating without a fast and accurate AF lens. Now that I shoot primarily landscapes and nature photography, AF has become less of a priority for me.

    That’s not to say that AF doesn’t have its uses even now for me and my work. The reason I share this is to demonstrate the priority that you should place on the quality of AF in whatever lens you might be looking at buying depends on your own needs.


    If you shoot sporadic, fast-moving, or otherwise unpredictable subjects, place a fair amount of emphasis on AF performance in the lens you seek. However, if you’re a landscapist, shoot still lifes, or otherwise find yourself making photographs of static subjects, AF becomes less important.

    That being said, if you find yourself requiring AF, look for a focusing system which consistently focuses accurately and is able to lock onto a subject. Granted, the type of camera you use plays a key role here as well.

    Image Stabilization

    There’s somewhat of a split in opinions when it comes to image stabilization. Some shooters swear by it, some say it isn’t worth the trouble. As for me, I’m a blend of the two factions.

    For the majority of my work, which involves a tripod and slow moving/non-moving scenes, I seldom use a stabilizer even when it’s available. Still, there are times when I find myself saying, “Man, this stabilizer is awesome!” So as with many aspects of choosing a lens, it depends on you and your needs.


    The truth is that the longer focal length lens you use, the more image stabilization will come in handy. It provides an exposure “cushion” when shooting handheld. I’m happy to say that the technology seems to be improving each year. If you shoot the majority of your photos without a tripod, for whatever reason, you will have the use of a stabilizer. The very bottom rung of modern image shake reduction systems can give you two to three stops of exposure latitude (to be able to use slower shutter speeds and maintain sharpness) which can go a long way depending on your camera.

    Some final thoughts on lens evaluation

    Hopefully, with any piece of gear you buy, you choose to analyze and find every scrap of information you can before taking the plunge. The tips here come from someone who has reviewed, tested, and used camera lenses from virtually every leading manufacturer on the market today. These lessons are simple, applicable, and most importantly, easy to understand so that you can make an informed choice.

    Today we find ourselves fortunate to be able to select from a pool of increased quality when it comes to our camera lenses. Unfortunately, this means choices are nearly infinite. Be smart and be savvy. Don’t spend time and money on new glass that does more or less than what you need.

    The post How to Evaluate and Purchase Your Next New Lens by Adam Welch appeared first on Digital Photography School.


    Digital Photography School

  • How to Find Inspiration for Your Photography When Your Muse is Missing

    How to Find Inspiration for Your Photography When Your Muse is Missing

    In a city full of construction sites, concrete walls tucked around a corner not visible from the street are a haven for graffiti artists. You have to go looking for them.

    Maybe you just recently bought your camera, or maybe you got it a while ago. But has it been sitting on a shelf for a few months? Perhaps you have been shooting for a while but have just run out of enthusiasm? Feel like you are stuck in a rut? Like you should change it up a bit but don’t quite know how?

    Or maybe you are just so overwhelmed with possibilities and potential that you are paralyzed with the indecision of what to try first?

    How to Find Inspiration for Your Photography When Your Muse is Missing

    Glorious spring cherry blossoms. So many shades of pink.

    Inspiration is everywhere

    Sometimes it’s a matter of opening your eyes and seeing the world in a different way. Perhaps you need to let go of the fear of trying something new. Lack of equipment can sometimes be an excuse. Difficulty or the cost of travel is another factor that can hold people back.

    Trying new things can be scary, especially if you are new to photography and uncertain about how your images will turn out. So let me tell you one really important thing;

    It doesn’t matter if you don’t get it right the first time.

    Or even the twentieth time, though you might prefer to move on to something new at that point.

    What is the worst that could happen if you try street photography? Pick some flowers and have a go with macro photography? Try to capture an awesome sunrise?

    How to Find Inspiration for Your Photography When Your Muse is Missing

    One of the best sunsets I have ever seen, absolutely stunning. Probably my 127th sunset shot, and worth the effort of the previous 126.

    Kickstart your inspiration

    Here are a few tips to help you kickstart your inspiration:

    • Actually get out there with your camera. Get your bum off the sofa, camera in hand, out the door in any direction. Make time for your hobby. Do it regularly. Give yourself permission to go out and shoot.
    • Go somewhere different than your usual places. Sit near a busy cafe. Take a walk in a nature reserve. Explore the sand dunes at the beach. Find a stream or river where birds are active.
    • Once you get to your new place, find a good spot and then just sit for five to 10 minutes. Immerse yourself in the sound of the place (yes take the headphones ooff). Watch the activity around you, see where the light and shadows fall, what textures are nearby. Be present and soon you will see all sorts of opportunities for images.
    • Be brave and attend events with your camera. Sports events, local festivals, markets, concerts, fairs, car rallies, agricultural shows – the list goes on and on of places you can go for minimal cost. There are people dressed up, doing interesting things, lots of different stuff to see and photograph. Walk around, watch the people, see the patterns, spot the areas of activity. Hover at the edges if that makes you more comfortable.
    How to Find Inspiration for Your Photography When Your Muse is Missing

    First time at Roller Derby – the lighting was awful so I decided to experiment with slower shutter speeds for fun.

    • See the small details via macro photography. Good macro lenses are expensive, so see if you can borrow or rent one to see if that is your thing.  Macro or close-up filters are a cost effective option to get you started. Look inside your pantry or fridge. See what is flowering in the garden. Setup a small studio with your tripod, a table and some natural window light and experiment.
    How to Find Inspiration for Your Photography When Your Muse is Missing

    Take time to see the small interesting details – this is an old cash register.

    • Learn to see in black and white. Look for contrast, texture, shapes, and lines. Try to see the image without color. At the beginning, this will be really hard, but eventually, you will start to see the core compositional elements that make for a good black and white image.
    How to Find Inspiration for Your Photography When Your Muse is Missing

    It was lightly raining as I took this image. The light was flat and dull, but I knew the sky would look fabulous once processed into black and white.

    • Start a photography project. There are lots of 365 Day or 52 Week Challenges around – some with themes and some just to encourage you to shoot regularly.  Try one of them or develop your own project idea.
    • Work with props. Taking straight portraits can be really challenging. Getting people to relax and smile naturally is hard. Instead, give them something to interact with and take their mind off the camera. A ball, or a hat. Perhaps a pretty shawl or wrap. A book or a bunch of flowers. Be creative, make it fun and light hearted.
    How to Find Inspiration for Your Photography When Your Muse is Missing

    Three ladies that I ran across and asked to pose in front of these blue statement walls. They did their own posing with no prompting from me.

    • Go out at nighttime. So many new possibilities – light painting, astrophotography, star trails, auroras, steel wool, light trails, fireworks or even kids sparklers.
    • Find a thing, anything, anywhere. Shoot it at different angles, in different kinds of light. Keep coming back and try and find a new and interesting way to capture the essence of a mundane everyday object.
    How to Find Inspiration for Your Photography When Your Muse is Missing

    Looks simple, try doing it backward in the dark within 30 seconds, ankle deep in snow with freezing feet running back and forth from the camera.

    Endless possibilities exist

    Landscapes, sunrise, sunset, wedding, portrait, boudoir, food, macro, street, dance, cats, astrophotography, waterfalls, compositing, fine art, black and white, weather, birds, architecture, events, underwater, travel, flowers, sports, product, photojournalism – all options for you to try.

    The list goes on, that is just off the top of my head. There are still many more choices. Take any one of those words above, and break it down into smaller elements, and there are even more choices, for example;  travel > people, places, food, color, culture, and experiences.

    How to Find Inspiration for Your Photography When Your Muse is Missing

    An installation at an outdoor art festival being constructed.

    Develop a habit

    Some of my best work came after completing a 21-day creativity course. On day five I was to “Allocate a 15-minute time-slot to shoot anything”. The idea is that when you tell yourself it will only take 15 minutes, then you are much more likely to make the time to do it. Of course, it always took much longer, but because the effort is made to get started, suddenly it becomes fun. It doesn’t matter that it actually ends up being an hour instead.

    Maybe you have kids to feed, bathe, and wrangle into bed so you feel like you cannot take the time. Instead of sitting down to Facebook or watch TV when you do have time, go get your camera instead. Talk to your family and friends, let them know it is important to you. Ask them to help – maybe they will be a model for you? Maybe they have a cool prop you could borrow?

    How to Find Inspiration for Your Photography When Your Muse is Missing

    Attendees at a local Zombie Run kindly agreed to lurch for me.

    What makes you happy?

    Where is your happy place? Is it a library? A cup of coffee at your favorite cafe? Is it down at the beach? At the park with the kids? Walking the dog? Playing a sport?

    What could be better than doing your favorite thing and taking the camera along to record the experience? Kids playing in the autumn leaves, or about to push off down the slide. Your dog fetching a stick or racing along the beach. Steam rising off a cappuccino with a cupcake on the side. Frost patterns on a morning walk. Sunset setting the sky on fire. The smell of a new book. What’s your thing?

    How to Find Inspiration for Your Photography When Your Muse is Missing

    It’s not my thing, but street photography is hugely popular.

    Learn to let it go

    Don’t try too hard. Have your camera handy but take the time to be in the moment too. Genuine emotions and responses are far more compelling than a contrived situation. Learn to be patient and wait for the right moment. Sometimes just put your camera aside and let it go. Not every day will give you a keeper, or even a reason to shoot.  But you can guarantee that the best shooting opportunities will be the ones that happen when you leave your camera behind.

    So in some circumstances, it may be more appropriate to be present, and leave the camera at home. It might be culturally insensitive or just plain rude. It could be more fun to enjoy being part of the event, rather than shooting from the sidelines as often happens with photographers.

    How to Find Inspiration for Your Photography When Your Muse is Missing

    A gorgeous art graffiti piece with the foundation for a building about to be built immediately in front of it. Taken on a step stool bought from home so I could shoot over the security fence.

    Research

    My favourite place for inspiration is Pinterest. I have boards dedicated to food, still life, fine art, Gothic, the macabre and pinup photography. All these things that have inspired me one way or another. Some are there to remind me to try a new thing. Others are there to remind me to keep experimenting with a style that is still new and experimental. Some are just fantastic images that delight me.

    Instagram is another source of wonderful images.  Both are places you can search for reasonably specific concepts and find images to match. It is also easy to curate your feed for both, so that you get a regular supply of stuff that may inspire you.

    Facebook has many groups dedicated to specific photography styles. As well as a good source of image inspiration you can also ask questions or ask for advice. Asking someone how they achieved a certain image can be a simple way of making your learning easier. Many people are often only to happy to help. Quite a few will even have blogged about the image with some backstory around how it was created.

    Art galleries, museums, books on the grand masters of painting or photography are all available for viewing – many of them online.

    How to Find Inspiration for Your Photography When Your Muse is Missing

    A local steampunk lady agreed to pose for me in exchange for an image.

    Summary

    It can be easy to fall into the same old habits, sticking to one particular style or technique. Making the effort to change that is difficult. Overcoming inertia and breaking out of your comfort zone is hard.

    Yet if you keep doing the same things, you will keep getting the same images, the same results. Eventually boredom will set in, causing you to put the camera aside.

    My challenge to you is to instead, pick up the camera, open your eyes and give yourself a chance to truly see the world around you. Once you do that, limitless possibilities will become apparent, and your inspiration will be everywhere.

    How to Find Inspiration for Your Photography When Your Muse is Missing

    A light festival held in mid-winter. It was bitterly cold, but I had so much fun I went back the second night to catch all the things missed first time round.

    Still, don’t try to do it all at once either, as creative fatigue and burnout can result. Learn to pace yourself. Break it down into manageable chunks, learn one thing and move on to the next. Some things will have more resonance and stay with you for longer. Others will not click with your style at all.

    Conclusion

    It’s possible that you could find your niche and want to stick with one particular style.  If so, then congratulations on finding your happy place. But keep in mind, even when you are in that zone, there are still ways to explore it, try different points of view, and push your boundaries.

    In Big Magic, Elizabeth Gilbert writes about her theory that ideas are constantly swirling around us. But unless we are in a receptive state of mind, they will fail to find purchase:

    “But sometimes – rarely, but magnificently – there comes a day when you’re open and relaxed enough to actually receive something. Your defenses might slacken and your anxieties ease, and then magic can slip through. The idea, sensing your openness, will start to do its work on you. It will send the universal physical and emotional signals of inspiration (the chills up the arm, the hair standing on the back of the neck) (…)”

    Inspiration is anywhere and everywhere, we just need to make ourselves open for our muse to find us.

    The post How to Find Inspiration for Your Photography When Your Muse is Missing by Stacey Hill appeared first on Digital Photography School.


    Digital Photography School

  • Instagram added an Archive feature to help you de-clutter your profile

    Instagram’s latest feature, the ability to archive posts, is pretty self-explanatory. But it’s kind of a big deal if you’re a user who wants a personal account to look somewhat polished and professional. Archiving a photo moves it from your profile page (along with its associated likes and comments) and tucks it away in a private Archive tab. Un-archiving a photo will move it back into its original spot in your timeline.

    Now, photographers can share personal photos without putting them front and center to anyone who visits their profile page for weeks afterward. And who hasn’t looked back at their body of work and wanted to hide at least one photo from way back? Anyway, the teens have embraced minimalist profile pages, so it’s only a matter of time before the rest of us do too.

    Articles: Digital Photography Review (dpreview.com)

  • New Pro Light Bumblebee family from Manfrotto targets still, video and drone users

    Manfrotto has introduced a new collection of outdoor backpacks and messenger bags that are designed to cope with extreme environments and to allow users to carry loads of kit. The largest backpack in the Pro Light Bumblebee series, the Bumblebee-230 PL can hold a DSLR with vertical grip with a 70-200mm F2.8 zoom attached as well as an extra ten lenses, according to Manfrotto.

    The series comprises two backpacks and two messenger bags all of which can hold a laptop as well as cameras and lenses. The backpacks have configurable internal dividers so the main compartment can be arranged for high-end still or video cameras, lenses and accessories. These backpacks also have a tripod holder and the Bumblebee-230 PL features a lens pouch on the waistband strap.

    $ (document).ready(function() { SampleGalleryV2({“containerId”:”embeddedSampleGallery_0518829044″,”galleryId”:”0518829044″,”isEmbeddedWidget”:true,”standalone”:false,”selectedImageIndex”:0,”startInCommentsView”:false,”isMobile”:false}) });

    The two messenger bags, the Bumblebee-M30 PL and M10 PL, can also be configured to hold a small gimbal with their XtraSecure handheld gimbal strap. The larger of the two, the M30 PL can also be used to carry a DJI Mavic plus the Osmo gimbal camera.

    The messenger bags have NoiseFree Velcro for silent access to the main compartments and all of the Bumblebee bags have DuoFace rain/sun covers. For more information see the Manfrotto website.

    Prices:
    MB PL-B-230 Bumblebee-230 PL Backpack $ 279.99
    MB PL-B-130 Bumblebee-130 PL Backpack $ 229.99
    MB PL-BM-30 Bumblebee M-30 PL Messenger $ 149.99
    MB PL-BM-10 Bumblebee M-10 PL Messenger $ 129.99

    Press release

    Manfrotto Launches New Pro Light Bumblebee Camera Bag Family

    Performance, Quality & Comfort, Redefined

    Manfrotto, a leading global innovator and manufacturer of premium photo, video and lighting support products and accessories, has launched the new Pro Light Bumblebee bags – perfect for professional and amateur photographers and videographers who work outdoors and want a reliable carrying solution. With this collection, users can stay comfortable in the harshest of conditions despite high temperatures, extreme cold or high humidity.

    The new Pro Light Bumblebee family is an exceptional assortment of high-performance camera backpacks and messenger bags which perfectly embody Manfrotto’s Italian heritage. This family introduces Manfrotto’s unique-to-the-market breathable harness system that greatly reduces photography gear fatigue, allowing image makers to cover more ground and locate the best spots for the perfect shots.

    Inside, the bags’ innovative designs safeguard the latest professional equipment options. The renowned Camera Protection System (CPS) dividers take extra care of camera bodies and lenses. They are fully adjustable and built to distribute weight evenly and avoid tension to the body.

    The new Manfrotto Bumblebee backpacks are designed to take stress and heat off the shoulders, neck and lower back and feature Manfrotto’s state-of-the-art AirSupport breathable harness and back panel, adjustable sternum support, shaped hip and waist support systems. A side handle helps users put the pack on or take it off, while elastic side pockets keep water bottles outside the critical gear zone.

    The removable Manfrotto CPS insert safeguards equipment right at the heart of the pack and keeps it organized with the efficiency of a portable studio:

    • The Bumblebee-230 PL backpack protects a gripped DSLR with a 70-200/2.8 lens attached and 10 additional lenses or an attached 400/2.8 with five additional lenses. In video configuration, it protects a disassembled modular camcorder like the Canon C100 with numerous lenses & accessories. It also fits a 17” laptop in its own padded compartment.
    • The Bumblebee-130 PL backpack keeps a high-end CSC or a DSLR safe with a 70-200/2.8 lens attached and eight additional lenses or an unattached 400/2.8 with three additional lenses. In video configuration, it protects disassembled modular camcorders like a SONY FS-5. It also fits a 15” laptop in its own padded compartment.

    The entire internal space is padded to protect camera gear but can be also configured to accommodate accessories and personal gear as well. The main zipper comes with four pullers, which can be divided by a stopper into a top and lower compartment. Just open the top zipper for rapid access to frequently used contents from above.

    A smart NeverLose tripod connection secures both longer and shorter tripods on the side of the pack. The connection straps are stitched in the side pocket and can be tucked away when not in use for a tidier appearance and to prevent straps getting lost.

    The bigger Bumblebee-230 PL also features a lens pouch located in the waist belt. When not in use, the pouch can be flattened by tightening the webbing strap. (This feature is not available in Bumblebee-130 PL.)

    Manfrotto’s new Bumblebee Messengers have significantly raised the bar for their category: a combination of flawless design and reliable performance, they meet all the needs of demanding professionals who travel light and fast. Like the backpacks, the messengers’ body-gripping fit and 3-point AirSupport harness system is breathable and perfect for prolonged outdoor use. The length of the strap can be rapidly adjusted using the EasyGrip buckle.

    Despite their compact size, they hold a substantial amount of professional gear:

    • The Bumblebee M-30 PL Messenger protects a DSLR with a 70-200mm/2.8 lens attached and three additional lenses, a handheld gimbal (such as a DJI Osmo) and a 15” laptop in their own padded compartments, with all the necessary accessories.
    • The Bumblebee M-10 PL Messenger keeps a CSC/DSLR safe with a 24-70/4 lens attached and two additional lenses (including 70-200/2.8) and a handheld gimbal (such as a DJI Osmo) and a 13” laptop in their own padded compartments, with all the necessary accessories. It can also carry a full set DJI Mavic plus the Osmo gimbal camera.

    These bags introduce the XtraSecure handheld gimbal-carrying solution – a stretchable band that holds the gimbal’s moving parts so it can be taken out quickly. The area can also be used as a traditional lens compartment if there is no gimbal in the bag.

    Manfrotto’s Bumblebee Messengers feature a secure silent quick-access flap. When shooting in quiet environments (e.g. during a ceremony), apply the NoiseFree Velcro silencer to keep a low profile. The broad front organizer keeps everything on hand. There are two bungee cord straps to hang a small tripod, monopod or selfie pole, which are also protected by the front flap. The Bumblebee Messengers can hold a gripped DSLR body when you take out the laptop from its compartment.

    All the bags of the Bumblebee collection come with a DuoFace sun/rain cover to protect from rain, reflect sunlight and keep the gear cool and dry all day long.

    Key features:

    • Breathable design – comfortable carrying solutions for professional and amateur outdoor photography
    • Super lightweight construction – carry more lenses and stay comfortable even with prolonged use
    • High-performance materials – rip-stop fabric and the Manfrotto Protection System safeguard equipment

    The following models are now available nationwide:

    MB PL-B-230 Bumblebee-230 PL Backpack $ 279.99
    MB PL-B-130 Bumblebee-130 PL Backpack $ 229.99
    MB PL-BM-30 Bumblebee M-30 PL Messenger $ 149.99
    MB PL-BM-10 Bumblebee M-10 PL Messenger $ 129.99

    Articles: Digital Photography Review (dpreview.com)

  • Sony a9 Full Review: Mirrorless Redefined

    The Sony Alpha 9 is the company’s first camera aimed at professional wedding, action and sports photographers. It’s a 24MP, full-frame mirrorless camera that can shoot at 20 frames per second with full autofocus. And, just as importantly, with very low viewfinder lag and absolutely no blackout during continuous shooting.

    That’s right, a mirrorless camera targeted at wedding, action and sports photographers – a strike at the DSLR’s area of greatest strength. It’s true that Olympus has pushed in this direction with its E-M1 Mark II, but Sony is promising both super-fast readout and full-frame image quality, backed up with an expansion of its Pro Support scheme that will be needed to break into the pro market. This is ambitious stuff.

    Of particular note for wedding and event photographers are the a9’s speed and silent shooting, both of which are certain to have a positive impact on capturing just the right moment without any interruption from the clacking of a conventional shutter.

    All this capability stems from a stacked CMOS image sensor, which includes processing circuitry nearer the pixels and features built-in memory to deliver all this data to the off-board processors at a rate they can cope with. It’s this structure that enables the camera to shoot at 20 frames per second and do so with an electronic shutter that’s fast enough to minimize the rolling shutter effect. The fast readout also allows 60 AF/AE calculations per second, promising better subject tracking and prediction.

    Key specifications

    • 24MP full-frame Stacked CMOS
    • 20 fps continuous shooting with full AF (electronic shutter, 12-bit files)
    • Continuous shooting buffer of up to 241 compressed Raw files (362 JPEG)
    • 10 fps continuous shooting with AF with adapted lenses
    • 5-stop (estimated) 5-axis image stabilization
    • 3.7M-dot OLED viewfinder (1280 x 960 pixels) with up to 120 fps update
    • 1.44M-dot rear touchscreen LCD
    • Oversampled UHD 4K/24p video from full sensor width (1.24x crop for 30p)

    The stacked CMOS design not only allows the super-fast readout that powers so much of the camera’s attention-grabbing spec, it also means it has all the benefits of BSI design. This means that the light-sensitive section of each pixel is closer to the surface of the sensor which, in turn, means the sensor is better at collecting light near the corners, where the incident angle will be high. It also generally means improved low light performance, and sharper pixel-level imagery.

    Sony’s crammed the a9 with seriously speedy technology and is aiming it at true sports professionals. Out-of-camera JPEG cropped to taste.
    Sony 24-70mm F2.8 GM | ISO 2500 | 1/800 sec | F2.8
    Photo by Carey Rose

    Beyond the technical wonders of the new sensor, there are a large number of significant changes to the a9 relative to Sony’s a7-series that have all been made with demanding professionals in mind; these include updates to menus, controls, image quality, and more. Will all of this be enough to tempt professionals to switch? Let’s dig in and find out.

    Review History
    23 Apr 2017 Introduction, Shooting Experience, Image Quality Impressions, Autofocus Impressions published
    30 May 2017 Studio Scene and Raw Dynamic Range published
    14 June 2017 Full review published

    Articles: Digital Photography Review (dpreview.com)

  • Architecture for Airheads: 13 Intriguingly Interactive Inflatable Structures

    [ By SA Rogers in Art & Installation & Sound. ]

    Who can resist a gigantic bubble that’s big enough to climb into? Inflatables aren’t just practical, packing down to surprisingly small packages and then popping right back up into sizable structures, they’re also just plain fun, whether they act as portable temporary architecture, offer bouncing surfaces, react to movement with light and sound or just casually perch on top of buildings like it’s no big deal.

    Stage for Oerol Festival by Plastique Fantastique

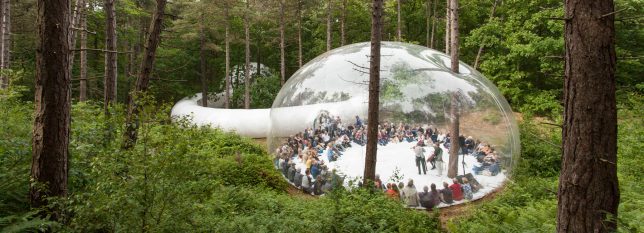
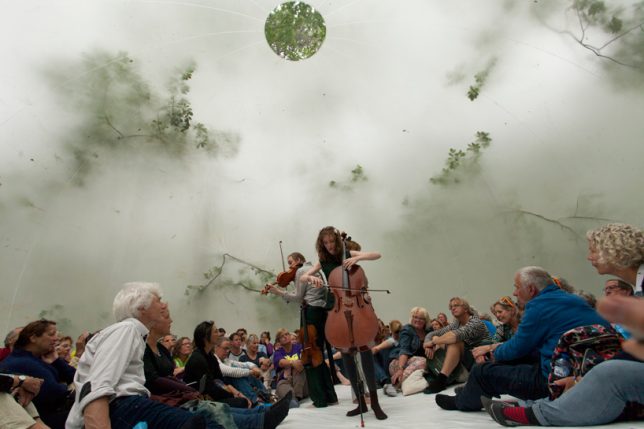
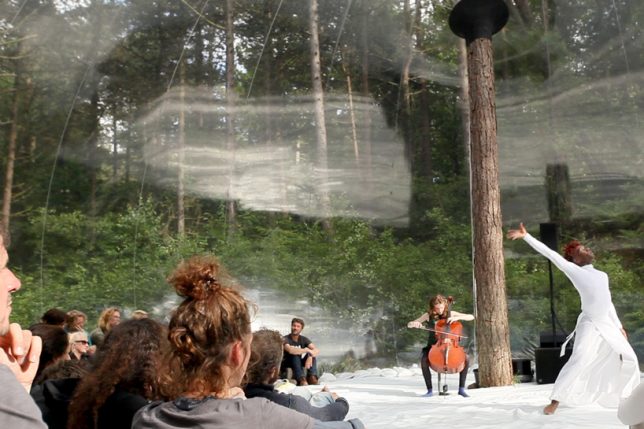
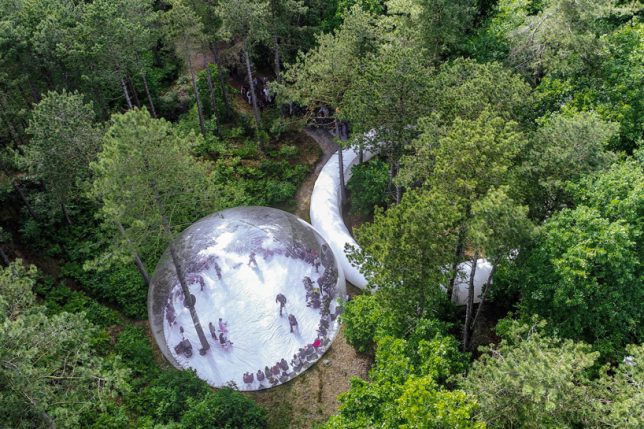
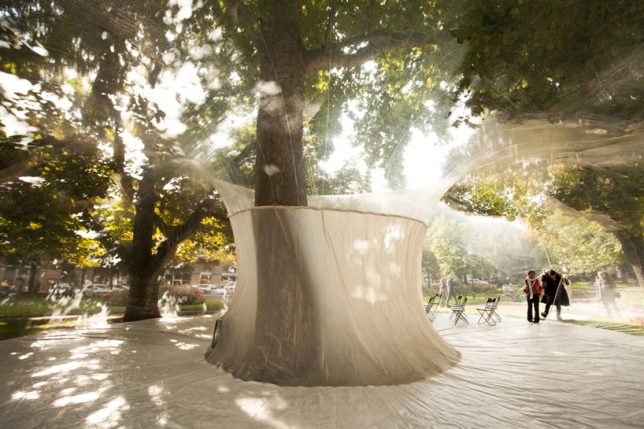
    An entire island is used as a stage for events during the Oerol Festival in the Netherlands, and this year, Plastique Fantastique has crafted a special way to enclose some of that space without cutting it off from its surroundings or erecting a permanent structure. This inflatable creation is a transparent orb pierced by a single tree trunk, its skin reflecting the performers as they move

    #FreeTheFeed Inflatable Breast Sculpture

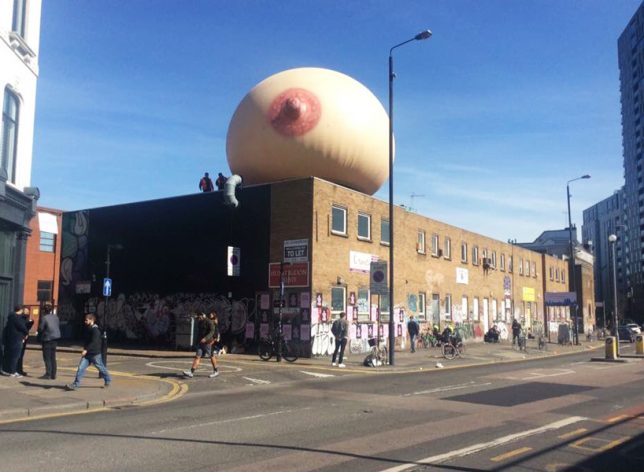
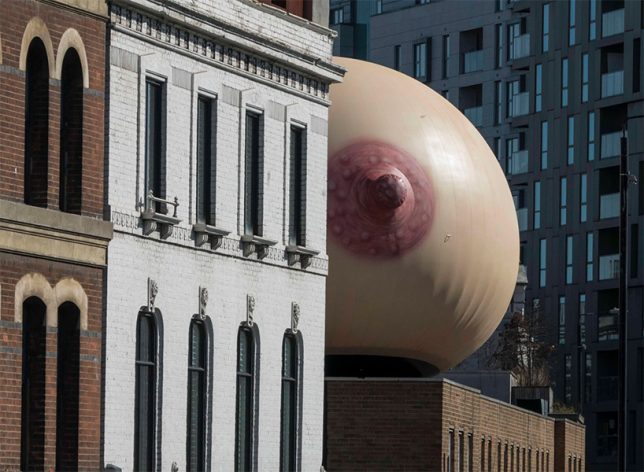
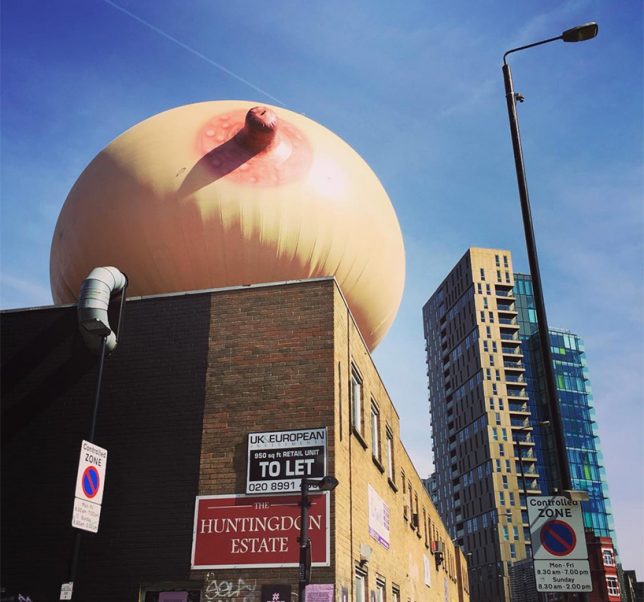
    A campaign by Mother London to normalize breastfeeding in public, called #freethefeed, placed a gigantic inflatable breast on top of a brick building in the east London district of Shoreditch during Mother’s Day in the UK. For anyone who might be scandalized at such a sight, nearby flyers explained the project’s educational motives. “It’s hard to believe that in 2017, UK mothers still feel watlched and judged when feeding in public, by bottle or breast. This was our Mother’s Day project. A celebration of every woman’s right to decide how and where they feed their children without feeling guilty or embarrassed about their parenting choices.”

    Inflatable Infinity Space

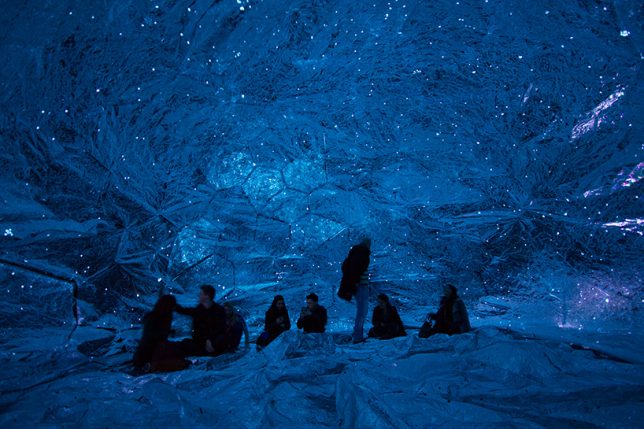
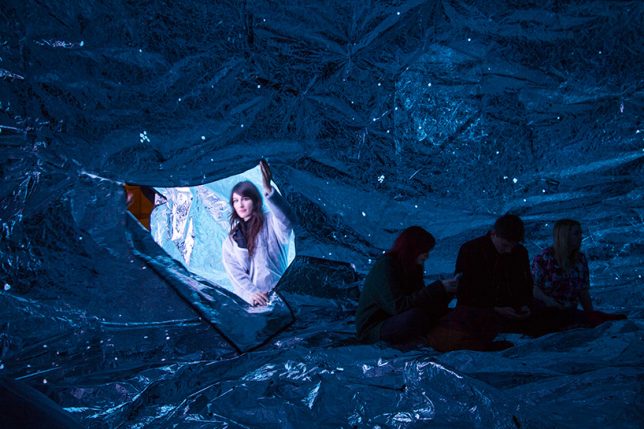
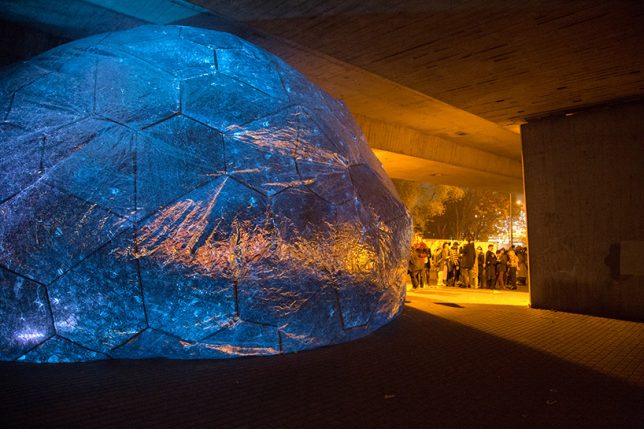
    Crinkled metallic fabric creates an inflatable silver sphere in which the cosmos seem to be contained. ‘Osmo’ was created by London-based studio loop.ph for the Light Night Canning Town 2014, placed beneath London’s high-traffic A13 flyover to recreate a stretch of star-filled sky that has been lost to development.

    SiloSilo by Plastique Fantastique

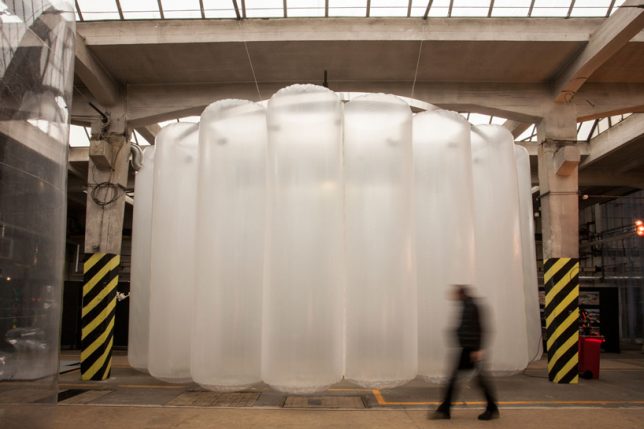
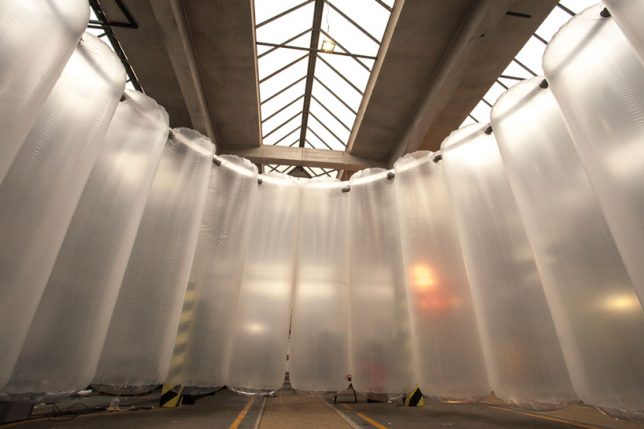
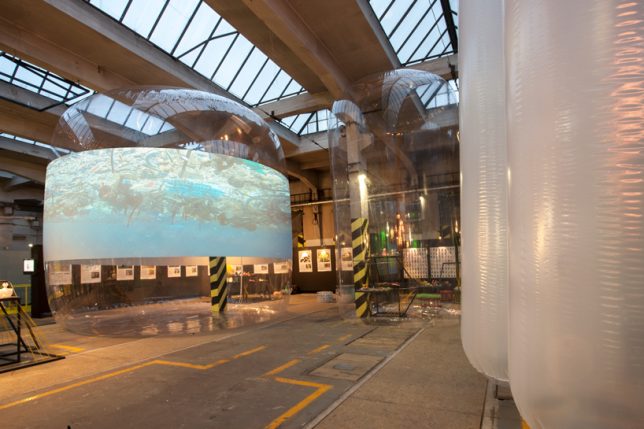
    Creating a series of conference spaces and acting as a backdrop for video projection, a bunch of giant inflated cylinders bring awareness to the use of recycled materials as part of the traveling project SiloSilo. For example, a donut-shaped inflatable called ‘MEDUSA,’ which packs down small enough to transport in a box, represents the amount of plastic garbage produced by the city of Pilsen, Czech Republic in just three days.

    Inflatable Floating Playground in Dubai

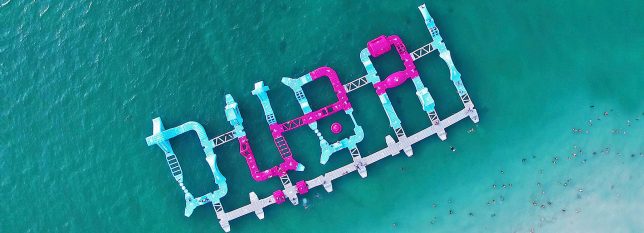
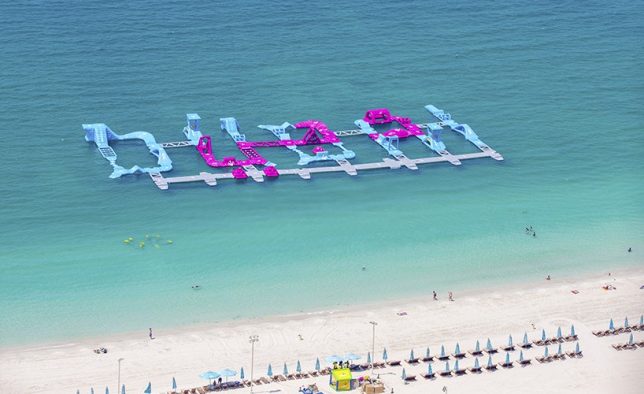
    Partiers bounce, jump and dive off a series of inflatable structures spelling out ‘DUBAI’ in the water at Jumeirah Beach residence. The ‘dubaiTAG’ installation by Wibit Sports is made from nearly 100 modular components to create an inflatable waterpark.

    Next Page – Click Below to Read More:
    Architecture For Airheads 13 Intriguingly Interactive Inflatable Structures

    Share on Facebook


    [ By SA Rogers in Art & Installation & Sound. ]

    [ WebUrbanist | Archives | Galleries | Privacy | TOS ]


    WebUrbanist

  • 5 Quick Tips for Outdoor Macro Photography

    Summer is arriving here in northern Europe, and with it, a whole new world of color, vitality, and humming activity. It’s the perfect time to go outside and explore what all the buzz is about! Doing macro photography outdoors can be a very rewarding and pleasant activity, and no, it doesn’t have to be complicated. Knowing some basics will make it more worthwhile, and it might also help you learn even more from your experiences.

    Outdoor macro photography 01

    So what are the essential steps of enjoying an outdoor macro photography session? There are a lot of excellent resources on macro photography here at Digital Photography School, so I won’t go through the technical aspects in too much detail. Either way, the most important factors for enjoying doing some macro photography outdoors are pleasant weather and an inquisitive mind. So let’s begin!

    https://digital-photography-school.com/everything-you-need-to-know-about-macro-photography/ https://digital-photography-school.com/everything-you-need-to-know-about-macro-photography/

    1. The gear

    The great thing about macro photography is that there’s a wide range of gear that you can use; everything from a complicated setup with microscope lenses and focus stacking to using your mobile phone camera. In between those extremes there are point-and-shoot digital cameras that often come with a surprisingly good macro mode, and SLRs in combination with macro lenses, close-up filters or extension tubes.

    5 Quick Tips for Outdoor Macro Photography

    Here are some dPS articles on macro gear options:

    • Close-up filters
    • Using extension tubes for macro photography
    • Reverse lens macro
    • Macro lenses
    • Budget alternatives for macro photography

    Once you have some kind of setup for macro photography, you’re ready for the next step!

    2. Find a subject

    What would you like to photograph? The choices outdoors are many and varied. It can be something small or a detail of something bigger. It might be something you’ve researched and planned for a long time or something you just found. This is where your creativity comes in.

    5 Quick Tips for Outdoor Macro Photography

    I have a thing for ants, so they are always a go-to subject for me.

    If you don’t have a specific idea and are looking for inspiration, lying down in the grass on a sunny day and seeing the world from the point of view of a frog might help!

    3. Lighting your subject

    You have your gear, you have your subject – now all you need for a photograph is some light. Good exposure can be accomplished either by using natural light or an external light source (such as a flash).

    5 Quick Tips for Outdoor Macro Photography

    This image was made using only natural light. It was taken late in the day in the shade, but the light was still bright enough to capture this sleeping dragonfly.

    In one way, using natural light is easier, as you don’t need anything but your camera of choice. In another way, natural light can be quite tricky. Apart from being unreliable, the very nature of macro photography calls for a narrow field of view, which means that the sensor has to receive enough light from a very small area. In short, there has to be a lot of light – especially if you’re trying to capture something that is moving and you have a ridiculously narrow depth of field.

    5 Quick Tips for Outdoor Macro Photography

    Here, a flash was bounced off a nearby wall to give the scene enough light.

    Using an external light source, such as a flash, is an excellent way to control both the amount and the direction of light. Before you begin, though, it’s useful to learn a bit about the basics of flash photography – as with everything, flash photography also has its own challenges. The look and feel of the photo will also be different depending on whether you use natural or artificial light.

    4. Stabilize yourself

    Remember that the longer focal length you use, the higher the risk is for getting a shaky image. This means that even if you’re photographing a still subject, your shutter speed needs to be fast – or you need to use a tripod. A tripods is a great photography tool in general, but it is especially useful in macro photography, where there might not be enough light due to the setup and the small field of view. Here, a tripod is essential.

    5 Quick Tips for Outdoor Macro Photography

    It might sometimes feel like the tripod is restricting your movement and making your photography session a bigger deal than what you want it to be. That’s okay! It’s possible to do fantastic macro photography without a tripod; just remember to keep that shutter speed fast.

    5. Telling a story

    When photographing something that is technically challenging and conceptually extraordinary, it’s easy to forget about the other aspects of photography. But as with photography in general, some of the most interesting macro photographs are the ones that have a story to tell.

    Death and birth.

    5 Quick Tips for Outdoor Macro Photography 5 Quick Tips for Outdoor Macro Photography

    You can create your own tale or just open your eyes to all the small stories that are being told around you, all the time. If you stop to have a look, there is a lot to be inspired by among the small lives that are being led in the great outdoors – whether it’s a remote wilderness or your backyard.

    5 Quick Tips for Outdoor Macro Photography

    Ants moving to a new colony – sometimes it takes less energy for the colony if workers carry each other to the new location.

    Conclusion

    These are the factors I try to keep in mind when I’m heading outside to do macro photography. There are many more that can help you create an interesting photograph of the natural world. What are your best tips? I’d love to hear your thoughts and see your creations in the comments below.

    The post 5 Quick Tips for Outdoor Macro Photography by Hannele Luhtasela-el Showk appeared first on Digital Photography School.


    Digital Photography School

  • How to Use a Prism to Make Creative Photo Effects

    In this article, I’ll give you some ideas and tips on how to use a prism to make some really cool and creative photo effects.

    How to Use a Prism to Make Creative Photo Effects

    Prisms

    Have you ever seen the beautiful rainbows dispersed by hanging suncatchers and wondered, how would that look in a photograph? Unfortunately, the small prisms used on most suncatchers don’t fill enough of the camera frame to render a detailed image. But where there’s a will, there’s a way!

    Triangular prisms, usually found in college science labs have become an increasingly popular tool for adding beautiful reflections and light to a photograph. Plus, because prisms are small, they are easy to pop in a camera bag, ready for your next shoot.

    How to Use a Prism to Make Creative Photo Effects

    How to Use a Prism to Make Creative Photo Effects

    How to Use a Prism to Make Creative Photo Effects

    The physics

    You may be familiar with triangular prisms from high-school demonstrations on the characteristics of light. The physics goes something like this – when a beam of light (made up of different electromagnetic waves with varying wavelengths) hits a piece of glass straight-on, the light passes right through it.

    However, if the beam of light comes into contact with a glass surface at an angle, the wavelengths bend, which is a phenomenon called refraction. Then, when the beam exits through the other side of the prism, the wavelengths bend again. The amount the light bend depends on the wavelength itself. Red bends at one angle, and violet bends another and so each color is dispersed into the rainbow we see when we look through a prism.

    As photographers, we exploit the inherent properties of light whenever we take a photo. The assembly of glass elements in camera lenses directs light from a scene, translating it to the digital sensor. But by adding a prism into the mix (in front of the lens) you can introduce some interesting creative effects to your photographs. Light that would usually meet the outer lens element first, hits the prism, dispersing the light before it’s directed into the camera.

    What you will need

    • A camera
    • One triangular prism
    • A lens cloth
    triangular prism - How to Use a Prism to Make Creative Photo Effects

    A triangular prism like this one is available on Amazon for only a few dollars.

    This project only has two ingredients – a prism and a DSLR camera. For this project, I used a triangular prism I purchased on eBay for a few dollars. A prism that can be manipulated with one hand is ideal. My preference is one that is approximately 3″ x 1″ (8cm x 2.5 cm). Keeping a lens cloth close by is useful for fingerprints on the glass that can show up in the image.

    How to Use a Prism to Make Creative Photo Effects

    How to Use a Prism to Make Creative Photo Effects

    How to Use a Prism to Make Creative Photo Effects

    Method

    Using a prism to create interesting effects in-camera requires a little trial and error and a bit of co-ordination. Holding the prism over the front lens element is the easy part. It’s getting the effect right that’s a little fiddly. I’d recommend using a tripod as it can be a bit vexing having to juggle the camera in one hand and the prism in the other. I would also recommend using Live View to give you an accurate indication of what impact the prism is making, without being blinded by wayward reflections from the sun streaking through your viewfinder.

    If you’ve ever shot through glass materials before, you’ll know that your autofocus can really start to struggle. First, focus the camera on your subject using autofocus, then switch to manual focus mode. That way, the subject in the background will already be sharp, without having the camera flail around trying to focus on the prism itself.

    Slowly rotate the prism, monitoring the effect on the LCD screen. Angling the prism away from the lens, or changing your position in relation to the sun can also add different effects. Experiment with the distance between the prism and the camera lens too. When you find a reflection in the image you like, take a snap!

    Now that you have the basics down, try changing up the prism! I am constantly switching between my triangular prism and a glass wine stopper I chanced upon in an op-shop. The hexagonal prism adds a greater kaleidoscopic effect but tends to distort the image more, so it’s fun to experiment and see what works best.

    How to Use a Prism to Make Creative Photo Effects

    How to Use a Prism to Make Creative Photo Effects

    A wine-stopper I found at an op-shop makes for a great tool in prism photography.

    How to Use a Prism to Make Creative Photo Effects

    You don’t always need sunny weather for prism photography, this abstract image of a crane was taken on a cold, rainy afternoon.

    Your turn

    So pick up a glass prism and give this a try. Please share your prism photographs in the comments below.

    The post How to Use a Prism to Make Creative Photo Effects by Megan Kennedy appeared first on Digital Photography School.


    Digital Photography School

  • The first photo shared from a phone just turned 20

    Sharing photos from a phone is easy as breathing these days, and we have Philippe Khan to thank for paving the way. In June 1997, he achieved a technological first that would be repeated countless times in the following decades: he shared a digital photo instantly.

    It all came together just under the wire in the delivery room where his wife Sonia was in labor with their daughter, Sophie. He connected his Casio QV-10 camera to his laptop, and with a his flip phone rigged up to the laptop by way of a makeshift cable, the system was ready for Sophie’s arrival.

    His laptop was connected to a server at home, already configured to send email notifications to friends and family once his photo and text were transmitted. He snapped the photo, and an email with a link to the photo was sent out to 2000 people. There are a lot fewer cables involved in the process today, but basically, we’re doing the same thing in delivery rooms twenty years later. New parents everywhere thank you, Philippe.

    Articles: Digital Photography Review (dpreview.com)