Blog

  • Miggo launches Agua line of waterproof camera and drone bags

    Miggo, the smartphone and photography accessory makers who brought us the Pictar iPhone camera grip among other innovative products, have returned to crowdfund the launch of a new Agua line of waterproof bags designed for DSLRs as well as the DJI Mavic and Spark drones.

    There are three models in the series, which are all made from a matte-finish tarpaulin material and offer the IPX3 environmental protection standard.

    The Agua Versa backpack is designed for carrying photographic gear but can easily be converted into a backpack for daily use by removing the “doc-bag” camera insert. The Versa can be carried as a backpack, sling bag or x-position style and comes with external charging system for mobile devices.

    The main compartment comes with laptop and tablet pocket, and there are several smaller pockets as well. Three water-proof outer pockets can hold a large variety of smaller items, and the rigid bottom offers impact protection when setting the bag down. The bag can hold a Canon 5D-sized full-frame DSLR and two F2.8 lenses, including a 70-200 F2.8 and a flash.

    The Versa’s strap system can be adjusted for sling-style use. Inside your gear is protected from the elements.

    The Agua Drone Lander is made from the same waterproof material as the Versa, but it was made to function as a carrier for the DJI Mavic or Spark drones. The latter and accessories are are protected by a padded three-layer insert, and an integrated landing mat doubles as a work surface. The Drone Lander is carried in the sling position, and an additional diagonal strap offers better stability for long-distance carrying.

    The third model in the line, the Agua Sling, combines a compact design with storage capacity for a 5D-sized DSLR and three lenses, including a 70-200 F2.8 and a flash gun. A padded strap allows for sling-style carrying and gear is accessed through a side-opening. Like the Versa, the Agua Sling comes with a water-proof front pocket for personal items and an external charging port for mobile devices. The main compartment offers a laptop pocket.

    The Drone Lander comes with a landing mat. Padded inserts protect your drone and accessories.

    We’ve had a chance to use the Agua Versa backpack for a couple of weeks, and our first impression is indeed very positive. The backpack is well-made, and the strap system is comfortable to wear and allows for a lot of adjustment.

    There are plenty of external and internal pockets to help you organize all sorts of small things, such as batteries, memory cards and other accessories. My 14″ Acer just fits into the internal laptop sleeve and the camera insert holds a DSLR and a couple of lenses no problem. When the insert is removed, the bag also works well as a rugged day pack, with more than enough space for a change of clothes for when you bike to work.

    You should be aware that access to your gear is only available from openings in the sides, but once you’re used to that, getting your stuff in and out of the bag is easy and quick. You can now pre-order the Agua bags on Indiegogo from $ 100 for each model with the early bird special, which sounds like an interesting deal if you are in need of a waterproof bag for your imaging gear.

    Press Release

    “Agua” storm-proof camera and drone bags set a whole new standard for adventure photography!

    After three successful funding projects which shattered all expectations, miggo returns to Kickstarter with three completely new “agua” bags – an exciting new take on storm-proof bags for cameras and drones.

    Jerusalem, July 2017 – One year after the launch of Pictar – the revolutionary iPhone camera grip, miggo returns to Kickstarter for the fourth time with Agua – a brand new collection of three storm-proof bags designed for DSLR cameras and the super-popular Mavic and Spark drones. Every new offer by miggo is a sensation, with its fun and exciting products for photography enthusiasts.

    “Kickstarter is the place where we bring products to life”, says Guy Sprukt, Marketing Manager and one of miggo’s founders. “This is where we introduced our first agua camera bag two years ago, and this year we are proud to present not one but three new agua bags! The entire new line is IPX3 standard storm-proof and the bags offer an exceptional combination of protection from the elements and quick-draw ability. We had a long development stage, and we’re proud of the results and we believe that the new agua bags offer a completely different approach to carrying photographic gear and drones.”

    The agua series consists of 3 bags – all of which are IPX3-standard storm-proof and carefully designed from durable tarpaulin with a impressive matt finish – unique to the entire miggo agua collection.

    1. Agua Versa Backpack

    A versatile backpack for carrying professional photographic gear, as well as for daily use. The bag lets users enjoy a handy and carefully designed everyday bag, while the photographic gear is safely stored in a “doc-bag” insert. With the insert firmly in place, the Versa turns into a tough photo bag for any challenging task.

    The Versa Backpack provides fast and easy access to the camera and additional gear, excellent weather protection, a versatile back system with 3 different carrying modes (backpack, sling and X-position), a retractable insert for photographic gear, external charging system for mobile phone, a designated pocket for a laptop or iPad and three water-proof outer pockets for personal stuff. Versa Backpack is made from durable tarpaulin with a matt finish, and offers a rigid bottom made with thermoforming technology for superior impact protection. The agua Versa Backpack can carry a full-format DSLR such as Canon 5D Mark 4 (or similar), 2 professional lenses including 70-200 f2.8, and flash. Like all the bags in the agua series, the Versa Backpack is IPX3-standard storm-proof.

    1. Agua Drone Lander

    Extreme enthusiasts will be delighted to know that they can now own a revolutionary carrier for Mavic or Spark drones, which offers easy carrying and excellent protection from weather and impact.

    Agua Drone Lander lets users carry their easily on their back to the most challenging places in the world or just for a weekend trip with the family. The sensitive gear is fully protected thanks to a specially padded three-layer insert with a dedicated space for the drone and all its accessories. The bag also comes with an integral landing mat, which doubles as a work station. The Agua Drone Lander is made from durable tarpaulin with a matt finish that wraps around the padded insert and serves as an additional layer of protection from the elements such as rain, snow, dust or dirt. The agua Drone Lander is equipped with a main padded strap for carrying in the “sling” position, and a diagonal strap to keep the bag tight against the body for easy long-distance carrying. Like all the bags in the agua series, the Drone Lander is IPX3-standard storm-proof.

    1. Agua Sling

    A one-time combination of superior storm protection and camera quick-draw – Agua Sling offers them both, perfectly!

    The Agua Sling offers a compact design with surprising storage capability. It can carry a full-format DSLR camera such as Canon 5D Mark 4 (or similar), three professional lenses including 70-200 f2.8, and flash.

    A wide, padded strap allows easy carrying and quick access to the gear through a side opening. Agua Sling is made from durable tarpaulin with a matt finish and offers a rigid bottom made with thermoforming technology for superior impact protection. It also features a water-proof front pocket for personal stuff, an external and convenient charging port for mobile phones and a dedicated laptop pocket. Like all the bags in the agua series, the Sling is IPX3-standard storm-proof.

    “In July 2017, we’ll be returning to Kickstarter for the fourth time, and we’re looking forward to hearty support and backing “, says Rafi David, miggo’s CEO. “Kickstarter is an amazing platform that enables young companies like us to bring innovative products to the market, to receive feedback from consumers at a stage where changes can still be made and thus offer the products that are most suitable for our users.”

    Articles: Digital Photography Review (dpreview.com)

  • Recommended Gear for Doing Long Exposure Photography at Twilight and Dusk

    Have you ever come across beautiful cityscape photos captured at twilight and dusk (the so-called “blue hour”) with silky smooth water, like this Marina Bay (Singapore) photo below, and wonder how you could do that yourself? Assuming that you’ve already got your camera (a body and lens), let me go through some of the other gear that is required to do stunning long exposure photography at twilight and dusk.

    Recommended Gear for Doing Long Exposure Photography at Twilight and Dusk

    Marina Bay (Singapore), shot at 35mm, f/11, for 194 seconds (just over a 3-minute exposure).

    Use a Tripod

    A tripod is the single-most important piece of gear for photographers shooting at twilight and dusk. Photos shot at these hours require long exposures sometimes lasting for many seconds or even minutes. Therefore, a sturdy tripod is absolutely essential for keeping photos blur-free.

    Unlike your camera body, a tripod isn’t something you will upgrade often. So, try to get the best possible tripod within your budget. A good tripod could last a lifetime! I own a Manfrotto MT190CXPRO3 Carbon Fibre Tripod (supports up to 7kg). If your tripod doesn’t come with a tripod head (like mine), get yourself a steady ball-head or 3-way style, whichever you prefer (I own Sirui K-20X Ballhead that supports 25kg).

    Tripod - Recommended Gear for Doing Long Exposure Photography at Twilight and Dusk

    Mini-Tripods

    Mini tripods come in handy at locations where a full-size tripod isn’t allowed inside (e.g. The observation deck of a tower). I own a Joby Gorillapod Focus for DSLRs which supports up to 5kg. It has a dedicated ball head (Joby GorillaPod Ballhead X for Focus) that you can buy as a bundle, but I’m using my own ball-head (aforementioned Sirui K-20X Ballhead) as I feel it’s redundant to have two.

    Mini tripod - Recommended Gear for Doing Long Exposure Photography at Twilight and Dusk

    Clamp Tripod

    A clamp tripod is another tool that comes in extremely handy when there is no appropriate space to set up a tripod. I own the Manfrotto 035 Super Clamp without Stud (supports up to 15kg). Into that, I plug the separately-sold Manfrotto 208HEX 3/8-Inch Camera Mounting Platform Adapter (or a cheaper alternative Manfrotto 037 Reversible Short Stud) into the socket in order to firmly mount a tripod head and camera on top of that. Then I clamp the whole setup onto handrails, etc. This setup is rock solid and is a game changer for us cityscape photographers aiming to take very sharp photos at twilight and dusk without using a full-sized tripod.

    Clamp infographic - Recommended Gear for Doing Long Exposure Photography at Twilight and Dusk

    This graphic shows how to mount a DSLR on Manfrotto Super Clamp by using a camera mounting platform adapter.

    Steps:

    1. Plug a camera mounting platform adapter into a Super Clamp socket and secure it with the double lock system.
    2. Mount a tripod head with DSLR on the mounting platform adapter, just like you do with your regular tripod.

    Clamp - Recommended Gear for Doing Long Exposure Photography at Twilight and Dusk

    Neutral Density Filters

    Neutral density (ND) filters help reduce the light that is coming through the lens, allowing your shutter speed to be extended much longer. This is a must have tool if you want to create the silky smooth water effect typically seen in long exposure photography.

    ND filters come in different strengths such as; 3-stop, 6-stop or 10-stop. The bigger the number, the darker the filter and the less light that is let through. My favorite is 6-stop ND filter (I own a B+W 6-Stop ND Filter). With this attached to my lens, a base exposure of 2 seconds (i.e. when no filter is attached) can be extended to 128 seconds. Each “stop” of the ND filter doubles the required exposure time (2 seconds > 4 seconds [1 stop] > 8 seconds [2 stops] > 16 seconds [3 stops] > 32 seconds [4 stops] > 64 seconds [5 stops] > 128 seconds [6 stops]), which is long enough to create silky smooth water effects.

    Filters come in two types, screw-on and square filters. If you’re getting screw-on filters, be careful with the size of filter you’re purchasing. It depends on the filter thread size of your lens (e.g. 77mm for Nikon 12-24mm, 67mm for Canon 10-18mm, etc. – look inside your lens cap for the filter size of that lens). If you have two or more lenses with different filter thread sizes that you’d like to use an ND filter on, get one that fits your largest lens (i.e. lens with the largest filter thread size). Then purchase a step-up adapter ring to make the single filter fit into other lenses with smaller thread sizes.

    Filters - Recommended Gear for Doing Long Exposure Photography at Twilight and Dusk

    Left: Screw-on ND filter. Right: Drop-in square filter (image courtesy of Tiffen).

    Or, you can get a square ND drop-in filter instead, along with a holder and adapters (check out at these options we’ve reviewed and featured here on dPS). The advantage of square filters is that you only need one filter to fit all of your lenses. That said, I still prefer screw-on filters because they take up less space in my camera bag and I only own one lens that takes front filters (my trusty Nikon 18-35mm with 77mm filter thread), anyway.

    Wireless Remote or Cable Shutter Release

    This is another essential tool, as it lets you take photos without touching the camera and helps keep your photos sharp. No need to get a pricey one, though. I’m still using a Phottix IR-Nikon (wireless remote) that I bought years ago for $ 20 (it is available for Canon as well).

    Wireless remote - Recommended Gear for Doing Long Exposure Photography at Twilight and Dusk

    Long Exposure Calculator App

    When you use a semi-manual mode (e.g. Aperture Priority), the shutter speed cannot exceed 30 seconds on most DSLRs. With a 6-stop ND filter used at twilight and dusk, much longer than a 30-second exposure is required. So this is where you’ll need to switch to Manual Mode and take the full control of the camera yourself.

    But, how will you know the correct exposure time (shutter speed) to use when your camera no longer assists you? Well, there are a number of free phone apps that help you determine a correct shutter speed. I’m using Long Exposure Calculator app by Junel Corales (get it here for iOS devices or here for Android).

    Long exposure calculator - Recommended Gear for Doing Long Exposure Photography at Twilight and Dusk

    By setting your filter density (e.g. 6-stop) and base shutter speed (e.g. 2-seconds), the Long Exposure Calculator app automatically calculates the required shutter speed you will need to use (2 minutes and 8 seconds [128 seconds] in this case).

    Lenskirt

    A lenskirt is a handy tool when shooting through the glass window of an observation deck, hotel room window, etc., as it helps eliminate reflections (such as yourself, room lights) off of the glass window. It might catch the unwanted attention of other visitors due to its odd shape but it has worked quite well for me and has found a permanent place in my camera bag when I’m traveling.

    Lenskirt - Recommended Gear for Doing Long Exposure Photography at Twilight and Dusk

    Lenskirt in use on the 100th-floor observation deck of the Shanghai World Financial Center. By attaching it to the lens and its pushing suction cups onto the window, it shades the front element of the lens and cuts reflections from the glass window, leaving no chance for any stray light to get into the camera.

    Conclusion

    That’s all about it. I hope this will get you started with long exposure photography at twilight and dusk. For me, dusk is the most beautiful moment of the day. It ends in the blink of an eye, and that’s what makes it even more special. Try to capture the beauty of long exposure photography at twilight and dusk with this gear.

    If you have any other pieces of gear you use for long exposures that you find indispensable, please share them in the comments below.

    The post Recommended Gear for Doing Long Exposure Photography at Twilight and Dusk by Joey J appeared first on Digital Photography School.


    Digital Photography School

  • How to Create Abstract Photos with Oil and Water and a Little Dish Soap

    Oil and water are like chalk and cheese. They just aren’t the same are they? But despite their seeming incompatibility, each brings out the qualities of the other. As photographers, we love a good juxtaposition. There’s nothing that creates balance better than imbalance – well, it’s definitely the case here, at least. So in this article we’re going to use that to create some abstract photos.

    For this project, we are going to create a body of images that look as if they come straight out of a chemistry class instructional… or a 60s liquid light show. With two philosophically opposed house hold items, several more amicable components, and a camera. The process is simple and the results are abstractedly beautiful and a little trippy too. Intrigued? Check it out below.

    How to Create Abstract Photos with Oil and Water and a Little Dish Soap

    How to Create Abstract Photos with Oil and Water and a Little Dish Soap

    Things you will need to do this:

    • Camera
    • Sheet of glass
    • Two objects to set your glass on (I used milk crates but chairs and even stacked books work too)
    • A macro lens or extension tubes (I used my Kenko extension tubes)
    • Tripod
    • Towel
    • Some colorful materials
    • Oil (it doesn’t really matter what type, I used vegetable oil)
    • Dishwashing liquid soap
    • Water
    • Eyedropper or spoon

    Find a background material

    First, you’ll need to gather a few materials for the background of your image. You are looking for colored cardboard, magazines, posters, cloth, scraps – anything with a bit of color that won’t be missed if it gets coated in a little oil or dish washing liquid. Duller toned materials like brown or black won’t reflect light as readily, so aim for brighter colors to begin with.

    Don’t worry too much about intricate patterns or details as they wont show in the final image. While you are scouting for materials, grab an old towel too, it’ll come in handy later.

    How to Create Abstract Photos with Oil and Water and a Little Dish Soap

    For my abstract oil project I selected a cardboard gift bag I had around the house and a reflective folder I flattened out. The bright color combinations of the bag will create smooth, vibrant gradients. The reflective sheen of the folder will guide a greater amount of light up through the image, but the holographic flowers can yield surprisingly subtle results.

    How to Create Abstract Photos with Oil and Water and a Little Dish Soap

    The reflective cardboard I used for this image directs small speckles of light up into the splotches of oil. The overall grey tone of the cardboard contrasts with the flecks of colors to create a surrealistic, rainy atmosphere.

    How to Create Abstract Photos with Oil and Water and a Little Dish Soap

    This is an image with the Happy Birthday bag as a backdrop. None of the details are discernible, but a soft gradient separates the image into soft hues

    Setting up

    One you’ve assembled a neat pile of colorful bits and pieces, it’s time to set up. The aim here is to construct a bridge of sorts for your sheet of glass to sit on. To reduce the impact of a potential oil-spill, I set my rig up outside. Wherever you choose to setup just make sure you work on flat, even ground. Grab your milk crates (or chairs, etc.), set them down a little distance apart and set the glass between the two. Now take a few of the colorful materials you’ve selected, and position them on the ground, directly under the sheet of glass.

    To set up your camera, I strongly recommend using a tripod. Because macro lenses and extension tubes can reduce the amount of light reaching your camera’s sensor, the tripod will steady the camera for longer exposures. A tripod will also cut down the handling of your camera with oily fingers. Once your camera is locked into the tripod, turn it on, select Live View Mode and focus the camera on an area directly in front of the lens. You’ll need to be able to watch what you are doing on the LCD screen in the next step.

    How to Create Abstract Photos with Oil and Water and a Little Dish Soap

    Positioning my pane of glass between two milk crates, I then set my cardboard birthday bag in the space underneath. Using a tripod is highly recommended as this project requires a fair bit of hands-on adjusting and fiddling both behind and in front of the camera. The lemon tree is not mandatory

    Time to start cooking

    Gather your water, dish washing soap, oil, spoon (or eyedropper), and towel and place them within reach. Begin by adding a small spot of oil to the glass. Keeping an eye on your LCD screen will help you position your drops within the camera’s field of view. To build up layers of liquid, add dots of water or dishwasher liquid to the center of the oil. As the liquids span out over the glass, add in new droplets of the different ingredients. Alternating between ingredients takes advantage of their natural resistance to each other, delineating shapes and patterns more readily. If you like, you can use the tip of your spoon or eyedropper to manipulate the shape of the growing bubble.

    That’s about it really! The rest is totally up to you. You can’t mess up, so don’t worry if you aren’t getting perfect circular bubbles or patterns. Allow the medium to take shape as you cycle through your three ingredients. Try running a spoon through the middle of the concoction to create smaller clusters of bubbles. Or use a greater ratio of dishwasher liquid to oil to enhance the spiderweb look of the cleaning chemicals. Even spritzing mists of water over the glass can make fascinating reflections.

    Experiment with the background and elements

    While you are watching the details unfurl beneath the camera lens, don’t forget to experiment with your background too! Add or remove materials, layer new colors, add materials which have a greater or lesser reflective surface. Use a flashlight (torch) to illuminate different areas in the image or shine the light up into the bubbles suspended on the glass.

    There are no hard and fast rules – the more you experiment the more you’ll discover. And, once all your liquids have inevitably pooled in a messy, semi-clear river of goo, grab your towel, wipe down the glass and start again! A word of caution, however, this project can become an addition in itself, not only because it looks good, but because each result is so illusive and unpredictable.

    Have fun and share your abstract photos made from oil, water and dish soap in the comments below.

    This smooth effect was created as the oil and dish washing liquid slowly spread over the surface of the glass

    The delicate strands in this image is a result of the dish washing liquid being spread across the glass surface with a spoon


    This image was photographed with a single color background. The consistent color illuminates the beads of oil and water in the light

    The post How to Create Abstract Photos with Oil and Water and a Little Dish Soap by Megan Kennedy appeared first on Digital Photography School.


    Digital Photography School

  • The One Good Reason to Choose Greyscale

    You have probably heard various reasons for converting a photograph to greyscale. I think that there is just one good reason.

    converted to sRGB profile and NO edits were done on the image – this caption is just for Richard’s information

    Small Point

    First though, a small point – the terms black and white versus greyscale.

    The One Good Reason to Choose Greyscale

    Is it black and white?

    It is a personal bugbear. We all do it. I do it. But we really should not say “black and white”. Maybe it is easy to say, and B&W does have a much wider catchment of understanding, however, it is a long way from the truth, and “greyscale” is much more accurate.

    Singular Reason for Choosing Greyscale

    The reason for choosing greyscale seems very clear to me. I could write one sentence, take a bow, then exit stage left. However, I think you, readers of dPS, deserve a little more explanation than that. Also, I admit, I have experienced that it is not necessarily an idea which others always greet with immediate enthusiasm. So I am very interested to see what you think.

    The One Good Reason to Choose Greyscale

    The pipe walk?

    You have probably heard some of the standard reasons given for choosing greyscale. For many people, at the top of the list is that it reveals form, shape, and line. Closely related to this is the capacity to emphasize texture. Also, the use of greyscale can help to set a mood, enhance an atmosphere. The luminance, the relative brightness of objects within the frame, often takes on more importance. All these are good reasons for choosing greyscale.

    First Example

    The One Good Reason to Choose Greyscale

    A good guy …

    Months after I had taken it, I came back to the image above and converted it to greyscale. I liked this guy when I met him. Rather, I liked his face, but I did not think the portrait offered much. Then:

    The One Good Reason to Choose Greyscale

    … shines out from the picture.

    In the context of writing for dPS, I find it difficult to comment on my own photographs, but surely the greyscale version is a great deal better, do you not agree?

    The reasons include many of the standard ones given above. For me, and we all see things differently, the prime thing is that the mood is much more dramatic. Surely the greyscale version emphasizes the shape of his face much more. The processing choices are quite extreme and show the texture and details of his face. Luminance is now also a much bigger factor. For me (please refer to my dPS articles on Photographer’s Metadata) it shows the man’s vibrant character more strongly. That is curious, isn’t it? When the color is removed the character is more evident.

    Zen

    For me, the preliminary point to grasp is that if something is not contributing to a picture in a positive way, it probably has a negative impact on the final result. If an element in the image is not contributing in a good way, it is very likely a distraction. All a bit Zen, aiming for clarity of vision, with all the unnecessary removed.

    The One Good Reason to Choose Greyscale

    A little Zen?

    Removing the Distractions

    Looking at the photograph of the watermelon store below, what do you think is the point, what is the subject, what is the story? I think it adds to the photograph that there is retail transaction taking place, and this tells part of the story. However, at least for me, I do not think that is the main subject of the photograph.

    The biggest feature is obviously the melons, and I do not think it is their color, I think it is their shape, and the repetition of that shape which is emphasized by the rim light. I am certain that the van at the back is not helpful, adds nothing to the story at all, and it is quite a big distraction.

    The One Good Reason to Choose Greyscale

    What is the subject here?

    The Zen of removing non-contributing factors, unnecessary distractions should be the reason why you choose to convert a picture to greyscale. The item at the top of that list of distractions is the most obvious thing. The biggest distraction is color itself. A tip that I heard a few years ago, which I have found very helpful, is that the reason for converting an image to greyscale is that it REMOVES THE DISTRACTION OF COLOR.

    Sorry, did I raise my voice for a moment there? I hope I did not offend you. But, at least for me, it is about as solid and certain as anything is in the compromise-filled world of photography. If color is not contributing to the photograph, it is a distraction.

    Whether you agree or not, as I’ve said, for me the photograph of the melon stall is about the repetitive shape of the melons. All of the items mentioned a couple of paragraphs above, the standard reasons, are improved by converting to greyscale, by removing the distraction of color.

    The One Good Reason to Choose Greyscale

    Shapes and light.

    More Examples

    Another street shot.

    The One Good Reason to Choose Greyscale

    Filipino street boys.

    In the greyscale version below, the luminance of the objects is improved. Just look at the plastic begging cup in the boy’s hand, it is much more of a feature. The texture is shown a great deal more clearly in the grime on the boys’ faces, shirts, and very much in the matted nature of their hair. The mood grimmer. All of these, probably more, are part of the standard list of reasons for choosing greyscale. However, all of them are subservient to the main overall reason. All the improvements are achieved because a conversion to greyscale has removed the distraction of color.

    The One Good Reason to Choose Greyscale

    With every detail clear to see.

    The next photograph is a typical Filipino sari sari store.

    The One Good Reason to Choose Greyscale

    Minding the store.

    Again, I acknowledge that we all see things differently. I can only say how I see it, but I would think that for most viewers, the removal of the distraction of color, has made the store owner much more prominent. Also, the clutter of all the sachets seems greater, their pattern, you might call it texture, seems more evident. It seems color was a distraction.

    The One Good Reason to Choose Greyscale

    It is clear to see.

    Greyscale for portraits

    I am very fond of using greyscale for portraits.

    The One Good Reason to Choose Greyscale

    This does not work.

    It would have been better to use a different chair, as that yellow is a huge draw away from the subject of the photograph, but I was chasing the light. The use of greyscale soon removes the distraction.

    The One Good Reason to Choose Greyscale

    This does work.

    As with the man at the top of this article, portraits can sometimes be greatly improved by using greyscale. The face, which is, after all, the subject of the photograph, is what your eye is drawn to.

    The One Good Reason to Choose Greyscale

    Incomparable.

    As I have said, the use of greyscale can help to show shapes and lines, make more of a feature of luminance. All of that is gained because – you may well have gotten the mantra by now – it removes the distraction of color.

    To my eyes, photographs of babies seem to work particularly well in greyscale.

    The One Good Reason to Choose Greyscale

    There are too many distractions here.

    Returning to the original Zen question, does the color add anything to the photograph above? Being a little absolutist about it, no it does not. It is, therefore, detracting from the end result.

    The One Good Reason to Choose Greyscale

    Fewer distractions.

    Removing the distraction of color, allows the texture to be emphasized. The skin of babies, and their young mother’s too, usually has a lack of texture, it is the beautiful smoothness which is emphasized.

    Sometimes it can be a matter of personal taste.

    The One Good Reason to Choose Greyscale

    Sweet dreams.

    But I much prefer the emphasis of lines and the calm mood of the greyscale version.

    The One Good Reason to Choose Greyscale

    Sweeter dreams.

    Finally, on the theme of portraits, and children in particular.

    The One Good Reason to Choose Greyscale

    The One Good Reason to Choose Greyscale

    Greyscale for other subjects

    If you even half accept what I am saying, mostly from the examples of portraits, what do you think about applying the same idea to other subjects?

    Below is a unique form of transport in the Philippines, a jeepney. What do you think the color adds to the version on the left?

    The One Good Reason to Choose Greyscale

    Converting to greyscale emphasizes the shiny parts, and the shapes and lines as well. Aren’t your eyes less drawn to the blue roof, and blue spare wheel cover?

    The One Good Reason to Choose Greyscale

    Though it is almost monochrome, does the color add anything to this image of buildings?

    The One Good Reason to Choose Greyscale

    A bit of a crop, a change to greyscale, and the subject, the bicycle, becomes much clearer.

    The One Good Reason to Choose Greyscale

    Then, with the photograph below, what do you think the subject is? Yes, of course, it is sand dunes. More specifically, isn’t it the lines of the sand dunes? It seems that this is a good time to ask the Zen question again. Is the color adding anything to that? The sand is not a color which appeals to me in this example, and the sky is a very insipid. To my eyes, the color adds nothing.

    The One Good Reason to Choose Greyscale

    The desert.

    The lines, light and shadow, the texture … the subjects of the photograph can sing their song when it is in greyscale.

    The One Good Reason to Choose Greyscale

    The shapes, lines, textures of the desert.

    The Counter Example

    Sometimes a point is made clearer with a counter-example. You might think the point of this photograph is the radiating lines.

    The One Good Reason to Choose Greyscale

    I think the color is at least an equal part of the subject of this photograph, not a distraction at all. The color version is much better to my eye.

    The One Good Reason to Choose Greyscale

    Then, I wonder what you think of this photograph.

    The One Good Reason to Choose Greyscale

    That girl!

    You may have different tastes than I do, and you are welcome to disagree. I would recommend that you question each individual shot, keep thinking, do not follow any formula. It may seem contrary to many of the decisions and comments I have made above, but I much prefer this shot in color.

    The One Good Reason to Choose Greyscale

    Closer, warmer.

    I’ve had to think about why I prefer the color version of this image. I think the really shallow depth of field is a factor, meaning that, with much of the image out of focus, the color is less present, distracts less from the subject of the photograph.

    Also, because the main subject is a fairly large portion of the photograph, it is quite an intimate photograph. The color is not only NOT a distraction, but enhances that intimacy, with a warm tone, and even the detail of the small pink tongue. The luminance is a factor in both versions, but the face seems to still shine through in the color version. Neither is the photograph as much about line, shape, or texture. Simply, it is a much better, more fully cohesive story when told in color.

    Processing

    One extra bonus to converting a photograph to greyscale is that it can allow quite a lot more flexibility in post-processing. My assertion is that this is also a result of removing the distraction of having to deal with color. If you do not have to worry about color when processing, you can certainly kick around all those greyscale pixels a lot harder. The distraction of color might be, as in the case of this photograph shot into the light, that the color was not very good in the original shot.

    The One Good Reason to Choose Greyscale

    I would never even start to think of publishing this.

    Or?

    The One Good Reason to Choose Greyscale

    This? Yes!

    The One Good Reason to Choose Greyscale

    This is not a great landscape photograph to start. I think it is very clear that the light, and the subsequently flat colour, does not help. It is too dull and flat.

    The One Good Reason to Choose Greyscale

    Remove the color, and the greyscale version is nowhere near to being a competition winner but, at least to my mind, it is better. It has a bit more depth, a bit more spark.

    As stated repeatedly, with color out of the equation, no longer needing to be considered, you do have a lot of choices.

    The One Good Reason to Choose Greyscale

    Soft, warm Arabian colors.

    The One Good Reason to Choose Greyscale

    Hard, lots of contrast, the structure of the pot and its holder are shown clearly.

    The One Good Reason to Choose Greyscale

    Texture, details, more balanced.

    The One Good Reason to Choose Greyscale

    The feel and the look that I had in my mind’s eye.

    For those who might remember the early Elton John album, Tumbleweed Connection, the album cover was my inspiration. I felt I got close. The point being that without color in the way, you can bend those pixels into all sorts of different moods.

    Simple Conclusion

    The first thing is an acceptance that if something in the frame is not adding to the photograph, it is detracting from it. Then, choosing greyscale removes the distraction of color! Simple!

    P.S. Yes, of course, I also call them black and white photos all the time too!

    The post The One Good Reason to Choose Greyscale by Richard Messsenger appeared first on Digital Photography School.


    Digital Photography School

  • Anime Architecture: Exhibition Showcases Japan’s Fictional Buildings

    [ By SA Rogers in Art & Drawing & Digital. ]

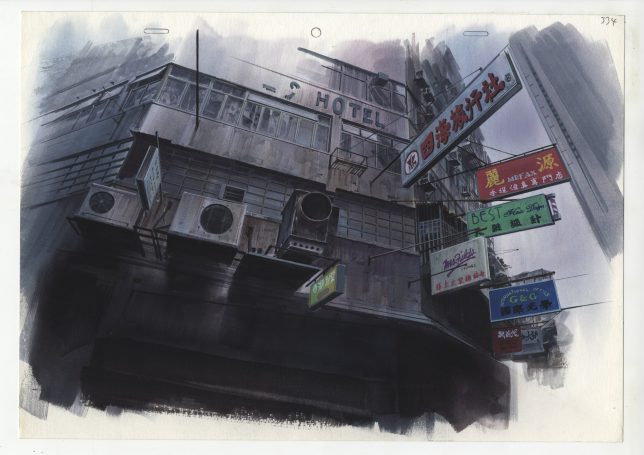
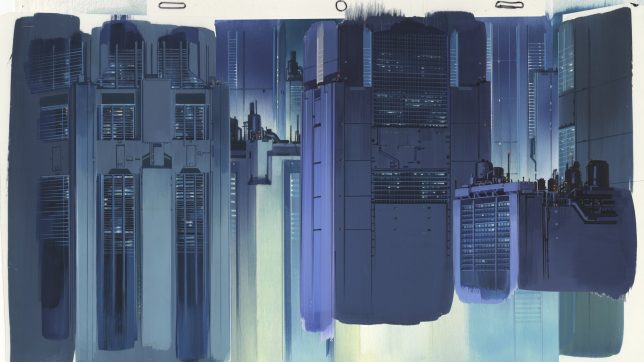
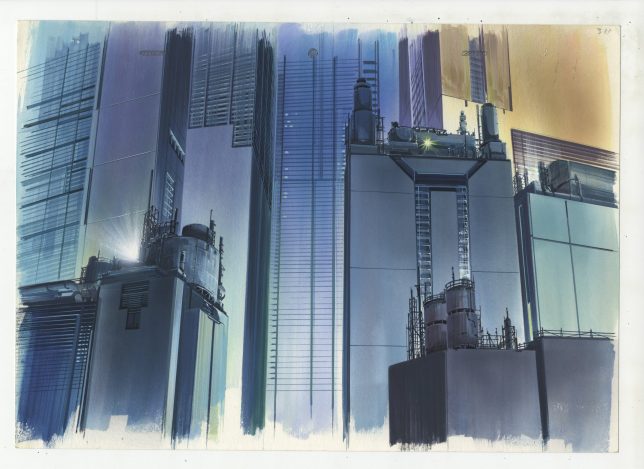
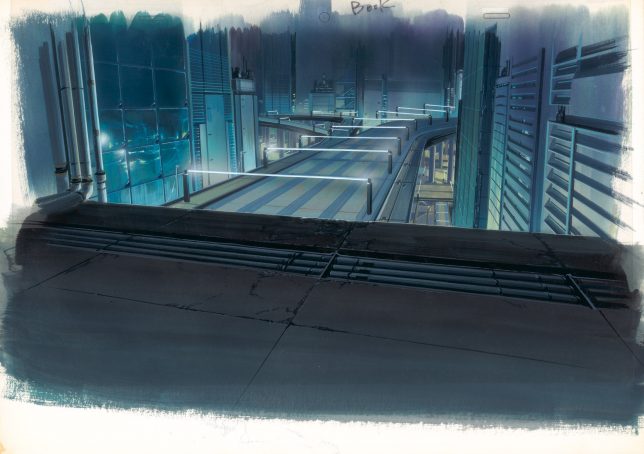
    Visions of fictional cities – whether optimistic, realistic, fantastical or dystopian – tend to take on a haze of mystery and grandiosity in Japanese anime, as epitomized in ‘Ghost in the Shell.’ Dark jumbles of nearly-identical skyscrapers lurk over the protagonists in futuristic metropolises, often emphasizing feelings of desolation, industrialization and technology run amok. If you’ve ever sighed over a particularly incredible work of fictional architecture, you might be interested in an exhibition currently on display at London’s House of Illustration.

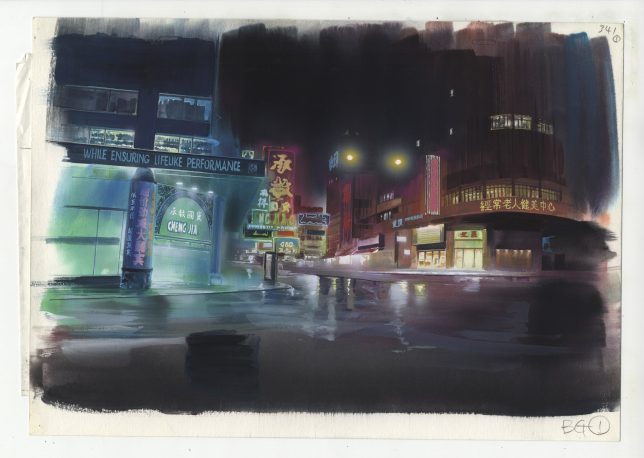
    ‘Anime Architecture: Backgrounds of Japan’ is the first UK exhibition of architectural illustrations for classic anime films, featuring over 100 technical drawings and watercolor illustrations. Most of these works come from series that debuted or were most popular during the anime heyday of the 1990s, including Hiromasa Ogura’s paintings for ‘Ghost in the Shell’, Takashi Watanebe’s pencil drawings from Ghost in the Shell 2: Innocence and work from the films ‘Patlabor: The Movie’ (1989) and ‘Metropolis’ (2001) by Mamoru Oshii and Atsushi Takeuchi.

    Sure, there are great anime works that came after these with fictional architecture that’s just as beautiful, but these days, artists use computer animation instead of hand-painting the backgrounds. In an interview with It’s Nice That, curator Stefan Riekeles explains that it took quite a bit of nudging and late-night meetings at bars to convince the artists that people would want to see these works outside the context of the films, and that they’d translate well to gallery walls.

    “[Ghost in the Shell], released 1995, was the continuation of [director Mamoru Oshii’s] reflection of the Asian mega-city, which he started with Patlabor in 1989 and continued after Ghost in the Shell: Innocence in 2004. Patlabor is set in a realistic urban depiction of Tokyo. Innocence is located in a purely fictional Asian world. The world of Ghost in the Shell is a hybrid of these poles.”

    “The idea was to evoke a feeling of submerging into the deep levels of the city, where a flood of information overflows the human senses and a lot of noise surrounds the people. The artists were looking for an expression of a crowded space. They found a blueprint for such a place in Hong Kong, which is exotic enough for a Japanese audience to evoke a feeling of alienation and strangeness but familiar enough to relate their daily life to.”

    Anime Architecture: Backgrounds of Japan will be open through September 10th, 2017 at the House of Illustration in King’s Cross.

    Share on Facebook


    [ By SA Rogers in Art & Drawing & Digital. ]

    [ WebUrbanist | Archives | Galleries | Privacy | TOS ]


    WebUrbanist

  • NVIDIA Computational Zoom lets you change perspective and focal length in post

    Researchers with the University of California, Santa Barbara (UCSB) and NVIDIA have detailed a new type of technology called ‘computational zoom’ that can be used to adjust the focal length and perspective of an image after it has been taken. The technology was detailed in a recently published technical paper, as well as a video (above) that shows the tech in action. With it, photographers are able to tweak an image’s composition during post-processing.

    According to UCSB, computational zoom technology can, at times, allow for the creation of ‘novel image compositions’ that can’t be captured using a physical camera. One example is the generation of multi-perspective images featuring elements from photos taken using a telephoto lens and a wide-angle lens.

    To utilize the technology, photographers must take what the researchers call a ‘stack’ of images, where each image is taken slightly closer to the subject while the focal length remains unchanged. The combination of an algorithm and the computational zoom system then determines the camera’s orientation and position based on the image stack, followed by the creation of a 3D rendition of the scene with multiple views.

    “Finally,” UCSB researchers explain, “all of this information is used to synthesize multi-perspective images which have novel compositions through a user interface.”

    The end result is the ability to change an image’s composition in real time using the software, bringing a photo’s background seemingly closer to the subject or moving it further away, as well as tweaking the perspective at which it is viewed. Computational zoom technology may make its way into commercial image editing software, according to UCSB, which says the team hopes to make it available to photographers in the form of software plug-ins.

    Articles: Digital Photography Review (dpreview.com)

  • NASA will chase the August eclipse in jets to capture ‘clearest images of the corona to date’

    It doesn’t matter where you’ll be during the August 21st solar eclipse, NASA plans to one-up you and capture a better photo—or at least a unique one. The space agency is actually going to chase the eclipse’s totality in two highly modified 1950s-vintage WB-57F jets, in order to capture the ‘clearest image of the sun’s […] corona to date,’ and the first-ever thermal images of Mercury.

    The whole plan is detailed in the short video above, although we have to warn you, it might make you feel a little bit of gear envy—”if only I’d bought that Air Force surplus reconnaissance plane…”

    Joking aside, the August 21st eclipse is a brilliant research opportunity, and NASA doesn’t plan to let it slip by unused. The two WB-57F jets have each been retrofitted with twin telescopes mounted on their noses. Using these telescopes, Amir Caspi of the Southwest Research Institute in Boulder, Colorado plans to capture “the clearest images of the Sun’s outer atmosphere — the corona — to date and the first-ever thermal images of Mercury.”

    One of the WB-57F jets is readied for a test run at NASA’s Johnson Space Center in Houston. The instruments are mounted under the silver casing on the nose of the plane. Photo: NASA’s Johnson Space Center/Norah Moran

    According to NASA, the jets will capture high-definition pictures at 30fps during the entire eclipse totality—which will last three times longer as the jets speed along, staying inside the moon’s shadow—from the stratosphere, avoiding interference from most of the Earths atmosphere. These photos will then be analyzed to determine why the sun’s atmosphere is so hot (millions of degrees), when the visible surface of the sun is significantly cooler (a few thousand degrees).

    Before and after these observations, the scientists will also use the jets to try and capture the first-ever thermal images of Mercury—”the first attempt to map the variation of temperature across the surface of the planet.”

    To find out more about this fascinating scientific (and photographic) mission, check out the video at the top or head over to the NASA website for a more detailed breakdown of what they’re looking to capture and why.

    Articles: Digital Photography Review (dpreview.com)

  • Art of Wearable Tech: 10 Fashionable Designs Help with Fun, Sex & Self-Defense

    [ By SA Rogers in Gadgets & Geekery & Technology. ]

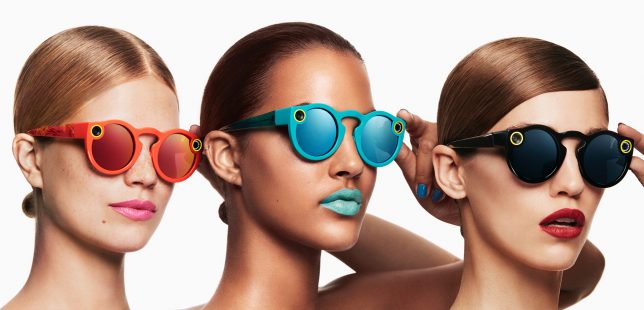
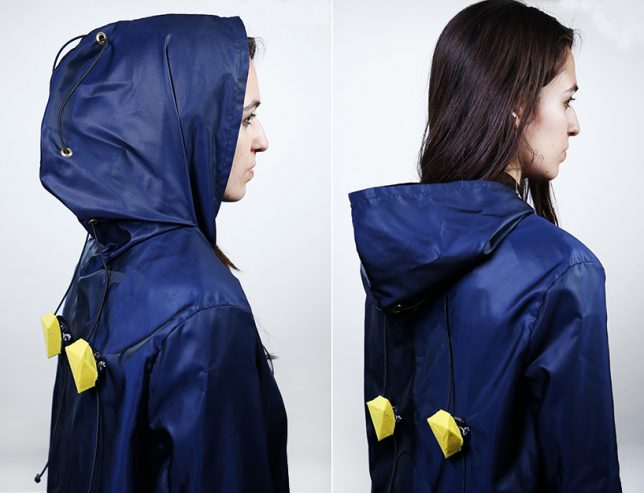
    Not all wearable tech has to be a tiny smartphone on your wrist or a device that tracks how many steps you’ve taken – it can also record your memories as you see them, visibly react to your emotions, flirt with people on your behalf, warn others they’re invading your personal space or even measure your sexual performance. These unconventional wearables are also a little less dorky than usual, aiming to blend fashion and technology in a way that’s exciting,  beautiful and sometimes strange.

    Robotic Jewelry by MIT Media Lab

    What look, at first, like jewels or little bulbous decorative accents on a blouse suddenly start crawling around like they’ve got minds of their own. ‘Kino’ is a collection of ‘living’ jewelry from MIT Media Lab, designed to reconfigure itself in response to environmental conditions. “It is our vision that in the future, these robots will be miniaturized to the extend that they can be seamlessly integrated into existing practices of body ornamentation. With the addition of kinetic capabilities, traditionally static jewelry and accessories will start displaying life-like qualities, learning, shifting, and reconfiguring to the needs and prefereces of the wearer, also assisting in fluid presentation of self.”

    Lumoscura Smog Mask by Stephanie Liu

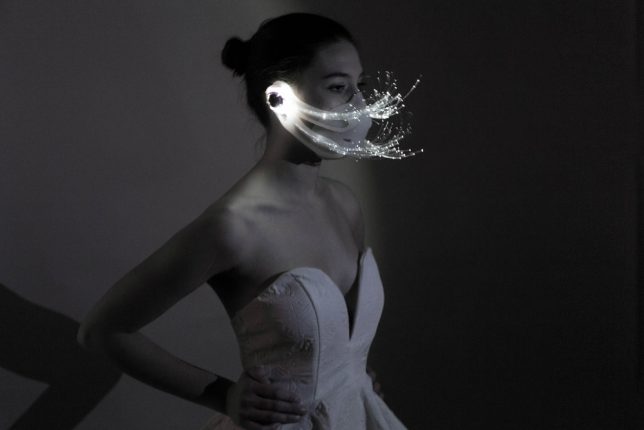
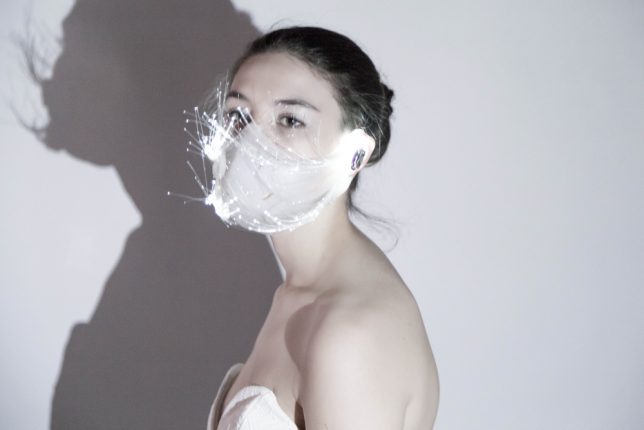
    Dazzling fiber optics inspired by shimmering white peacock feathers make the need to wear a smog mask at least a little bit more fashionable. Says designer Stephanie Liu, “Masks have always been associated with disease, fear and negativity. Some wear it in public to hide their identities, in reality it attracts attention and can generate fear and stress amongst those in their immediate surroundings. As air pollution becomes more and more of an issue in many countries, people have begun to surrender to wearing a mask for the sake of their health, however there are still a lot of people who do not wear masks for many reasons – the top three being unattractive, uncomfortable and repelling people.”

    Smart Self-Defense Spider Dress by Anouk Wipprecht

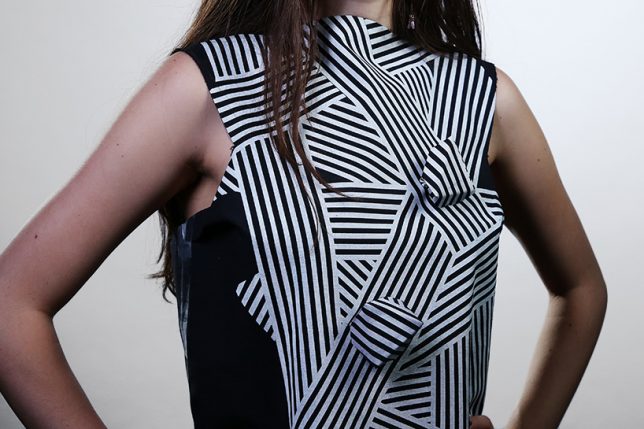
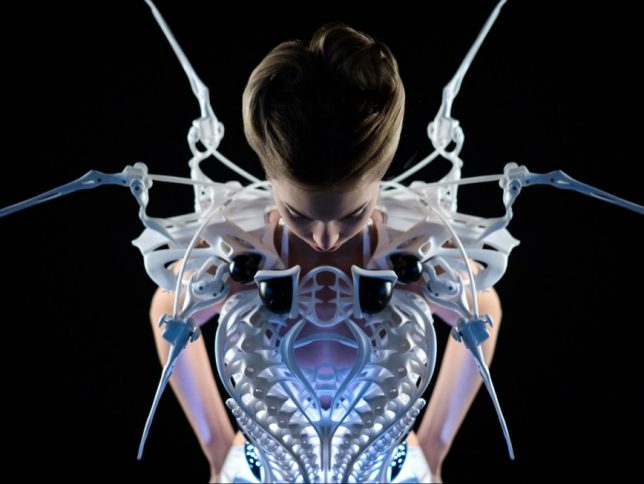
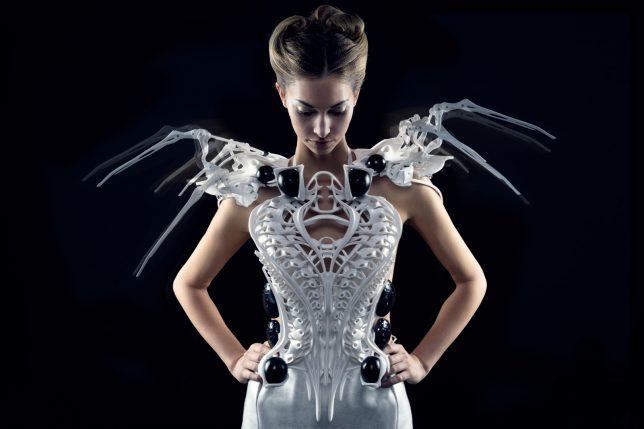
    People might be less likely to mess with you if the mechanical spider you’re wearing as a dress makes a sudden move. That’s the idea behind the Smart Spider Dress by Anouk Wipprecht, powered by Intel Edison. The legs of the spider constantly move, reacting to the wearer’s real-time biometrics as well as violations of social norms, like when someone invades their personal space. “Since the system based with mechanic spider legs is literally hosted on the shoulders of the wearer and attacks using the same viewing angle as the wearer, the system knows how you feel and adapts to those feelings,” says Wipprecht.

    MIT Duoskin Temporary Electrical Tattoos

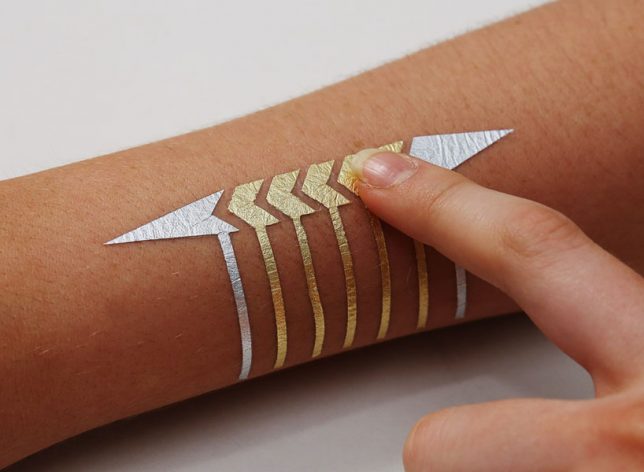
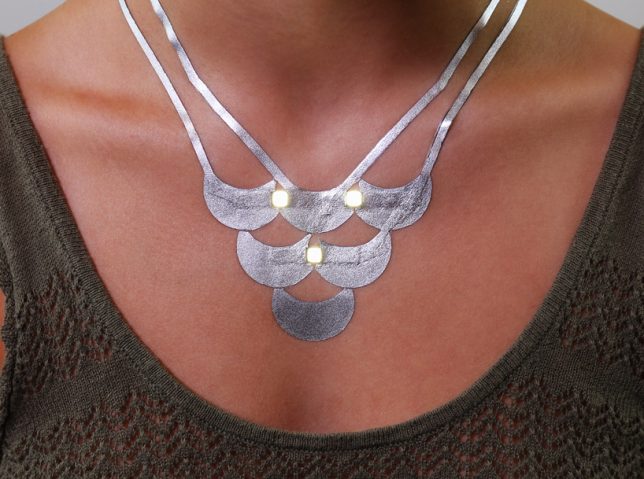
    Anyone can create functional devices directly attached to their skin, including lights and controls for mobile devices, using an electricity-conducting gold leaf paint in a fun design that makes it look like a metallic tattoo. “We believe that in the future, on-skin electronics will no longer be black-boxed and mystified; instead they will converge toward user friendliness, extensibility, and aesthetics of body decorations, forming a DuoSkin integrated to the extent that it has seemingly disappeared,” says MIT, who refer to the project as ‘digital skin jewelry.’

    i.Con Smart Condom Ring Measures Performance

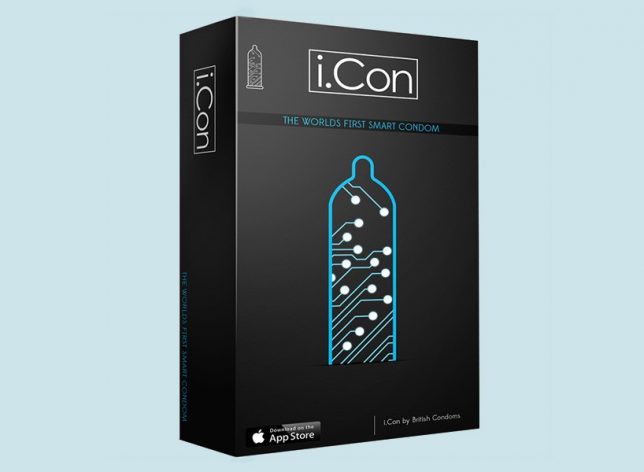
    No more boasting about your performance using inaccurate figures. The i.Con smart condom ring by British Condoms will know exactly how long you last, how many positions you used, ‘velocity of thrusts,’ ‘girth’ and other data, sending the information straight to your smartphone via bluetooth. One positive of this technology is, it can give users a way to measure improvement if their data is disappointing and they want to work on things. But perhaps even more valuable is the fact that the wearable comes with an ‘antibodies filter’ to detect the presence of sexually transmitted infections.

    Next Page – Click Below to Read More:
    Art Of Wearable Tech 10 Fashionable Designs Help With Fun Sex Self Defense

    Share on Facebook


    [ By SA Rogers in Gadgets & Geekery & Technology. ]

    [ WebUrbanist | Archives | Galleries | Privacy | TOS ]


    WebUrbanist

  • Full-res image samples from the 16-module Light L16 camera

    The Light L16 camera has been in the works for years now. A 16-module camera that looks like a smartphone, it uses up to 10 camera modules at once to capture 52-megapixel (minimum) photographs, and promises to “DSLR quality in the palm of your hand.” Plenty of people are skeptical of that claim, but now that the L16 is finally shipping to pre-order customers, Light has released three high-resolution image samples for you to pour over and critique.

    Admittedly, none of the three photographs pits the L16 agains what you might consider a challenging lighting scenario. There’s a portrait, a landscape photo taken at the Grand Canyon’s famous Horseshoe Bend, and a photograph of the iconic shipwreck at Point Reyes.

    All three are taken when there was plenty of natural light around, and while the Point Reyes shot does contain some more intense contrast between the highlights and shadows we really wish Light had shared one or two low-light shots. Still, barring that, the photos will give you a good idea of what this diminutive little computational photography camera can do:

    $ (document).ready(function() { SampleGalleryV2({“containerId”:”embeddedSampleGallery_3604419316″,”galleryId”:”3604419316″,”isEmbeddedWidget”:true,”standalone”:false,”selectedImageIndex”:0,”startInCommentsView”:false,”isMobile”:false}) });

    The smallest of the three photos is 53.3MP, the largest a whopping 81MP, giving you some serious cropping power. Give our gallery a second to deal with the photos, especially if you’re using the 100% zoom feature… these files are nothing to scoff at.

    To see more photos taken with the L16, or if you want to download these full-res samples for yourself, head over to the Light.co gallery. And once you do pixel peep these shots your heart’s content, let us know what you think of the L16 in the comments.

    Articles: Digital Photography Review (dpreview.com)

  • RED’s Raven Camera Kit is now sold exclusively through Apple

    Cinema camera company RED has teamed up with Apple to offers its ‘affordable’ (relatively) RED Raven Camera Kit exclusively through Apple’s online store. Interested buyers may be able to head over to their local physical Apple retail store to see demonstrations of the camera, as well, though RED says that only ‘select’ locations are offering demos.

    The camera kit is described as being a ‘complete handheld camera package’ that includes the RED Raven 4.5K camera BRAIN alongside accessories, storage, a lens, and software.

    The Raven 4.5K is notable as RED’s most compact BRAIN offering at 3.5lbs/1.6kg, according to the company, as well as being one of its most affordable models—the entire camera kit is priced at $ 15,000 USD. RED President Jarred Land described the Raven Camera Kit in a statement today as being a “ready-to-shoot professional package.”

    With this camera, users are able to shoot REDCODE RAW (R3D) footage at a 4.5K resolution at up to 120fps or 2K footage at up to 240fps.

    The RED Raven Camera Kit includes:

    • RED Raven 4.5K camera BRAIN
    • RED DSMC2™ Touch LCD 4.7” Monitor
    • RED DSMC2 Outrigger Handle
    • RED V-Lock I/O Expander
    • RED 120 GB RED MINI-MAG®
    • Two IDX DUO-C98 batteries with VL-2X charger
    • G-Technology ev Series RED MINI-MAG Reader
    • Sigma 18-35mm F1.8 DC HSM | Art
    • Nanuk heavy-duty camera case
    • Final Cut Pro X
    • foolcontrol iOS app for Raven Camera Kit

    The RED Raven Camera Kit is available from Apple.com now.

    Press Release

    RED Digital Cinema’s RED RAVEN Camera Kit Now Available Exclusively Through Apple.com

    This Professional Package Includes Everything Cinematographers Need to Start Shooting, Including Lens, Media, Batteries, Software and More

    IRVINE, Calif. – RED Digital Cinema® announced today that its RED RAVEN® Camera Kit is now available exclusively through Apple.com and available to demo at select Apple Retail Stores. This complete handheld camera package features a diverse assortment of components from some of the industry’s top brands, including:

    • RED RAVEN 4.5K camera BRAIN
    • RED DSMC2 Touch LCD 4.7″ Monitor
    • RED DSMC2 Outrigger Handle
    • RED V-Lock I/O Expander
    • RED 120 GB RED MINIMAG
    • Two IDX DUO-C98 batteries with VL-2X charger
    • G-Technology ev Series RED MINIMAG Reader
    • Sigma 18-35mm F1.8 DC HSM | Art
    • Nanuk heavy-duty camera case
    • Final Cut Pro X
    • foolcontrol for RAVEN Camera Kit

    The RED RAVEN Camera Kit is available for $ 14,999.95. Customers can buy this package or learn more at Apple.com and select Apple Retail Stores.

    “We are very excited to work with Apple on the launch of the RED RAVEN Camera Kit, available exclusively through Apple.com,” said Jarred Land, President of RED Digital Cinema. “The RED RAVEN Camera Kit is a ready-to-shoot professional package that gives content creators everything they need to capture their vision with RED’s superior image capture technology.”

    The RAVEN 4.5K is RED’s most compact camera BRAIN, weighing in at just 3.5 lbs. This makes it a great choice for a range of applications including documentaries, online content creation, indie filmmaking, and use with drones or gimbals. The RAVEN is equipped with a 4.5K RED DRAGON sensor, and is capable of recording REDCODE RAW (R3D) in 4.5K at up to 120 fps and in 2K at up to 240 fps. RED RAVEN also offers incredible dynamic range, RED’s renowned color science, and is capable of recording REDCODE RAW and Apple ProRes simultaneously—ensuring shooters get the best image quality possible in any format.

    The RED RAVEN Camera Kit also includes Final Cut Pro X which features native support for REDCODE RAW video, built-in REDCODE RAW image controls, and the most complete ProRes support of any video editing software. Together with the free RED Apple Workflow software, Final Cut Pro allows professional video editors to work quickly and easily with RED RAVEN footage on MacBook Pro, iMac, and Mac Pro systems.

    All RED cameras feature a modular design that empowers customers to dial in their ideal configuration for any production environment. Customers looking to outfit their RAVEN with additional accessories should go to www.red.com.

    Articles: Digital Photography Review (dpreview.com)