Blog

  • Photo Experiment: Shooting macro photos of boiling water

    Recently I’ve become interested in photographing boiling water in a glass tea kettle. It may sound boring and uninteresting, but with the right lighting you can get some truly interesting images.

    It began when I was boiling my tea water one day in January this year, and I happened to have my camera with a macro lens and a speedlight mounted, laying nearby. I decided to try what would happen if I photographed the boiling water in the glass tea kettle and was very surprised by the results! It looked like melted metal, and the shapes were a lot more intricate and detailed than I would have expected.

    When experimenting with this, I have gotten the best results when using a macro lens with a long focal length. I used my trusty Sigma 150mm f2.8 macro. You could probably get interesting photos with a non-macro lens, but you would likely have to do some cropping to take away the edges of the teakettle and the background, as you wouldn’t be able to focus as closely.

    I set the aperture to around F6 or F7 for the sharpest results, and I focus fairly close, but not all the way to 1:1 magnification. I make sure that the room is as dark as possible, as this gives the photos a calmer background. I use either a normal speedlight mounted on the top of the camera, or, for more interesting results, I use two speedlights with colored gels, placed at different angles towards the teakettle.

    In this case, I used two Godox TT 685s: cheap but incredibly well-built wireless speedlights.

    Finally, I turn on the teakettle and let the water start boiling, while I press the shutter as many times as possible. Be prepared to take a lot of photographs, and know that most of them will turn out only okay. When I recorded my video about this, I took thousands of shots, and only deemed around 10-20 to be “good.” But when you get a nice composition of bubbles, with perfect sharpness and that metallic, futuristic look, it is worth the effort!

    $ (document).ready(function() { SampleGalleryV2({“containerId”:”embeddedSampleGallery_9440977853″,”galleryId”:”9440977853″,”isEmbeddedWidget”:true,”standalone”:false,”selectedImageIndex”:0,”startInCommentsView”:false,”isMobile”:false}) });

    The most interesting photos seem to come at two stages: when the water is boiling the most – when it is total chaos inside that teakettle—and when it has stopped boiling and you only see small, flat bubbles rising from the bottom with some distance between them.

    Again, this might seem like a silly, boring idea but photographing boiling water is a fun and interesting experiment to try at home on a rainy day!


    Micael Widell is a photography enthusiast based in Stockholm, Sweden. He loves photography, and runs a YouTube channel with tutorials, lens reviews and photography inspiration. You can also find him as @mwroll on Instagram and 500px.

    Articles: Digital Photography Review (dpreview.com)

  • 3D-Printed Muscle Straight Out of ‘Westworld’ Makes Robots More Realistic

    [ By SA Rogers in Conceptual & Futuristic & Technology. ]

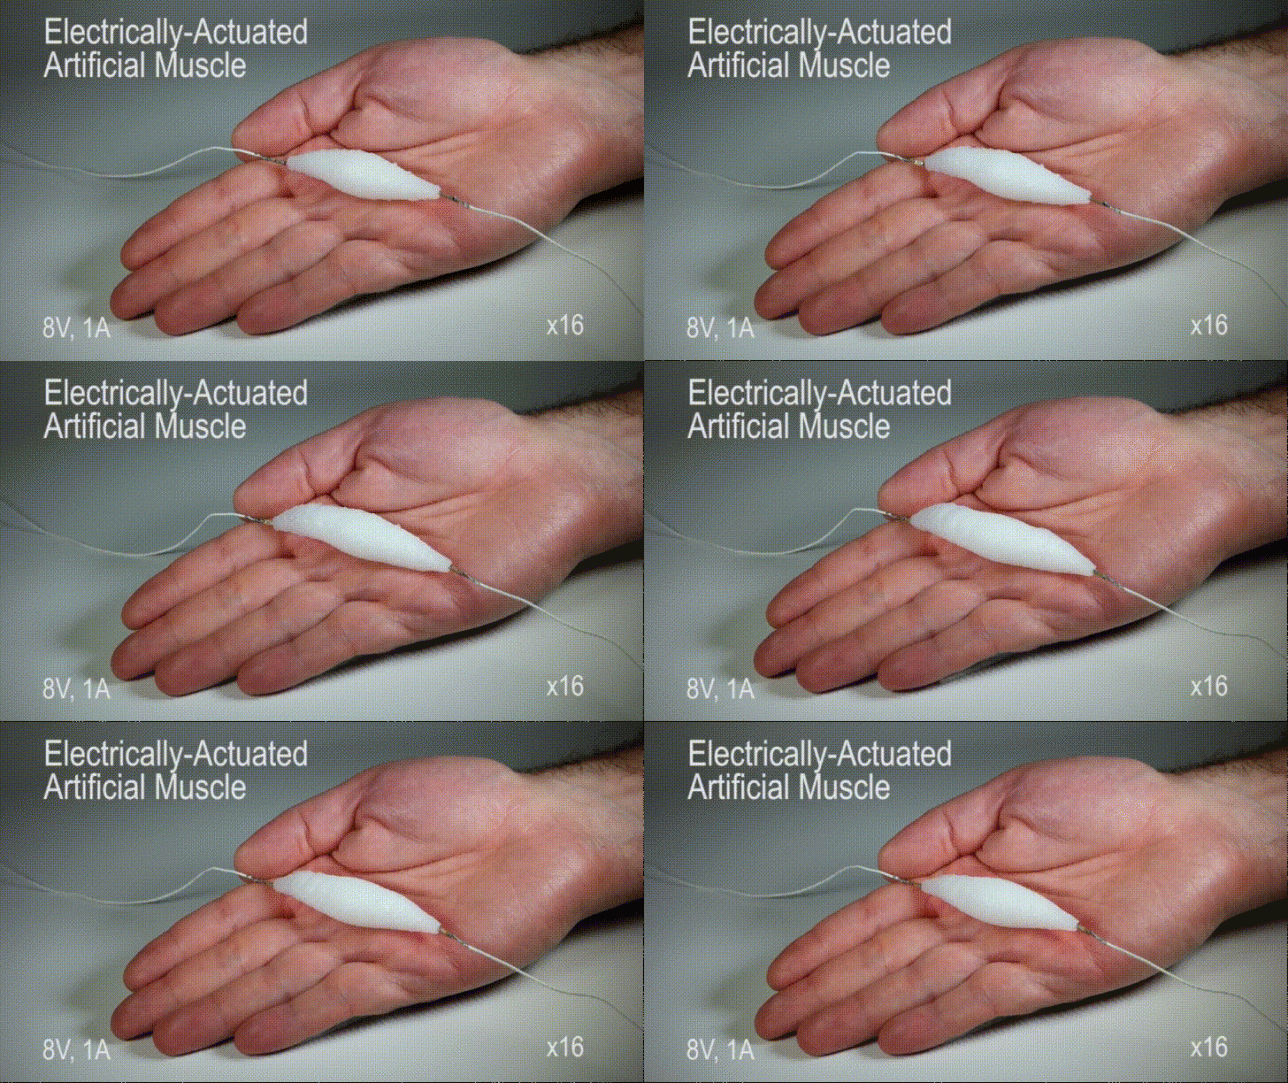
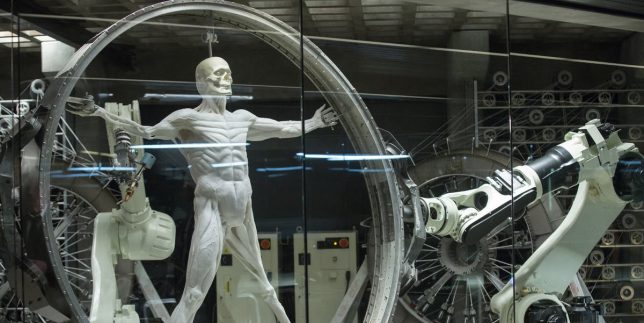
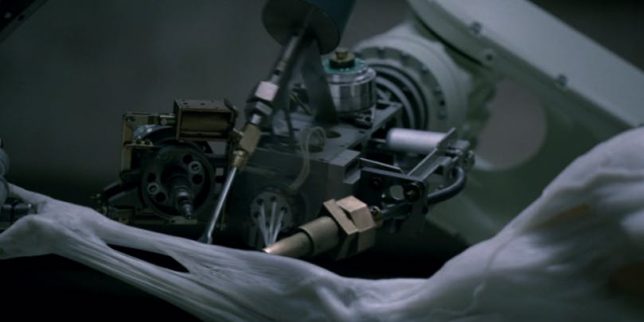
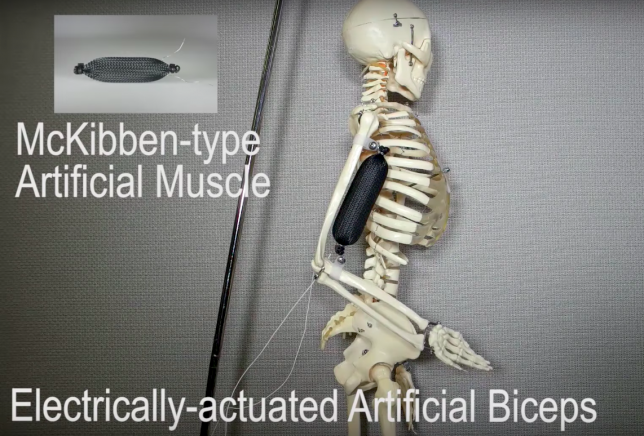
    If you watched HBO’s ‘Westworld’ earlier this year, you probably remember the scenes where the nascent humanoid robots were strung up on circular frames like Leonardo da Vinci’s ‘Vitruvian Man,’ with machines printing white muscle fibers onto their skeletons. While the process of constructing androids doesn’t quite resemble this sci-fi vision just yet, it’s surprisingly close, especially with a new breakthrough in synthetic muscle tissue announced by researchers at Columbia Engineering. Their tests show a bundle of white muscle held in the palm of a researcher’s hand, moving and expanding in response to low power sent through a thin resistive wire.

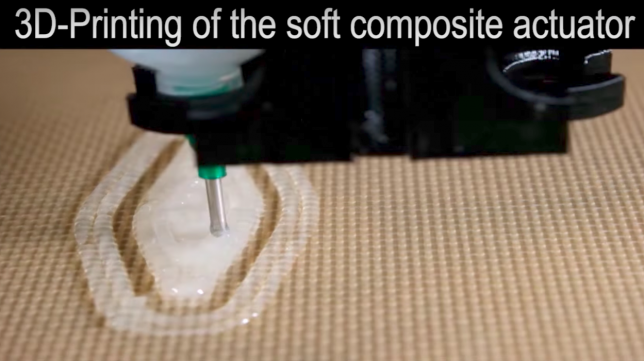
    This self-contained ’soft actuator’ is three times as strong as natural muscle, so yes, it’s true: Skynet is going to kill us all. The creators took inspiration from living organisms, using a silicone rubber matrix with ethanol distributed through micro-bubbles to simulate muscle tissue. It’s capable of expanding up to 900% when electrically heated to 80 degrees celsius, and can perform all sorts of motion tasks when controlled by computers.

    “We’ve been making great strides toward making robots minds, but robot bodies are still primitive,” says Hod Lipson, Professor of Mechanical Engineering at Columbia and leader of the project. “This is a big piece of the puzzle, and, like biology, the new actuator can be shaped and reshaped a thousand ways. We’ve overcome one of the final barriers to making lifelike robots.”

    “Our soft functional material may serve as robust soft muscle, possibly revolutionizing the way that soft robotic solutions are engineered today,” adds Aslan Miriyev, a postdoctoral researcher in the Creative Machines lab and lead author of the study ‘Soft Material for Soft Actuators,’ published by Nature Communications. “It can push, pull, bend, twist and lift weight. It’s the closest artificial material equivalent we have to a natural muscle.”

    Share on Facebook


    [ By SA Rogers in Conceptual & Futuristic & Technology. ]

    [ WebUrbanist | Archives | Galleries | Privacy | TOS ]


    WebUrbanist

  • Report: Blackstone working with Morgan Stanley to sell 45% Leica stake

    Photo by Alexander Andrews

    In early August, Reuters reported that Blackstone was engaging in talks with potential buyers to acquire its 45% stake in Leica. Sources had said at the time that Blackstone was working with an investment bank, though that bank wasn’t named, and that it had already discussed the potential business deal with several possible buyers. Reuters is back with more info about the alleged business plan, revealing that Blackstone is working with Morgan Stanley.

    Sources have claimed that Zeiss was interested in possibly acquiring a stake in Leica, but only if it could get a majority of the company. Private equity funds, family investors, and “Asian optics groups” are also claimed among those interested in Blackstone’s 45% stake.

    In its most recent report, Reuters said that Blackstone is aiming for a high valuation, banking on the fact that Leica is perceived as a luxury brand versus other big camera companies like Nikon and Canon. No auction for the stake has been started, the sources claim. Neither Blackstone or Morgan Stanley have commented on the report.

    Articles: Digital Photography Review (dpreview.com)

  • How to be Better Prepared for Your Next Photo Shoot

    Greater success with your event, street, travel or any other genre of photography can depend a lot on how prepared you are before you leave the house and how observant you are at the location you are making pictures. Here are some tips to help you be better prepared for your next photo shoot.

    senior Thai woman taking part in a street parade holding a painted parasol - How to be Better Prepared for Your Next Photo Shoot

    A participant in the annual Chiang Mai Flower Parade enjoys having her photo taken.

    I’ve based this article on street and event photography so I can use my photos to illustrate specific situations.

    Planning

    Planning your photography session in advance can make it a much more rewarding experience. You don’t necessarily need to start making spreadsheets and contingency preparations if you’re going out to photograph a local farmers market or craft fair. But a little groundwork can make times you are out with your camera significantly more enjoyable.

    Having some prior knowledge of your subject, the location, and the type of activity that happens there (if any) will increase the opportunities you have to capture better photos. Even the way you dress and the footwear you choose can potentially have an influence on your photos. Certainly, the amount and type of camera equipment you choose to carry will have an effect on the outcome of your photography excursion.

    Women in traditional Thai costume prior to the start of the Flower Parade in Chiang Mai, Thailand - How to be Better Prepared for Your Next Photo Shoot

    Girls talking before a parade starts.

    For example

    Performers rest prior to the start of a Chinese New Year parade in Chiang Mai, Thailand

    Performers rest prior to the start of a Chinese New Year parade.

    Before heading out to photograph the Chinese New Year Parade I checked so I knew the starting time, location, and the route it would take. I arrived at least an hour early for some behind the scenes moments when the morning light was rich.

    Some prior knowledge of the type of subjects and activity I would encounter enabled me to anticipate the flow of action. So I was able to capture the dragon as it moved through the streets and received cash gifts from locals in its mouth.

    A woman places money in the mouth of a Chinese New Year dragon during a street parade in Chiang Mai, Thailand. - How to be Better Prepared for Your Next Photo Shoot

    A woman places money in the mouth of a Chinese New Year dragon during a street parade in Chiang Mai, Thailand.

    Prepare yourself too

    I was wearing a good pair of sports shoes as I knew I would need to run at times to keep ahead of the parade. With many parades and festivals in south east Asia, there are often few restrictions for photographers assertive and considerate enough to just go with the flow of things.

    I traveled light, without an abundance of camera gear. There’s always a choice between carrying more and having it weigh you down and making your movements more difficult and not having the right lens with you. I typically prefer to take two lenses so I have one on the camera and the other in a small belt bag. This way I am free to move and can often get closer to the action than if I was weighted down with a shoulder bag or backpack full of gear.

    Chinese New Year parade and photographers - How to be Better Prepared for Your Next Photo Shoot

    Photographing the dragon during a Chinese New Year parade.

    Researching is easy these days. So planning and being prepared before you head out with your camera takes very little effort but can make a huge difference to the photos you’ll make and how much you enjoy your experience.

    Anticipation

    Once you’re on location it pays to take a little time to observe and anticipate how you can obtain the best photos.

    • Walking around, watching people, and considering what you think will be the best spots to take photos from is an important first step. Think about lighting and composition.
    • How many places will you be able to clearly see your subject?
    • What will the background be like?
    • Will the lighting work for the style of photo you want to make?
    • Are there any vantage points that allow you to get above your subject?
    • Is there some place safe to get down and lie on the ground for a low perspective?
    Chinese New Year parade with a ceremonial dragon - How to be Better Prepared for Your Next Photo Shoot

    Try to position yourself where there will be a good background.

    Find a good vantage point

    Once you’ve found a good location it can often pay to stay there for some time. Consider the flow of the action and if you can get a good variety of photos from your position, don’t rush off. This is particularly relevant when you have a pleasing combination of good lighting and a background you can incorporate into strong compositions.

    If you are constantly changing locations you may find that you have to adjust your exposure frequently and your background is different which will require more attention to your framing.

    Sometimes moving around is necessary to follow your subject. It’s good to be aware of your surroundings and considerate of who else is around you, especially if you are on the move a lot. At events with a lot of spectators, you don’t want to block their view but you also want to make sure you and your equipment are safe.

    How to be Better Prepared for Your Next Photo Shoot

    Watching dancers practice prior to the start of a parade I observed the pattern of their movement and positioned myself so the background and light were best, and then made a series of photos. The image on the left illustrates reasonably well what’s happening. But because I had paid attention to the dance I knew the girl would arch her back and I would be able to photograph her face and a more interesting pose.

    Get out of the flow of traffic

    Putting yourself in position a little away from the traffic flow, when there is one, will allow you to work more freely also. I made this series of photos of cheese vendors at Istanbul’s spice market by standing in between two of the stalls where there were no other people. I got the nod from the men selling the cheese nearby that I was okay to be there and was even offered a slice of very tasty cheese to try.

    Vendor selling cheese at the Istanbul spice market - How to be Better Prepared for Your Next Photo Shoot

    It’s good to get out of the traffic flow so you can take photos without being bumped or disrupting business.

    As I savored the flavor of the cheese I observed the action of the vendors offering cheese to passers by and got a feel for the rhythm of activity.

    close up of cheese being sold in a Turkish street market - How to be Better Prepared for Your Next Photo Shoot

    Once you find a good location make a series of photos.

    Being out of the flow of foot traffic (which was very busy) allowed me to take my time without being bumped and jostled. I made a series of photos that illustrate this part of the market better than I could have with a single image taken as I was just passing by. This series of photos were made with my 50mm prime lens.

    Istanbul spice market cheese - How to be Better Prepared for Your Next Photo Shoot

    A few tips for taking the photos

    • Concentrate. Don’t hesitate or be distracted from your task. Stay focused and single-minded about getting the photos that you have come to make.
    • Don’t worry about making mistake. These will help you learn. Keep all your photos on your card so you can compare them once you have them loaded to your computer.
    • Choose your moments carefully. Machine gunning your subject will result in an overwhelming number of bad photos which can be discouraging.
    • Use a narrow aperture and a fast enough shutter speed to avoid blur. You might need to raise your ISO even if you are working in bright conditions.
    • Use manual focus and zone focus to ensure greater success.

    Kebab Seller, Istanbul, Turkey - How to be Better Prepared for Your Next Photo Shoot

    Conclusion

    With a little research and planning, you’ll be better equipped mentally to approach your chosen subject with confidence. Observing your surroundings and the flow of activity once you’re on location will help you find the optimal spots in which to position yourself to obtain the best photos. Then, employ some solid photographic technique to ensure you make some great photographs.

    The post How to be Better Prepared for Your Next Photo Shoot by Kevin Landwer-Johan appeared first on Digital Photography School.


    Digital Photography School

  • Adobe announces record-breaking $1.84 billion in revenue for Q3

    Adobe has once again posted record quarterly revenue, this time for the fiscal quarter that ended on September 1, 2017. The software company experienced a 26% year-on-year revenue growth with $ 1.84 billion in its third fiscal quarter this year. Of that, $ 1.27 billion came from the company’s Digital Media segment, including Creative Cloud. On a GAAP basis, Adobe saw its year-on-year net income grow 55% and its operating income grow 48%.

    We’ll give you a moment to take that in… 55% net income growth, and a fiscal quarter of $ 1.84 billion. The jump to a subscription model is treating the company VERY well.

    This marks yet another high point for Adobe, which previously posted record revenue during its second fiscal quarter ending in June 2017. During its Q2, Adobe made then record-setting $ 1.77 billion with its Digital Media segment having driven that revenue.

    Looking forward, Adobe anticipates fourth fiscal quarterly revenue of $ 1.95 billion, which would once again keep it in line with analysts’ expectations and set yet another record. Financial highlights from Adobe for Q3 are listed below:

    • Adobe achieved record quarterly revenue of $ 1.84 billion in its third quarter of fiscal year 2017, which represents 26 percent year-over-year revenue growth.
    • Diluted earnings per share was $ 0.84 on a GAAP-basis, and $ 1.10 on a non-GAAP basis.
    • Digital Media segment revenue was $ 1.27 billion, with Creative revenue growing to $ 1.06 billion.
    • Digital Media Annualized Recurring Revenue (“ARR”) grew to $ 4.87 billion exiting the quarter, a quarter-over-quarter increase of $ 308 million.
    • Adobe Experience Cloud achieved revenue of $ 508 million, which represents 26 percent year-over-year growth.
    • Operating income grew 48 percent and net income grew 55 percent year-over-year on a GAAP-basis; operating income grew 43 percent and net income grew 46 percent year-over-year on a non-GAAP basis.
    • Cash flow from operations was $ 704 million, and deferred revenue grew to approximately $ 2.20 billion.
    • The company repurchased approximately 2.1 million shares during the quarter, returning $ 298 million of cash to stockholders.

    Articles: Digital Photography Review (dpreview.com)

  • Oprema Jena revives Biotar 58mm F2 lens with record-setting 17 aperture blades

    After successfully funding the ‘legendary’ Biotar 78mm F1.5 lens through Kickstarter, newly-minted company Oprema Jena is trying to pull off yet another resurrection. This time the crowdfunding platform is Indiegogo, and the lens they’re bringing back is the Biotar 58mm F2: the world’s only lens with a ‘historic’ 17-blade aperture.

    Oprema isn’t holding back when it comes to describing this lens in the most epic of terms:

    Reengineered to its true historic 17 aperture blade version it will change how you feel about photography. With its unique design the Biotar 58 balances the need for sharpness and bokeh in one lens like no other. It is truly an enchanting miracle bokeh wonder lens for all your photographic situations.

    “Miracle bokeh wonder lens” …. there’s a tagline for you. And if that’s not enough, here’s an overly-dramatic introduction to this lens complete with inspiring music and over-zealous presenter voice:

    Joking aside, people seem very excited about this old lens coming back. The original design dates back to 1927, and it was introduced to the public around 1937. Unfortunately, due to the war, the original Biotar 58 was only produced in small numbers, and later versions never quite recaptured the original’s flare for dramatic bokeh.

    Until (at least according to Oprema Jena) now.

    Oprema identified the models that were “most outstanding” from the Biotar’s history, and recreated those while adding in some modern conveniences like rangefinder coupling for Leica users, and modern-day lens mounts for everyone else. Here are some web resolution sample photos so you can judge for yourself if they succeeded in creating a lens worth dropping a grand on:

    $ (document).ready(function() { SampleGalleryV2({“containerId”:”embeddedSampleGallery_8023124066″,”galleryId”:”8023124066″,”isEmbeddedWidget”:true,”standalone”:false,”selectedImageIndex”:0,”startInCommentsView”:false,”isMobile”:false}) });

    Already over 150% funded, it looks like the Biotar 58mm F2 will come to be whether or not anybody else decides to pledge their money and pick one up. But if you want to learn more about this lens and/or drop the $ 950 it’ll take to buy one in either Silver or Black (Super Early Bird level, still 180 available), head over to the Indiegogo campaign by clicking here.

    Articles: Digital Photography Review (dpreview.com)

  • Incredible microscopic close-ups of a peacock feather

    $ (document).ready(function() { SampleGalleryV2({“containerId”:”embeddedSampleGallery_0637573666″,”galleryId”:”0637573666″,”isEmbeddedWidget”:true,”standalone”:false,”selectedImageIndex”:0,”startInCommentsView”:false,”isMobile”:false}) });

    Turkish macro photographer Can Truncer takes his macro work far beyond most macro shooters. Forget 1:1 or even 2:1, when Truncer decides on a project his super macro work requires complex focus stacking rigs, microscope lenses, and 40-images per photo to get everything in focus.

    This was the case with his most recent project, Peacock Feather, in which he used three different microscope lenses and a super-macro setup to capture extreme closeups of these colorful marvels.

    For this particular project, Truncer used three lenses: a Lomo 3.7x (3.7x magnification), Mitutoyo M Plan Apo 5x (5x magnification), and Nikon CF Plan 10x 0.30 WD 16.5 (10x magnification). Each was mounted to his Canon 6D in turn and, using the light from a single Yongnuo YN-560 III and two Ikea Jansjö LED lamps.

    The final rig looked like this:

    And these are the three lenses used:

    The project took two weeks to complete, during which time Can captured 1,500 images of a single feather in order to create the final focus-stacked series you see at the top. Scroll through the high-res versions for yourself if you need to add a bit of wow-factor to your Wednesday.

    And then, if you want to see even more incredible macro photography, you can find more of Can’s work on 500px, Flickr, and Instagram.


    All images by Can Truncer and used with permission.

    Articles: Digital Photography Review (dpreview.com)

  • Concrete Like You’ve Never Seen It: 15 Unexpected Furniture & Object Designs

    [ By SA Rogers in Design & Furniture & Decor. ]

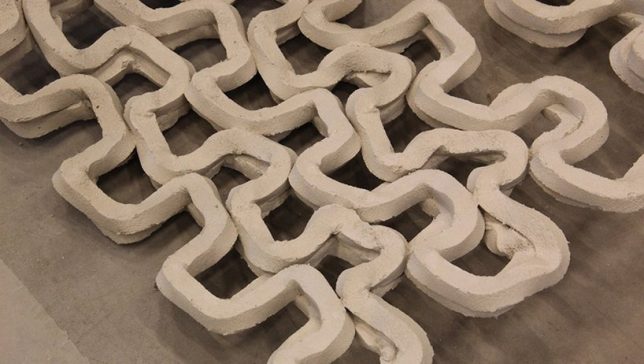
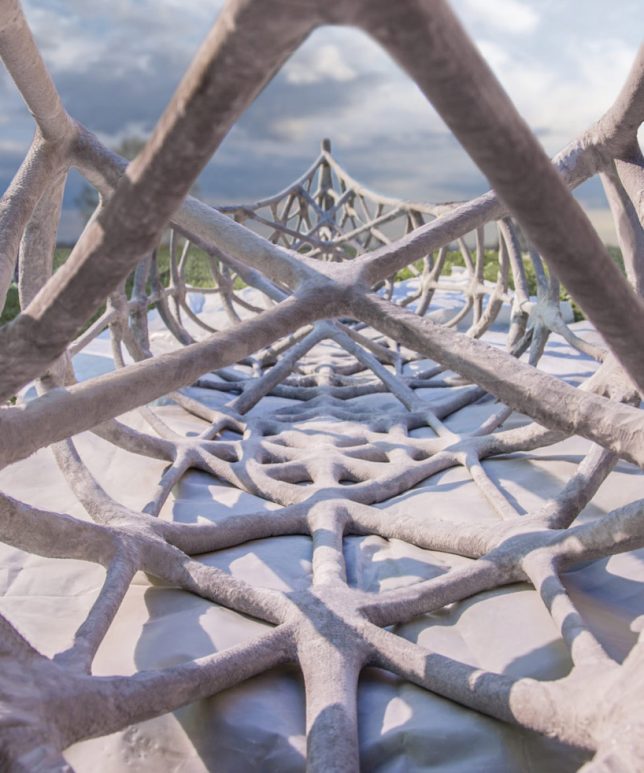
    Concrete might typically be cold, hard, impersonal and impermeable, but treat it right and it’ll soften right up into surprisingly comfortable, accessible and usable everyday items, from pens and iPhone skins to rocking chairs and squishy-looking seating. Cast it from pillowy molds, 3D-print it in squiggles, brush it onto highly detailed objects, impregnate it into textiles or imprint it with delicate textures and you’ll have objects full of intriguing contradictions.

    Concrete 3D Printer Enables Innovation

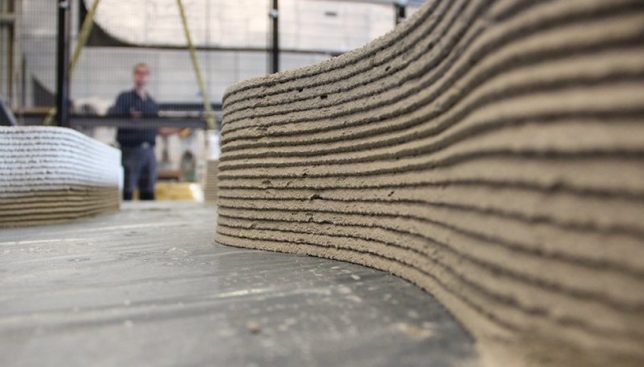
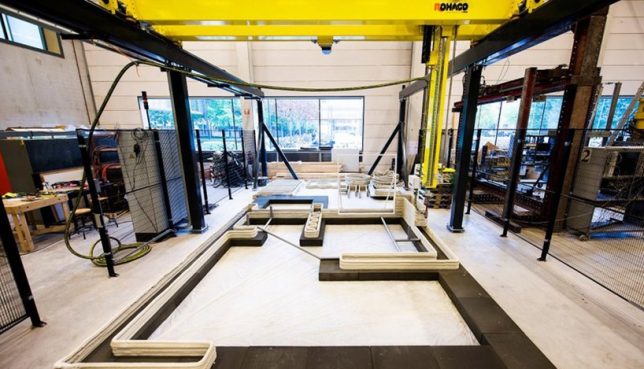
    This 3D printer by Dutch company ROHACO spits out concrete in all manner of shapes, even squiggly lines, through a swivel head attached to a hose from a concrete mixer. Not only does this enable concrete to take unprecedented forms, it makes it possible to 3D print entire homes unsupervised, with the kinds of curves and details that would normally take an extraordinary amount of work.

    3D-Printed Concrete Canoe

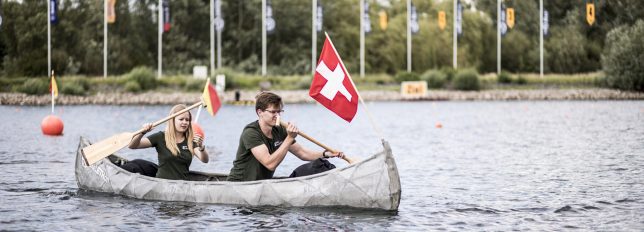
    3D printing with concrete makes it possible to produce things like the skelETHon 3D printed concrete canoe, which won first place at the 16th Concrete Canoe Regatta competition in Germany. That’s right, it’s not even the first canoe to be made from concrete! The inner frame of this one is made of concrete reinforced with stiff steel fibers, while the shell is a two- to three-millimeter-thick waterproof concrete skin.

    Concrete & Canvas Seating

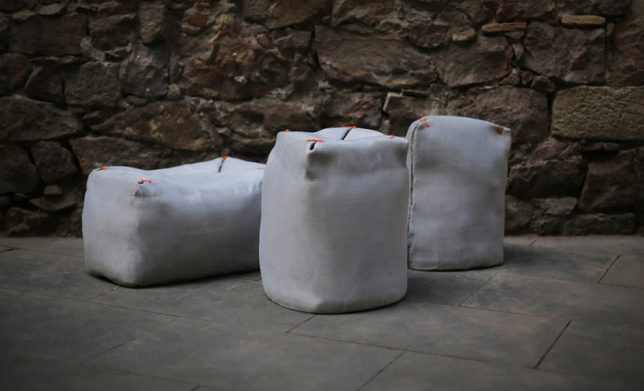
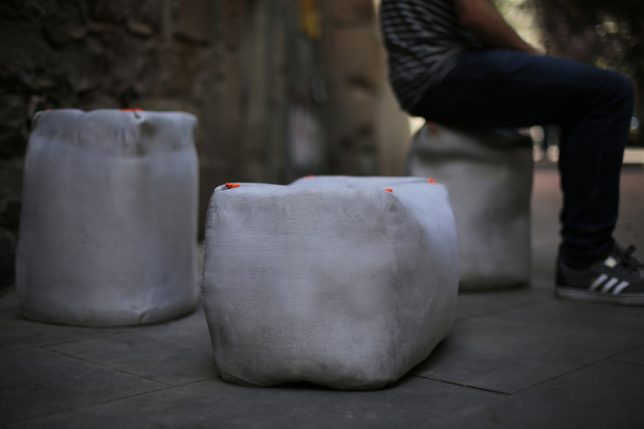
    These objects are a bit of a contradiction: simultaneously appearing soft and hard. That’s because they’re both, technically. ‘Fabric’ is an outdoor seating collection by Miriam Estévez, wherein soft fabric poufs are soaked in a liquid concrete and allowed to dry in order to create a surprisingly strong, durable, waterproof result.

    Traditional Chair Covered in Concrete

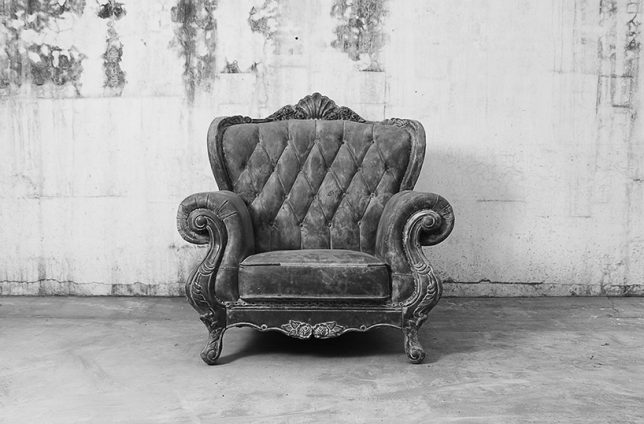
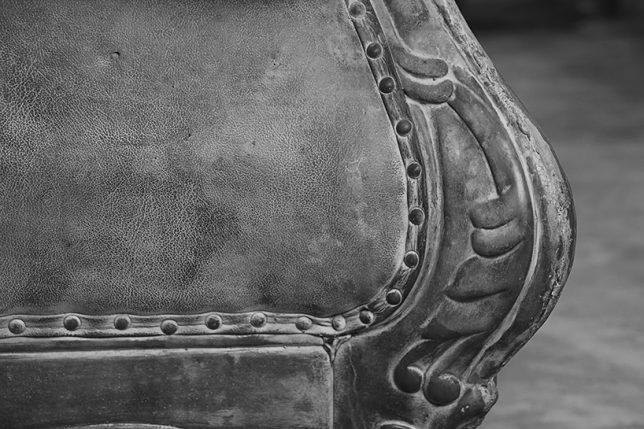
    You might imagine that someone took a mold of a traditional chair and then cast it with solid concrete, producing the detailed form you see before you. The truth is actually much simpler. Bentu Design teamed up with Guangzhou fine arts students to carefully cover an existing chair with concrete mixture, making sure to preserve every detail, from the scallops along the wooden frame at the top to each individual upholstery nail.

    Delicate Persian & Islamic Patterned Tables

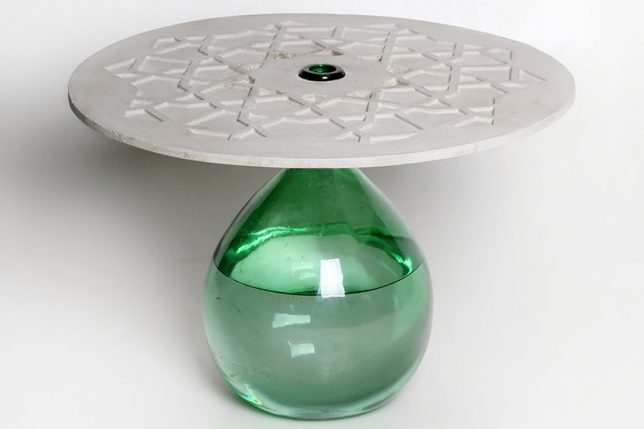
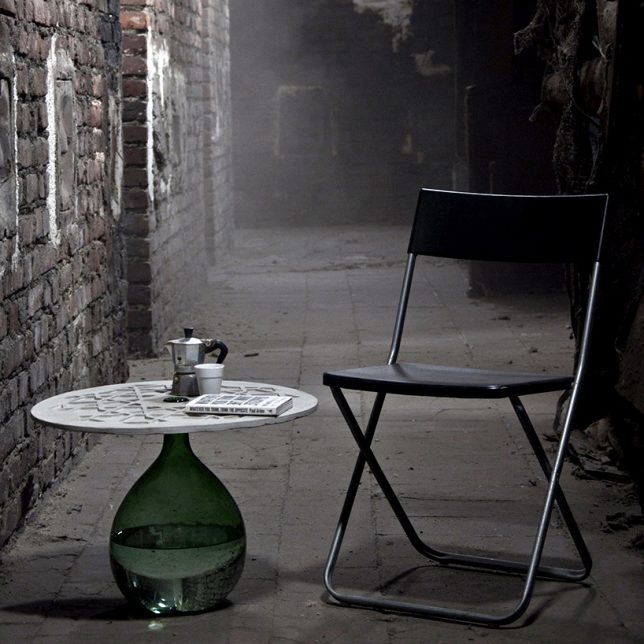
    Concrete doesn’t take on the adjective ‘delicate’ easily, but every now and then, something qualifies. This disc-shaped tabletop, just a few millimeters thick, balances on the neck of a water-filled jug to form a beautiful recycled coffee table. Milan-based design studio Daevas printed the top with a traditional Persian pattern.

    Next Page – Click Below to Read More:
    Concrete Like Youve Never Seen It 15 Unexpected Furniture Object Designs

    Share on Facebook


    [ By SA Rogers in Design & Furniture & Decor. ]

    [ WebUrbanist | Archives | Galleries | Privacy | TOS ]


    WebUrbanist

  • Snapseed app updated with new interface and presets, adds perspective tool to iOS

    Google has just pushed out an update to Snapseed, the popular mobile image editing app for iOS and Android. The update (version 2.18) is for both versions of the app, and offers users on both mobile platforms a new interface and 11 new image presets. Additionally, the iOS update has brought the app’s Perspective Tool to Apple’s mobile devices, enabling users to adjust the horizon and “skewed lines” using their iPhone or iPad.

    The update was announced on the Google Plus Snapseed page, where the team explained that Snapseed 2.18 is redesigned to make accessing features more efficient while speeding up the overall editing process. The new interface, meanwhile, moves Looks to the main screen, a feature that enables users to save their favorite edits so they can be applied to multiple other photos quickly.

    Other changes are minor, and include switching the app from a dark to a light theme, as well as making certain tools and the export function accessible in a menu at the bottom of the display while editing. Both the Android and iOS updates are available now through the Google Play and iTunes App Stores, respectively.

    Articles: Digital Photography Review (dpreview.com)

  • How to do High-Speed Photography – the Fundamentals

    What is high-speed photography?

    High-speed photography is capturing the moments that happen in a fraction of time which you can’t see with the naked eye, like a bursting balloon or a splash of water. This photography is different from other kinds because it requires almost 1/20,000th of a second exposure time to freeze these moments. Most DSLR cameras don’t have such a high shutter speed, so how can you take these kinds of shots? In this article I will explain how to do high-speed photography.

    Dancing Colors - Fundamentals of High-Speed Photography

    What camera and lens do you need?

    Let’s talk about the gear you need for high-speed photography first. Of course, you need a DSLR camera and the good news is that any DSLR will work. If you have any other camera that has manual controls, it will also work fine. Next is the lens and just like the camera, any will work. I use a 100mm macro lens for close-up shots like liquid sculptures and a 24-70mm zoom for balloon shots.

    The only lens requirement is that the focal length should be long enough so that you have sufficient distance between your camera and the subject, to keep your gear safe from colors and water splashes. I found that 100mm macro is the best lens as it has 1:1 magnification so you can fill the frame with your subject. Because of the 100mm focal length, your camera will also be far enough from the subject.

    Punch - Fundamentals of High-Speed Photography

    Other equipment needed

    Next, you need flashes and you need a lot of them. In some shots, I’ve even used four flashes together. The next requirement is a tripod because you need to do lots of work simultaneously, so it’s better that camera is fixed on the tripod. You also need a shutter release cable or remote to release the shutter.

    Have patience

    The most important requirement for this kind of photography is practice and lots of patience. Sometimes you’ll take hundreds of shots and none of them will be good, and you may think that it’s not your cup of tea. But don’t give up, as with practice and patience you can get desired results easily.

    When I was trying to take following water drop shot, it took me almost 3 months and over 3,000 shots to get my first accurate shot. Eventually, I discovered a trick that made everything easy for me. I’ll share that trick later in this article so keep reading.

    Fundamentals of High-Speed Photography

    Get a helper as well

    You may also need an assistant as you have to do lots of tasks all at the same time, and you can’t do everything on your own. Also, there will be a lot of mess after your shoot and it’s very boring to clean it up all alone. Last but not least, you need to find some creative hacks. For example, for “Dancing Colors” shots I made this setup using a soap dish, a plastic pipe, a black swim cap, some Velcro and fixed this in the air vent of the subwoofer of my computer speakers.

    Fundamentals of High-Speed Photography

    Along those lines, one day I also discovered that it’s much easier to fire flashes instead of releasing the shutter to capture an accurate moment. So I used some wire and a push button switch to make a switch to fire the flash manually.

    Camera settings

    Before we talk about camera settings, I am going to reveal a shocking truth. Are you ready for this? Okay, the reality is that camera shutter speed doesn’t matter in high-speed photography. In fact, in this image, my shutter speed was 1/10th of a second.

    Fundamentals of High-Speed Photography

    What, have I lost my mind? I just wrote that you need 1/20,000th of a second to freeze the moment and now I am saying that shutter speed doesn’t matter. Relax, I’ll explain everything.

    In such photography, we usually shoot in a dark room with a narrow aperture and using bulb mode. We open the shutter and fire the flash at the right time to expose the image. So, regardless of whether the camera shutter speed is 1/10th or 1/250th, the exposure time is only when the flashes fire (for the duration of the flash).

    Color Injected in Water Fundamentals of High-Speed Photography

    Color injected into water.

    Hence, these are the camera settings required:

    • Camera mode: Bulb
    • Aperture: f/11 – f/16
    • ISO: 100 – 400
    • Focus: Manual
    • Flashes with the lowest power setting possible.

    Why do you need to use your flashes on the lowest power setting? Because that will give you the shortest flash duration. If you fire a flash on full power the flash duration is around 1/1,000th of a second. But at 1/128th power, it comes down to almost 1/35,000th of a second, which will freeze the subject completely.

    Color Injected in Water Fundamentals of High-Speed Photography

    Color injected into water.

    Work flow

    Set your camera on a tripod with a shutter release cable. Set the lowest possible ISO, go for 100 and increase it only if you don’t have enough flash power. Then, set the aperture between f/11-f/16, focus manually, and leave the camera. Now you need to train someone to press the shutter release button on your mark and release it as soon as the flash has been fired.

    Your job is to do the action using one hand (like bursting the balloon, playing the beats or releasing the water drop) and fire the flashes using a switch at the perfect moment. You’ll need some practice but eventually, you will do it accurately.

    Fundamentals of High-Speed Photography

    Points to remember

    Shoot in dark room: You should always shoot in a dark room as you are using bulb mode and sometimes your shutter speed will come down to 1/10th or 1/5th. So, if the light in the room is bright, it’ll affect the shot. The room should only have a small (low) light source so that you can see everything.

    Small Aperture: Always shoot between f/11 – f/16 so you can get deep depth of field and everything comes into focus. Also, with a narrow aperture, the ambient light won’t affect the shot as much.

    Made For Each Other - Fundamentals of High-Speed Photography

    Manually Focus: Manual focus is a must as a camera can’t focus in the dark and you may miss the action if the camera keeps attempting to focus.

    Flashes: Use the lowest power and slave mode on your flashes so you don’t need to attach all the flashes using wires. With slave mode, you need to fire only one master flash and the others will fire automatically.

    The secret trick

    Liquid Sculpture Fundamentals of High-Speed Photography

    Now sit back and relax, because I am going to reveal a super easy way that you can shoot high-speed photography and get such pictures without much effort. Your chances of getting an accurate shot will increase tenfold. Are you ready?

    The secret is to use burst mode on your camera. Set your camera to high-speed burst mode. You also need to change the camera mode to manual and the shutter speed to 1/125. Plus, you need to attach your master flash to the camera so that it’ll fire with the camera simultaneously.

    Now when you press shutter release button, the camera will start taking photos and keep clicking until you release the button. Depending on your camera model, it will click between four to 10 shots per second.

    Water Galaxy - Fundamentals of High-Speed Photography

    With one hand, press the shutter release button and with your other hand do the action. Once the action is finished, release the button. By using this trick, you can get your first perfect shot in just 5-6 trials.

    Conclusion

    High-speed photography is a lot of fun. It can be tricky to get right. But don’t give up, keep trying until you get the desired results and share your photos in the comments below.

    Refraction Fundamentals of High-Speed Photography


    The post How to do High-Speed Photography – the Fundamentals by Ramakant Sharda appeared first on Digital Photography School.


    Digital Photography School