Blog

  • Throwback Thursday: the Samsung NX1 is still impressive three years later

    We usually dig a bit further into the past for Throwback Thursday, but decided to make an exception for the Samsung NX1. Announced just three years ago, the NX1 is the camera that still leaves us wondering what might have been had Samsung decided to remain in the camera market. Alas, we’ll never know.

    On paper, the NX1 had impressive specifications; the camera that landed in our laps still felt rough around the edges and a bit, well… unfinished when it arrived. Samsung diligently improved the camera through a series of firmware updates over the following months, and the NX1 ultimately became a much more refined, responsive machine.

    On paper, the NX1 had impressive specifications; the camera that landed in our laps still felt rough around the edges and a bit, well… unfinished when it arrived.

    The ‘post-multiple-firmware-updates’ version of the camera delivered technical innovation, pro-level performance, and a fantastic user experience all in a single package, earning it one of the highest scores we had ever awarded to a camera at the time, and winning the 2015 DPReview Innovation Award.

    In addition to impressive performance, the NX1 held up well in extreme conditions. When shooting in 0ºF (-18ºC) conditions the camera kept going as long as I did.

    We highlighted this innovation in our review of the NX1, writing “One can almost imagine a group of Samsung engineers sitting in a conference room and having the spec sheets of every leading APS-C and four thirds camera dropped in front of them, along with a directive to outperform the whole lot. And here’s the crazy thing – to a certain extent they seem to have pulled it off.”

    The NX1 was a mirrorless camera that looked and performed like a high-end DSLR. It included a hybrid AF system with 205 phase detect autofocus points covering 90% of the frame, and in burst mode could shoot up to 15fps. Impressively, in our testing the AF system was able to keep up.

    1 2 3 4 5 6 7 8 9 10 11 12 13 14 15

    The AF system on the NX1 was very quick to keep up, even when shooting fast moving subjects at close range at 15fps in burst mode. In this example, the camera tracked Richard with a cloud of AF points that covered his body and the bike and kept him in focus, though there are minor differences in terms of where the camera focused on him between frames. Manually selecting an single AF point would have given us more precision. (Samsung 50-150mm F2.8 S at F2.8)

    It also delivered the goods when it came to image quality. Built around a 28MP BSI sensor, it held its own against the best APS-C cameras of its day. The ISO-invariant sensor also made it possible to push shadows 5EV in post without paying any additional noise cost (when shooting at base ISO).

    Even the ergonomics and shooting experience were excellent. It was comfortable in the hand, with most dials and buttons in easy to reach places. The bright and crisp OLED EVF had no perceptible lag (a common challenge back then), and was the first electronic viewfinder I really fell in love with. In our review I commented, “Once I started shooting with NX1 it was easy to forget that I was using an EVF and I just got on with taking photos.”

    The NX1’s OLED electronic viewfinder impressed us with its bright, crisp image and fast performance. Its layout was also well-designed and easy to use.

    The NX1 also excelled at video. Unlike many cameras – even some the ones we encounter today – there was no sense that video was wedged in to fulfill a spec sheet requirement. On the contrary, the NX1 was clearly designed with video in mind. The interface was excellent, included tools such as peaking and zebras, and the oversampled footage exceeded the quality of the Panasonic GH4, our reference camera for video at the time.

    Ironically, the only major complaint we had about the NX1’s video was that it was a bit too forward looking.

    Ironically, the only major complaint we had about the NX1’s video was that it was a bit too forward looking: it relied on the advanced H.265 codec, something that many computers and editing systems are just now beginning to handle well.

    Samsung also gets a nod for having the first (and still one of the best) Wi-Fi + Bluetooth implementations we’ve seen.

    Video on the NX1 was outstanding, exceeding the quality of the Panasonic GH4, our reference camera for video at the time. The user interface for shooting video was also good, taking advantage of touchscreen controls for many functions.

    There seemed to be a lot of commitment from Samsung to getting the NX1 right, including numerous firmware updates that improved performance and added functionality over time. (A bit ironic when you consider the fate of the camera.) Let me share one behind-the-scenes anecdote about how all those updates impacted our review of the camera.

    I actually wrote two entire reviews of the NX1. The first review was less than a week from publication when Samsung released a big firmware update; it included so many performance improvements and feature updates that I had to scrap the entire review, go back and re-test the camera, then write another one. The review you read on the site was actually the second one I wrote.

    Despite its age, the NX1 is still remarkably competitive with today’s top APS-C cameras, and Samsung seemed to be investing a lot to develop a strong line of pro quality lenses as well. It’s interesting to think of what the camera market might look like today had Samsung not exited the business.

    Samsung NX1 Sample Gallery

    $ (document).ready(function() { SampleGalleryV2({“containerId”:”embeddedSampleGallery_8415181188″,”galleryId”:”8415181188″,”isEmbeddedWidget”:true,”standalone”:false,”selectedImageIndex”:0,”startInCommentsView”:false,”isMobile”:false}) });
    Articles: Digital Photography Review (dpreview.com)

  • The Samsung 360 Round camera can capture 360° 4K 3D video at 30fps

    Samsung has just unveiled an interesting new gadget at their annual Samsung Developer Conference. Meet the Samsung 360 Round: a 3D VR camera.

    The new device uses 17 total lenses—eight horizontally positioned stereo pairs and one upwards pointing single lens—to capture and livestream 4K 3D panoramic video at 30 frames per second. Each camera module features a 1/2.8’’ 2MP sensor and F1.8 aperture. All of this is housed in a compact and rugged (IP65 water and dust resistance) uni-body that Samsung claims can handle all weather conditions.

    PC software for controlling the camera and stitching is included, and the camera features a range of interfaces for connecting external microphones, storage devices and more.

    “The Samsung 360 Round is a testament to our leadership in the VR market. We have developed a product that contains innovative VR features, allowing video producers and broadcast professionals to easily produce high quality 3D content,” said Suk-Jea Hahn, Executive Vice President of Samsung Electronics’ Global Mobile B2B Team. “The combination of livestreaming capabilities, IP65 water and dust resistance and 17 lenses makes this camera ideal for a broad range of use cases our customers want—from livestreaming major events to filming at training facilities across various industries.”

    The Samsung 360 Round will be available in October in the United States, and should be introduced to other markets over time. Samsung says the camera is aimed at VR professionals and enthusiasts, and will be ‘reasonably priced’… although the company hasn’t yet specified exactly what that ‘reasonable’ price will be. For more information, visit the Samsung website.

    Articles: Digital Photography Review (dpreview.com)

  • Macphun responds to Lightroom CC release, teases its own photo manager

    Macphun’s own Digital Asset Manager (DAM) is coming to Luminar in 2018… and it’ll be a free upgrade. Photo: Macphun

    It’s no surprise that not everyone is exactly thrilled by Adobe’s Lightroom announcement. The end of standalone Lightroom, and the birth of Lightroom in the cloud, has a lot of legacy users looking for a new way to organize their photos into a perpetual library they don’t have to ‘subscribe’ to. There are already tons of options out there, but if you’re a fan of Macphun’s editing applications, take heart: the software company has their own solution in the works.

    Earlier today, we heard from Macphun that they’re working on their own Digital Asset Manager (DAM), which will work with both hard drives and cloud storage platforms.

    The Luminar photo manager’s single image view. Photo: Macphun

    “It’s going to be a perfect tool for organizing and managing images,” says Macphun. “Moreover, users will be able to run it along with LR library to compare both DAMs side by side and choose which fits them better.”

    Here’s a quick video ‘preview’ (read: teaser):

    The DAM will be added to Luminar in 2018, and the best part of it all is that it will be completely and totally free for current Luminar users.

    For now, those are all of the details we have, but if you’re unhappy with the latest update to Lightroom and you’re looking for an alternative DAM and photo editor combo, check out the preview above and keep an eye on Macphun in 2018.

    Articles: Digital Photography Review (dpreview.com)

  • Great Gifts for Filmmakers

    Since DSLRs are used today for both photography and videography, the lines are becoming  more and more blurred.  Filmmakers may not be the easiest to shop for, especially if you are not a techie and cant tell 1080i from 1080p.  Here we try to make your choice easier by giving you a wide range of gift ideas for your favorite Continue Reading

    The post Great Gifts for Filmmakers appeared first on Photodoto.


    Photodoto

  • Cutting Corners: LOT-EK’s 21-Box Sliced Shipping Container Home in NYC

    [ By WebUrbanist in Architecture & Houses & Residential. ]

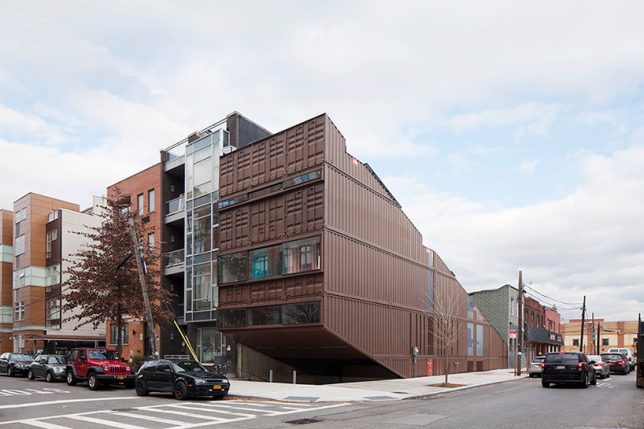
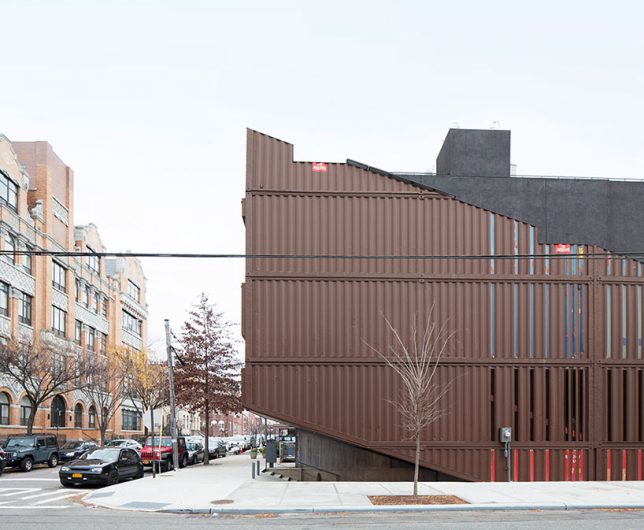
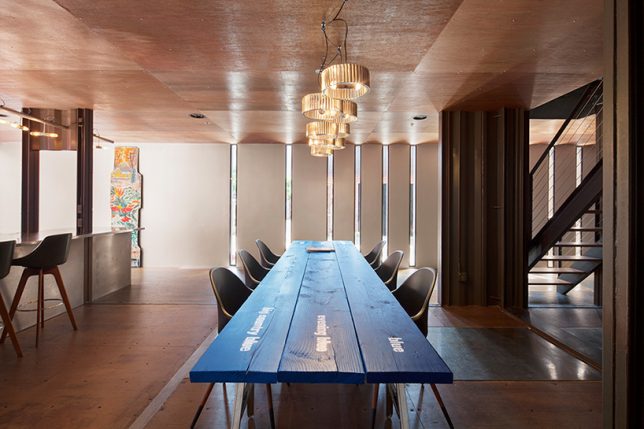
    Rising up from its corner lot like a ship on a wave, this shipping container home in Williamsburg, Brooklyn, is a stunning private residence made from sliced, diced and strategically reassembled cargo boxes.

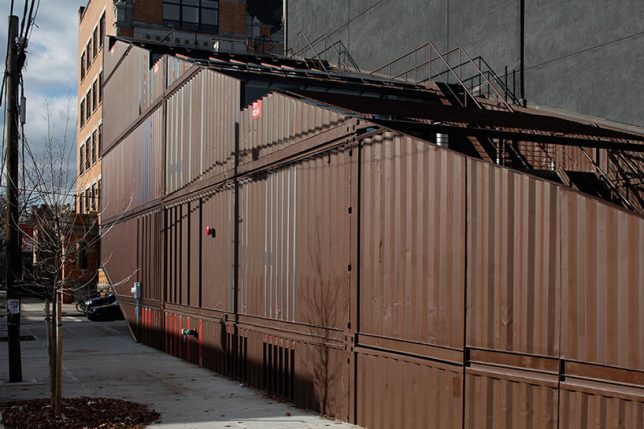
    The cut containers were flipped and reassembled to avoid waste, reusing various angled sections generated through diagonal slicing (images by Danny Bright). Moving through the home, the logic of these cuts becomes increasingly clear.

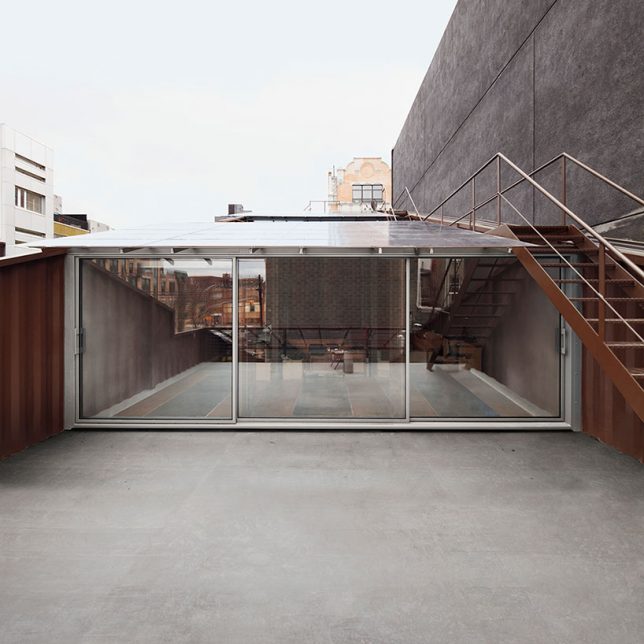
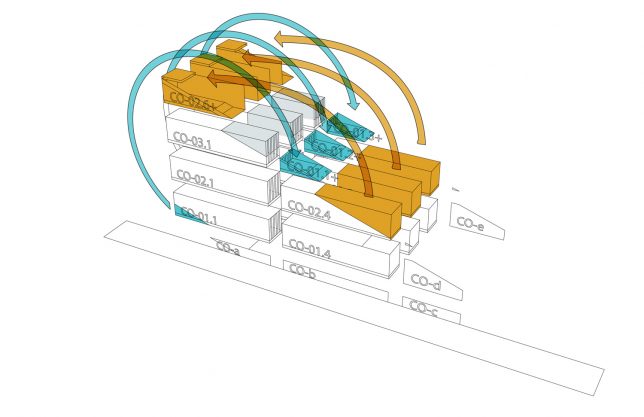
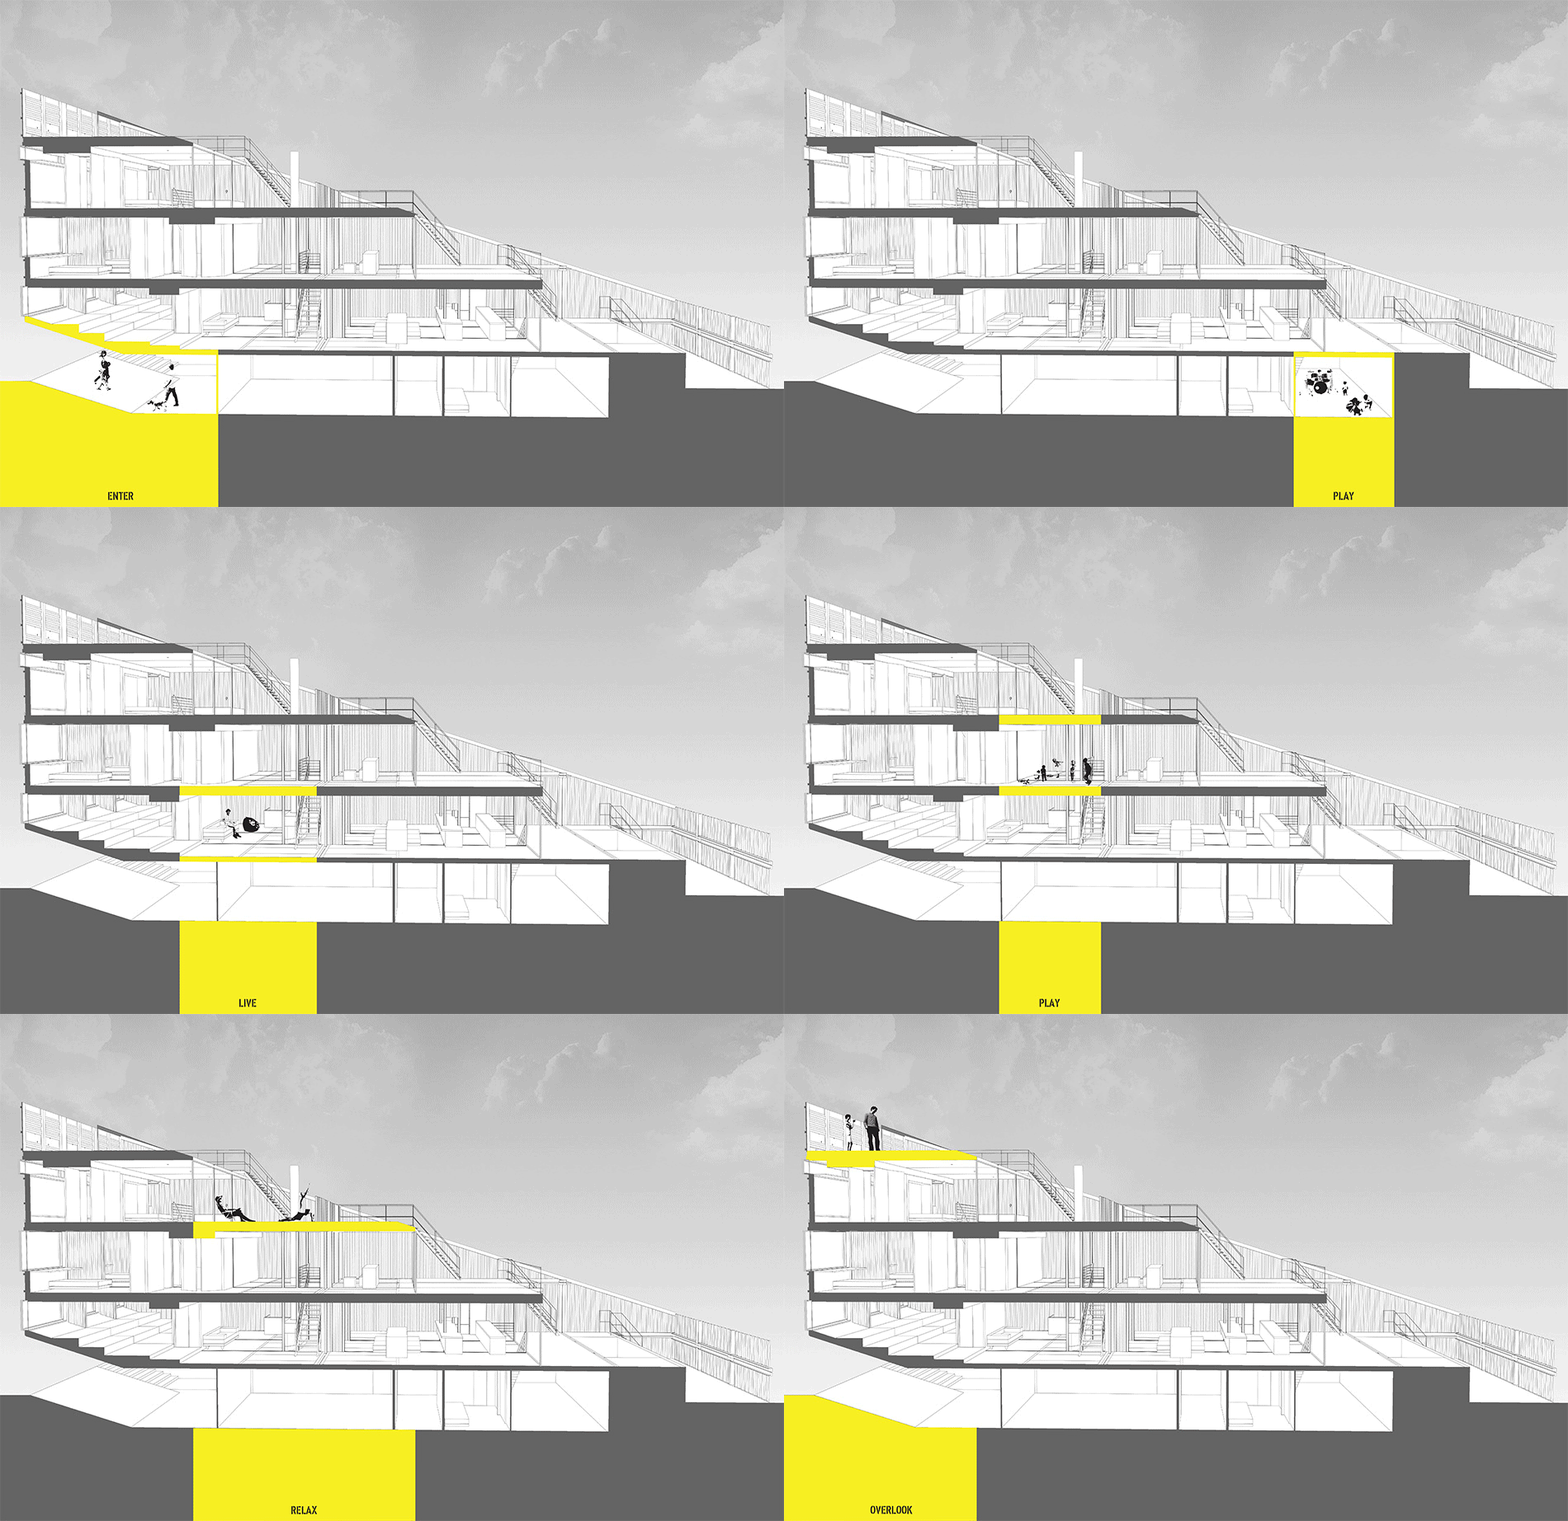
    Designed by LOT-EK, a firm famous for its industrial-style containertecture, the corrugated facade is spliced with vertical windows along the sides. Along the front and back, container ends open up for larger views and terraced roof access — there are outdoor spaces at each level, given privacy thanks to the angled cuts. Below, those same cuts provide a natural opening for the building’s sunken entry, garage and cellar.

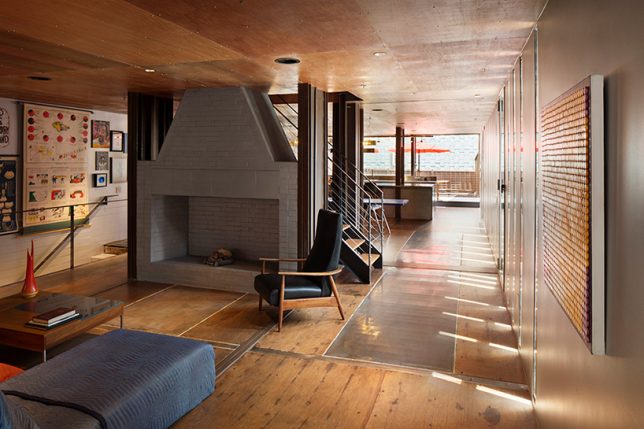
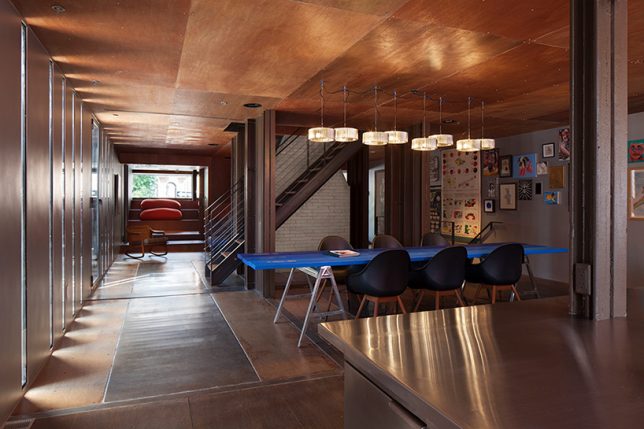
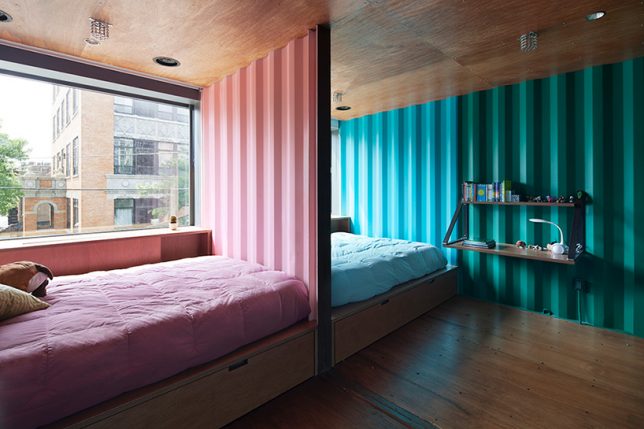
    Social living, dining and kitchen spaces are on the first floor. The inside is also shaped by the slice angles, forming spaces like a media room with bleacher seating and a projector. Upper levels include bedrooms, play areas and other private spaces.

    Share on Facebook


    [ By WebUrbanist in Architecture & Houses & Residential. ]

    [ WebUrbanist | Archives | Galleries | Privacy | TOS ]


    WebUrbanist

  • Upcoming Strobist Events: Buenos Aires, Dublin and Havana

    Just a quick heads-up on upcoming Strobist events. If you are local to Buenos Aires or Dublin—or have ever wanted to spend a photo-centric week in Havana—check out the details below.

    Buenos Aires, Argentina: November 17-19

    I’ll be doing a seminar and two workshops in Buenos Aires in November. In the half-day seminar on the 17th, we’ll move beyond F/stops and shutter speeds and take a step back to look at photography from a broader perspective. How can you approach your photography in a way that also incorporates your other skills and expertises? How can you turn this approach into sustainable business models and ecosystems?

    Whether your goal is to make money or just to become more aware of and focused on who you are as a photographer, this talk is designed to prompt deeper thought. And because of the Contrastes Magazine’s sponsorship, the talk is *free*. Well, at least for subscribers of the magazine. (Which means that if you are not yet a subscriber, the half-day seminar will only set you back the cost of a magazine subscription.)

    On the 18th and 19th, I’ll be teaching small-class workshops on lighting. These are shooting workshops, and are appropriate for anyone who wants to learn (or learn more) about small-flash lighting. Because of the sponsorshop, they are also economically priced.

    More details are here: Buenos Aires Workshops

    Dublin, December 3-5

    I’ll be both speaking and teaching for the Irish Professional Photographers Association in Dublin in December. More important: Italian photographer Sara Lando will also be teaching here during this time.

    Sara and I will both be speaking on Sunday the 3rd. Sara will talk in the morning about the thousand things you wouldn’t think about that go into a successful conceptual portrait session. I’ll be talking in the afternoon about how to incorporate your photographic expertise into a wide range of external possibilities—and how to build digital and economic ecosystems around that.

    On Monday and Tuesday the 4th and 5th, I’ll be running a two-day, small-flash speedlight bootcamp. This is a small class, and we’ll be shooting the whole time. But between us, where you really want to be is in either or both of Sara’s two classes. Her unique approach to creative portraiture will cause you to completely re-examine your own approach. Honestly, the less creative you feel you are, the more you can benefit from spending a couple of days with her.

    More details here, with early bird prices in effect until October 31: Dublin Workshops

    X-Pedition Havana, January 12-19

    Our inaugual Strobist X-Pedition is set for Havana, Cuba, from January 12-19. This is not a photo junket. This is an intensive week in perhaps the most photographically (and culturally, economically, etc.) interesting city in the western hemisphere.

    The US government makes it a total pain in the butt to get to Cuba, and it is becoming far more so under the tightening restrictions. But having been there, I can tell you it is well worth the trouble. Go while you still can.

    Our week is designed around learning and photography in a tight, small-group environment. When the light is crap, we’ll be indoors learning how to think and see more like a photojournalist. When the light is right, we’ll be out shooting. We have several location shoots lined up, and you’ll get plenty of time to explore on your own as well. Throughout the week, we’ll also be learning to bridge the perception-reality gap for lesser-traveled destinations.

    Our goal by the end of the week is threefold: to make you a more observant and focused traveling photographer, to learn to shoot efficiently while retaining time for yourself and/or family while on the road, and to have the knowledge and experience to grab your camera and confidently head to nearly any place in the world.

    This trip is nearly full. As of this writing, we have only two spots left in our Havana X-Pedition.

    More details: X-Pedition Havana
    __________

    I’m stoked about each of these, and very much hope to see you there.

    -DH
    Strobist

  • Wiral LITE cable system lets you capture cinematic shots almost anywhere

    A simple cable cam system called Wiral LITE has launched on Kickstarter, where the campaign has already blown away its funding goal, raising nearly a quarter-million dollars in just a few days’ time. The system is comprised of a motorized, remotely-controlled device that rolls across a cable fixed to two poles or similar structures. A camera can be attached to the bottom of Wiral LITE, which itself rolls across the cable while the camera records cinematic motion shots.

    The cable cam system is being presented as an alternative to portable motorized slider devices, offering the ability to record motion shots over much larger distances than the average portable slider.

    Wiral LITE features a standard camera mount on the bottom and can handle camera/lens weights up to 3.3lbs / 1.5kg. The system includes a ball joint, a GoPro mount, cable, quick reel for retracting the cable, a tightening strap, end stop clips, batteries, and a battery charger.

    The cable system offers multiple modes, including a time lapse mode that moves with a minimum speed of 0.006MPH, but the device’s top speed is 28mph / 45kmh.

    The team behind the device explains that the Wiral system takes 3 minutes to setup, which involves attaching both ends of the reel to a pair of objects, tightening the cable between the two, and then mounting the Wiral LITE onto the cable. In other words, setup is a breeze:

    And once you’re set up, you can capture long-range panning shots like this with ease:

    Wiral LITE is being sold to backers for a pledge of $ 200. Bundles are also available for those who want to pledge a bit more, such as an ‘Ultimate Kit’ for pledges of $ 250 or an ‘Extreme Kit’ for $ 1,700.

    To learn more or put a pledge in yourself, head over to the Kickstarter page.

    Articles: Digital Photography Review (dpreview.com)
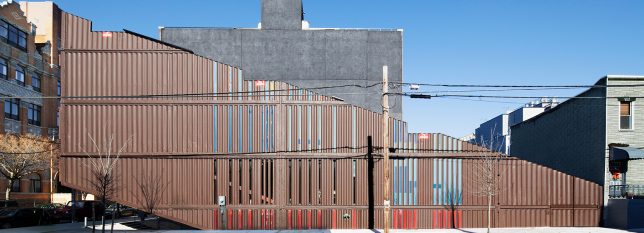
  • 3 Times it’s Okay to Consider Offering Free Sessions

    If you’ve made the transition from a hobbyist photographer to a part-time or full-time professional photographer, chances are that you’ve spent a lot of time thinking about your pricing. You’ve likely looked over your cost of doing business and the cost of goods sold. You’ve probably had to have some difficult conversations with friends and family members establishing that you can’t work for free.

    These are all really important parts of starting (and maintaining) a photography business. However, it’s also just as important to sit down and identify some instances in which you would consider donating your services. In this article, we’ll talk about three times you might consider offering free sessions or options at a reduced rate.

    3 Times it's Okay to Consider Offering Free Sessions

    1. New Technique or Gear

    If you’ve always wanted to try newborn photography, it might make sense to offer reduced rate or free sessions. This will help you build your portfolio while perfecting your technique at the same time. Let’s be clear–offering free sessions shouldn’t replace classes and workshops designed to teach you proper technique and safety. Instead, you should consider offering free or discounted sessions after taking a class or workshop in order to implement the new techniques you’ve learned.

    Learning Newborn Photography - 3 Times it's Okay to Consider Offering Free Sessions

    Similarly, if you want to break into wedding photography, it might make sense to offer to assist a local wedding photographer for free. You’ll learn a lot by watching the primary photographer manage the flow of the day and seeing how they interact with the bride, groom, and guests. Additionally, depending on your contract, you may even end up with images that you can use as part of your own portfolio.

    3 Times it's Okay to Consider Offering Free Sessions

    Likewise, if you’ve just upgraded from a crop sensor to a full frame camera, you’ll probably want to take that equipment for a test drive before using it with a paying client. It may very well be that you can get your bearings photographing your kids in your own backyard. However, depending on the genre of photography you specialize in, it might make more sense to put out a model call on social media and offer a mini session that will allow you to put your new gear to the test in a low stakes environment.

    Learning Newborn Photography - 3 Times it's Okay to Consider Offering Free Sessions

    2. For a Creative Photography Project

    I spend most of my time photographing newborns, children, and families. As a young mom myself, I really love that genre of photography and feel passionate about helping families preserve their memories.

    That said, because I spend so much time photographing people, I make a concerted effort to take on a creative photography project that doesn’t involve people at least once a year. Sometimes, that may mean begging a winery to let me come photograph their grapes after hours in exchange for allowing them to use the images on social media.

    3 Times it's Okay to Consider Offering Free Sessions

    Other times, it has meant asking a local photographer for half an hour to pick his brain about astrophotography in exchange for snapping a photo of his family for their annual Christmas card. For me, the point isn’t to actually become an astrophotographer. Lord knows this image isn’t winning any astrophotography awards anytime soon, and it feels really uncomfortable to share something publicly that isn’t perfect.

    But the point isn’t to be perfect with a creative project. The point is to stretch yourself in ways that you normally don’t, realizing that sometimes the journey is more important than the final destination.

    3 Times it's Okay to Consider Offering Free Sessions

    Ideas for your project

    Perhaps you are already an award-winning astrophotographer, and you’d really like to stretch yourself by doing some child or family photography. Consider asking a friend if they’ll meet you at a park to try photographing them and their children. Try snapping a few images at your nephew’s next soccer game. Ask a friend that loves to bake if you could photograph the next cheesecake he or she makes. The point is that you’ll never grow as a photographer if you don’t take risks. Similarly, it can feel easier to take risks and do something new if you’re not being paid–there’s really nothing to lose.

    The point is that you’ll never grow as a photographer if you don’t take risks. Similarly, it can feel easier to take risks and do something new if you’re not being paid–there’s really nothing to lose.

    3 Times it's Okay to Consider Offering Free Sessions

    3. Partner With a Non-profit You Care About

    You’ve probably already been asked to donate a photo session to a non-profit’s fundraiser or auction. This is a great way to give back to the community, and it’s not my intention to discourage you from doing so. However, more and more frequently I’m finding that donating my services directly to the non-profits that I care about is an even more rewarding way to stretch my creative ability and become involved in my community at the same time. Perhaps, instead of donating a session gift certificate, offer to come photograph the office staff, an event the non-profit is holding, or the population that the non-profit serves.

    Perhaps, instead of donating a session gift certificate, offer to come photograph the office staff, an event the non-profit is holding, or the population that the organization serves.

    3 Times it's Okay to Consider Offering Free Sessions

    In doing so, you will likely learn more about the organization itself, their mission, and the community as a whole. Your local humane society would probably love images of the animals in their care. A nearby NICU may be completely blown away by the offer to come photograph the families and babies they serve. Your child’s school may love abstract photography of kids that they could hang on their walls or use as reminder postcards. If you’re religious, your church would probably love photos of their upcoming baptisms or other special religious ceremonies.

    Serve your community

    This sort of partnership isn’t about parlaying the non-profit organizations into future clients. Rather, it is about using your time and talent to bless others in your community. There are opportunities to use your gifts and talents to make the world better–use them.

    Sometimes the things that a non-profit may ask for may be completely outside of your normal wheelhouse. You may have to tell them that you don’t think you’d be the best person for the job they have in mind. Other times, you may feel comfortable telling them that though their idea is outside your normal wheelhouse, you’d be happy to give it a try. Both responses are absolutely okay, but I’ve never regretted trying an unusual request that a non-profit has given me!

    3 Times it's Okay to Consider Offering Free Sessions

    Conclusion

    Have you identified instances in which you will consider offering reduced rate or free sessions? Do you partner with any local non-profits in order to give back? Chime in below and tell us about your experiences.

    The post 3 Times it’s Okay to Consider Offering Free Sessions by Meredith Clark appeared first on Digital Photography School.


    Digital Photography School

  • How to Use Soft Light Blend Mode in Photoshop to Improve Exposure and Contrast

    Do you have an overexposed sunny side and an underexposed shadow on the other side of your image? Or maybe a well-exposed photo that needs more vibrancy? There’s a tool so versatile that can help you fix any of these problems and more: the Soft Light Blend Mode.

    What are Layers?

    Imagine your photo as a printed one. Then you take a sheet of acetate and draw on it. Then you take another sheet and you put it on top of the others and obscure a part of it; and so on, and so forward. Each acetate sheet is a layer and you can make as many alterations as you want on top of your original this way.

    To create layers in Photoshop you need to go to Menu > Layers > New. A pop-up window will appear where you can name your layer, choose the color, the blending mode and the opacity. When you click OK the new layer will appear on the Layers panel window on top of the background, which is the original image.

    Layers - How to Use Soft Light Blend Mode to Improve Exposure and Contrast

    What is the Blend Mode?

    The default setting of a new layer is normal blending mode. This covers the background or the layer underneath. However, Photoshop gives you the option of choosing a different Blend Mode, which changes the way your edit affects the pixels. You can change it in the pop-up window of the new layer.

    Blending Modes - How to Use Soft Light Blend Mode to Improve Exposure and Contrast

    In the case of the Soft Light blending mode it is similar to using the dodge or burn tool. In other words, every color that is lighter than 50% grey will get even lighter, like it would if you shine a soft spotlight to it. In the same way, every color darker than 50% grey will get even darker. However it will never reach pure black.

    So, why not use dodge and burn instead?

    First of all, when you work in layers you don’t lose any information. You can always discard the layer and start over because there is no damage to the original image.

    With layers, you can change the opacity or transparency of each one, which allows you to control how evident your edit is in the final image. You will find the opacity tool on the Layers panel with a slider that goes from 0 to 100 %.

    Note that there is another slider next to it called Fill. There are 8 blending modes in which these two sliders make a difference, however, Soft Light is not part of these “special 8” so the Fill opacity and Standard opacity have the same result when using this Blend Mode.

    Opacity - How to Use Soft Light Blend Mode to Improve Exposure and Contrast

    Another advantage is that you can change the blending mode of each of the layers. In this article, we are exploring the use of Soft Blend, however, each mode offers different possibilities. One blending mode can have different uses, here are three of them.

    3 ways to use Soft Light Blending Mode

    1. Add punch to your image

    Increase the contrast and saturation to have more vivid colors and give a punch to your image. You can do this by duplicating the background layer: Menu > Layer > Duplicate Layer and changing the blending mode from normal to Soft Light. Finally adjust the opacity until you are happy with the result.

    Duplicate Layer - How to Use Soft Light Blend Mode to Improve Exposure and Contrast

    BeforeSoftLight - How to Use Soft Light Blend Mode to Improve Exposure and Contrast

    AfterSoftLight - How to Use Soft Light Blend Mode to Improve Exposure and Contrast

    2. Gradient tool to balance the lighting

    If you have an image that is underexposed on one side and overexposed in the other you can easily even it out with a Soft Light blend layer. First go to Menu > Layer > New Layer. Pick the Gradient tool and draw a line from the brightest side to the darkest one. The gradient will look like this:

    Gradient How to Use Soft Light Blend Mode to Improve Exposure and Contrast

    Then change the layer blending mode to Soft Light and lower the opacity to find the best results.

    Before Gradient - How to Use Soft Light Blend Mode to Improve Exposure and Contrast

    Before gradient

    After Gradient - How to Use Soft Light Blend Mode to Improve Exposure and Contrast

    After gradient

    3. Dodging and burning with a Soft Light layer

    The past workflows altered the entire image, however, if you need to do a more precise job you can also do that using Soft Light. First, add a new layer with Soft Light blending mode like you did in the previous procedure. Only this time instead of the gradient tool, you are going to use the brush tool. When you select it you can choose the size of the brush on the top menu and the color on the bottom.

    Brush How to Use Soft Light Blend Mode to Improve Exposure and Contrast

    If you paint with black you will darken the image:

    Darken - How to Use Soft Light Blend Mode to Improve Exposure and Contrast

    Painting with white will lighten certain areas, and with different shades of grey, you can also control tones of your image.

    Painting - How to Use Soft Light Blend Mode to Improve Exposure and Contrast

    Keep going until you are happy with the contrast and exposure of your image.

    Before Painting - How to Use Soft Light Blend Mode to Improve Exposure and Contrast

    After Painting - How to Use Soft Light Blend Mode to Improve Exposure and Contrast

    Conclusion

    Now you know that blending modes have a lot of potential, so keep exploring. How do you use Soft Light Blend Mode? Please share your ideas and tips in the comments below.

    The post How to Use Soft Light Blend Mode in Photoshop to Improve Exposure and Contrast by Ana Mireles appeared first on Digital Photography School.


    Digital Photography School

  • AI-powered Pholio hard drive is an offline alternative to Google Photos

    If you feel uncomfortable with your images being stored on cloud servers the Pholio device is a new offline alternative that offers many of the features we are used to from cloud services like Google Photos.

    Once connected to a PC, Mac, tablet or smartphone, Pholio automatically searches through the device storage and backs up all images and videos, either at full size or smaller ‘optimized’ versions. If you choose the latter Pholio provides a link to the full size-version.

    Pholio comes as a standard version with a 500GB capacity or as a ‘Pro’ variant that offers 2TB of storage. 20,000 built-in descriptors allow for automatic tagging and easy searching, but the system is capable of learning if you want to add your own keywords. Face detection allows to find images and create albums for a specific person and the software is even capable of finding still shots within a video clip. The Pholio makers say an update will expand the backup services and include encryption.

    You can now reserve a 500GB Pholio by pledging £200 (approximately $ 260) on the project’s Kickstarter page. If the funding goal is reached delivery is expected for January 2018.

    Articles: Digital Photography Review (dpreview.com)