Blog

  • Canon EOS M100 shooting experience and gallery

    Washington State is known as the Evergreen State, a slogan that is emblazoned on automotive license plates from Seattle to Spokane. New York is the Empire State. Montana is Big Sky Country, and Florida is the Sunshine State.

    What about Idaho? Famous Potatoes.

    Seems to me there’s a lot more to Idaho than just potatoes. Processed and cropped to taste in Adobe Camera Raw using the Camera Landscape color profile. Great exposure in full automatic mode.
    ISO 200 | 1/250 sec | F2.8

    While on a recent road trip through Idaho, this topic of state slogans came up with a few traveling companions who happen to live in the state capital, Boise. In all fairness, it does look like there is an updated slogan. “Great Potatoes. Tasty Destinations.” Eh. Somehow, it still fails to capture any sense of the awesome beauty that I experienced on my first trip through the north-western part of the state, along the Snake River and Hells Canyon and through the Clearwater Mountains.

    The primary reason for this trip was to get some more shooting time in with the Canon EOS 6D Mark II. But I also threw the new, beginner-friendly Canon EOS M100 with the 22mm F2 pancake prime into my jacket pocket for capturing some of the lighter moments on the trip.

    And given just how much of a thing I have for large-sensor compact cameras with prime lenses, it shouldn’t be much of a surprise that I really, really enjoyed it.

    What Canon got right

    Not a bad parking spot. Processed to taste in Adobe Camera Raw using the Camera Neutral profile.
    ISO 100 | 1/250 sec | F5.6

    The most important thing that Canon got right with this camera is that it’s just fun to use. With a good full Auto mode, and an easy switch over to Program Auto or Aperture Priority, it was easy to just yank the M100 out of my pocket, take a quick shot, and put it back in at a moment’s notice. This was especially handy on, say, the top of a mountain with failing post-sunset light.

    Despite the fairly serious guts in the M100, which include Canon’s newest 24MP APS-C sensor and Digic 7 processor, the M100 doesn’t feel like too ‘serious’ a camera to use. While it sometimes seemed overkill to take out the 6D II for some photos of late-night photo editing or a trip to the pool hall, the EOS M100 just seems made for such photographic opportunities.

    Image processed to taste in-camera using tuned monochrome settings, with increased sharpening and contrast – still another good exposure from full Auto mode.
    ISO 6400 | 1/40 sec | F2.8

    It’s also true that default sharpening and noise reduction values aren’t really our favorites on Canon’s recent cameras, but if your main purpose is getting better photos than what your cellphone can capture and then uploading to Instagram, it doesn’t seem to be too much of a problem. Speaking of cellphones, the built-in NFC on the M100 (which the older M10 also has) makes pairing with Android phones an absolute breeze.

    And if you find yourself needing to tweak your images, the M100 is one of the few entry-level Canon cameras that allows for in-camera Raw processing, which is a really nice touch. It also makes it easier to find your preferred settings.

    Lastly, the tilting touchscreen combines with the excellent Dual Pixel AF to make shooting from the hip a really addictive experience.

    Smartphone cameras are steadily improving, but there’s no way my phone could handle this sort of thing. Processed and cropped to taste in Adobe Camera Raw.
    ISO 2000 | 1/60 sec | F2

    Things to consider

    Of course, there’s also a couple things Canon could improve. I mean, look at this USB port. Just look at it.

    What’s wrong with this picture?

    First off, that’s a mini USB port, not the far more common micro USB port, so good luck finding a cable should you need to transfer over USB. The bigger issue is that the USB port included on the M100 does not support USB charging – something that’s also true of Canon’s EOS M5 and M6.

    These cameras, particularly the tiny M100, practically beg to be travel cameras, at least with the pancake prime. Even if I’m traveling ultra-light, I’ll need a charger for my phone, and being able to share that between the phone and camera means one less power brick to lose. Plus, if I do lose it, a generic USB charger is damned near ubiquitous compared with something that works specifically with Canon’s LP-E12 batteries. And if you already have a bigger Canon kit with its own chargers, do you really want to carry another dedicated charger?

    Besides that, I do wish that the M100 came with the M6’s screen mechanism. The fact that the screen only flips up makes shooting top-down difficult, but it’s better than a screen that doesn’t tilt at all, particularly given the M100 lacks a viewfinder. Of course, a more complex screen mechanism would likely mean a bigger physical size, so there’s no free lunch here, I suppose.

    Tilt-up screens – great for low angles with pets and kids, lousy for high angles of whatever it is you might be eating. Out-of-camera JPEG in auto mode, cropped to taste.
    ISO 200 | 1/250 sec | F5

    Lastly, there’s no getting around the limited native lens ecosystem for Canon’s EF-M mount. Seriously, I love the 22mm F2, but it’s the only compact, fast prime they’ve released in five years. The 35mm macro option is great to have, and the 11-22mm wide-angle is of high-quality, but is it too much to ask for a native fast 50mm equivalent? Given the system’s size, packing an extra lens or two isn’t going to be too much of a stretch for people who are into photography, but there just aren’t great options out there right now.

    The wrap

    This Idaho roadtrip got me thinking. We did, of course, do a lot of serious photography with the Canon EOS 6D Mark II, including some portraits with Canon’s gorgeous new 85mm F1.4L IS as well as some off-road action with something called an RZR. For the more serious stuff, the 6D Mark II was far and away the better tool.

    But after a full day of shooting, when I’d stumble across some nice light or a casual moment I wanted to capture, I found that having the M100 in my pocket was a godsend, especially if it was my main option while the 6D II’s batteries were charging, or files were backing up, or I simply didn’t want to carry a full-frame DSLR with me out to dinner.

    The EOS M100 was great for when I wanted to unwind from using a full-frame DSLR all day, but still have the capability to snag some nice photos. Out-of-camera JPEG.
    ISO 4000 | 1/60 sec | F2

    For the serious photographer, the M100 doesn’t make much of a case for itself as that user’s only camera. But for someone looking for a fun second camera, or a smartphone user looking to get into more serious photography with an excellent and easy-to-use touchscreen interface (i.e. the camera’s intended audience), the EOS M100, with its updated sensor, processor and autofocus system, is definitely worth a look. And sure, it’s just another ‘entry level’ model, but kind of like Idaho and it’s ‘famous potatoes,’ you may find there’s a lot to like in the M100 when you start exploring it – or better yet, exploring with it.

    Sample gallery

    $ (document).ready(function() { SampleGalleryV2({“containerId”:”embeddedSampleGallery_1754041899″,”galleryId”:”1754041899″,”isEmbeddedWidget”:true,”standalone”:false,”selectedImageIndex”:0,”startInCommentsView”:false,”isMobile”:false}) });
    Articles: Digital Photography Review (dpreview.com)

  • Review: Sigma 100-400mm F5-6.3 DG OS HSM Contemporary Lens

    I believe it was Robert Capa who said, “If your pictures aren’t good enough, you’re not close enough.” While this is not incorrect nor is it bad advice, the fact remains that there will be times when our feet simply can’t do the zooming for us. To facilitate getting up close and personal without actually being up close and personal, photographers rely on telephoto lenses to bridge the gap between themselves and their subject.

    Review: Sigma 100-400mm F5-6.3 DG OS HSM Contemporary Lens

    The Sigma 100-400mm F5-6.3 Contemporary Lens

    With each lens I evaluate with every passing year, I am fortunate enough to bear witness to the staggering advances lens manufacturers are making in the world of photographic optics. Today, there are many instances where aftermarket “non-native” third-party camera lenses either meet or even surpass the performance of their more expensive cousins manufactured by their respective camera brand. We now have a high-grade glass without the high-grade price tags. This is especially true when it comes to long range telephotos and fast primes.

    So, when the opportunity arose for me to get my hands on one of the newest budget-conscious telephotos, the Sigma 100-400mm F5-6.3 DG OS HSM Contemporary lens, I lept at the chance. I have a couple of friends who spoke quite favorably of this particular lens, so I had to see it for myself. Take a few minutes, sit back and relax, and let me tell you exactly why the Sigma 100-400mm might be a good choice for you if your bag is missing a good long-range zoom lens.

    Build Quality

    The main housing of the Sigma 100-400mm lens is made from a solid-feeling hard plastic. Being from the Sigma Contemporary line, it lacks the metallic-feeling TSC (thermally stable composite) construction of their Art series lenses. Even without this type of material, the lens feels incredibly solid in the hand and feels great. The zoom and focus rings are both rubberized and work smoothly.

    The Sigma 100-400mm is exceptionally balanced. Overall, for a lens of this size, it feels surprisingly nimble when mounted on my Canon 7D.

    Review: Sigma 100-400mm F5-6.3 DG OS HSM Contemporary Lens

    Review: Sigma 100-400mm F5-6.3 DG OS HSM Contemporary Lens

    Oddly enough, the balance seems to improve when the lens is extended out to its maximum focal length of 400mm. The lens hood included with this lens also offers a great hand-hold which facilitates easy “push/pull” zooming.

    Review: Sigma 100-400mm F5-6.3 DG OS HSM Contemporary Lens

    The lens sports a zoom-lock switch which is quite useful for carrying around a telephoto lens. This prevents gravity from slowly extending the lens while hiking or walking. The zoom-lock switch on the Sigma 100-400mm firmly locks the lens into place at its 100mm focal length.

    Review: Sigma 100-400mm F5-6.3 DG OS HSM Contemporary Lens

    Weather sealing

    The folks at Sigma have beefed up the weather sealing of their lenses considerably. As primarily an outdoor and wilderness shooter, I am constantly at the mercy of the elements. The weather sealing of this lens is superb.

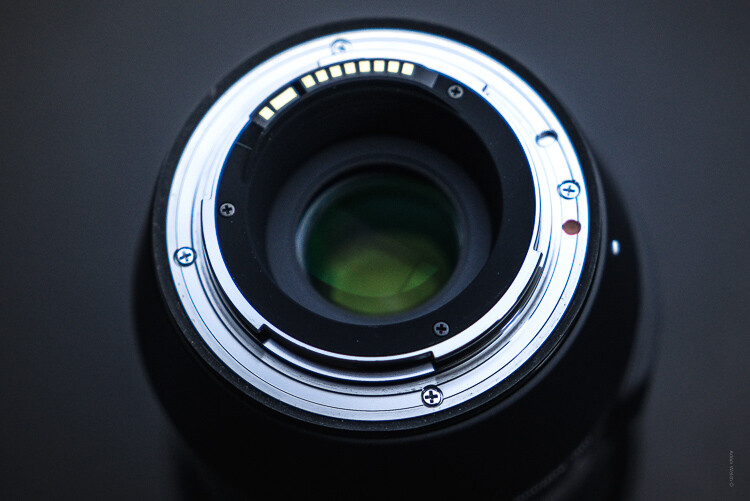
    Something that I love to see is a visible rubber gasket on the lens bayonet mount. This type of extra assurance and protection against dirt and moisture making their way to my camera’s sensor makes me feel all warm and fuzzy inside even when the conditions outside are decidedly not.

    Review: Sigma 100-400mm F5-6.3 DG OS HSM Contemporary Lens

    Review: Sigma 100-400mm F5-6.3 DG OS HSM Contemporary Lens

    One thing to note on the overall design of the 100-400mm is that it certainly has a lot of external switches. While these switches are each quite actionable and serve a purpose, they also make it difficult to manipulate the various lens functions without looking. With high range zoom lenses such as this such problems aren’t uncommon.

    Review: Sigma 100-400mm F5-6.3 DG OS HSM Contemporary Lens

    Image Quality

    Sharpness

    The sharpness of the Sigma 100-400mm is wonderful for the price range of this lens. In fact, I was stunned to see just how crisp the images produced at the maximum apertures actually were. Both at 100mm and 400mm the sharpness was impressive.


    Review: Sigma 100-400mm F5-6.3 DG OS HSM Contemporary Lens

    400mm at f/9.

    Review: Sigma 100-400mm F5-6.3 DG OS HSM Contemporary Lens

    100mm at f/6.3.

    Review: Sigma 100-400mm F5-6.3 DG OS HSM Contemporary Lens

    400mm at f/6.3.

    There was slight edge softening while at 100mm f/5 and at 400mm f/6.3. The incredible thing about the sharpness, which I feel speaks to the true quality of this lens, was only noticed while I was examining test images for this review at 3:1 magnification. Look closely at these two photos. The first was made at 100mm.

    Review: Sigma 100-400mm F5-6.3 DG OS HSM Contemporary Lens

    100mm

    The second is the same scene but zoomed to 400mm.

    Review: Sigma 100-400mm F5-6.3 DG OS HSM Contemporary Lens

    At 400mm.

    Look closely at the left side of the clock tower. Here, let me help you. Below is the same image magnified in post-processing to about 1:1.

    Review: Sigma 100-400mm F5-6.3 DG OS HSM Contemporary Lens

    The Same image viewed at 1:1 (100%) in Lightroom.

    Yes, those are wasps or some other type of insects swarming around the clock tower! Considering the small size of the insects coupled with the distance, approximately 600 yards, the resolving power of this lens is exceptional.

    Chromatic Aberration

    Chromatic aberrations detected with the Sigma 100-400mm are barely worth mentioning. At 100mm using a relatively wide f/5 aperture, there is a minutely observable purple/magenta fringe in high contrast areas. Other than that, there is nothing remarkable to speak of with this lens.

    Autofocus Performance

    Fast and responsive is the best description I can give to the 100-400mm Sigma autofocus. The AF performed well and focused locked well while in AI Servo mode on my Canon. The autofocus was quite silent and worked great for not disturbing “temperamental” wildlife.

    Review: Sigma 100-400mm F5-6.3 DG OS HSM Contemporary Lens

    Can you spot the hiding deer?

    Review: Sigma 100-400mm F5-6.3 DG OS HSM Contemporary Lens

    There she is, A 400mm reach helps out immeasurably.

    Optical Stabilization

    The point of vibration reduction, sometimes referred to as optical stabilization, is where the Sigma 100-400mm didn’t exactly impress. Not that the OS didn’t work but the overall improvement was not as drastic as I have observed with some other lenses of this type.

    Review: Sigma 100-400mm F5-6.3 DG OS HSM Contemporary Lens

    With no stabilization.

    Review: Sigma 100-400mm F5-6.3 DG OS HSM Contemporary Lens

    With OS1 Mode turned on.

    There are two OS modes present on the 100-400mm not including the “Off” mode. They are OS1 and OS2. The OS1 mode is general OS. This serves to reduce multi-directional camera shake and what I generally left the lens set to during my tests. OS2 is geared exclusively towards panning with the 100-400mm and works to reduce single plane vibration.

    Customization

    Sigma offers a USB dock so that firmware and custom modes can be uploaded directly to the lens via computer with the Sigma Optimization utility. That’s where the custom mode switch comes into play. You can customize Autofocus and Optical Stabilization functions within the lens. I have never used the functionality but if you want ultimate control over every aspect of your gear, this is a great option.

    The Tripod Collar Conundrum

    The common complaint I’ve gathered about the Sigma 100-400mm F5-6.3 is concerning the lens’s tripod collar; there isn’t one. This comes as somewhat of a surprise to some photographers, myself included. Although, it seems to be of more importance to some than others.

    Personally, the lack of a tripod ring is not a huge problem for me. The featherlike balance of the lens negates the need for a tripod mount in my opinion. Still, if you plan on using the lens with a smaller, adapted camera body, the weight of the lens could be an issue. If you want a lens with a tripod ring or collar, this might not be the choice for you.

    Final Thoughts on the Sigma 100-400mm F5-6.3

    So, what’s the bottom line on the Sigma 100-400mm F5-6.3 DG OS HSM Contemporary Lens?

    First of all, the sharpness is outstanding. Even at its widest aperture, the sharpness is exceptional with very little edge softening.

    The build quality is more than capable of serving as a “go-to” telephoto for sports and outdoor work and the beefy weather sealing only enhances the workability of this lens.

    If you absolutely MUST have the capability of a tripod collar then look elsewhere because the Sigma 100-400mm lens simply doesn’t have one. If you don’t care about that, then for around $ 799 USD, this telephoto from Sigma won’t fail to impress.

    The post Review: Sigma 100-400mm F5-6.3 DG OS HSM Contemporary Lens by Adam Welch appeared first on Digital Photography School.


    Digital Photography School

  • Tamron unveils lightweight 100-400mm F4.5-6.3 ultra-telephoto zoom for $800

    Tamron just revealed its newest ultra-telephoto zoom. Meet the Tamron 100-400mm F4.5-6.3 Di VC USD (Model A035) for full-frame Canon and Nikon DSLRs—a lens that combines compact, lightweight construction with ‘superior’ image quality and ‘fast and precise AF’, according to Tamron. The lens’ tagline: heavyweight performance in a lightweight lens.

    The new lens was revealed this morning, and its claim to fame is its size and weight. At just 39.3 oz., the new 100-400mm lens is the lightest in its class thanks to the use of magnesium allow in ‘key areas’ of the lens barrel. Inside that barrel you’ll find 17 lens elements in 11 groups—including three low dispersion (LD) elements—and Tamron’s high-speed Dual MPU that allows for ‘fast and precise AF’ as well as four stops of stabilization.

    Below are some sample photos captured with the new Tamron 100-400 F4.5-6.3 Di VC USD at the racetrack by photographer Takahito Mizutani for Tamron:

    $ (document).ready(function() { SampleGalleryV2({“containerId”:”embeddedSampleGallery_8730107360″,”galleryId”:”8730107360″,”isEmbeddedWidget”:true,”standalone”:false,”selectedImageIndex”:0,”startInCommentsView”:false,”isMobile”:false}) });

    The Tamron 100-400mm F4.5-6.3 Di VC USD will be available starting November 16th, in both Canon and Nikon mounts, for $ 800. To find out more or see more impressive sample photos, read the full press release below or head over to the Tamron website.

    Press Release

    100-400mm F/4.5-6.3 Di VC USD (Model A035)

    Tamron announces the launch of a new ultra-telephoto zoom lens with fast and precise AF, superior image quality and a lightweight, compact design

    October 26, 2017, Commack, New York— Tamron USA, Inc. , announces the launch of a new ultra-telephoto zoom lens, 100-400mm F/4.5-6.3 Di VC USD (Model A035), for full-frame Canon and Nikon DSLR cameras. The Model A035 delivers fast and precise AF performance and consistently powerful VC (Vibration Compensation) 4 stops*1 benefits thanks to the high-speed Dual MPU (Micro-Processing Unit) control system that is found in the latest Tamron lens models. The advanced optical design of Model A035 includes three LD (Low Dispersion) lens elements for aberration reduction and Tamron’s original eBAND Coating for superior anti-reflection performance. At 1,115g (39.3 oz), the new lens is the lightest in its class*2 and features magnesium alloy in key areas of the lens barrel to ensure weight reduction, and improve strength and portability. Model A035 is compatible with Tamron’s 1.4X tele converter and the Tamron TAP-in ConsoleTM that enables lens customizations for focus adjustments, VC mechanism adjustments and more. Additionally, an Arca Swiss compatible tripod mount is available as an optional accessory. The new Tamron 100-400mm will be available in both Canon and Nikon mounts on November 16th at $ 799.

    PRODUCT HIGHLIGHTS

    1. High-speed Dual MPU (Micro-Processing Unit) control system delivers quick and highly responsive autofocus performance plus outstanding VC image stabilization

    The Dual MPU system includes an MPU dedicated to vibration compensation processing, enhancing the computational capacity of the entire system. An MPU with built-in DSP (Digital Signal Processor) provides high-speed digital signal processing and achieves outstanding autofocus performance and vibration compensation, both indispensable for ultra-telephoto photography.

    2. Superb image quality in an ultra-telephoto zoom lens

    The Model A035 includes three LD (Low Dispersion) lens elements for optimal optical design and aberration correction. Lighter weight, increased light transmission and crisp images with excellent contrast are achieved by reducing the number of lens elements while ensuring an appropriate balance with aberration correction. The A035 has minimum object distance (MOD) of 1.5 m (59 in) and a maximum magnification ratio of 1:3.6 for close-up work.

    3. Exclusive eBAND Coating reduces flare and ghosting

    The new A035 features Tamron’s eBAND (Extended Bandwidth & Angular-Dependency) Coating, which has an extremely low refractive index and fine multiple-layer coating technology, to achieve outstanding antireflection performance. BBAR (Broad-Band Anti-Reflection) Coating, with excellent antireflection characteristics, increases light transmission. These coating technologies greatly reduce the ghosting and flare that can occur when subjects are backlit.

    4. Lightest weight, 1,115 g (39.3 oz) lens in the ultra-telephoto zoom lens class*, and only 196.5 mm (7.7 in) long

    Magnesium alloy is used in key areas of the lens barrel to improve weight reduction, strength and portability. Total length of 196.5 mm (Nikon mount) means a compact size for an ultra-telephoto zoom lens covering up to 400 mm, and the A035 can therefore be easily carried in a standard camera bag. Combined with excellent vibration compensation functions, the compact size enables successful handheld ultra-telephoto photography.

    *Length is the distance from the front tip of the lens to the lens mount face.

    5. Optional accessory tripod mount is Arca-Swiss compatible

    An Arca-Swiss style tripod mount is available as an optional accessory. Designed exclusively for Model A035, it provides quick and secure attachment to a tripod and greater stability. An easy-to-hold grip shape includes an expanded mounting plane, and the use of magnesium helps achieve lighter weight, thereby further facilitating handheld photography.

    6. Compatible with tele converters and TAP-in Console

    Model A035 is compatible with tele converters designed exclusively for Tamron lenses to achieve 1.4X and 2X the original focal length*. It’s also compatible with Tamron’s TAP-in Console (Model TAP-01), an optional accessory enabling users to update lens firmware and customize the lens settings, including adjustments of focusing positions for autofocusing and the operation modes for the lens’s Vibration Compensation system.

    *Use of the 1.4× tele converter results in light reduction of 1 F stop; use of the 2× tele converter results in the loss of 2 F stops

    7. Moisture-Resistant construction and fluorine coating for enhanced weather protection

    The surface of the front element is coated with a protective fluorine compound that has excellent water- and oil-repellant qualities. The front surface is easier to wipe clean and is less vulnerable to the damaging effects of dirt, dust, moisture or oily fingerprints, allowing for much easier maintenance. Also, with active use of the A035 for outdoor photography likely, sealant is used in each of the movable and joining areas of the lens barrel to resist the intrusion of moisture.

    8. Electromagnetic diaphragm system now used also for Nikon-mount lenses

    An electromagnetic diaphragm system, which has been a standard feature for Canon-mount lenses, is now employed in Nikon-mount lenses*. More precise diaphragm and aperture control is possible because the diaphragm blades are driven and controlled by a built-in motor through electronic pulse signals.

    * Available only with cameras compatible with the electromagnetic diaphragm (D5, D4s, D4, D3X, Df, D850?D810, D810A, D800, D800E, D750, D600, D610, D300S, D500, D7500, D7200, D7100, D7000, D5600, D5500, D5300, D5200, D5100, D5000, D3400, D3300, D3200, D3100). (As of October, 2017; Tamron)

    9. External design places importance on functionality and ease of use

    While inheriting the design that makes use of many organic curves and the delicately polished form down to fine details that characterize the SP lens series, the new Model A035 comes with a highly sophisticated design that also places a lot of importance on the lens’s functionality and ease of use, featuring an overall form that faithfully encompasses the internal structures within, a slim Luminous Gold brand ring and the switch shape design.

    Tamron 100-400mm F4.5-6.3 Di VC USD specifications

    Principal specifications
    Lens type Zoom lens
    Max Format size 35mm FF
    Focal length 100–400 mm
    Image stabilization Yes
    CIPA Image stabilization rating 4 stop(s)
    Lens mount Canon EF, Nikon F (FX)
    Aperture
    Maximum aperture F4.5–6.3
    Minimum aperture F32–45
    Aperture ring No
    Number of diaphragm blades 9
    Optics
    Elements 17
    Groups 11
    Special elements / coatings Three LD elements + eBAND coating
    Focus
    Minimum focus 1.50 m (59.06)
    Maximum magnification 0.28×
    Autofocus Yes
    Motor type Ring-type ultrasonic
    Full time manual Yes
    Focus method Extending front
    Distance scale Yes
    DoF scale No
    Physical
    Weight 1135 g (2.50 lb)
    Diameter 86 mm (3.39)
    Length 199 mm (7.83)
    Materials Magnesium alloy
    Sealing Yes
    Colour Black
    Zoom method Rotary (extending)
    Filter thread 67.0 mm
    Hood supplied Yes
    Tripod collar No
    Optional accessories Tripod collar

    Articles: Digital Photography Review (dpreview.com)

  • Sony a7R III UHD 4K sample video clips

    The Sony a7R Mark III can shoot UHD 4K video at 24 and 30p using the full width of its image sensor or over-sampled footage using a Super 35 crop. We had a quick moment to shoot sample clips while at a Sony-sponsored shooting event earlier this week in New York City. All the clips were shot hand-held, using the camera’s tracking AF function and the new 24-105mm F4 lens.

    The first clip was shot in UHD 4K/24p at the camera’s highest bit rate using the full sensor. You’ll notice the tracking jumps off the subject midway through the clip, only to re-acquire toward the very end. You can download the clip here.

    The next clip was shot UHD 4K/30p using the Super 35 crop mode (also hand-held, using tracking). In this mode, the camera shoots using a 5176 x 2924 pixel region and down-samples it to produce highly detailed 3840 x 2160 UHD 4K footage. In theory, this footage should look better than the full frame footage. You can download the clip here.

    The final clip above was also shot in UHD 4K/30p, but this time Full Frame for the sake of comparison. You can download it here. We’d expect the difference between the quality of the clips to be exaggerated in lower light, where the Super 35 mode is actually using more of the sensor, even though the full frame mode is taking its footage from a more dispersed area.

    For more out-of-camera samples, check out our Sony a7R III sample image gallery.

    Articles: Digital Photography Review (dpreview.com)

  • 6 Reasons You Should Hang Out With Other Photographers

    Solo indulgence in any form of creative expression can leave you in a vacuum unless you are completely confident and never lack inspiration. I don’t think I know anyone like that. Being a photographer, whether for a living or as a hobby, is often something people do on their own. Here are 6 reasons you should hang out with other photographers, they’re cool.

    6 Reasons You Should Hang Out With Other Photographers

    #1 – Build Photography Friendships

    If you are interested in photography, meeting other photographers is a great way to make new friends. It’s easier to talk with people who have the same interests as yourself. A conversation about common topics flows more readily and remains more engaging.

    One of the greatest advantages of being friends with other photographers is going places together. You can enjoy spending more time taking photos without being harassed that you’re taking too long. Which is what usually happens when you go places with people who don’t have a camera.

    6 Reasons You Should Hang Out With Other Photographers

    #2 – Enjoy Diversity

    Meeting other photographers who have interests in different subjects can lead to fresh inspiration. For example, if you love photographing landscapes and become friends with someone who loves photographing people, you can inspire, encourage and challenge one another. This is a wonderful way to learn and explore different subjects, methods, and styles of photography.

    Getting together with photographers who have more or less experience than you brings lots of opportunities to learn, and teach. You will see things differently and use alternative camera settings than other photographers.

    6 Reasons You Should Hang Out With Other Photographers

    Talking about what you do and how you do it can be a fun learning experience. Spending time making photos with others and sharing your experiences and ways of working will help you become a better photographer.

    #3 – Share Experience

    If you are new to photography, being around other photographers is one of the best ways to learn more. Naturally, it’s advantageous to read and do courses, but photographing with others and sharing the experience is also valuable.

    How you each set your camera, choose what to photograph, how to compose an image and loads of other things can seem overwhelming when you’ve just bought your first camera. Talking about these things with other photographers will teach you more effectively than just reading or doing courses.

    Reviewing your photographs with someone you trust will also be encouraging and help you grow in your creative expression. If you only ever look at your photos alone and do not get any feedback on them it’s very easy to stagnate and not develop creatively.

    6 Reasons You Should Hang Out With Other Photographers

    Having someone more experienced help you choose your best photos and give you constructive feedback can lead to new understanding and different ways of taking photos that you may not think of on your own.

    #4 – Collaborate

    Collaboration on photographic projects is a lot of fun. Spending time working on the same subject with a common purpose, maybe a gallery show, book or website, with other photographers can really stretch you creatively and help you grow. Each photographer will see things differently and your styles will complement or contrast the other, and add a richer dynamic to your project.

    6 Reasons You Should Hang Out With Other Photographers

    #5 – Best Friends

    I bought my first camera (a Nikkormat FTN) from a friend who wanted to upgrade. We have another friend who loved photography and the three of us would go out often to different places to take photos together. I learned a terrific amount from these two guys and we had a lot of fun together.

    We’d also review the photos we’d made on previous excursions.  That usually meant sitting around a slide projector for hours enjoying one another’s photos and planning where to go on our next photography outing.

    Over the years I have had photographer friends, some professional, some hobbyists. They’ve been some of my best friends. Now I am married to a photographer and it’s wonderful always having someone to share the experience with, getting constructive informed feedback and continually encouraging one another to do better.

    6 Reasons You Should Hang Out With Other Photographers

    #6 – Meet Photographers

    There are many ways to meet other photographers and make friends. Local meet-up groups, camera clubs, online groups and forums (like the dPS facebook group). I’m sure if you go down to your local camera store and talk with the owner they would know other keen photographers they could introduce you to.

    6 Reasons You Should Hang Out With Other Photographers

    Concluding Recommendations

    One other recommendation I would make is to hang out with other photographers who have a similar way of enjoying photography.

    Some people love to go out as much as possible and explore new ways of making great photos. Other people like to spend time discussing equipment and what their next purchase will be. Others still discuss technical details for hours on end.

    6 Reasons You Should Hang Out With Other Photographers

    Finding yourself with people who love the tech side of photography if you’re one who loves to just get out and photograph can be discouraging, so choose your friends carefully. Have fun!

    The post 6 Reasons You Should Hang Out With Other Photographers by Kevin Landwer-Johan appeared first on Digital Photography School.


    Digital Photography School

  • Photo of the week: I Am Legend

    At first glance this image seems much akin to “Wanderer above the Sea of Fog,” a lonely hiker standing at the edge of a cliff. This is no coincidence as Caspar David Friedrich’s paintings have always been a great inspiration to me. Their striking iconography and atmosphere are unparalleled; however, this image was not taken in Germany, Friedrich’s home country, but in Japan.

    Most might not be able to tell, since the fog doesn’t allow for our gaze to wander off into the distance. But some might have heard of the location it was shot before: the isle of Yakushima. It is a small island about 100 kilometers south of the southern most main isle of Japan called Kyushu. Its great expanses of temperate rainforest have since 1993 been part of the UNESCO World Heritage due to their diverse endemic flora and fauna. Some of the island’s Japanese Cedars are up to 7,000 years old.

    The forest is often engulfed by clouds hanging in the mountains which reach up to almost 2,000 meters in altitude. To explore the woods was one of my main goals when I travelled to the island earlier this year. Even though it’s the rainiest part in all of Japan I just couldn’t help to go. What awaited me was beyond what I had expected.

    It was much like what I had seen in Princess Mononoke—a movie the setting of which was largely inspired by the forests of Yakushima. Actually so much so, that there is now a small part of the forest titled “Mononoke no Mori,” which translates as “Mononoke’s Forest.

    For four days I hiked with my friend Philipp Lutz along the Yakushima traverse, witnessing the forest’s and mountain’s beauty. Part of the allure of the place was the fact that it is not very well known in the western landscape photography realms; something which comes as no surprise, given the language barrier and its distance to Europe and the US mainland. Luckily my friend and I do speak some Japanese, so it wasn’t as hard for us to obtain the information we needed to get around.

    This specific image was taken on the third day on the island on our way up to Miyanoura-Dake, the highest elevation of the island. Originally we had planned to get up that day, but the islands paths were quite long and winding, offering so many photo opportunities such as this one, that we spent much time just shooting the forest scenery instead of treading on, arriving a day later than anticipated.

    Due to the topography of the island the upper slopes of the mountain ranges are almost always engulfed in fog. When we went through the undergrowth for some time we came to a cliff where I almost stumbled down the slope as the path was taking us through the ravine you can see on the right side of the image. The old cedar trees were omnipresent and lend the forest its distinct, primordial character. With this image I tried to combine the aforementioned iconography of “The Wanderer above the Sea of Fog” with the island’s unique fauna and mood to forge an atmospheric rendition of what it was like to hike through this one of a kind landscape. It is times like these where I feel like telling people that I am inspired much by landscape painters is more than just a educational phrase to encourage students in my workshops to look beyond photography to find meaningful inspiration. I for myself might not have taken this image had I not looked at so many of Friederich’s works.

    This is something with may be lost on the younger generation and the myriads of instagram selfies on cliffs, but the image type is not even a product of out post-modern, self-referential crave for admiration. Instead it is part of a long tradition dating back hundreds of years.


    Nicolas Alexander Otto is a semi-professional landscape photographer based out of North-Rhine Westphalia, Germany. He writes for different online and print media, teaches workshops for several agencies, sells prints and calendars and offers post processing sessions. You can find more of his work on his website, Facebook and Instagram.

    Articles: Digital Photography Review (dpreview.com)

  • How to Super-Charge the Spot Healing Brush Tool in Photoshop

    The Spot Healing Brush Tool is often used in portrait photography to remove blemishes, wrinkles, and other distracting elements. By default, this tool works great, but sometimes you will need to add an extra level of control to get the results that you want.

    In this tutorial, you will learn how to use the Spot Healing Brush Tool with Content-Aware to quickly remove blemishes and other imperfections from your photos.

    Getting Started

    First, create a new layer to work non-destructively (Shift + Ctrl/Command + N).

    Then select the Spot Healing Brush from the Toolbar. Make sure that “Content-Aware” is the selected Type and that “Sample All Layers” is checked in the Options Bar.

    How to Super-Charge the Spot Healing Brush Tool in Photoshop

    Spot Healing Brush Tool – Normal Mode

    With the Spot Healing Brush Tool active, just paint over any distraction to remove it. In most cases, the Spot Healing Brush Tool will do an excellent job in eliminating the problem.

    02 spot healing comparison

    However, there are times where the Spot Healing Brush Tool will destroy the original detail and texture found in the photo, giving you very unrealistic results.

    In the example below, the Spot Healing Brush Tool removed the wrinkles under the eye by adding a skin texture that made the image and problem worse.

    03 spot healing normal

    Left before using the Spot Healing Brush. Right – after using it in Normal mode.

    Using Modes to Enhance the Spot Healing Brush

    For a more realistic result, you need to keep as much of the original detail as possible and only remove the distracting element.

    To do so, first consider the blemish, wrinkle, or distraction you are trying to remove. Is it darker than the skin tone? Or is it brighter than the skin tone?

    If the distraction is lighter, select Darken from the Mode in the Options bar. If the distraction is darker, select Lighten. In this case, the wrinkle is darker than the skin tone. That means that we want to lighten the wrinkles. So in the Options Bar, under Mode, select Lighten.

    04 lighten

    With the brush mode set to Lighten, Photoshop will only replace pixels that are darker than the good portion of the skin. Since the wrinkles and other skin distractions in this photo are darker than normal skin tone, only the distracting elements are removed, leaving more of the original texture surrounding it intact.

    Notice that as you paint over a wrinkle, you don’t lose the original highlights and you keep a lot of detail. The example below shows the results between using Normal and Lighten to apply the same correction.

    05 spot healing normal

    Comparing results from different brush modes. Left: Spot Healing Brush in Normal Mode. Right: Spot Healing Brush in Lighten mode.

    Additional Notes

    To work faster, keep in mind that you can switch between Modes by holding the Shift key and pressing the + or – keys.

    This technique also helps you remove blemishes in areas that contain detail that you would like to keep.

    In the example, below you can see how by using the Lighten mode we were able to remove the skin blemishes while leaving the white hair strands intact.

    06 spot healing forehead

    This technique works in this case because the hair strands are lighter than the skin tone, and the blemishes are darker than the skin tone. The Lighten Mode makes the Spot Healing Brush target only darker pixels, so the fine white strands of hair are left intact.

    This tutorial is part of my Content-Aware series on YouTube. There are more videos there if you would like to learn more about how content-aware works in Photoshop.

    The post How to Super-Charge the Spot Healing Brush Tool in Photoshop by Jesus Ramirez appeared first on Digital Photography School.


    Digital Photography School

  • Video – How to Shoot Stunning Photos at Sunrise and Sunset

    In another video from Practical Photography, get some really good tips on how to shoot at sunrise and sunset to get the most epic images.

    Follow along as two photographers go head to head in a little friendly competition to get the best sunset and sunrise photos. Get some practical tips that you can use in your photography at these magic hours as well.

    Need more sunrise and sunset tips? Try these dPS articles:

    • 4 Reasons Shooting at Sunrise and Sunset Will Help You Take Better Photos
    • 8 Simple Guidelines for Capturing Spectacular Sunrise and Sunset Images
    • 7 Uncommon Tips for Winter Sunrise Photos Near Water
    • Tips for Location Scouting to Get the Perfect Sunset Photograph
    • Tips for Doing More Spectacular Sunset Photography
    • 5 Tips to Take Better Sunset Photos – and Why Not to Photograph the Sunset Directly

    The post Video – How to Shoot Stunning Photos at Sunrise and Sunset by Darlene Hildebrandt appeared first on Digital Photography School.


    Digital Photography School

  • Hands-on with Zeiss Milvus 25mm F1.4

    Hands-on with Zeiss Milvus 25mm F1.4

    Zeiss just announced a new prime lens for full-frame Canon and Nikon DSLRs: The Milvus 25mm F1.4 is very big, very heavy, and should be very high-performing – and we just got our hands on one.

    Hands-on with Zeiss Milvus 25mm F1.4

    The new Milvus 25mm F1.4 is the fourth widest lens in the family – which ranges from 15mm to 135mm – and brings the total number to Milvus lenses to 11, four of which boast fast F1.4 apertures. As we’d expect from previous lenses in this series, build quality is extraordinarily good. If you can handle the size and weight, the experience of using a Milvus is nothing short of luxurious.

    Hands-on with Zeiss Milvus 25mm F1.4

    Optical construction comprises 15 elements in 13 groups, including a grand total of six aspherical elements, for a (claimed) almost total reduction of CA. If that sounds like an expensive way to make a lens, it is. The Milvus will cost $ 2400 (but that’s still a lot less than a new Leica Thambar).

    Hands-on with Zeiss Milvus 25mm F1.4

    At 123mm (4.8 inches) long and 1225 g (43.20 oz), the Milvus 25mm F1.4 is a large, heavy lens. The Canon EOS 5D Mark IV shown here is a pretty chunky camera, but the Milvus makes it look like an Olympus OM-D E-M10 III…

    Hands-on with Zeiss Milvus 25mm F1.4

    Announced earlier this year, the Milvus 35mm F1.4 is similarly tank-like, weighing in at 1174 g (41.40 oz).

    Hands-on with Zeiss Milvus 25mm F1.4

    As well as being slightly lighter, the Milvus 35mm F1.4 is a little less expensive than the 25mm too, at $ 2228.

    Articles: Digital Photography Review (dpreview.com)

  • Sony a7R III sample gallery

    $ (document).ready(function() { SampleGalleryV2({“containerId”:”embeddedSampleGallery_9985983572″,”galleryId”:”9985983572″,”isEmbeddedWidget”:true,”standalone”:false,”selectedImageIndex”:0,”startInCommentsView”:false,”isMobile”:false}) });

    The Sony a7R Mark III is here and we get our hands on one for a few hours while at a press event in New York City. First impressions are positive – The camera’s Eye AF function seems reliable – which we used for quite a few images in this gallery, as well as the lock on AF. Also everything here was shot using the new 24-105mm F4 G OSS lens. We’ll update with more images soon when we get one in the office and can process Raw files.

    Articles: Digital Photography Review (dpreview.com)