Blog

  • Moment releases new case and lenses for Apple iPhone X

    Moment has launched a new photography case and lenses for the iPhone X, all of them currently listed for preorder on the company’s website. The protective case, which is simply called Photo Case, is black with a canvas or optional walnut wood backing, and is joined by wide-angle, macro, super fisheye, and telephoto lens options.

    The lenses attached directly to the Photo Case.

    Moment’s system gives the iPhone X—and select other phones—a sort of interchangeable lens system, enabling photographers to quickly attach and remove various lenses to the device as needed. The Photo Case doubles as a slim protective case, featuring microsuede on the inside, a thin rubberized body, and support for an optional wrist strap.

    The lenses, meanwhile, are made with glass and feature Moment’s new bayonet system for locking the lens to the case. Moment explains that its lenses are durable due to the use of “aerospace grade metal” and a unique hardening process. The company offers a 12-month warranty for their lenses.

    The Moment for iPhone X is available to preorder at the following prices:

    • Photo Case: $ 30
    • Wide Lens: $ 100
    • Superfish Lens: $ 90
    • Macro Lens: $ 90
    • Tele Lens: $ 100

    Articles: Digital Photography Review (dpreview.com)

  • Sigma releases full-res sample photos captured with 16mm F1.4 DC DN lens

    The new Sigma 16mm F1.4 DC DN | Contemporary lens made for APS-C E-Mount and M43 cameras has a lot of crop-sensor shooters very intrigued. Sigma says this lens boasts quality on par with its Art lens lineup, and our own hands-on at PPE 2017 was very positive. But before you order the lens—which ships at the end of this month and costs a very tempting $ 450—you’ll want to check out the gallery below.

    Sigma Global has finally released official, full-resolution sample photos captured with the new lens. Despite the lens being made primarily for APS-C E-Mount, Sigma shooter Wataru Nakamura used a Sony A7RII to capture these samples in the camera’s 3:2 crop mode (17.8MP resolution).

    Check them out for yourself below, or head over to the Sigma Global website to download the samples yourself:

    $ (document).ready(function() { SampleGalleryV2({“containerId”:”embeddedSampleGallery_0548830374″,”galleryId”:”0548830374″,”isEmbeddedWidget”:true,”standalone”:false,”selectedImageIndex”:0,”startInCommentsView”:false,”isMobile”:false}) });
    Articles: Digital Photography Review (dpreview.com)

  • Top 10 sample galleries of the year #5: the Fujifilm X-T20

    $ (document).ready(function() { SampleGalleryV2({“containerId”:”embeddedSampleGallery_7251932144″,”galleryId”:”7251932144″,”isEmbeddedWidget”:true,”standalone”:false,”selectedImageIndex”:0,”startInCommentsView”:false,”isMobile”:false}) });

    We’re counting down our top 10 most popular sample galleries of 2017, and we’ve at last cracked the top 5 (see the other winners below). Sitting pretty in the #5 spot is a little number we like to call the Fujifilm X-T20.

    The little brother of the mighty Fujifilm X-T2, the X-T20 uses the same sensor and image processor, but packed in a smaller, lighter body. We think it’s a beautifully designed mirrorless camera that is also pleasure to use – it even earned a silver award in our review.

    We’ve got four sample galleries left to go, and the final four represent some of our absolute favorite products launched this year. Stay tuned!


    Top 10 most popular sample galleries of 2017:

    #10: Sigma 14mm F1.8 Art
    #9: Fujifilm GFX 50S
    #8: Nikon D7500
    #7: Olympus Tough TG-5
    #6: Sigma 85mm F1.4
    #5: Fujifilm X-T20
    #4: To be revealed on 11/21
    #3: To be revealed on 11/22
    #2: To be revealed on 11/23
    #1: To be revealed on 11/24

    Articles: Digital Photography Review (dpreview.com)

  • Treat yourself 2017: the ultimate holiday gift guide for that special person (you)

    2017 Treat Yourself Buying Guide

    The holidays are all about giving, so why not give back to the most important photographer in your life? That’s right, I’m talking about you.

    At this time of year there are plenty of gift guides out there geared toward buying for others, but at the end of the day, your own photographic spirit needs nurturing. Also, camera gear can be pretty pricey and no matter how much they love you, your significant other/siblings/parents/friends might not be able to spring for that $ 1600 item on your wish list.

    In this guide, we’ve rounded up a list of gear designed to pamper you and your creative spirit. From the ultimate pocket compacts, to nicer ways of carrying your camera, to the perfect rugged, portable hard drive – we’ve got you covered.

    Peak Design Everyday backpack, 20L black

    Peak Design Everyday backpack, 20L | $ 260 | PeakDesign.com

    Treat yourself to one of the most technical and well-thought-out camera backpacks on the market: the Peak Design Everyday backpack. It comes in both a 20L and 30L capacity.

    Weather-proof with plenty of ways to expand its carrying capacity including luggage straps, this bag is also real slick-looking. We’re big fans of the origami-style Flex-Fold dividers used to organize the bag’s interior, and we also appreciate the many interior pockets.

    DJI Mavic Pro Fly More Combo

    DJI Mavic Pro more combo | $ 1300| DJI.com

    There are smaller, cheaper drones than the DJI Mavic Pro out there, (like the DJI Spark) but we recommend treating yourself to the Pro because it offers a great balance of portability, features and image/video quality. The Mavic Pro can shoot 12MP Raw files and 4K video and offers 27 minutes of flight time, 3-axis gimbal stabilization and can fly at up to 40 mph. It’s also pretty easy to pick up and start using, especially in beginner mode, though there is a slight learning curve.

    In a sense, it’s the perfect drone for the first-time-flyer, long-time-photographer who wants to shoot more than HD video or JPEGs with their drone. We recommend you spend the extra cash on the controller – using your cellphone alone provides a very limit flight range and mediocre flight experience. But there are few things better for changing up your photographic perspective than owning a flying camera.

    Affinity Photo for desktop

    Affinity Photo for desktop | $ 50 | Affinity.Serif.com

    Affinity Photo for desktop is a nifty piece of editing software that rivals Photoshop, all for a one time payment of $ 50.

    In our review of Affinity Photo, we found the software more than capable at handling the majority of our re-touching tasks. Editing is mostly non-destructive and there are tools for batch processing, Raw processing, tone mapping, creating panoramas and focus stacking. Plus, if you’re coming from Photoshop, the learning curve is pretty shallow.

    Affinity Photo for desktop is available for both Mac and PC.

    Polaroid OneStep 2

    Polaroid OneStep2 + i-Type film pack | $ 146 | PolaroidOriginals.com

    The ultimate treat yourself: Take a step back from the technical nitty-gritty of this modern digital world and try shooting just for composition – it can do wonders for your creative spirit. To get into this mindset may we suggest one of the coolest instant cameras on the market, the Polaroid OneStep2?

    The OneStep2 is a modern rebirth of the classic Polaroid OneStep. The controls on this camera are purposely limited: there’s a shutter button, a flash on button and a self-timer. It shoots Polaroid i-Type film which is similar to the original Polaroid 600 film and substantially larger than the Instax film offered by Fujifilm.

    The camera itself is pretty affordable ($ 100), but it’s the film cost that’ll get you – at ~$ 2 a shot it’ll definitely have you shooting decisively. Nothing wrong with that!

    Sandisk Extreme 500 portable SSD 500 GB

    Sandisk Extreme 500 portable SSD 500 GB | $ 170 | ShopSandisk.com

    This tiny portable SSD drive is both drop-proof and weather-proof and it weighs less than 80g. For the traveling photographer with limited space, it’s an invaluable piece of gear – one that won’t fail if dropped or knocked around. It also offers super fast transfer speeds and runs cool and quiet.

    So treat yourself and your data to peace of mind and pick up what we consider to be the most sensible rugged hard drive currently on the market.

    Ricoh Theta V

    Ricoh Theta V | $ 430 | us.Rioch-Imaging.com

    360-degree photos and videos are pretty darn cool and the technology required to make decent looking 360/VR content is finally coming down in price. Why not get in on the fun and treat yourself to one of the nicest stand-alone 360-cameras on the market in the form of the Ricoh Theta V?

    We’ve found found the Theta V to be both easy-to-use and capable of impressive quality stills and video. It offers 4K video capture and shoots 14MP stills. Connectivity and audio capture have both been improved over the previous model, and the camera itself has a slick, Apple-like design.

    Olympus Tough TG-5

    Olympus Tough TG-5 | $ 450 | Get.Olympus.com

    The budget compact may be dead but the rugged compact is still very much alive. And the Olympus Tough TG-5 is a DPReview favorite. We already recommended it as a great gift option for others, but if you’re into outdoor activities it’ll make a great compact option alongside your main camera. In fact, DPR’s Carey Rose deemed it the ‘best rugged compact you can buy right now,’ based on his shooting experience.

    The camera offers a 25-100mm equiv zoom lens and the body is completely sealed, making it waterproof down to 50ft, drop proof from 7ft, crush proof up to 220lb and freezeproof to 14F. It also shoots Raw and is capable of surprisingly good image quality. Other features include 4K video capture and 20 fps burst shooting.

    There’s something to be said for a go-everywhere-camera that you don’t have to worry about dropping, breaking or soaking. And there’s none we’d recommend over the Olympus Tough TG-5. Treat yourself!

    Sony RX100 V

    Sony Cyber-shot RX100 V | $ 950 | Sony.com

    Speaking of compacts, the Sony Cyber-shot RX100 V is arguably the most advanced high-end pocket camera to ever exist, jam packed with a dizzying array of technology and features. The creme de la creme of small cameras, for many it is a want-to-have, not a need-to-have. To that we say… treat yourself!

    It’s got a useful and sharp 24-70mm equiv. F1.8-2.8 zoom lens and can shoot at up to 24 fps with AF and auto exposure. Plus, it uses an impressive 315-point phase detect AF system. But that’s not all: it’s capable of outstanding 4K video and class-leading stills. The RX100 V also offers built-in Wi-Fi, a pop-up electronic viewfinder and a pop-up flash (read our full review).

    The RX100 V has come down a tiny bit in price since launch, but if it’s still too expensive, you should consider some of the other also excellent, but more affordable RX100-series cameras.

    Fujifilm X100F

    Fujfilm X100F | $ 1300 | Fujifilm.com

    We’ve enjoyed using every camera in the Fujifilm X100-series, and the X100F is the latest and greatest iteration. A beautifully-designed, retro-looking camera, the X100F offers a fixed 35mm F2 equiv. lens and tons of direct controls.

    The X100F gains a higher-resolution 24MP sensor, an AF joystick and improved AF performance. We especially like the hybrid optical/electronic viewfinder. And unsurprisingly, we gave the X100F a gold award in our review.

    In short, we think it’s among the nicest-designed compact cameras around and a great companion for travel, or documenting friends and family. So treat yourself to retro-elegance in this fixed-lens beauty.

    Canon 85mm F1.4L IS USM

    Canon 85mm F1.4L IS USM | Canon.USA.com | $ 1600

    If you’re going to buy a portrait lens, you might as well buy one of the nicest primes released this year. We’re talking of course about Canon’s new 85mm F1.4L IS (see our sample gallery shot with it). Sharp, fast and stabilized, this lens is capably of seriously excellent image quality. It’s also dust and weather-sealed and features a 9-blade aperture.

    At $ 1600, it’s priced pretty competitively, but Sigma’s stabilized 85mm F1.4 is also excellent, and somewhat cheaper at $ 1200.

    Nikon D850

    Nikon D850 | $ 3300 | NikonUSA.com

    Perhaps you already shoot Nikon, but maybe you are invested in another DSLR system, or you shoot mirrorless. Regardless of the camera your are currently shooting with, we’d urge you to take a look at the best DSLR currently on the market: the Nikon D850. As we stated in its gold award winning review…

    ‘Offering an impressive 45.7MP of resolution, 7fps burst shooting, full-width 4K video and a focusing system derived from the flagship D5, it looks as though Nikon’s thrown just about everything they’ve got into the D850, and priced it well to boot. Competitors with similarly specced megapixel counts such as the Sony a7R II and Canon EOS 5Ds R may be cheaper at this point in their lifetimes, but they also fall short of the D850 in a number of ways that may make a difference in the way you shoot.’

    If that doesn’t have you convinced the Nikon D850 is the ultimate treat yourself purchase, maybe our sample gallery will.


    That’s all the self-gifting advice we have for you this year. We certainly don’t expect you to pick up everything on our list, but hopefully there is something here that’ll make you, or a special someone smile.

    Articles: Digital Photography Review (dpreview.com)

  • Tips for Aerial Photography from Small Planes and Drones

    At its heart, good photography is about showing people views of the world they would not otherwise see. That might be; places your viewers have not visited, impossible ways of seeing to the human eye such as long exposures and night photography, but most often this novelty comes in the form of a different perspective. Even familiar scenes and objects can make compelling photographic subjects if we are willing to explore them from new angles.

    Tips for Aerial Photography from Small Planes and Drones

    Aerial photography is one of my favorite ways to provide that novel perspective. I’m fortunate to spend a lot of time in small planes. My life in Alaska is full of flights in bush planes to remote places in the state. While only occasionally do I fly specifically to make aerial images, I find simply going to and from different locations provides ample opportunity.

    The second way I frequently use to access an aerial perspective is by flying drones. While both techniques get me the elevation I want, the photographic experience is very, very different. The two methods, planes and drones, require very different ways of thinking about image-making.

    Tips for Aerial Photography from Small Planes and Drones

    Here are a few tips to improve your aerial photography images, whether you are shooting from a plane or using a remote drone.

    Airplanes

    While big passenger jets are great for getting us from one place to another quickly, they are lousy photography platforms. Sure, I’ve made some images from jet windows, but they inevitably follow the same formula. There’s an airplane wing in the foreground with some sunset or mountain beyond. It gets old. Plus the perpetually fogged or scratched windows will destroy your image quality. Except for the occasional phone snap, I rarely bother with it anymore.

    Small, single-engine planes, however, are a different story and can be an amazing platform for creative aerial photography.

    Tips for Aerial Photography from Small Planes and Drones

    Sharpness

    Attaining a sharp image is a major challenge because airplanes are vibration-filled nightmares. Here are four things to help you improve sharpness:

    1. Use a fast shutter speed. I like anything over 1/1000th of a second.
    2. Don’t brace your lens or arms on the plane. Hold your camera and elbows free of the window. If you touch the plane, the vibrations will be transmitted straight into your camera. I tuck my arms against my sides and hold the lens an inch or so away from the window glass.
    3. Focus at infinity. I often shoot manual focus from the air and pre-set my focus point to infinity. Everything you are seeing from the air will be in focus when the lens is set to infinity, so don’t even bother with autofocus.
    4. Shoot wide open. The depth of field is not a problem from a 1000 or meters from your subject. So a take advantage of the extra shutter speed provided by your fastest f-stop.

    Lens Choices

    Tips for Aerial Photography from Small Planes and Drones

    When flying 100+ mph at low altitude, the landscape passes very quickly. If you don’t act quickly, you’ll miss the shot. That’s why I like zoom lenses for aerial photography. I can quickly compose with different focal lengths, without having to change lenses or cameras. I favor a wide to moderate zoom. A 24-105mm or similar lens is about right.

    Communication

    Usually, in a small plane, you’ll be in direct communication with your pilot, who might be willing to help you out with your photography. When I’m flying over something interesting, but a wing or strut is in the way, I’ll often simply ask the pilot to tip a wing one way or another. Pilots are often happy to accommodate you.

    Tips for Aerial Photography from Small Planes and Drones

    You can also ask them to make slight turns, or even circle if there is something particularly compelling. If you’ve chartered a flight for photographic purposes, feel free to ask for what you want.

    I recommend talking to your pilot ahead of your trip to discuss what kind of images you want, and how he or she might be able to help you. If it is a photography-specific flight, you may even be able to remove windows or doors from the plane.

    Tips for Aerial Photography from Small Planes and Drones

    Remember your pilot is the final judge of what is acceptable in terms of safety and time. If they say they can’t do something, they can’t. Don’t push them into something with which they aren’t comfortable.

    Composition

    There are almost as many ways to shoot from an airplane as there are from the ground so any discussion of composition runs the risk of leading us deep into the photographic weeds. However, the general rules of landscape photography still apply. Remember depth, foregrounds, and the way lines connect the image.

    Tips for Aerial Photography from Small Planes and Drones

    Some shots from the air could be details of the landscape below, but more often they will be sweeping landscapes. I like to place elements in the frame that guide the eye through; a river, a mountain valley, or a highlight like a lake or patch of colorful ground.

    The altitude at which you are flying will also dictate your options. When making aerial images of mountain environments (my usual subject) I prefer the plane to be below the level of the surrounding peaks. This perspective still provides a sense of grandeur, while maintaining the unique aerial perspective. Ask your pilot if you can fly lower or higher, and they may be able to help you out if conditions are safe.
    Tips for Aerial Photography from Small Planes and Drones

    Drones

    Flying a remote copter or drone is a very different experience from being up high yourself. There are advantages, but also some drawbacks.

    First the drawbacks. Most consumer grade drones limit you to one focal length. Without the ability to zoom or change lenses, most drone shots tend to have the same wide-angle look. To change the scene, you’ve got to move the drone. Drones also have limited ranges, elevation capabilities, and at times, limiting regulations.

    Tips for Aerial Photography from Small Planes and Drones

    Some locations, like national parks in the United States (and many other countries) are off-limits for drones. Range limitations also mean that you have to get yourself close to your desired subject. So if you want to make images of some remote, or difficult to access location, you’ll still have to do it on the ground.

    The advantages, however, are many. Cost is a big one. For the price of a couple hours charter of a small plane, you can buy a decent drone, literally. Flexibility is another. If you want to go make some aerial photos, you simply do it, no waiting around for a pilot or plane charter. If the light is right, you just go fly.

    The biggest advantage for me, though, is composition flexibility. You can create an image from a few meters off the ground, to a couple hundred. You can also spend the time necessary to get the composition right. The drone sits still when you want it to, or you can adjust to your heart’s desire.

    Composition

    I like to fly my drone fairly low. I find the combination of altitude and wide angle lenses make everything look less dramatic and smaller if I’m flying too high. 20-30 meters off the ground is probably my favorite height, but of course, it varies on where I’m flying and the image I’m creating.

    Remember to take advantage of the many camera angles drones allow. Shooting straight down is almost impossible from a plane. But with a drone, it’s as easy as angling your camera.

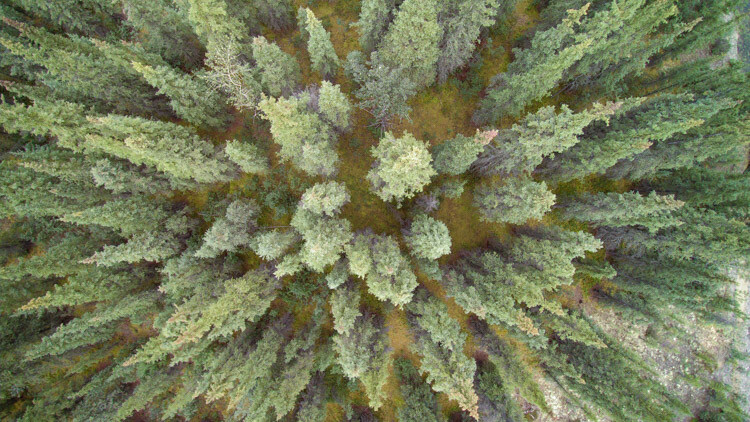
    Playing with lines and patterns is a drone specialty, so take advantage of the way the world looks from above. Play with dividing your images into parts using the natural variations in the landscape. Trees from above, for example, create a starburst pattern, not a typical way humans see a forest!

    Tips for Aerial Photography from Small Planes and Drones

    The flexibility provided by drones is extraordinary. Don’t be afraid to experiment with aerial images of places a plane could never fly.

    Drone Warning

    Follow the rules! Flying a drone in a dangerous area like around airports, or at the scene of an emergency is not only irresponsible it can be life-threatening. Be aware of the laws surrounding drones, and fly only in areas where it is allowed, and at permitted elevations.

    Lastly, be respectful of others. Don’t fly over private property if you don’t have permission, and be aware of how your flight is impacting the experience of others. Simply put, don’t be a jerk.

    Tips for Aerial Photography from Small Planes and Drones

    Conclusion

    Aerial photography is a gateway to new ways of seeing. Whether you are shooting from the passenger seat of a Cessna or from your phone screen using a drone, there are abundant opportunities to make new and exciting images. Explore it and share with me what you make!

    The post Tips for Aerial Photography from Small Planes and Drones by David Shaw appeared first on Digital Photography School.


    Digital Photography School

  • 10 pictures from Fat Bike Riding in Northern Colorado

    I enjoy a variety of outdoor activities. Of course, paddling in different flavors (SUP, kayak, canoe, packraft) comes first. It includes long distance racing. But, there is also biking, hiking, inline skating, drone flying and 4WD driving. The common theme […]
    paddling with a camera

  • New Ayesha Curry, Michael Mina San Francisco Hot Spot International Smoke, A Contemporary Take on Barbecue

    International Smoke
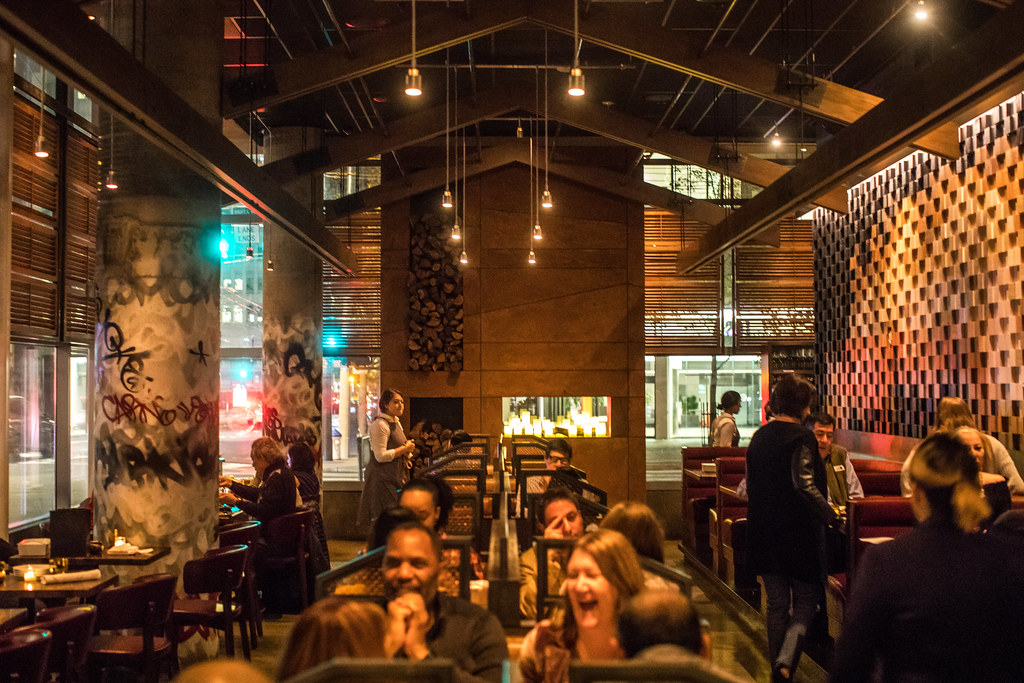
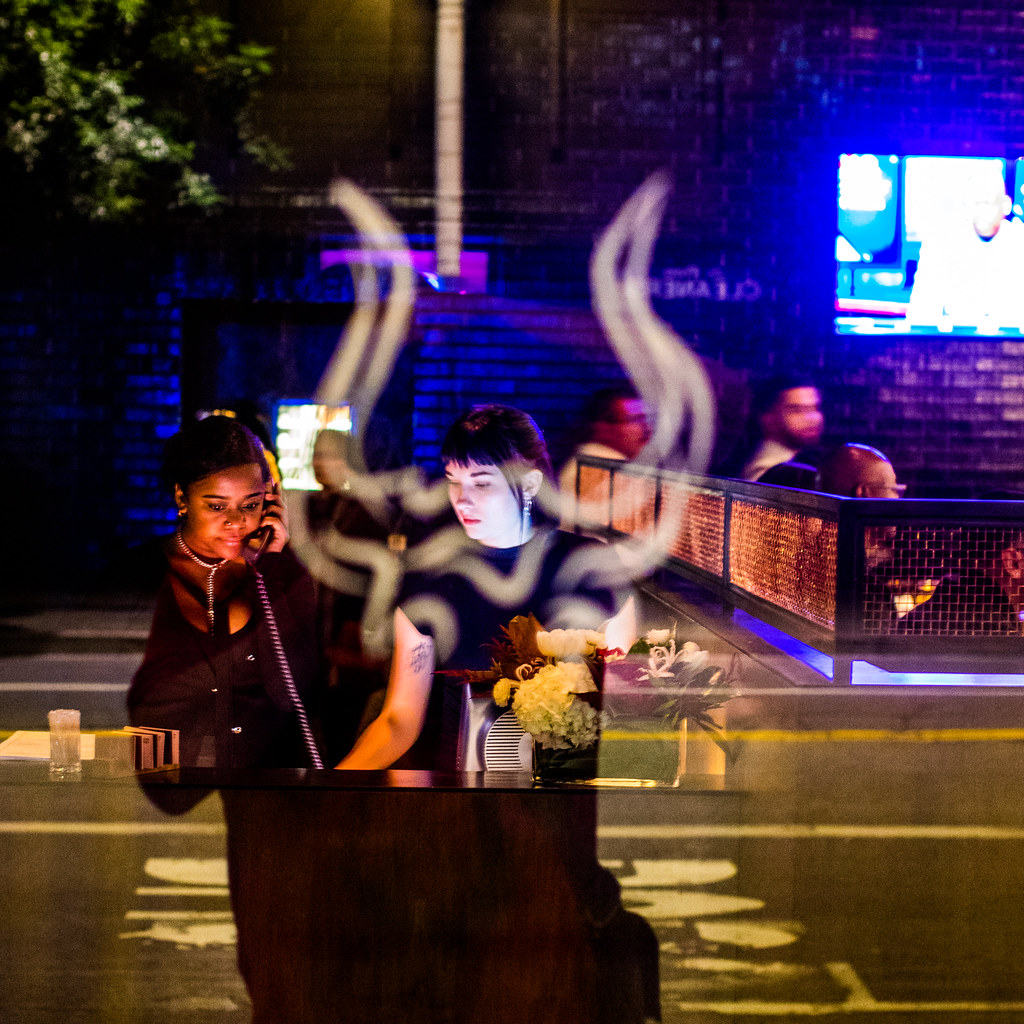
    International Smoke, San Francisco’s newest restaurant in the lobby of the Millennium Tower

    International Smoke

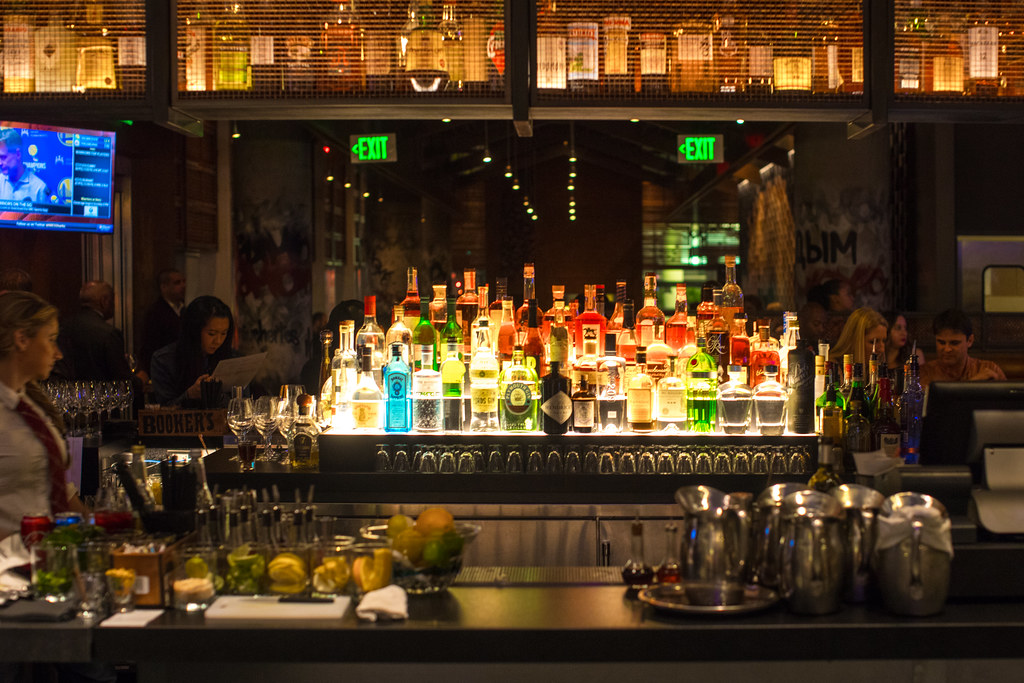
    Last night mrsth, the four kids and I had the opportunity to dine at San Francisco’s newest restaurant hot spot from celebrity chefs Ayesha Curry and Michael Mina, International Smoke. The restaurant is the latest lobby tenant in the great leaning tower of Millennium at 301 Mission Street in San Francisco’s SoMA district.

    Only a week old, International Smoke is already solidly booked for months. The good news though is that they take walk ins at the bar and have several tables that can seat up to six in the bar. Before getting into my thoughts on the food, I will say that with a big family (six of us) one of my frequent disappointments is when too many diners are crammed into a small table at a bar. In the case of International Smoke this is not the case for their 6 tops. They are large, roomy and comfortably accommodated our large group. There are also several 4 tops in the bar and of course you can also dine seating at the bar itself. We luckily got the last table in the bar last night just before dinner service started at 5:30 pm.

    The bar also has several televisions which can be viewed from almost every seat and which were appropriately tuned in last night to the Warriors 124-116 win over the Philadelphia 76ers during dinner.

    Although barbecue features prominently on the International Smoke menu, it would be misleading to call it a “barbecue” restaurant. While definitely a place for carnivores, the barbecue has a more modern and international presentation and the menu also includes many non-barbecue offerings.

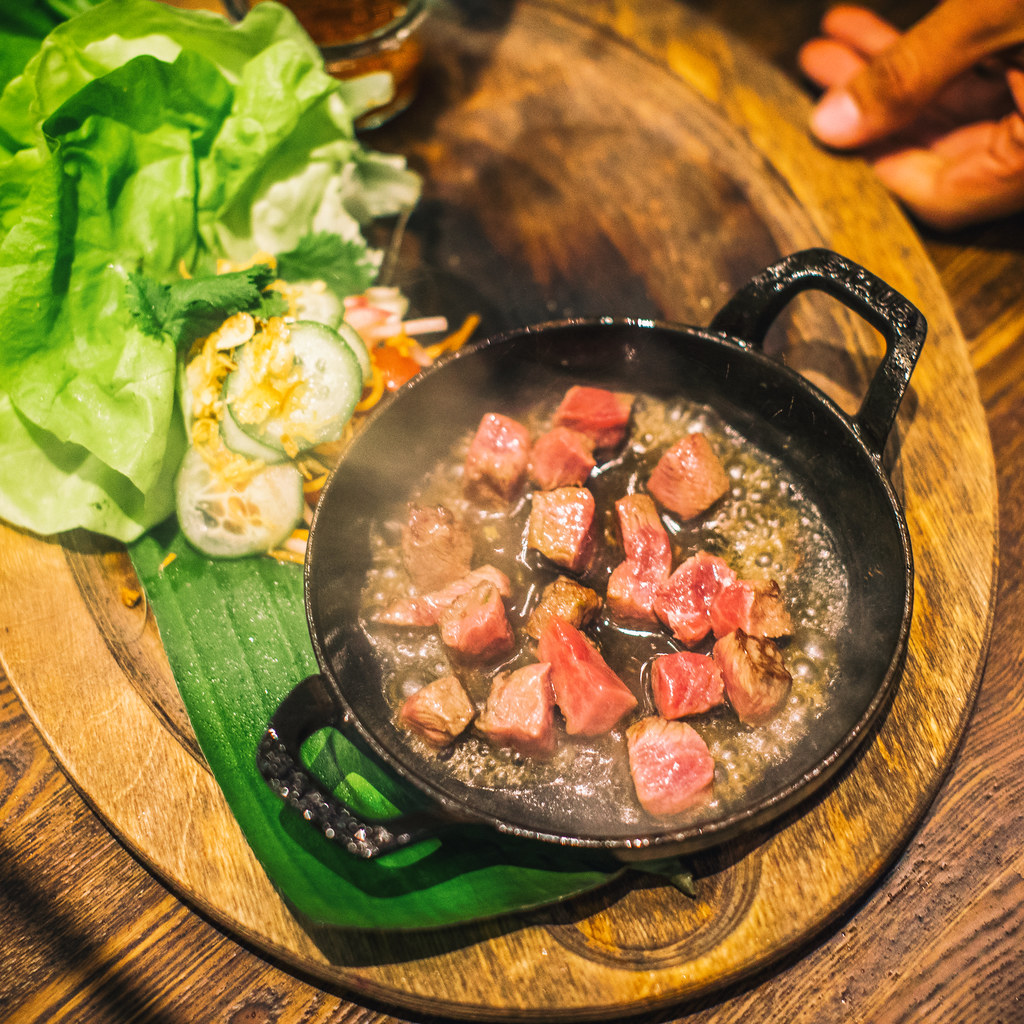
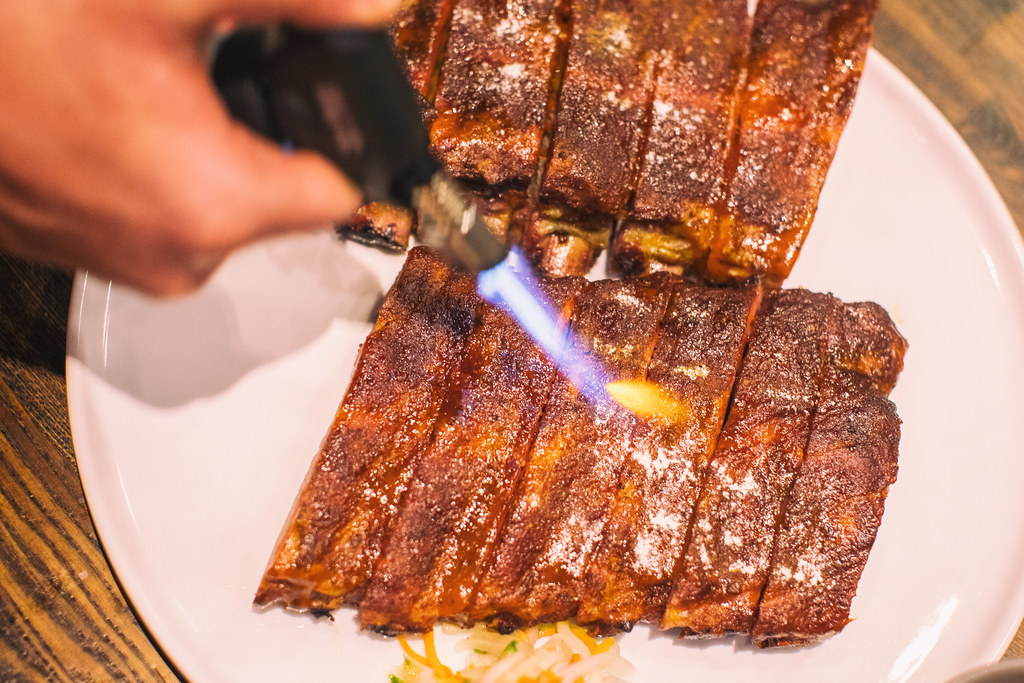
    Many of the offerings are also fairly theatrical in nature, not quite what you’d find at say Edith’s down in Cabo San Lucas, but they incorporate smoke prominently to give you your fun little dinner show to go along with the food. In addition to serving two of our dishes (the smoked burrata and instant bacon) in glass encased smoke filled canisters, they prepare the Wagyu Shaking beef in a hot skillet tableside and use a cooking torch to caramelize the sugar while serving the ribs. It’s always nice to get a little extra pizzaz at the table when taking the kids out.

    So let’s get into the cocktails and food.

    I started off the evening with the Curry Up Now cocktail, because, well Steph Curry right? Plus I like bourbon. The drink is made with Wild Turkey 101 Bourbon, Madras Curry, Amontillado Sherry, and Corazon Bitters. It was served in a beautiful Waterford crystal style tumbler over one of those giant ice cubes you get at fancy bars these days. Although I’m not sure that Steph drinks one of these things every day at cocktail hour, it was a well balanced, slightly sweet bourbon based cocktail and it worked just fine for me.

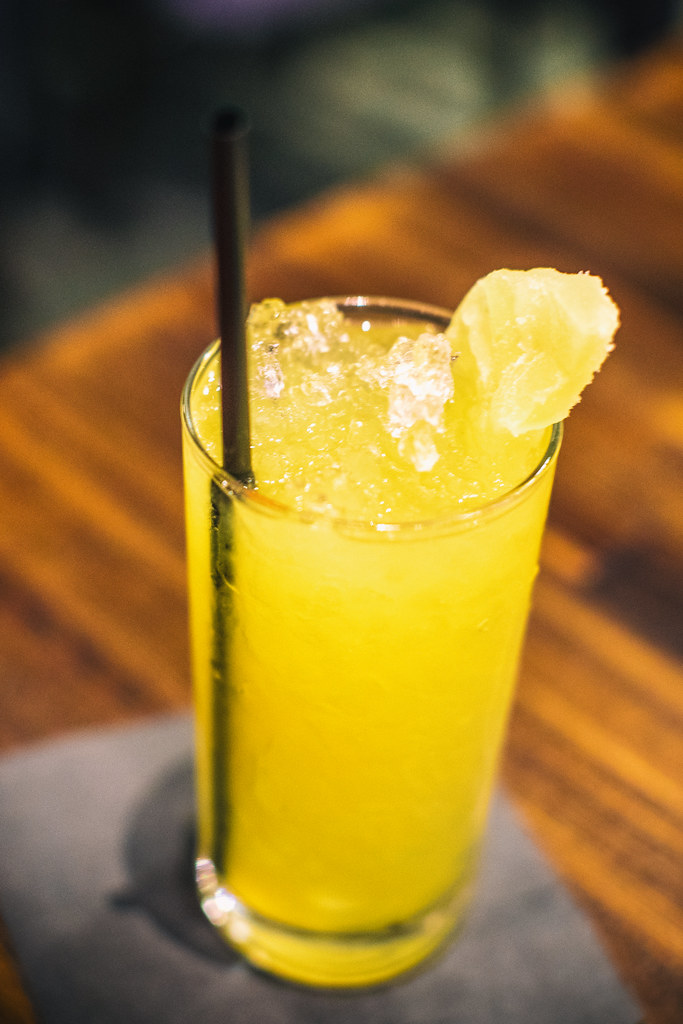
    We also tried the Rhinestone Cowboy, made with Hangar One Kaffir Lime Vodka, Espolòn Blanco Tequila, and Coconut Calamansi, refreshing served over that nice soft crushed ice that you also find at fancy bars these days.

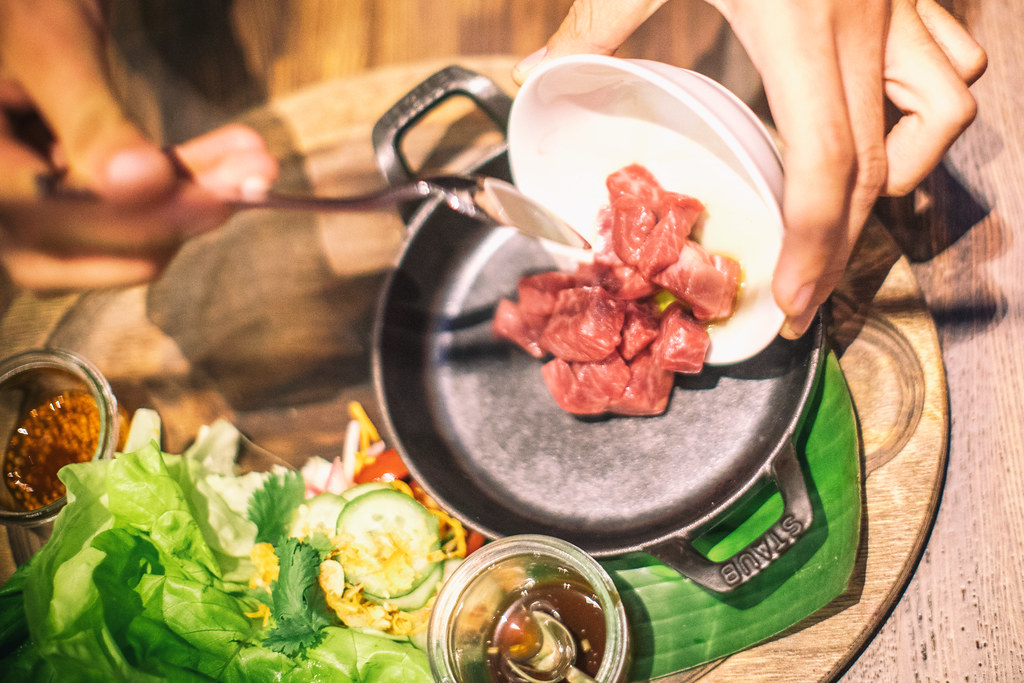
    WAGYU SHAKING BEEF, International Smoke
    International Smoke’s Wagyu Shaking Beef

    International Smoke
    International Smoke’s Wagyu Shaking Beef

    Our first dish was the aforementioned Wagyu Shaking Beef, cooked in that black hot skillet tableside. It comes with lettuce and you make little lettuce wrap taco like things. This was a favorite. The beef was delicious, cooked slightly rare and very juicy. They added a marinade to the beef as it was cooking. It’s Wagyu so it’s bound to be tasty, but as expected for things labeled Wagyu, it’s also expensive and you wish you got a lot more of it. I would probably order this again, and probably again, and again.

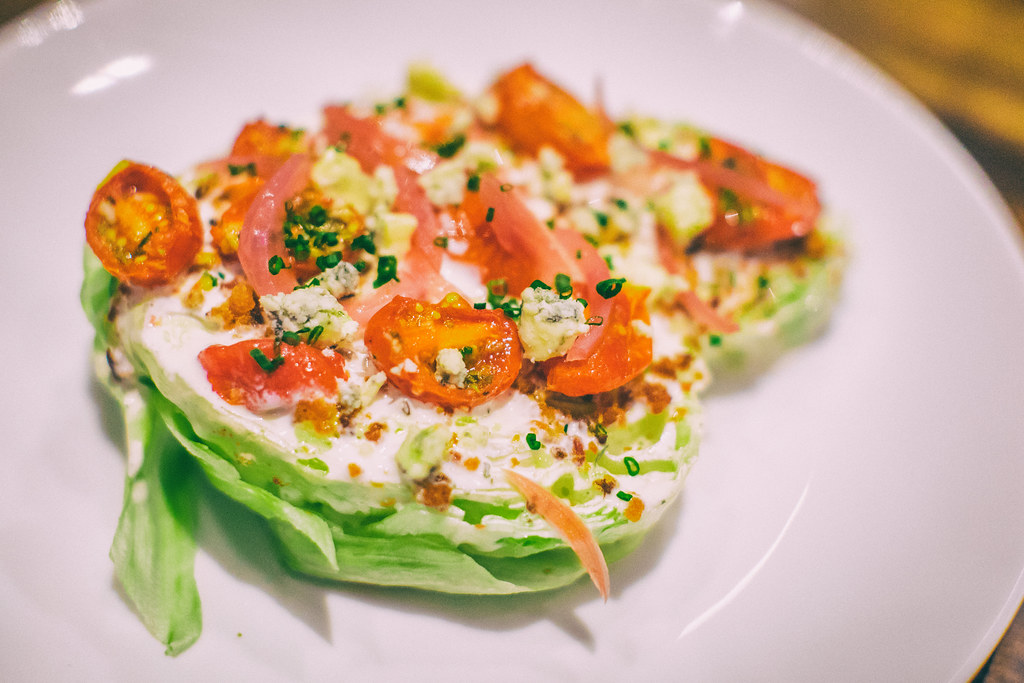
    Classic American Wedge, nternational Smoke

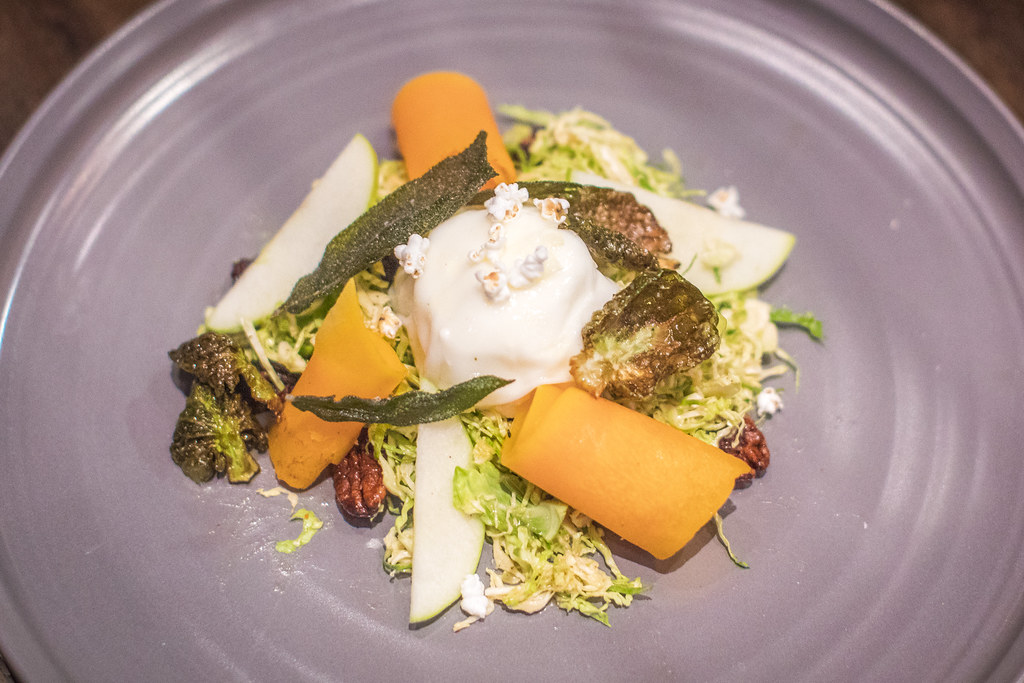
    Smoked, Burrata, International Smoke

    Next up was International Smoke’s take on an all time classic, the wedge salad. It’s prepared cut in half with everything served up on top. Again, a little small, but delicious and a beautifully balanced mixture of dressing, bacon, onions and tomatoes.

    The burrata was served at the same time as the wedge and came in the previously described smoke filled canister. The aha moment comes as the canister lid is lifted and the smoke disappears into the air, leaving you with a very creamy piece of smoke flavored cheese. The brussel sprouts went well with the cheese and it was a nice bit of salad before getting into the meats.

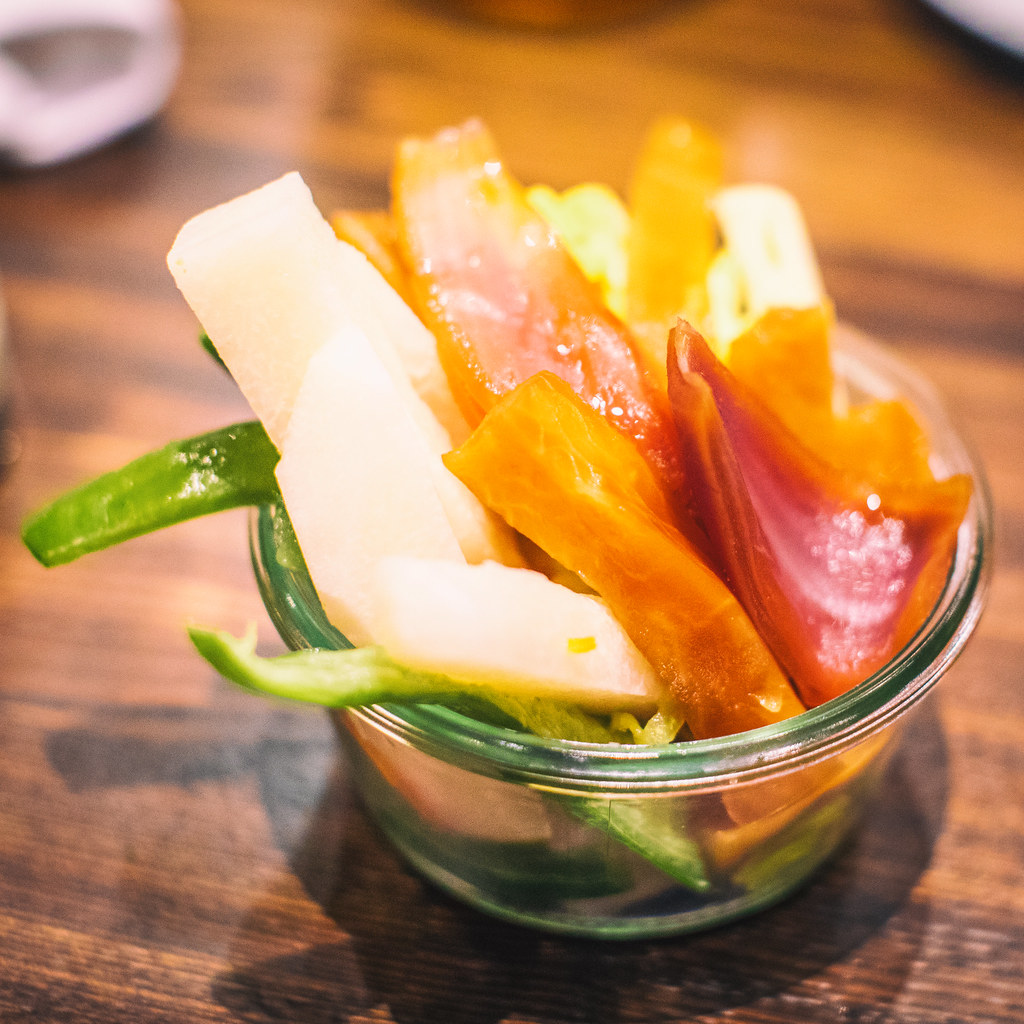
    We also ordered a mixed pickle jar which is a myriad of pickled vegetables. At $ 6 it felt like a bargain on the menu and if you like pickled veggies I’d recommend it. I liked the pickled onions the best.

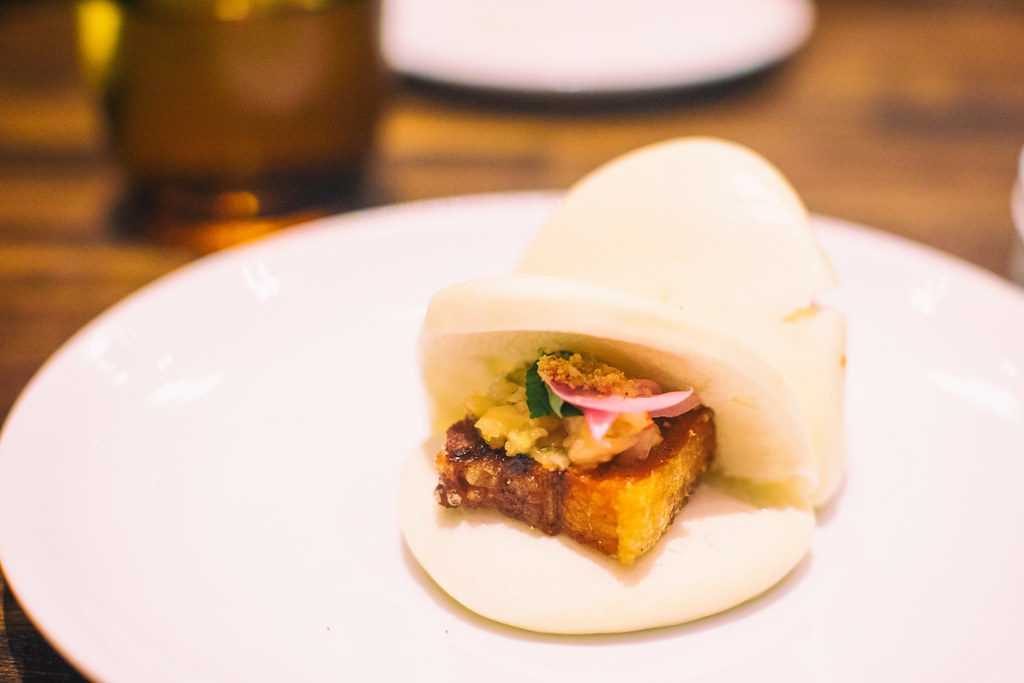
    Kalua Style, Instant Bacon, International Smoke
    The big reveal, Kalua Style, Instant Bacon, International Smoke

    Kalua Style, Instant Bacon, International Smoke
    Kalua Style, Instant Bacon, International Smoke

    The Kalua “Instant Bacon” is more like a pork bun than anything, served in another one of those smokey canisters with the big reveal — a very rich piece of pork served in a bun — again very tasty, but two to a plate a bit on the small side.

    Smoked Pork Shoulder, International Smoke
    Smoked Pork Shoulder, International Smoke

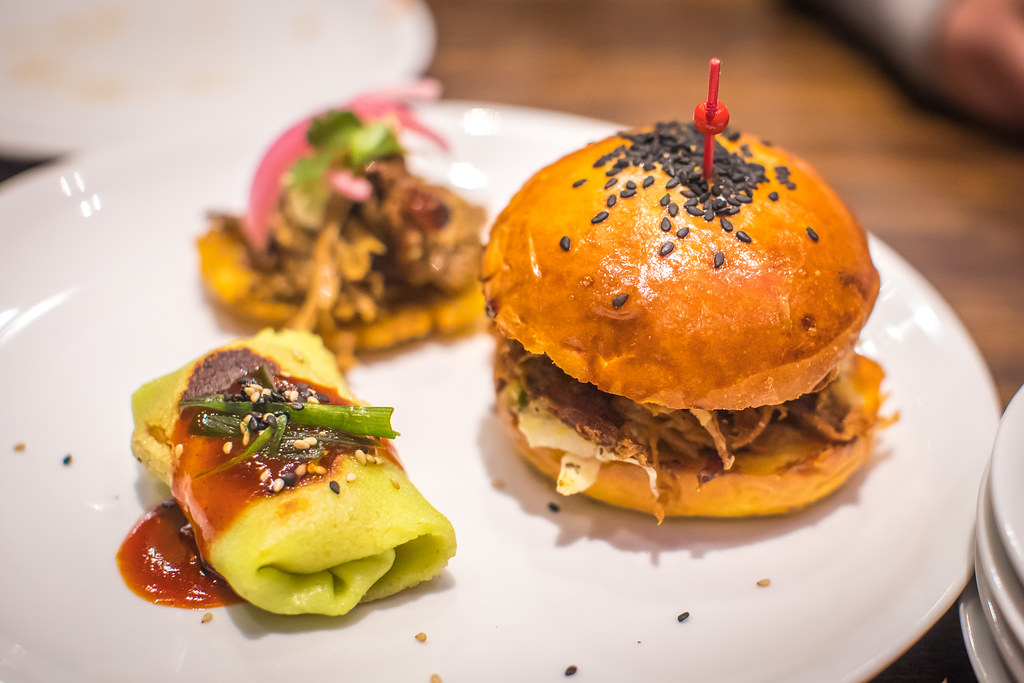
    We tried two orders of the Trio Sampler smoked pork shoulder. This consisted of an American pulled pork slider, Cuban Mojo Tostones and Korean Scallion Crepes. The American pulled pork slider was the favorite (especially with the kids) but I liked the Cuban Mojo Tostones the best myself. I did not care for the Korean Scallion Crepes.

    Double Duck Wings, International Smoke
    Double Duck Wings, International Smoke

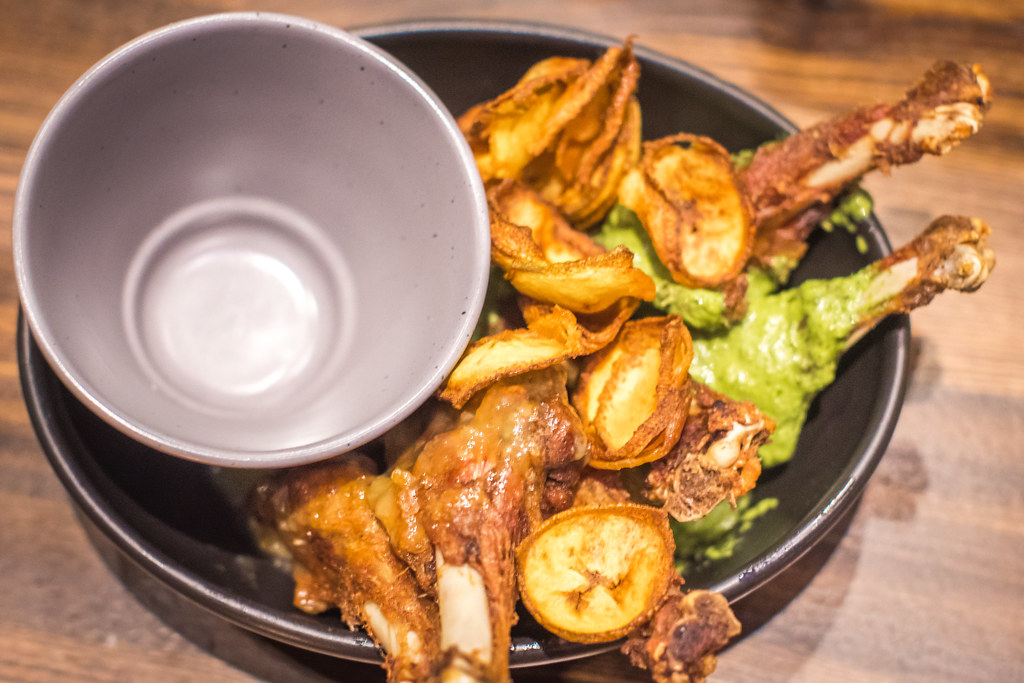
    The double duck wings were up next. These were ok but my least favorite dish of the evening. They were pretty basic and a bit bland. The sauce they came in was tasty and interesting, but I would not order this again. We didn’t eat most of this dish and took it home with us in a box. I tried it again for breakfast this morning and it tasted a little better cold, but still not a favorite.

    Smoked Pork Ribs, St. Louis Cut, International Smoke
    Smoked Pork Ribs, St. Louis Cut, International Smoke

    Up next was the main event, a full slab of the smoked pork ribs. As previously mentioned, they bring these out with a cooking torch and torch the sugar on the ribs right there tableside. As far as ribs go these were perfectly adequate but nothing spectacular. The ribs probably had too high a bar to live up to in my mind though. When I read “St. Louis Cut” on the menu the only thing I could think about from then on was how much I love the ribs at Pappy’s in St. Louis. Those juicy, beautiful bone dripping ribs at Pappys, or if not Pappy’s at least all of the great sauces at St. Louis’ latest downtown barbecue spot Sugarfire with one of the best neon signs ever.

    International Smoke’s ribs were just fine, but they were not as good as what you’d get at the best spots in St. Louis, or Kansas City, or Texas or Alabama. Again, I’m spoiled having experienced some spectacular barbecue over the years though. I probably should have known San Francisco celebrity chefs would be no match for hardcore pitmasters who’ve been doing their thing for 30 years.

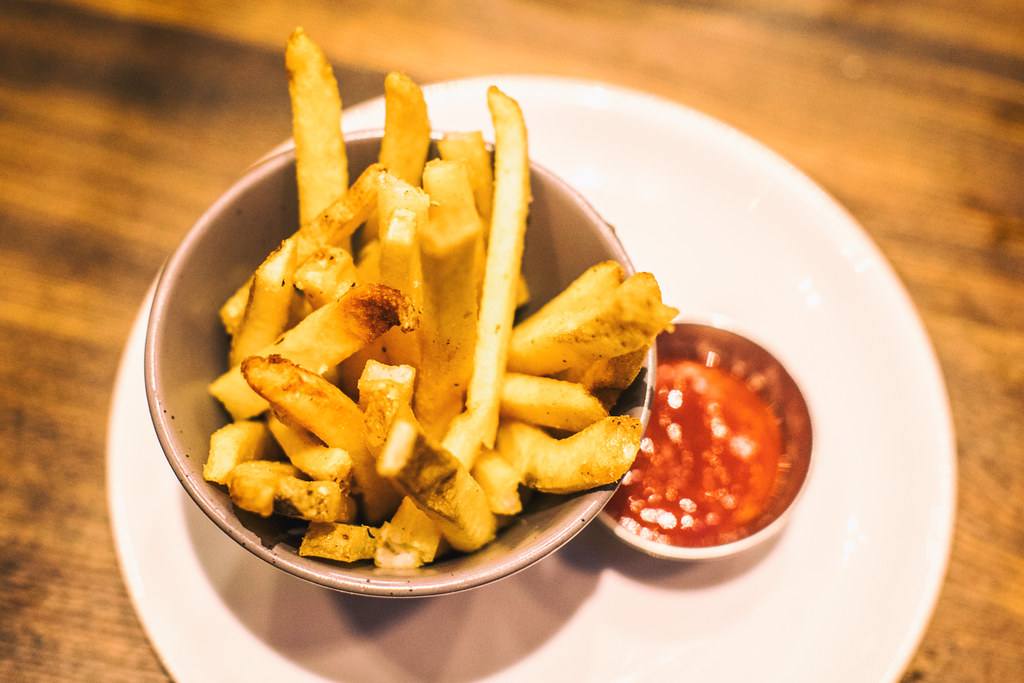
    Along with the ribs we ordered the french fries, which were pretty much the same basic fries you’d get anywhere and three sides of the mac and cheese.

    Smoked Rib Tip Mac and Cheese, International Smoke
    Smoked Rib Tip Mac and Cheese, International Smoke

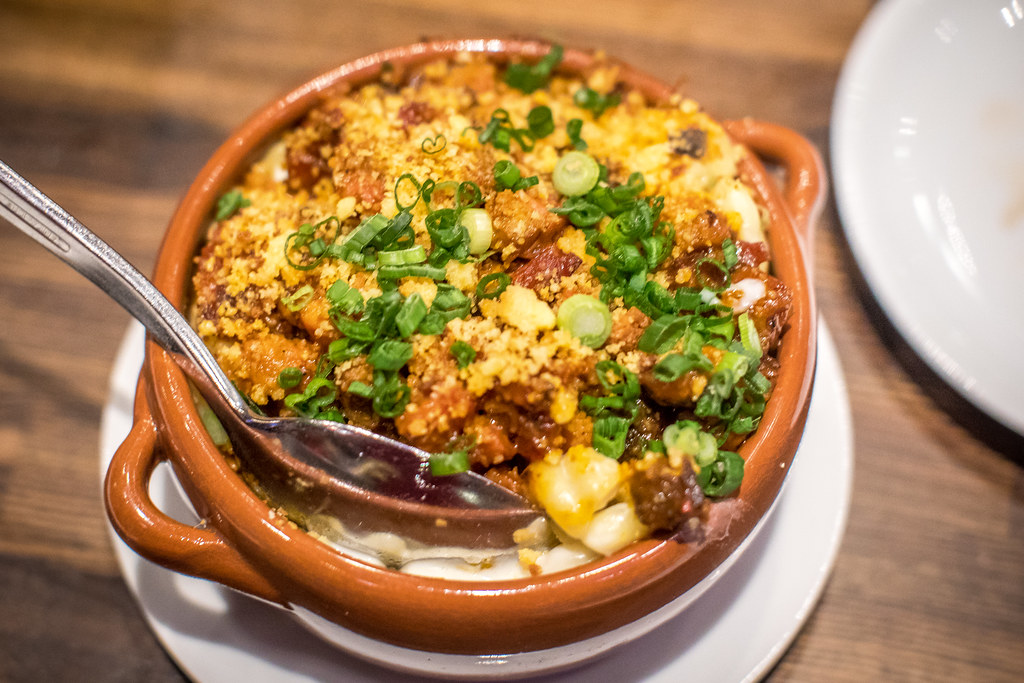
    The mac and cheese was interesting — actually it was my favorite dish of the evening, but I’m a big mac and cheese fan. It’s served with rib tips and cornbread crumble on top. It was very good. I was very happy with this dish… but… would I rather have International Smoke’s mac and cheese or the buffalo chicken mac from Homeroom? See, again, it’s a high bar in my opinion, so while I was perfectly happy with this dish it was probably doomed from the start in my mind.

    Anyways, there you have it. We ordered too much food for dinner so didn’t have room for dessert. Apparently my youngest daughter Kate was promised ice cream earlier in the day, however, so we stopped by Fenton’s on the way back home to pick up a half gallon of toasted almond. I’m sure International Smoke’s ice cream is probably just fine, but I doubt they hold a candle to Fentons. ?

    More on International Smoke from Business Insider, SF Eater and the San Francisco Chronicle.

    International Smoke
    Bar at International Smoke

    Curry Up Now, International Smoke
    Curry Up Now cocktail

    International Smoke
    Front desk at International Smoke

    Rhinestone Cowboy, International Smoke
    Like a Rhinestone Cowboy

    Mixed Pickle Jar, International Smoke
    Pickles at International Smoke

    French Fries, International Smoke
    French Fries, International Smoke


    Thomas Hawk Digital Connection

  • Full Frame or APS-C for Wildlife Photography – Which is Best?

    Choosing between a full frame or cropped sensor camera for wildlife photography can be a tough decision. Both options offer their own benefits, so choosing between the two can cause quite the headache. Lots of photographers have their opinions, but choosing what’s right for your own use will largely come down to your personal style of shooting. So let’s break it down.

    FX full frame and APS-C - Full Frame or APS-C for Wildlife Photography - Which is Best?

    The Basics

    Most modern camera companies use either full frame or APS-C (crop) type sensors in their DSLR (and mirrorless) cameras. The former is often classed as the professional standard, with the sensor size being a close replica to that of a 35mm film negative.

    APS-C on the other hand, is roughly two thirds the size of a full frame sensor, resulting in the field of view being multiplied by a factor of 1.5-1.6x that of a standard full frame model. These sensors feature mostly in the lower tiered offerings by camera companies, with the chips being less expensive to produce.

    Full Frame or APS-C for Wildlife Photography - Which is Best?

    Working with APS-C means you can travel lighter.

    Crop Factor

    For APS-C models one of the largest benefits for wildlife photographers is that of the additional crop factor. The 1.5-1.6x magnification of your optics can be hugely beneficial when working out in the field, trying to photograph small birds or distant wildlife.

    The crop factor also allows you to get a similar angle of view with a far smaller lens, helping to reduce the gear you need to carry while still giving you great telephoto reach. This is something a lot of photographers find as a huge benefit, as they can minimize the size and weight of the gear they need to carry out into the field.

    For example, a 70-200mm lens on a 1.5x crop-factor body gives you the equivalent of a 105-300mm lens. A perfect compact wildlife setup.

    APS-c cameras crop factor can be a great benefit for wildlife photography - Full Frame or APS-C for Wildlife Photography - Which is Best?

    APS-C cameras crop factor can be a great benefit for wildlife photography.

    ISO Sensitivity

    One of the large benefits of a full frame camera is that of better image quality when shooting at high ISO. The larger sensor means in the individual pixels (and light sensitive photo sites) are larger than those on an APS-C type camera. This means as a general rule they are more sensitive to light, allowing cleaner noise-free images at high ISO settings, something that is fabulous when trying to work and photograph wildlife in low light conditions.

    Now with modern sensor advances, APS-C models of the past few years have come up leaps and bounds in terms of ISO performance – easily being useable to ISO 6,400. But, if low light usability is key for the subjects you’re working with, a full frame camera is still king.

    Full Frame or APS-C for Wildlife Photography - Which is Best?

    APS-C cameras can still make great results at a high ISO.

    Depth of Field

    When comparing that of full frame sensors with APS-C models, one extra thing to consider is the depth of field characteristics and how areas are rendered out of focus.

    With the smaller sensor in APS-C models, they give the effect of having a larger depth of field at equivalent apertures when compared to a full frame camera. This means that if you are going after images that render clean bokeh and have a very restricted depth of field to isolate and direct your viewer’s attention to your subject, a full frame model will be better suited.

    Full Frame or APS-C for Wildlife Photography - Which is Best?

    Full frame cameras are great for shallow depth of field effects.

    Of course, if you do a large amount of macro work and want to maximize the depth then an APS-C camera might be right up your alley.

    Resolution

    In the past few years, technology has advanced in resolution steadily, with cameras being introduced that have high 36-42 megapixel sensors. For the most part, ultra high-res sensors have been used in the realms of advertising and commercial photography for years. But of course, now having been brought into DSLRs they offer photographers more flexibility.

    The high resolutions models are mainly full frame sensors, as packing huge numbers of pixels onto small sensors can heavily impact their quality. The FX models that have high resolution offer a unique advantage, as they make the most of the benefits of full frame models, yet offer the ability to crop heavily to replicate the crop factor of those advanced APS-C DSLRs.

    Often a disadvantage is that these high-resolution cameras are slower in terms of frames per second, due to internal data writing limitations. But this is advancing all the time, especially with new forms of storage media offering faster write times.


    Full Frame or APS-C for Wildlife Photography - Which is Best?

    High megapixel full frame cameras offer great all-around performance.

    The full frame camera with a high-resolution sensor can be somewhat of a perfect compromise for those wanting the ISO performance and bokeh rendering benefits of full frame, combined with the ability to crop. Providing, of course, that they aren’t to hung up on needing blazing fast frame per second shooting rates.

    Cost

    One factor that always plays a part when looking to buy new gear is that of cost. Full frame bodies by their nature are more expensive, with the chips inside being harder to engineer and more expensive to produce. APS-C cameras are often found at lower price points, but this depends on the body design and extra features such as speed, construction, and technologies implemented.

    Some full spec APS-C cameras are significantly more expensive than full frame models due to the advanced autofocus features, frame rates, and build quality.

    So what to choose?

    For wildlife photography, it largely depends on your target subjects.

    If you love photographing birds and small creatures, a high-end APS-C body that combines the crop factor with speed will serve you well. The crop factor is also a huge benefit if you want to get a longer telephoto reach without having to shell out for ultra-expensive super telephoto lenses. Meaning you can have a small set up that offers a good compromise for most situations.

    If you want to truly get the best performance and quality, full frame models are where to look. The high-resolution sensors and excellent low light performance make for great image quality. However, of course, you’ll also need to invest in the best optics to make the most of them.

    These are both costly and a large burden to carry around. However, if you want the best quality imaginable that’s what it takes. For those starting out investing, an APS-C model would be my recommendation. Save your funds to buy decent quality lenses, as these will largely make more of a difference to your images than a single stop of ISO or a slightly higher resolution sensor.

    The post Full Frame or APS-C for Wildlife Photography – Which is Best? by Tom Mason appeared first on Digital Photography School.


    Digital Photography School

  • How to Use Framing in an Urban Environment

    Photographers have long developed different classifications to pair with the design and execution of a photograph – lines, shape, texture, light, framing, contrast, just to name a few. For example, leading lines appeal to a viewer’s natural tenancy to trace line into a photograph. Sharp lines are used to grab attention and organic lines create a peaceful atmosphere.

    Other composition techniques like the Rule of Thirds require a photographer to mentally break down an image to evaluate balance. Low and high perspective alter the way a viewer sees the world and symmetrical/asymmetrical elements highlights the quirky beauty of life. The technique we’ll have a quick look in this article, demonstrates the power of framing, especially in an urban environment.

    How to Use Framing in an Urban Environment

    What is framing?

    Framing in photography creates a self-contained image, like a photo-within-a-photo effect. As photographers, we are used to seeing the world through the frame of a viewfinder. We constantly evaluate what we’ll keep in an image and what we’ll exclude. We deliberately apply perspective, aim, zoom and positioning techniques to construct our photographs – sometimes without even noticing.

    By cradling the subject in a balance of space and line, a frame is created, not dissimilar to the photo frames you’d find on your shelf at home.  Essentially, you are crafting a frame within a frame to deliberately bring focus to a subject, adding narrative and the unique experience of voyeurism that photography affords.

    How to Use Framing in an Urban Environment

    How do I frame a photograph?

    For such an effective technique, framing has plenty to offer. It makes use of strong design skills, adding an extra layer to an image to create more depth.  Framing can also be used to obscure more mundane areas of a scene, boosting the efficacy of a photograph when viewed by others.

    Composing an image by making use of framing is fairly straightforward. Start out searching for windows and doors as they are the most abundant frames in an urban environment. You’ll find that windows and doors, when photographed, contain their own little ecosystem within the one image. This is great for capitalizing on both content and narrative, almost like reading a window in a comic strip!

    Frame shapes

    Square or rectangular frames are probably the first things that leap to mind when someone considers framing. Doorways and windows are a great way for emphasizing a subject or depth, but they are not the only options and framing is not limited to squares or rectangles.

    The image below proves how versatile the urban environment can be for artificial framing. The image was taken from the floor of a train station, lens pointed to the floor above. The darkness of the building structure is silhouetted against the blue sky, forming a crescent shape. The frame draws attention to the contrast of the architecture against the sky but also cradles the form of a human passing by.

    How to Use Framing in an Urban Environment

    How to Use Framing in an Urban Environment

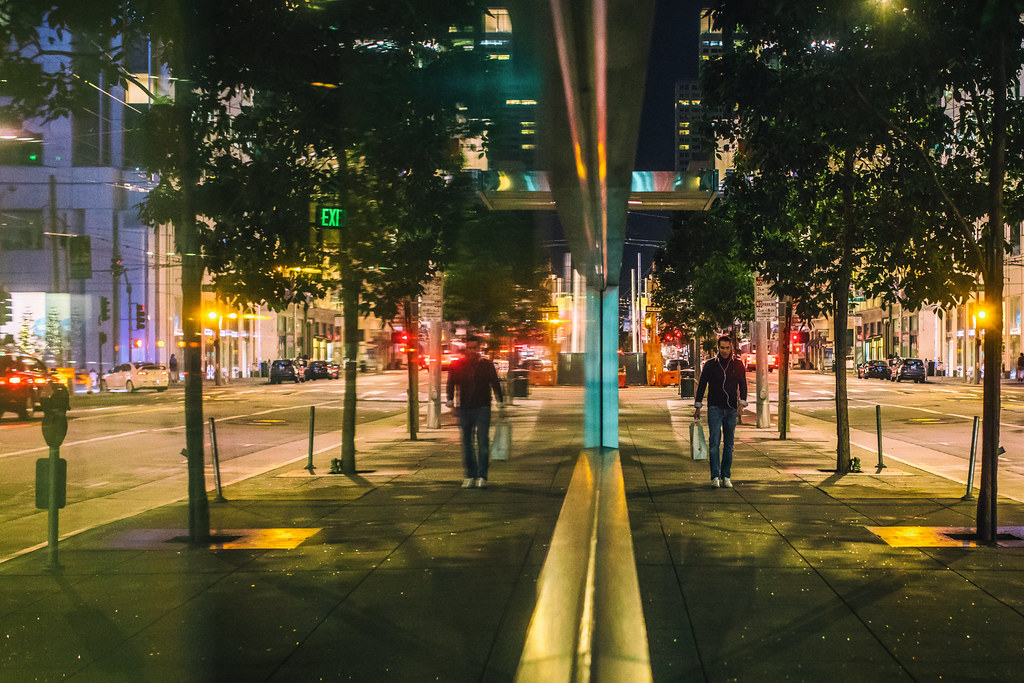
    This photo was taken by chance in a late night shopping district. The framing of the man emphasizes his presence but also isolates him from the rest of the landscape.

    How to Use Framing in an Urban Environment

    For this image, I aimed to align a gap in the cage with the cat’s face. The slight distortion caused by the lens draws the center square closer to the viewer’s eye. Framing isn’t always a split-second discovery, taking the time to assess a situation and respond creatively can be just as effective as shooting from the hip.

    How to Use Framing in an Urban Environment

    Shattered windows in rundown urban landscapes offer beautifully detailed landscapes complemented by an informed framing technique.

    Keep it real

    Framing can be really effective for highlighting specific areas of a photograph. However, it’s important to keep in mind that not every photograph needs framing. Some images are much more effective when they stand alone. Like most photography, you need to be versatile and trust your instincts.

    While lining up a perfect shot through a fence can be effective, make sure to be aware of your surroundings too. Don’t focus so heavily on framing that you sacrifice other photographic opportunities. You don’t need to force a frame on an image, so don’t overthink it. You want natural images that are enhanced by a frame, not poor images that require a frame to garner interest.

    Just stay open to the idea of framing and gather enough experience to recognize a framing opportunity when one presents itself. This way, opportunities tend to reveal themselves rather than you having to force them out of hiding.

    How to Use Framing in an Urban Environment

    How to Use Framing in an Urban Environment

    The branches of these trees act as a natural frame, sectioning up the image to draw attraction to the cute little bunnies within.

    The post How to Use Framing in an Urban Environment by Megan Kennedy appeared first on Digital Photography School.


    Digital Photography School

  • Top 10 sample galleries of the year #6: the Sigma 85mm F1.4 Art

    $ (document).ready(function() { SampleGalleryV2({“containerId”:”embeddedSampleGallery_1444131463″,”galleryId”:”1444131463″,”isEmbeddedWidget”:true,”standalone”:false,”selectedImageIndex”:0,”startInCommentsView”:false,”isMobile”:false}) });

    We’re counting down our top 10 most popular sample galleries of 2017. Our #6 gallery was looked through more than 1.3 million times. So what product attracted this number of eyeballs? Why, the Sigma 85mm F1.4 DH HSM Art lens of course.

    Oh the portraits you will take! This lens is capable of outstanding image quality – read our full review and find out why we gave it a gold award. Not only that, it’s one of the most affordable 85mm F1.4 lens available. So peak through our gallery and see just what all the hype is about.


    Top 10 most popular sample galleries of 2017:

    #10: Sigma 14mm F1.8 Art
    #9: Fujifilm GFX 50S
    #8: Nikon D7500
    #7: Olympus Tough TG-5
    #6: Sigma 85mm F1.4
    #5: To be revealed on 11/20
    #4: To be revealed on 11/21
    #3: To be revealed on 11/22
    #2: To be revealed on 11/23
    #1: To be revealed on 11/24

    Articles: Digital Photography Review (dpreview.com)