Blog

  • 2017 Buying Guides: Best compacts, drones and phones

    Looking for a lightweight compact camera that’s easy to bring with you anywhere? Or maybe you’re smartphone-shopping and want the one that takes the best picture. And what if you want to shoot from above? In these buyers guides we have recommendations for the best compact cameras, smartphones and drones.

    If you want a compact camera that produces great quality photos without the hassle of changing lenses, there are plenty of choices available for every budget. All of the cameras in this buying guide have zoom lenses, with focal length ranges mostly spanning around 24-70mm (equivalent).

    Best pocketable enthusiast cameras


    The long zoom cameras in this buying guide fit into the enthusiast category, meaning that they offer solid build quality, electronic viewfinders and (usually) 4K video capture. All of these long zooms have 1″-type sensors, which slot in between the micro-sensors in phones and cheap compacts, and Micro Four Thirds and APS-C sensors in interchangeable lens cameras.

    Best enthusiast long zoom cameras


    The fixed lens camera market may be a bit niche, but it’s here that you’ll find some of the best cameras you can buy. Sensors ranging from APS-C format to full-frame are designed to match their lenses, so image quality is top-notch.

    Best fixed prime lens cameras


    All of the products in this guide fall into the ‘buy and fly’ category, meaning they require no extra components or customizations. Options range from personal ‘selfie’ drones to advanced models capable of producing professional-grade photos and video. Best consumer drones


    In 2017 phone manufacturers turned to software and computational imaging methods to achieve better detail, wider dynamic range and lower noise levels, as well as high-quality zooming and DSLR-like bokeh effects. We’ve put the latest flagship smartphones through their paces and can point you in the right direction.

    Best smartphone cameras

    Articles: Digital Photography Review (dpreview.com)

  • 2017 Buying Guides: Best cameras for any budget

    Shopping for a camera with a set budget? No problem! We’ve rounded up our favorite cameras, broken them into price brackets from around $ 500 to well over $ 2000 and listed our favorite choices. So, if you want to give that special someone a holiday gift that won’t bust your wallet, we’ve got you covered.

    If you’re looking for a camera for a specific use case, we have plenty of suggestions right here.

    The cameras in this buying guide are light and portable, and several feature selfie-friendly LCDs. Generally speaking, you won’t find a lot of direct controls or a lot of customizability, and 4K video is rare, but for those seeking a point-and-shoot experience with better image quality, these cameras fit the bill.

    Best cameras under $ 500


    The cameras in this buying guide tend to offer more direct controls than cheaper models, better autofocus systems, and some feature 4K video capture as well. Some of them are easy to pick up and use, while others require a bit more work to get the hang of.

    Best cameras under $ 1000


    Cameras in the $ 1000-1500 price range have excellent sensors (some full-frame), advanced autofocus systems and 4K video capture. Expect plenty of direct controls and customizability and, in some cases, weather-sealed bodies.

    Best cameras under $ 1500


    As you approach the $ 2000 price point you’ll find flagship APS-C and Four Thirds cameras, built for speed and durability. You’ll also find a handful of full-frame ILCs and DSLRs, with their own unique selling points.

    Best cameras under $ 2000


    If you’re a serious enthusiast or working pro, the very best digital cameras on the market will cost you at least $ 2000. That’s a lot of money, but generally speaking these cameras offer the highest resolution, the best build quality and the most advanced video specs out there, as well as fast burst rates and top-notch autofocus.

    Best cameras over $ 2000

    Articles: Digital Photography Review (dpreview.com)

  • 2017 Buying Guides: Best cameras for every kind of photographer

    There’s never been a better time to shop for a new camera, but the number of options available can be overwhelming. In this series of buying guides we’ve provided customized recommendations for several use cases, from shooting landscapes to buying a first camera for a student photographer.

    In each of these guides you’ll find one or two main recommendations, and detailed content on several other cameras that deserve your consideration. Our recommendations span product class and cost, but if you’d rather shop by price, click here

    If you’re specifically looking for a compact camera, check out our phones, drones and compacts buying guide hub here


    Maybe you want better photos in low light. Maybe you’re tired of digital zoom. Whatever the reason, if you’re looking for a capable, beginner-friendly camera to grow and learn with, we’ve got you covered in our guide to best cameras for beginners.

    Best cameras for beginners


    Quick. Unpredictable. Unwilling to sit still. Kids really are the ultimate test for a camera’s autofocus system. In this guide we’ve compiled a shortlist of what we think are the best options for parents trying to keep up with young kids.

    Best cameras for parents


    There’s no doubt that the digital revolution made it easier than ever before to pick up a camera and start learning photography. But it hasn’t necessarily gotten easier to choose a first camera. We’re here to help.

    Best cameras for students


    Whether you’re piling the family in the minivan for a trip to the Magic Kingdom or backpacking through Southeast Asia, you’re going to want to capture the experience with photographs.

    Best cameras for travel


    Are you a speed freak? Hungry to photograph anything that goes zoom? Or perhaps you just want to get Sports Illustrated level shots of your child’s soccer game. Keep reading to find out which cameras we think are best for sports and action shooting.

    Best cameras for sports and action


    Video features have become an important factor to many photographers when choosing a new camera. Read on to find out which cameras we think are best for the videophile, at a variety of price points.

    Best cameras for video


    Landscape photography isn’t as simple as just showing up in front of a beautiful view and taking a couple of pictures. Landscape shooters have a unique set of needs and requirements for their gear, and we’ve selected some of our favorites in this buying guide.

    Best cameras for landscapes


    Those shooting portraits and weddings need a camera with a decent autofocus system, which won’t give up in low interior lighting. Good image quality at medium/high ISO sensitivity settings is a must, and great colors straight out of the camera will make your life much easier. These days, video is a big deal too. Read on to see which cameras are best suited to those tasks.

    Best cameras for people and events

    Articles: Digital Photography Review (dpreview.com)

  • Review of the Tamron 18-400mm F/3.5-6.3 DI-II VC HLD Zoom Lens

    Tamron has been specializing in super-zoom lenses for the last few years. You may be familiar with their 16-300mm, 18-270mm or 150-600mm lenses. Their newest super-zoom is an even more astonishing focal length, the Tamron 18-400mm. I recently had a chance to review this lens for a few weeks so I thought I’d give you an idea of who this lens is for, the good, the not-so-good, and my overall recommendation.

    Review of Tamron 18-400mm F/3.5-6.3 DI-II VC HLD Zoom Lens - Hibiscus

    Hot pink hardy hibiscus bloom. Canon 7D Mark II, Tamron 18-400mm lens @ 400mm, f/9, 1/160th, ISO 100, handheld.

    About this review

    I know you already know this (because you read ALL my pieces for dPS, right? Right?!) but my lens reviews are pretty real world. I don’t sit in a lab or use techy gizmos to measure sharpness. I actually hold a lens in my hands and shoot with it. This lens was tucked in my favorite bag for most of August.

    That said, my intention was to see how a lens holds up for an actual shoot. I used this lens to photograph Lipizzan horses at a dressage performance as well as at the racetrack. Then I used it on a mission to photograph old barns and finally to make some macro flower images.

    Tamron 18-400mm lens -  Lipizzan Foal

    Lipizzan foal at Tempel Farms, Old Mill Creek IL. Canon 7D Mark II, Tamron 18-400mm lens @ 300mm, f/6.3, 1/640th, ISO 500, handheld. 

    The goal was to make images at most focal lengths with a variety of apertures, but a few might have been skipped because I was really out there shooting. I shoot at the focal length, shutter speed, ISO and aperture that each situation calls for. So let’s just say I apologize in advance if I’ve skipped something important to you. Give me a shout in the comments if that’s the case. I’ll dig through my notes and image archives to see if I can answer your question.

    Lens specs

    Let’s start off with a quick overview of the lens specs. This lens is for Nikon and Canon APS-C (crop sensor) cameras only. I tested the lens on a Canon 7D Mark II.

    The Tamron 18-400mm super-zoom is a variable aperture lens. Meaning that at 18mm, the maximum aperture (largest opening) is f/3.5. But when you zoom into 400mm, the maximum aperture is f/6.3. The minimum aperture (smallest opening) is f/22 at all focal lengths.

    Tamron 18-400mm - Red barn

    Dilapidated red barn, McHenry County IL. Canon 7D Mark II, Tamron 18-400mm lens @ 71mm, f/9, 1/250th, ISO 200, handheld.

    The lens has an HLD Autofocus Motor that is quick and quiet for a consumer lens at this price. It also has Tamron’s standard VC Image Stabilization. This feature enables you to get sharper shots while hand-holding at longer focal lengths. The lens also has what Tamron calls Moisture-Resistant Construction. I’m relieved to tell you I didn’t get to test this feature.

    The minimum focusing distance – important especially if you want to try your hand at making macro images – is 17.72″ (45 cm). Macro is usually a 1:1 ratio and this lens only produces 1:2.9, but I was pleasantly surprised with my macro results.

    Tamron 18-400mm - White bud

    White hardy hibiscus bud. Canon 7D Mark II, Tamron 18-400mm lens @ 400mm, f/13, 1/320th, ISO 320, handheld.

    If you use screw on filters, like a circular polarizer, the front thread is 72mm. The lens is 1.56 pounds (710 g) and approximately 3.11” in diameter by 4.88″ in length (79 x 123.9 mm). It’s an incredibly compact lens for this focal length range.

    The price, at the time of publication of this article, is $ 649.00 USD.

    Who is this lens for?

    I would describe the ideal user of this lens as an amateur or enthusiast. If you’re an amateur photographer who travels but doesn’t want to carry more than one or two lenses, this is the perfect choice for you.

    With an 18-400mm focal length, you might not need to ever change the lens, except in a dark indoor situation, when you need either flash or perhaps the fast f/1.8 maximum aperture of a nifty fifty.

    Tamron 18-400mm - racehorse portrait

    Low-key portrait of a racehorse, Arlington Park IL. Canon 7D Mark II, Tamron 18-400mm lens @ 400mm, f/6.3, 1/250th, ISO 250, handheld.

    This lens would also be great for a busy parent who needs more than a smart phone to capture pictures of soccer matches and dance recitals but who doesn’t have a ton of extra room in her carryall bag. The compact size and weight of the Tamron 18-400mm make it an easy addition to any parent’s standard kit.

    What’s good about this lens

    The size of this lens just can’t be beat. At only a pound and a half and less than 5 inches long, it’s a lot of focal length in a very small package. I was really taken with how small it was since I normally shoot with such large neck-and-shoulder-busting glass.

    Hand-holding this lens for an afternoon at the race track wasn’t even remotely painful. With the insane focal length capabilities, I didn’t even bother to carry a second lens with me (or even my camera bag!) and that made for a really care-free afternoon.

    Tamron 18-400mm - size comparison

    The Tamron 18-400mm lens, attached to the Canon 7D Mark II, with the Canon 100-400 lens alongside for size comparison.

    Tamron 18-400mm lens comparison - extended

    The extended Tamron 18-400 lens, attached to the Canon 7D Mark II, with the extended Canon 100-400 lens alongside for size comparison. Clearly you can see what a compact size this lens is and how beneficial that could be when you travel.

    Great for landscape images

    It’s also a pleasure to catch a pretty landscape out of the corner of your eye and to simply zoom out to 18mm to capture it. Typically if you’re shooting with a long lens, you have to take the time to switch over to your wide-angle lens, take the shot and then switch back to your longer focal length lens again. Well, actually, if you’re me, you see that landscape and think ooh, pretty and then walk away without taking the shot.

    Tamron 18-400 - at the track

    Arlington Park Racetrack IL. Canon 7D Mark II, Tamron 18-400 @ 18mm, f/13, 1/100th, ISO 320, handheld. Processed in Lightroom.

    I’m lazy that way so this was the first time I’ve actually made images of the racetrack itself. The lens performed really well in the 18-50mm focal range. It was both sharp and relatively distortion free. Lightroom’s Lens Correction easily managed the slight distortion there was too.

    Things to be careful of

    Remember I said we’d talk about the not-so-good too? It is a touch tricky to twist the lens in order to zoom in past 200mm to get to the 400mm focal length. First, your hand gets a bit “stuck” since anatomically, your wrist only twists so far before you have to reposition in order to continue the twisting motion.

    Tamron 18-400mm lens - racetrack

    Headed to the gate, Arlington Park IL. Canon 7D Mark II, Tamron 18-400mm lens @ 209mm, f/6.3, 1/1000th, ISO 250, handheld. 

    Second, the lens has what I call a “hiccup” where you need to exert more pressure to push it past this point. I missed a few shots because the twisting motion wasn’t smooth enough and I jerked the lens a bit as I zoomed in from 200mm to 400mm.

    Tamron 18-400mm lens - white hibiscus

    White hardy hibiscus bloom. Canon 7D Mark II, Tamron 18-400mm lens @ 227mm, f/13, 1/400th, ISO 320, handheld.

    Softness around the edges

    There is a definite softness (or loss of sharpness) at the longer end of the lens, especially when your aperture is wide open, e.g., 400mm at f/6.3. If you crop in too much during post-processing or print too large, you’ll start to see the loss of fine details in your image since they weren’t tack sharp to start. You won’t see this loss of detail in a small 5×7″ print, or if you post to social media – so for many people, this actually won’t be a big issue.

    Tamron 18-400mm lens Review - Riders up

    Riders up at the paddock, Arlington Park IL. Canon 7D Mark II, Tamron 18-400mm lens @ 18mm, f/5, 1/500th, ISO 640, handheld.

    Use the center focus point

    The lens tends to be softest in the corners so sharpness improves if you use your camera’s center focus point. It also improves if you close down your aperture to f/8, f/9, or smaller. Because the lens is not tack sharp all the way through the focal length spectrum, I’m not recommending this lens for super serious wildlife shooters or anyone who likes to print really large. For you guys, I’m going to suggest sticking with a more standard zoom lens like a 100-400mm or 200-400mm. (I apologize in advance for the wear and tear this recommendation will cause your shoulders.)

    If you predominantly shoot wide-angle images, like landscapes, and only occasionally shoot long, this lens will be a good fit for you when you don’t want to carry a ton of gear.

    Final thoughts

    Ultimately there were a number of things I really liked about this lens. The small size and super-zoom focal length make it a very practical tool to have in your bag. At $ 649.00 USD, it’s also a great value.

    However, the softness at the long end of that focal length can become a real issue if you’re not careful. Because of that, I’m cautiously going to rate this lens 3.5 stars out of 5.

    Tamron 18-400mm lens running foal

    Running Lipizzan foal at Tempel Farms, Old Mill Creek IL. Canon 7D Mark II, Tamron 18-400mm lens @ 400mm, f/6.3, 1/640th, ISO 100, handheld. 

    I’d love to hear your opinions too. Have you tried super-zooms lenses? Do they work for your type of photography? Which is your favorite one and how does it compare to the Tamron 100-400mm lens? Please share your thoughts with the dPS community in the comments below.

    The post Review of the Tamron 18-400mm F/3.5-6.3 DI-II VC HLD Zoom Lens by Lara Joy Brynildssen appeared first on Digital Photography School.


    Digital Photography School

  • Facebook just doubled the resolution of photos in Facebook Messenger

    Photo messaging has been around for a long time, but as smartphone cameras get better and better, this form of ‘visual communication’ is only becoming more common. That’s why, earlier today, Facebook announced a major update to Facebook Messenger that doubles the resolution of the photos you send from 2K to 4K—or, more specifically, to a max of 4096 x 4096 pixels.

    “We heard that people want to send and receive high resolution photos in Messenger,” reads the release from Facebook, “and considering people send more than 17 billion photos through Messenger every month, we’re making your conversations richer, sharper, and better than ever.”

    And just in case you’re wondering: this resolution bump should not affect speed. According to Facebook, “your photos will also be sent just as quickly before, even at this new, higher resolution.”

    Here are a few before and after samples that show what doubling the resolution from the previous 2K looks like IRL.

    *The images on the left were reproduced to reflect the previous default resolution at 2K. The images on the right reflect the new default resolution at 4K

    $ (document).ready(function() { SampleGalleryV2({“containerId”:”embeddedSampleGallery_8182396623″,”galleryId”:”8182396623″,”isEmbeddedWidget”:true,”standalone”:false,”selectedImageIndex”:0,”startInCommentsView”:false,”isMobile”:false}) });

    To take advantage of the new feature yourself, update your FB Messenger app to the latest version and every photo you send should automatically go out at up to 4096 x 4096 pixels.

    For now, the feature is limited to iPhone and Android users in the US, Canada, France, Australia, the UK, Singapore, Hong Kong, Japan, and South Korea. Additional countries will be added ‘in the coming weeks.’

    Press Release

    Making Visual Messaging Even Better – Introducing High Resolution Photos in Messenger

    By Sean Kelly & Hagen Green, Product Managers, Messenger

    The way people message today is no longer limited by just text; visual messaging as our new universal language is much more emotional and expressive. Whether you’re catching up over moments big and small — like a recent vacation, an amazing meal at a new restaurant, a new member of the family, or the first snow day of the year — sharing photos of our experiences brings our conversations to life.

    We’re making significant investments in how people communicate visually on Messenger. That’s why today, we’re excited to share that people can send and receive photos in Messenger at 4K resolution — or up to 4,096 x 4,096 pixels per image — the highest quality many smartphones support. We heard that people want to send and receive high resolution photos in Messenger — and considering people send more than 17 billion photos through Messenger every month — we’re making your conversations richer, sharper, and better than ever.

    Your photos will also be sent just as quickly before, even at this new, higher resolution.

    You may be curious how much of a difference 4K resolution makes. Take a look at the before and after examples in the gallery above. On the right at 4K resolution, once you zoom in, the photo is much sharper and clearer so you can see every detail. That’s what we mean by bringing your conversations to life.

    To send and share photos at 4K resolution, first update your Messenger app to make sure you have the latest version. Then open a conversation and tap the camera roll icon. Select the photo, tap send, and the person you’re messaging with will receive the high resolution photo.

    Starting today, we are rolling out 4K resolution on both iPhone and Android to people in the US, Canada, France, Australia, the UK, Singapore, Hong Kong, Japan, and South Korea. In the coming weeks, we’re planning to roll out 4k resolution to additional countries.

    We know that every message matters to you, no matter how or what you’re sharing. We appreciate that you continue to use Messenger to connect with the people you care about most.

    Articles: Digital Photography Review (dpreview.com)

  • Analysis: The Sony a7R III is still a star eater

    We sent some files to our friend Jim Kasson for analysis, and he confirms that the Sony a7R III is definitely still a Star Eater, despite several claims to the contrary that have been published online over the past week.

    Looking at Kasson’s graphs, one can clearly see the noise reduction kick in near Nyquist in Kasson’s energy plots. Indeed, in our own shots of the stars with the a7R III and latest a7R II (firmware v3.00 and above), our final files only show stars that are larger than one pixel with a few neighboring pixels: suggesting that smaller stars are indeed ‘eaten’ or dimmed due to a spatial filtering algorithm.

    At a 3.2-second exposure, the ‘spacial filtering’ (Star Eater) is very mild, and won’t affect your stars.
    But as soon as you hit 4-seconds, spacial filtering kicks in big time, causing the same Star Eater problems that was seen in the a7R II

    This is a missed opportunity for Sony, and something dedicated astrophotographers will want to consider when deciding between the a7R III and other options that don’t have this same issue (a Nikon D850 for example). Other photographers happy with the number of stars still in their shots simply won’t care.

    We’ll drop in one of our sample photos shortly for your pixel-peeping pleasure. But for now, we can say this with confidence: while a lot of stars still survive ‘Star Eater’, the a7R III continues the trend of noise reduction that dims or erases small stars at exposure longer than 3.2s.

    Articles: Digital Photography Review (dpreview.com)

  • How to Process Real Estate or Architectural Photos with Aurora HDR 2018

    If you’ve ever tried your hand at real estate or architecture photography, you know that these are two of the most complicated forms of photography out there. The challenge is due mostly to having to balance out shadows created by harsh or uneven lighting. Thus, it’s no wonder that High Dynamic Range (HDR) photography is one of the most-used techniques for capturing real estate and architecture photos.

    Before I go any further, let’s make it clear that this article is not about defining what HDR photography is or debating its merits. There is a myriad of arguments for and against HDR, but let’s save those are for another article. For now, let’s talk about Aurora HDR 2018 and how it might help you capture and process better HDR images.

    How to Process Real Estate or Architectural Photos with Aurora HDR 2018

    Simple, intuitive interface

    If you’ve made HDR images using other photo editing programs such as Adobe Photoshop, you’ve probably had trouble figuring out how to use the software. One of the best features of Aurora HDR is that it is very stripped down, presenting you with only a few essential options that you can select to create your image. This greatly reduces your learning curve and makes it easy to get started immediately.

    Use as standalone or with other programs

    Speaking of other photo editing programs, you can use them in conjunction with Aurora HDR. It’s very easy to do. When you install Aurora HDR 2018 you can set it up to work both as a standalone program, or as a plugin for Lightroom, Photoshop, and others.

    You don’t need a tripod

    Historically, you’ve always needed to shoot bracketed images with a tripod to make sure they’re all aligned before merging them into a single HDR image. Not so with Aurora HDR. Thanks to their handy Alignment feature, Aurora HDR can automatically align your bracketed images (more on this in #2 below). This means that you don’t necessarily need to capture brackets with a tripod.

    Of course, your images should be relatively aligned beforehand, but you don’t need the pinpoint accuracy that you used to need with other HDR photo editing programs.

    Macphun Aurora HDR Photo Editing

    Getting started with Aurora HDR

    1. Open Aurora HDR and load images

    When you first open Aurora HDR, you’re presented with a straightforward dialogue box that offers you three options (as seen in the screenshot above).

    a) Open Image – In the very center is a button labeled “Open Image.” You can click on the button to select your images, or drag and drop them.

    b) Batch Processing – If you have multiple sets of bracketed shots that you want to process all at once, drag and drop them into the Batch Processing dialogue box! Aurora HDR is intuitive enough to sort through the batch of files for you and automatically detect and match up your bracketed images.

    Aurora HDR Batch Processing

    c) Open Sample Image – This is a blue hyperlink below the “Open Image” button that you’ll probably only use the very first time you’re getting your feet wet with Aurora HDR. It exists mainly for demonstration purposes.

    2. Set additional settings

    For now, let’s assume you chose to Open Images (or, in the demo screenshots below, Load Sample Images). After doing so, another dialogue box appears with just a few options. The Alignment option is visible, and the others pop up when you click on the “Additional Settings” button.

    Aurora HDR Brackets

    Alignment

    As mentioned above, checking the Alignment box will make sure all of your bracketed images line up properly. This means that you could possibly hand hold your camera while taking bracketed shots. But if you’re shooting a paid job, I’d still recommend shooting on a tripod to make sure you get the right shots, in perfect registration.

    Ghost Reduction

    If you happen to have a moving subject in your HDR brackets, enable the Ghosts Reduction setting. This can minimize the effect of ghosting in which moving objects may appear translucent or ghost-like in your final image. For real estate and architecture photography, you’re unlikely to have moving subjects unless you’re incorporating people in your photo or you can see moving tree branches through a window.

    Aurora HDR Options

    Get to Ghosts Reduction, Color Denoise, and Chromatic Aberration Removal by clicking on the gear icon (seen here in orange).

    Color Denoise

    Reduces the low-light noise in color pixels that can sometimes occur when merging photos together. This option is automatically enabled (as seen above), but you can shut it off if you wish.

    Chromatic Aberration Reduction

    It’s not unusual for real estate or architecture photos to have chromatic aberrations. Luckily, Aurora HDR has an option for minimizing the appearance of the purple and green glow along your image edges that is a clear indication of chromatic aberration.

    3. Merge your photos

    After checking the settings, click on the blue Create HDR button, and wait for your images to merge. This is perhaps the only downside to Aurora HDR (or, the whole HDR process in general). It takes a minute or two for the images to be merged together, so sit tight!

    4. Select a preset or edit with the tools

    Once Aurora HDR is done merging your photos, you’ll be presented with a more robust workspace where you can edit your HDR image further.

    At the very bottom of the screen are a bunch of presets that you can choose to automatically adjust your image to a certain style. The Basic presets are selected by default, but if you click on the yellow “Categories” hyperlink, a bunch more will appear. For real estate, the Architecture presets are particularly helpful. Once you select a preset, you can adjust the amount to lessen or magnify the effect to your taste.

    If you prefer to manually edit the photo with or without presets, use the far right panel where you’ll find basic photo editing tools. Scroll down to find even more editing tools such as Adjustment Layers and Dodge and Burn (more on these below).

    aurora HDR

    Preset categories here.

    Aurora hdr

    Lessen the effect of a preset by lowering the slider.

    5. Add Adjustment Layers

    Another fantastic feature of Aurora HDR is the ability to easily add Adjustment Layers in order to make targeted, non-destructive edits to your image. This is extremely useful in real estate and architecture photography, as you often need to make color and tonal adjustments to your image without inflicting permanent changes on the pixels.

    For example, the image below illustrates the addition of an Adjustment Layer that targets the blue tinge in the staircase and chairs in the middle of the image, with the goal of color correction. Adjustment Layers also exist in Photoshop, and they function very similarly in Aurora HDR. The best part is that it is much more intuitive and easier to find in Aurora HDR than they are in Photoshop.

    Aurora HDR Adjustment Layers

    Adding an Adjustment Layer for local color control in selected areas.

    6. Dodge and Burn

    If you’ve upgraded to the brand new Aurora HDR 2018 version, you’ll find a couple of essential real estate photo editing tools that are much handier to access: Dodge and Burn Tools! If you’re unfamiliar with dodging and burning, you can read up on these photo editing processes in this dPS article.

    In short, dodging helps you brighten targeted areas of an image while burning lets you darken them. Both techniques are essential for real estate photography retouching. In the new version of Aurora HDR, these tools are easily accessible in the right-hand panel. Simply scroll down to the “Dodge and Burn” panel and click on “Start Painting.” This will activate a few settings right above your image.

    Aurora HDR Dodge and Burn

    Use the Dodge and Burn tools to do special localized tone control in your image.

    In Conclusion

    If HDR photography sounds interesting to you and you’re looking for an easier way to post-process your images, give Aurora HDR 2018 a shot! Its intuitive, clutter-free interface is relatively easy to learn and you can begin enhancing your real estate photos in no time.

    Disclaimer: Macphun is a dPS advertising partner.

    Aurora HDR Final

    Final image edited with Aurora HDR 2018.

    Aurora HDR Sample Images

    Before – a single image of a series of brackets.

    Before

    01 Macphun Aurora HDR Photo Editing

    Before

    Before

    01 Macphun Aurora HDR Photo Editing

    01 Macphun Aurora HDR Photo Editing

    The post How to Process Real Estate or Architectural Photos with Aurora HDR 2018 by Suzi Pratt appeared first on Digital Photography School.


    Digital Photography School

  • DJI AeroScope demo shows drone tracking tech in action

    In October, DJI introduced a new technology called AeroScope that makes it possible for law enforcement and other officials to track drones that broadcast info. The system was launched to address growing concerns about drones being operated in forbidden locations, such as near airports or over wildfires. AeroScope works by picking up telemetry and ID data broadcast by DJI drone.

    The Verge recently shared a video showing AeroScope in action.

    The system, which is a box-shaped device that includes a touchscreen display, issues an alert when it detects a drone nearby. Officials can pull up the ID and telemetry info the drone is broadcasting and potentially use that to identify the operator. A explained in the video, AeroScope shows the operator’s email address, which officials can message for direct contact.

    Speaking to DIY Photography, DJI said that email addresses were displayed to users in a beta version of the AeroScope software, and that such abilities won’t be included in the final version.

    There are some limitations to the AeroScope system. For example, drones that aren’t registered won’t provide info that helps officials identify the operator. As well, the system is localized, meaning it can only detect drones within a couple miles of the device. DJI previously explained that it chose this localized tracking method to prevent drone data from being easily amassed in government databases.

    Articles: Digital Photography Review (dpreview.com)

  • Sigma’s high-end Art lenses get $100 Black Friday discount

    Sigma has announced its Black Friday sale, and fans of the company’s high-end Art line will want to pay attention. This ‘unprecedented’ Art sale takes up to $ 100 off both prime and zoom Art models, and runs from now until November 30th.

    Buyers will need to order the lenses through Sigma’s website or shop through a Sigma authorized dealer in the US to get the discounted pricing.

    The Black Friday sale covers eight prime and five zoom Art lenses (below), plus the MC-11 mount converter. All of the lenses are discounted by $ 100, with the exception of the 30mm F1.4 | Art lens, which is only discounted by $ 50. The lens converter is also discounted by $ 100.

    Here’s the list of all 13 lenses on discount starting today:

    High-Performance Art Prime lenses

    • 14mm F1.8 DG HSM Art ($ 1,599 Retail Price) World’s First F1.8 Ultra-Wide Angle – $ 100.00 off
    • 20mm F1.4 DG HSM Art ($ 899 Retail Price) Bright & Sharp Wide-Angle – $ 100.00 off
    • 24mm F1.4 DG HSM Art ($ 849 Retail Price) Front Filter Compatible, Fast-Aperture Wide Angle – $ 100.00 off
    • 30mm F1.4 DC HSM Art ($ 499 Retail Price) A Low-Light Pro for APS-C – $ 50.00 off
    • 35mm F1.4 DG HSM Art ($ 899 Retail Price) A Groundbreaking Flagship Wide-Angle – $ 100.00 off
    • 50mm F1.4 DG HSM Art ($ 949 Retail Price) Redesigned for High Megapixel DSLRs – $ 100.00 off
    • 85mm F1.4 DG HSM Art ($ 1,199 Retail Price) Award-Winning Ultimate Portrait Lens – $ 100.00 off
    • 135mm F1.8 DG HSM Art ($ 1,399 Retail Price) Award-Winning Prime with Reach – $ 100.00 off

    Versatile Premium Art Zooms Lenses

    • 12-24mm F4 DG HSM Art ($ 1,599 Retail Price) Ultra-Wide Zoom Excellence – $ 100.00 off
      18-35mm F1.8 DC HSM Art ($ 799 Retail Price) The First and Fastest of its Kind – $ 100.00 off
    • 24-35mm F2 DG HSM Art ($ 999 Retail Price) Prime Performance, Zoom Versatility – $ 100.00 off
    • 24-105mm F4 DG OS HSM Art ($ 899 Retail Price) Exceptional Usability for High-Resolution Cameras – $ 100.00 off
    • 50-100mm F1.8 DC HSM Art ($ 1,099 Retail Price) Larger Aperture and Long Reach for your APS-C Sensor – $ 100.00 off

    Articles: Digital Photography Review (dpreview.com)

  • Are Photographers Artists? Let’s Discuss

    Are Photographers Artists? Let's Discuss

    I took this image while on a trip out west to the Grand Teton Mountains and Yellowstone National Park with my family and about 50 other people. We were driving towards our next lodge, past the mountains and the Snake River where we would be rafting the next morning when I became rather fascinated with the scene that lay before me.

    Having never seen mountains before in my life – besides seeing the photographs online and in movies – I was awestruck. Immediately I grabbed my camera and began snapping away, fighting the glare of the window while also paying careful attention to the meter in my viewfinder. After I had arrived home about a week later, I was culling the images I had taken on the trip. Almost immediately, this became my favorite.

    Are Photographers Artists? Let's Discuss

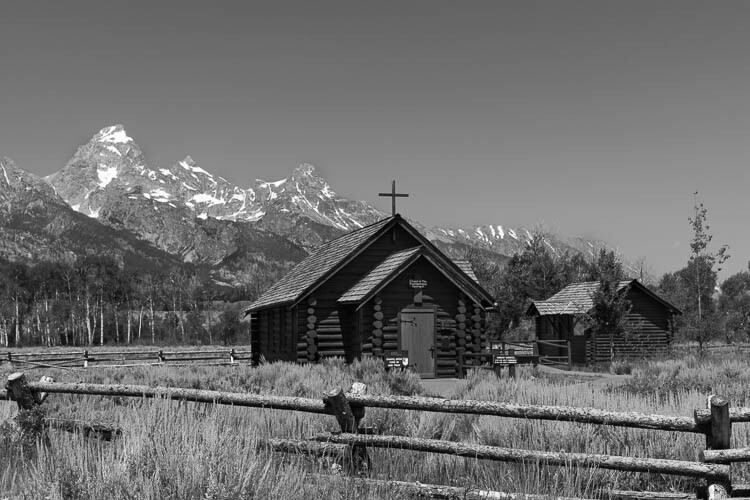
    This image was also taken in the mountains, another favorite of mine, was a much more thought out composition. Our tour guide had told us that we would be stopping to see a church with plenty of photographic opportunities. Almost immediately I knew the shot that I wanted.

    I set up my tripod ever so perfectly, did a few test shots to make sure my exposure was right-on, and then explored the area, leaving my camera in position until everyone else was back on the bus. Although I knew I would be the last back in my seat, I knew it would be worth the wait. And it most definitely was, for as everyone else was loading on the bus, the scene was almost completely empty. I took three exposures of the scene, bracketing it just in case the light had changed, and got back on the bus.

    Are we artists or photographers?

    The reason I’m telling you about these two images is not to make you jealous of my amazing adventure with my family. Rather, I tell you about these to get you thinking. You see, since the days of Ansel Adams, there has been a major debate regarding whether or not photographers should be considered artists.

    Ansel Adams himself had struggled with this, having been amongst many other photographers in the beginning of the craft who used soft-focus lenses to create images which looked less like reality and more like paintings. Why? Because photography as a form of art was not taken seriously at the time and to make it among other artists, you had to make your images look like they were painted, not photographed.

    Do we document or make art?

    So, this begs the question: as photographers, are we crafting works of beautiful art? Or are we simply documenting the world around us with some special – yet easily done by others – ability?

    Are Photographers Artists? Let's Discuss

    One argument that is commonly brought to light against photography being an art form, is that anyone can do it. There is no need for special gear, no apprenticeship is mandated; you do not even need to take a class to learn photography. Most professional photographers haven’t taken a formal education.

    But if this is the case, why do we bother honing our skills? What is the point of constantly learning new compositional techniques, new ways of post-processing? Why do we bother to buy “better” camera bodies, new lenses, sturdier tripods, if our craft is not considered a form of art? If anyone can do it, what is the point of buying a $ 4000 Nikon D850 that everybody is drooling over?

    Because not everyone can do what we do

    Are Photographers Artists? Let's Discuss

    Yes, everyone can be a photographer; every random guy on the street can pick up a camera – or use his smartphone – and take a pretty picture of the sunset. Just look on Instagram and you will see what I mean. But that can be said of painters, sketch artists, etc., as well. Everyone can be an “actual artist” as well. I can pick up a paintbrush, slap some paint on a canvas, and call it modern art. I can draw a single line in the center of a 20×30 foot canvas, hang it in a prestigious art gallery, and sell it for millions. It’s been done before, and it will continue to be done. So, the question is, is this still art?

    So if you tell me that painting a single stroke on a canvas is art, then you must also allow me to tell you that photography is art. Otherwise, you are saying that everyone can do photography yet not everyone can paint a line, correct?

    Are Photographers Artists? Let's Discuss

    Photographers as documentarians

    There is also the argument that, as photographers, we are simply documenting the world. We are merely at a location at the right time; we are lucky.

    But if we are lucky, how can you explain the countless hours we spend sitting in one spot, waiting for the light to hit, only for the photograph to not turn out as we had hoped. And then we go back to that same location and wait even longer, hoping that the light will turn out this time. Then when it doesn’t, we continue to go back until finally, that light works out. Is that truly luck?

    Are Photographers Artists? Let's Discuss

    Yeah, just like painters we could probably find a way to Photoshop in some light, replace the sky in the scene to something more visually appealing, and then call it a day.

    It’s more than just luck

    To say, however, that we are lucky with almost all the shots that we obtain only undermines the countless hours, months, years that we have spent attempting to get better at our craft. Studying compositions of the great photographers before us, buying tutorials of the photographers we admire in hopes that they know something we do not – that does not constitute luck.

    Yes, as photographers, we rely on chance. We rely on the weather turning out how we had hoped and the scene we are looking for to be found. At the same time, however, we must learn to adapt to our surroundings, and to our situation. If we are to make it as photographers, we must learn that not everything will turn out as perfectly as we had hoped.

    Are Photographers Artists? Let's Discuss

    And at that point, we can either come back to the location later or find a way to make it work. We must use our creativity to craft a scene that will be just as good, if not better, than the one we had originally planned in our head.

    Looking back at the photographs I had taken while out west, I must ask myself, am I an artist?

    What does the master say?

    I think Ansel Adams had it right when he said:

    “A photograph is made, not taken. A photograph is not an automatic recording, neither is it an accident. It is a concept, a vision of the world translated into shades of gray, communicated in terms of simple devotion to the medium – a statement of the utmost clarity and perfection possible…”

    Are Photographers Artists? Let's Discuss


    Art has always been subjective. It doesn’t matter if you are taking a picture of your cat or a grand vista in Iceland. In my opinion, if you have an opinion, a mood or emotion, that you are trying to convey to the world through your imagery, then you are an artist.

    So, the question is, do you consider yourself to be an artist? Let’s discuss in the comments below.

    The post Are Photographers Artists? Let’s Discuss by Cody Schultz appeared first on Digital Photography School.


    Digital Photography School